
- What Is a Windows Blue Screen of Death?
- What Causes the Blue Screen of Death?
- Different Microsoft Stop Codes and What They Mean
- How to Check Causes of Windows BSOD
- How to Fix BSOD Stop Code Errors on Windows 11/10
- Fix 1: Restart your computer
- Fix 2: Disconnect unnecessary devices
- Fix 3: Boot in Safe Mode
- Fix 4: Update Windows
- Fix 5: Scan for malware
- Fix 6: Uninstall any updates, apps, or drivers that are incompatible or recently installed
- Fix 7: Check your computer’s RAM using the Windows Memory Diagnostic tool
- Fix 8: Run SFC, DISM, and CHKDSK utilities
- Fix 9: Perform a system restore
- Fix 10: Reinstall Windows as a last resort
- Windows Stop Codes: Explained
- FAQ
This guide walks you through the various stop codes, what they mean, and their causes.
You have probably heard recent news stories about the thousands of Windows PCs booting up with a blue screen of death , disrupting the operation of supermarkets, banks, airlines, and many other businesses worldwide. Even though it wasn’t Microsoft’s fault, it shows how problematic BSODs can be.
Data loss, system instability, and serious work disruption are some of the issues that can result from BSODs. Fortunately, BSOD errors usually come with a W indows stop co de, which can help you identify the problem and resolve it before it gets worse.
I’ll walk you through everything important you need to know about stop codes and how to use them to resolve various BSODs issues.
Let’s begin.
What Is a Windows Blue Screen of Death?
BSODs (blue screen of death), or STOP codes, alert users about critical system failures that force Windows to crash. They appear on blue backgrounds (hence the name) and typically do not linger for long before the system restarts.
Every Windows blue screen may look similar, but each error displays a message with the name of the affected file and a code (called a bug check value) to explain the cause of the problem. The operating system saves a dump (.dmp) file with more details about the crash on your system before rebooting.
Earlier BSOD errors threw a lot of vague information and code at users, which left most of us even more confused. But since Windows 8, Microsoft has scaled back the texts and tried to make the screen less scary and more helpful.
Stop code interfaces now contain QR codes, stop code descriptions that you can look up on Microsoft’s website, and sad smiley faces.
Regardless of how the code appears, each Windows stop code has its own special meaning and points to a specific problem with your computer.
What Causes the Blue Screen of Death?
I mentioned that Windows saves a dump file before rebooting. Reading and interpreting these .dmp files can help explain the causes of the BSOD error. Going through the Windows Event Viewer is another way to find the specific cause of the problem.
Still, the following underlying issues should come to mind whenever Windows displays a blue screen:
- Device driver issues
Device drivers act as go-betweens for Windows and your hardware. BSODs show up when these drivers are out-of-date, corrupt, or missing.
- Faulty hardware
Some stop codes advise you to check recently installed hardware devices because blue screens of death on Windows 10 and Windows 11 are generally connected to hardware issues. A recently installed device or an older component might be malfunctioning and triggering the error. They include your RAM, hard drive, and peripherals.
- Missing and damaged system files
System files control critical Windows processes, from boot operations to shutdowns. If any of these files are missing or corrupt, Windows will experience a fatal failure that will cause the blue screen error.
- Malware
Malicious programs can corrupt or delete system files and drivers to trigger BSOD errors.
- Overheating
Windows usually displays blue screens and shuts down when system temperature reaches dangerous levels. I got used to blue screens when I put my gaming laptop under load and it generated too much heat. The solution was employing effective cooling measures. Your overheating issue could be due to a poor cooling system, your computer activity, or unsafe overclocking .
📌Further reading:Ultimate Guide: How to Stop a Laptop from Overheating
Different Microsoft Stop Codes and What They Mean
The first step to fixing a blue screen of death issue is to understand the stop code you are seeing and the potential cause of the error. Different stop codes warn you about different things and have different severity levels. The following is a list of some of the Windows stop codes and what they mean:
| Windows stop code | Stop code error | Explanation | Causes |
|---|---|---|---|
| 0x0000001A | MEMORY_MANAGEMENT | A severe error with system memory management | Faulty RAM, corrupted system files, or outdated drivers |
| 0x000000D1 | DRIVER_IRQL_NOT_LESS_OR_EQUAL | A driver attempted to access an invalid memory address | Faulty drivers, incompatible hardware, or antivirus conflicts |
| 0xC0000005 | ACCESS_VIOLATION | The system encountered an access violation, typically due to memory issues | Faulty RAM, corrupted drivers, incompatible software, or malware infection |
| 0x0000003B | SYSTEM_SERVICE_EXCEPTION | An exception occurred while executing a privileged code routine | Outdated drivers, corrupted system files, or incompatible software |
| 0x00000023 | FAT_FILE_SYSTEM | Indicates an issue with the FAT file system used by the storage device | Corrupted or damaged hard drive, or failure to load virtual memory |
| 0x000000EF | CRITICAL_PROCESS_DIED | A critical system process terminated unexpectedly | Corrupted system files, malware, or hardware failure |
| 0x00000051 | REGISTRY_ERROR | Indicates a severe issue with the Windows registry | Corrupted registry files, faulty hardware, or insufficient system resources |
| 0x0000002E | DATA_BUS_ERROR | A parity error occurred in system memory | Faulty hardware, especially RAM, or hardware conflict issues |
| 0x000000ED | UNMOUNTABLE_BOOT_VOLUME | The system failed to mount the boot volume | Damaged hard drive, corrupted boot files, or incorrect BIOS settings |
| 0x00000119 | VIDEO_SCHEDULER_INTERNAL_ERROR | A video scheduler detected a fatal error in the graphics processing | Outdated or corrupted graphics drivers, faulty graphics card, or hardware acceleration issues |
| 0x00000139 | KERNEL_SECURITY_CHECK_FAILURE | A Windows stop code error that indicates a failure in the kernel security check | Corrupted system files, incompatible drivers, or memory issues |
| 0x0000012B | FAULTY_HARDWARE_CORRUPTED_PAGE | A hardware memory error detected | Faulty RAM or hardware-related issues |
| Windows stop code | Stop code error | Explanation | Causes |
|---|---|---|---|
| 0x0000007B | INACCESSIBLE_BOOT_DEVICE | OS cannot access the system partition during startup | Missing or corrupted boot files, incorrect BIOS settings, or hard drive failure |
| 0x00000074 | BAD_SYSTEM_CONFIG_INFO | An error in the system registry | Corrupted registry, incompatible hardware, or failed Windows updates |
| 0x00000050 | PAGE_FAULT_IN_NONPAGED_AREA | The system attempted to access a non-existent or restricted memory area | Faulty RAM, corrupted system files, or incompatible software or drivers |
| 0x00000019 | BAD_POOL_HEADER | A memory pool header is corrupt | Faulty drivers, malware, or corrupted system files |
| 0x0000009C | MACHINE_CHECK_EXCEPTION (MCE) | Indicates a hardware error detected by the processor | Overheating, hardware failure (such as CPU, RAM, or motherboard), or power supply issues |
| 0xC0000221 | STATUS_IMAGE_CHECKSUM_MISMATCH | A driver or system DLL has a mismatched checksum | Corrupted system files or faulty hardware |
| 0x0000007A | KERNEL_DATA_INPAGE_ERROR | The system couldn’t read data from the paging file into memory | Faulty hard drive, corrupted memory, or loose/damaged drive connection |
| 0xC000021A | STATUS_SYSTEM_PROCESS_TERMINATED | A critical process (like winlogon.exe or csrss.exe) failed | Corrupted system files or third-party software conflicts |
| 0x00000133 | DPC_WATCHDOG_VIOLATION | The system detected a prolonged Deferred Procedure Call (DPC) | Outdated drivers, storage issues, or device firmware problems |
| 0x0000009A | SYSTEM_LICENSE_VIOLATION | The software license agreement was violated | Software license issues or OS-related restrictions |
| 0x8007025D | INSTALLATION_ERROR | A Windowsstop error code indicating that the installation process encountered an issue | Corrupted installation files, USB issues, or hardware incompatibility |
| 0x80070091 | SYSTEM_RESTORE_ERROR | A Windowsstop code error indicating that System Restore encountered an issue while attempting to restore your system to a previous state | Corrupted file system, antivirus conflicts, or disk space issues |
| 0x80000003 | BREAKPOINT_REACHED | A breakpoint was reached during debugging | Software debugging pause or outdated drivers |
How to Check Causes of Windows BSOD
| Method | Ease of use | When to use | What it helps you see |
|---|---|---|---|
| Event Viewer | Medium | Use when you need detailed logs of system errors and stop codes | Provides precise error codes and detailed event logs for troubleshooting |
| Reliability Monitor | Easy | Best for users looking for a user-friendly summary of recent system issues | Shows an overview of system stability, crashes, and failures |
| Dump file analysis | Complex | Use this for deep analysis and understanding complex errors | Reveals in-depth crash data, including driver or memory-related issues |
Method 1: Using the Event Viewer to check stop codes
While Wi ndows stop code s can be helpful, they often don’t provide a complete picture. To truly understand the causes of the BSOD, you need to dig a bit deeper. This is where the Event Viewer comes in.
It’s a built-in log viewer that records everything under your system’s hood. Event Viewer is your first stop when deciphering what causes the BSOD. Follow these steps to check stop codes:
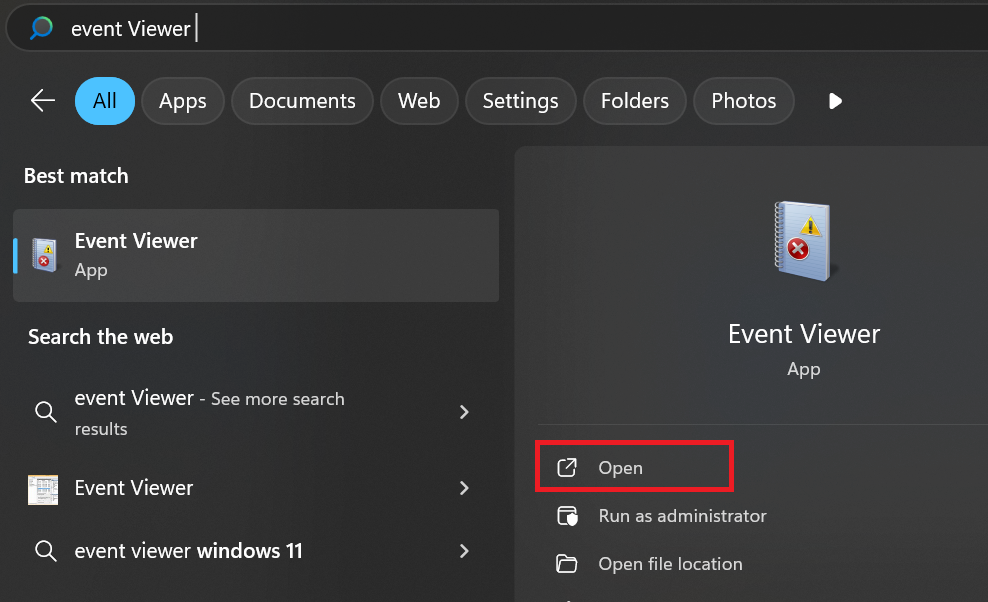
- Press the Windows key to open the Start menu, type “Event Viewer,” and select it.
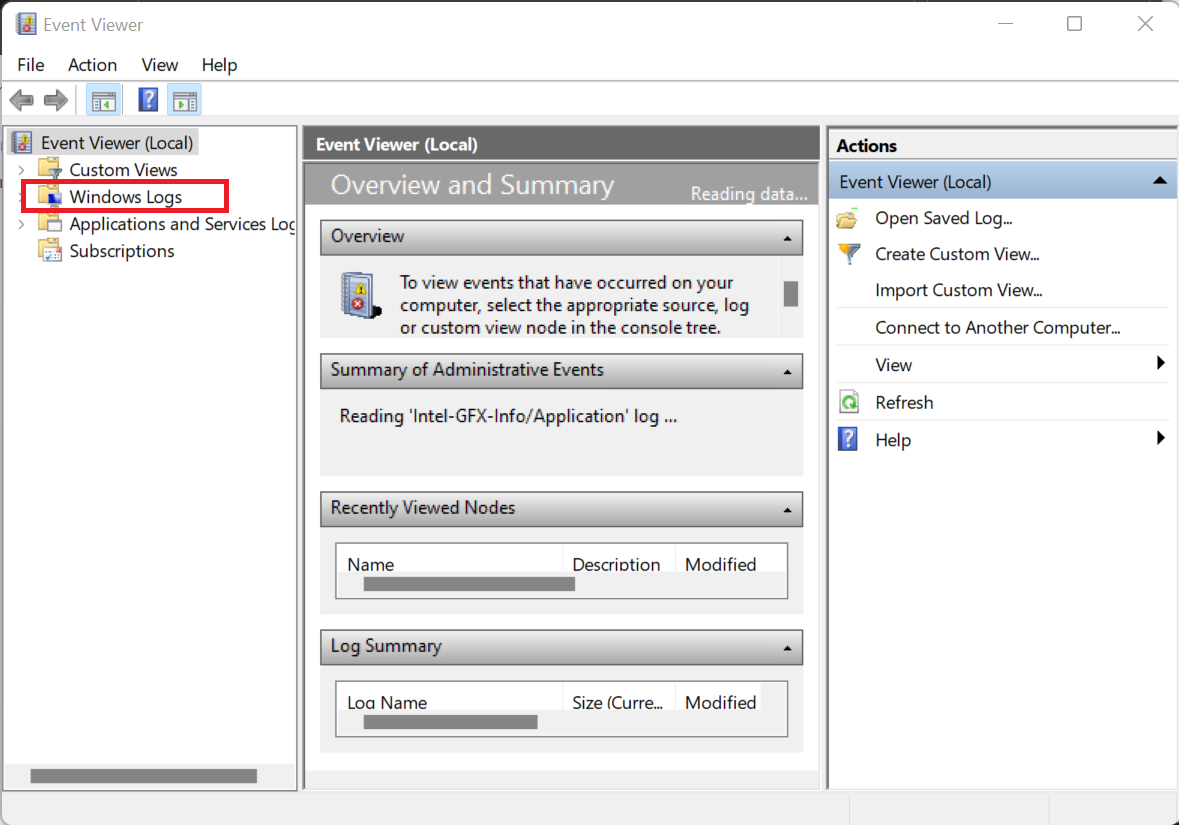
- In the Event Viewer, look at the left panel and click Windows Logs category.
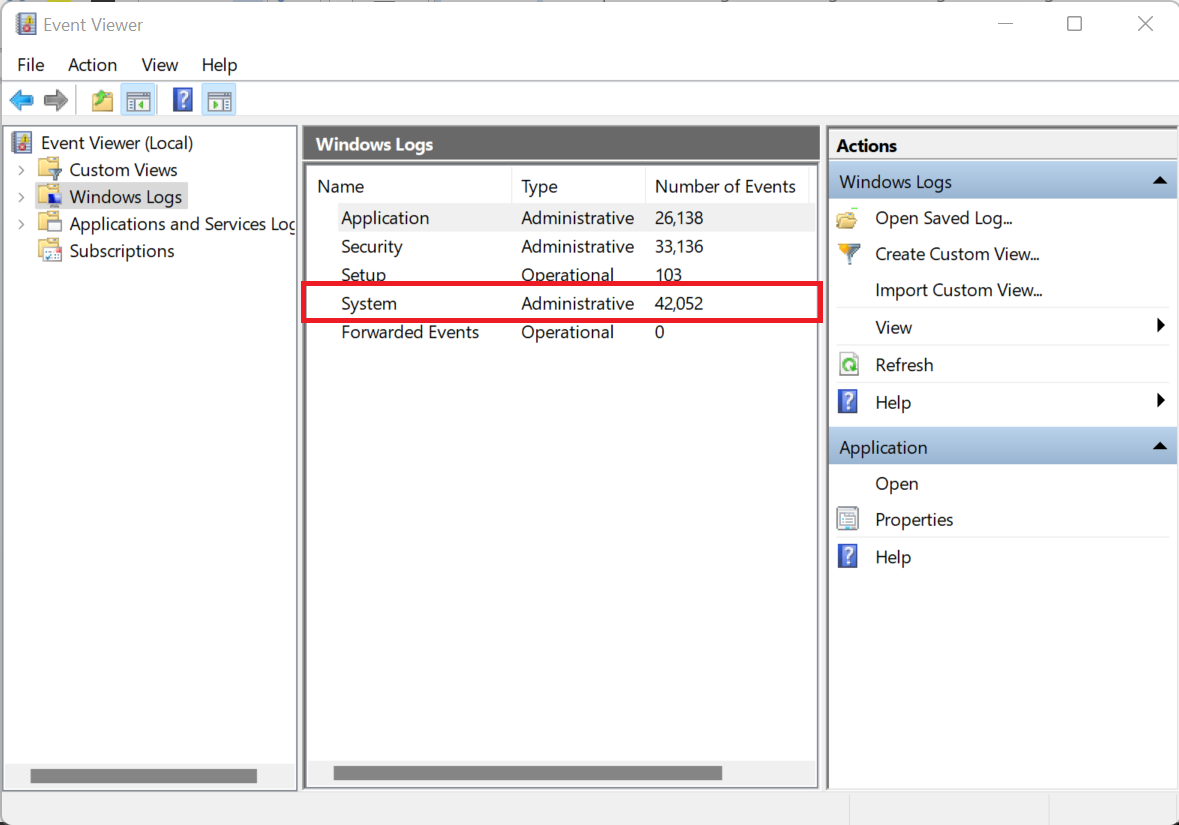
- Under Windows Logs , click on System. System logs carry detailed records of your system’s operations, including Microsoft stop code occurrences.
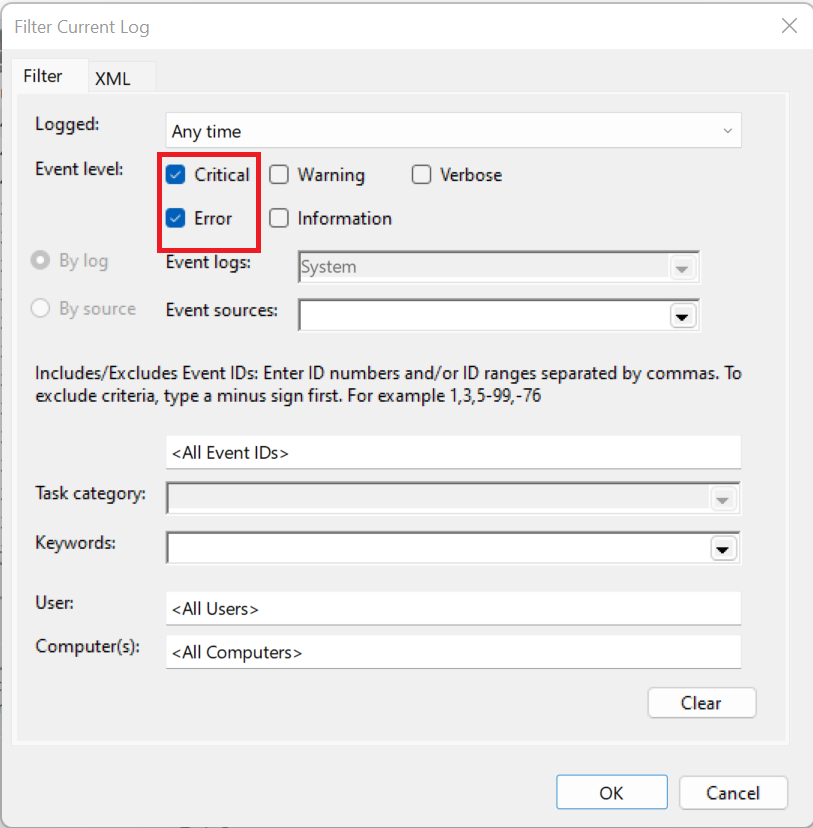
- In the top right, find Filter Current Log.
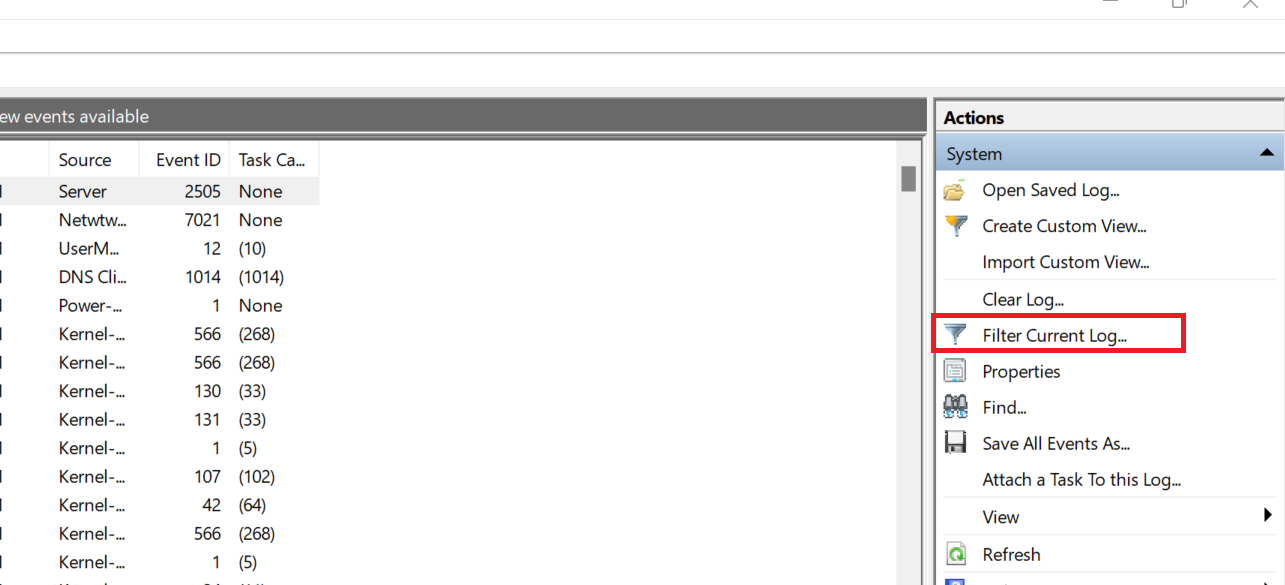
- In the dialogue box, check the boxes with the tags Critical and Error . Then, click OK .
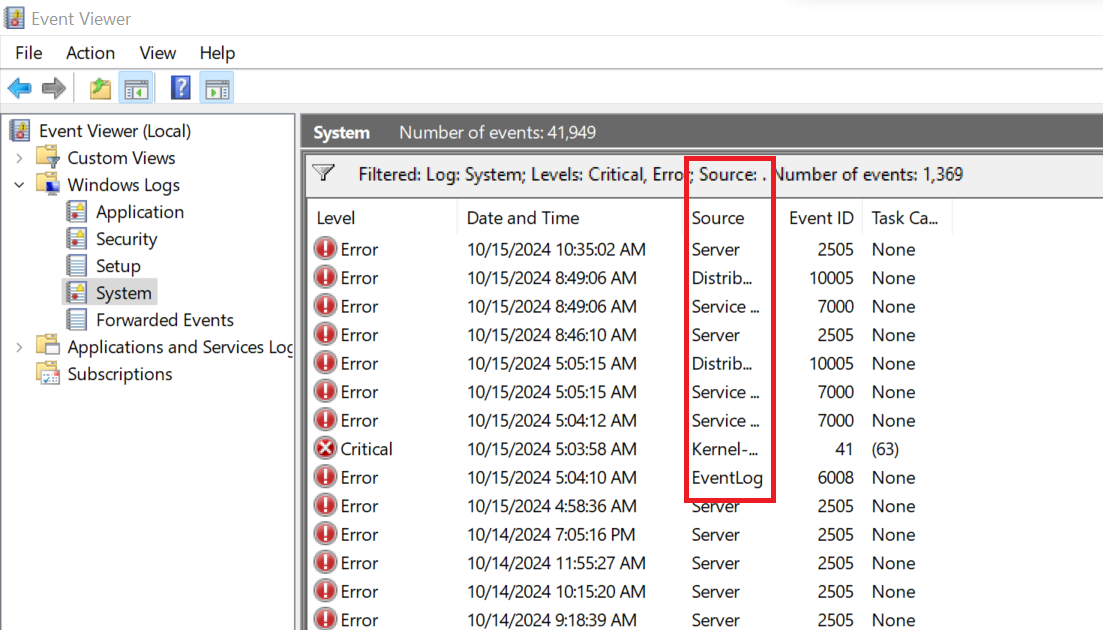
- Look through the items on your screen and observe if there are any items labeled BugCheck in the Source tab. Any item like this is the error you are looking for. Click on it to see the stop error code.
Method 2: Using the Reliability Monitor to identify issues
The Reliability Monitor provides a clear view of your system’s stability, making it easier to troubleshoot issues that may lead to a BSOD. It logs critical events, including memory, hard disk, application, and operating system failures, which are common causes of BSOD errors.
Additionally, it tracks significant system changes, like new software installations or updates, that could impact stability. This can help you identify patterns or recent changes that may be linked to the BSOD error and take specific actions to correct it.
How to access the Reliability Monitor
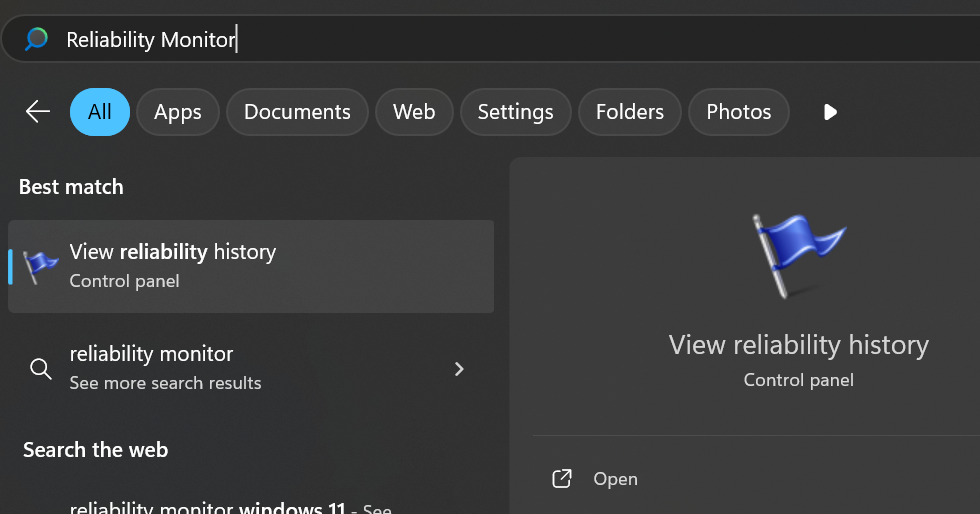
- Type “Reliability Monitor” into the search bar in your Start menu.
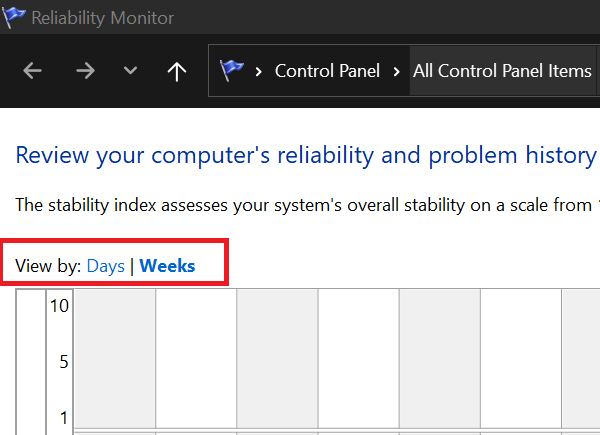
- Once you click the application, you will see a graph showing the stability index of your system over time.

- On the horizontal axis, you have dates. On the vertical axis, you will see numbers 1, 5, and 10. Those numbers indicate how stable your computer was on the dates displayed. Usually, the higher the number, the better. For the computer above, we can tell its most stable day was on the 11th of November.
- For a more detailed view, you can change from days to weeks. This gives you more details from previous weeks instead of just the week in view.
Identifying critical events in the Reliability Monitor
Below the graph is a list of errors. Each error on the Reliability Monitor timeline has an icon that denotes its type. Here, you’re primarily looking for critical events or instances that have led to the BSOD.

These events provide key insights into what can cause a blue screen. Examining them closely can lead to identifying the Windows stop code responsible for your woes.

Method 3: Analyzing dump files
Even with tools like the Event Viewer and the Reliability Monitor, the causes of the error can sometimes remain elusive. This is where dump files come in. They can provide a deeper understanding of the Windows blue screen of death you’re facing.
Dump files are essentially snapshots of your system at the moment of the crash. They contain detailed information about your system’s actions when encountering the blue screen of death in Windows 10 and 11.
How to generate dump files
Before you analyze the dump files, you need to generate them first. Here’s how to do it:
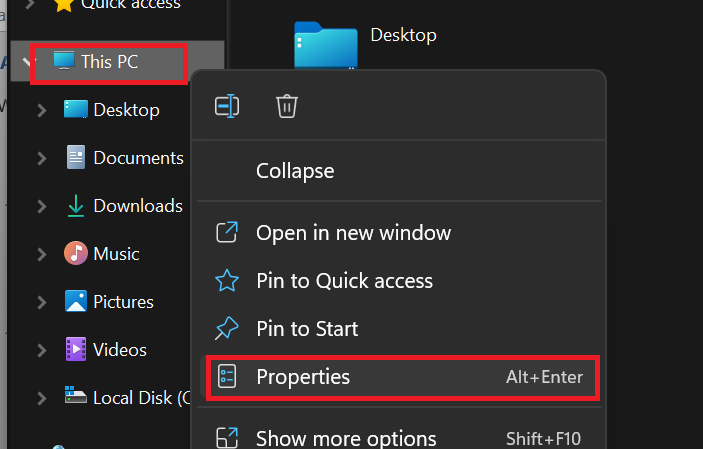
- Go to Windows Explorer (
Windows + E), right-click on This PC , and select Properties .
- Click on Advanced system settings .

- Under Startup and Recovery , click Settings .

- Ensure Write an event to the system log is checked in the new window. Choose the dump file type you want under Write debugging information .

- Click OK and then Apply .
After a BSOD occurs, you can locate these dump files in the C:\Windows\Minidump folder.
Analyzing dump files using WinDbg
The simplest and easiest way to read the dump files is to use WinDbg. Microsoft developed this tool, so you have nothing to worry about.
To use it, follow these steps:
- Download the WinDbg tool from Microsoft’s website and install it.
- Open WinDbg and click File , then Open Crash Dump.
- Navigate to C:\Windows\Minidump and open the dump file.
- Once the file is open, type “!analyze -v” in the command line at the bottom of the WinDbg window and press Enter.
- Wait while WinDbg analyzes the file. It will then display the Windows stop code and other information about what caused the crash.
Navigating dump files might feel like a complicated task. However, these files contain the key to understanding the Windows 11/10 stop codes and the root of the Windows blue screens of death. With the information you gather, you’ll be better prepared to solve and prevent further BSOD occurrences.
How to Fix BSOD Stop Code Errors on Windows 11/10
Now that you found the Windows stop codes, what is the next thing to do? The answer to that will depend on the severity of the problem you are facing.
The following are general solutions that should work for most problems. Think of them as first-aid solutions. However, you should know that every stop code error has a unique solution, like you saw in the table above.
Backing up your files will not fix the blue screen error you are experiencing. However, it gives you enough time to save your documents before you lose any of your files.
For a quick backup of essential files, you can simply connect an external drive and copy your files there.
Fix 1: Restart your computer
Even though the BSOD looks like a big issue, simple fixes like restarting your computer might solve the problem. A computer restart acts like a complete refresh button for your system, addressing various technical hiccups in one simple action.
Simply press the power button of your computer for about 10 seconds until it shuts down. Once it is off, you can turn it on again and see if the problem is resolved.
Fix 2: Disconnect unnecessary devices
If you started seeing the error after connecting a plug-and-play external device, consider walking your way back. Some peripheral components could cause critical conflicts that trigger the BSOD.
Disconnect your mouse, external webcam, and even external monitors one after the other and try running your computer each time.
Fix 3: Boot in Safe Mode
If your PC keeps blue screenin g whenever you try to start Windows, boot your system into Safe Mode to apply the fixes that follow. These steps will show you what to do:
In Safe Mode, you can apply the following fixes: uninstall problematic updates, remove conflicting software, update drivers, and run diagnostic tools like SFC and DISM to repair system files.
- Press and hold your power button to shut down your system.
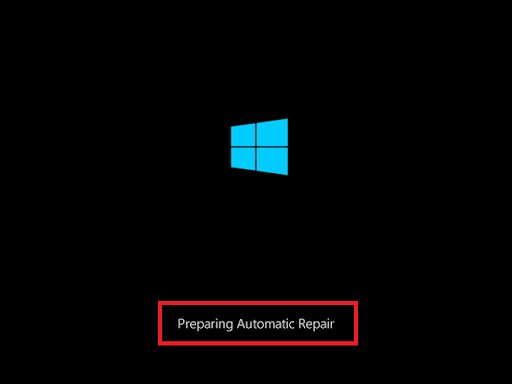
- Turn on your computer, but once your PC manufacturer’s logo flashes and Windows starts to boot, press and hold the power button to force your system to shut down again. Repeat this step two to three times until the Preparing Automatic Repair message appears.
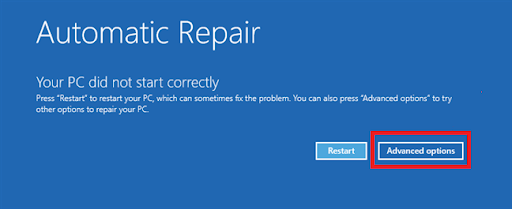
- Click the Advanced options button when the Automatic Repair screen appears.
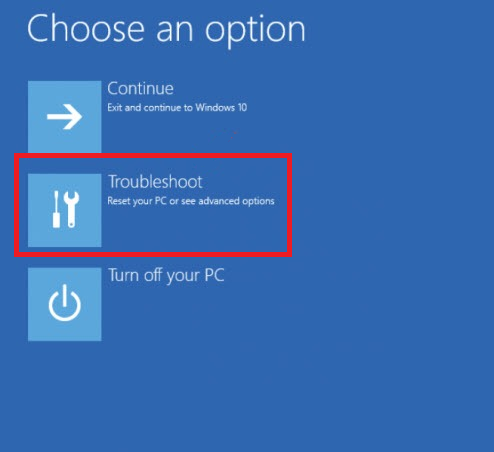
- Click Troubleshoot when you see the Choose an option interface.
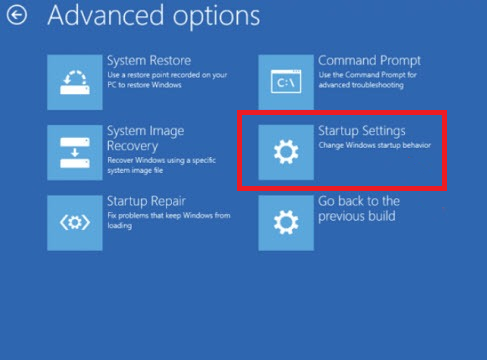
- Under Troubleshoot , click Advanced options , then click on Startup Settings .
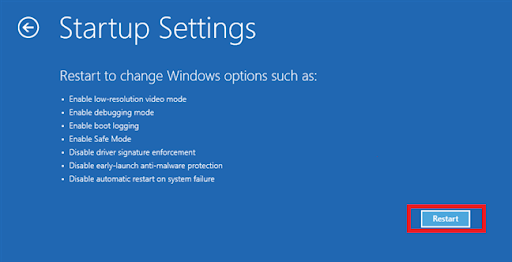
- Click the Restart button once you get to the next screen.
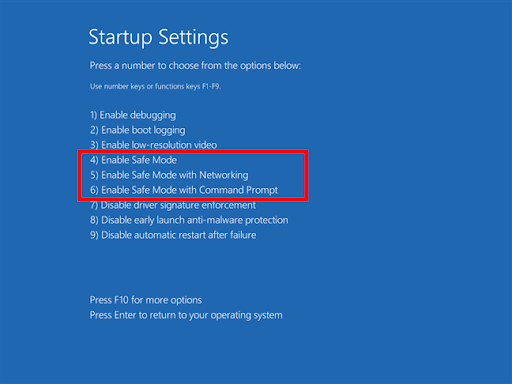
- After your system restarts, you’ll be provided with a list of rebooting options, choose the number beside Safe Mode , which is usually 4, or the number beside Safe Mode with Networking if you want to use an internet connection.
Fix 4: Update Windows
If the problem was from a bad update from Windows, there is a huge possibility that Windows is already working to fix the issue. Therefore, updating your OS in such cases will likely fix the problem.
To do that, simply check for available Windows updates , and if there are any available, download and install them.
Fix 5: Scan for malware
Viruses and malware can also cause BSOD issues. Some of these malicious software can delete or corrupt critical system files, making it difficult for Windows to boot properly.
If you are dealing with malware, this is probably the beginning of many other problems. To be safe, consider scanning your PC with a trusted malware tool . Run a full scan of your computer and promptly delete any malware you find in the process.
Fix 6: Uninstall any updates, apps, or drivers that are incompatible or recently installed
BSOD errors may appear due to apps, drivers, or even Windows updates that may be incompatible. If you recently installed an app, a driver, or updated Windows before you saw the BSOD error, this might be the cause of the problem.
Try uninstalling these applications to see if that resolves the problem.
If it’s a Windows update that causes the error, roll it back with these steps:
- Press
Win + Ito open Settings. In Settings, go to Update & Security > Windows Update . - Click View update history > Uninstall updates . Windows will take you to Control Panel.
- In the Control Panel window, select the most recent update (or the one causing the error) and click Uninstall .
- Follow the prompts to complete uninstallation and restart your PC.
Fix 7: Check your computer’s RAM using the Windows Memory Diagnostic tool
Issues with your computer’s RAM can lead to the BSOD. If that is the case, you can run the Windows Memory Diagnostic tool to identify and potentially fix the issue.
Remember that the tool will run after your computer restarts and give you its results. The results are usually stored in the Event Viewer, just in case you need them again.
Fix 8: Run SFC, DISM, and CHKDSK utilities
When you see Windows stop code errors, you could be dealing with corrupted system files or disk errors.
You can fix some of these issues by running Windows’ built-in system repair utilities like the SFC, DISM, and CHKDSK .
These powerful tools can scan for, detect, and repair corrupted files and disk errors that might be triggering these stop codes.
To run these tools, open the Command Prompt with administrative privileges and execute the following commands:
-
sfc /scannow

-
DISM /Online /Cleanup-Image /RestoreHealth

-
chkdsk x: /f /r

Run these commands one after the other and, if possible, back up your data before proceeding.
Fix 9: Perform a system restore
If the problem persists, restore Windows to a previous version when it was working well. The process only tries to fix Windows by restoring it to a saved restore point and may roll back your operating system settings and application files but will not affect your personal data.
Remember that the restore point you want to use should be from a time when your PC was not showing the error. If you choose a restore point that was saved after you started experiencing the BSOD, you may be restoring the problem instead of fixing it.
To perform a system restore:
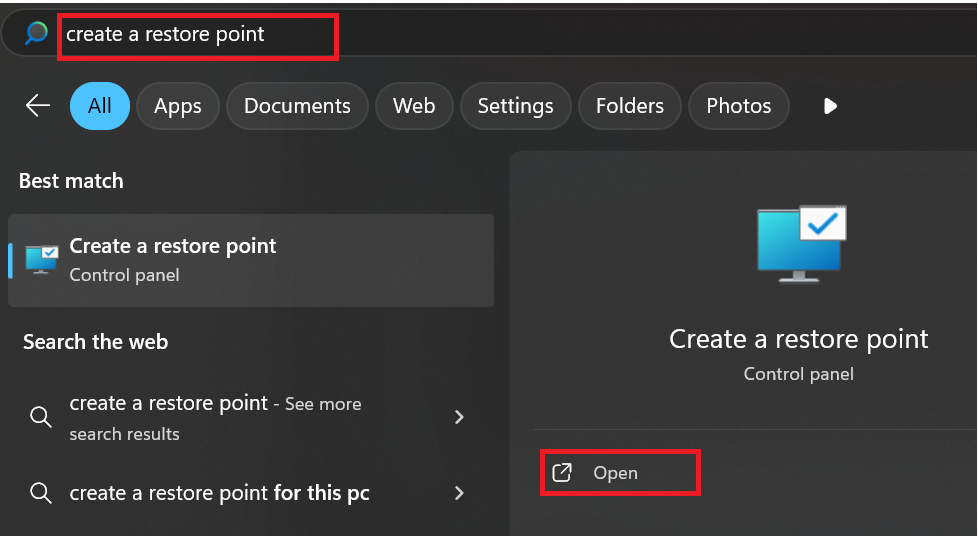
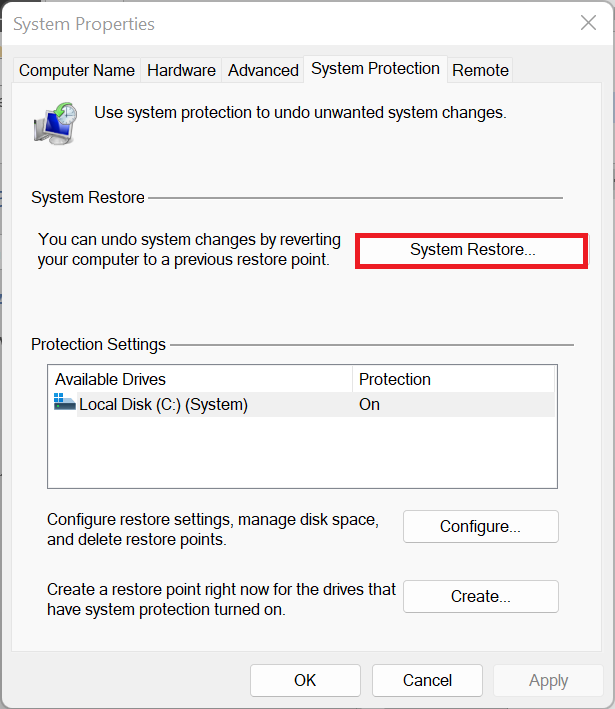
- Type “create a restore point” into the Windows search box and open the application.
- In the System Properties window, click on System Restore .
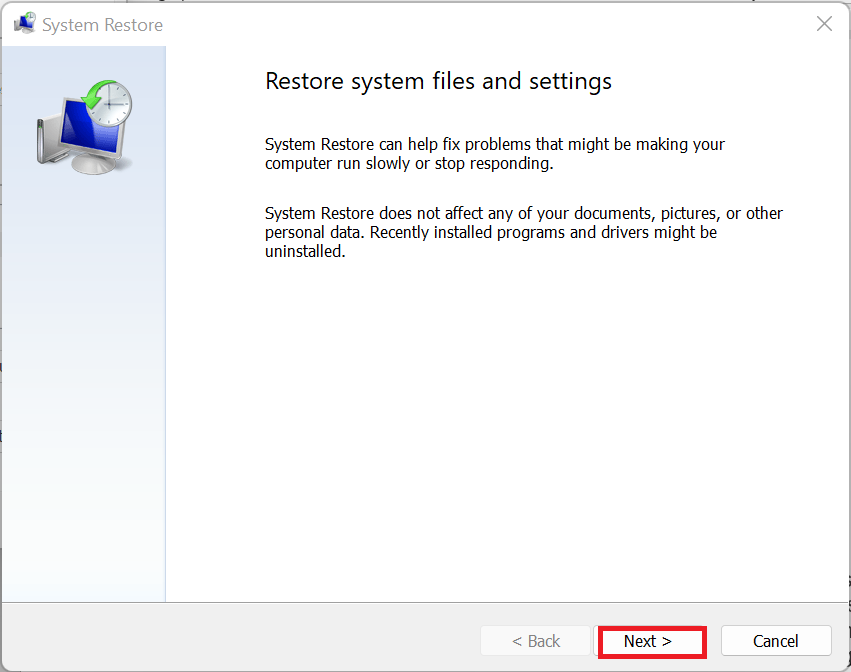
- Click on Next to see the available restore points.
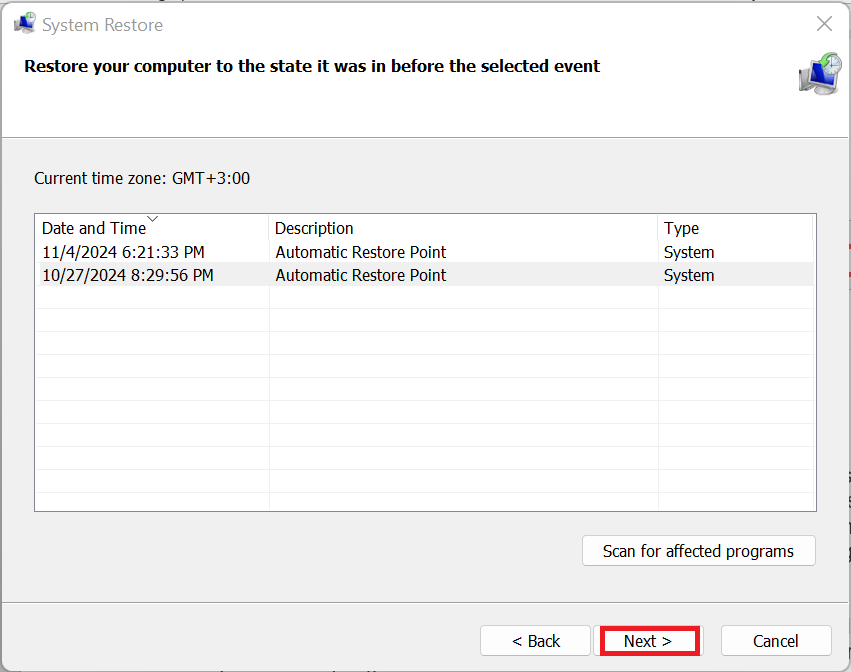
- Choose any of the restore points you think were created before the problem started and click Next > Finish .
Fix 10: Reinstall Windows as a last resort
If you have tried everything above and nothing worked, you should consider reinstalling Windows. Sadly, this process will remove all your installed programs and system settings, essentially giving you a clean slate.
However, it is a good way to ensure that your system returns to a stable, error-free state by removing any deep-rooted problems that might be causing the recurring blue screen errors.
📌Here’s a detailed guide to help you:How to Factory Reset a Computer Running Windows 10/11
Windows Stop Codes: Explained
We hope that you have found a solution from the above steps. However, it does not end there. Once you’ve resolved the Windows stop code error, it’s essential to take proactive steps to prevent the BSOD from recurring.
One of the best things to do is keep a regular system maintenance schedule. This will help keep your computer running smoothly. To avoid stress, you can use third-party tools like Auslogics BoostSpeed or similar software to optimize and manage your system.
Also, keep your machine updated, perform regular scans, and monitor your system performance. All of these steps will go a long way in preventing future errors.
By the way, we would like to hear from you! Drop a comment below and let us know how this guide helped you or if you have any additional questions!