
- Why Is My Computer So Slow?
- How to Fix a Slow Computer
- Step 1: Remove unneeded apps
- Step 2: Disable startup programs you don’t need
- Step 3: Free up disk space
- Step 4: Slim down your Windows operating system
- Step 5: Update your software
- Step 6: Update your device drivers
- Step 7: Scan for and remove malware
- Step 8: Fix hard drive errors
- Step 9: Fix Windows registry issues
- Step 10: Defragment your computer
- Step 11: Check if you have enough RAM
- Step 12: Fix the overheating issue (If you have one)
- Final step: Maintain your PC regularly
- Extra Tips to Improve Computer Performance
- Why Do You Need a PC Optimizer to Improve Your PC Performance?
- Why Is My Computer So Slow: Explained
- FAQ
There’s nothing more frustrating than a computer that takes ages to start up, load apps, or even respond to basic commands.
However, a PC running slo w doesn’t mean it’s time to get an expensive upgrade just yet.
In this article, you’ll find a detailed, step-by-step guide to diagnose and fix your slow computer.
We’ve covered every possible issue that causes systems to slow down and given you the best method to fix them. You’ll also find insider tips that anyone can apply right away. Let’s begin!
Why Is My Computer So Slow?
Let’s briefly go through the reasons why your computer is running slow. Luckily for you, there is an absolute fix to the following issues:
- Poor computer maintenance. If you’re not the type that performs regular maintenance like updating your system or running disk cleanup, you’ll face system slowdowns.
- Hard drive becomes fragmented. Files on traditional hard drives and SSDs get fragmented over time, which spreads across various sectors. This makes the drive work harder to bring together data, and that causes it to slow down.
- Problems with the hard drive. When your hard drive is aging or failing, it can considerably impact your PC speed. You might notice system crashes, slow file transfers, or files or apps taking too long to load.
- Cluttered storage space. When your hard drive is nearly full, it can affect how well your computer performs. This is especially true if there’s little space left for virtual memory or temporary files.
- Issues with the registry. The Windows registry stores important settings and configurations for your system and programs. Over time, it becomes filled with corrupt, outdated, or invalid entries, which can sl ow your compute r.
- Outdated drivers. If you’re not a fan of updating drivers, like most of us, you’ll experience hardware malfunctions and slowdowns. That’s because the drivers allow your hardware to communicate with the operating system. So, if you don’t pay attention to it, your system may even crash or have security risks.
- Errors with the hard drive. Issues with your drive, like bad sectors or corrupted files, can slow down file access and cause apps to freeze or crash. Usually, you can use the CHKDSK tool to detect and repair any errors. However, if it doesn’t, you’ll have to pull up the big guns. I’ll explain further in the article.
- Virus and malware infections. Did you know that malware can eat up system resources, run unwanted background processes, and even damage files? All these activities can be the reason your PC is running slow.
- Insufficient RAM. When you don’t have enough physical memory to support the applications you’re running, your PC switches to virtual memory. And this is much slower. Switching between programs can lag and even cause the system to freeze.
- Overheating issues. Usually, when your computer is overheating, it throttles to prevent damage. However, if dust continues to build up inside the system, vents are blocked, or fans are not working well, the overheating may persist.
- Leftovers from uninstalled programs. When you delete programs, it usually leaves behind temporary files, registry entries, and folders. And all these residues can take up space on your system and reduce its speed.
- Too many startup programs or background apps. Generally, many applications are set to launch when you boot your PC. And this consumes lots of memory and CPU power.
How to Fix a Slow Computer
Below are the best recommended fixes you can use if your computer is running slow:
Step 1: Remove unneeded apps
Uninstall unnecessary programs
to free up disk space and resources. Besides that, you can also delete pre-installed software or bloatware, which you most likely don’t use because they can consume a lot of resources.
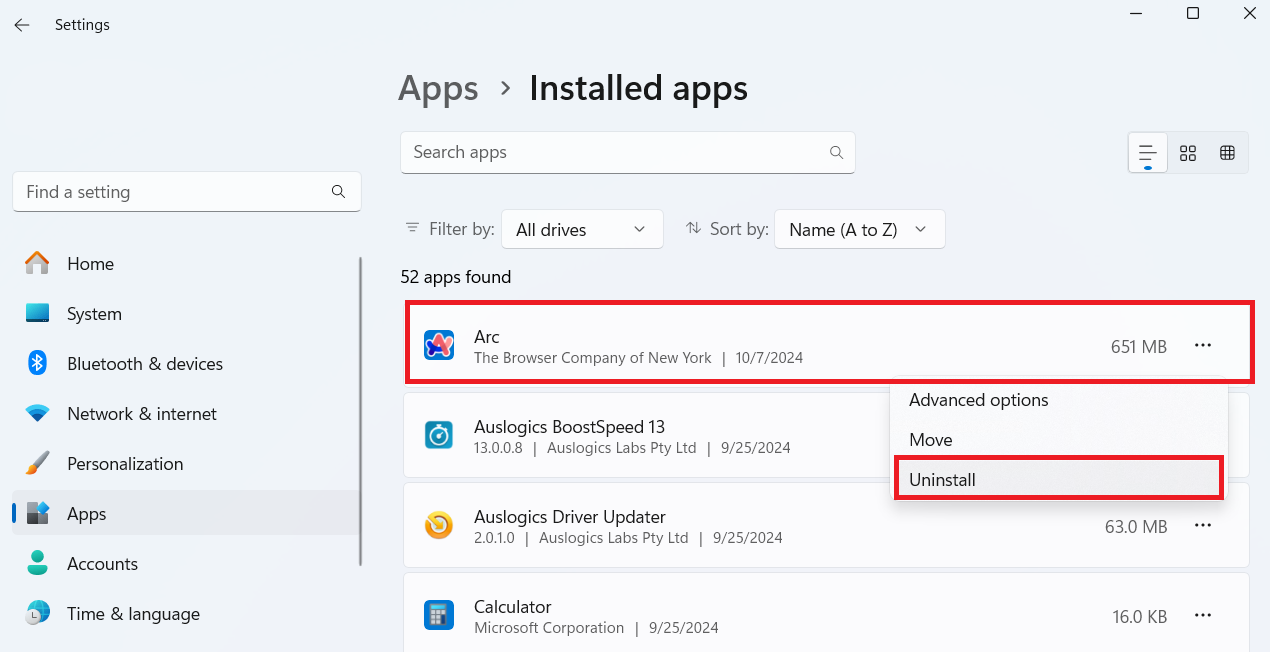
You can also delete applications you don’t need anymore. Here’s how to go about it. This method works on Windows 10 or 11 PCs:
- Open your search box and type “add or remove programs.” Then, press the Enter key to open it.
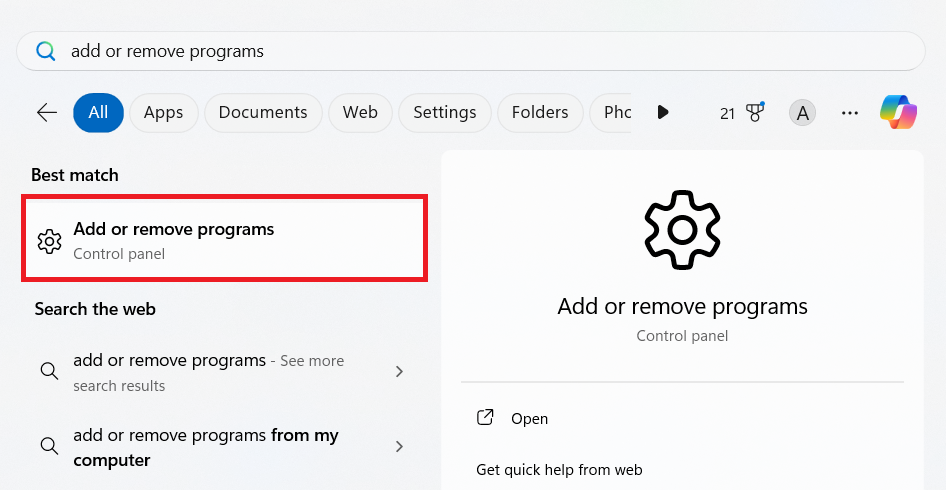
- Now, you can go through the programs you don’t want and delete them.
If you can’t delete pre-installed programs using this method, you may have to employ Windows10Debloater or Win11Debloat . Just make sure to verify what the tool identifies as bloatware before deleting them.
Step 2: Disable startup programs you don’t need
decreases boot time and improves performance, particularly if your PC is slow. That said, startup apps are there for a reason—they load critical software or services your system needs as soon as you turn on your PC. Programs like your antivirus software are a key example.
However, many programs, including third-party apps, configure themselves to launch when Windows starts. And too many of these startups can s low your computer.
Let me show you how to disable these startup programs to free up resources, but remember to keep the essential ones running:
- Go to your Task Manager by pressing
Ctrl + Shift + Esc. You can also right-click on your taskbar and select Task Manager if you’re using Windows 11. - Click on Startup (Windows 10) or Startup apps (Windows 11).
- Then, select the unneeded apps running and disable them. When you click on it, the Disable button should appear. Just click on it. Another way is to right-click and select Disable.
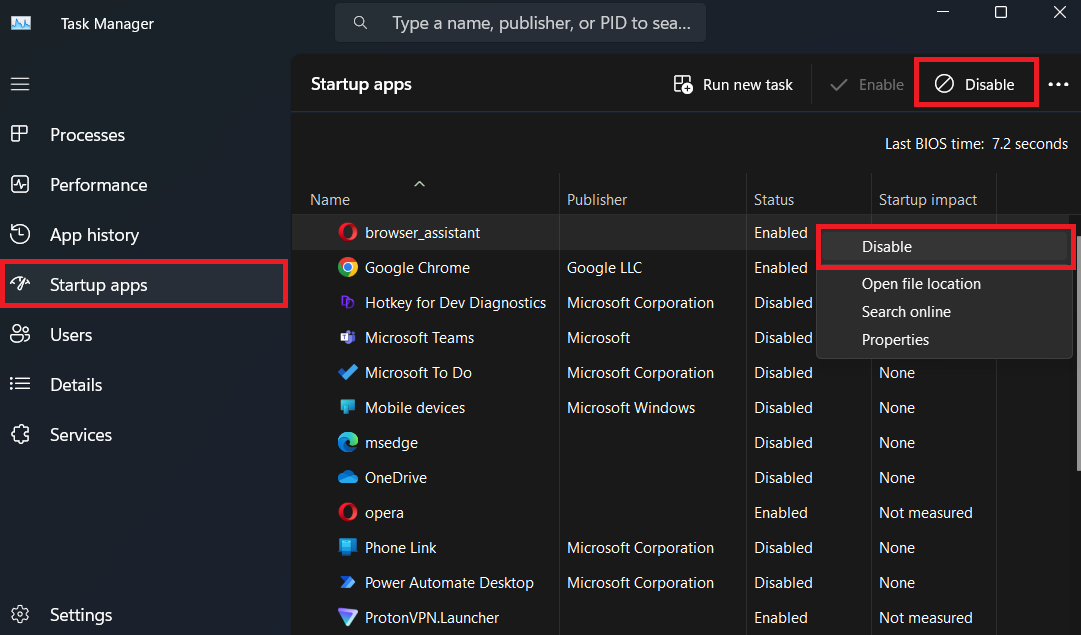
Another tip is that critical programs usually include system utilities, antivirus programs, and hardware drivers. If you notice these names, leave it enabled.
Step 3: Free up disk space
by deleting unused files ensures better system performance. When your drive is full or nearly full, it can drag your computer’s speed because Windows may not have enough space to:
- Manage virtual memory .
- Create temporary files for operations like updates, installations, and everyday tasks.
- Check and update the system (Windows updates).
It can also create severe fragmentation, especially on traditional hard drives. And it can also affect your boot time. Here’s how to get more disk space :
- Type “Disk Cleanup” in the search bar and open it.
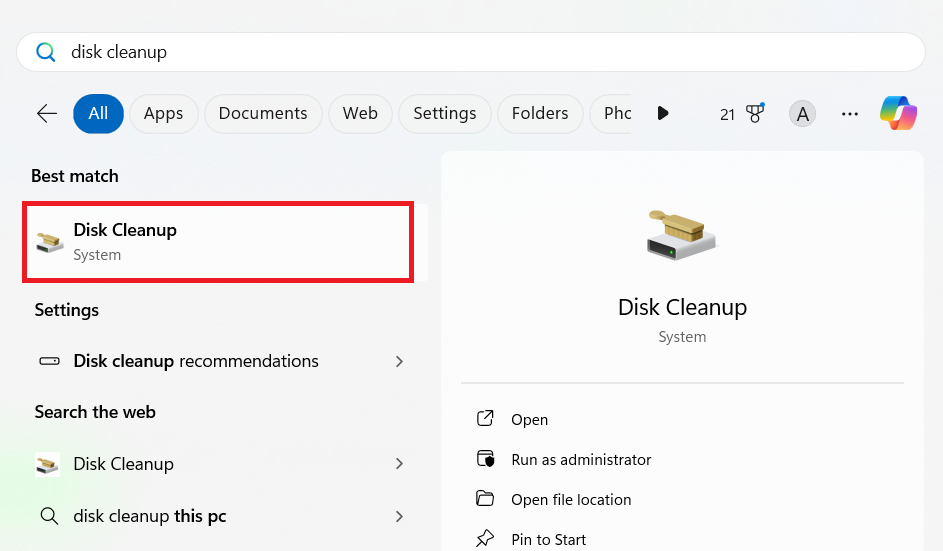
- If you have multiple hard drives, the system will allow you to choose the preferred drive to clean up.

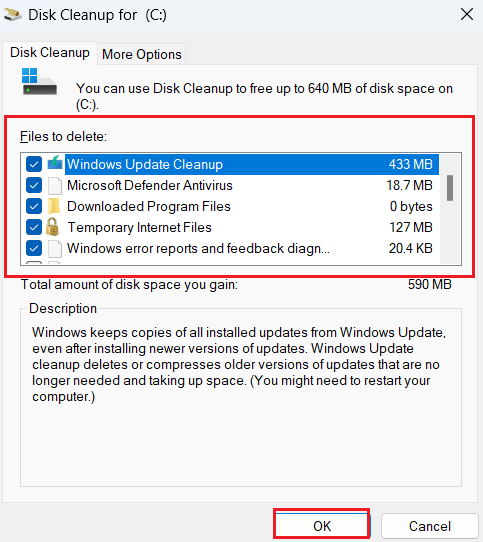
- Different Windows components produce temp files. If you want to get rid of them, click on Clean up system files . It’ll scan the files and display them.
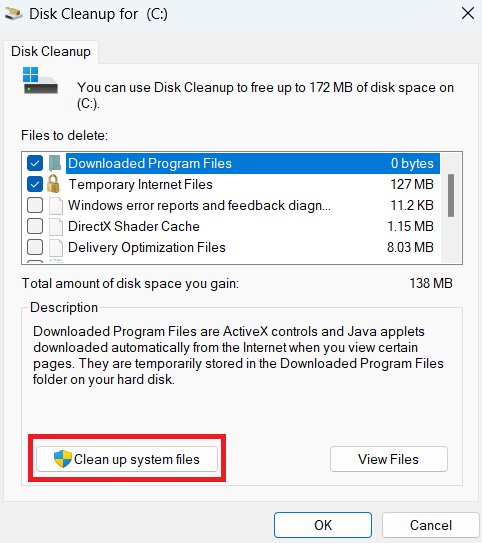
- Now, check the preferred boxes and click OK to start the cleaning process.
Step 4: Slim down your Windows operating system
Remove unnecessary system bloat
for better efficiency because Windows accumulates system files and features that you may not use, like old drivers, legacy system files, and system cache. This is true, especially in situations where you’ve upgraded from an older version of Windows.
Here’s how to get rid of extra features and bloat to help your Windows 10 and 11 run more efficiently.
Let’s start with deleting unnecessary system files:
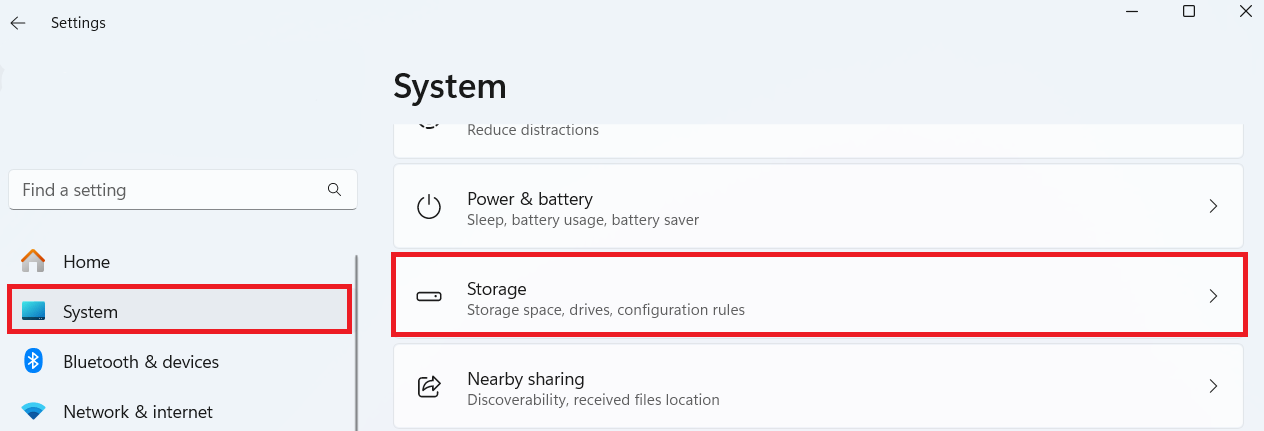
- Open the Settings app on your system and click System .
- Then, scroll down and select Storage.
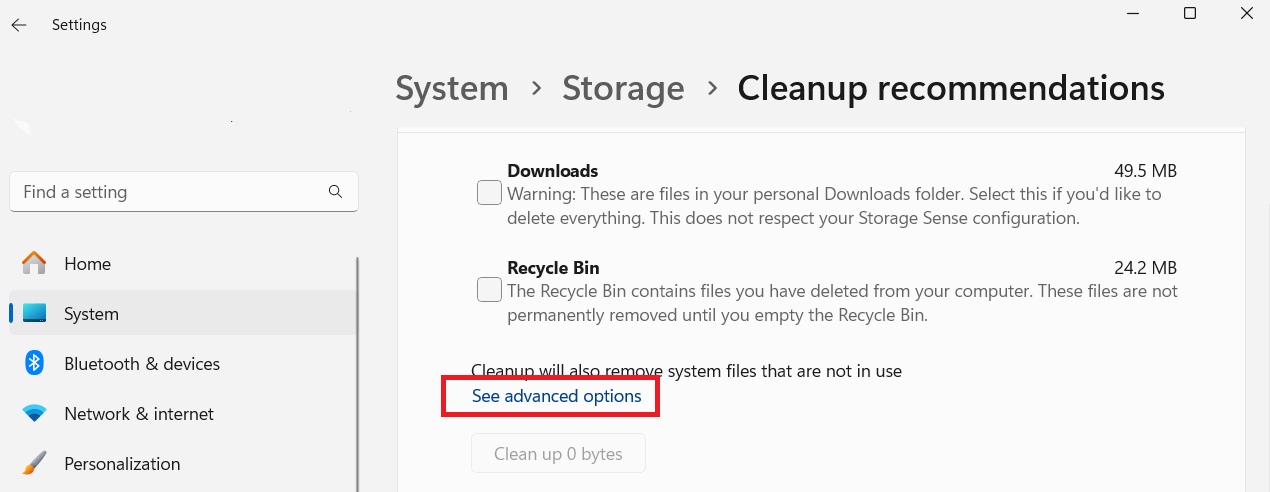
- If you haven’t turned on Storage Sense, do so. After, click on Cleanup recommendations found under Storage management.
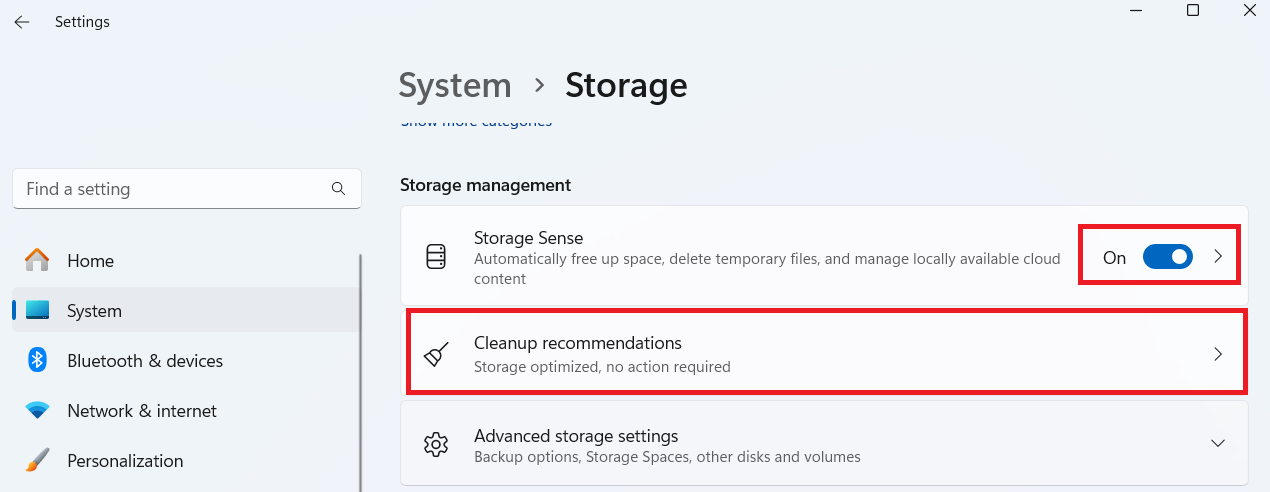
- Next, click on See advanced options .
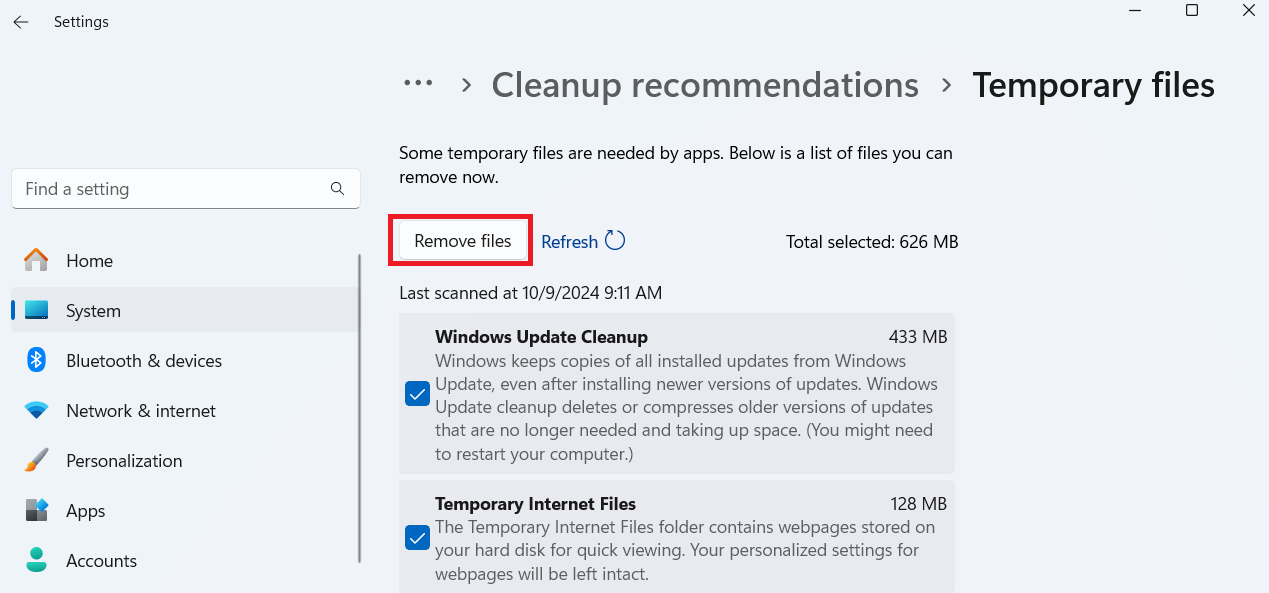
In the next window, you’ll find a list of files you can remove. Check the ones you don’t need and click Remove files.
For Windows 10 users, the steps outlined above are similar, so you shouldn’t face any problems navigating Storage Sense.
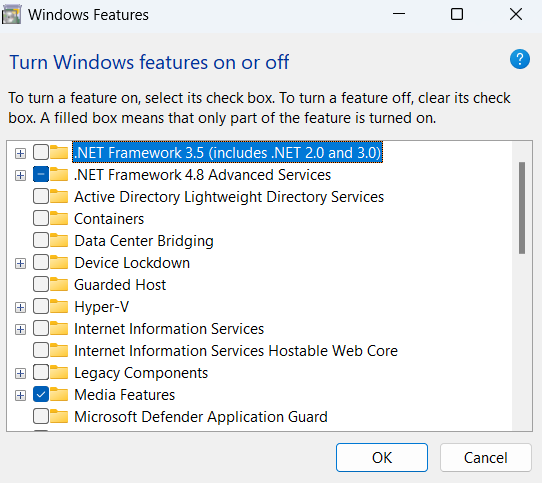
How to delete Windows features you don’t need
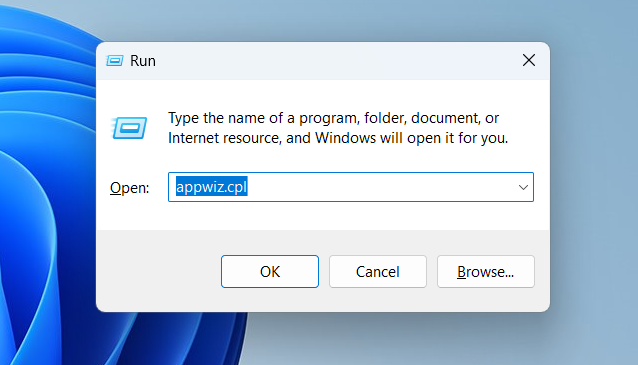
- Press
Windows + Rto open the Run dialog box. - Type “appwiz.cpl” to open the Programs and Features window in the Control Panel.
- When the window opens, click on Turn Windows features on or off.
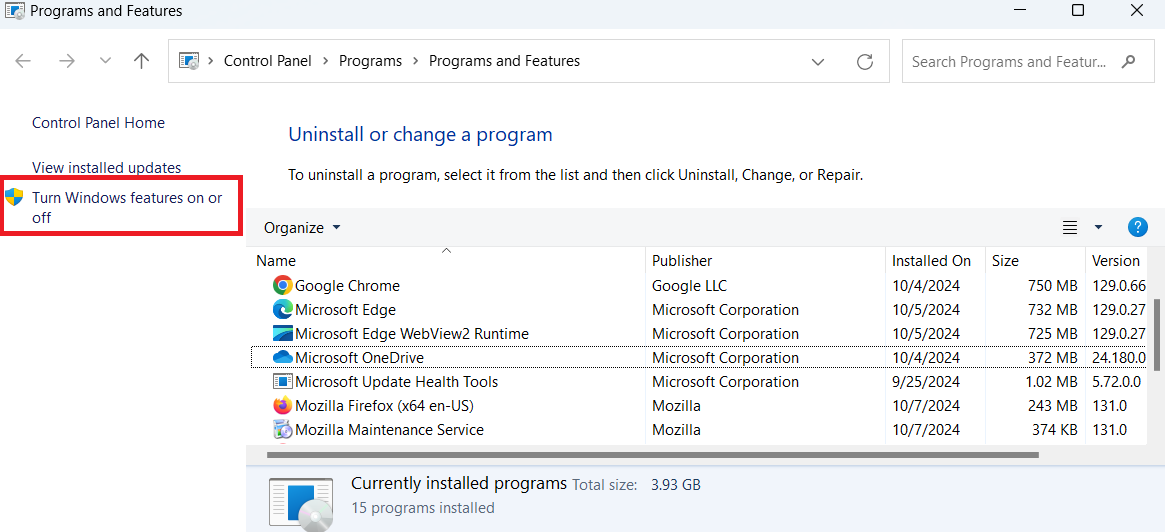
- You can go through the list and uncheck any feature you don’t want and click OK .
Step 5: Update your software
and patches are installed for security and better performance. Windows updates usually contain bug fixes and performance improvements that can resolve your computer running slo w or correct incompatibilities. To check for updates on Windows:
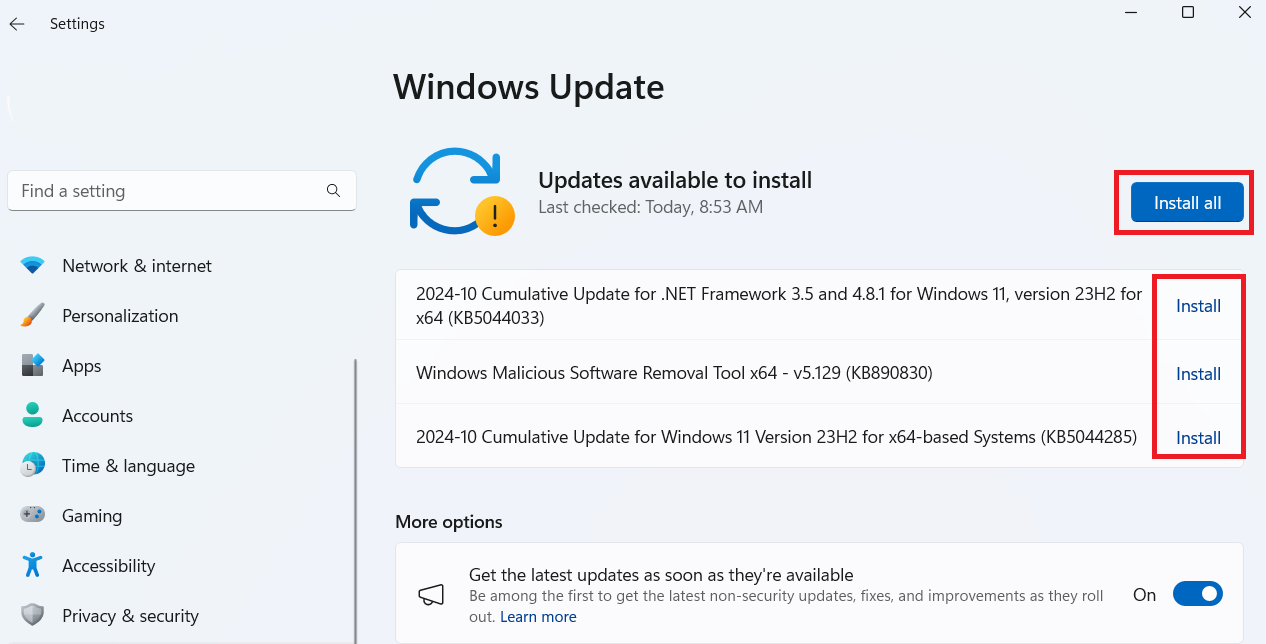
- Open Settings and go to Windows Update .
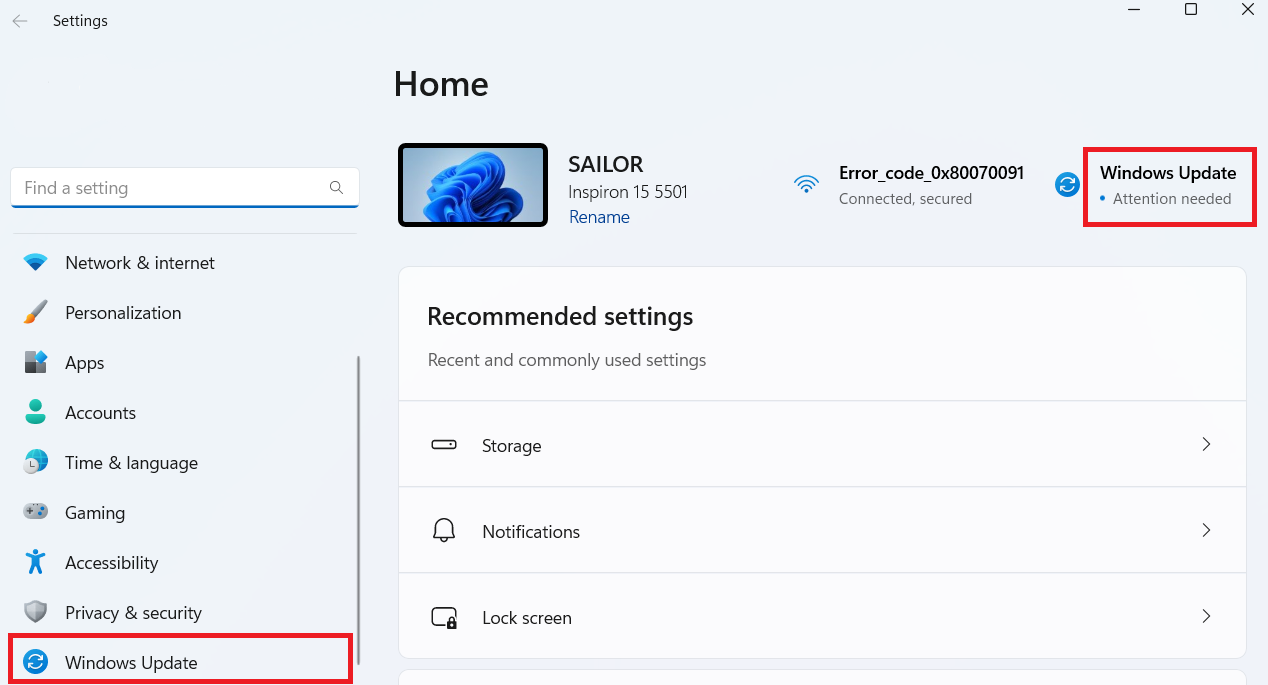
- Then, click on Check for updates. If there are any updates like the screenshot below, click on it to download and install.
Step 6: Update your device drivers
Ensure all drivers are up to date because they allow your hardware to communicate with your operating system. When your drivers are outdated or faulty, it can
- lead to a slow computer,
- problems with the hardware, or
- cause your system to crash.
Let’s go through how to update your device drivers :
- Right-click the Start button and select Device Manager .
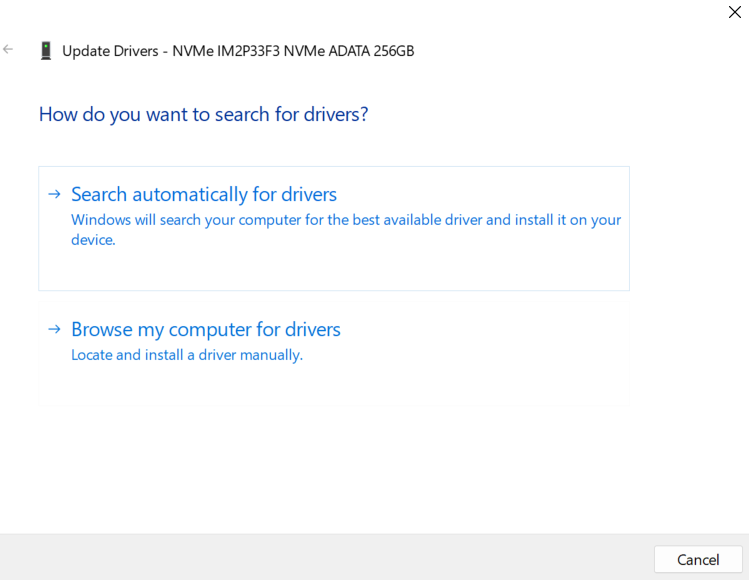
- Check if a driver is having issues. Usually, if there is a problem, you’ll see a yellow triangle beside the driver. Expand that driver, right-click on it, and select Update driver.
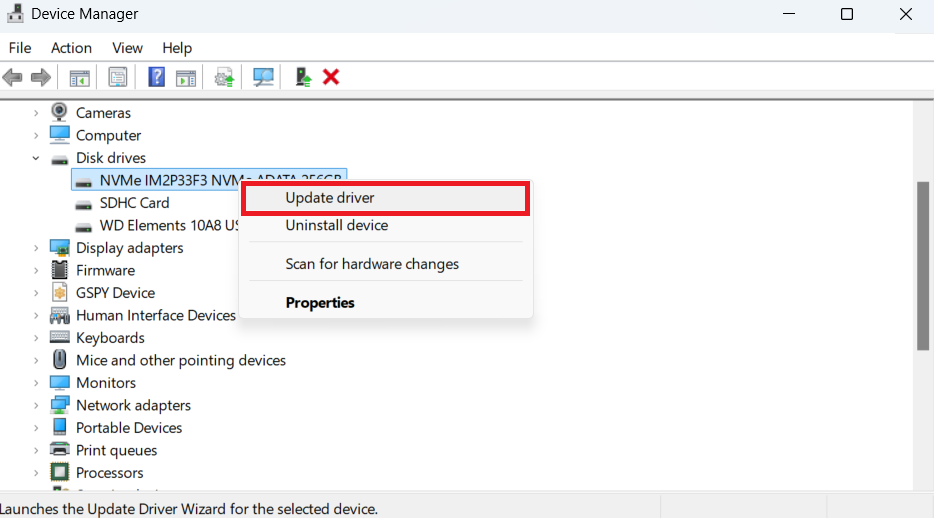
- Click on Search automatically for drivers . The system will search for drivers on your PC and install if it finds any.
You can opt for Browse my computer for drivers , but you’ll have to install the drivers from the manufacturer’s website.
Step 7: Scan for and remove malware
A malware scan helps detect and remove harmful files slowing down the system. Malware has an ingenious way of consuming lots of the system’s resources, like your CPU, memory, and disk space.
Furthermore, malware operates stealthily in the background, carrying out malicious tasks like data mining. All these can slow down your computer, but we can fix that:
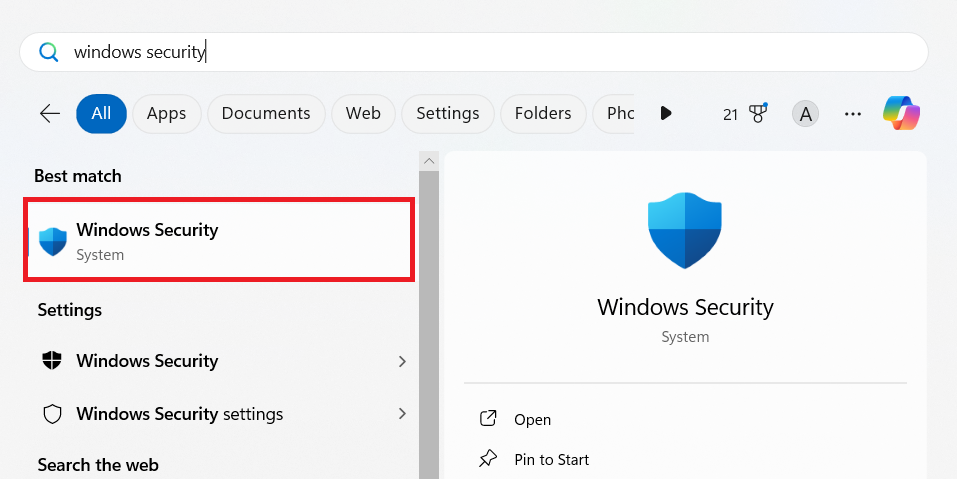
- Type “Windows security” in the search field and click on it to open.
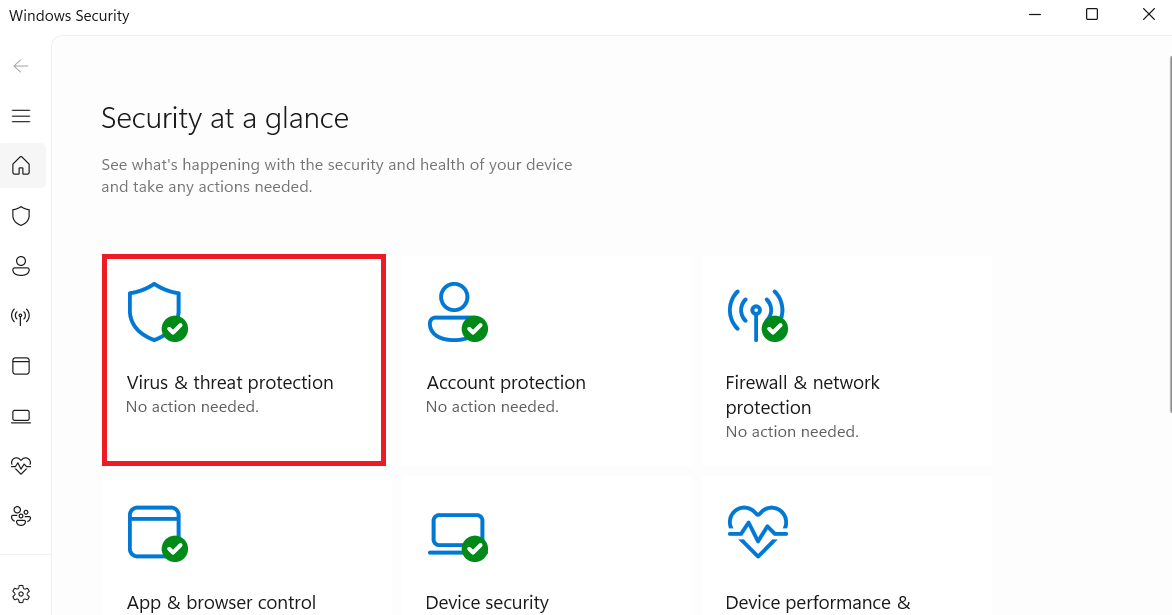
- Navigate to Virus & threat protection .
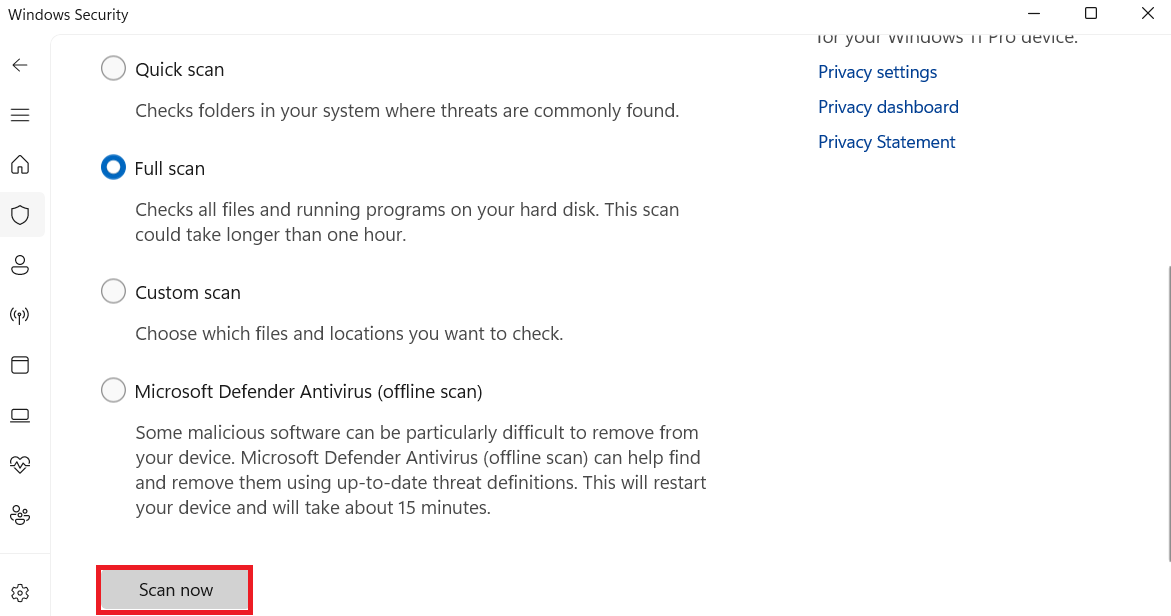
- Next, select Scan options .
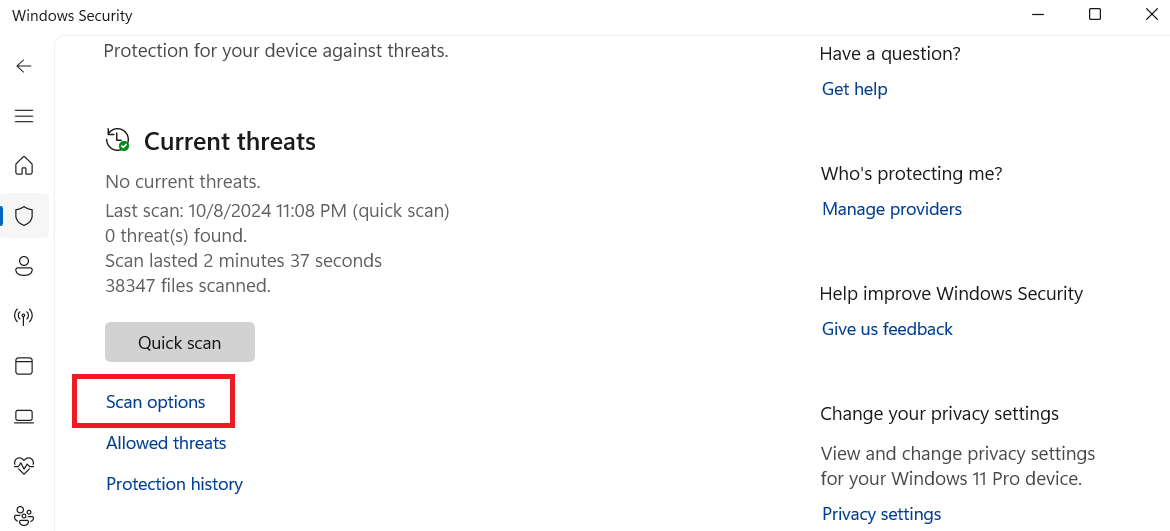
- Click on Quick scan or Full scan for a thorough check and select Scan now.
Step 8: Fix hard drive errors
can help improve the speed of a slow PC. Drive issues like bad sectors or a corrupt file system can cause your computer to be unstable. You can use the CHKDSK command to scan for errors and fix them.
Follow the steps below to run the command:
- Type “command prompt” in the search bar, right-click, and select Run as administrator.

- Enter the following command and press Enter: chkdsk C: /f /r /x . This command will scan your file system and check for bad sectors. Then, fix any errors it finds.

You’ll need to restart your computer to start the process. The scan will run during bootup before Windows loads.
Step 9: Fix Windows registry issues
fixes errors and boosts your system performance. The reason is quite simple. With time, corrupt or invalid entries can lead to a s low compute r. Here’s how to clean your Windows registry:
- Open the Command Prompt with administrative privileges.

- Enter “dism /online /cleanup-image /restorehealth” and press Enter.

- Wait for the process to complete and restart your PC.
Step 10: Defragment your computer
makes file access faster and more efficient, especially if your PC runs on an HDD.
But it’s not something you necessarily have to worry about because SSDs can access fragmented files just as fast as non-fragmented ones. The reason is that they don’t have moving parts like HDDs.
Instead, Windows uses the TRIM command in place of the normal defragmentation process. When you delete or modify files, the TRIM command informs the SSD which data blocks are no longer needed. The driver will then clear those blocks and make them available for new information.
The below steps will explain how to defragment your hard drive:
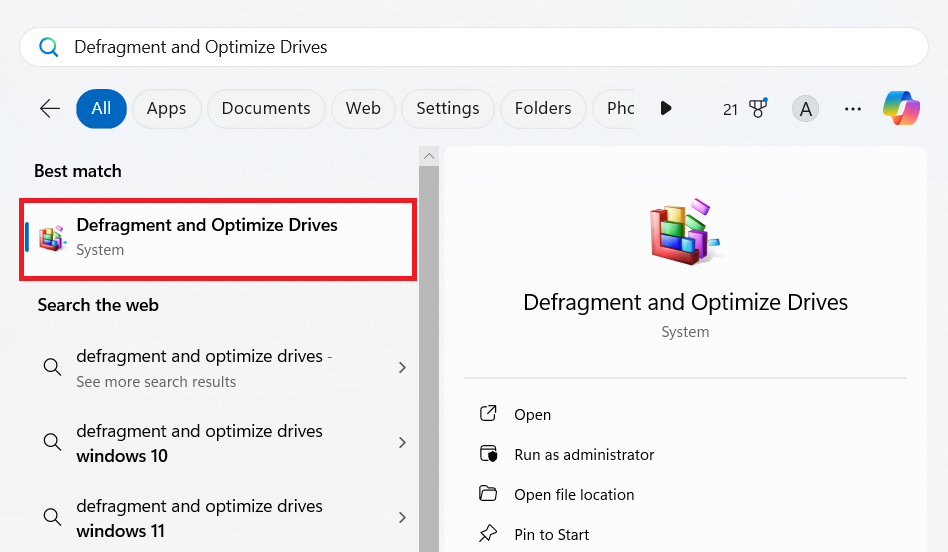
- Type “Defragment and Optimize Drives” in the search menu and hit Enter.
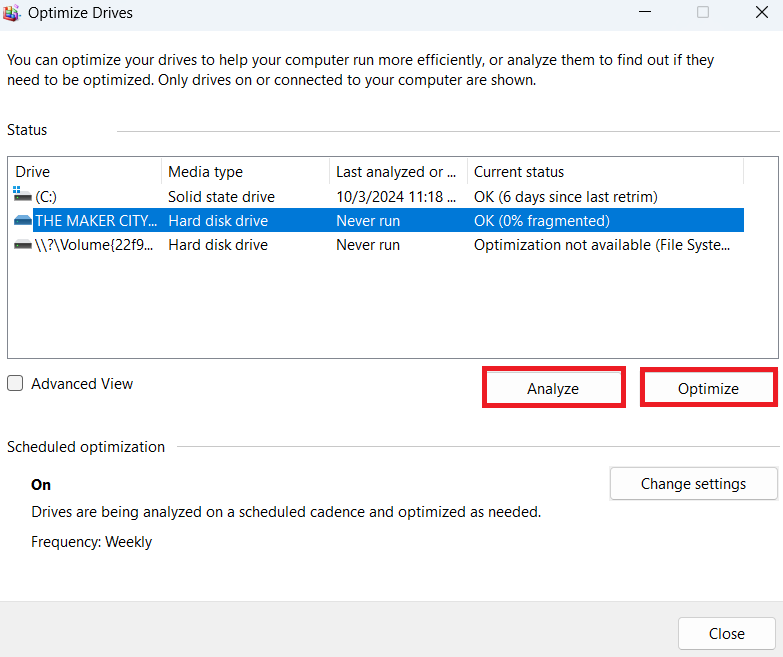
- Select the drive to defrag and select Optimize to begin the process.
- You can click Analyze to check how fragmented the drive is to determine it needs an optimization.
- Wait for the process to complete and close the window.

If you check the box for Run on a schedule (recommended) , it’ll ensure that your drives are defragmented regularly based on the plan you set.
If you check Increase task priority if three consecutive scheduled runs are missed , Windows will place it as its first priority if the scan is skipped three consecutive scheduled runs.
Step 11: Check if you have enough RAM
you have to see if it’s sufficient to run multiple programs or memory-intensive apps like editing or playing games.
Part of the reason why users ask the question, “W hy is my computer running so slow? ” is because they don’t have enough memory.
You can check your memory by going through the below steps:
- Press the
Windows key + R, type “msinfo32,” and press Enter.
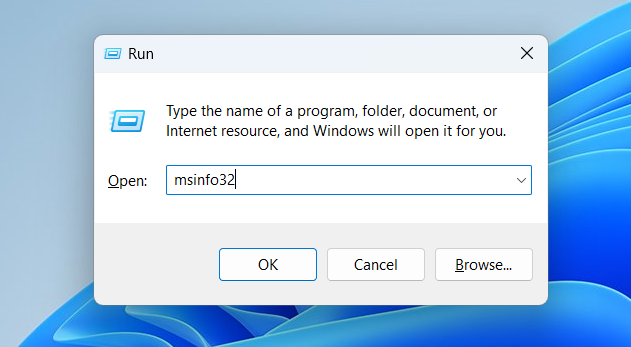
- Then, search for Installed Physical Memory (RAM) in System Summary.

4GB RAM is usually ideal for browsing the web, checking email, and using office applications. And 8GB RAM is good for casual gaming and light multitasking. It may be suitable for some professional software and light video or photo editing or similar apps.
Step 12: Fix the overheating issue (If you have one)
to prevent CPU throttling, which affects performance. Poor ventilation, dust buildup, and fans not working well are the common reasons that can cause your computer to overheat. Here are ways you can take to fix overheating:
- Use compressed air to gently clean inside your computer to prevent dust and debris clogging your system.
- Make sure that you place your laptop on a flat, hard surface to allow proper airflow when using your PC. You can get a laptop stand, which is ideal in these situations.
- You can also use cooling pads or ensure your fans are properly working.
using tools like HWMonitor or CoreTemp to ensure it’s always running within a safe range.
However, you need to know what you’re doing because improperly setting voltages can cause system instability. You can use tools like Intel XTU (Extreme Tuning Utility) or Throttlestop to help with the process.
Final step: Maintain your PC regularly
Regular maintenance tasks, such as clearing cache and updates, keep the system running smoothly. Basically, all the steps we’ve covered so far can keep your computer in good shape, like:
- Clearing your cache and temporary files to get more storage space and prevent your PC from running slow.
- Scanning your system for malware.
- Installing Windows updates regularly.
- Disabling unnecessary startup programs, and more.
Extra Tips to Improve Computer Performance
Tip 1: Run Windows’ built-in maintenance
Windows’ built-in maintenance feature can handle updates, disk optimization, and other routine tasks to keep the system running smoothly. It’s a hand-off way to ensure your PC remains in good health.
However, this feature comes with limitations. For example, the tool might not always catch some deeper issues, such as those stubborn malware, registry errors, or corrupted files.
Furthermore, it might not be aggressive in freeing up space because it may leave behind some temp files or system clutter.
So, while it’s useful for basic upkeep, it’s better to combine it with manual checks or third-party software to give you a more detailed cleanup.
Tip 2: Tweak your system for better performance
like adjusting visual effects, disabling startup programs, and managing power settings can indeed boost performance. If you’re using an older or less powerful computer, these adjustments can be helpful. However, remember that these alone have their limits.
For example, it’s important to balance performance with usability because disabling too many visual effects may make your system look less appealing or even harder to use.
You should always tailor the adjustments to your specific needs and what your system is capable of. Also, if the reason for your c omputer running slow is from the hardware or software, adjusting system settings won’t fix the real problem.
Tip 3: Diagnose your system for issues
Running diagnostics helps identify software or hardware problems that might slow down performance. You can use the Windows Memory Diagnostic tool to check your RAM for errors.
You can even use command-line prompts like CHKDSK to analyze issues with your PC, but diagnostics only go so far.
These tools can detect certain problems but might not always offer direct solutions. And even with the ones that do, like CHKDSK, you might create more issues if you use the wrong parameters.
So depending on the situation, you may need to use third-party software to accurately fix the problem.
Tip 4: Upgrade to an SSD
Switching from an HDD to an SSD
offers a huge performance boost, especially with loading times and boot speed. The improvement is so huge that even a modest system with a low-end SSD can still outperform a PC using an HDD.
The only downside is that solid-state drives tend to be more expensive compared to hard disk drives. So, you might need to balance storage needs with your budget.
📌 Also read: Best SSD for Your Gaming: Top Choices for Your Gaming Needs
Why Do You Need a PC Optimizer to Improve Your PC Performance?
All the points we’ve discussed can certainly boost your computer’s speed. However, implementing all the methods is time-consuming and requires constant attention.
Even though Windows have built-in tools to automate most of these tasks, it doesn’t cover everything. This is where a PC optimizer comes in.
These tools do a very good job at automating crucial maintenance tasks and saving you time while keeping your computer in top condition.
Here is a breakdown of some of the best PC cleaners and optimizers, along with their main features:
| Feature | Auslogics BoostSpeed | CCleaner | IObit Advanced SystemCare | Glary Utilities |
|---|---|---|---|---|
| Performance improvement | Excellent | Good | Good | Good |
| Storage cleanup | Comprehensive | Good | Good | Decent |
| Registry cleanup | Effective | Basic | Advanced | Basic |
| Startup management | Easy to use | Basic | Advanced | Basic |
| Privacy protection | Strong | Decent | Decent | Basic |
| Real-time monitoring | Yes | No | Yes | No |
| Automated maintenance | Yes | Yes | No | No |
| User interface | Intuitive | Simple | Detailed | Simple |
| Compatibility | Windows 11,10,8,8.1,7 | Windows 11,10,8,7 | Windows & Mac | Windows 11,10,8,7 |
| Pricing | Free/paid (affordable) | Free/paid | Free/paid | Free/paid |
| Pros |
|
|
|
|
| Cons |
|
|
|
|
Let’s say your c omputer is running slo w and you just installed Auslogics BoostSpeed . The first thing you should do is run the system scan. The tool will:
- Check your disk space for any unneeded files to clean up.
- Search for anything causing stability and performance issues.
- Check your drive for any fragmentation.
- Find any vulnerabilities with your privacy.
- Look for recommended Windows tweaks.
- Review your internet connection settings.
Here’s how to get started:
- After launching the program, click on the big Scan button in My Dashboard.

- Wait for the process to complete as it searches your entire system.

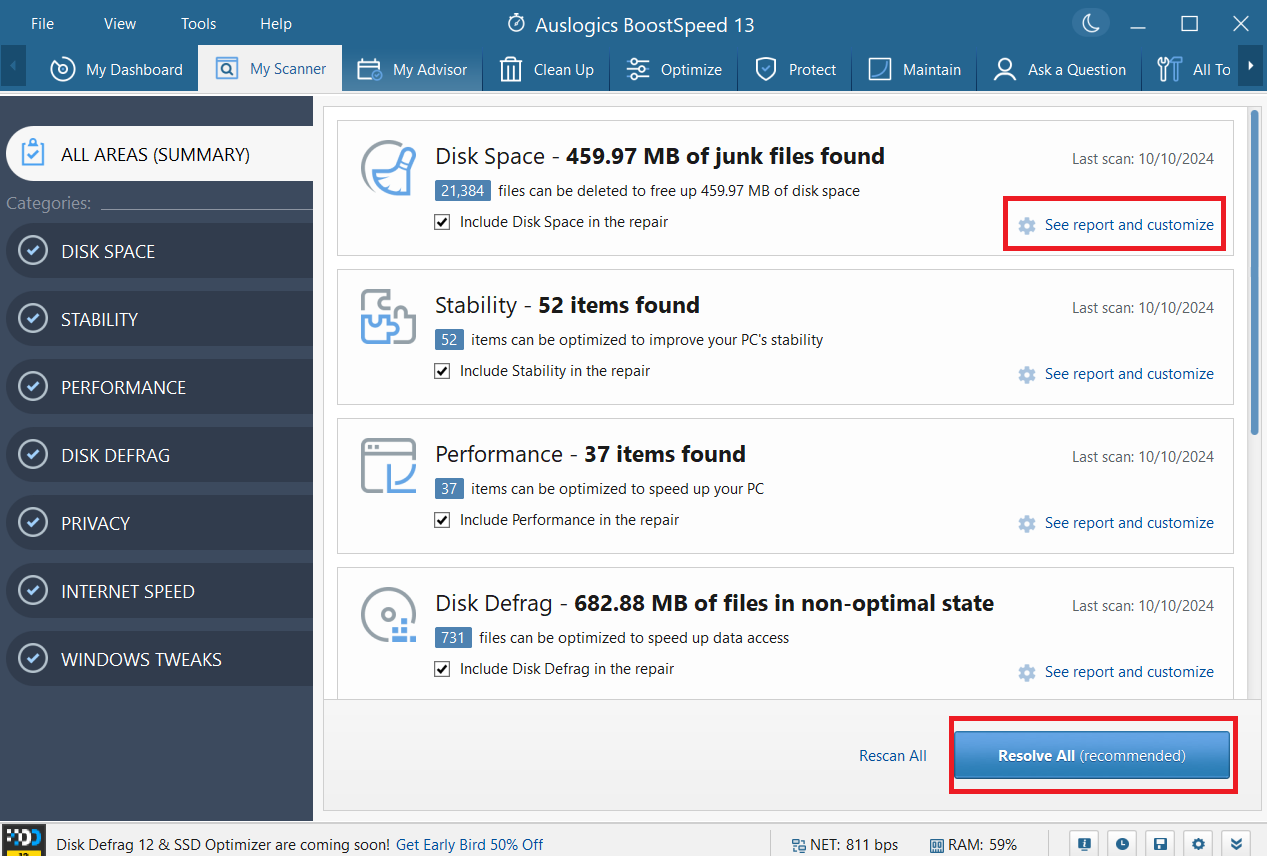
- When the scanning is complete, you can simply click on Resolve All to resolve all the issues it found. But if you want to know what BoostSpeed found, click on See full report.

- From the screenshot below, I can delete 490MB worth of junk files, optimize 52 items to improve stability, 37 items to speed up performance, etc. You can click See report and customize to make changes as you see fit. Or just click on Resolve All (recommended) to delete the files causing the slow performance.
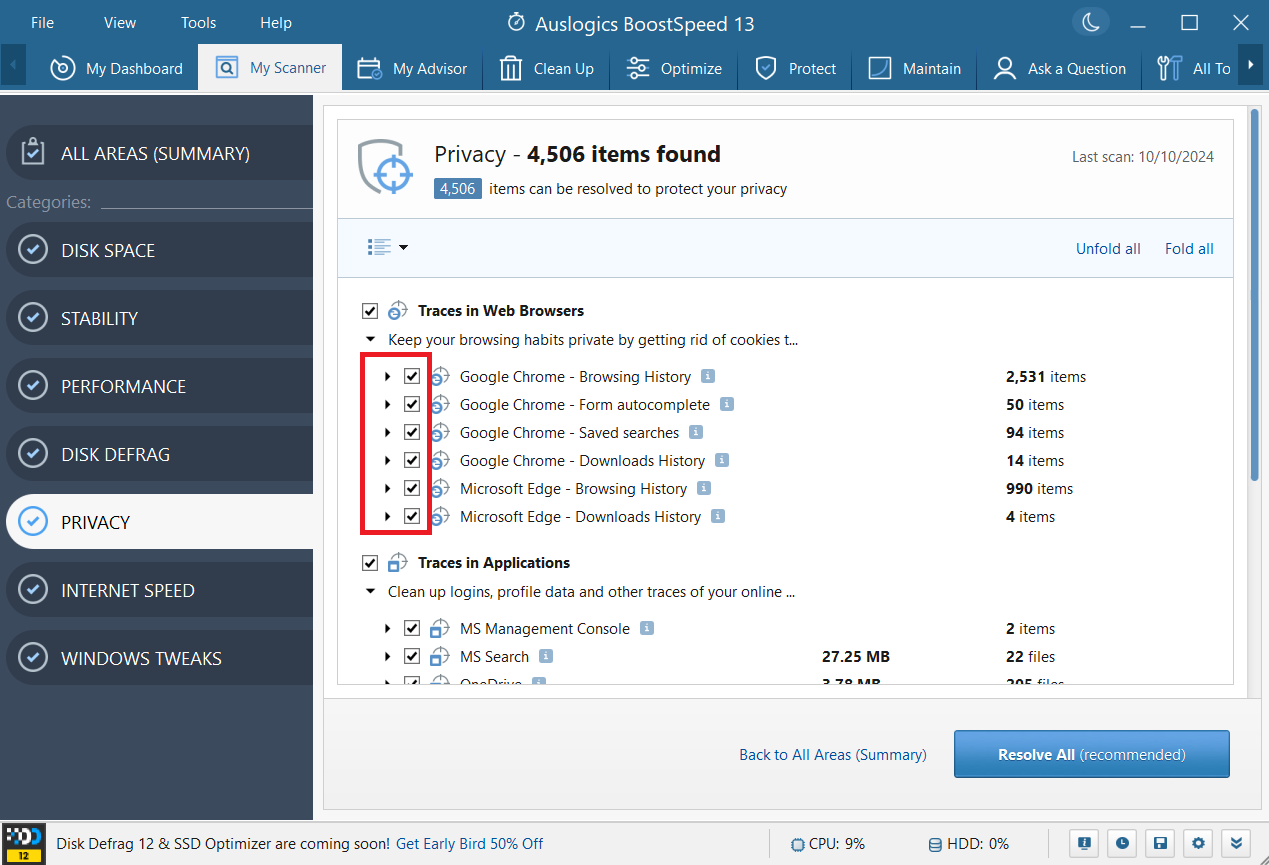
- When I clicked the See report and customize for Privacy , this is what I got (check the screenshot below). Click on the small black arrow beside each item to expand it. You can uncheck an item if you don’t want to remove it.
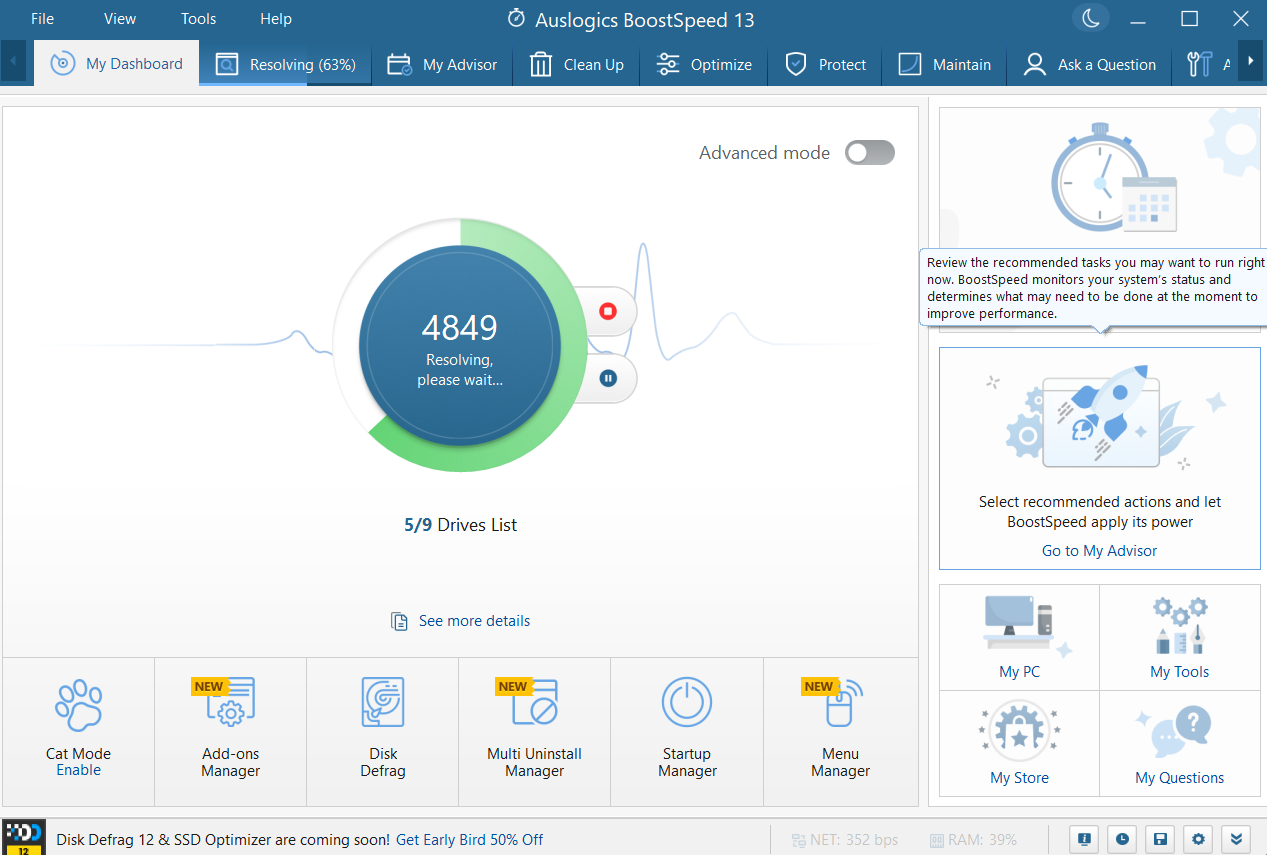
- When you click on Resolve All (recommended) , wait for the process to complete. If you’ve opened your browser, you’ll be asked to close it until the process completes. In some cases, if the tool made some tweaks, you’ll be asked to restart your PC for it to take effect.
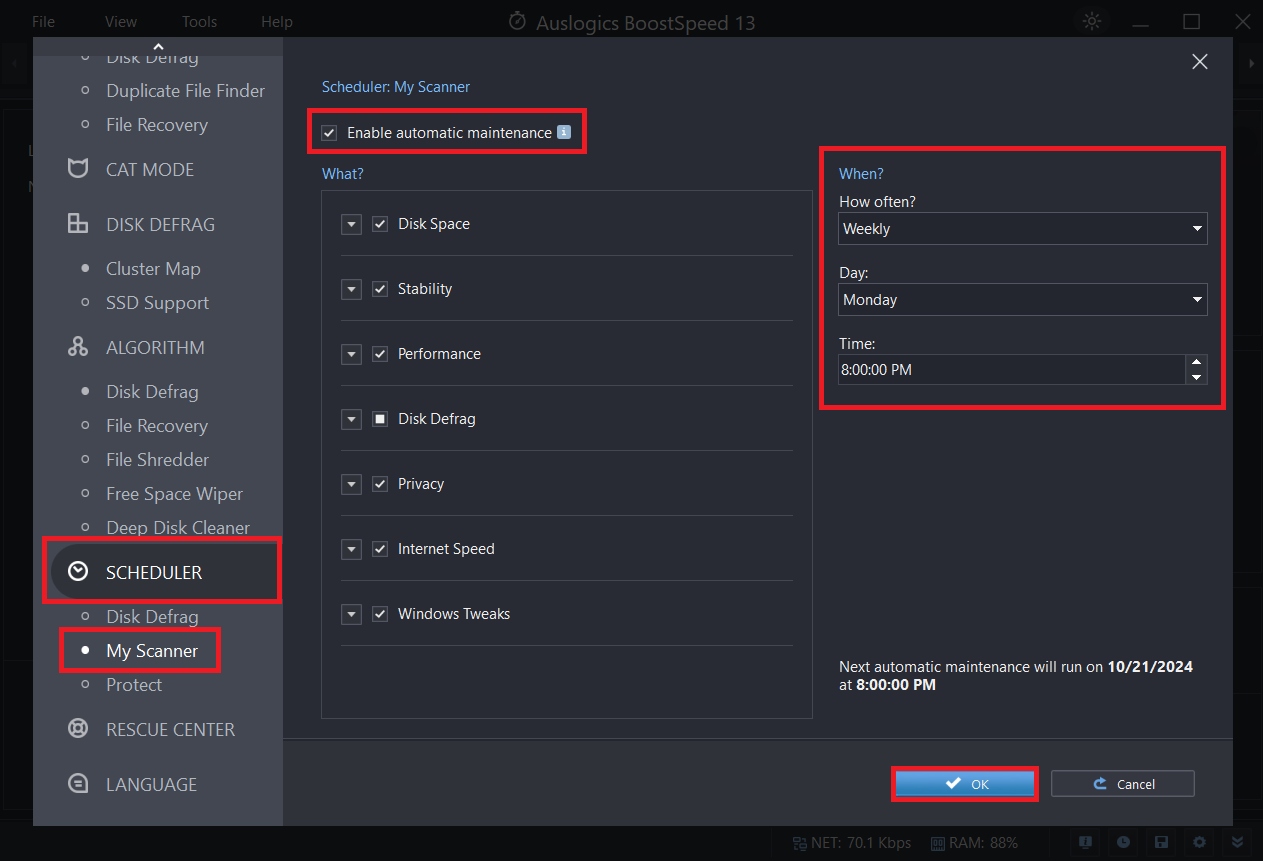
How to schedule the scan
- Click on File and select Automatic Maintenance .
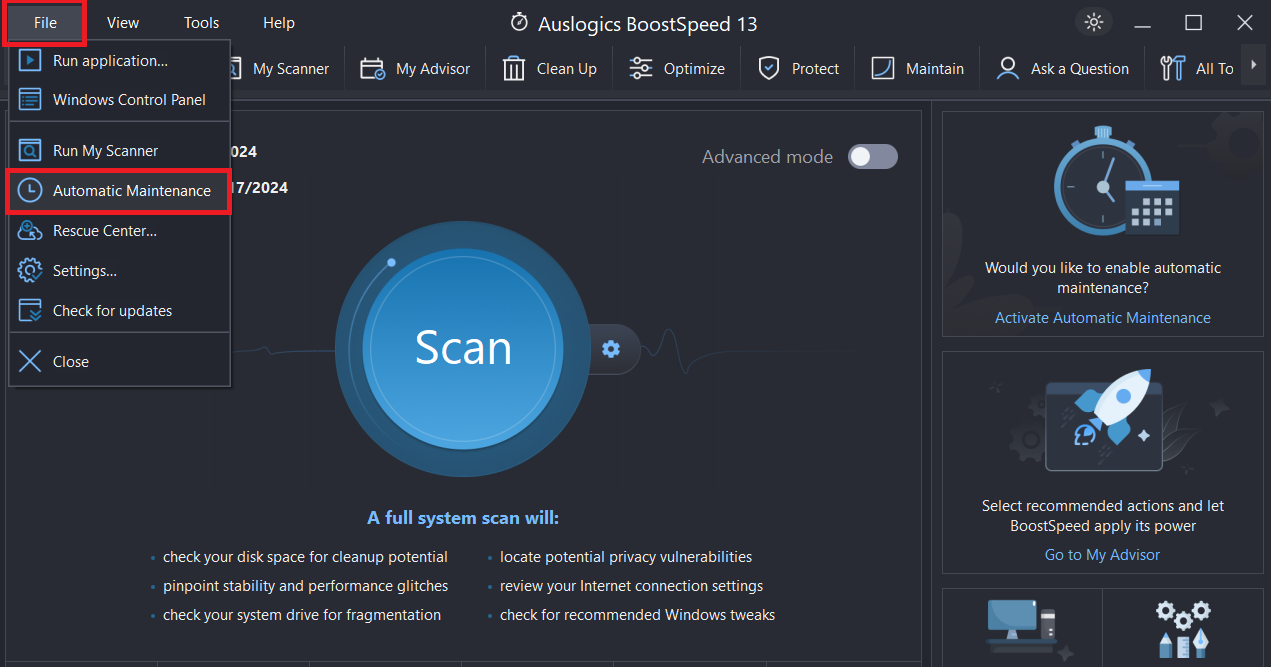
- Go to Scheduler and select My Scanner . Then, enable automatic maintenance by checking the appropriate box.
- From there, select what to scan, select how often to run the scan, and the time to begin the process.
- Then, click OK .
- Scan your system.
- Clean up junk files.
- Optimize performance.
- Fix any issues it finds without interrupting your workflow.
- Help you save time and keep your PC running smoothly.
Why Is My Computer So Slow: Explained
We’ve covered the most effective ways to diagnose, tweak, and speed up a slow computer. You don’t have to make massive changes to fix your slow system.
If the points we’ve discussed, like upgrading your HDD to an SSD, seem complex, check out the relevant linked article to learn how to do it. You can also seek help from an expert if you don’t want to do it yourself.
If you’ve already implemented the solutions, let us know in the comments below how it worked for you!