![[Complete Guide] How to Use CHKDSK Commands to Check and Repair Hard Drive Issues](https://www.auslogics.com/en/articles/wp-content/uploads/2024/11/admin-ajax.php_-568x343.webp)
If you are experiencing performance issues on your PC, the disk drive is usually one of the main suspects. An overload or error in your disk drive can cause lots of problems. This is where the Check Disk tool comes in.
If you’re not a fan of using the Command Prompt, it can be quite tricky. But don’t worry; we’ll show you how to run the CHKDSK command with our easy-to-implement steps.
Let’s begin.
What Is the CHKDSK Command?
CHKDSK (Check Disk) is a useful Windows tool that checks and fixes problems with your hard drives. It’s particularly useful when your computer freezes or when files become inaccessible due to a corrupted file system.
Beyond fixing errors, it can also help you maintain good computer hygiene. It scans your drive’s file system for things like broken file records or errors that could cause data loss or corruption.
CHKDSK typically fixes software (logical errors) and hardware (physical errors) issues on your hard drive.
An example of a logical error is a situation where you have a corrupted file system and the structure that organizes files on the drive becomes damaged. A physical error could be a bad sector problem , where a part of your hard drive can no longer store data properly.
When Should I Use the CHKDSK Command?
How often you should run Check Disk on Windows 10 or 11 depends on your PC usage patterns and the health of your disk. If you notice any of the symptoms below, we recommend running the CHKDSK utility tool as part of your regular PC maintenance .
- Disk errors or corruption. Running the CHKDSK repair command can help fix disk-related errors, such as the “Boot device not found” error, bad sectors, or file system errors, and recover data from corrupted files.
- Shutdowns and crashes. CHKDSK can help diagnose and fix unexpected shutdowns and the dreaded blue screens of death .
- Performance problems. If your Windows PC is slow, the CHKDSK command can help with hard drive diagnostics , fixing disk errors, and improving computer performance.
- Unresponsive apps, freezes, or glitches. If your apps become unresponsive or freeze or you encounter computer glitches frequently, it is time to run Windows CHKDSK as disk-related problems may be the culprit.
- File management problems. Files failing to save or open is a sign you need to try some CHKDSK commands since there may be underlying disk issues.
- Disk noise or strange sounds. If your hard drive starts producing strange noises, hardware issues may be at play. Running CHKDSK can help identify and fix them.
Tips to Know before Running CHKDSK
Here are some pointers to note before running the Check Disk tool:
Tip 1: CHKDSK is not all-powerful
While CHKDSK commands can help you resolve a variety of disk-related problems, they have certain limitations. To begin with, you can only use CHKDSK on Windows.
Also, the Check Disk tool can take quite some time to complete, especially when it comes to larger disks or drives with numerous errors. While it is doing its job, your system’s performance might be affected, and you won’t be able to use the drive.
Another concern is that CHKDSK may not be able to repair all disk-related errors. If your drive has developed severe physical damage or extensive corruption, other tools might be required. You may even require technical assistance in some cases.
Tip 2: Back up your data
Running the CHKDSK command involves altering disk data, which might cause a slight risk of data loss, especially if your drive has severe issues. This has been confirmed by some users .
For example, when trying to recover data from bad sectors with CHKDSK, you may accidentally lose or corrupt some of your files. If that happens, you will have to spend valuable time recovering deleted files on Windows .
To prepare for unforeseen events, you need to protect your data. We have a detailed guide on how to back up your Windows . You can go through the article and save your files.
How to Run CHKDSK on Windows 10/11
There are different ways to run Check Disk in Windows 10 and 11. You can opt for the most convenient one in your case and give it a try:
How to run CHKDSK from File Explorer
Running Check Disk from Windows Explorer is the easiest method. This is the option for those who may not be comfortable using the command line.
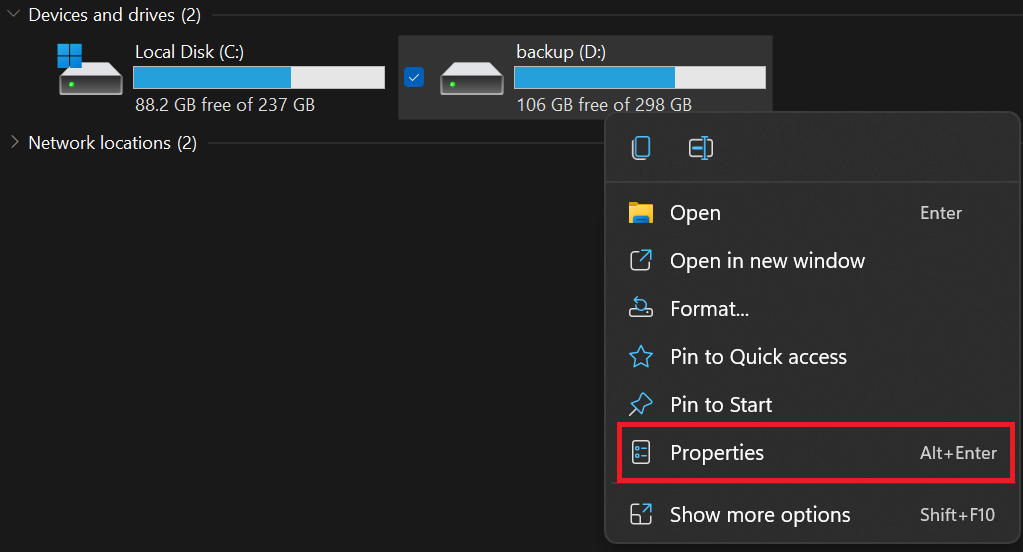
- Launch File Explorer, open This PC, right-click the drive you would like to check, and click Properties.
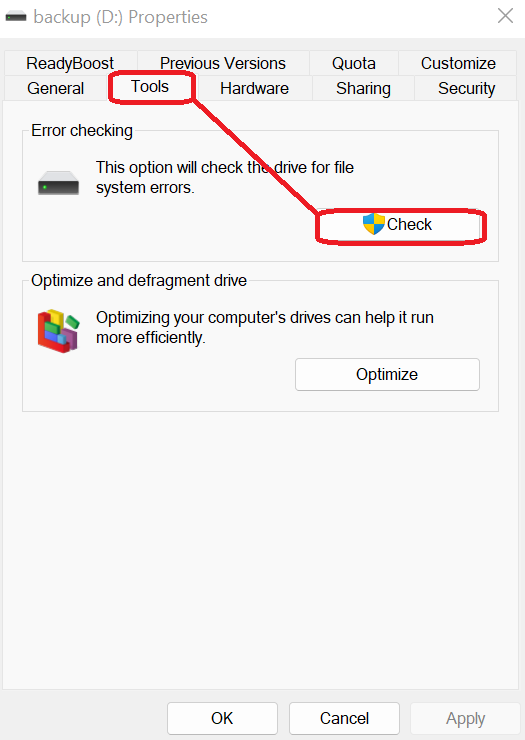
- Go to the Tools tab and click on the Check button under Error checking.
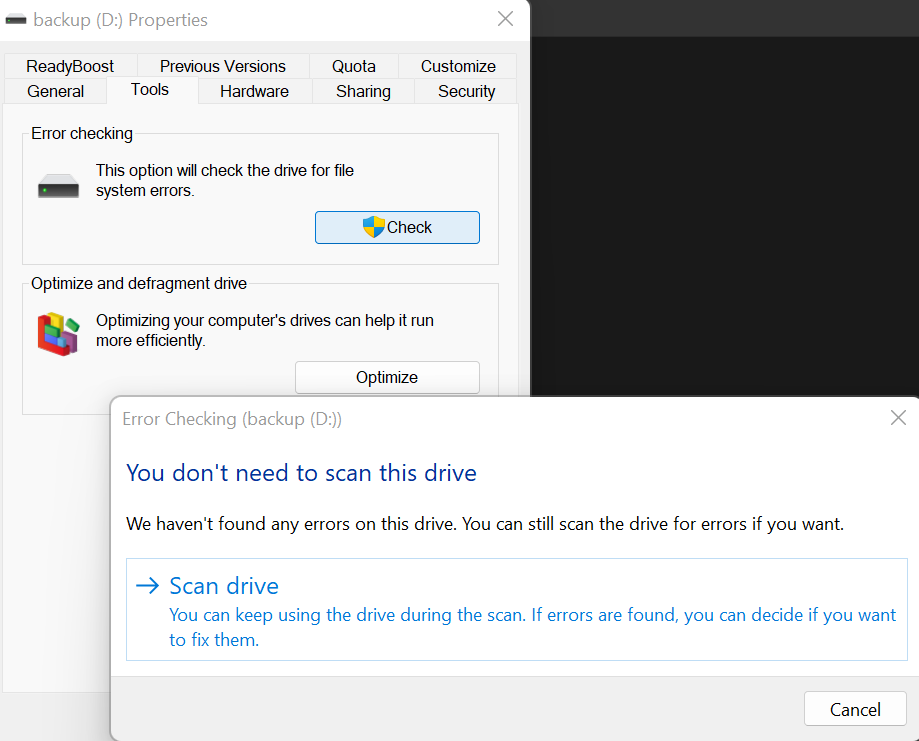
- The Error Checking window will open. If you see the You don’t need to scan this drive message, it means no errors are detected. If you still want to check this drive, click Scan drive.
This method works on both Windows 10 and 11.
How to run CHKDSK from the Command Prompt
Running CHKDSK from Windows Explorer may be a little restrictive. This is where the Command Prompt comes in. When you run CHKDSK from the Command Prompt, you can configure the command to do more.
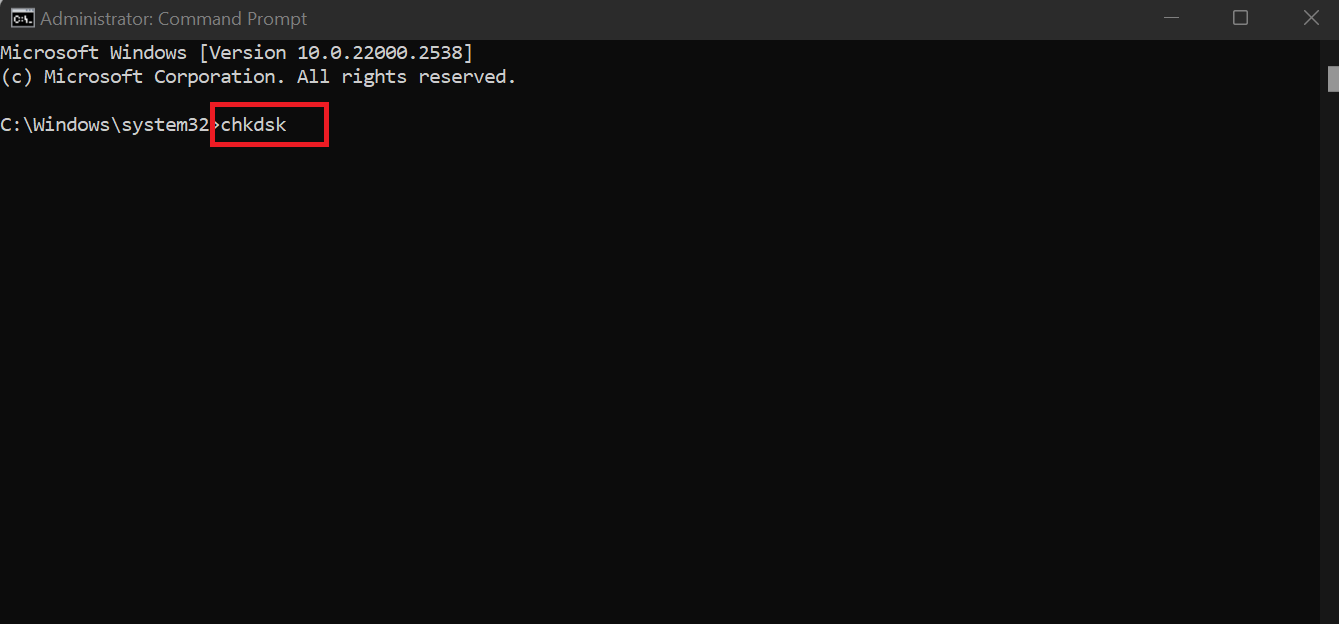
- Type “cmd” into your search bar and click Run as administrator under the Command Prompt option.

- Once the admin version of the Command Prompt is up and running, insert “chkdsk” and hit Enter. The CHKDSK utility will start scanning your C drive for problems.
- If you want CHKDSK to scan another drive, specify it at the end of the command. For example, if you want to check your D drive, enter “chkdsk D.”

On its own, the chkdsk command does not fix errors; it only scans your drive and shows you a report. Based on the report, you can proceed to take action:
- If it finds no errors, you don’t need to worry about anything.
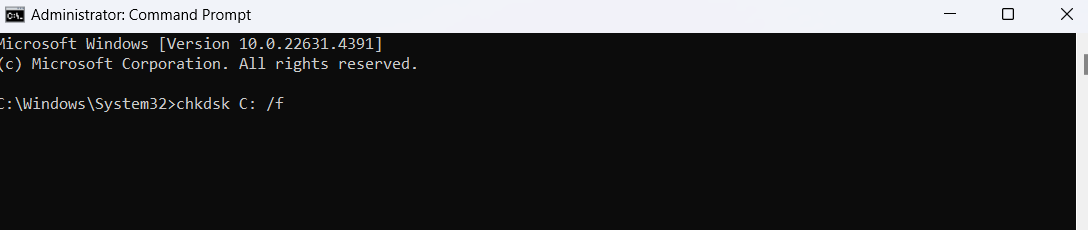
- However, if the scan comes back with errors, you need to start the process again, but this time use “chkdsk C: /f.” This command looks for errors and fixes them. Once the process is complete, you may need to restart your computer, especially if it is the main C drive.
How to run CHKDSK from installation media
If you are getting errors that won’t let you run CHKDSK on your computer, like “Access Denied” or “The volume is in use by another process,” this might be a better option.
- Create installation media , such as a Windows installation USB or DVD, and insert it into your PC.
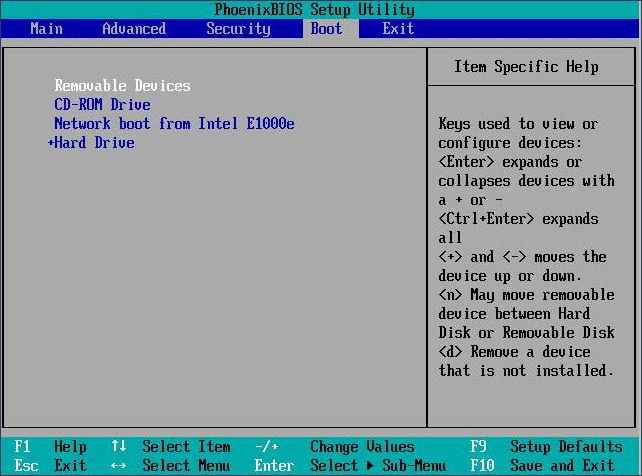
- Restart your Windows computer, then boot from the installation media. To prioritize the installation media over your hard drive, you might need to enter your BIOS settings and change the boot order.
- Configure your language, time, and keyboard input settings.
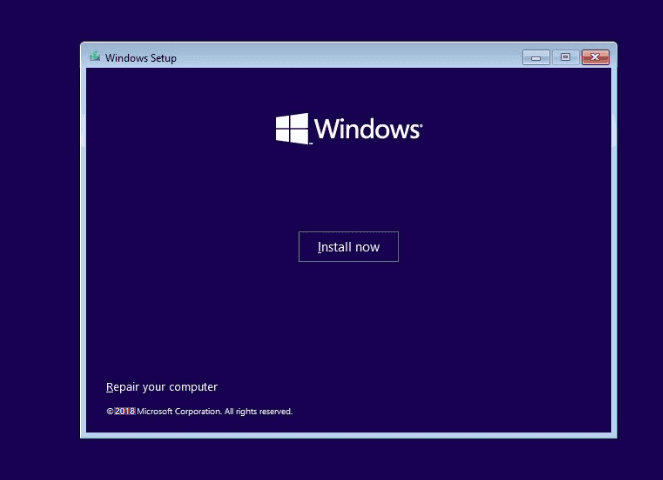
- Select Next and then click Repair your computer at the bottom left corner of your screen.
- Once the Choose an option screen appears, select Troubleshoot.

- From the Troubleshoot menu, select Advanced options and click the Command Prompt option.

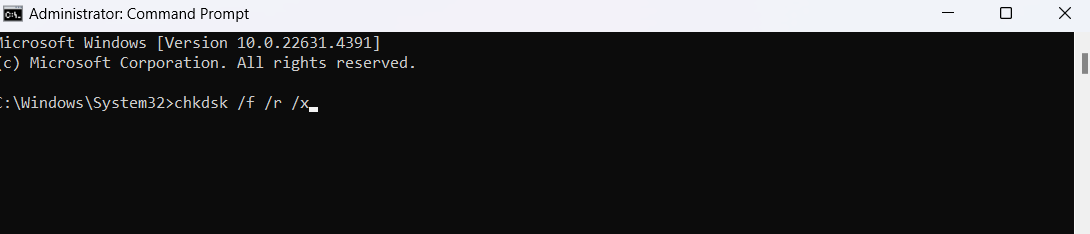
- Then, type the CHKDSK command (for example, “chkdsk /f /r /x”) to run and add the drive letter or the partition you want to start the scan.
- You may be prompted to schedule the check for the next time you restart your system. Type “Y” and press Enter.
Your computer will schedule a disk check that will scan and attempt to fix any drive errors the next time you restart your computer.
How to Adjust CHKDSK Options
If you want to modify how CHKDSK runs on your system, such as changing its schedule or running it with different options, you need to start with running the Command Prompt as an administrator.
- To do that, press the Windows key, type “cmd,” then select Run as administrator. With that done, you can proceed to make any of the following changes:
Schedule CHKDSK to run at startup
If you’d like CHKDSK to run during the next system startup, type the following command:
chkdsk C: /f /r
The CHKDSK utility tool doesn’t have an option to schedule it for a specific future date. It just automatically runs at the very next system startup after you issue this command. This is because CHKDSK needs to run when the drive isn’t in use, which is why it happens during the boot process.
Cancel or change a scheduled CHKDSK run
To cancel a scheduled CHKDSK run, type:
chkdsk /x C:
This prevents CHKDSK from running on the specified drive at the next startup.
The Most Common CHKDSK Parameters in Windows
Below you will find a comprehensive list of CHKDSK commands to diagnose and fix disk-related errors on your PC:
- chkdsk : This command checks your drive for problems but doesn’t attempt to repair them.
- chkdsk [drive letter] : With this command, you can specify which drive or partition to scan.
- chkdsk /f: The chkdsk /f command, or the CHKDSK fix command, attempts to fix errors while performing a drive scan.
- chkdsk /r : The chkdsk /r command, or the CHKDSK repair command, is designed to repair hard drive sectors to make them readable within your system. It also runs the chkdsk /f command, meaning it involves a check deeper than in the previous case.
- chkdsk /x : This command disconnects a drive to scan and repair it. It also runs the CHKDSK fix command.
- chkdsk /f /r /x : With this one-stop-shop command, you can scan your file system and its sectors and fix detected errors. It runs both the CHKDSK fix command and the CHKDSK repair command and also disconnects your drive first if need be.
- chkdsk /scan : This command runs an online scan of your drive and lets you use it while the scan is in progress.
Here’s a table breakdown:
| Command | What it does |
|---|---|
chkdsk |
Checks the drive for errors without attempting repairs |
chkdsk [drive letter] |
Scans a specific drive or partition for errors, e.g., chkdsk C: |
chkdsk /f |
Fixes errors on the drive, ensuring all folders and files are correctly listed in the file system |
chkdsk /r |
Repairs hard drive sectors and makes them readable, while also performing the actions of chkdsk /f |
chkdsk /x |
Forces the drive to dismount before the scan. It’s useful for drives in use (includes /f ) |
chkdsk /scan |
Scans the drive online without requiring a reboot. Useful for minor errors |
wmic diskdrive get status |
Checks the status of all connected drives to identify potential hardware issues |
How to Troubleshoot Windows CHKDSK Issues
The most common issues that may arise after running a CHKDSK repair scan are as follows:
Issue 1: The drive is currently in use or in read-only mode
This problem means the CHKDSK utility tool can’t fix your hard drive errors because it is currently in use or in read-only mode. To get rid of it and make sure your drive is error-free, follow these steps:
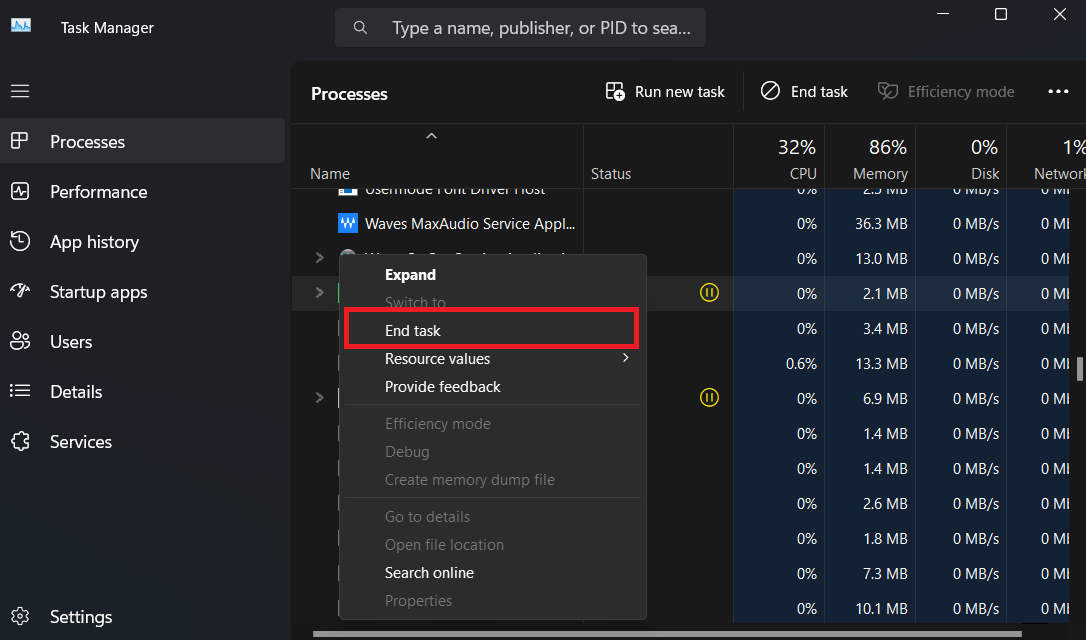
- Run the Task Manager by pressing the
Ctrl + Shift + Esckeyboard combo. - Locate an open app or process that might be using the drive you want to check and click End task to stop it.
- Try running a CHKDSK scan to see if your drive can be fixed now.
Related: How to Fix Scanning and Repairing Drive Stuck Issue on Windows 10/11? Quick Patch Here
Issue 2: CHKDSK keeps freezing
CHKDSK may freeze during a scan for several reasons, such as severe bad sectors on the hard drive, background programs interfering with the process, or system file corruption. If you encounter this issue, here are some solutions to help you resolve it:
1. Run CHKDSK in Safe Mode
Restart your computer and boot into Safe Mode by pressing F8 (or the appropriate key for your system) before Windows starts. Once in Safe Mode, open the Command Prompt as an administrator and run the following command:
chkdsk C: /f /r

This may allow CHKDSK to complete without interruptions.
2. Disable startup programs
Background programs can disrupt CHKDSK repair . Open the Task Manager and disable non-essential startup programs before running CHKDSK again.
3. Check for bad sectors
If Windows CHKDSK continues to freeze, your drive may have significant bad sectors. In this case, consider using dedicated disk repair software or replacing the drive if it’s failing.
4. Run SFC and DISM commands
To fix potential system file corruption, open the Command Prompt as an administrator and run the following commands:
DISM /Online /Cleanup-Image /RestoreHealth

Then run:
sfc /scannow

Issue 3: The disk is write-protected
If your disk is write-protected, it may be due to software settings, physical switches, or corrupted files. To remove the write protection and allow CHKDSK to run, follow these steps:
1. Remove the write protection using the Diskpart utility
Open the Command Prompt as an administrator and enter the following commands one at a time to clear the write protection:
diskpart

list disk

select disk X
(replace X with the number of your write-protected drive)

attributes disk clear readonly

This will remove the write protection from the selected disk.
External drives may also have a physical switch for write protection. Check if your drive has one and switch it off if needed. Internal hard drives don’t have such physical write protection switches.
2. Check registry settings
- Press the
Windows key + R, type “regedit,” and press Enter.
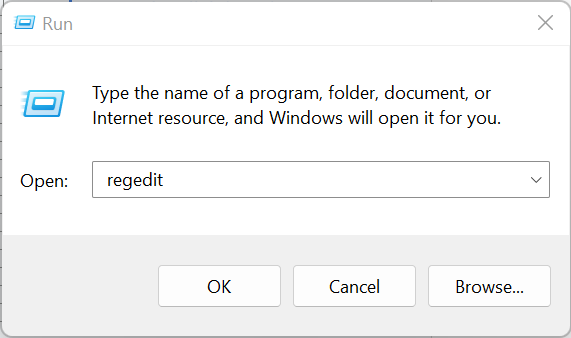
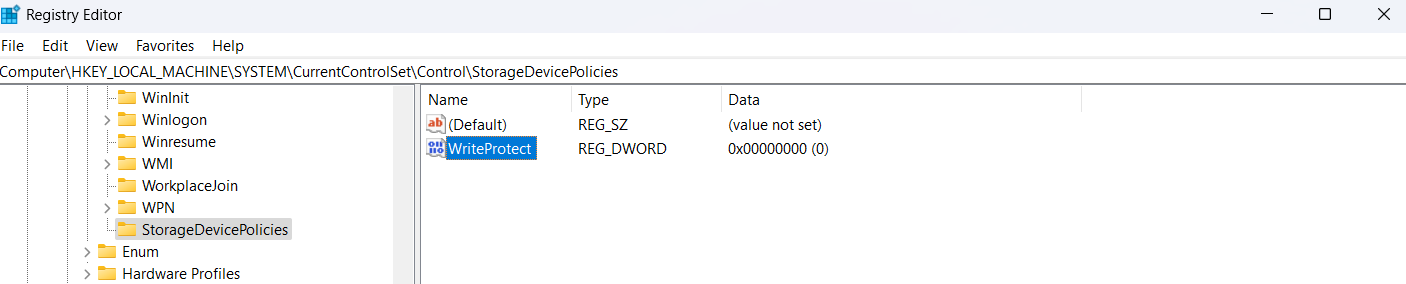
The system should issue you a warning. Click Yes and proceed. In the Registry Editor window, type the following in the address bar:
HKEY_LOCAL_MACHINE\SYSTEM\CurrentControlSet\Control\StorageDevicePolicies
If the WriteProtect value is set to 1 , double-click it and change it to 0 .
What if the registry doesn’t exist?
Sometimes this registry key might not exist by default, like in my situation. In that case, you would need to:
- Create a new key called StorageDevicePolicies under Control . To do that, right-click on the Control folder, select New , and choose Key .
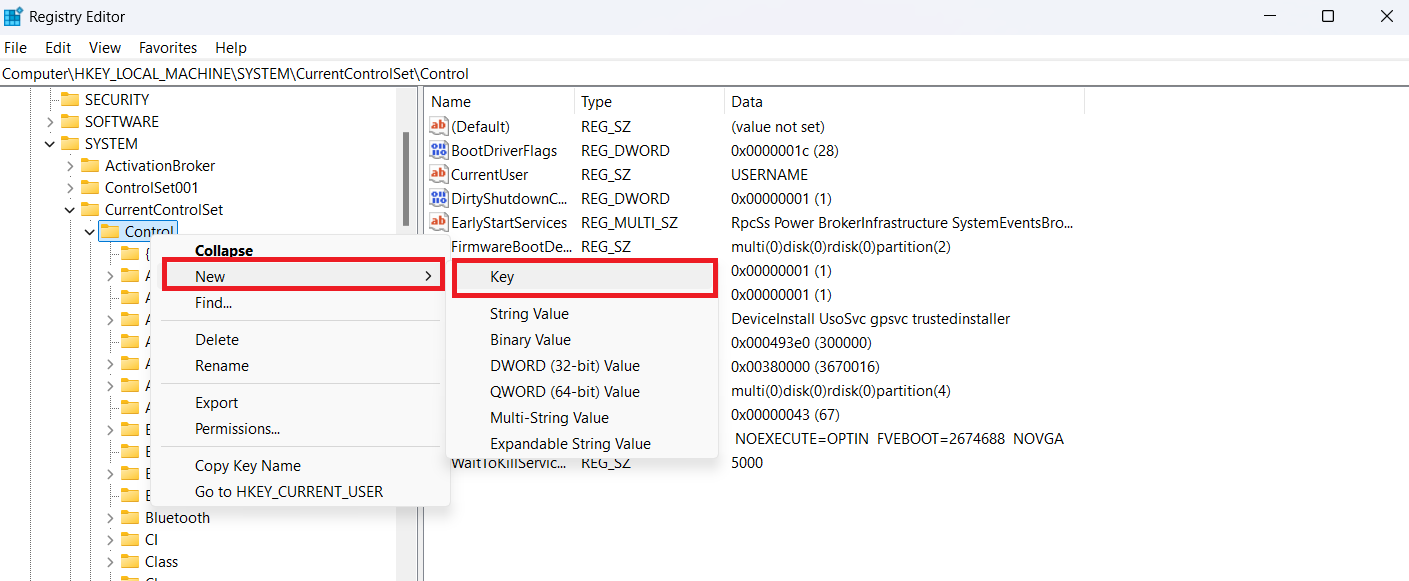
- Name the new key StorageDevicePolicies .
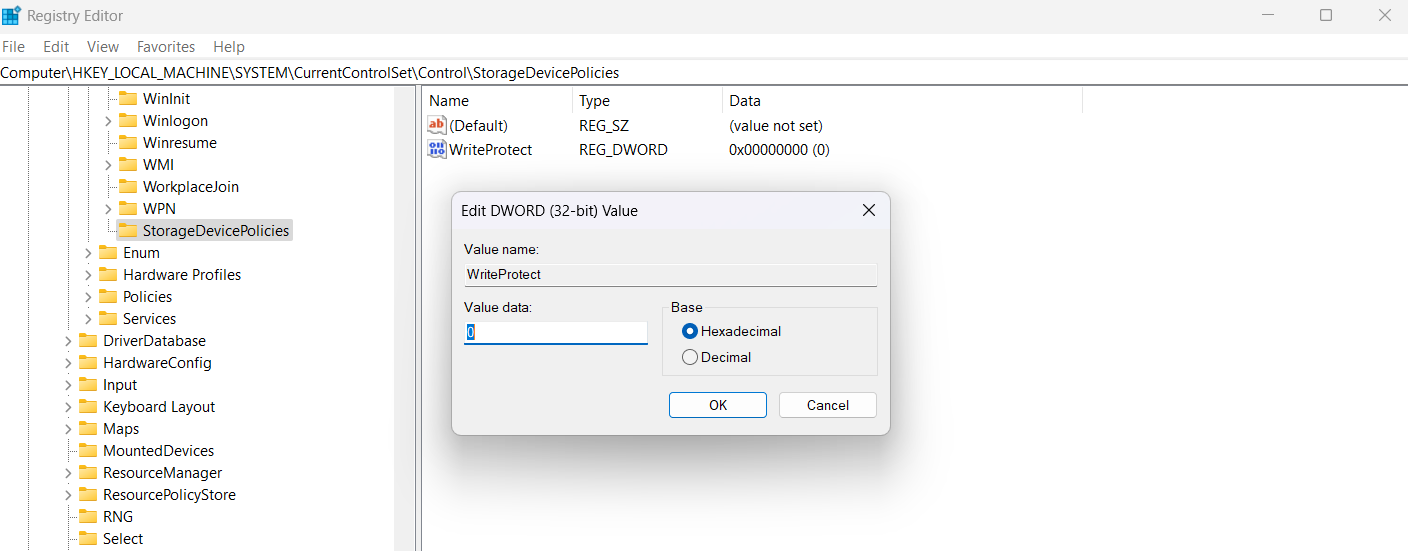
- Now, right-click on the StorageDevicePolicies folder, select New, and go for DWORD (32-bit) Value.
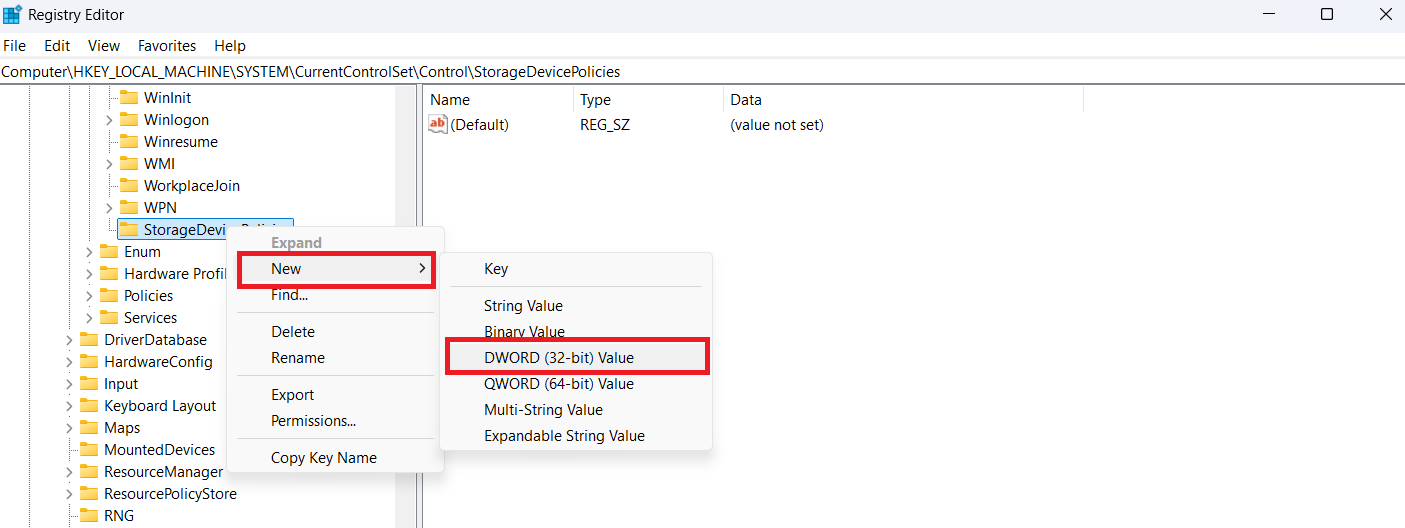
- Name this value WriteProtect .
- Double-click on WriteProtect and set Value data to 0. Then, click OK.
3. Format the drive (Last resort)
If the drive remains write-protected after trying the above methods, consider backing up your data and formatting the drive to remove the protection.
So, if your system has more issues that may be reducing performance, chkdsk /f /r may simply not fix those issues.
A better option might be to get a dedicated PC optimizer like Auslogics BoostSpeed . With this tool, you can scan your PC for issues—even beyond your hard drive—and fix them automatically.
Conclusion
The CHKDSK commands in Windows 10/11 are essential for detecting and fixing disk-related problems. The tool plays a crucial role in maintenance and troubleshooting, helping to speed up your system and resolve issues such as crashes, freezes, and slowdowns.
To enhance the effectiveness of CHKDSK, consider enabling automatic PC maintenance with tools like Auslogics BoostSpeed . This can further optimize your system’s performance, ensuring a smoother and more efficient computing experience.
FAQ
To run CHKDSK in Recovery Mode, follow these steps:
- Boot your computer from a Windows installation media (USB or DVD).
- On the Windows Setup screen, click Next , then select Repair your computer .
- Choose Troubleshoot > Advanced options > Command Prompt .
- In the Command Prompt window, type:
chkdsk C: /f /r
Replace C: with the drive letter you want to scan. This will run CHKDSK to check and repair your drive in Recovery Mode.
You can tell if CHKDSK is working by looking at the progress displayed on the screen during the scan. It shows a percentage as it checks each part of the drive.
After the scan is complete, you can view the results by going to the Event Viewer:
- Press the
Windows key + R, type “eventvwr,” and hit Enter. - In the Event Viewer, go to Windows Logs > Application .
- Look for an event with the source Wininit to find the CHKDSK log and see detailed results.