![[FIXED] “You Need Permission to Perform This Action” Issue in Windows](https://www.auslogics.com/en/articles/wp-content/uploads/2023/11/FIXED-You-Need-Permission-to-Perform-This-Action-Issue-in-Windows-568x359.png)
- What Does the “Need Permission to Perform This Action” Message Mean?
- How to Fix the “You Require Permission From the System to Perform This Action” Error on Windows 10
- Fix 1: Confirm the type of user account you have
- Fix 2: Log in to your administrator account
- Fix 3: Make your account an Administrator account
- Fix 4: Activate the administrator account
- Fix 5: Change the security permission of the file, folder, or app
- Fix 6: Take Ownership of the File or Folder
- Fix 7: Scan your PC for malware
- Fix 8: Run a DISM and SFC Scan
- Fix 9: Run a CHKDSK Scan
- Fix 10: Start your PC in Safe Mode
- Fix 11: Disable conflicting programs
- Fix 12: Reinstall the problematic program
- Fix 13: Disable User Account Control (UAC)
- Fix 14: Reset your OS
- Conclusion
- FAQ
Windows has built-in security controls that block unauthorized access to system files, folders, and applications. Sometimes, these security mechanisms also protect the OS from you.
That’s because even the slightest change to system components, such as renaming files, can brick the operating system. So, when you see the “You need permission to perform this action” error, Windows is indicating that you’re trying to alter a critical module. However, not every action should trigger the error, especially if you’re the system administrator.
For example, you shouldn’t see the message when installing a program, accessing personal files on any drive, or uninstalling third-party programs.
To solve access denied errors and other access problems may be a lot harder if you don’t have an administrator account or you’re logged in as a local user.
You should also be able to access some Windows files, such as dynamic link library (DLL) files, without issues.
If you experience the “You need permission to perform this action” message more often than you should on your PC, this guide will show you what to do.
What Does the “Need Permission to Perform This Action” Message Mean?
To better understand this restriction, you must know why Windows is enforcing it. The common reasons include:
- You are trying to access system files and folders reserved for Windows applications and protected by the Windows File Protection feature.
- You’re trying to modify a file or folder protected by the system administrator.
- You’re trying to make system changes reserved for admin only from a guest or standard account.
The above reasons are no cause for alarm. However, it’s normal to become worried when you’re the system administrator and are still blocked from effecting some pretty basic changes. In such a scenario, the cause of the restricted permissions issue could be due to corrupt system files, malware infection, disk issues, and your antivirus program. Now that we’ve seen the factors that could make you face this limitation on your PC let’s discuss what you can do about it.
📌 Also read: How to Uninstall Programs and Delete Unnecessary Files in Windows 10
How to Fix the “You Require Permission From the System to Perform This Action” Error on Windows 10
Your situation should guide how you approach the problem. For example, if you’re not the admin, you don’t have permission to perform the action if it affects the system.
So, in that case, you must contact the system administrator for permission or get them to upgrade your account’s access. If you’re a system admin, you can start from the first solution and work through the advanced troubleshooting steps, such as fixing system files. Let’s get started.
Fix 1: Confirm the type of user account you have
Before we start with the actual fixes, let’s confirm the account you currently operate. There are two types of Windows PC users: administrator and standard users. Formerly, there was a third type of user account: the guest account. Your user account type determines the actions you can perform on the device. Let’s explain:
- Administrator: An admin account has free access to the computer. It can control the entire system and other users. An administrator can change security settings, access all files, modify other user accounts, and run all apps. What’s more, an admin account can install and uninstall apps, software, and hardware.
- Guest: Guest accounts have minimum privileges. They are for people who use your system temporarily. Guests cannot install apps, access your private files, or change your PC settings.
- Standard: A standard user can run programs, access files, and perform other actions that do not have system-wide effects. They can use most software and change system settings that don’t impact other users or the PC’s security.
They cannot install new apps or remove existing ones, change PC settings, or run apps and software to which an admin has not permitted them. If you are not using an administrator account, Windows will prevent you from performing specific actions, such as modifying files and folders. Moreover, you cannot run apps that have access restrictions.
You may also be asked to provide an administrator password to continue an action. To check your account type, here’s what you need to do:
- Press the
Windows + Rkeyboard combination to open the Run dialog box. - Type Control Panel into the text box and press Enter on your keyboard or click the OK button on the dialog.
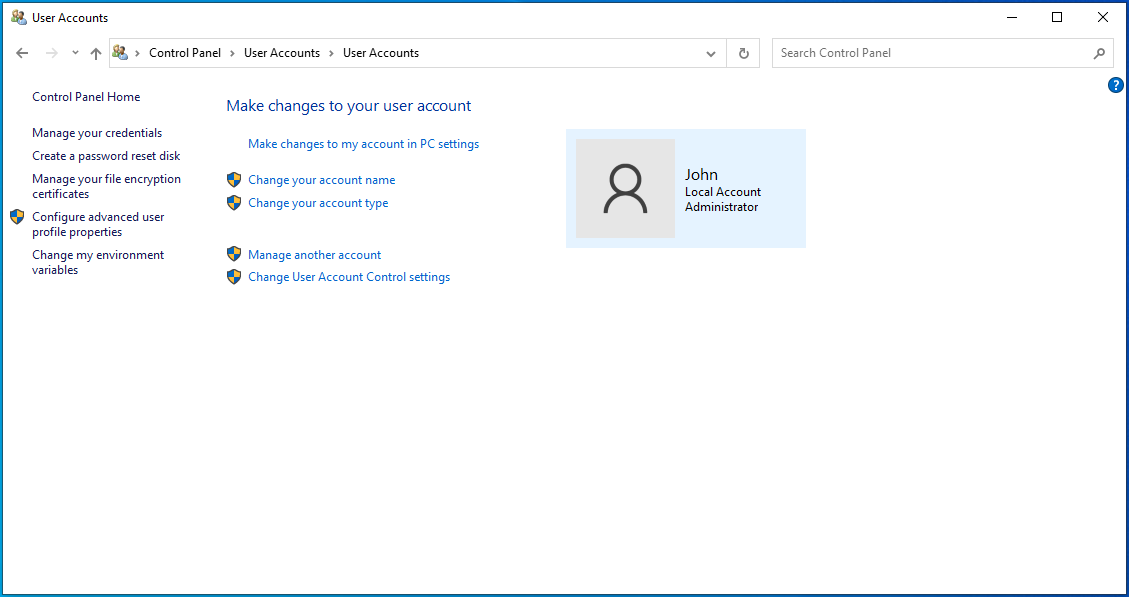
- When Control Panel opens, click on User Accounts.

- Click User Accounts again to see your username along with your account type.
Fix 2: Log in to your administrator account
You may have mistakenly logged into the standard account, forgetting that you should use the admin account instead. Switching to the correct user account will resolve the issue for good.
Here’s how to do so:
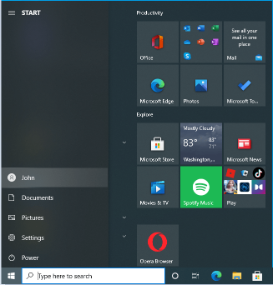
- Launch the Start menu.
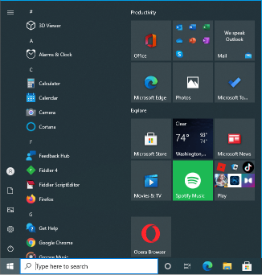
- Click the user account icon.
- Click the account to which you want to switch.
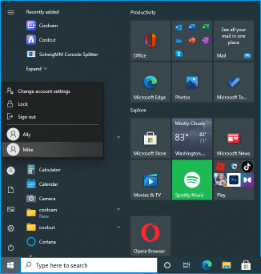
- Provide your login information.
Alternatively, you can use these steps:
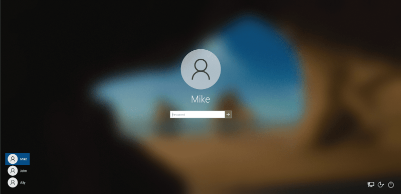
- Press the
Windows + Lkeyboard combination to Lock your screen. - Click the screen or tap any keyboard button to open the Sign-in options page.
- Select the account you want to use in the bottom-left corner and enter your sign-in information.
A📌 lso read: How to Fix “The Administrator Account is Disabled” on Windows 10
Fix 3: Make your account an Administrator account
You can assign administrator privileges to the accounts you use the most to prevent the error message. There are different ways to grant admin-level permissions to any account. But to do that, you must be logged into your system’s administrator account. You can use an elevated Command Prompt window, the Settings app, Control Panel, and the User Accounts dialog.
Using Command Prompt
Follow these steps:
- Press the
Windows + Rcombination on your keyboard to open the Run box. - Type CMD and click the OK button or press Enter on your keyboard.
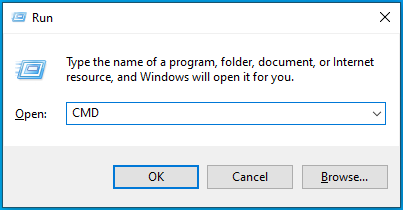
- When the Command Prompt window opens, input the following line and press Enter to run it:
net localgroup Administrators UserAccountName /add
Ensure you replace “UserAccountName” with the name of the account whose privileges you’re changing.
- Restart your computer.
You can now try performing the previously restricted action to check if the “You don’t have permission to perform this action” error appears.
Using the Settings app
- Log into Windows with your administrator account.
- Press the
Windows + Ikeyboard combination to open the Settings app.
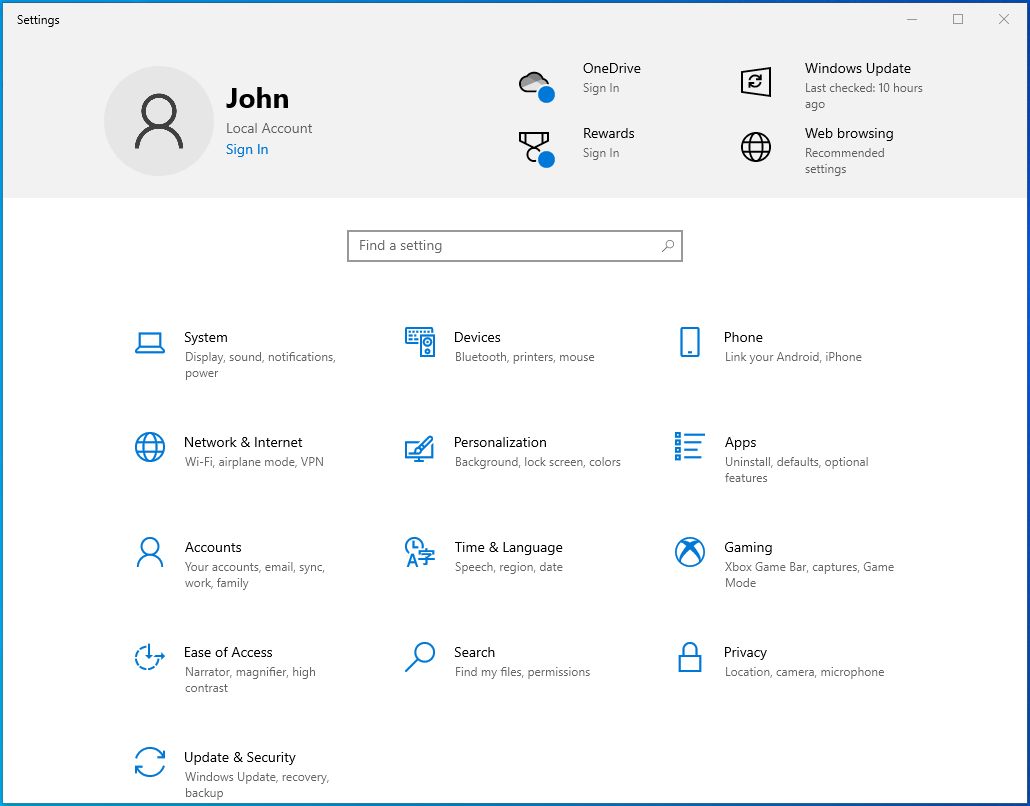
- Click on Accounts.
- Click Family & other users in the left pane.

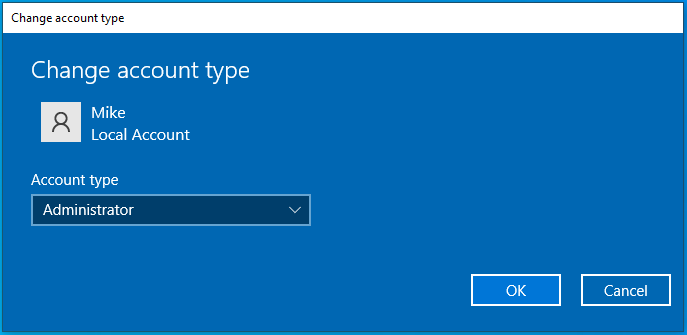
- On the right-hand side of the page, select the account you want to change and click the Change account type button.
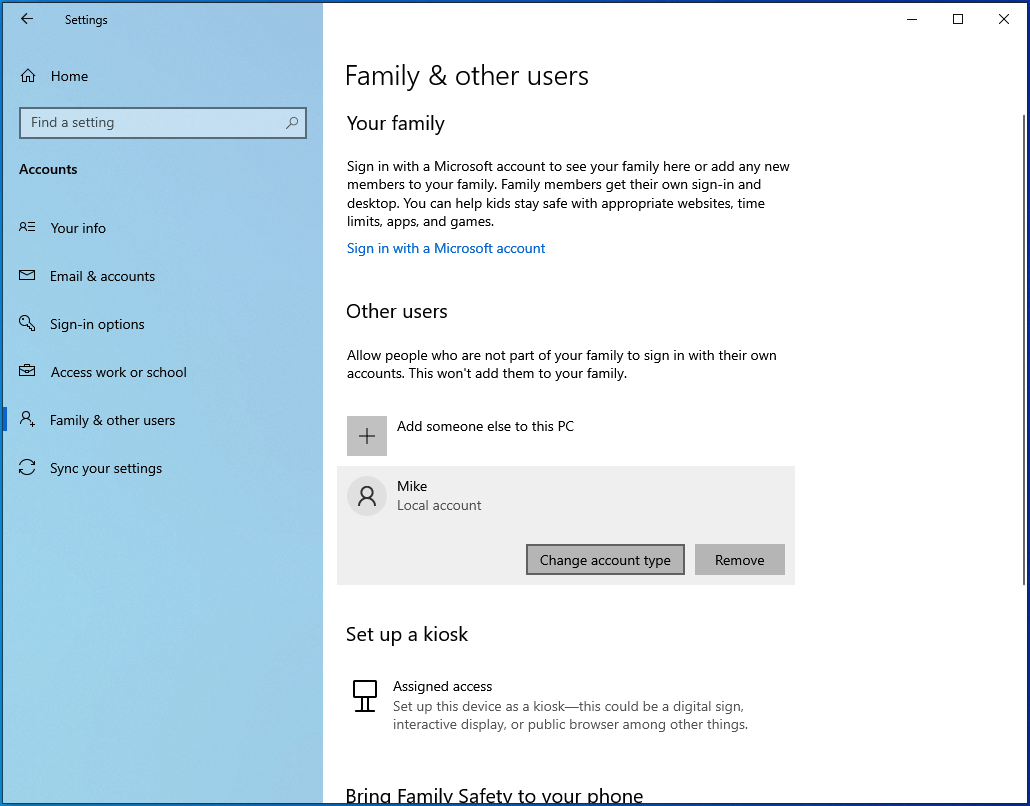
- Select Administrator.
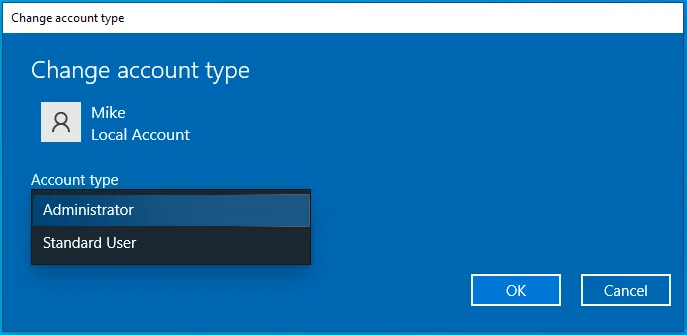
- Click OK.
- Restart your computer.
Using Control Panel
- Press the
Windows + Rkeyboard combination to open the Run dialog. - Type Control Panel and click the OK button or press Enter on your keyboard.
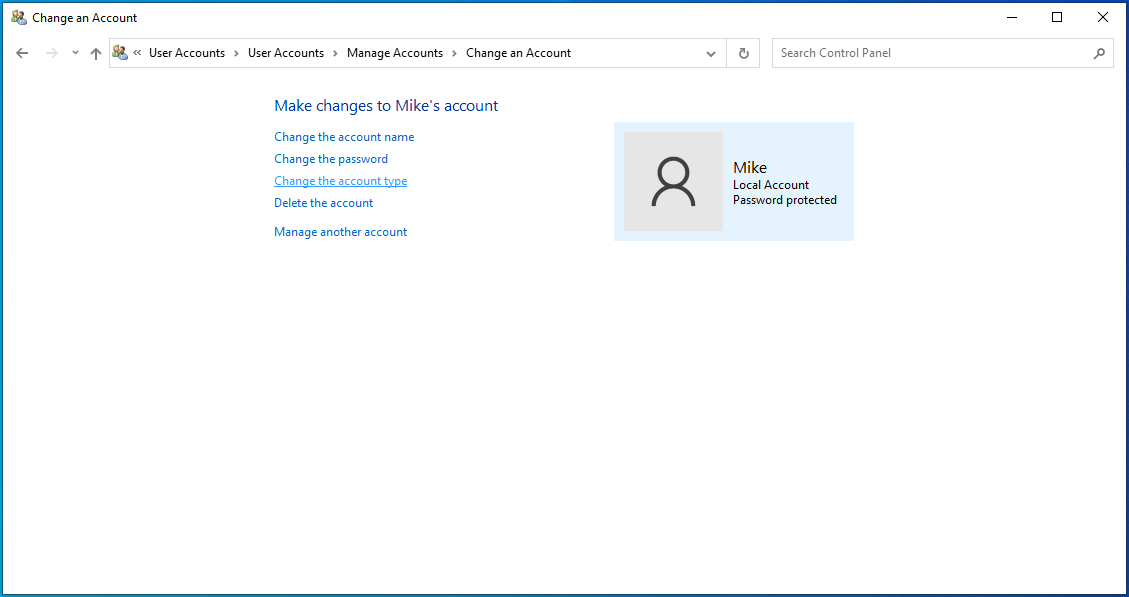
- When the Control Panel window opens, click on Change account type under User Accounts. You can use the search bar to locate the option.

- Select the account you want to change.
- Click the Change the account type link in the left pane.
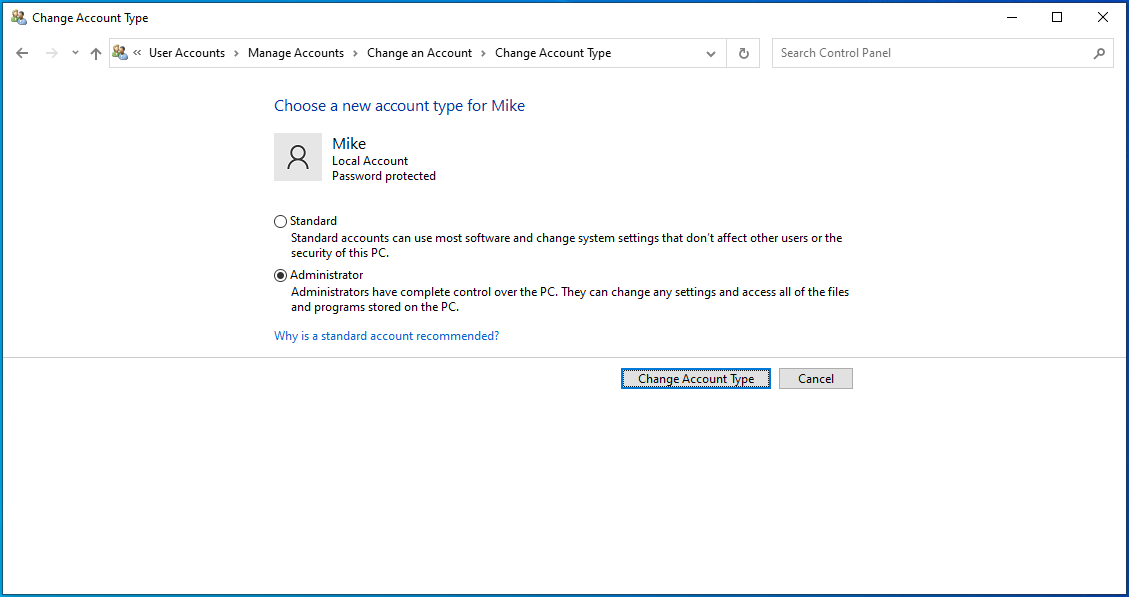
- Select Administrator and click the Change Account Type button.
Using User Accounts:
- Open the Run dialog: Press the
Windows + Rcombo. - Type
Netplwizand click the OK button.
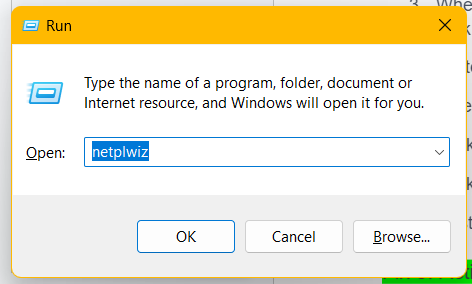
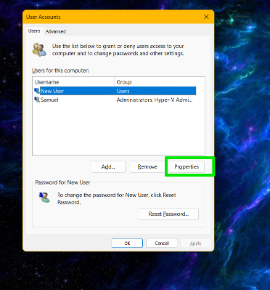
- When the User Accounts box opens, select the account you wish to change and click the Properties button.
- Switch to the Group Membership tab.
- Select Administrator.
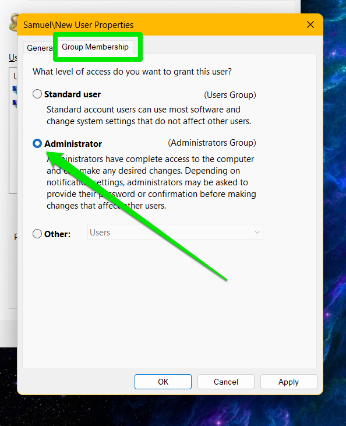
- Click the Apply button. Click the OK button.
- Click Apply and OK again.
- Restart your computer.
Also Read:Windows 10 Control Panel: Where to Find It and How to Use It
Fix 4: Activate the administrator account
While your admin account has the highest privilege on your computer, Windows treats it as a standard account by default. That is why you see the User Account Control prompt whenever an application wants to make changes to the computer.
This default treatment is the same reason you may have to run applications as administrators to grant them advanced access. Activating the administrator account allows every command you run to have admin privileges without triggering any warning.
Using this method helped some users fix the issue for good. Follow these steps to activate the account:
- Press the
Windows + Rcombination on your keyboard to open the Run box. - Type CMD and click the OK button or press Enter on your keyboard.
- When the Command Prompt window opens, input the following line and press Enter to run it:
net user administrator /active: yes
- Restart your computer.
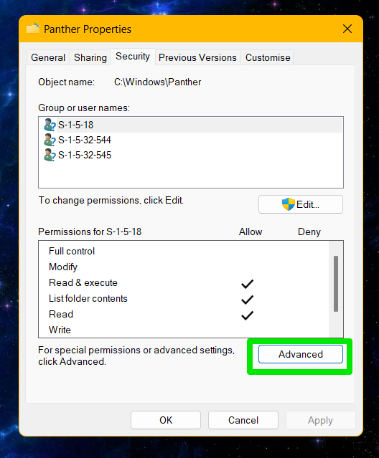
Fix 5: Change the security permission of the file, folder, or app
You can gain the rights to a file, folder, or application by modifying your security permissions. Here’s how:
- Press the
Windows + Ecombination on your keyboard to open File Explorer. - Locate the file, folder, or app you have issues with and right-click it.
- Click Properties in the context menu.
- When the Properties box opens, go to the Security tab and click the Edit button.
- Check for your username in the Group or user names field and select it.
Note: If you cannot find your username in the Group or user names field, here’s what you have to do:
- Click the Add button. It will open the Select Users or Groups box.
- Type your username into the Enter the object names to select field. Note that it is case-sensitive. Finally, click the Check Names button.
- If unsure of your username, click the Advanced button instead and select Find Now. It will list all the available users and groups on your computer. Locate your username in the search results and select it. Click OK.
- Go to the Permissions field and check whether Full Control is allowed for your account.
If it is not allowed, mark the Allow checkbox for Full control. Doing so will also mark the Allow checkbox for other permissions, including Modify, Read & execute, Read, and Write.
- Click the Apply button.
- Click the OK button.

Use command prompt to change security permission.
You can also use Command Prompt (Admin) to change your security permission:
- Log into your Administrator account.

- Go to the Start menu and type CMD into the search box.
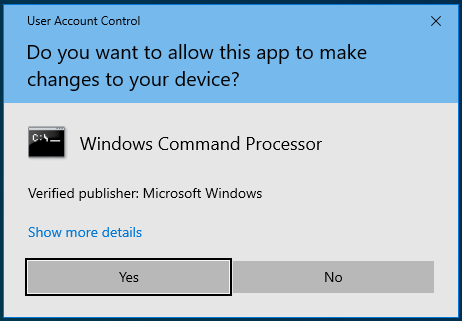
- Right-click Command Prompt in the search results and select Run as administrator.
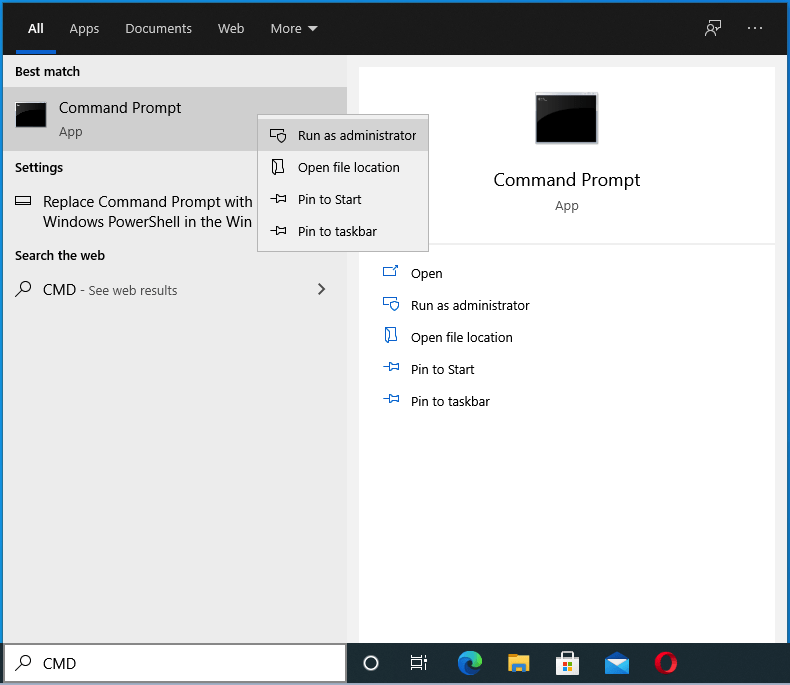
- When User Account Control comes up, click the Yes button to confirm that you want to allow Command Prompt to make changes to your computer.

- When the Command Prompt (Admin) window opens, enter the following command and press Enter to run it:
icacls <folder_path> /grant administrators:F /T
- After executing the command, the Administrators group on your PC will now have full control over the directory/file/folder.
- If your account is a standard account and not in the Administrators group, replace administrators in the above command with the username of your standard account.
- Close the Command Prompt (Admin) window and restart your computer.
You can now check if the “ You require permission from the system to make changes to this folder ” issue persists.
Fix 6: Take Ownership of the File or Folder
Taking ownership of the restricted item will permit you to access it. However, you should remember that changing the ownership of sensitive files, especially system files, can be risky.
You might be better off using the previous method to change your security permissions.
If you do not need the file for something critical, we advise that you leave it.
You can go through File Explorer and Command prompt to change a file or folder’s ownership.
Via File Explorer:
- Press the
Windows + Ekeyboard combination to open File Explorer. - Navigate to the item you are having issues with and right-click it.
- Click on Properties in the context menu.
- Go to the Security tab and click the Advanced button.
- Click Change next to Owner.
- When the Select User or Group box opens, type the name of your user account into the Enter the object name to select field.
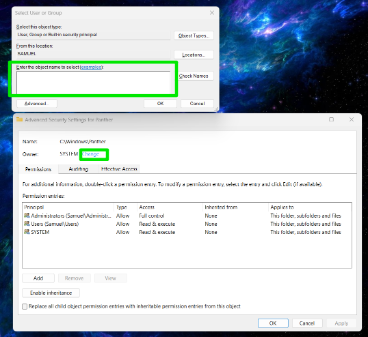
- Click the Check Names button to confirm the username.
- Click OK.
- Now, mark the Replace owner on subcontainers and objects checkbox.
- Click Apply.
- Click OK.
- Click OK again.
Using Command Prompt (Admin): Follow these steps:
- Log into Windows with your administrator account.
- Launch an elevated Command Prompt window.

- When the Command Prompt (Admin) window opens, input the following command and press Enter to run it:
takeown /f “folder_path” /r /d y
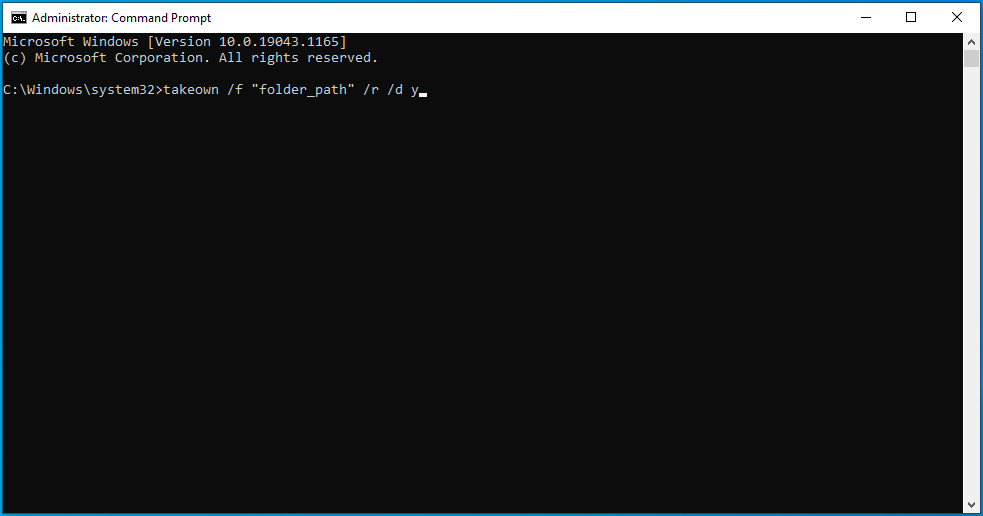
- After executing the command, you’ll own the file, folder, or directory. Close the Command Prompt (Admin) window and restart your computer.
Fix 7: Scan your PC for malware
The “You need permission to perform this action” could be caused by malware that has hijacked your computer and taken control of its files and processes. These malicious items may also have corrupted or deleted some entries in the registry and your system files.
📌Also read: How to Remove Virus and Other Malware from Windows
If you don’t have a third-party antivirus program on your PC, Windows Security must be active but hasn’t been getting updates. That’s why malware was able to invade. If you do have a third-party antivirus program, it may be outdated or not robust enough to detect elusive threats. Either way, we suggest you update your antivirus and run a scan immediately.
If you use Windows Security, ensure it has the latest security updates. Then, proceed to run a scan. Here’s how to run an advanced scan to deal with stubborn threats:
- Press the
Windows + Ikeyboard combination to open the Settings app.
- Click Update & Security.

- Click Windows Security in the left pane.
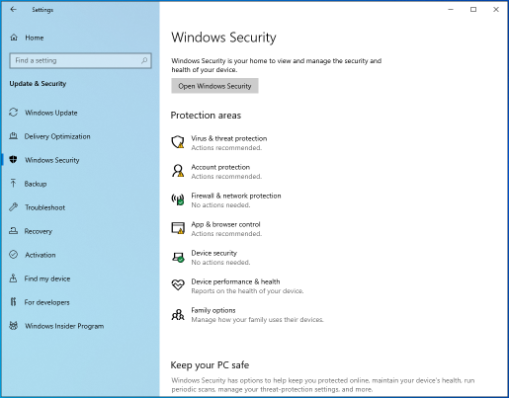
- Click Virus & threat protection.
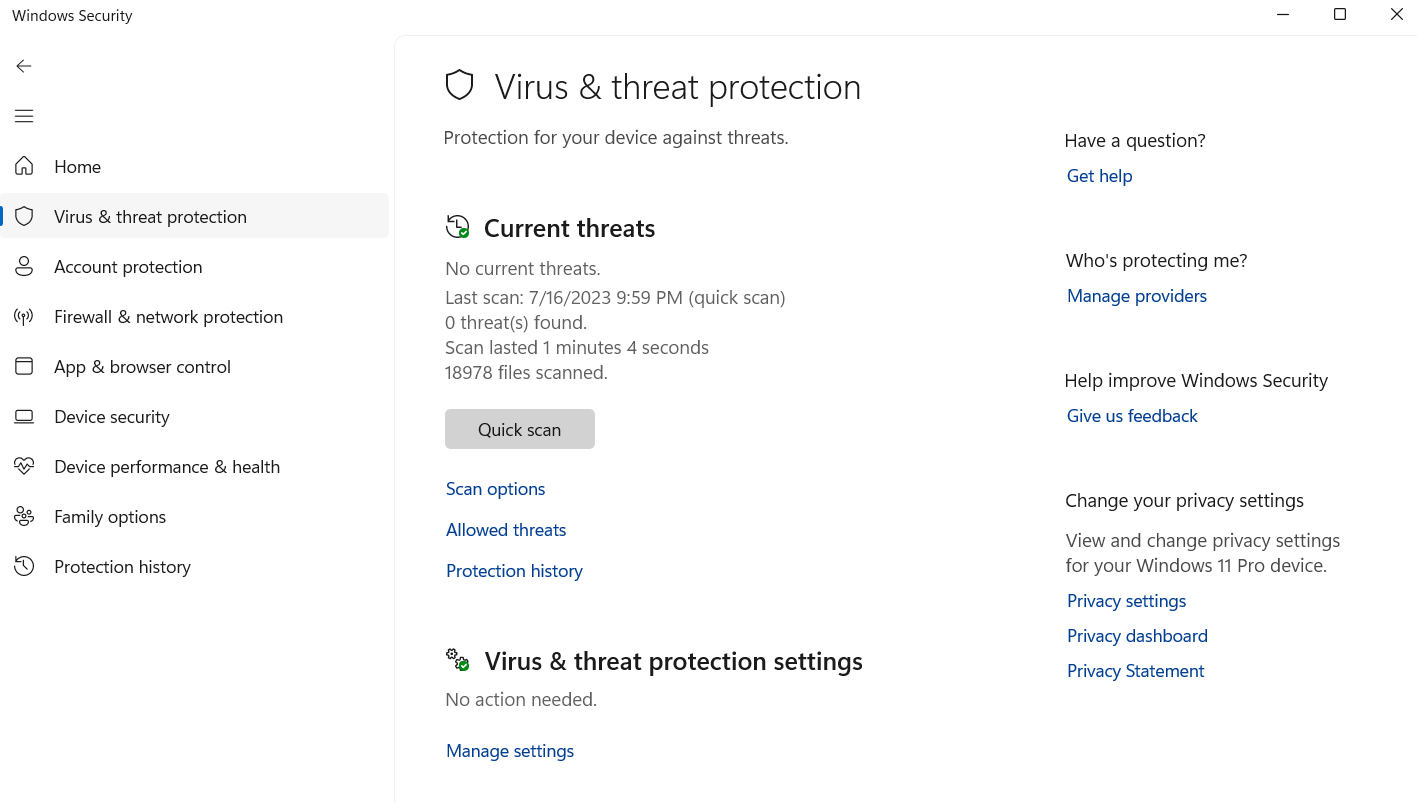
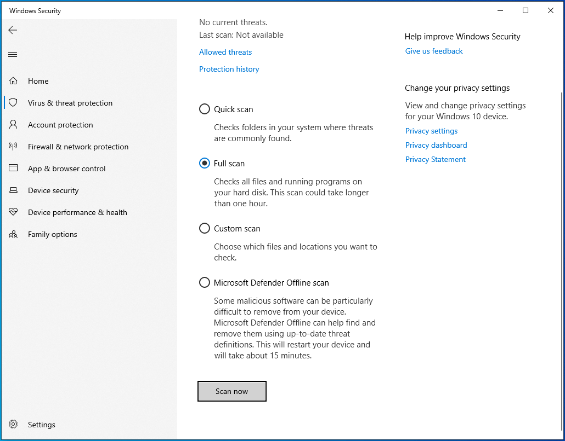
- Select Scan options under Current threats.
- You’ll see three options: Full scan, Custom scan, and Microsoft Defender Offline scan. First, select Full Scan and click Scan Now. After the scan is complete, run the Microsoft Defender Offline Scan.
Use Auslogics Anti-Malware
If you use a third-party antivirus program, we suggest getting Auslogics Anti-Malware to complement it. This tool was designed and released by a Microsoft Silver Application Developer.

The program can detect deeply hidden threats that your current antivirus might miss. It is user-friendly and easy to set up and run.
Related: Auslogics Anti-Malware: Features and Reviews
Fix 8: Run a DISM and SFC Scan
Verify the integrity of your system files by running Deployment Image Servicing and Management (DISM) and System File Checker (SFC) scans. Here’s how to go about it:
- Open Command Prompt as an Administrator.
- Click the Yes button on the User Account Control dialog to allow Command Prompt to make changes to your PC.
- When the Command Prompt (Admin) window opens, turn on your internet connection and input the following command (you can copy and paste it). Then, press Enter on your keyboard to execute it:
DISM /online /cleanup-image /restorehealth

- Wait for the scan to complete. It may take up to 30 minutes, depending on your system.
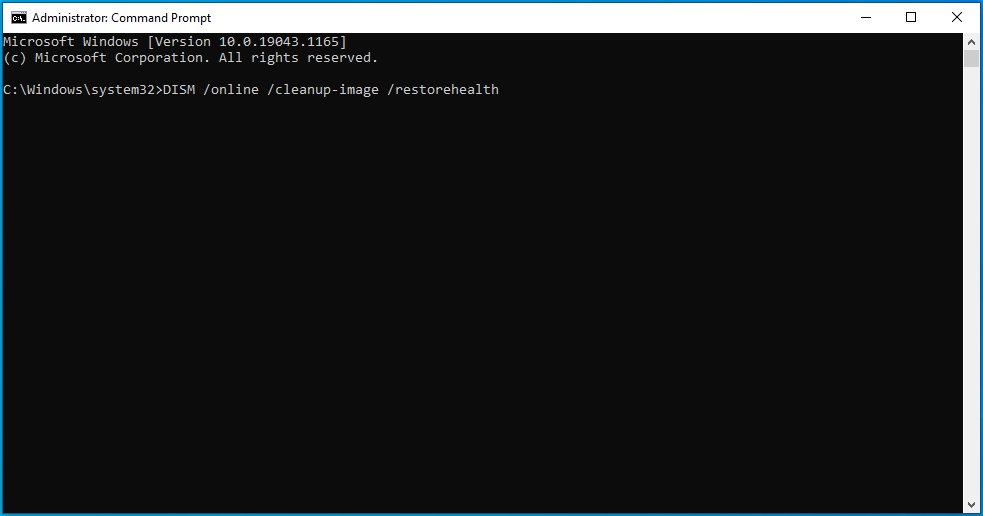
- After the scan completes, input the following command and press Enter to run it:
sfc /scannow
- Also, wait for the scan to complete. It will display the results to let you know the issues that were fixed.
- Afterward, close the Command Prompt (Admin) window and restart your computer.
Fix 9: Run a CHKDSK Scan
Your hard drive might contain some errors, and that’s why you are unable to perform specific actions. To find out, run a CHKDSK scan. Follow these steps:
- Launch Command Prompt as an administrator.
- Input the following command and press Enter on your keyboard to run it:
chkdsk /r
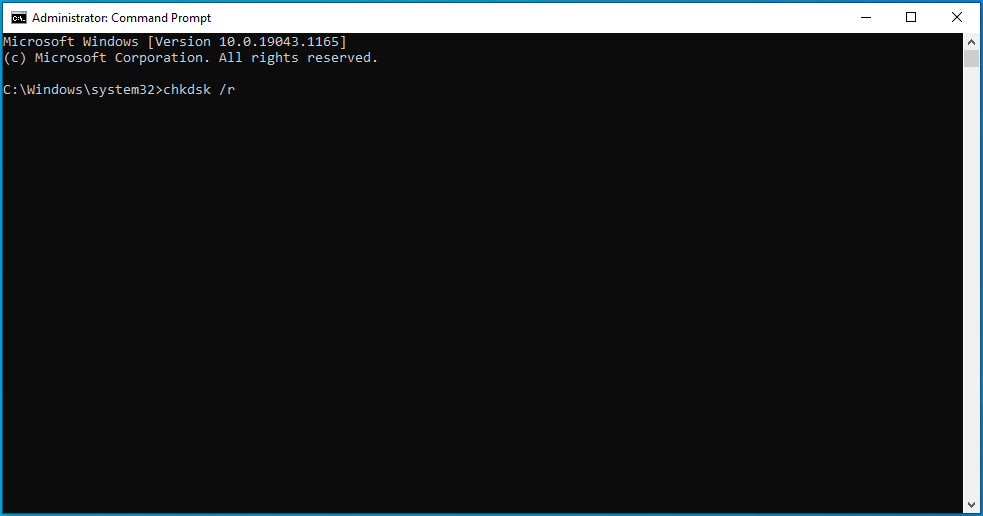
- When the process is complete, close the Command Prompt (Admin) window and restart your computer.
📌 Also read: Ultimate Guide: How to Check For and Fix Disk Errors with CHKDSK Command
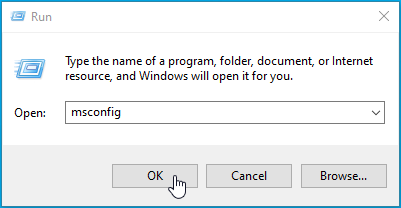
Fix 10: Start your PC in Safe Mode
You can boot your PC into Safe Mode and try accessing the restricted file. Here’s how to boot Windows in Safe Mode:
- Press the
Windows + Rkeyboard combination to invoke the Run dialog. - Type
Msconfigand press Enter or click the OK button to open System Configuration.
- Go to the Boot tab.
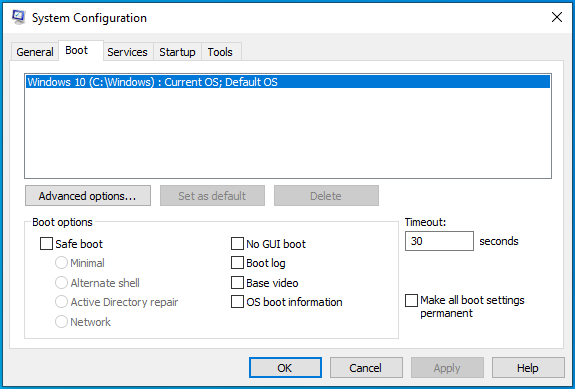
- Mark the Safe Boot checkbox under the Boot options section.
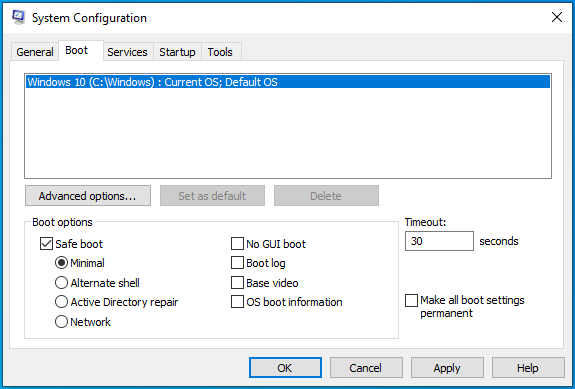
- Click the Apply button and click the OK button.
- Restart your system to boot into Safe Mode. Try performing the restricted action now and see whether it goes through.
To boot Windows normally again, open System Configuration, as shown previously. Uncheck the Safe Boot checkbox, and then click Apply > OK.
📌 Related: Safe Mode Made Easy: How to Boot Windows 10 in Safe Mode?
Fix 11: Disable conflicting programs
Some users reported that their antivirus programs caused the “You need permission to perform this action” message. Consider disabling your security application to check if that will fix the issue. Follow the steps below:
- Right-click the Start button or press the
Windows + Xkeyboard combination to open the Power User menu. - Click Task Manager.
- Go to the Startup tab and select your antivirus program. Next, click the Disable button to prevent the program from starting automatically when you boot your PC.
- Restart your computer.
- Try performing the restricted action again. See if it goes through. Afterward, re-enable your antivirus or consider using the Windows built-in Microsoft Defender instead to protect your PC.
Fix 12: Reinstall the problematic program
Does the “You need permission to perform this action” message appear when you try to run an app? Are you logged in to your admin account when this happens? If so, it’s difficult to tell what’s causing the permission issue. So, try reinstalling the app and see if that helps. Follow these steps to uninstall the program:
- Press the
Windows + Ikeyboard combination to open the Settings app. - Click the Apps tile on the Settings home page.
- Click on Apps & Features in the left pane.
- Now, go through the list of apps and locate the app you are having trouble accessing. Click on it and click the Uninstall button.
- Restart your PC and reinstall the app. See if the problem is resolved.
If the issue persists, another program or process on your computer is likely the culprit. You can find out by running a clean boot. A clean boot will start Windows with minimal drivers and startup programs. It is similar to starting your system in Safe Mode. However, it gives you control over which services and programs run at startup so that you can pin down the cause of your troubles.
Fix 13: Disable User Account Control (UAC)
User Account Control is a security system in Windows that helps prevent apps from making unsolicited changes to your OS. It is ill-advised to disable it. However, if you are determined, you can disable UAC temporarily to see if you can run your app without the “ You do not have permission to perform this action ” message. Follow these steps to disable UAC via Control Panel:
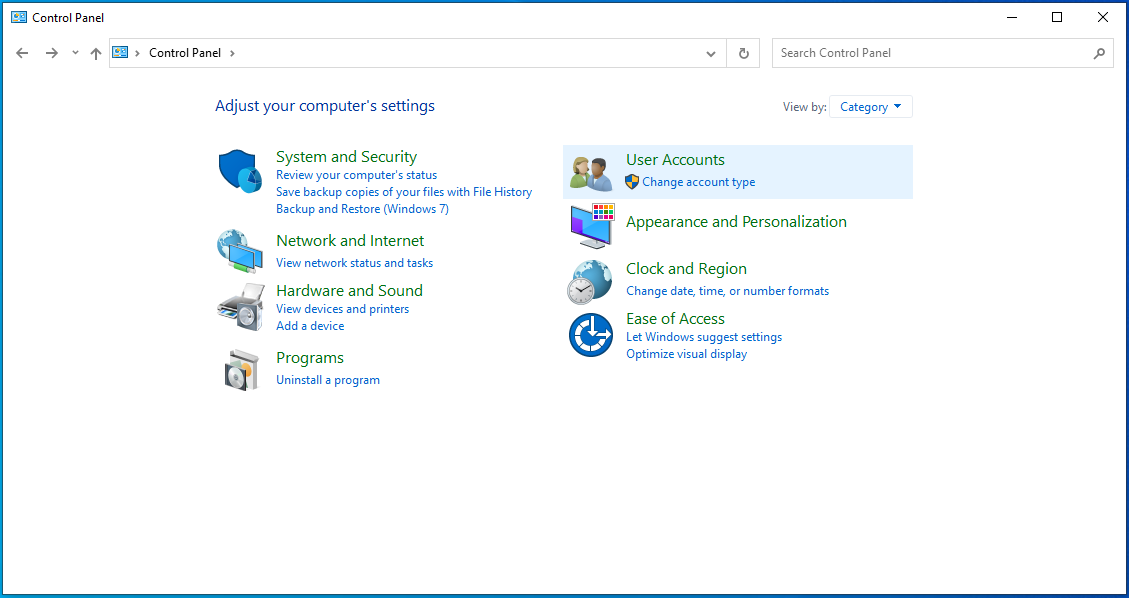
- Press the
Windows + Rcombination on your keyboard to open the Run dialog. - Type Control Panel and press Enter or click OK.

- Click User Accounts.
- Click Change User Account Control settings.

- Drag the slider down to Never notify and click OK.
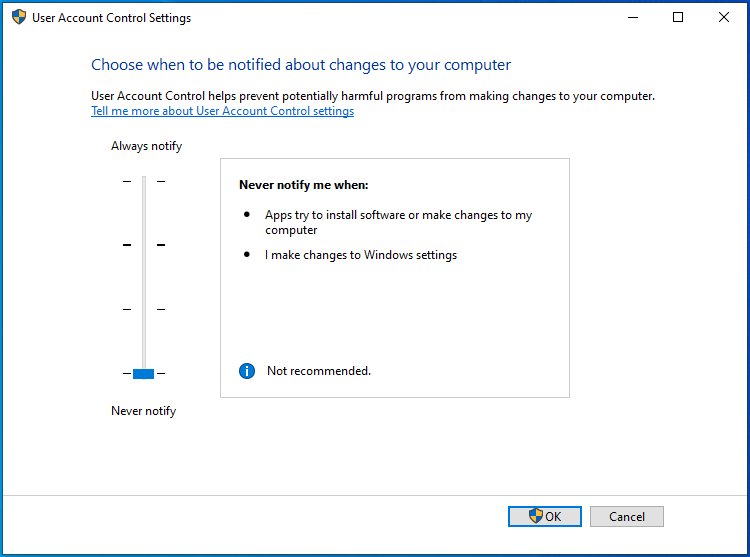
Try running your app again and see if the problem will persist. Don’t forget to turn on UAC notifications afterward.
Fix 14: Reset your OS
If none of the solutions presented here helped you, you have no alternative but to reset your operating system. While you can prevent Windows from removing your files during the process, we recommend backing them up. Afterward, follow the procedure below:
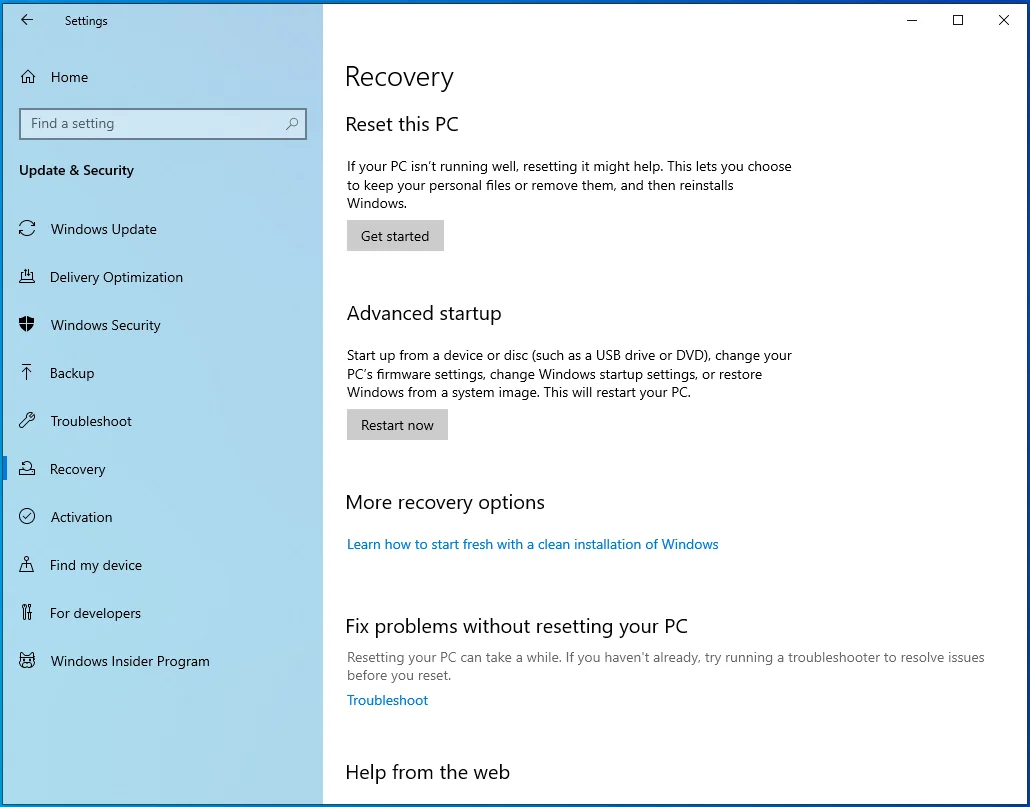
- Press the
Windows + Ikeyboard combination to launch Settings and click Update & Security.
- Click Recovery in the left pane.
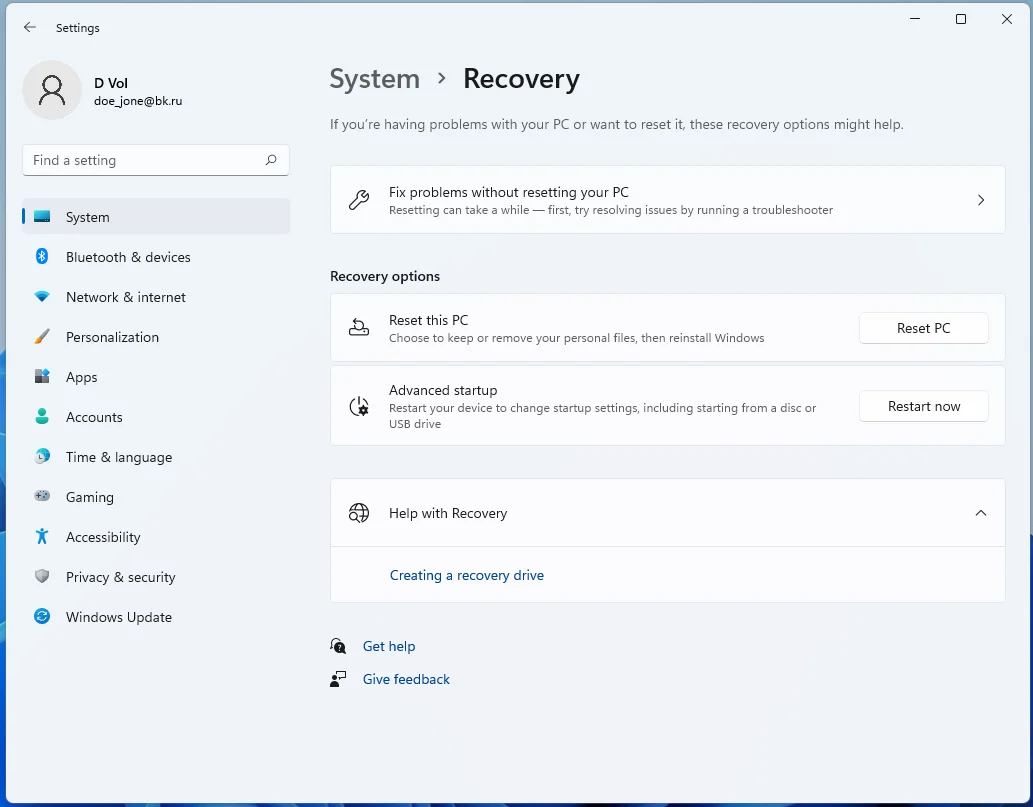
- Click Get started under Reset this PC.
- Select Keep my files.
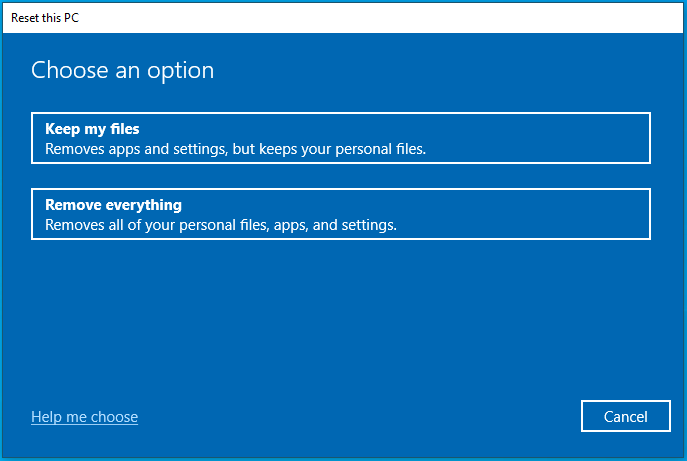
- Choose Cloud download or Local reinstall, whichever method you prefer to install Windows.
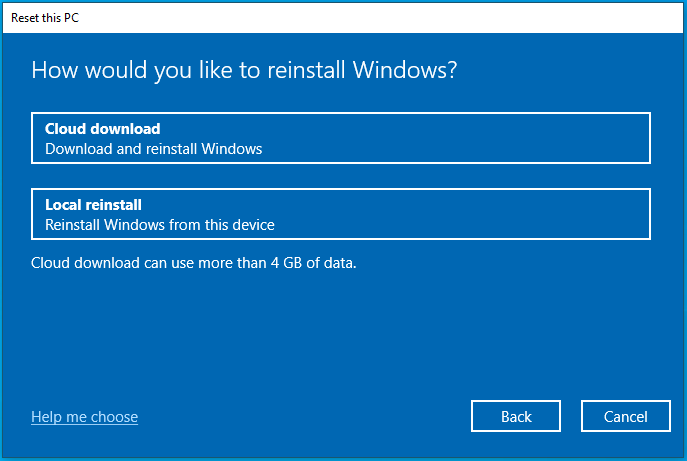
- Click Next.
- Click Reset.
The issue should disappear after reinstalling your operating system.
Keep your newly reset system secure and running smoothly with Auslogics Anti-Malware!
Conclusion
Realizing that you require permission from administrators to make changes to the folder or file you want to rename, copy, move, or delete is not a fun discovery. Thankfully, the methods we shared above effectively resolve the issue for good. Still, you should stay clear of system components to avoid messing with your operating system.
FAQ
Microsoft built User Account Control (UAC) into Windows to prevent unauthorized apps and users from making changes to the operating system.
You may need to deactivate it temporarily to access a system file, folder, or application.
Applications that you run as an administrator will have access to Windows’ files, folders, and apps, empowering them to apply changes that can potentially brick the operating system.
So, before running any program as an administrator, ensure it is entirely safe to use.