
Have you noticed that your computer’s CPU usage usually skyrockets when installing or updating apps? Well, this is normal because that’s what the WSAPPX does. However, what’s not normal is when you experience a WSAPPX high CPU usage , especially when you’re not updating or installing apps. Sometimes, this can be the work of a virus or malware. But that’s not always the case. This guide will show you the various causes and ways to fix the problem. Keep reading!
What Is WSAPPX?
WSAPPX is a background process in Windows. It’s a component of the Universal Windows Platform and Microsoft Windows Store.
This feature manages the installation, downloading, updating, and uninstallation of apps via the Microsoft Store and other related services.
However, when you’re done with your Steam downloads , for example, you won’t need this process.
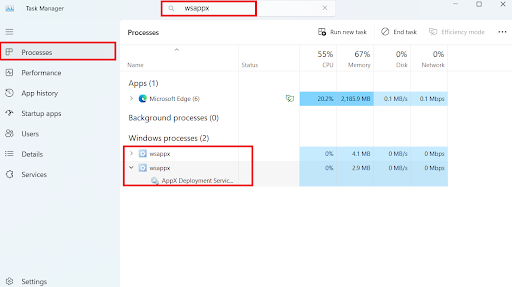
What Is WSAPPX in Task Manager?
If you want to find WSAPPX in Task Manager, press Ctrl + Shift + Esc. Then, search for “wsappx” in the “Processes” tab.
Understanding WSAPPX Components
You need to understand the components to better understand the WSAPPX high disk usage. Let’s go through them briefly:
1. AppX Deployment Service (AppXSVC)
So, what is the Appx Deployment Service? This service helps you install, update, and uninstall apps from the Microsoft Store . AppXSVC ensures that these processes are carried out efficiently and seamlessly so that you can access the apps’ current versions.
2. Client License Service (ClipSVC)
ClipSVC manages app licenses downloaded from the Microsoft Store. It ensures that you get the required authorization to access and use these applications.
3. Windows Store Service (WSService)
WSService manages the Windows Store program. It handles updates, installs apps, and performs other store-related tasks.
What Causes WSAPPX High Disk and CPU Usage?
The WSAPPX service can occasionally use a lot of CPU power and resources when running, which can negatively impact your computer’s overall performance . Sometimes, you can see the WSAPPX service running while using the Windows Store. As previously stated, the WSAPPX service works continuously in the background, and you may see that it’s active even when you are not using Microsoft Store apps. That’s because the service might be updating an app like Windows Media Player in the background.
How to Fix WSAPPX High CPU?
Follow the steps below to fix the WSAPPX high CPU usage:
Solution 1: Scan your computer
One of the primary reasons a system uses a lot of CPU is malware. Of course, as mentioned earlier, WSAPPX itself isn’t malware, but it could be a malicious program pretending to be it.
So, the first step is to restart your computer anytime you experience problems with high CPU consumption and system slowdown.
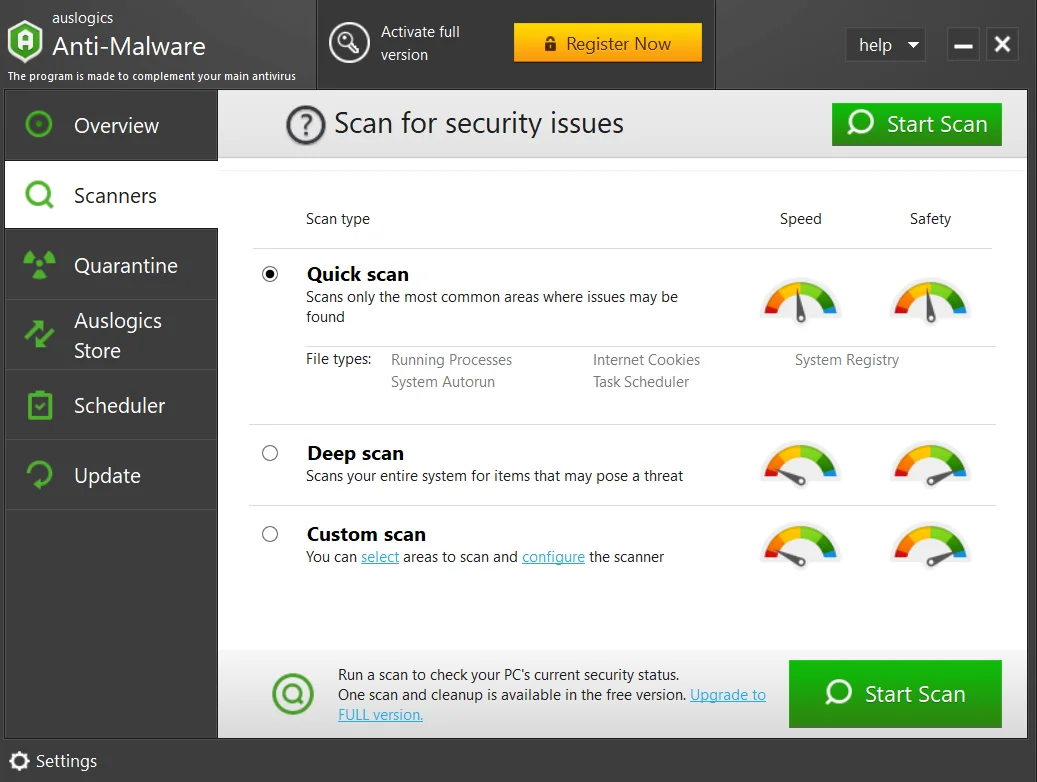
If that doesn’t resolve the problem, perform a system scan. We recommend using Auslogics Anti-Malware for this. This program detects malware, viruses, and spyware and safely removes them from your system.
Here’s how it works:
- Download the software from Auslogics’ official website and install it.
- Launch the program. If it’s your first time, the program will update its database to give you the latest updates.
- After the update, click Scanners and select Quick scan, Deep scan, or Custom scan to start the scanning process.
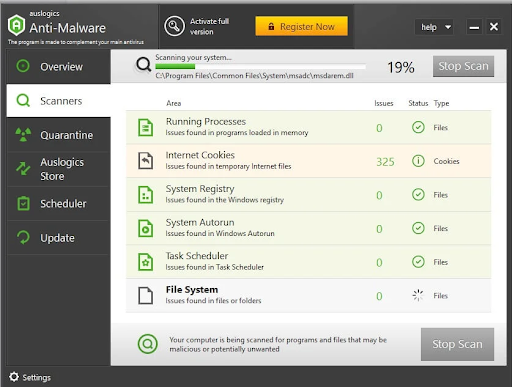
- Wait for the scan to complete and delete any malware detected.
After that, restart your PC and check if the problem has been resolved.
Related: Auslogics Anti-Malware: Features and Reviews
Solution 2: Disable your Windows Store
One of the major causes of the WSAPPX high disk usage is the Windows Store. Here’s how to disable this service using the Local Group Policy Editor:
- The first step is to press the
Windows key with the letter R. Then, typegpedit.mscon your keyboard and click OK.

- Next, select Local Computer Policy and double-click Computer Configuration.
- Click Administrative Templates, expand Windows Components, and double-click Store.
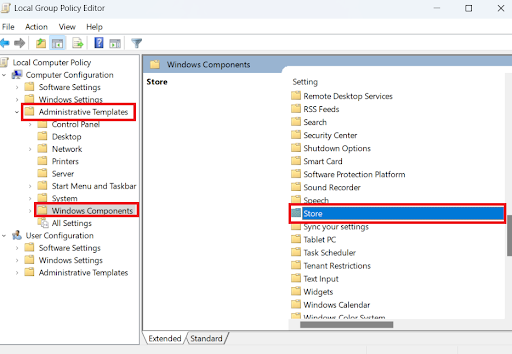
- Double-click Turn off the Store application and select Enabled in the window that appears.
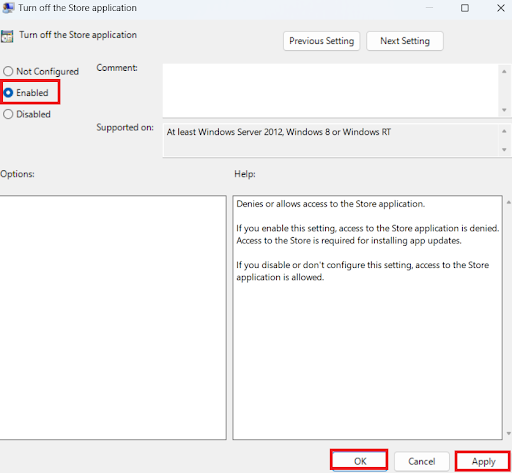
- Click Apply and select OK to save and apply the changes.
You can restart your computer to see if the problem has been resolved.
Solution 3: Extend virtual memory
Extending virtual memory is another effective way to fix the AppX Deployment Service’s high CPU usage. Here’s how to do it:
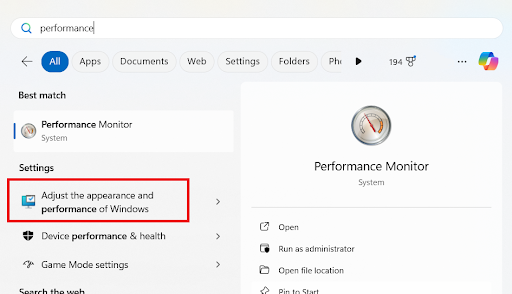
- Type
performancein the search bar and select Adjust the appearance and performance of Windows.
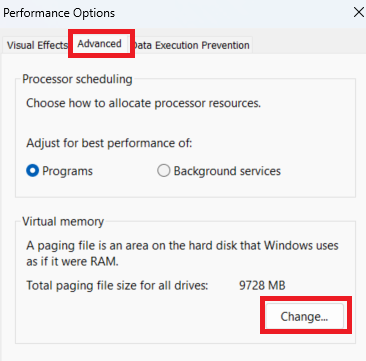
- Click the Advanced tab and select Change under the Virtual memory section.
- First, uncheck Automatically manage paging file size for all drives. Then, click your primary drive (which is usually C:) and select Custom size.
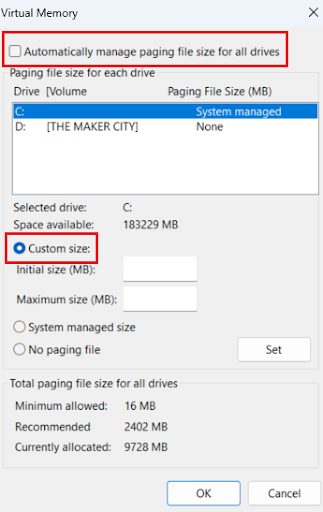
- In the Initial size (MB) field, enter the number in MB equal to your RAM size. The Maximum size (MB) field should be double your RAM size.
- Click Set and OK to save the changes. After that, restart your computer and check if the problem is fixed.
Solution 4: Use Disk Cleanup
When you store a file on your computer, a specific memory location is assigned to that data. This location is removed when you delete the file.
Since you do this several times, it creates a memory gap, which slows down your computer. It takes a long time to search for files because of this problem.
The way to fix this is to use Disk Cleanup . Here’s how to do it:
- Type
disk cleanupin the search bar and click on it to open it.
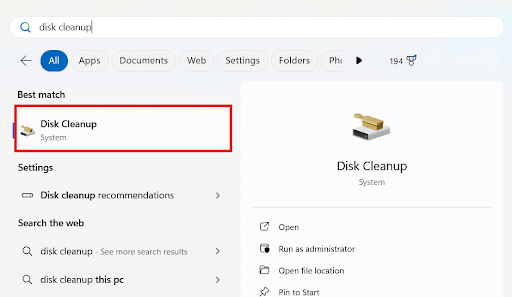
- Select the files you want to delete and select OK.

If you want to clear more space, select Clean up system files. After that, check to see if you’re still experiencing the WSAPPX high CPU usage.
Solution 5: Use the Registry Editor to change the value of AppXSVC
Sometimes, using the Windows Registry to change the value of the AppXSVS can help fix the WSAPPX high CPU usage. Here’s how to do it:
- Press
Windows + Ron your keyboard, typeregedit, and pressEnter.
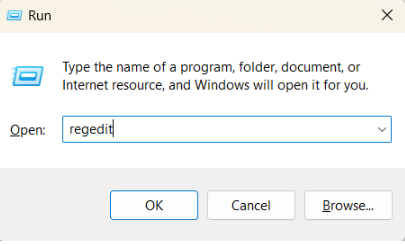
- Enter the following in the field and press
Enter:
Computer\HKEY_LOCAL_MACHINE\SYSTEM\ControlSet001\Services\AppXSvc
- Then, double-click on Start, change the value to 4, and press
Enter.
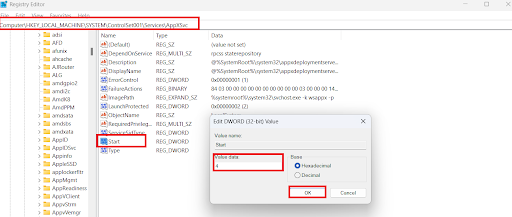
Restart your computer to see if the problem has been resolved.
Related: How to Clean Registry in Windows 10?
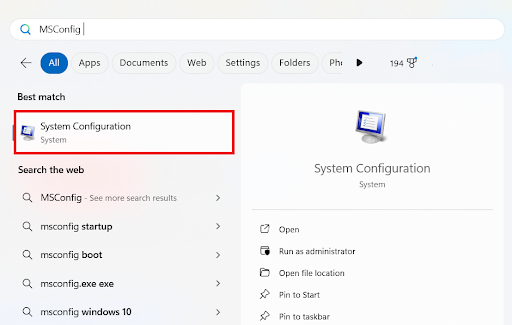
Solution 6: Troubleshoot in a clean boot state
The last method to fix the WSAPPX high CPU usage is to perform a clean boot . This can help you resolve the issue manually. Follow the steps below:
- Type
MSConfigin the search bar and click on it to open.
- Under the General tab, select Selective startup, check Load system services, and Use original boot configuration.
- Then click OK.

- Go to the Services tab, select Hide all Microsoft services, and click Disable all.
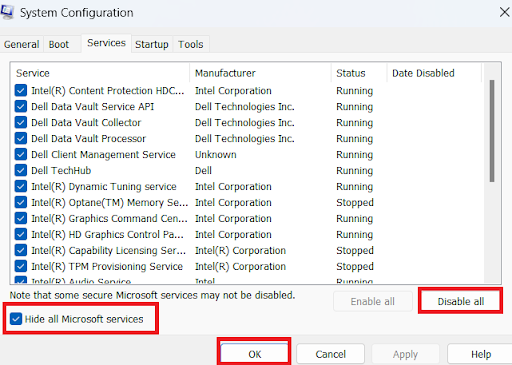
When you’re done, restart your PC and let Windows start in the clean boot state. This should help resolve the issue.
WSAPPX High CPU Usage: Fixed
In this article, we’ve discussed the causes of the WSAPPX high CPU usage and effective ways to resolve the problem. Go through the methods outlined in this guide and implement the one that works for you.
If you’ve found this article helpful, kindly share it with your friends who might need it. Also, if you have any thoughts or suggestions, let us know in the comments below.