
The Windows sleep option is a great way to give your PC a few moments of rest and save some battery life. But what if the sleep option is missing from your Windows 10 Power menu?
Don’t worry—there are a few simple fixes to the problem, and we’ll give you the problem-solving steps right below.
Try them one by one understand what happened to the sleep option in Windows 10 and Windows 11, and how to bring it back in no time.
How to Enable the Sleep Option on Windows 10?
As we’ve mentioned above, there are three main fixes for the missing sleep option issue in Windows 10.
Option 1: Enable sleep mode via control panel
This fix is available for all versions of Windows 10 and is not as complicated as it may seem. Here’s what you will need to do:
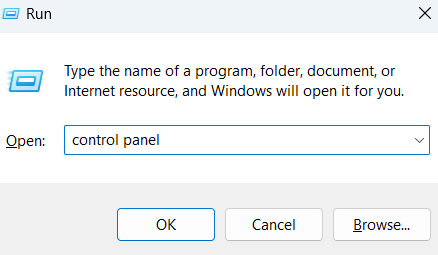
- On your keyboard, press the
Windows + Rkey combo to launch Run - Type control panel and press Enter.
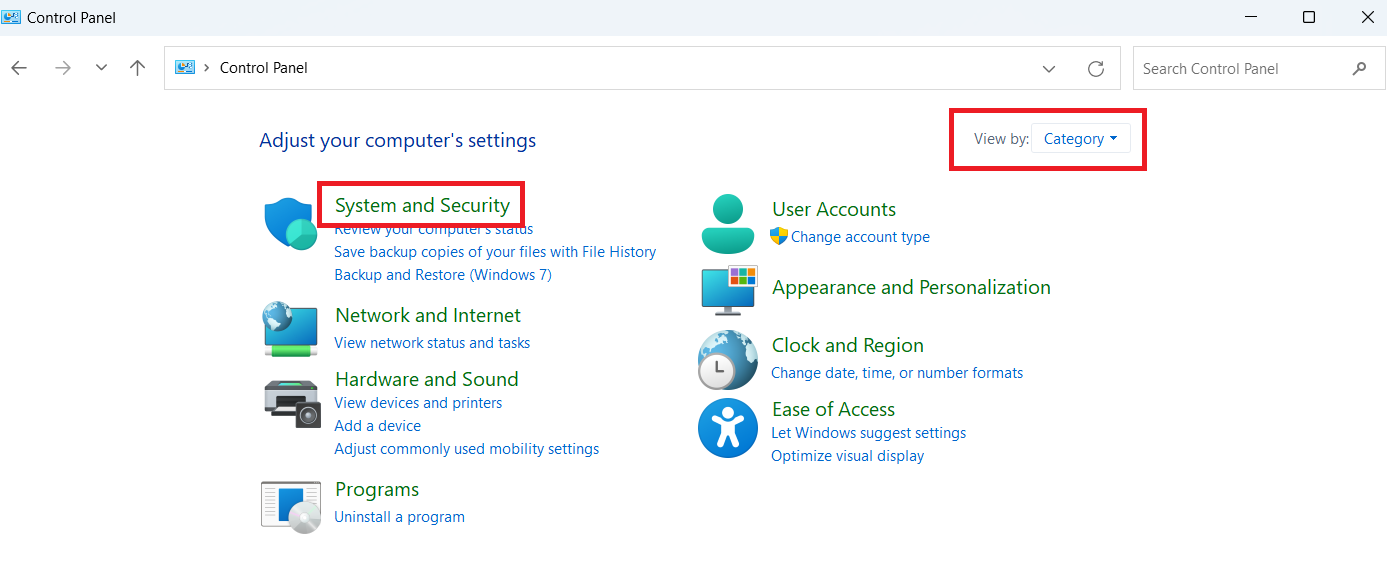
- When the Control Panel window has opened, go to the drop-down list next to View by.
- Here, select Category.
- Next, click System and Security.
- In the next window, click Power Options.
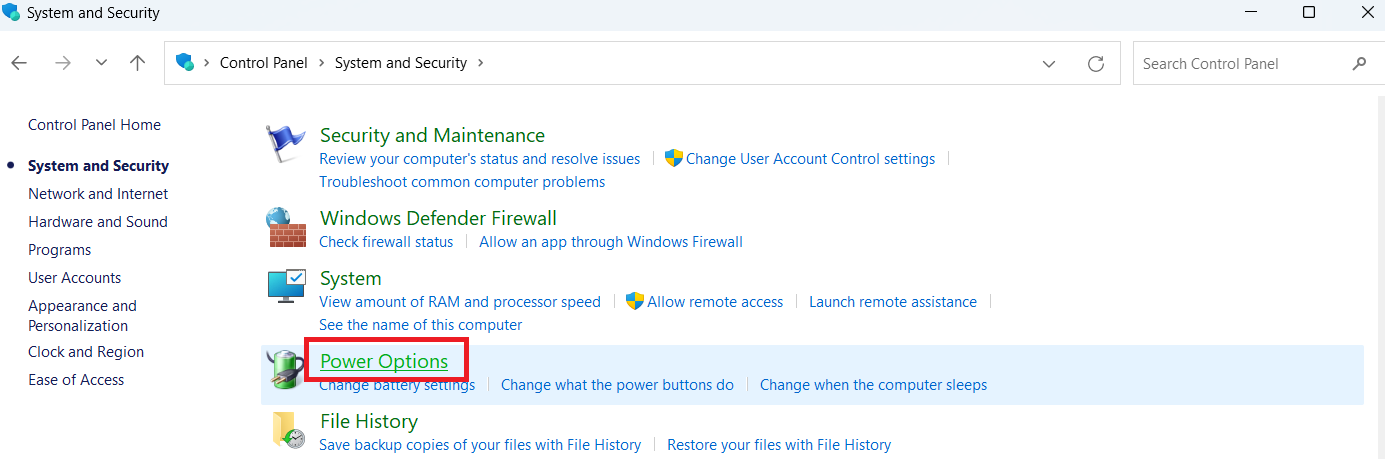
- In the left pane, click Choose what the power buttons do.
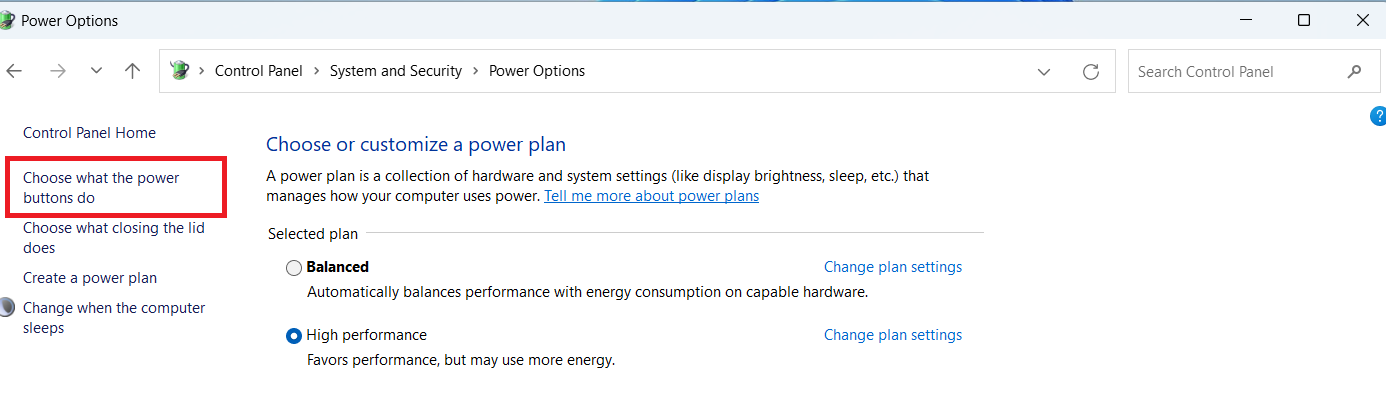
- Next, click Change settings that are currently unavailable.
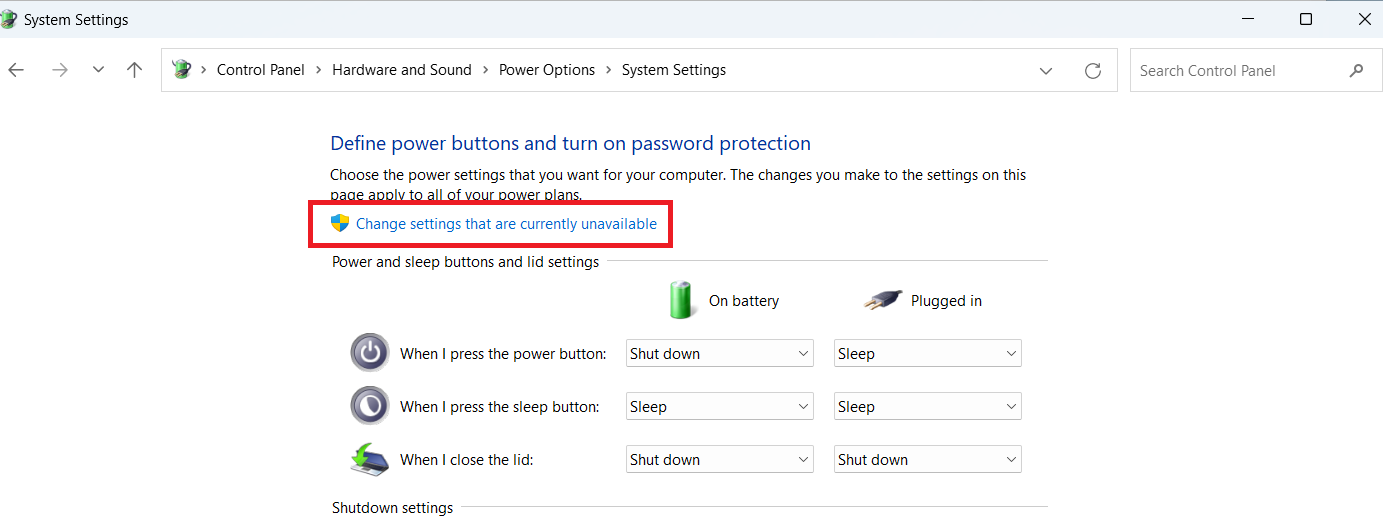
- Make sure to check the Sleep box down below.
- Click Save Changes to bring the sleep option back.
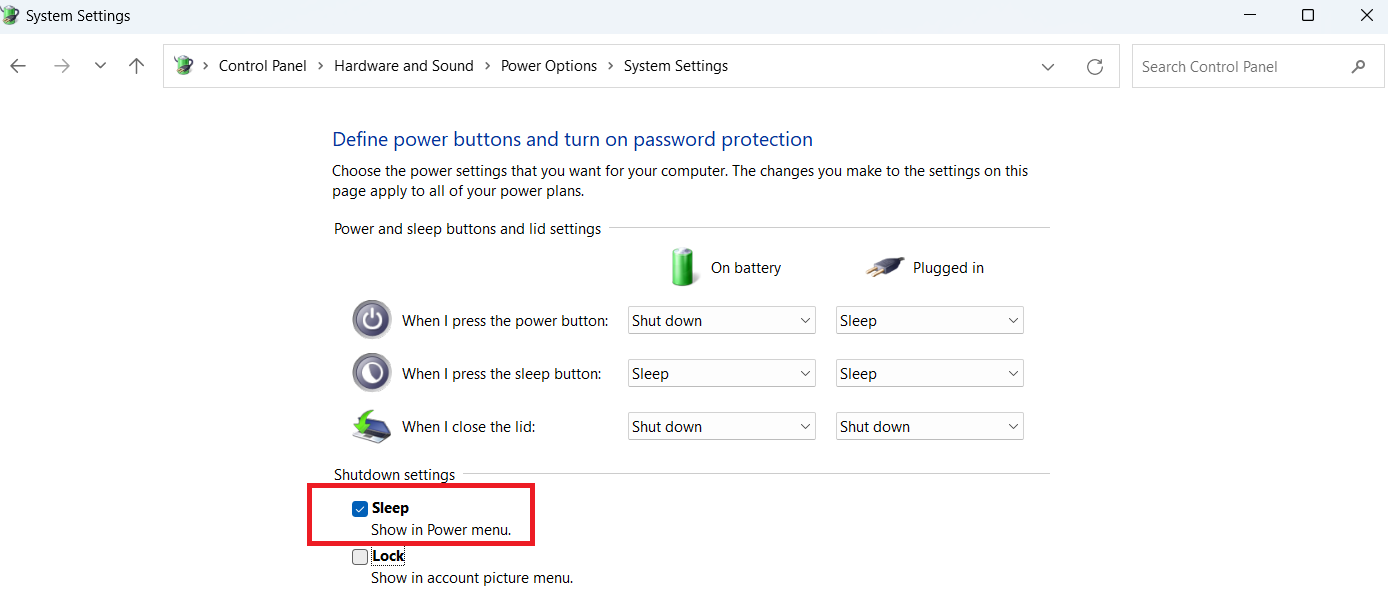
- To confirm this, go to the Power menu and see if the sleep option has returned.
If the sleep option is back in the Power menu — congratulations! You have successfully restored your system’s ability to rest.
If, on the other hand, the sleep option is still missing from the menu, proceed to the next step.
Option 2: Enable Sleep via Local Group Policy Editor
Note that this solution is only available for Windows 10 Pro and Windows 10 Enterprise.
If you are using a different edition of Windows 10, you won’t be able to open the Local Group Policy Editor on your computer — if this is the case, proceed to the third option.
Here’s how to enable sleep via Local Group Policy Editor:
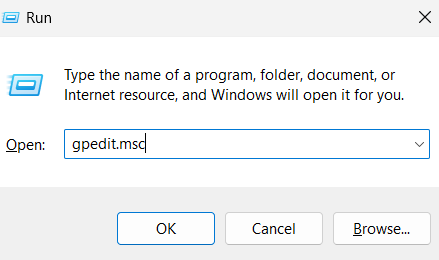
- Launch Run by pressing the
Windows + Rkey on your keyboard. - Type
gpedit.mscand click OK.
- Open the Local Group Policy Editor.
- Go to Computer Configuration > Administrative Templates > Windows Components > File Explorer in the new pop-up window.
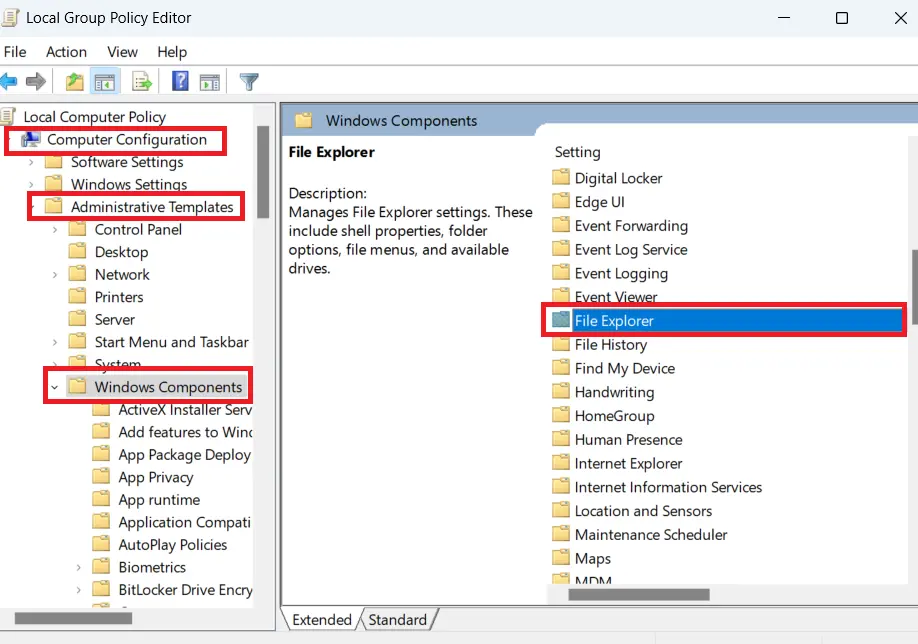
- In the right panel in File Explorer, find and double-click Show sleep in the power options menu
- Next, select Enabled or Not Configured.
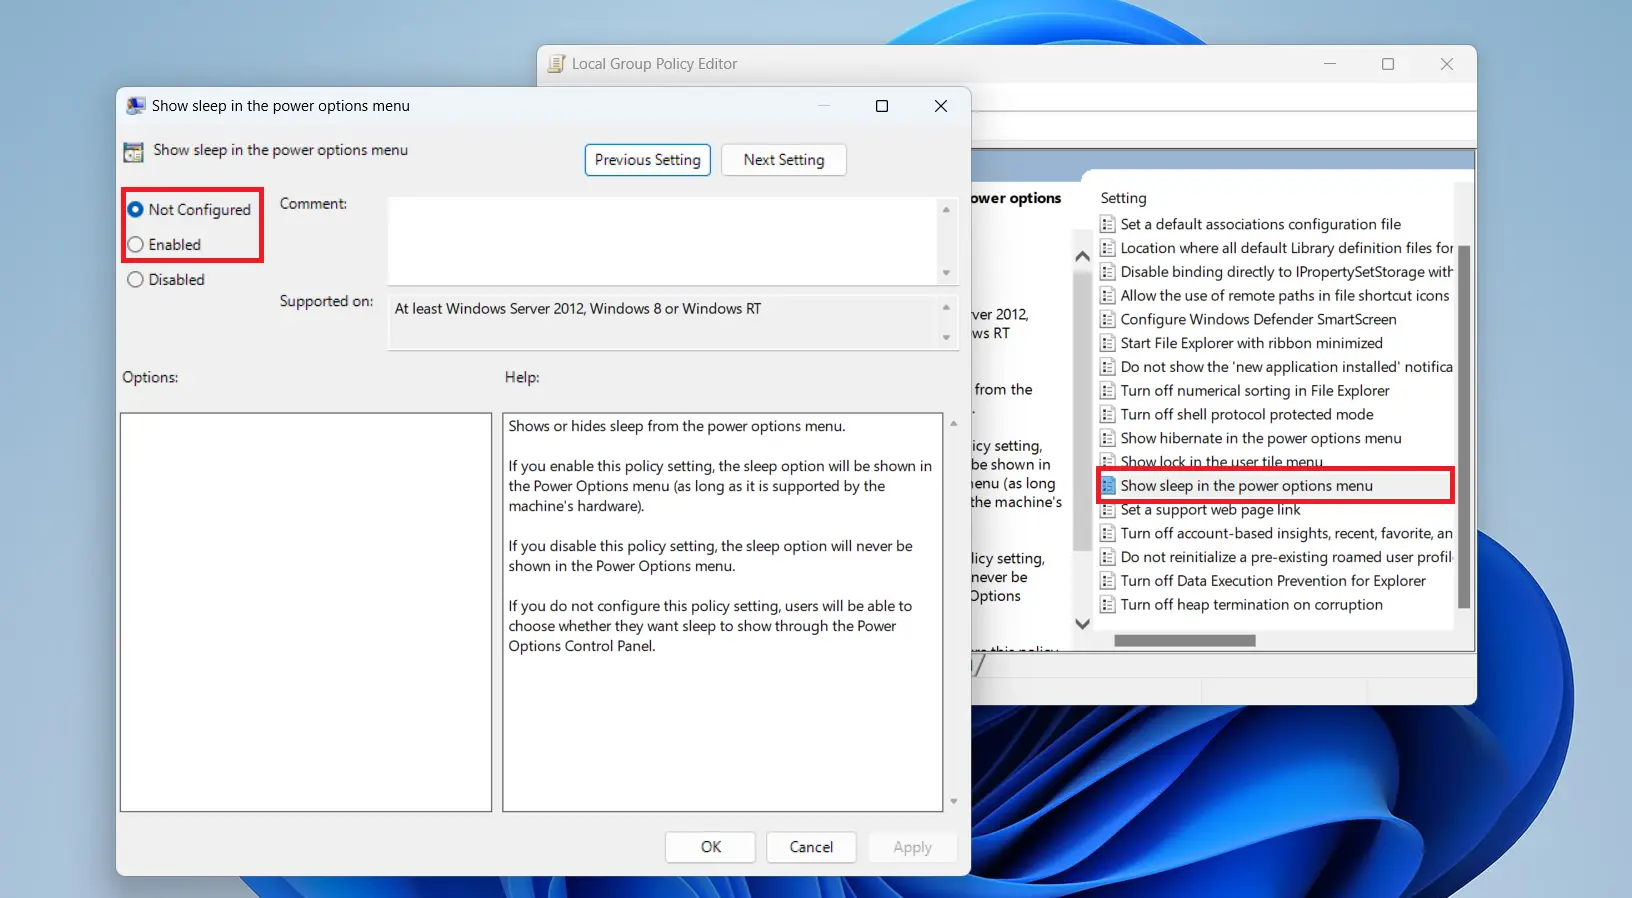
- Click OK to save the changes you’ve made.
- Once again, go back to the Power menu and see if the sleep option has returned.
Option 3: Update your display adapter driver
If you still can’t see the sleep option in your Power menu, try updating your display adapters driver. There are several ways to do that.
First, you can do this automatically. In this case, you must go to the manufacturer’s website to download the latest driver version.
Then, you will need to update the driver in your system manually. While this can be absolutely done, if you are updating your drivers for the first time, the whole process may seem overwhelming.
The program will run a quick scan of your system, locate existing and potential driver issues and update your drivers to the latest manufacturer-recommended versions.
This process can be completed in just one click and will require minimal input.
Find out more: Auslogics Driver Updater: Update Your Drivers in One Click!
Option 4: Use the Power Troubleshooter
Windows provides a power troubleshooter that you can use to check for the triggering issue and immediately resolve it. The following guide will explain how to enable sleep mode on Windows 11 PCs using the power troubleshooter:
- Press the
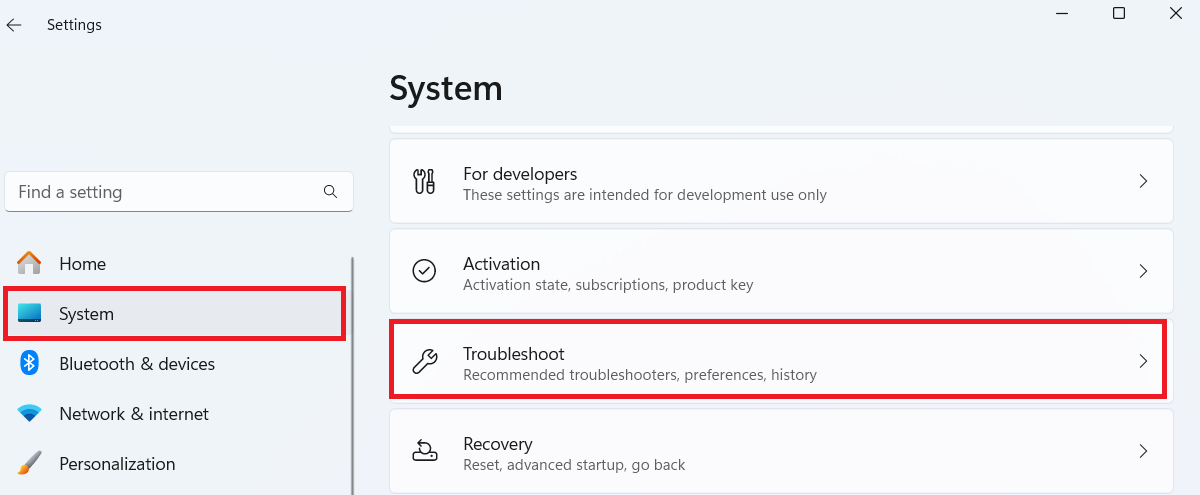
Windows key + Icombination to bring up the Settings window. - When it opens, switch to the System tab.
- Scroll down the right pane to locate the Troubleshoot option and select it.
- Click on the Other troubleshooters option.
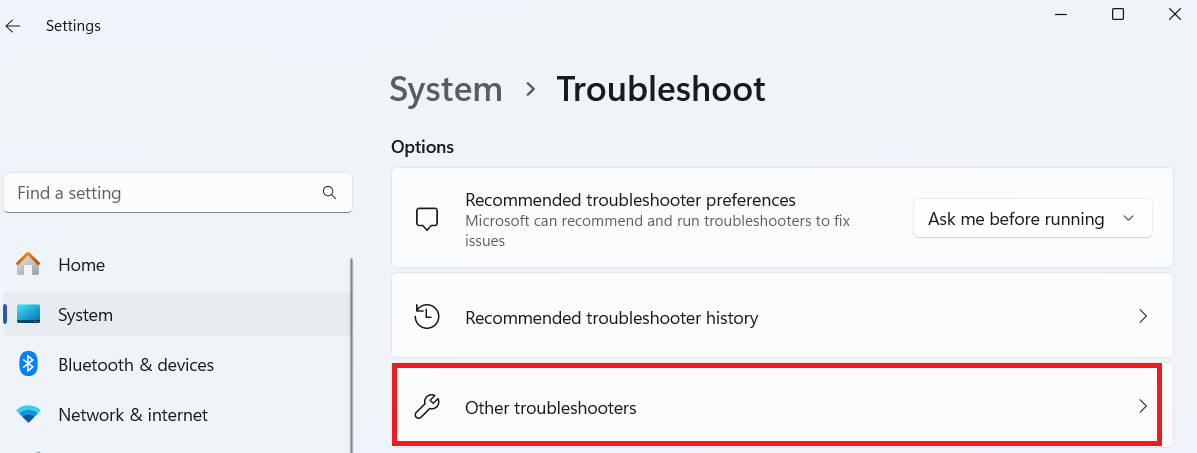
- Scroll down the Other section and click on the Run button for Power.
- Wait for the system to scan for any issues that may be preventing your machine from having the sleep option.
- Once the process is done, reboot your PC and check if the problem has been solved.
If you still can’t see the sleep option, don’t panic. The next method below might be what you need.
Windows 10/11 (8, 7, Vista, XP)
Also Read: Windows Update Troubleshooter: Easily Fixing Windows Update Issues
Option 5: Use Command Prompt
If your power settings are not properly configured, then you are likely to experience the no sleep option problem. Luckily, restoring your power settings to default helps eliminate the incorrect configurations.
Here is how this works in Windows 11:
- Hit the Windows button to access the search bar.
- Type cmd then right-click on the Command Prompt result.
- Choose Run as administrator.
- Click the Yes button in the confirmation window.
- Once the Command Prompt window opens, type the following command into it and then hit Enter:
powercfg -restoredefaultschemes.

- Once done, restart your computer and then check if the issue has been removed from your PC.
Conclusion
You probably came here wondering, “why is sleep option missing from power menu in Windows 10/11?” Hopefully, the missing sleep option behavior is no longer an issue.
However, if you still have any bothering questions about this, feel free to drop a comment below.
Also, consider checking out our blog for more solutions to common Windows issues like this one.