
From time to time, when bad sectors accumulate in a hard disk, this disk can go bad. If this happens, the data in the damaged sectors will be lost, but you should still have access to the rest of the data on the disk.
To prevent any data loss resulting from bad sectors and stop the process in time, go through the tips below. In this article, we will cover the following:
- What is a sector?
- How are bad sectors created?
- What types of bad sectors are there?
- And how to repair bad sectors?
Finally, we’ll share a great solution with you for keeping your system optimized and running smoothly.
Let’s get started.
What Is a Sector?
A sector is a unit of information that is stored on a hard disk. The standard sector is 512 bytes in size.
How are bad sectors created?
There are several things that may cause a sector to go bad. These may include:
- An improper shutdown of Windows;
- Hard disk defects such as general surface wear, pollution of the air inside the unit, or the head touching the surface of the disk;
- Low-quality or aging hardware, such as a bad processor fan, dodgy data cables, an overheated hard drive, etc.
- Malware infecting your system.
What types of bad sectors are there?
There are two main types of bad sectors: hard sectors and soft sectors.
Hard bad sectors are those that have been physically damaged (for instance, as a result of a head crash) or are in a fixed magnetic state.
If you’ve bumped your computer while data was being written onto a hard disk or if it was exposed to extreme heat, a bad sector may have been created.
Soft bad sectors are created when an error correction code (ECC) in the sector doesn’t match the sector’s content.
The errors in a soft bad sector are logical, not physical. To repair them, you will need to overwrite all the data with zeros.
How to Repair Soft Bad Sectors on Windows 10/11?
When your operating system detects bad sectors, it will mark them as unusable, whether they are soft bad sectors or hard bad sectors. Because of this, there is no way to avoid data loss as well as the loss of disk capacity.
So, how do you fix bad sectors on the hard drive?
The first thing you will need to do is back up and clone your hard disk to a good hard drive, skipping bad sectors.
If your disk has too many soft bad sectors and you frequently experience slowdowns and glitches, it may be impossible to repair the bad sectors.
In this case, the best option is to back up and save all the remaining data on your hard disk first.
If your hard drive is experiencing one or multiple soft bad sectors, you can try the following solutions to fix them:
Fix 1: Check for system errors on the disk (Windows 11)
The first thing you can do is scan your hard disk for system errors. Here’s how
- Press the Windows 11 keyboard shortcut
Win key + E. - Next, right-click the needed drive and open Properties.
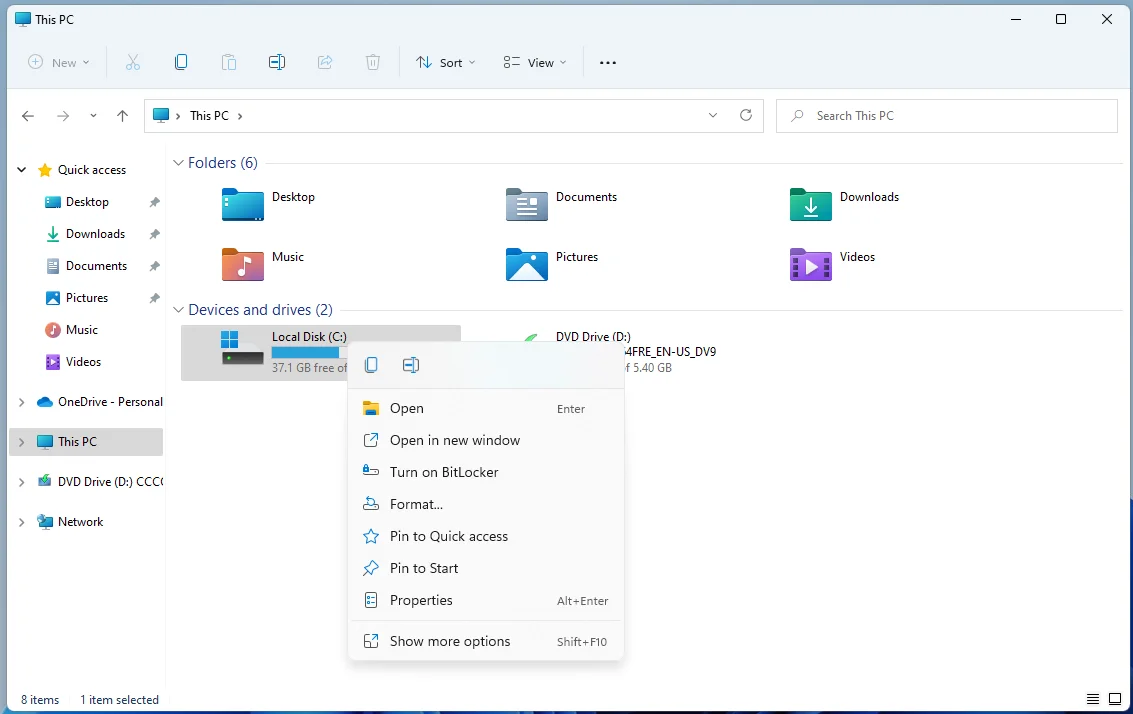
- Go to Tools and select Check under Error checking.
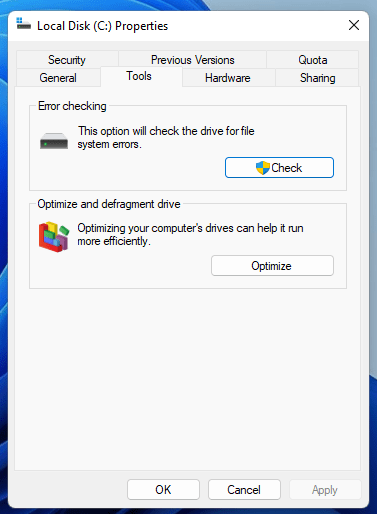
- Next, on the pop-up window, click Select Drive.
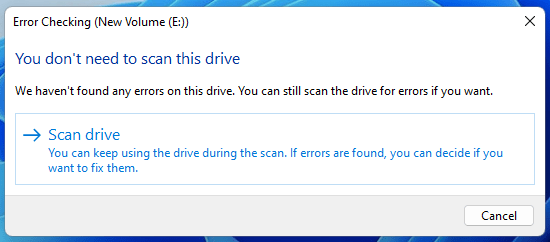
- Windows 11 will then go on to look for system errors in the selected drive. If any issue is detected, you will be able to repair the disk.
With its powerful tools, you can fix issues, free up disk space, and enhance your computer's speed and stability.
Related: How to Speed Up a Hard Drive Performance on Windows?
Fix 2: Run the CHKDSK command And format the hard drive
If there are only a few bad sectors in your hard drive, you can use the CHKDSK command first and then format the hard drive to repair the bad sectors. Here are the steps to take:
- Press the Win key on your keyboard.
- Type in cmd.
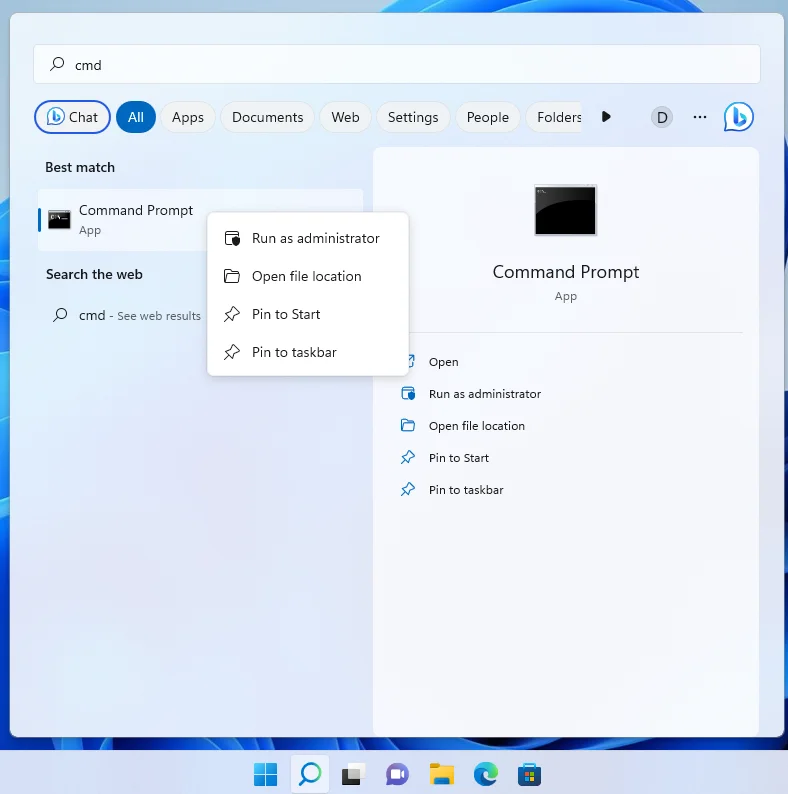
- Right-click Command Prompt and select the Run as administrator option.
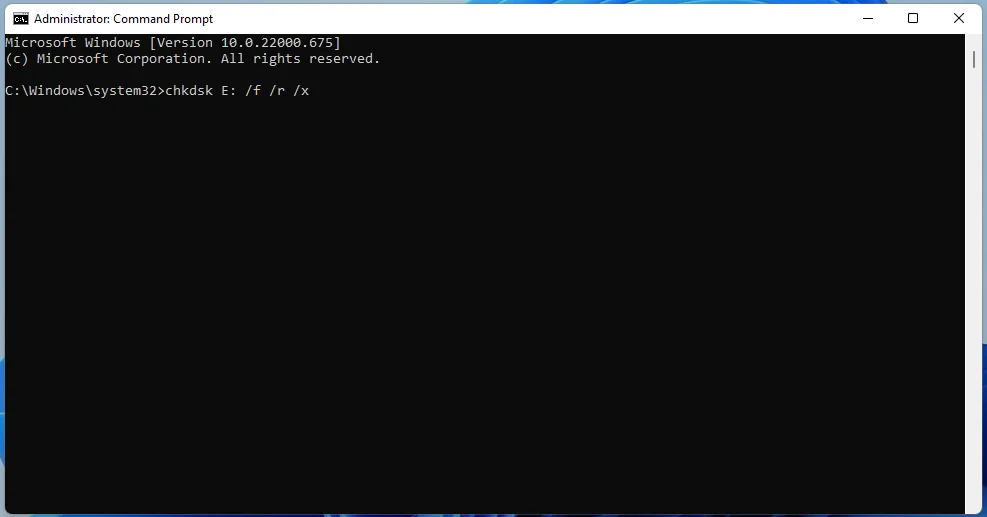
- Type in
chkdsk E: /f /r /xand press the Enter key. (You will need to replace the E with the needed hard drive letter).
Next, you will need to format your hard drive. Here’s how:
- Go to Windows File Explorer.
- Locate your hard drive and right-click it.
- Select Format.
- Reset the file system as NTFS.
- Next, check the Quick Format and click Start.
Once this is done, you can save the data back to your hard drive, and it will be usable again.
Fix 3: Defragment your hard disk
If you are running Windows 11 or Windows 10 on a mechanical hard disk, you can try defragmenting the drive.
Here’s how to proceed:
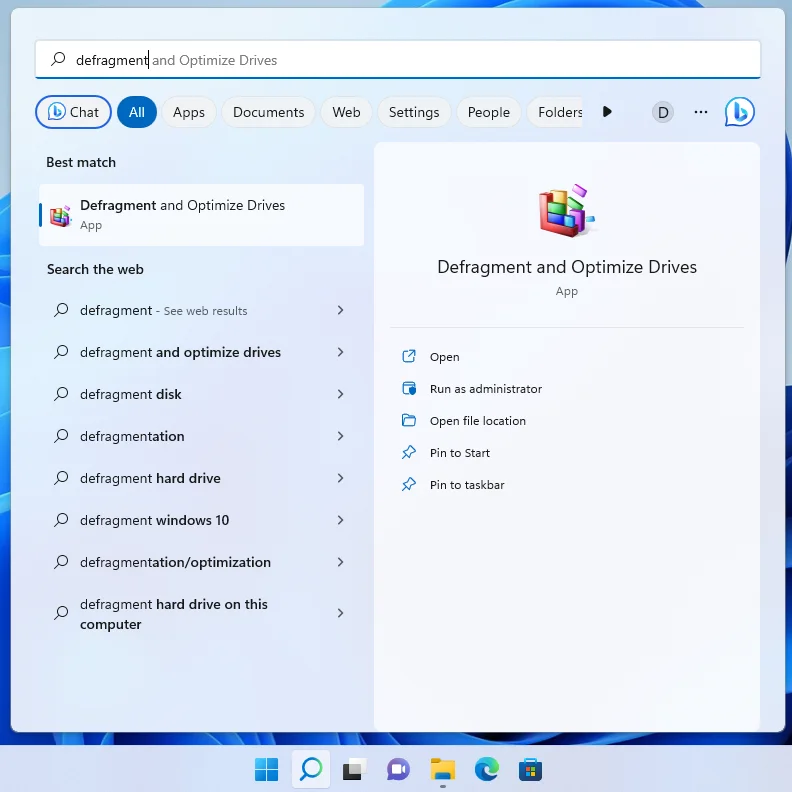
- Press the Win key and look for defragment.
- Open the Defragment and Optimize Drivers tab.

- Select the needs to drive and click Optimize.
- Wait as Windows completes the defragmentation process.
- Once it’s complete, restart Windows 11.
- Your disk errors should now be fixed.
Also read: SSD Optimization on Windows 10/11
Fix 4: Use Windows PowerShell to repair disk errors
Here is how to use PowerShellon Windows 10/11:
- Press the Win key and type “PowerShell.“
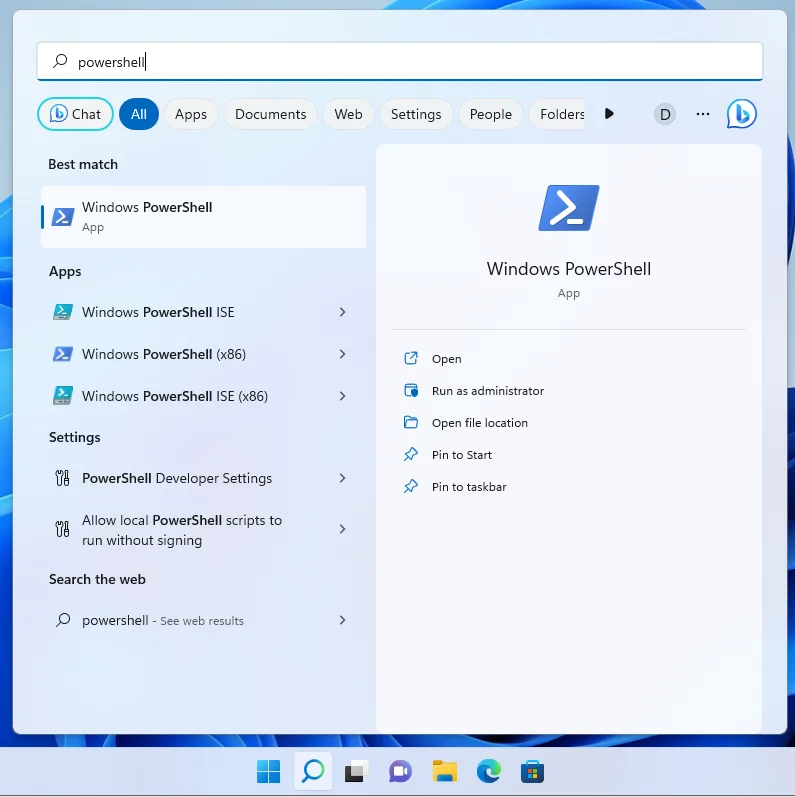
- Select the Run as administrator option on the right.
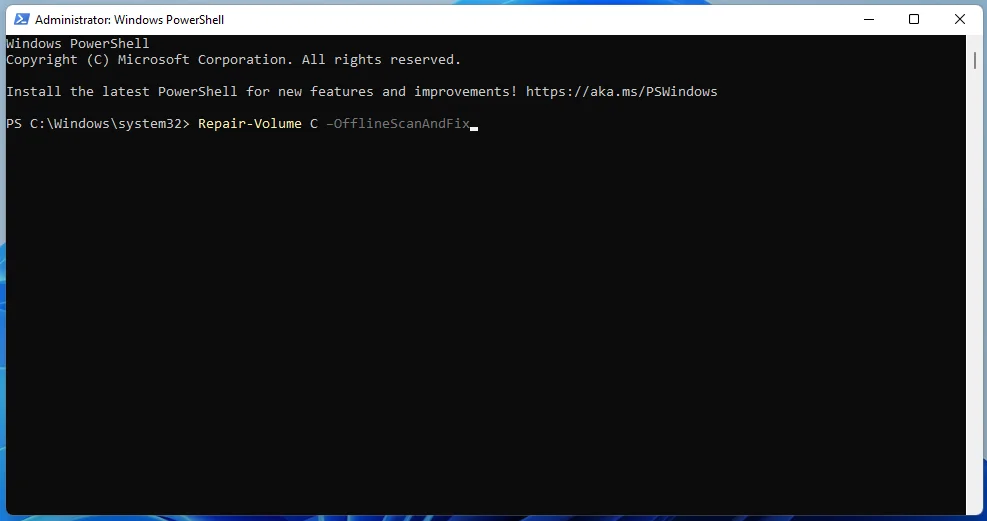
- In the new window, copy and paste this command and press the Enter key:
Repair-Volume C –OfflineScanAndFix
(replace C with the needed drive letter).
- Next, run the following command:
Repair-Volume C –Scan
(replace C with the drive letter needed).
When the repair process is complete, restart Windows and check whether disk errors have been resolved.
Also read: Most Useful Powershell Commands: Cheat Sheet with Examples
Fix 5: Troubleshoot From Recovery
If you are looking at error messages like “Windows detected a hard disk problem” or “Repairing disk errors” during boot, you will need to troubleshoot your Windows PC from the recovery screen
. Here is how:
- Before you proceed, shut down your PC.
- When you turn it back on and see the Windows loading sign, turn your PC off again. You will need to do this two or three times.
- Windows will then load a recovery screen.
- Alternatively, you can press F2, F8, or F12 (depending on what PC you are using) during boot. This will also bring up the Startup recovery screen.
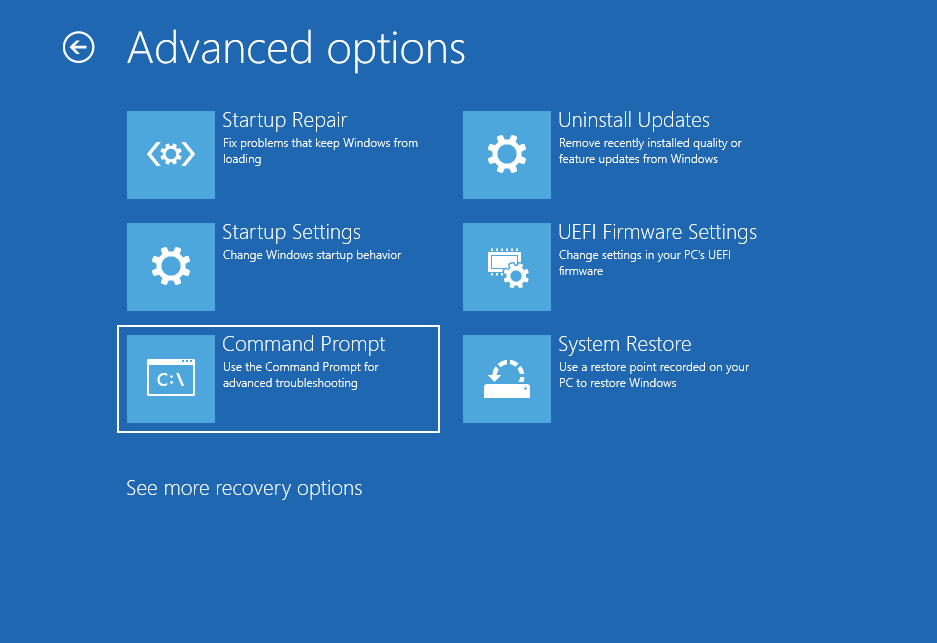
- Once on the Recovery screen, click Advanced options.

- Next, go to Troubleshoot and open Command Prompt.
- In the Command Prompt window, run the following commands:
bootrec /fixmbr
bootrec /fixboot
bootrec /rebuildbcd
Restart your PC and check if the issue has been resolved.
Also read: Windows Command Prompt: 28 Most Useful CMD Commands [with Examples]
Fix 6: Boot into Safe Mode
If you are still having the same issues, boot into Safe Mode and go try out all of the above solutions again:
- check for system errors on the disk
- run the CHKDSK Command and format the hard drive
- defragment your hard disk
- and use Windows PowerShell to repair disk errors
Once this is done, restart your PC. Your disk errors should now be solved.
Also read: Ultimate Guide: How to Check For and Fix Disk Errors with CHKDSK Command
Fix 7: Reinstall Windows
Finally, if none of the above solutions have worked, your next best bet is just to reinstall Windows.
To reinstall Windows without losing your files, follow the steps below:
- Go to Settings.
- Select System.
- On the right side, click Recovery.
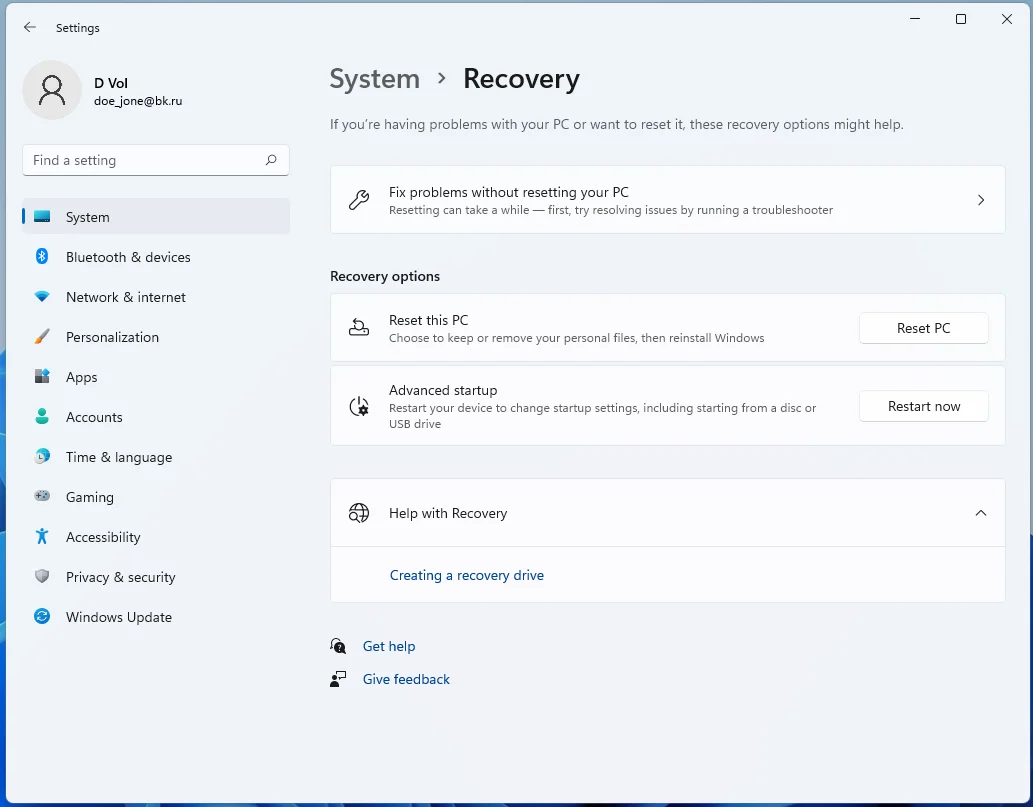
- Under Recovery options, press the Reset PC button to start Windows reinstallation.
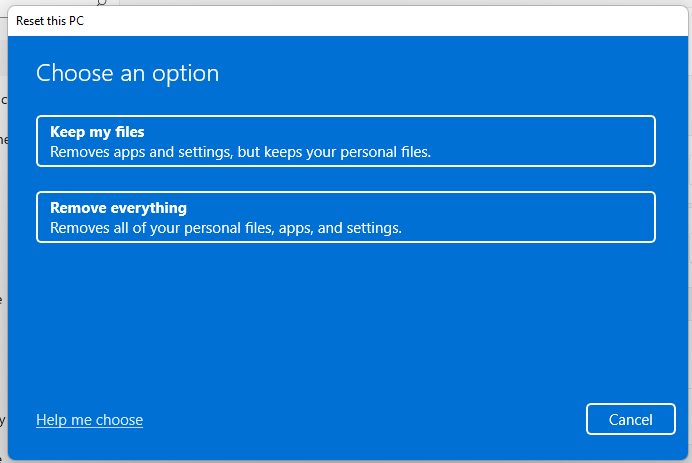
- Make sure to select the Keep My Files option.
- Next, select the Cloud download option (if you want to download Windows 11 to perform a fresh reinstallation) or the Local reinstall option (if you want to use local files to reinstall your operating system).
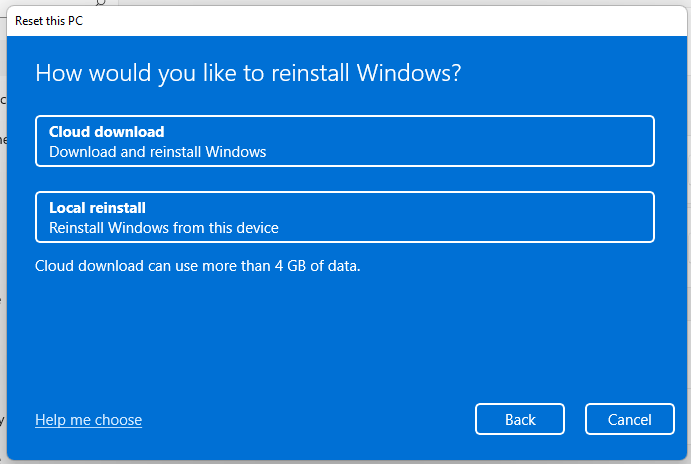
- Click Next and Reset.
Once you’ve completed these steps, your Windows will be reinstalled, and you will keep all your files. However, your settings will be reset, and your apps will be removed.
Extra Tip: Optimize Your PC with Auslogics BoostSpeed
We hope that the above solutions have been helpful and you’ve successfully gotten rid of bad sectors on your hard disk, restoring your system to its full capacity
In this regard, there is one more tool we’d like to recommend. If you often feel that your system is running too slow and is plagued by various glitches, you may be looking for an efficient way to optimize your PC.
We are here to suggest a tool that can do just that—it’s called Auslogics BoostSpeed.
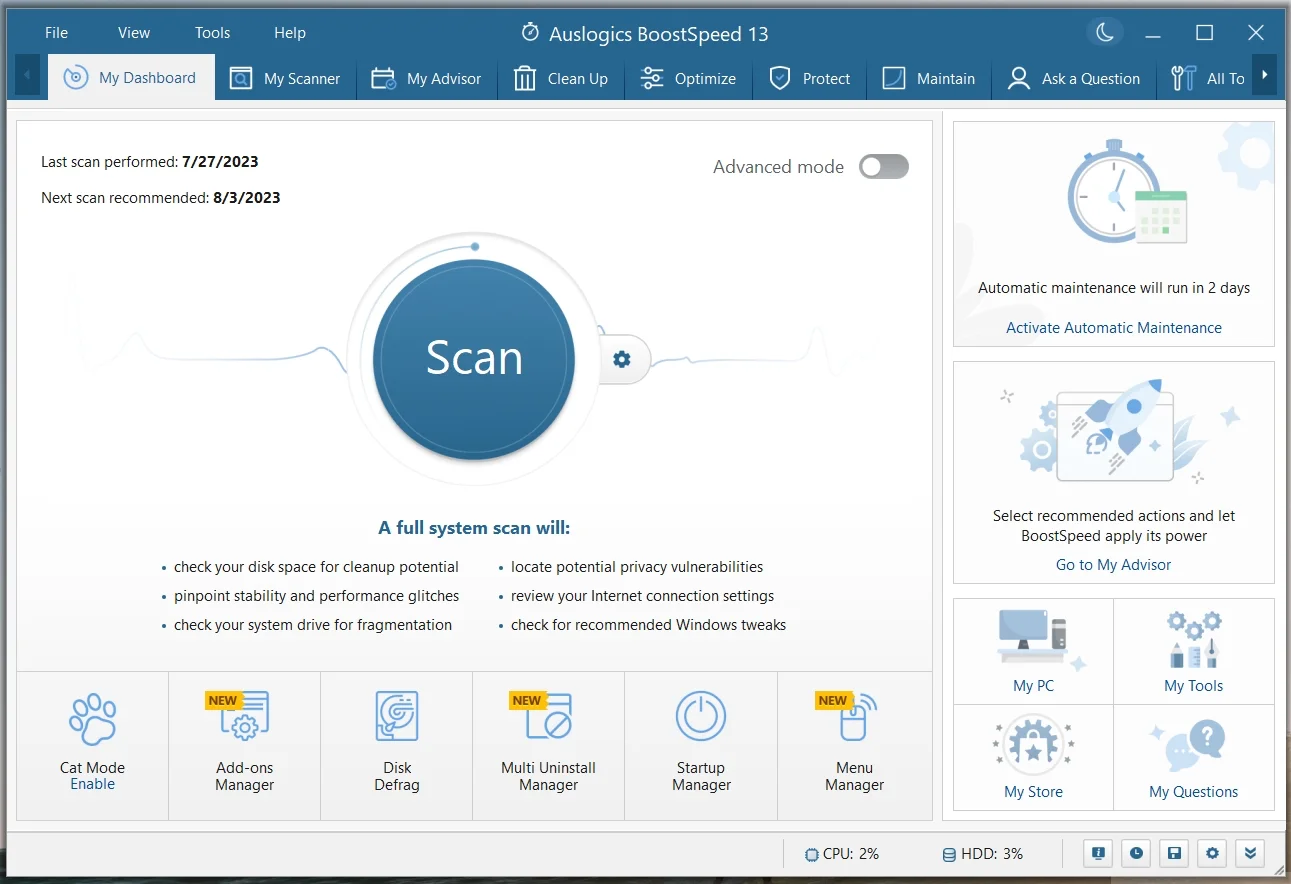
Auslogics BoostSpeed is a PC optimizer with over 10 years on the market and 15 million users.
The software has been designed to boost your system professionally and can help you eliminate a wide range of issues and errors.
Conclusion
Dealing with bad sectors on a hard drive is crucial to prevent data loss and maintain optimal system performance. Various methods, such as disk checks, CHKDSK commands, defragmentation, and troubleshooting, can help repair bad sectors. For an efficient and comprehensive solution, using Auslogics BoostSpeed can not only address bad sectors but also optimize your PC’s overall performance, making it a valuable tool for maintaining a smooth and secure system.
FAQ
Defragging (short for defragmenting) reorganizes data on a hard drive to improve efficiency and performance.
Over time, data fragmentation slows down access times, and defragging consolidates the data, making file access faster and enhancing the overall speed of the hard drive.
To check your hard drive health, you can use the following methods:
Built-in Windows Tools: Windows offers tools like “Check Disk” (chkdsk) and “Error Checking” to scan the hard drive for errors and bad sectors. Right-click on the drive in File Explorer, go to “Properties,” click the “Tools” tab, and select “Check” under “Error checking.”
Third-party Software: for example, Auslogics BoostSpeed. It not only checks hard drive health but also optimizes overall system performance, removes clutter, and frees up disk space for a smoother computing experience.
To fix a corrupted hard drive, follow these steps:
Backup Important Data: Prioritize backing up important data to avoid permanent loss in case the situation worsens.
Run Check Disk (chkdsk): Use the built-in “Check Disk” tool in Windows to scan and repair file system errors on the corrupted drive. Open Command Prompt as an administrator and type “chkdsk /f X:” (where X is the drive letter of the corrupted drive) and press Enter.
Use Data Recovery Software: If chkdsk doesn’t fully repair the corrupted drive, try using data recovery software to retrieve valuable data before resorting to more aggressive measures.
Reformat the Drive: In severe cases where other methods fail, reformatting the drive may be necessary. Remember that reformatting erases all data, so proceed only if you’ve already backed up your data.