![[FIXED] “Your Graphics Card Does Not Support DirectX 11 Features”](https://www.auslogics.com/en/articles/wp-content/uploads/2023/10/FIXED-‘Your-Graphics-Card-Does-Not-Support-DirectX-11-Features-568x359.png)
- What Causes the “Your Graphics Card Does Not Support DirectX 11 Features” Error?
- Does My Graphics Card Support DirectX 11?
- How to Fix the “Your Graphics Card Does Not Support DirectX 11 Features” Issue?
- Fix 1: Update your Windows
- Fix 2: Update your Game
- Fix 3: Repair Game Files
- Fix 4: Update your graphics card driver
- Fix 5: Force the game to run on your dedicated graphics card
- Fix 6: Using the settings app
- Fix 7: Using your graphics card’s application
- Fix 8: Install the DirectX graphics tools optional feature
- Conclusion
- FAQ
Many Windows games require DirectX to run optimally. It is a suite of software components within the operating system that developers rely on for video, multimedia, 3D graphics, and controller features.
That is why you see a DirectX version as part of almost every game’s minimum system requirements for graphics cards. During installation, the standard process for these games will be to check for DirectX support and install the related software applications.
You will see errors, such as “Your graphics card does not support DirectX 11 features,” if the game does not find the needed support for the minimum DirectX version.
In some cases, users who see this error believe their computers support even a higher version of DirectX. If you’re one such user, you have come to the right place.
This article answers questions such as “ Is my graphics card compatible with DirectX 11? ” We’ll also show you how to resolve the problem.
📌 Related: [FIXED] ‘DirectX Failed to Initialize. Please Install the Correct Drivers for Your Video Card’
What Causes the “Your Graphics Card Does Not Support DirectX 11 Features” Error?
While the error might suggest that your graphics card does not support DirectX 11, the card might not be the main culprit. That said, you have to strike out that possibility by checking whether your GPU supports the tech. Other factors may be at play if you have a DirectX 11 graphics card.
Your computer’s DirectX may be out of date, you may need to update your graphics card driver, and the game may be outdated or corrupt.
📌 Also read: How Do I Check My Graphics Card on Windows 10?
Does My Graphics Card Support DirectX 11?
You can go through the DirectX Diagnostics Tool to confirm. These steps will show you how:
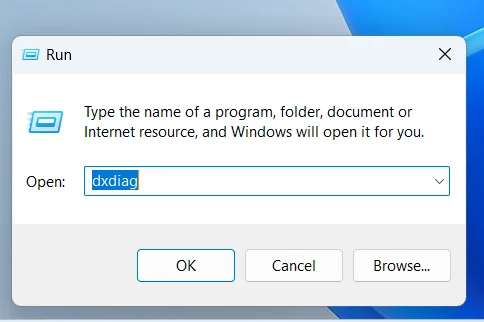
- Launch the Run dialog box by hitting the
Windows + Rhotkey. - After Run opens, type
dxdiaginto the text box and tap theEnterkeyboard button or click OK.
- Switch to the Display tab after the DirectX Diagnostics Tool window opens.
- Go to the Drivers box and check the Feature Levels list.
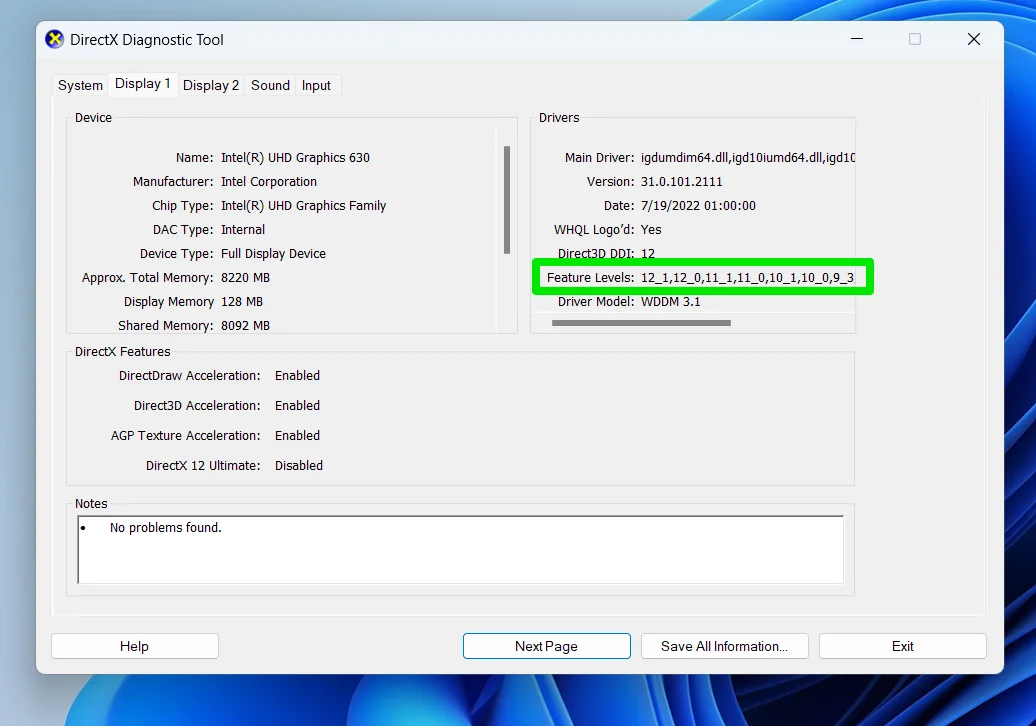
If “11” or above does not appear next to Feature Levels, your graphics card does not support DirectX 11. So, consider upgrading the component to run the game.
Continue reading if your card supports the DirectX version.
📌 Also read: How to Install a New Graphics Card in a PC?
How to Fix the “Your Graphics Card Does Not Support DirectX 11 Features” Issue?
If you’re sure that your card supports the feature, you can get rid of the error using the fixes that follow.
Fix 1: Update your Windows
There’s a chance that your current Windows installation and the DirectX version on your computer are triggering the problem. Updating these components can resolve the issue. You can do that by going to the Windows Update page and installing every available update for your computer. Follow these steps:
- Open the Start menu, click the Settings icon, and select Updates & Security. Click on the Check for Updates button on the next page.
- If you run Windows 11, click Windows Update in the top-right corner once the Settings window appears.
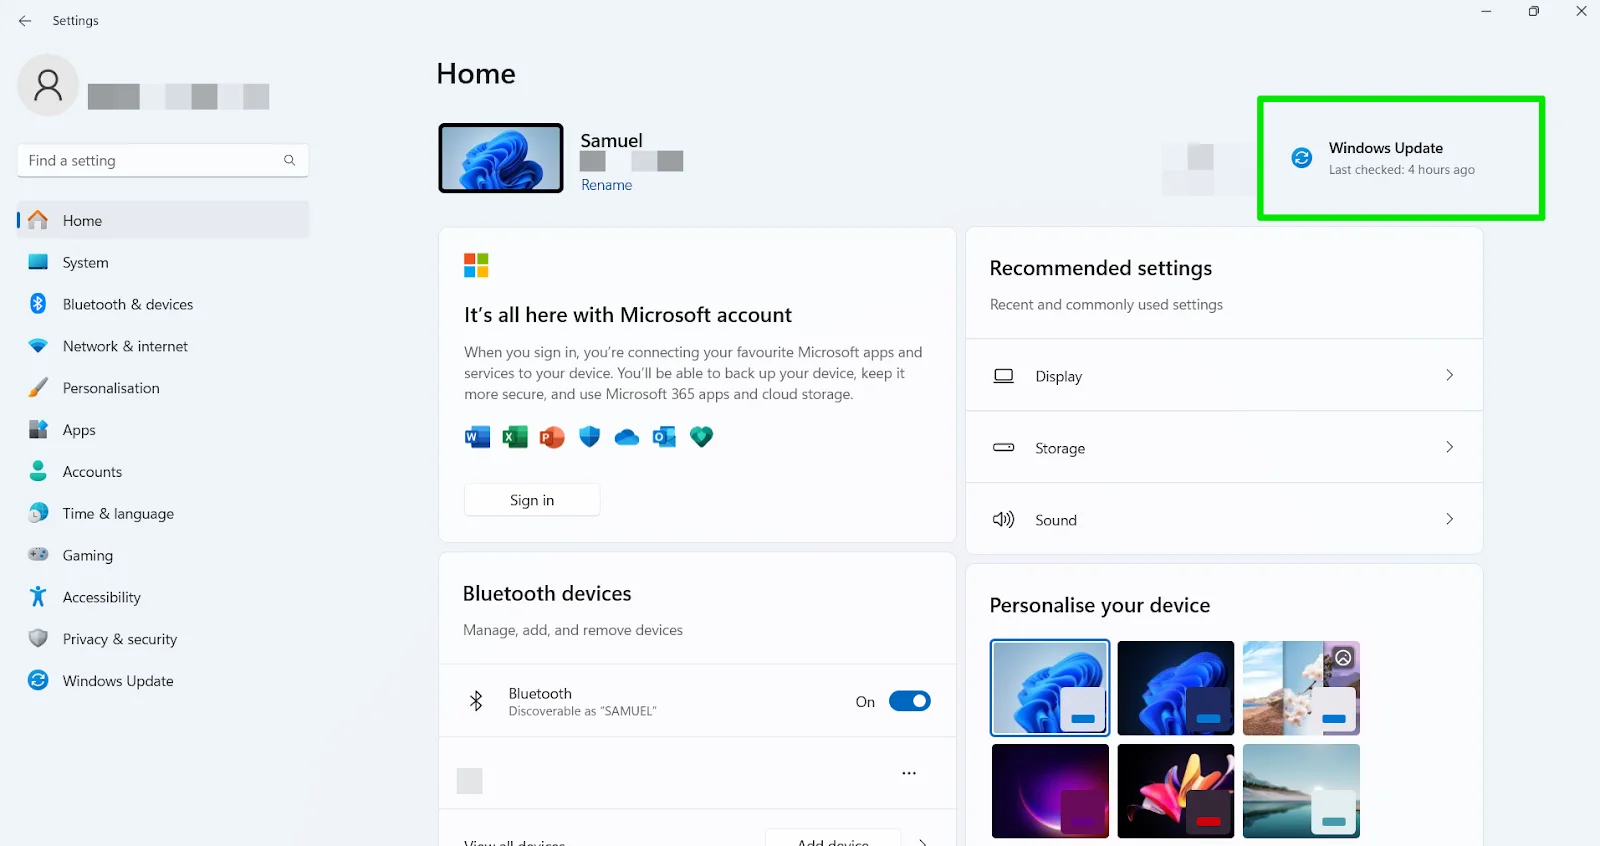
- Allow the operating system to download and install the updates. Restart your computer to complete the process, then check if the problem persists.
📌 Also read: Ultimate Guide: How to Manually Check and Install Windows Updates
Fix 2: Update your Game
If the problem happens in a game you already play regularly, you may have to update it. Sometimes, game developers release hotfixes and patches through updates to resolve issues.
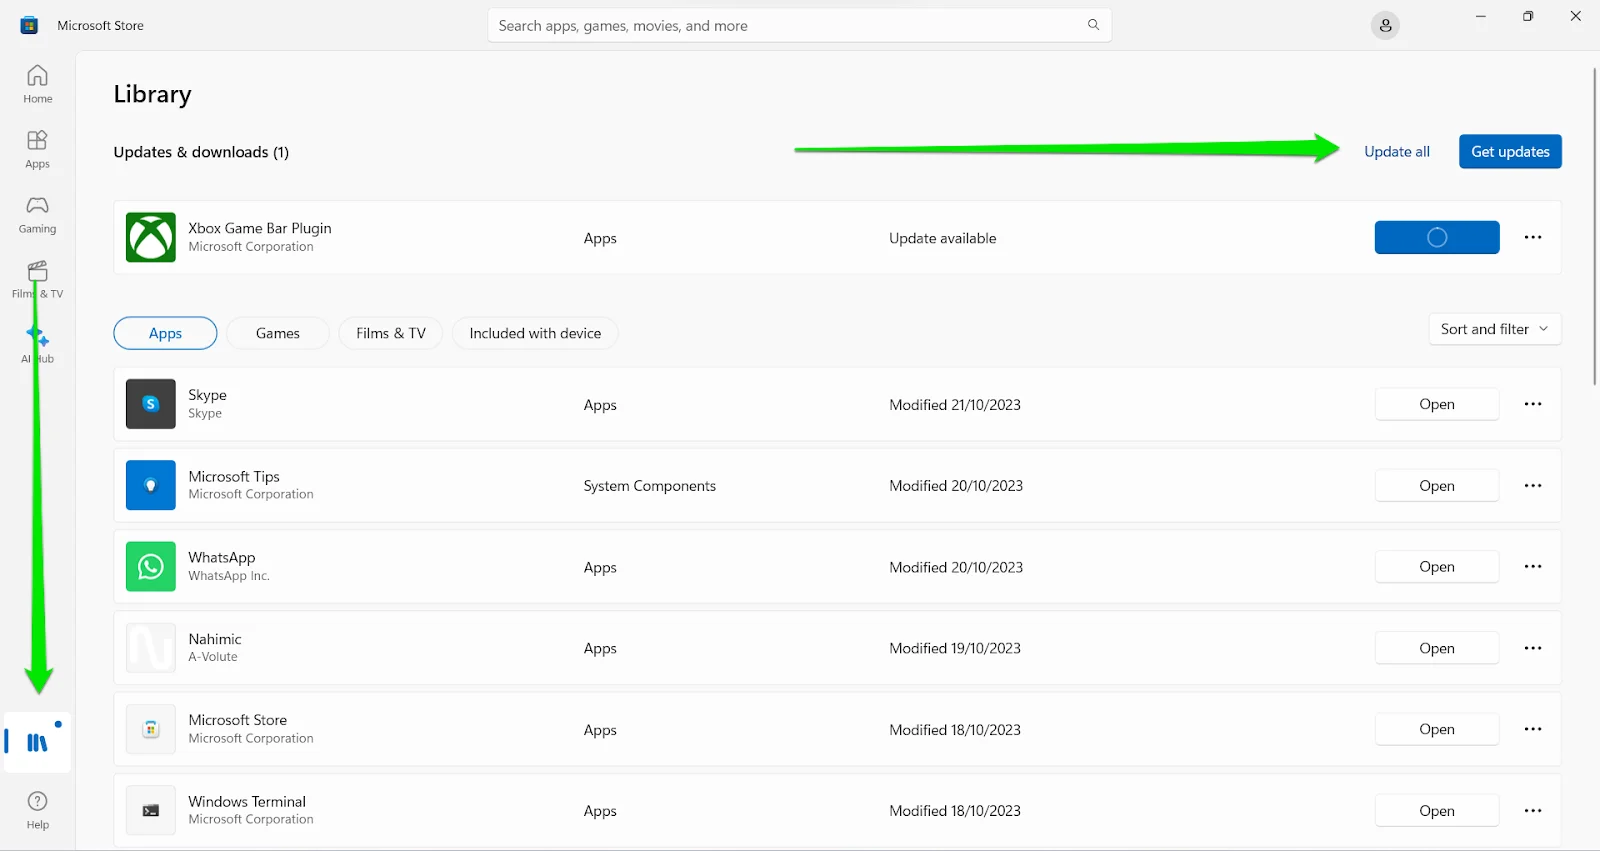
Updating a game is easy, and the process typically depends on how you installed it. If you installed the game through the Microsoft Store, you can launch the Store, click Library, and click the Get updates button.
You can also go through your game’s launcher to update it.
Fix 3: Repair Game Files
Corrupt and missing game files can also cause the problem. You can use your launcher, such as Steam, to repair your game’s files.
The launcher will scan the game’s installation files and replace missing or corrupt ones.
If you installed the game through the Microsoft Store, you can use this method:
- Right-click the Start button and launch the Settings app.
- Go to Apps. If you’re on Windows 11, click Installed apps after that.
- Now, use the search bar to find the game.
- If you’re running Windows 10, click the game and select Advanced options. If you’re running Windows 11, click the three dots to the game’s right and choose Advanced options.
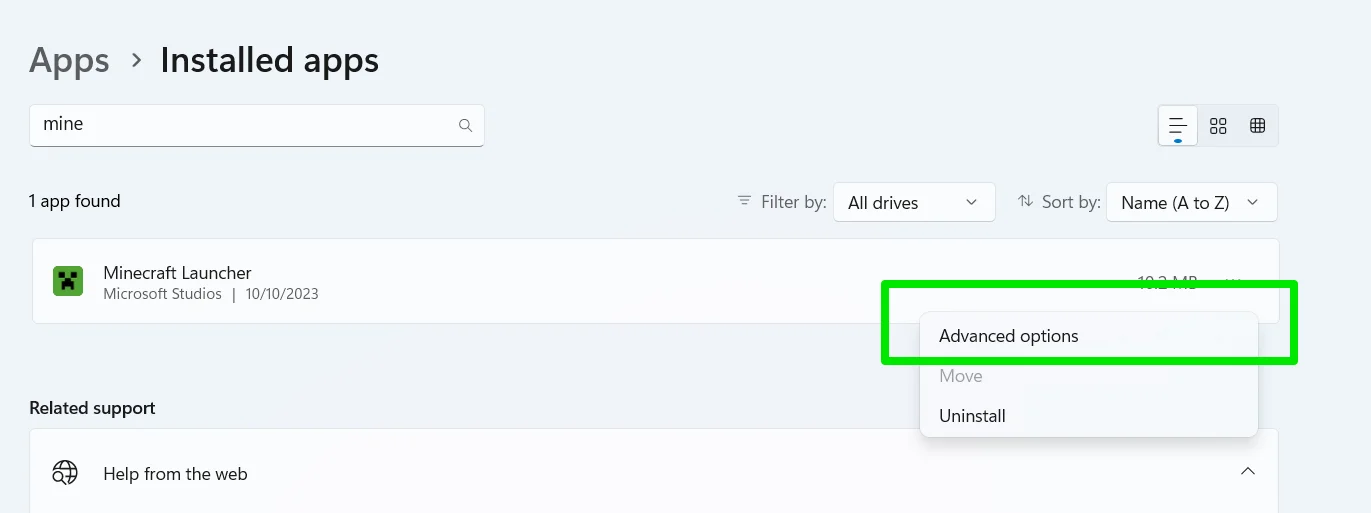
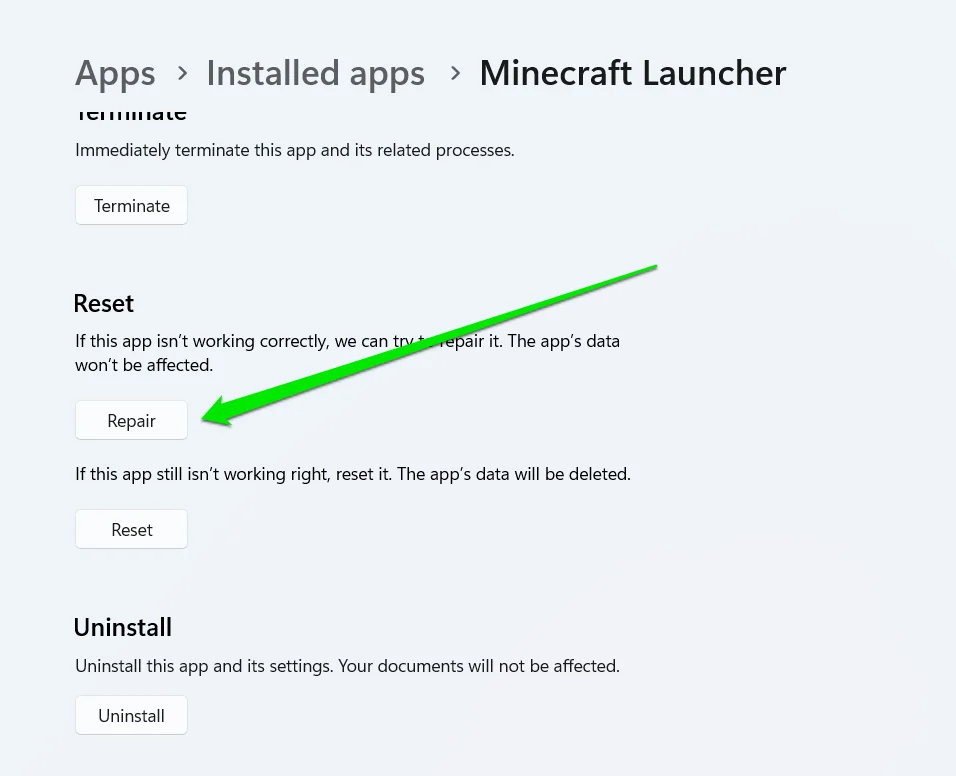
- Scroll to the Reset section and click the Repair button.
📌 Also read: How to Find and Fix Corrupted Files in Windows 10?
Fix 4: Update your graphics card driver
A faulty graphics card driver can trigger the error. You should reinstall and update your driver to check if that will resolve the error.
Reinstalling the software application is easy. Follow these steps:
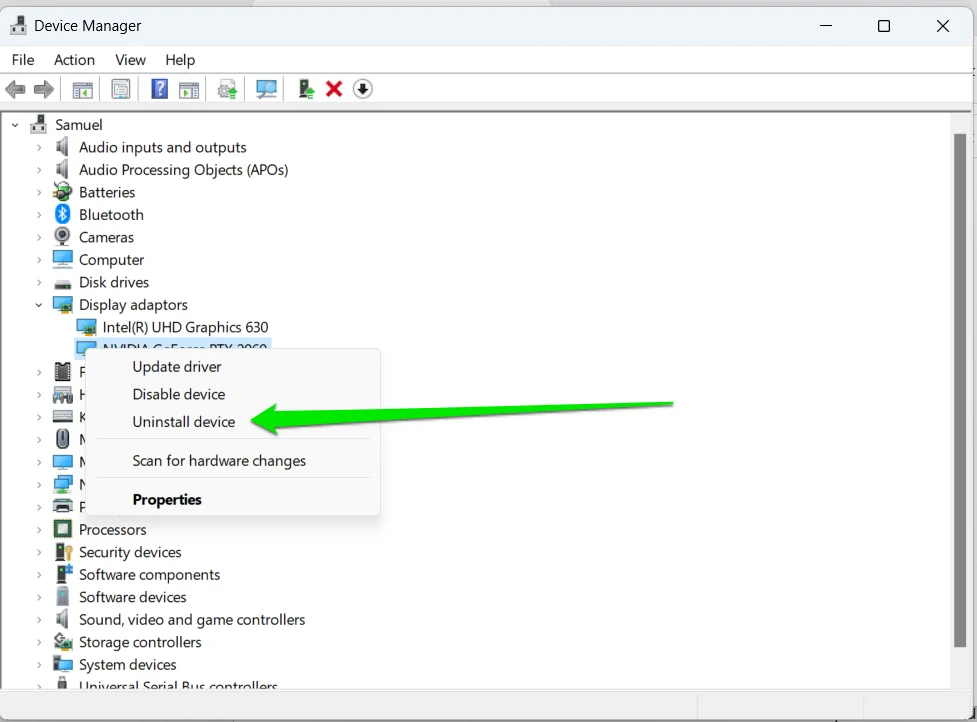
- Right-click the Start button in the Taskbar and select Device Manager.
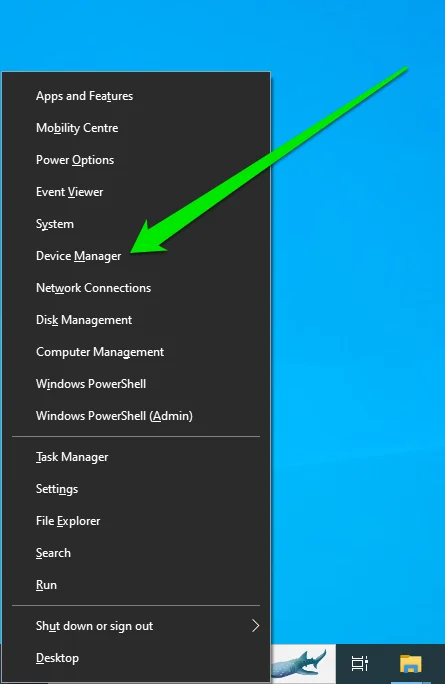
- Go to the Display adapters section and right-click your graphics card.
- Now, select Uninstall device and click Uninstall in the confirmation prompt.
- Restart your computer.
Windows will now automatically reinstall the GPU driver. You can now go to the device manufacturer’s website to download and install the driver. If you use dedicated GPUs, you can use their software applications to fetch their latest drivers. Our guide on updating device drivers will show you ways to download and install the correct drivers for your card.
📌 Also read: Step-by-Step Guide: How to Update AMD Drivers
Another way to automatically update your graphics card driver is using Auslogics Driver Updater. The tool is designed to scan for problematic drivers, whether outdated or corrupt and install their official updates. It works for every device on your computer, not just your graphics card.
📌 Also read: How to Check if My Drivers Are Up to Date on Windows 10 PC?
Fix 5: Force the game to run on your dedicated graphics card
The “Your graphics card does not support DirectXx 11 features” issue is more frustrating for users with dedicated graphics cards supporting DirectX 11 and above. If you’re one such user, the game is likely reporting the error because it runs on your integrated graphics card that lacks DirectX 11 support. Usually, Windows should run heavy applications, such as games and video editors, on your discrete graphics card. However, it may be failing to do so for some reason. You can easily resolve this issue by manually forcing the game to run on the dedicated graphics card. You can apply this fix using the Settings app or the software application for your dedicated graphics card.
Windows 10/11 (8, 7, Vista, XP)
Fix 6: Using the settings app
There are different ways to use the Settings application, depending on your Windows version.
Follow these steps if you run Windows 10:
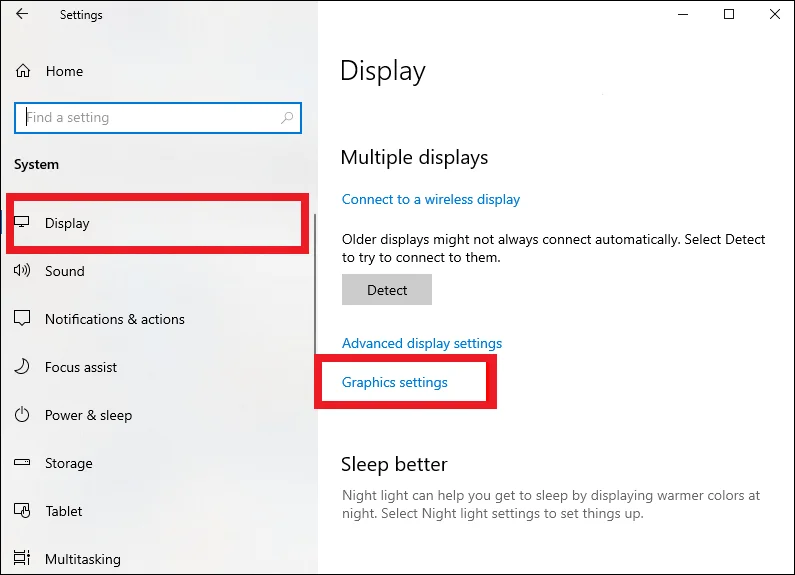
- Right-click your desktop and select Display settings.
- Once the Display settings window shows up, click Graphics settings.
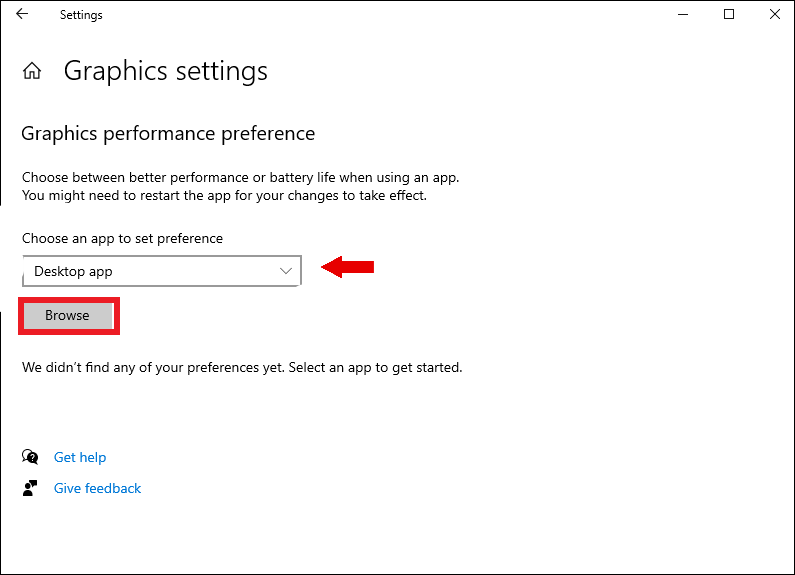
- Go to the Choose an app to set preference option and select Desktop app.
- Click the Browse button and use the mini File Explorer to locate and double-click your game’s executable file.
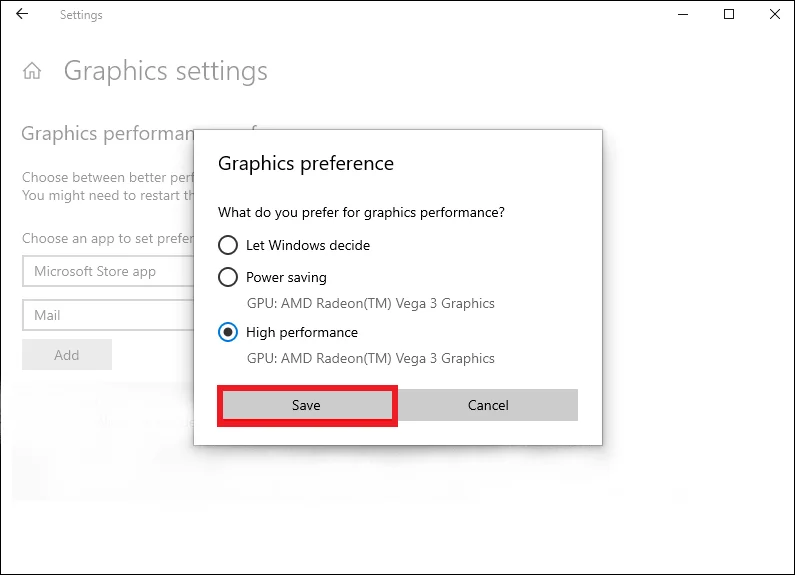
- After the game’s icon shows up, click it and select Options.
- Select High performance to force it to run on the discrete graphics card and click the Save button.
Follow these steps if you run Windows 11:
- Right-click your desktop and click Display settings.
- After the System > Display window appears, scroll down to Related settings and click Graphics.
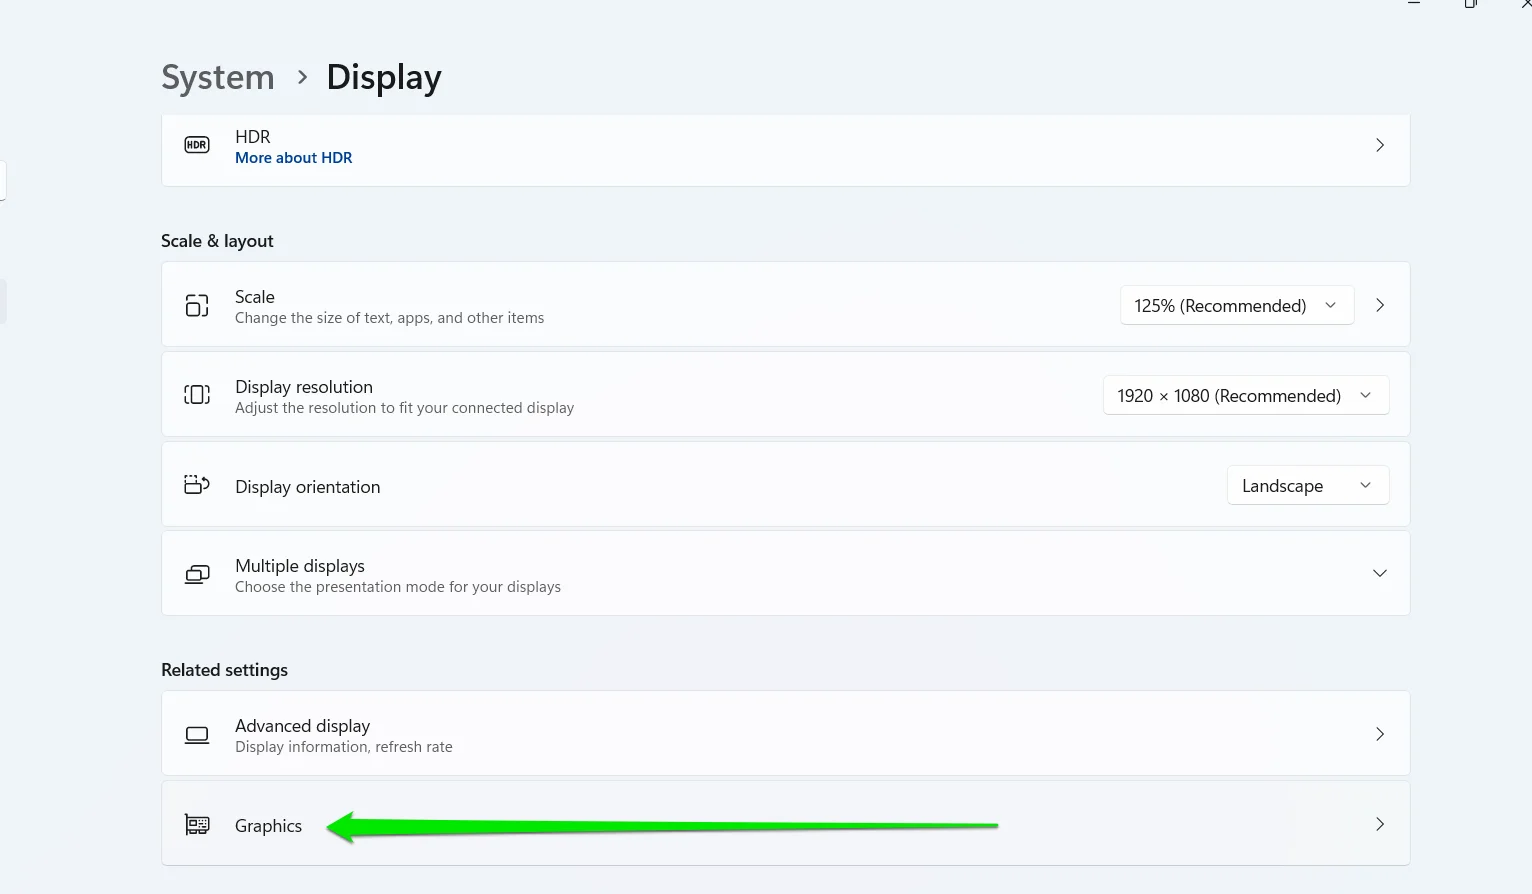
- Next, go to the Custom options for apps section after the System > Display > Graphics screen opens, and click your game. Use the search bar to find the application if you do not want to scroll through the list.
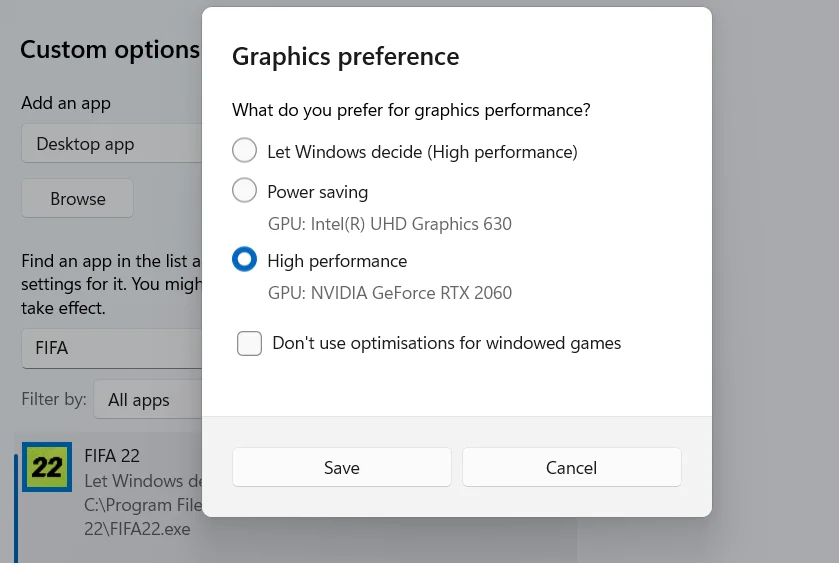
- Select Options after clicking the game’s icon.
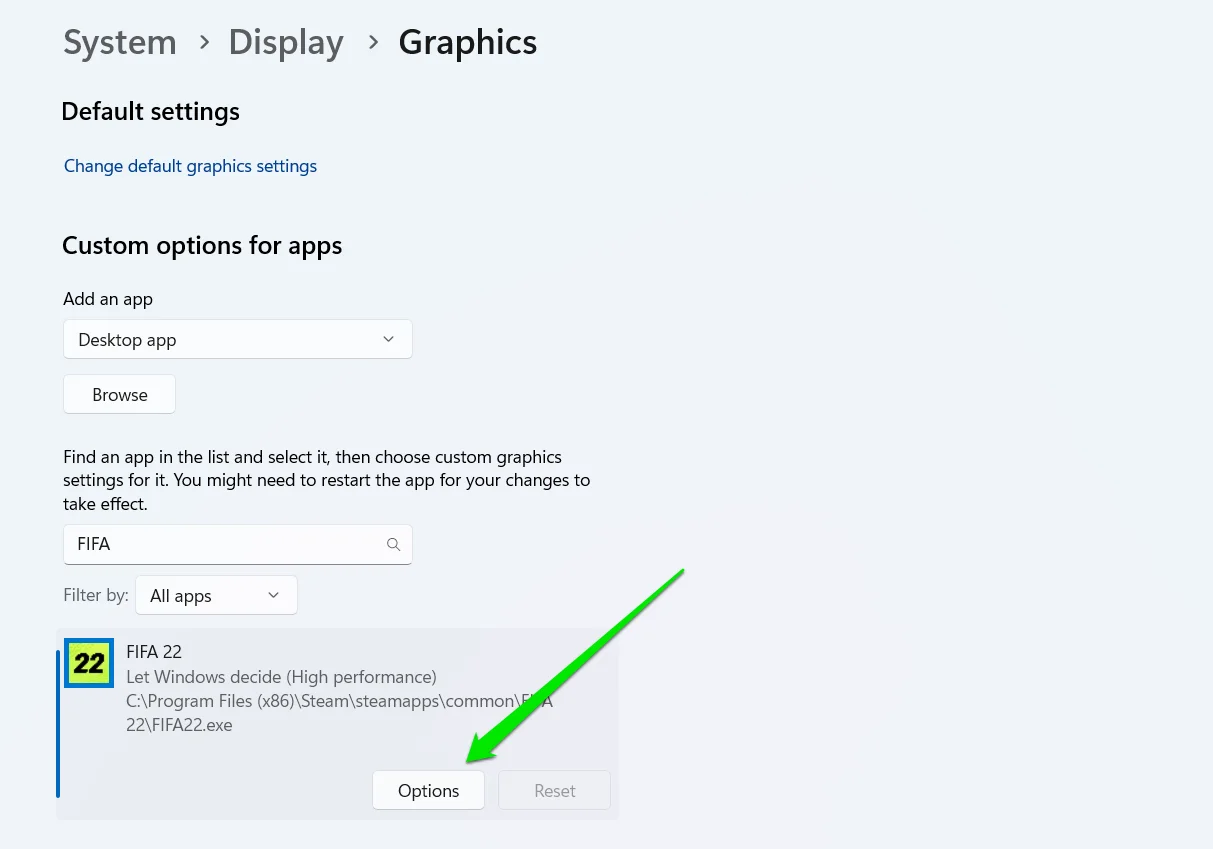
- Now, select the High performance option and click Save.
Fix 7: Using your graphics card’s application
If you’re using an AMD GPU, use AMD’s Radeon Settings application, and if your computer is fitted with an NVIDIA card, you can use the NVIDIA Control Panel.
Follow these steps if you have an AMD dedicated graphics card:
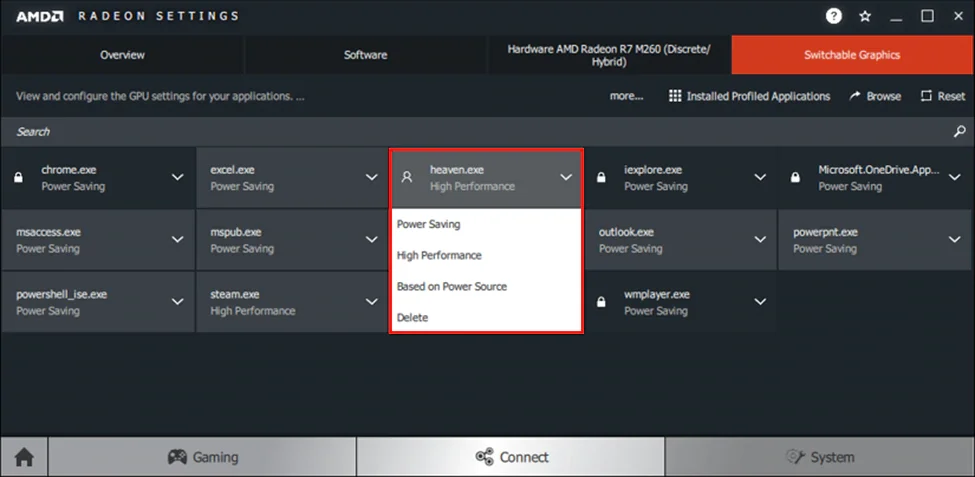
- Right-click your desktop and select Radeon Settings from the context menu.
- After the application shows up, go to the top-right corner and select System.
- Click Switchable Graphics.
- Now, go to the application or use the search bar to find it and click the arrow beside it.
- Select High Performance to force the game to run on the AMD card.
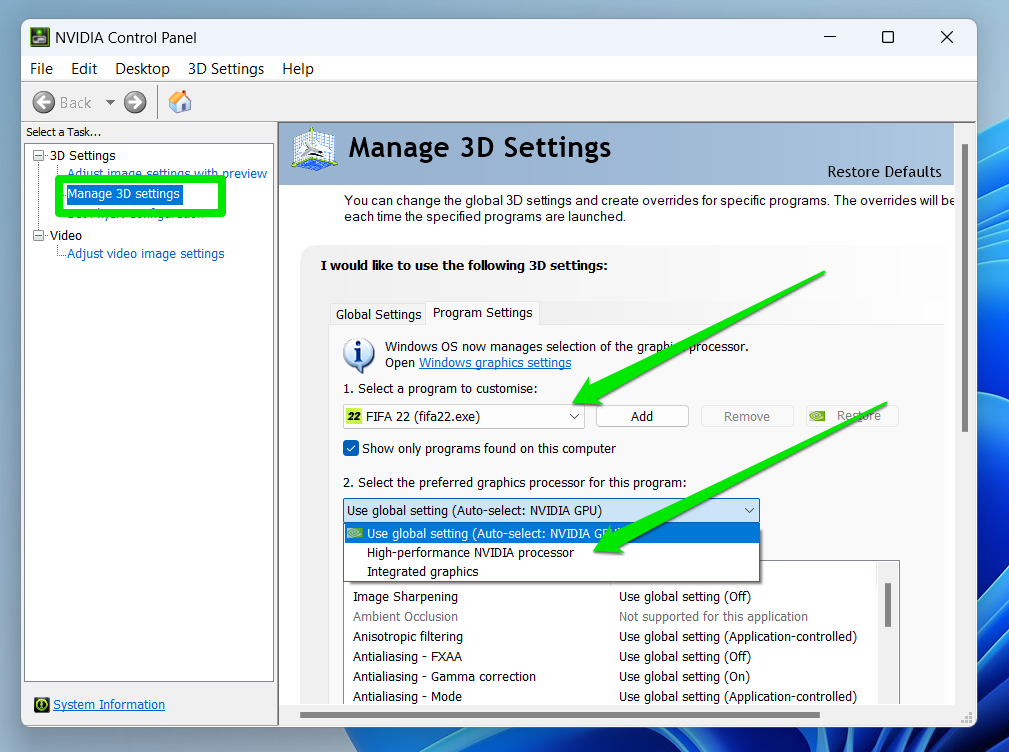
Follow these steps to use NVIDIA Control Panel:
- Right-click your desktop and select NVIDIA Control Panel. If you use Windows 11, you may have to click Show more options in the context menu before selecting NVIDIA Control Panel.
- Go to the left navigation pane and select Manage 3D settings under 3D Settings.
- Next, go to the right side of the screen and switch to the Program Settings tab.
- Go to the Select a program to customize and choose the game.
- Select High-performance NVIDIA processor from the Select the preferred graphics card processor for this program.
- Click the Apply button.
📌 Further reading: Windows PC Guide: How to Set GPU as Primary for Apps and Games?
Fix 8: Install the DirectX graphics tools optional feature
The DirectX Graphics Tools program is one of the Windows optional features that users can install and remove whenever they choose. Developers mainly use the program to monitor DirectX apps performance in real-time and debug DirectX graphics rendering issues.
That said, it may help resolve the “Your graphics card does not support DirectX 11 features” error. We’ll show you how to install it on Windows 10 and 11.
Follow these steps if you run Windows 10:
- Launch the Settings application and click Apps.
- Go to Apps & features and select Optional features.
- Click the Add a feature option.
- Now, check the box next to Graphics Tools and click Install. You can use the search box if you don’t see the entry immediately.
- Follow the instructions to complete the installation.
Follow these steps if you run Windows 11:
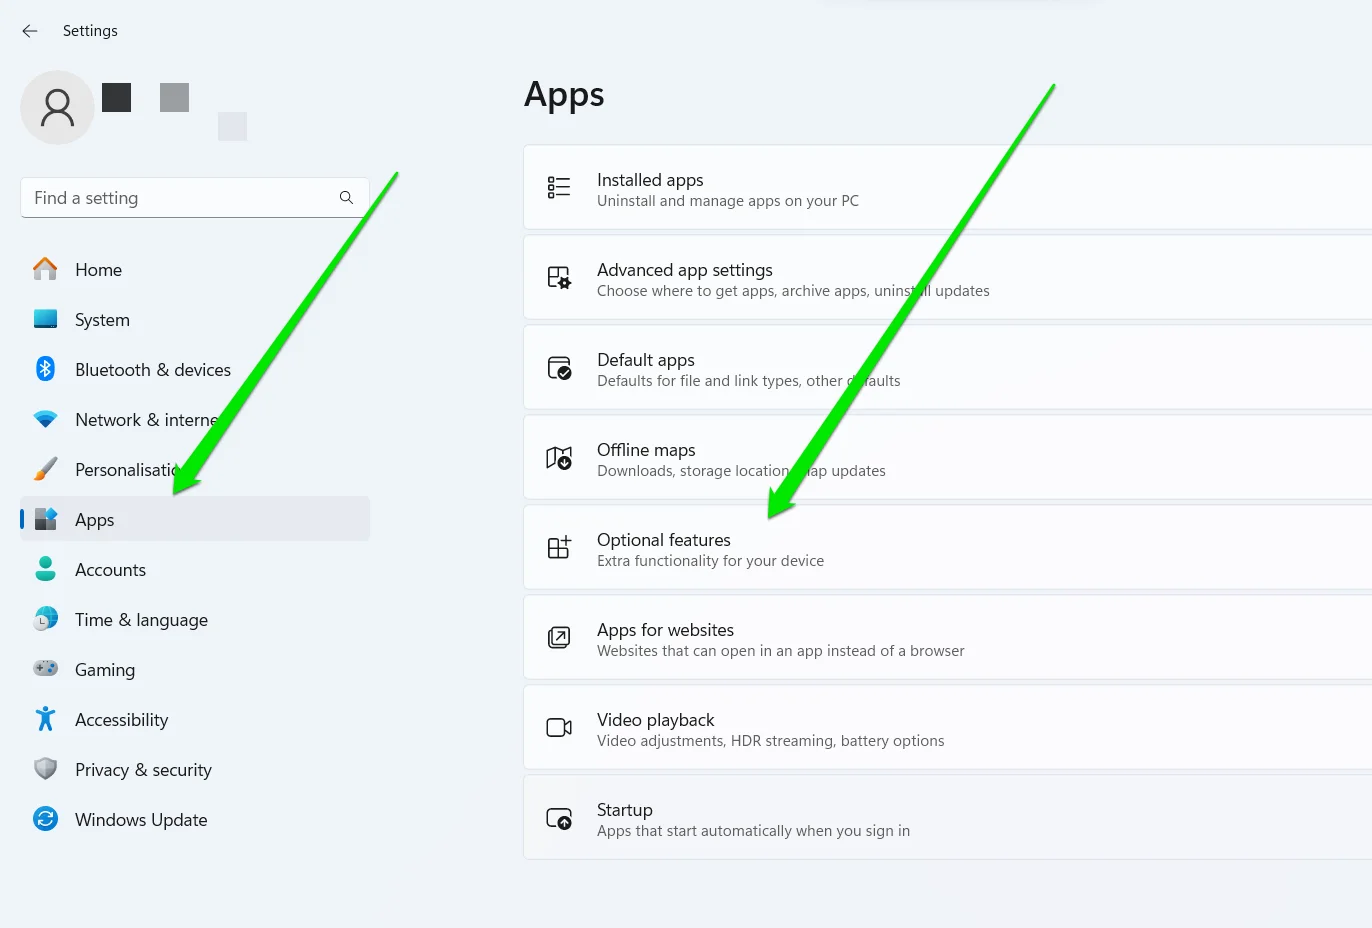
- Open the Settings application and select Apps on the left side of the window.
- Go to the right side and select Optional features.
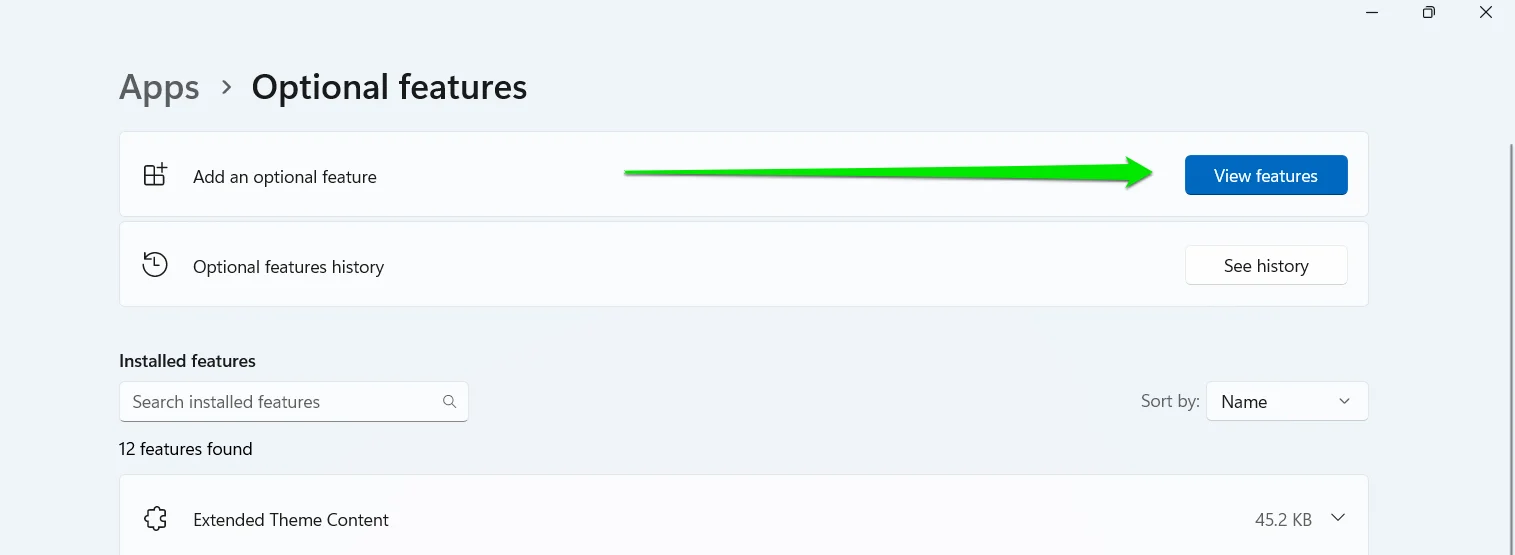
- Click View features next to Add an optional feature.
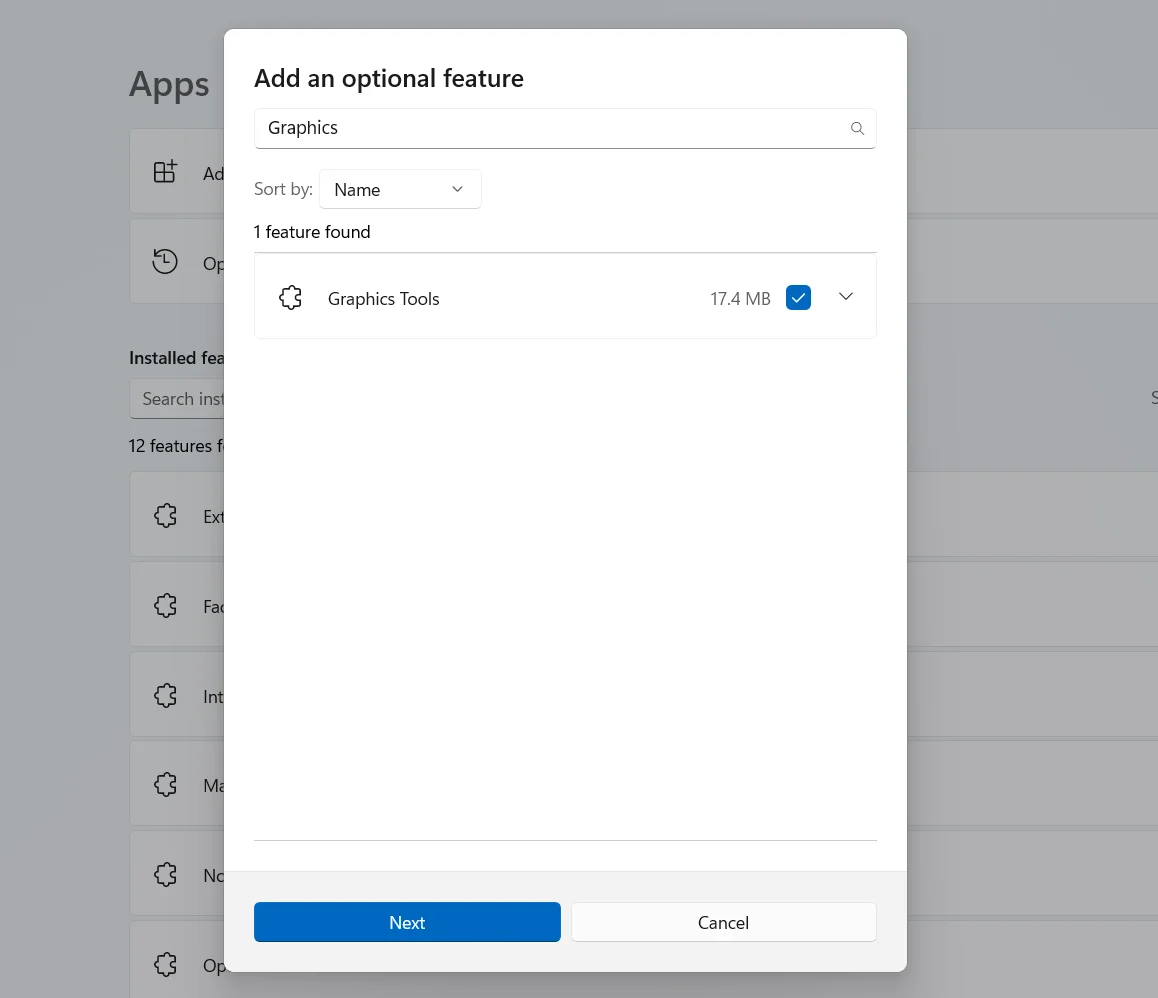
- Now, use the search bar to find Graphics Tools, select it, and click Next.
Windows 10/11 (8, 7, Vista, XP)
Conclusion
The “Your graphics card does not support DirectX 11 features” problem is quite easy to resolve if your graphics card supports the latest version of DirectX.
You can save yourself the headache of asking yourself, “Can my graphics card run DirectX 11?” in the future by keeping your drivers, games, and operating system up to date.
FAQ
You can tell if your graphics card supports DirectX 11 by going to the Display tab of the DirectX Diagnostic Tools window and looking at the Feature Levels in the Drivers box.
If you have more than one GPU, make sure you check their tabs.
You can download and install your graphics card drivers manually by going to the device’s manufacturer’s website and fetching the updated driver.
That said, using automatic tools like Auslogics Driver Updater saves you the stress of continually checking for new updates.
That said, using automatic tools like Auslogics Driver Updater saves you the stress of continually checking for new updates.
However, you can check to confirm if another app is the culprit by shutting down the currently running apps and performing a Clean Boot.