![[FIXED] Video Driver Crashed and Was Reset](https://www.auslogics.com/en/articles/wp-content/uploads/2023/10/FIXED-Video-Driver-Crashed-and-Was-Reset--568x359.jpg)
- What Does It Mean If an Intel Or AMD Video Driver Crashed And Was Reset?
- What Other Factors Can Cause the Video Driver Crash And Reset Problem?
- How to Fix the “Video Driver Crashed And Was Reset” Issue With an AMD Or Intel GPU
- Fix 1: Reinstall the display drivers
- Fix 2: Update the video card driver
- Fix 3: Update the video driver automatically
- Fix 4: Tweak some system settings
- Fix 5: Adjust the GPU processing time
- Fix 6: Change the game’s launch options
- Fix 7: Change the visual effects
- Fix 8: Use the video playback troubleshooter
- Conclusion
- FAQ
System crashes are among the most common causes of a poor gaming experience. If you are an avid gamer, “Video driver crashed and was reset ” is one error you will face at some point.
This article will guide you on how to fix the “ Video driver crashed and was reset ” issue, focusing on situations where an AMD or Intel GPU is used.
What Does It Mean If an Intel Or AMD Video Driver Crashed And Was Reset?
In full, the exact error message reads as follows: “Video driver crashed and was reset! Make sure your video drivers are up to date. Exiting…”
That means the Intel or AMD graphics driver was having issues at the time the problem occurred.
Below are the most common scenarios that could prompt the crashed video driver message on your PC:
- Viewing heavy video files with the in-built Media Player in the middle of playing a resource-intensive game like Fortnite or ARK on Steam.
- Playing flash videos on the web.
Also read: How Do I Check My Graphics Card on Windows 10?
What Other Factors Can Cause the Video Driver Crash And Reset Problem?
Aside from faulty display drivers, some users point to the following as potential sources of the problem:
- Occasional system failure: If the error appears once in a while, then it is just a random system glitch. Reboot the PC and continue with your activities.
- CPU overloading: High CPU usage can cause several software drivers to fail. Excessive heating and the overall slow response time of your programs are usually the symptoms. In such cases, stop all the resource-intensive applications eating into the system’s memory.
- An overstrained integrated GPU: Having an integrated GPU in place of a dedicated one while playing 4K games can also cause the issue. Therefore, check if your integrated GPU can adapt to graphically demanding apps. Otherwise, consider buying a dedicated GPU instead.
- Inappropriate launch options: The wrong launch option can make a game start with incompatible video settings, thus prompting the display driver crash error message. We will show you how to configure the launch options on third-party gaming platforms like Steam.
- GPU processing time issues: Your GPU’s slow processing time might cause the issue even if it meets the game’s graphic requirements. This article will show you how to use the Registry Editor to adjust the processing time of your GPU.
Also read: How to Set GPU as Primary for Apps and Games?
How to Fix the “Video Driver Crashed And Was Reset” Issue With an AMD Or Intel GPU
Fix 1: Reinstall the display drivers
The previous installation of the display drivers might have gone wrong. Therefore, reinstalling them might resolve the video driver crash problem. Follow the instructions below:
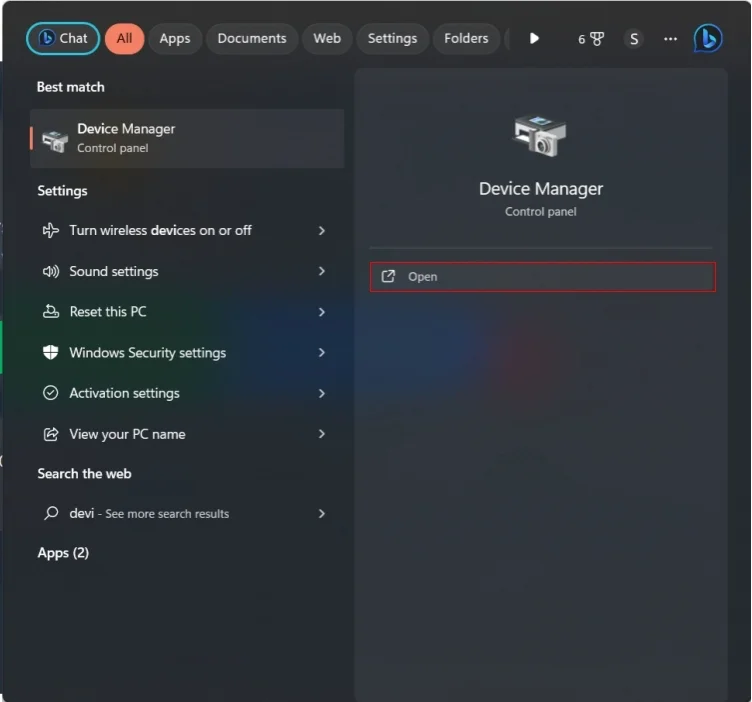
- First, press the
Windows key + Sshortcut. - Then, type Device Manager into the search bar and select the matching option from the results.
- Next, expand the Display adapters category and select your graphics device.
- After that, right-click on it and select the Uninstall device option.
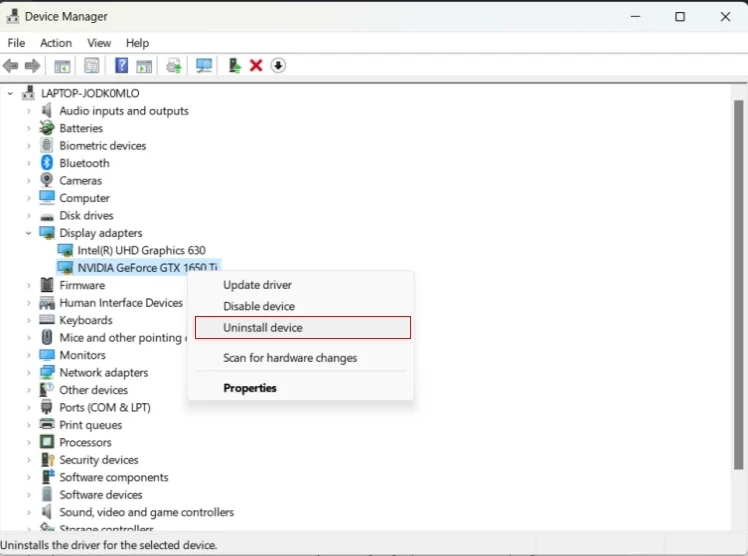
- Then, follow the on-screen instructions in the Uninstall wizard.
- Reboot the PC after the uninstall process is complete.
- Go to the Device Manager and click on Action > Scan for hardware changes.
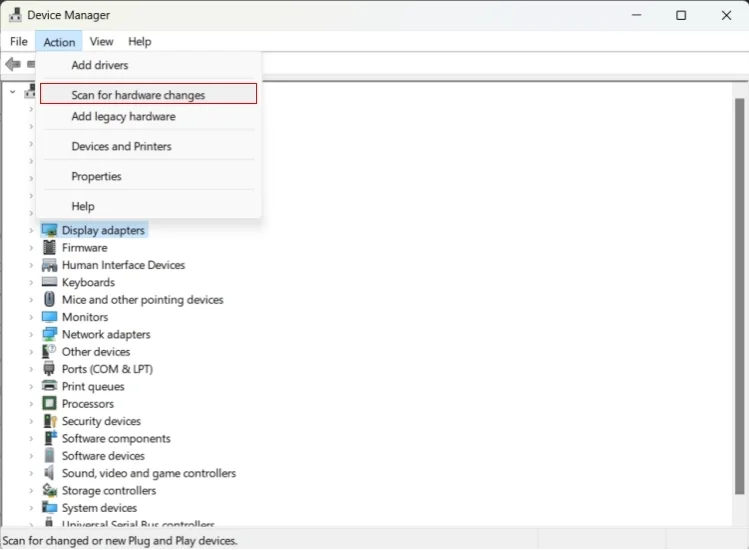
- The PC will automatically detect and replace the missing software drivers.
Try running a graphics-intensive program to see if the fix worked. If it didn’t, then you will need to download the updated version of the graphics driver. See details in the next method.
Fix 2: Update the video card driver
Updating your video card driver is a very effective way to resolve graphics-related issues. An out-of-date display driver creates issues, such as the “Video driver crashed and was reset” error, on your device.
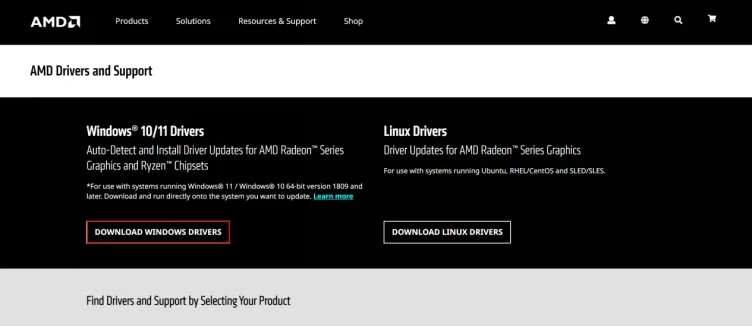
To update the graphics driver, head to the manufacturer’s website ( Intel or AMD) and download the appropriate version for your PC.
Similarly, for those looking to enhance their video editing capabilities, a video background remover can be a valuable tool, offering seamless integration and ease of use for various multimedia projects.
You can also do it directly from the Device Manager window. Here is how:
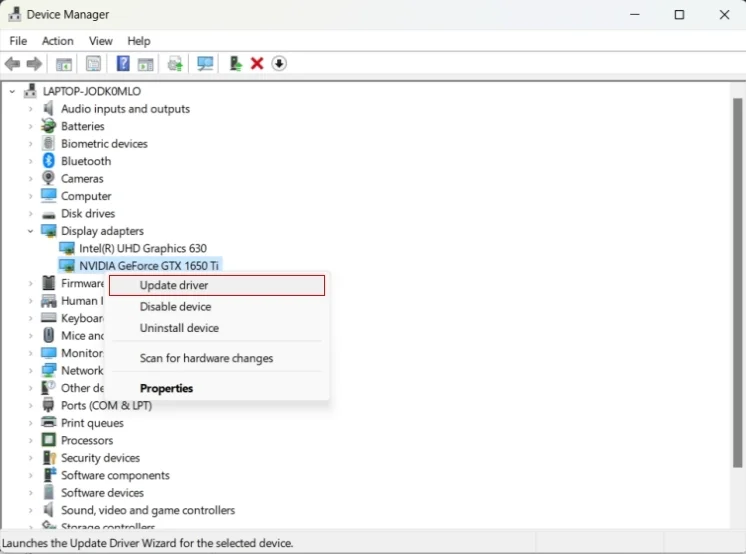
- In the Device Manager window, go to the Display adapters section.
- Then, right-click on your graphics device and click on the Update driver option.
- In the next window, you will see the option Search automatically for drivers. Click on it.
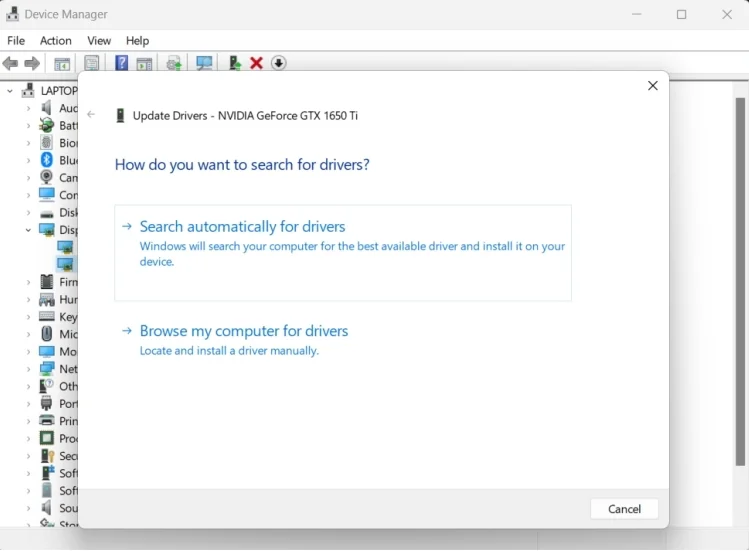
- Next, follow the instructions on the screen to complete the process.
- After updating all the drivers, reboot the computer and check to see if the fix worked.
Also read: Step-by-Step Guide: How to Update AMD Drivers
Fix 3: Update the video driver automatically
Updating your video driver is crucial to prevent the dreaded ” video driver crashed ” error. While manual updates can be time-consuming and may risk installing incompatible drivers, using a reliable tool like Auslogics Driver Updater streamlines the process.
This tool scans your system, identifies outdated drivers, and ensures that you have the most compatible and up-to-date drivers to avoid future ” video driver crashed ” issues.
Here’s a guide to get started with Auslogics Driver Updater:
- Begin by downloading and installing Auslogics Driver Updater.
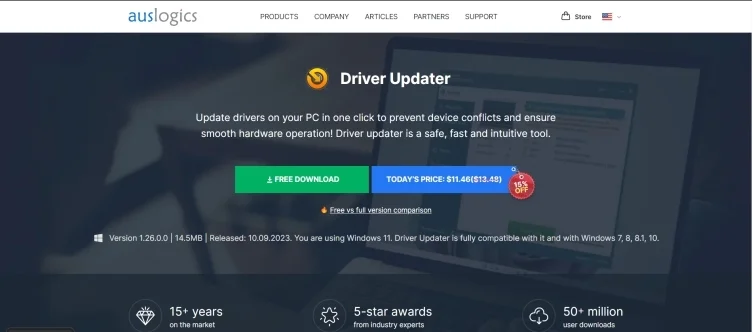
- After installation, open the application to begin.
- The app will automatically scan for outdated or missing drivers and identify those that require updates.
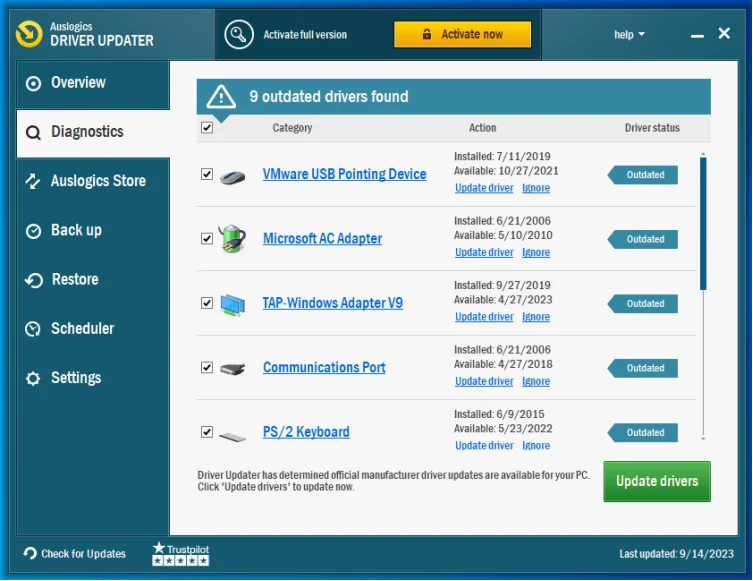
- You can update each driver separately by clicking the Update driver button next to the driver or streamline the process by clicking the green Update drivers button on the bottom right side of the screen to update all at once, if you are a lucky owner of the full version.
- Finally, complete the process by rebooting your PC. Experience enhanced performance with peace of mind.
Auslogics Driver Updater backs up your drivers automatically before updating them, ensuring that your system remains secure. Should you ever suspect that your drivers need updating, simply press the Start scan button, and the program will search for any new updates. Then, after all the driver updates have been installed, you will not be troubled again with the Video driver crashed and was reset error prompt.
Fix 4: Tweak some system settings
Active background processes might be overloading the GPU. To derive the best experience, now that your drivers are updated, do the following:
- Close every unnecessary browser tab on your PC.
- Stop RAM-clogging background activities.
- Disable startup programs that you don’t need.
For an additional performance boost and to prevent the ” video driver crashed and was reset ” error, consider using Auslogics BoostSpeed.
This powerful tool offers a wide range of optimization options to clean up your system, improve system responsiveness, and ensure smooth gaming experiences.
By addressing issues such as system clutter and inefficient system settings, Auslogics BoostSpeed can be a valuable companion in maintaining a high-performing PC.
📌 Also read: Speed Up Slow Computer as a Pro – Introducing Auslogics BoostSpeed 13
Fix 5: Adjust the GPU processing time
While updating your display drivers helps fix issues, having a lasting impact depends on your GPU configuration. However, it takes a registry operation to tweak the GPU processing speed.
And here is how you can make your GPU work faster:
- First, press the
Windows key + Rbutton simultaneously to invoke the Run dialog box. - Copy and paste
regeditinto the text entry field and hit Enter to open the Registry Editor:
- In the Editor’s window, go to the GraphicsDrivers folder using the following path:
HKEY_LOCAL_MACHINE\SYSTEM\CurrentControlSet\Control\GraphicsDrivers
- On the right pane of the GraphicsDrivers folder, right-click anywhere on the blank space.
- Then, from the pop-up menu, expand the New drop-down list and select the DWORD (32-bit) Value option.
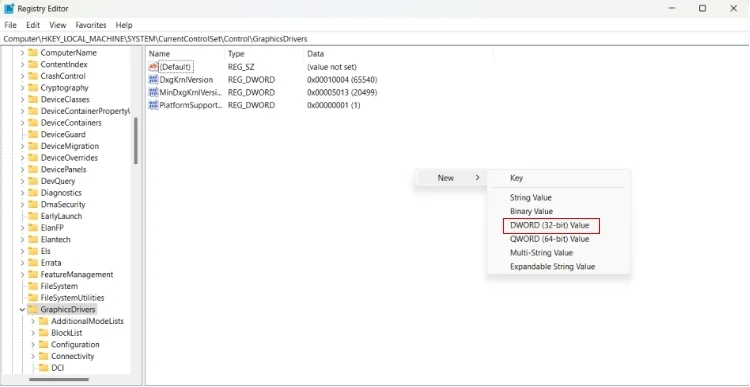
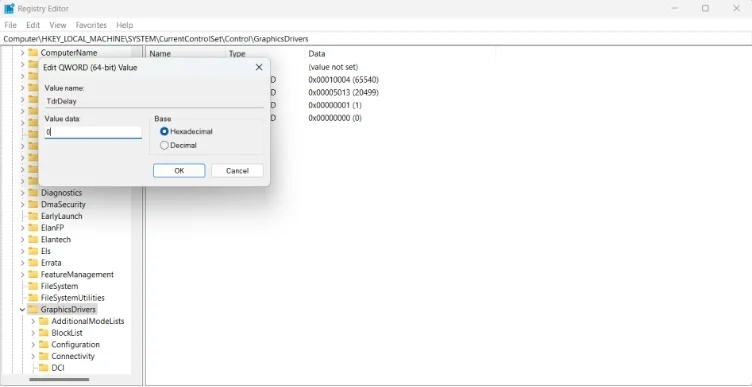
- For the new DWORD key, use TdrDelay as its name.
- Now, double-click on the key and edit the Value data from 2 to 8.
- Click OK to apply the change, and exit the Registry Editor window.
- Lastly, restart the computer.
The GPU should start working faster now. Therefore, check if the video driver crash problem has stopped.
📌 Also read: What Happens if You Delete Windows System 32?
It performs a thorough scan and offers the option to review and selectively repair errors.
By maintaining a clean and error-free registry, the software enhances system stability and performance, reducing the risk of issues like “video driver crashed and was reset” errors and other severe system problems.
📌 Learn more: Auslogics Registry Cleaner
Fix 6: Change the game’s launch options
As explained earlier, launch issues are another source of the “Video driver crashed and was reset” problem.
Launch settings help to control certain game features that might overstrain a computer’s system. Tweaking them is one good way to improve your PC’s performance.
Follow the instructions below to change your device’s current configuration:
Note: For this guide, we will focus on the Steam gaming platform. However, the procedures for changing the launch options on other platforms are more or less similar.
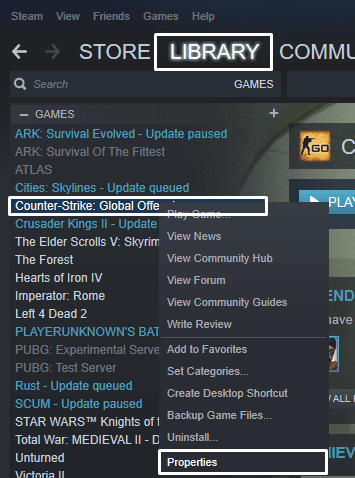
- First, open Steam and dive straight to the Library menu.
- Here, right-click on the title you wish to play and select the Properties option from the pop-up menu.
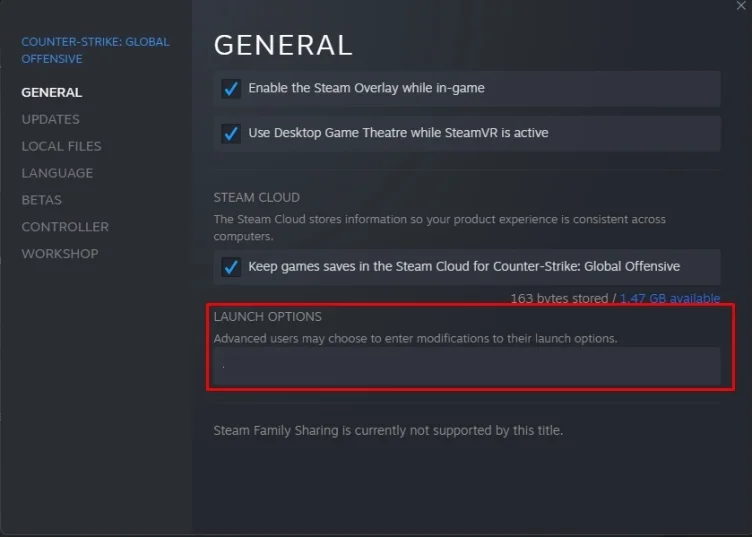
- Next, locate the Launch Options section under the General tab , paste the text copied from below, and click OK:
-USEALLAVAILABLECORES -sm4 -d3d10 -nomansky -lowmemory -novsync
Now close the Properties window, then restart the game.
Fix 7: Change the visual effects
Visual effects are another graphics setting you should review on your computer. Follow these procedures to optimize the effects of visuals on your GPU:
- Open the Run dialog box.
- Type the text below and click OK: SystemPropertiesAdvanced.
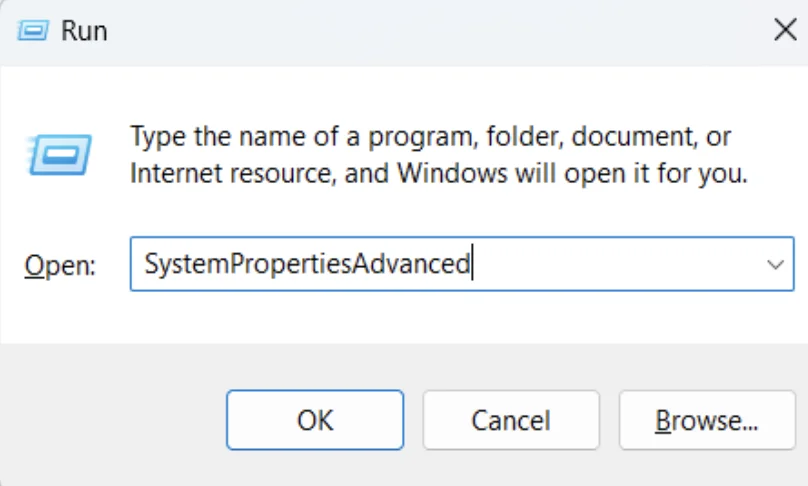
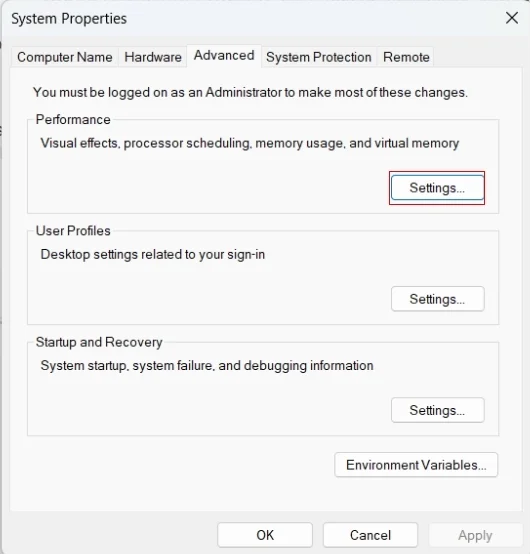
That will bring you to the Advanced tab of the System Properties window.
- Click the Settings button under Performance.
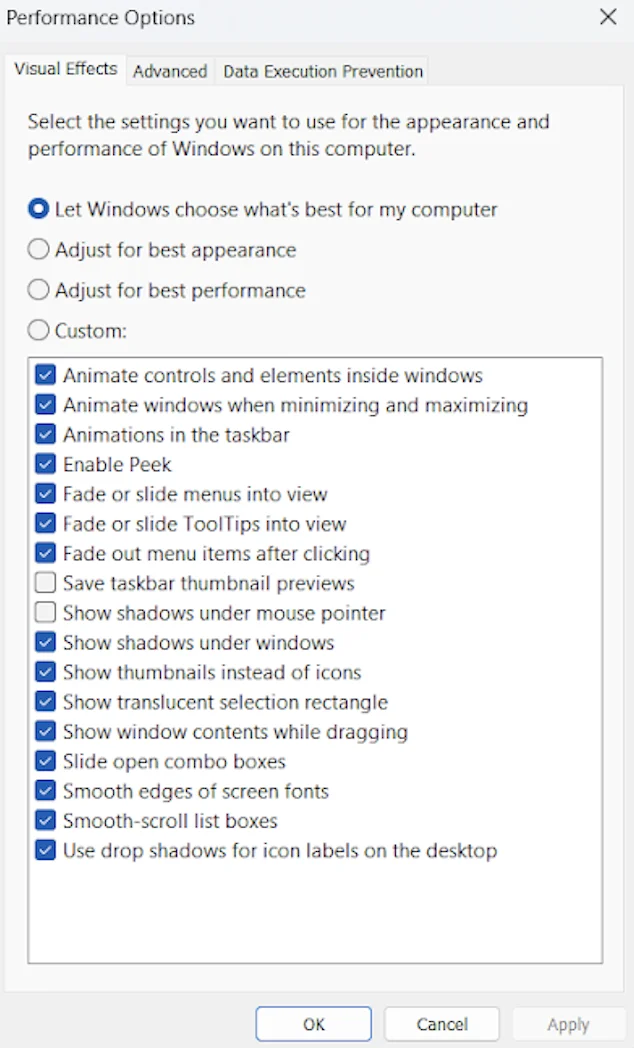
- On the next menu, select the tab for Visual Effects.
- Next, click on Adjust for best performance.
Fix 8: Use the video playback troubleshooter
If you encounter the video driver crash problem while playing videos with the in-built Media Player, you can try running the Video Playback Troubleshooter. Here is how to do that:
- Press the
Windows key + Ishortcut to open the Settings menu. - Then, go to System > Troubleshoot.
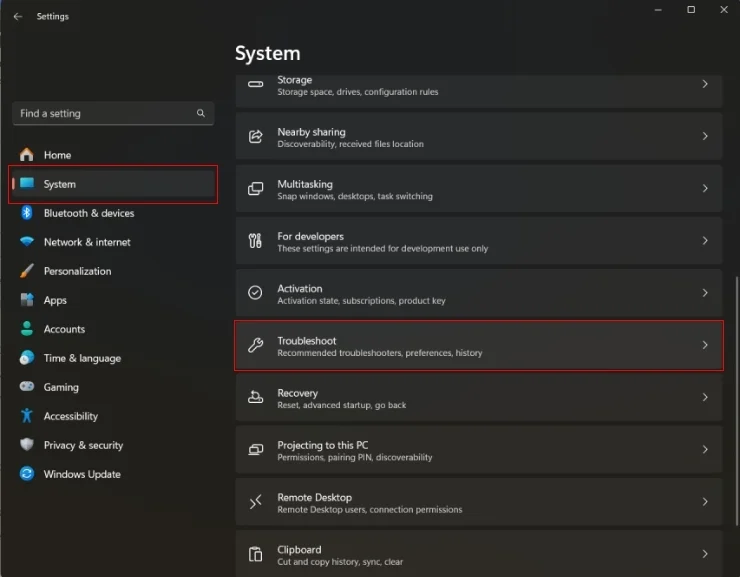
- Select Other troubleshooters from the right-side panel.
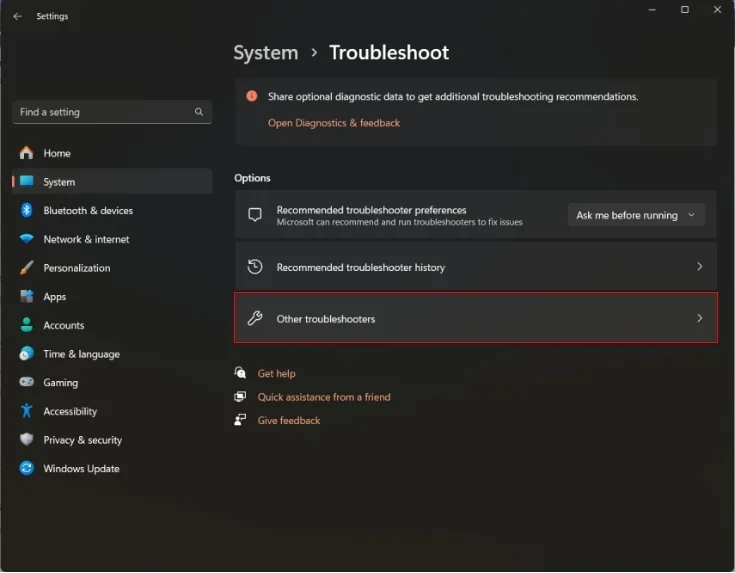
- Here, you will see the Video Playback option. Click the “Run” button.
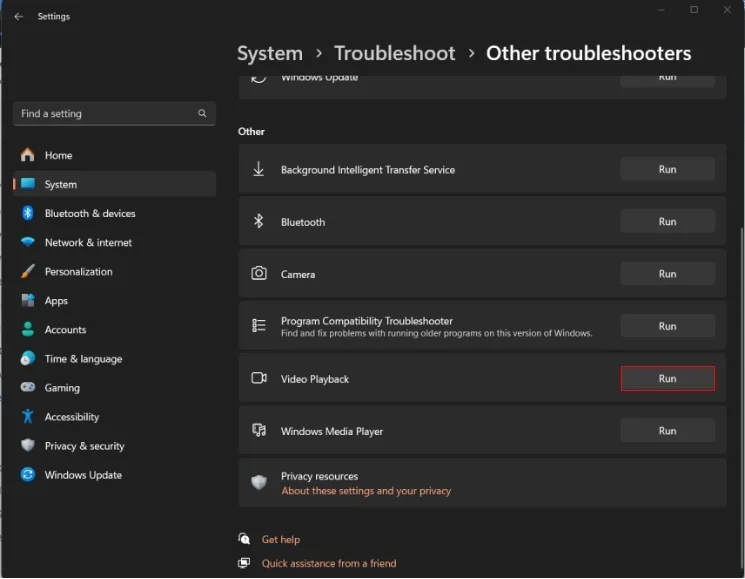
- After that, follow the on-screen instructions to complete the process.
- The troubleshooter will attempt to find and fix the potential causes of the problem.
📌 Related: Upgrade GPU on Laptop: All You Need to Know
Conclusion
Not only does having your system drivers updated help to resolve crash issues like “ Video driver crashed and was reset ”, but it also saves you from other problems as well. Choosing the right graphics card is equally important to keep your system in top shape and deliver immersive visuals without interruptions. We hope you find this post helpful.
Kindly let us know in the comments box. Also, feel free to forward your questions to us. We are here to help you get the best experience on your PC.
FAQ
A video driver, also known as a graphics driver, is software that allows your computer’s operating system to communicate with and control the graphics hardware, such as your GPU.
It plays a crucial role in rendering images and videos on your screen.
There are several reasons why graphics drivers may crash, including outdated or corrupted drivers, excessive system load, overheating, incompatible game launch options, and issues with the GPU’s processing time.
Updating drivers and optimizing your system settings can help prevent these crashes.
By addressing these issues promptly, you can ensure a smoother gaming and multimedia experience, free from the frustration of a recurring “video driver crashed” error.
Make sure your graphics drivers are up to date, as outdated versions can lead to crashes. If that doesn’t solve the problem, try uninstalling and then reinstalling the drivers to eliminate any corrupt files.
Consider using driver update software like Auslogics Driver Updater for a streamlined approach.
Additionally, optimize your system settings, close unnecessary background applications, and check for conflicting third-party software that may be causing driver crashes.
Resetting drivers on a PC can be done by uninstalling the driver and then reinstalling it.
This process varies depending on the type of driver, but it often involves using the Device Manager to uninstall the driver and then downloading and installing the latest driver version from the manufacturer’s website.