
Curious about why your PC behaves this way? This article explains why your computer keeps restarting and offers practical solutions to fix the issue.
Reasons Why Your Computer Keeps Restarting
There are many reasons why a PC randomly restarts. It can result from various issues, including corrupted drivers, faulty hardware, and malware infection. It can be challenging to pinpoint exactly what keeps your computer in a reboot loop.
However, many users have reported that the issue occurred after they installed a Windows 10 update. Since this error is quite common, many ways exist to fix it.
We’ve listed below some solutions that will help you fix the reboot loop on Windows 10 or even Windows 11.
Method 1: Disable automatic restart
When you want to fix an endless reboot loop after a Windows updates, the first thing you should do is disable the automatic restart feature . This will allow you to temporarily stop the computer from restarting.
This way, you can efficiently try the other methods to resolve the problem permanently. Here are the steps:
- Turn on your computer.
- Before the Windows logo shows up, press and hold the F8 key. This should bring up the boot menu.
- Select Safe Mode.
- Boot your computer through Safe Mode, then press Windows Key + R.
- In the run dialog, type
sysdm.cpl,then click OK. - Go to the Advanced tab.
- Under the Startup and Recovery section, click the Settings button.
- Under System Failure, you will find the Automatically Restart option. If it has been checked, deselect it. Note that the box beside Write an event to the system log must be selected. This feature records problems occurring in your system.
- Save the changes by clicking OK.
As we’ve mentioned, this can only temporarily fix the reboot loop on Windows 10/11. Therefore, we recommend that you proceed with the method listed below.
Windows 10/11 (8, 7, Vista, XP)
Method 2: Delete bad registry files
Before you follow our instructions, you have to be completely confident that you can complete the process without making any mistakes.
Even misplacing a comma can cause damage to your computer!
As such, we suggest checking out Auslogics Registry Cleaner.
This software thoroughly checks your computer and automatically fixes any problems in the Windows registry. With a click of a button, you can fix the endless reboot loop after a Windows updates.
Cleaning the Registry Manually
On the other hand, if you prefer doing it manually, you can follow the steps below:
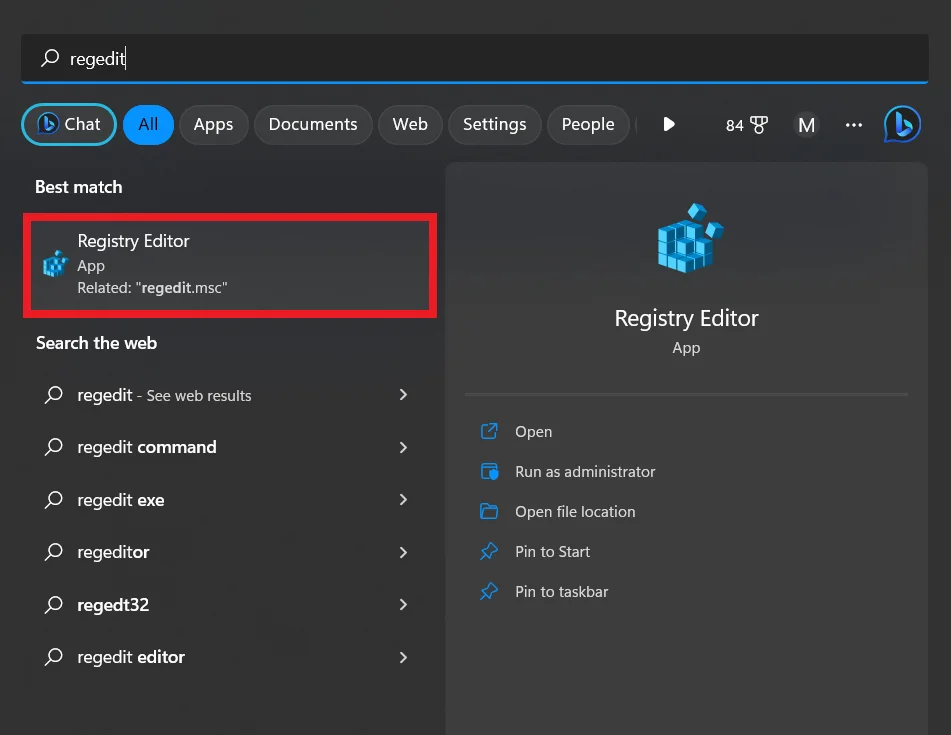
- Type in regedit in the search bar and hit Enter.
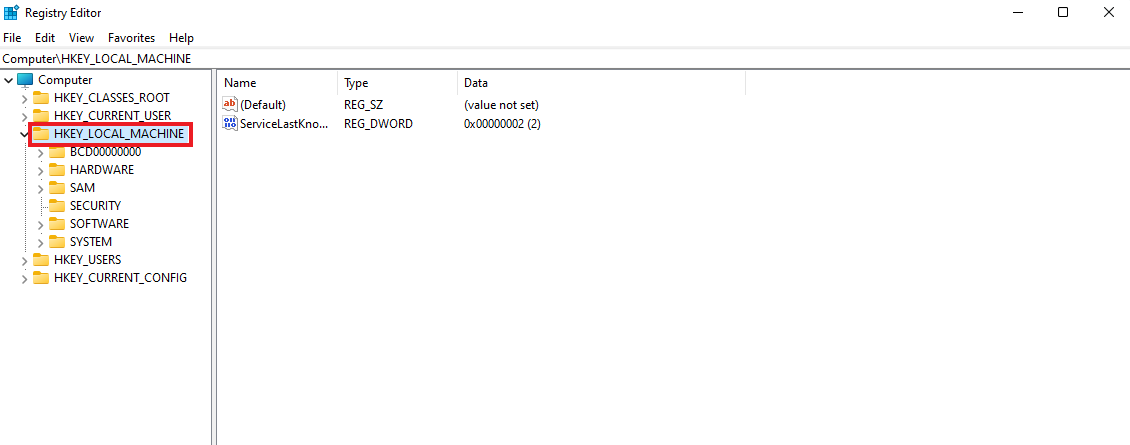
- Navigate to this path:
HKEY_LOCAL_MACHINE\SOFTWARE\Microsoft\Windows NT\CurrentVersion\ProfileList
- Before you make any changes, make sure you create a backup of your registry first. This ensures that you can easily undo any mistakes you might make.
- Browse through the ProfileList IDs and look for those with ProfileImagePath. If you find any, delete it.
- Exit the Registry Editor.
- Restart your computer and check if the problem has been fixed.
Method 3: Update your drivers
Your computer can get stuck in a reboot loop when drivers are outdated. This is because your devices can’t communicate with your system correctly. As such, it’s essential to check if your drivers are up to date.
- checks for potential driver issues,
- gives you a detailed report on the missing or outdated drivers, if any,
- allows you to update them to the latest manufacturer-recommended versions.
This saves you time by updating your Windows drivers with one click. Also, the drivers are always compatible with your device model and type, and you can create backups before the update.
Updating your drivers manually
If you update your drivers manually, you must dedicate a significant amount of time. You’d have to go to the manufacturer’s website and scour the driver installers to get the right versions for your computer.
Method 4: Check for hardware issues
In some cases, the computer restarted unexpectedly because of faulty hardware. We’ve listed some of the possible hardware issues you must check:
- RAM:
The problem may be with your Random Access Memory (RAM). Check the RAM and the condition of the slot. Remove the RAM from the slot and carefully clean both. Insert the RAM back in, then check if this fixes the problem.
- CPU:
Overheating may also get your computer stuck in a reboot loop. As such, you have to check if your CPU is working properly. It would be best to remove the dust from your CPU, ensuring the fan and surrounding areas are clean. After this, turn on your computer and check that the issue has been resolved.
- External devices
Unplug all your external devices. After that, turn on your computer and check if it’s no longer in a reboot loop. If your unit is now properly functioning, there must be something wrong with one of your external devices. You can identify exactly which it is by plugging them back one at a time. Ensure you restart your computer after every device to determine which causes the issue.
Method 5: Scan for viruses or malware
A virus or malware may have infected your computer, so it keeps restarting. You can run a complete virus scan by using Windows Defender.
On the other hand, if you want a more comprehensive virus/malware check, you can use top-notch security software like Auslogics Anti-Malware. It checks your system and Registry and looks for malicious items.
After letting the tool eliminate viruses and malware, you can restart your computer to see if the problem has been solved.
Windows 10/11 (8, 7, Vista, XP)
Conclusion
Although it can be frustrating if your computer starts restarting, several fixes can be implemented to solve the issue. We’ve highlighted some of the frequent causes of PC random restarts and offered practical solutions.
You can disable the automatic restart feature, delete bad registry files, update drivers using Auslogics Driver Updater, and scan for malware. If your computer keeps restarting, you can use these methods to solve the issue.
FAQ
You can update your drivers and software, complete a system scan for malware, check for overheating, and examine recent modifications. If necessary, seek professional help to troubleshoot the issue.