
- Experiencing a Slower Internet Connection with VPN Active
- How to Fix WiFi Not Working with VPN
- Method 1: Re-configuring your VPN connection
- Method 2: Deleting then reinstalling the VPN connection
- Method 3: Re-installing the VPN software
- Method 4: Updating your Windows operating system
- Method 5: Change your DNS settings
- Method 6: Change your power savings settings
- Method 7: Kill your VPN kill switch
- Fix Other Network Issues with VPN Not Connecting on WiFi
- Conclusion
- FAQ
There are many practical and even good philosophical reasons that can justify why people spend money on a reliable virtual private network (VPN) connection.
For instance, if you are a firm believer of your right to your personal privacy, then you would understand the importance of this service.
You probably do not like the idea of being watched and cataloged by authorities based on your online activities.
What will you do when your WiFi is getting disconnected frequently whenever you use this service?
If your WiFi gets disconnected when connected to VPN, it may prevent you from completing important tasks.
As such, we’ve compiled a list of solutions that will help you resolve this issue.
Keep on reading to know what you should do when your wireless Internet’s getting disconnected due to VPN problems.
Experiencing a Slower Internet Connection with VPN Active
However, if you start to notice that the speed is a lot slower than the usual, then it is possible that there are other factors that might be affecting your computer’s efficiency. In this case, we recommend using Auslogics BoostSpeed.
This reliable tool will clean out junk files, restore system stability, and improve your computer’s speed.
What’s more, it reinforces your privacy protection by eliminating traces of your online activities and safeguarding your sensitive personal information.
On the other hand, if the problem lies within your VPN connection, you will experience the following symptoms:
- You notice that you’re not connected to the wireless network. You would then have to look at the list of available networks and re-connect to one of them.
- You would have to turn on the wireless card by pressing a button on your keyboard.
- You notice that the wireless network and VPN connection are still active, but you cannot access the Internet.
📌 Also read: Speed Up Slow Computer as a Pro – Introducing Auslogics BoostSpeed 13
How to Fix WiFi Not Working with VPN
Method 1: Re-configuring your VPN connection
If you have let your VPN service use the default gateway of the remote network, it may cause Internet connectivity issues.
Such configuration cancels what has been specified in your TCP/IP as the default gateway setting.
In this case, you would simply have to reconfigure your VPN connection by following the instructions below:
- Click the Search icon on the tray.
- Type
settings, then hitEnter. - Select Network and Internet.
- Click Change Adapter Options.
Network, and click View Network Connections.- In the Network Connections window, you will see all available connections, including WiFi, LAN, and VPN.
- Right-click VPN Connection, then select Properties.
- Once you’ve opened the Properties window, go to the Networking tab.
- Select Internet Protocol Version 4, then click Properties.
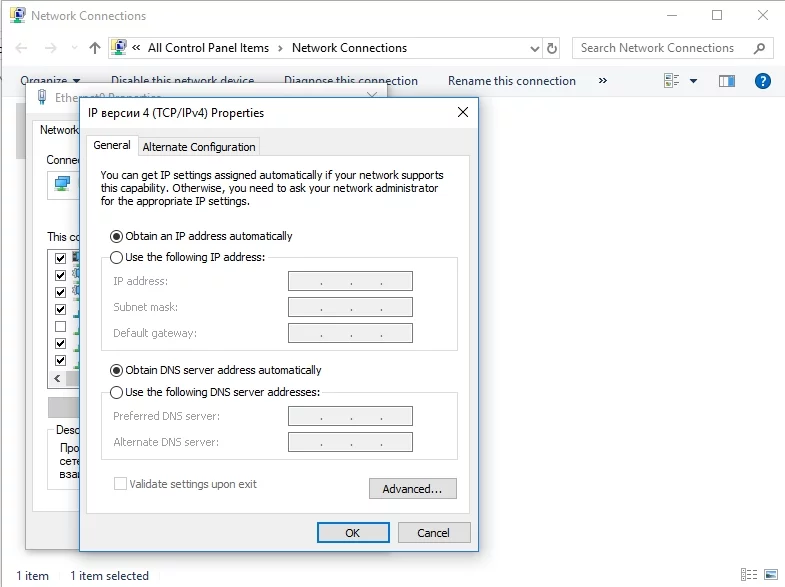
- Choose Advanced and make sure that the Use default gateway on remote network option is deselected.
- Close the windows, then check if the problem has been resolved.
Alternatively, you can use PowerShell to disable the VPN’s default gateway. With that said, follow the instructions below.
- Right-click the Windows Key.
- Choose Windows PowerShell (admin).
- In the PowerShell window, type the commands below:
Get-VpnConnection
Set-VpnConnection -Name “myVPN” -SplitTunneling $True
📌 Also read: “Do I Need a VPN?” Main Benefits of Using a VPN
Method 2: Deleting then reinstalling the VPN connection
It is possible that the VPN software has been corrupted – that’s why your WiFi is getting disconnected frequently.
In this case, it would be advisable to delete the VPN network connection, then install it again. Simply follow the steps below.
Uninstalling the VPN software:
- Click the Search icon on the tray.
- Type
device manager, then hitEnter. - Once the Device Manager window is open, expand the contents of Network Adapters.
- Look for the VPN adapter you wish to delete, then right-click it.
- A shortcut menu will appear. Choose Uninstall Device.
- A prompt will appear, warning that you’re about to uninstall this device from your system. Give your consent and wait until the uninstallation process is complete.
If the VPN is a standalone software program, follow these steps to uninstall it:
- Launch the Start menu, type
control panel, and click on Control Panel in the results. - After the Control Panel window appears, select Uninstall a Program under the Programs category.
- Scroll through the list of programs to find the VPN application.
- Click on the app and select Uninstall.
- Follow the prompts to remove the software application.
Method 3: Re-installing the VPN software
It is likely for you to get custom software when you subscribe to a VPN service.
You simply have to download the installer and follow the on-screen instructions to add the program to your computer. On the other hand, you can use the built-in VPN client in the Windows operating system.
With that said, follow the steps below:
- Click the Search option from the icon tray.
- Type
settings, then pressEnteron your keyboard. - Select Network & Internet.
- Go to the left bar menu, then click VPN.
- Click Add a VPN Connection.
- Make sure that you choose the ‘Windows (built-in)’ option from the VPN provider drop-down list. This sets VPN Type to Automatic as well as Type of Sign-in Info to Username and Password.
- Fill out the Connection Name and Server Name or Address areas. You can get the details from your VPN provider.
- Scroll down and enter your username and password.
- Click Save, then close the Settings window.
- Click the WiFi symbol on the menu icon tray. You should be able to see the VPN connection you have just created.
📌 Also read: How to Choose VPN: Best Free VPN for Windows 10 PC
Method 4: Updating your Windows operating system
You may find it annoying whenever Microsoft rolls out updates for your Windows operating system. However, these updates can fix bugs and errors, including the ones related to the problem making sure you can’t connect to VPN on WiFi .
- Click the Search icon.
- Inside the Search box, type
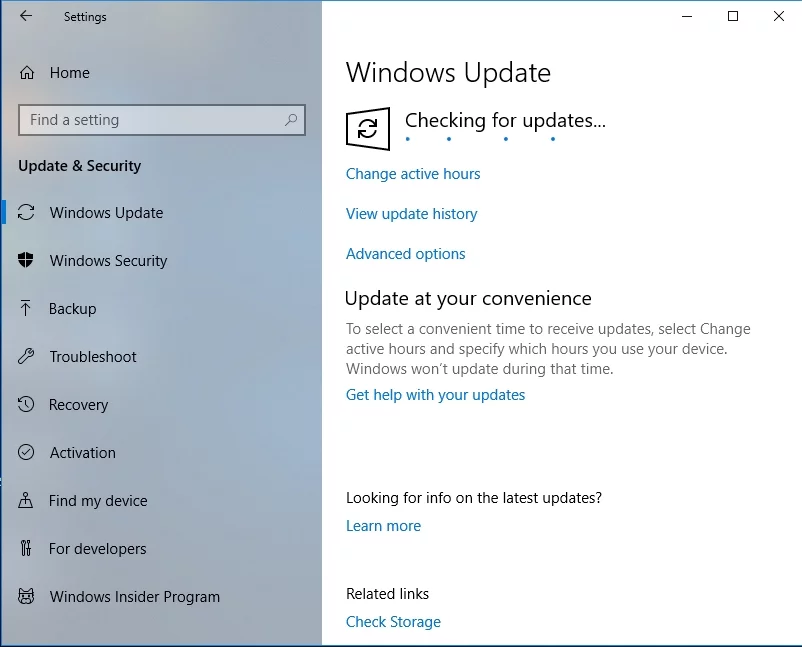
settings, then hitEnter. - Inside the Settings window, click Update and Security.
- Select Check for Updates. This should allow you to see if there are pending updates you have to install.
- Allow your Windows system to install available updates.
📌 Also read: Ultimate Guide: How to Manually Check and Install Windows Updates
Method 5: Change your DNS settings
Domain Name Systems servers help computers – especially browsers – to connect alphanumeric website names to their correct IP addresses. Most devices use the default DNS provided by ISPs.
These DNS services often conflict with VPN servers or might be scrambled at the time you are facing a connection problem. Your VPN might also alter your computer’s DNS settings as it may switch to using its default DNS servers in resolving domain names.
You can manually change your DNS settings (and that of your VPN) to allow your device to use a more reliable server like Google’s. Follow these steps:
- Go to the Start menu, type
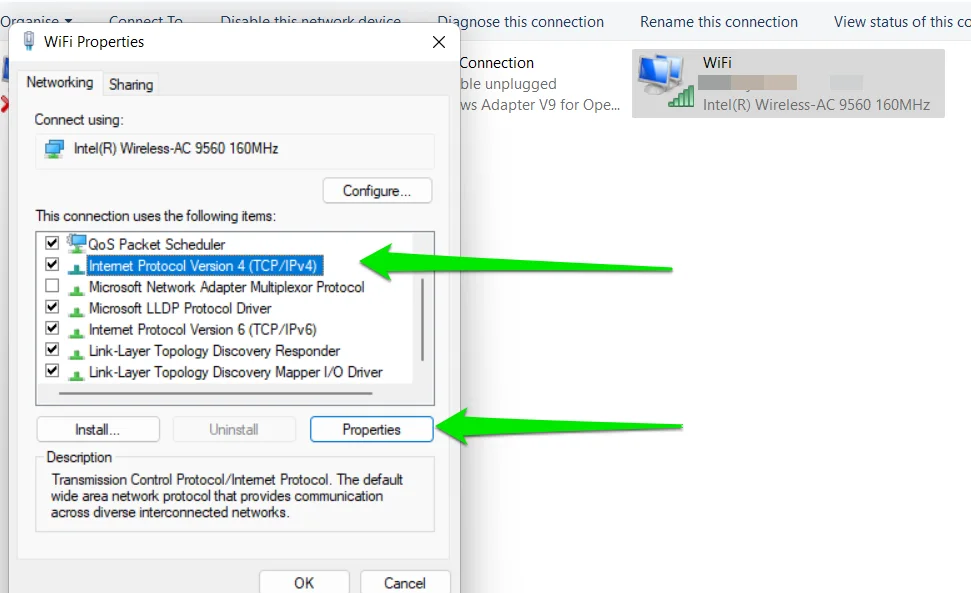
Network, and click View network connections. - Right-click your active connection (WiFi, LAN, Ethernet, or VPN) and select Properties.
- Under the Networking tab, go to the section below This connection uses the following items:
- Find and choose Internet Protocol Version 4 (TCP/IPv4) and select Properties.
- Check the radio button associated with Use the following DNS server addresses.
- Enter these parameters to use Google’s DNS:
For Preferred DNS: 8.8.8.8
For Alternate DNS: 8.8.4.4
- Click on OK.
- Once you return to your network’s Properties dialogue, left-click Internet Protocol Version 6 (TCP/IPv6) and choose the Properties button under it. This time, enter these parameters after selecting the Use the following DNS server addresses button:
For Preferred DNS: 2001:4860:4860::8888
For Alternate DNS: 2001:4860:4860::8844
- Click OK.
Flush your DNS cache
Your computer’s DNS cache may also be affected when your VPN alters your system’s DNS settings. The cache is where Windows stores resolved domain name information so that it doesn’t have to go through the DNS server to resolve the same domain names.
Since the VPN routes your traffic through its servers, primarily through different locations, the DNS cache may begin to contain conflicting information that may affect how you connect to the Internet.
This could explain why the VPN causes the internet to stop working on your computer.
You can resolve the issue in this case by clearing the DNS cache. Follow these steps:
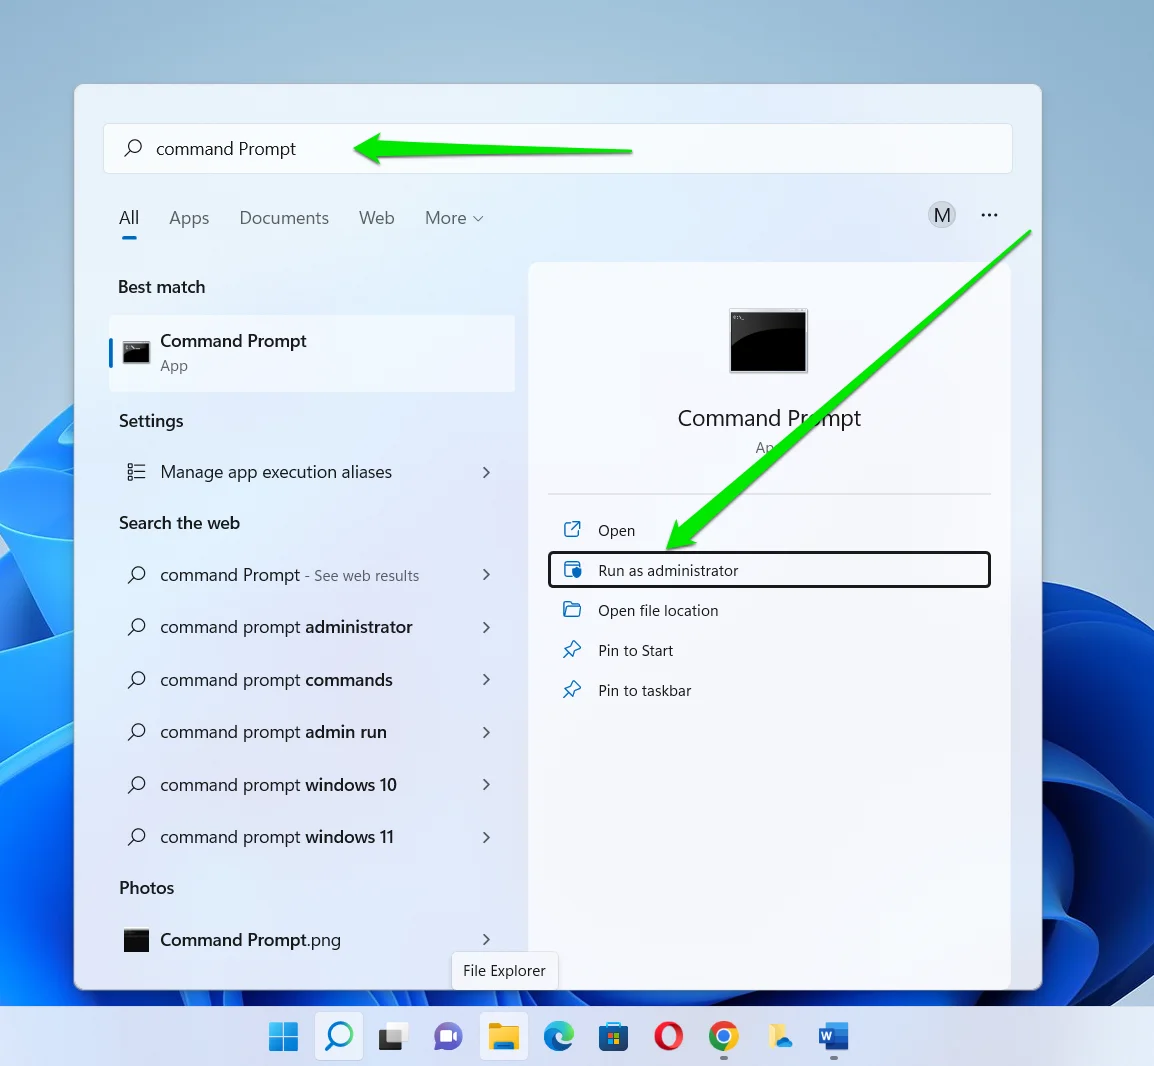
- Type
commandin the Start menu and click Run as Administrator.
- Click Yes in the UAC dialog.
- When the Command Prompt window launches, type
ipconfig /flushdnsand pressEnterto flush your PC’s DNS cache.
📌 Also read: [FIXED] “Your DNS Server Might Be Unavailable” Error On Windows 11
Method 6: Change your power savings settings
Your power settings can impact your internet connection and disrupt your VPN. If you’re using a laptop, your battery-saver feature may choose to kill off some apps it deems to be inactive.
Since VPN programs run in the background, they might be deactivated once the power-saving feature kicks in.
So, your “ VPN not working on WiFi ” or “ VPN affecting internet connection ” issue may, in fact, be a power problem.
You can resolve the issue by deactivating any power-saving protocol you have in place.
If you’re running Windows 11, go to the bottom right corner of your desktop (System Tray) and click on your battery icon. Now, click the Battery Saver button to toggle it off.
If you use a Windows 10 computer, click on the battery icon and drag the Performance Mode slider to Best Performance.
Alternatively, you can use the Control Panel to tweak your power settings. Follow these steps:
- Open the Start menu, type
control panel, and click on Control Panel. - Go to the top right corner of the Control Panel window and select Large Icons in the View by drop-down menu.
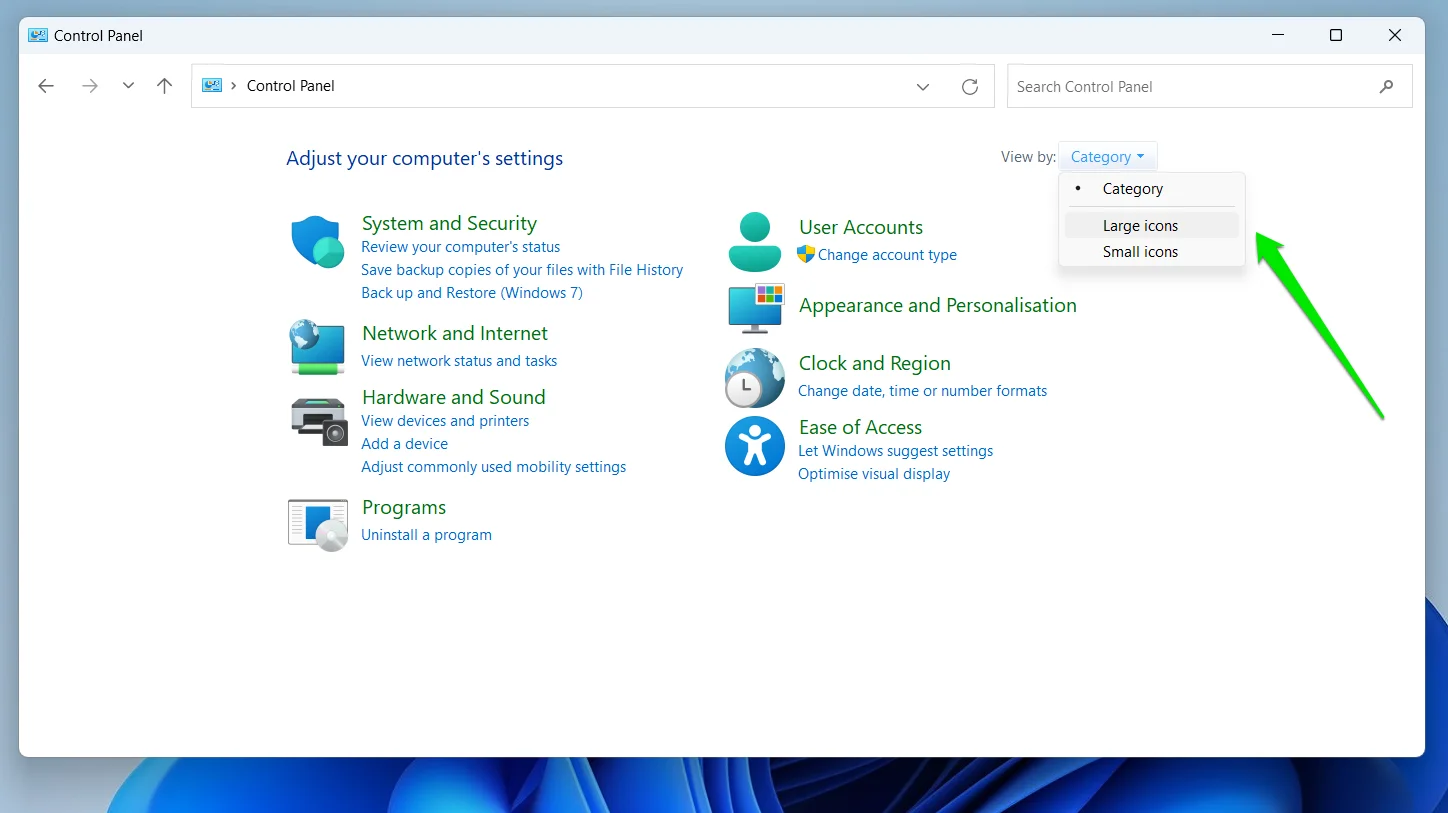
- Click on Power Options.
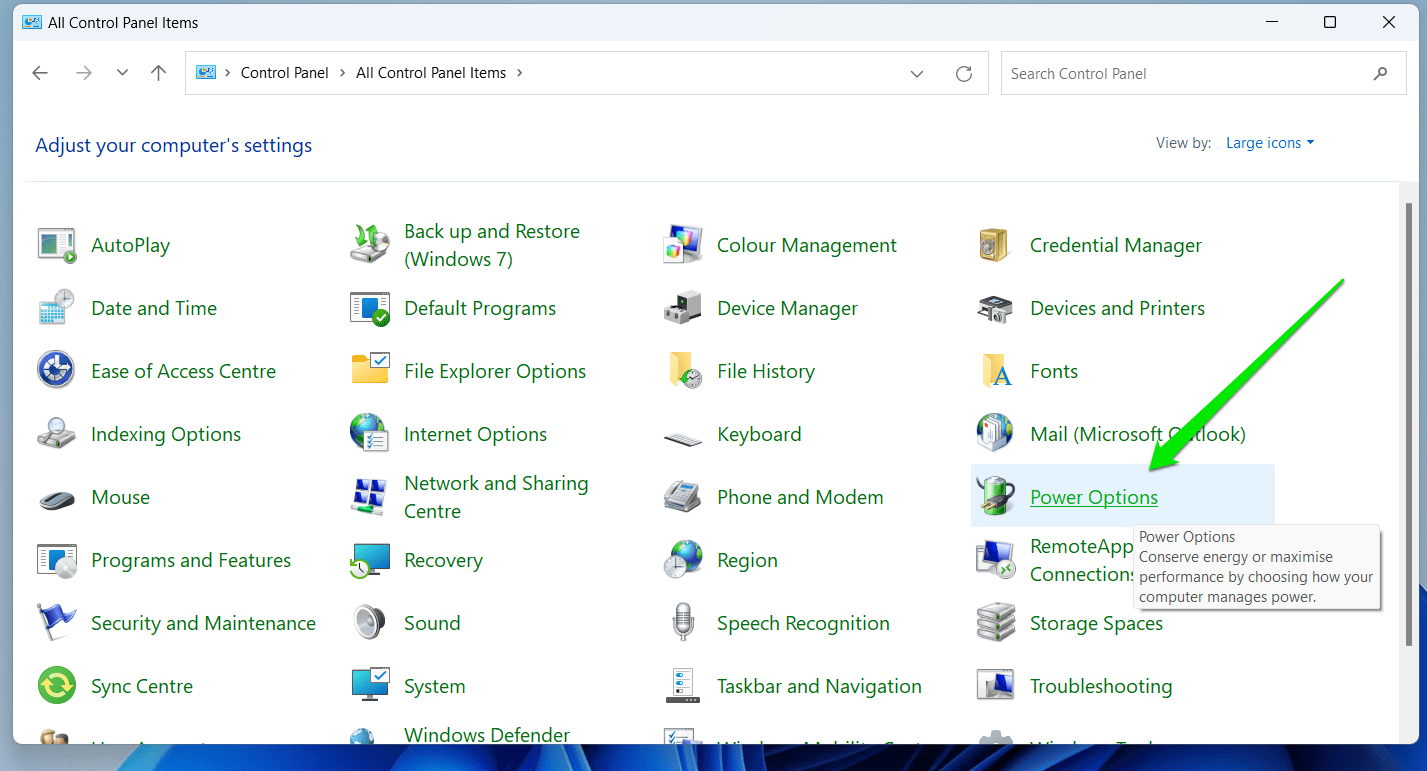
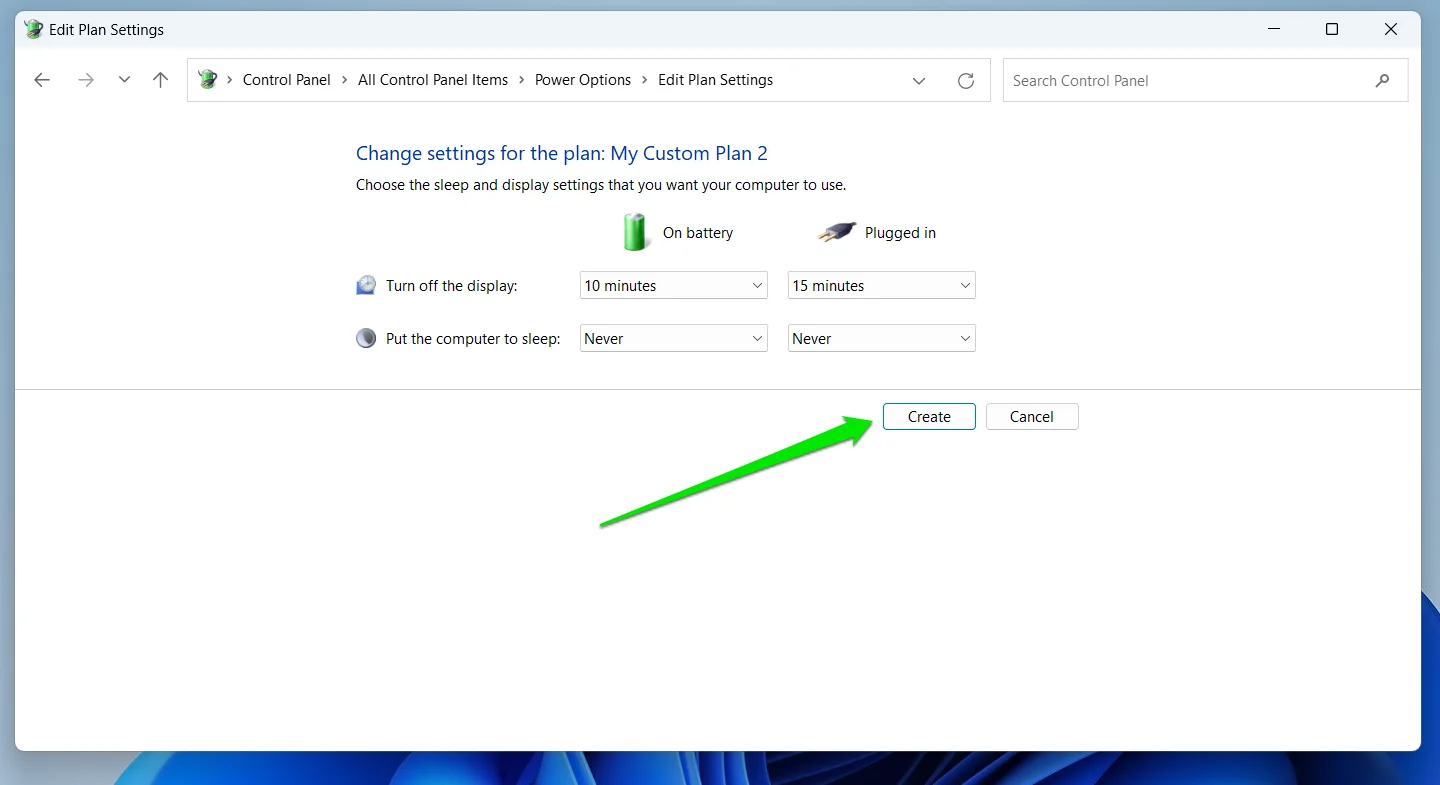
- Go to the Power Options window’s left side and click Create a Power Plan.
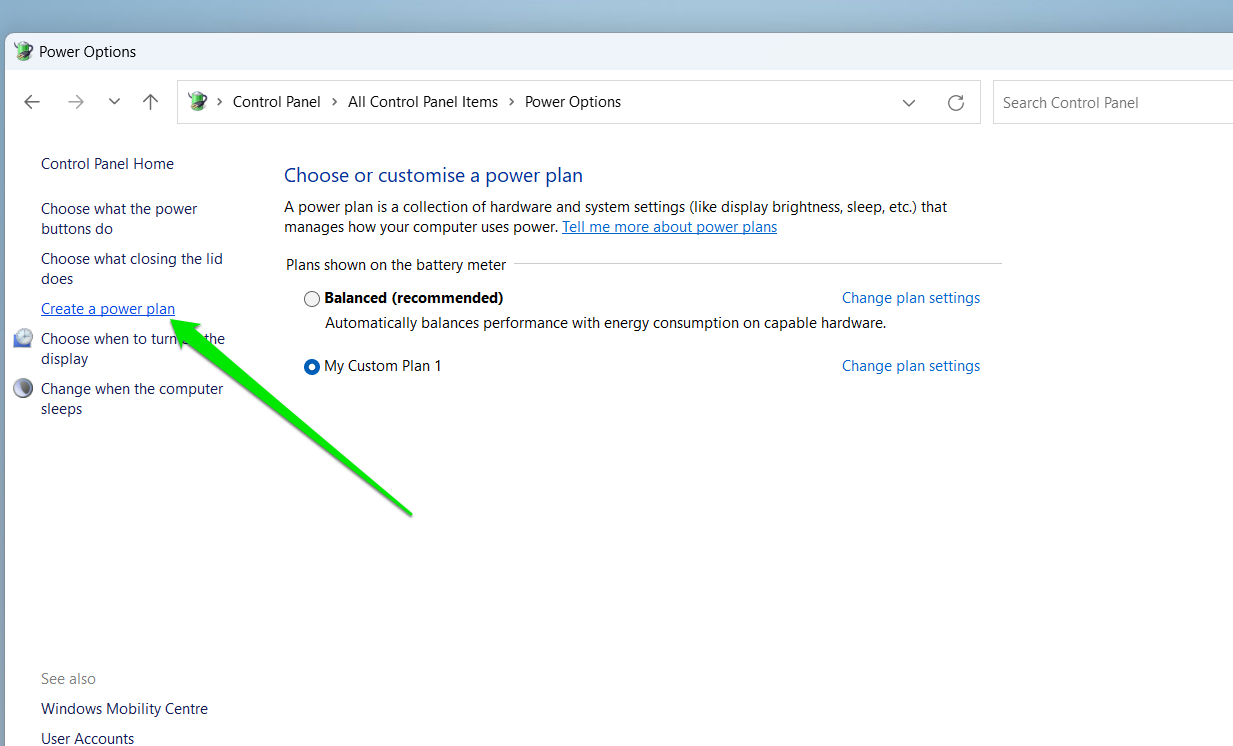
- Select High Performance and click on Next.
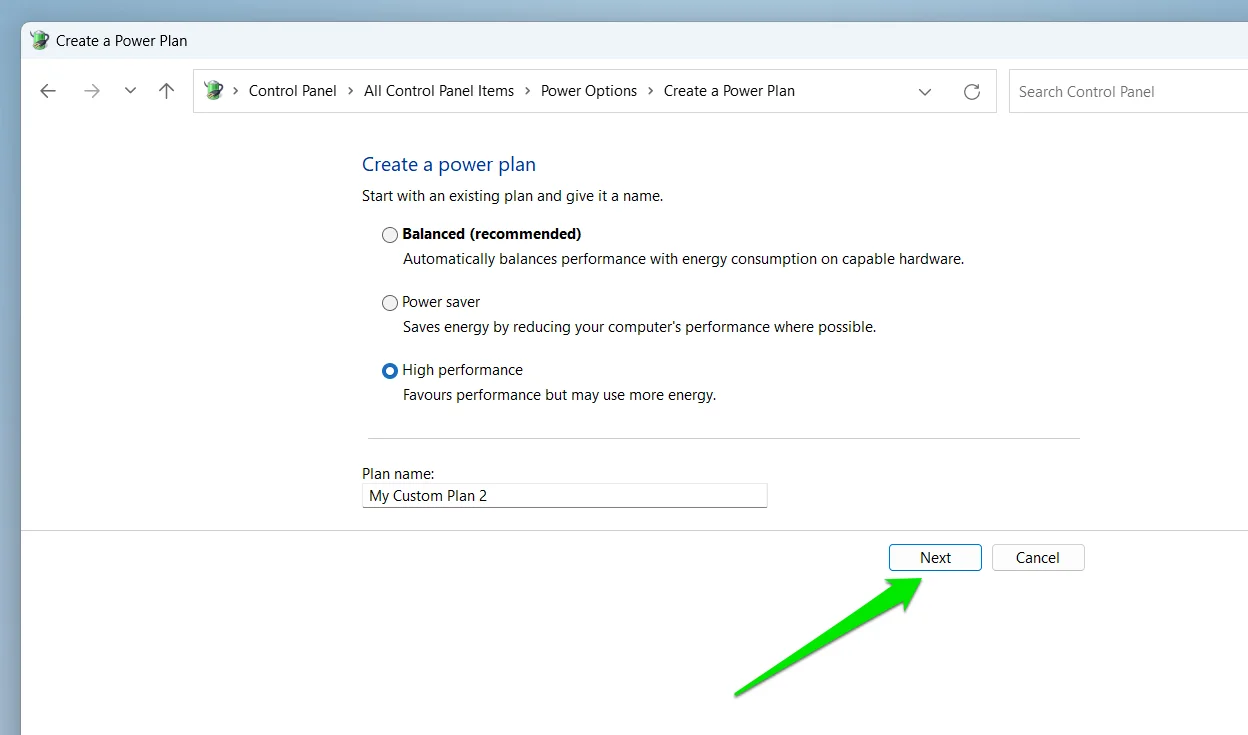
- Choose your power settings on the next page and click the Create button.
📌 Also read: [FIXED] “There are Currently No Power Options Available” Windows Issue
Method 7: Kill your VPN kill switch
A VPN kill switch is a crucial privacy and security feature often found in modern and advanced VPN applications. Since VPNs shield your online activities from potential prying eyes, you may be left exposed and vulnerable once the secure connection disconnects abruptly and you continue browsing with your default network. The VPN kill switch is designed to prevent this exposure.
It immediately activates and severs your device’s internet connection whenever your VPN connection suddenly drops. That way, you won’t transmit data over potentially insecure networks.
Think of it as a safety net. The kill switch may be an easy explanation as to why VPN makes the Internet not work on your system.
Sometimes, the VPN promptly goes back online when the connection drops. However, the internet connection may not return if the kill switch is active. So, turn off the feature to confirm if it’s the cause of the VPN problem .
Fix Other Network Issues with VPN Not Connecting on WiFi
You have to consider the possibility that the “ VPN not connecting on WiFi ” problem may not be connected to your VPN. Your computer’s network infrastructure, WiFi service, or ISP may be having issues and causing your connection to drop.
First, you can confirm whether your internet connection is the problem by connecting your device to another network and using the VPN server.
Installing the VPN application on another computer can also help you confirm whether the problem is associated with your PC/network. We’ll go through different troubleshooting methods you can employ to fix network issues on your computer.
Fix 1: Power cycle your network device
If you use a router or modem, start by restarting it alongside your computer. This process helps clear issues with each device’s RAM and glitchy software. Unplug the device from its power source and shut down your computer. Wait for a few minutes and turn your devices back on.
Fix 2: Update your modem’s or router’s firmware
Your router’s native software program (firmware) typically updates itself whenever there is a new version. These updates are deployed to fix bugs, add new features, and improve functionality. If your router or modem hasn’t been updated in a while, head to the device’s dashboard and try installing its latest software.
📌 Also read: How to Keep Your Software Up to Date
Fix 3: Prevent your firewall and antivirus from blocking the VPN
You may be unable to use the internet if your antivirus or firewall program is blocking the VPN application. These security programs often block apps they consider threats, especially if they want to alter your internet connection or IP address.
To stop your antivirus from blocking the VPN application, you have to add the VPN as an exclusion. Follow these steps:
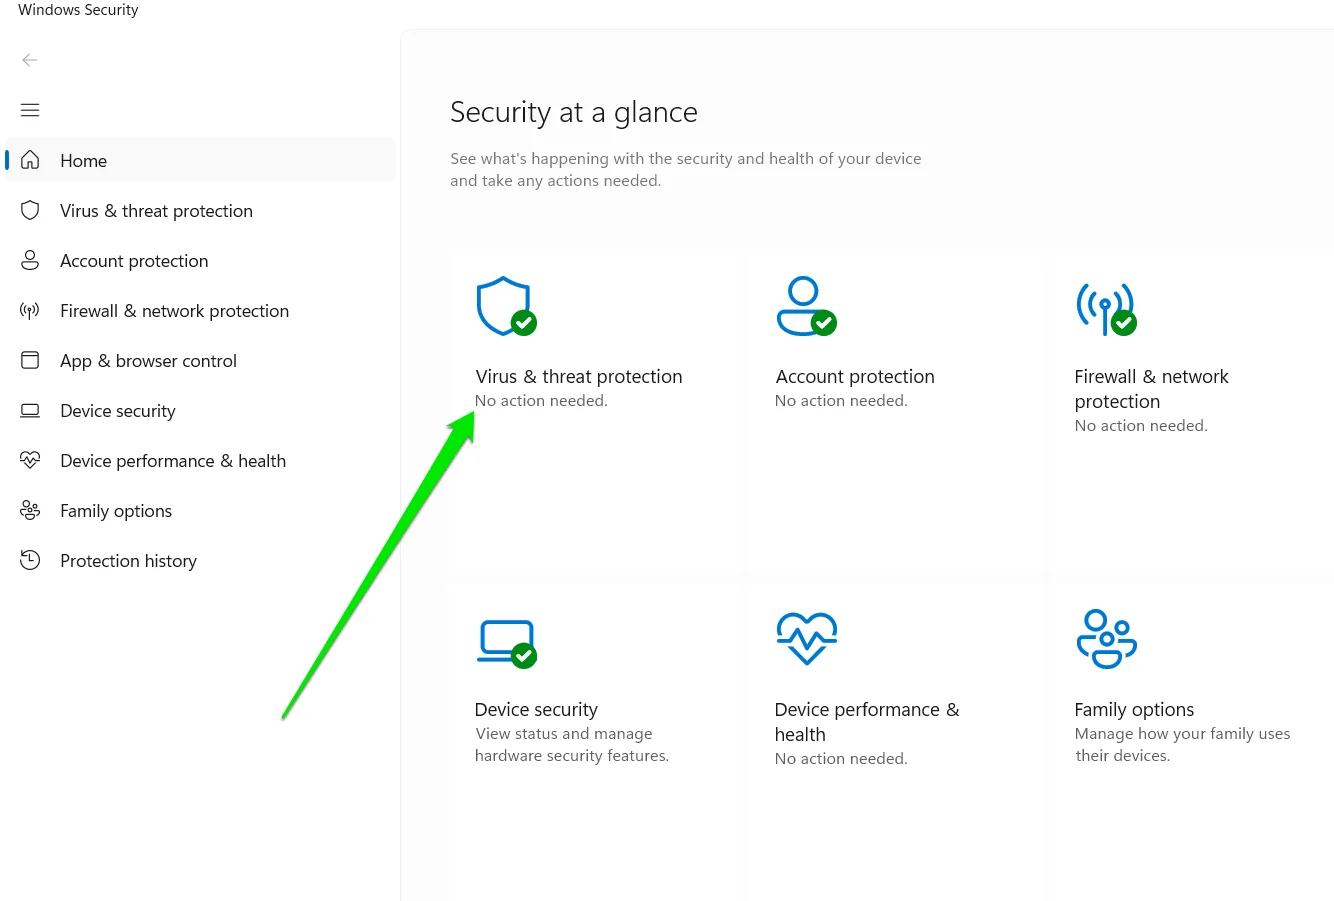
- Expand the system tray and click the White or Blue shield to open the Windows Security app.

- Click on Virus & Threat Protection.
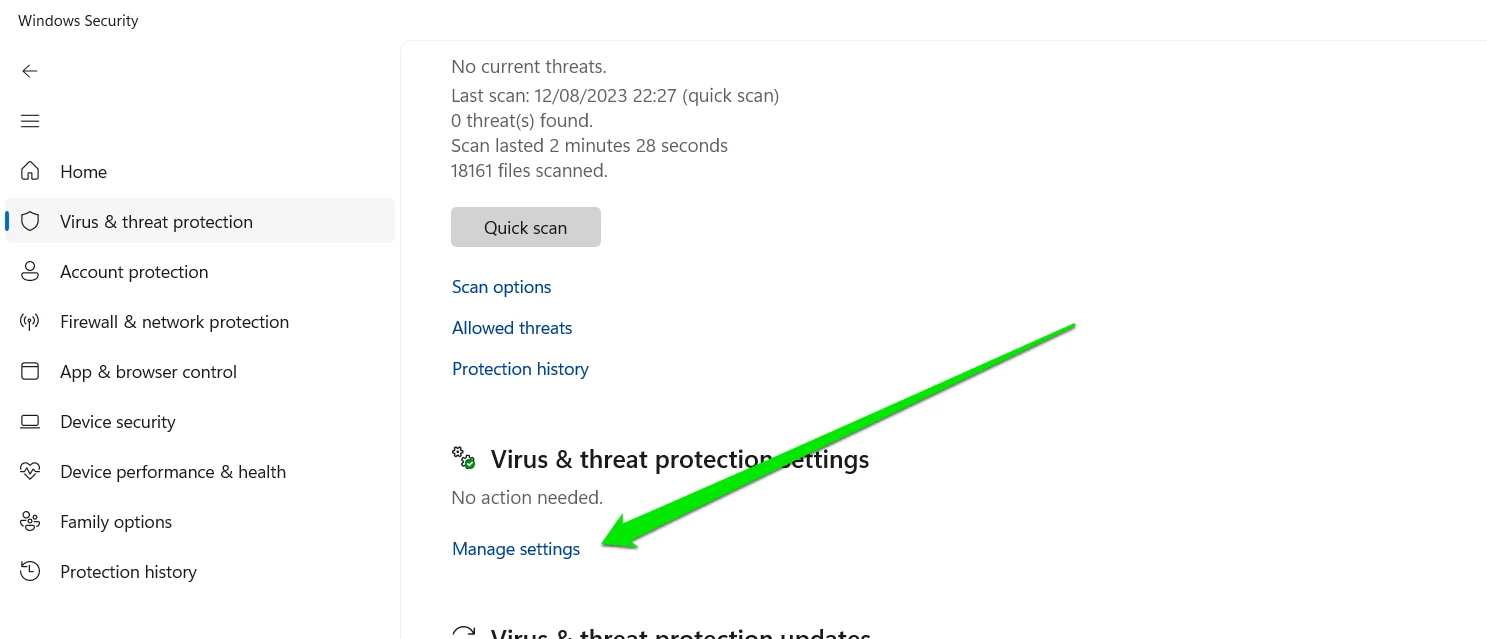
- Scroll through the page and click on Manage Settings under Virus & Threat Protection Settings.
- Scroll through the next page and click Add or remove exclusions.
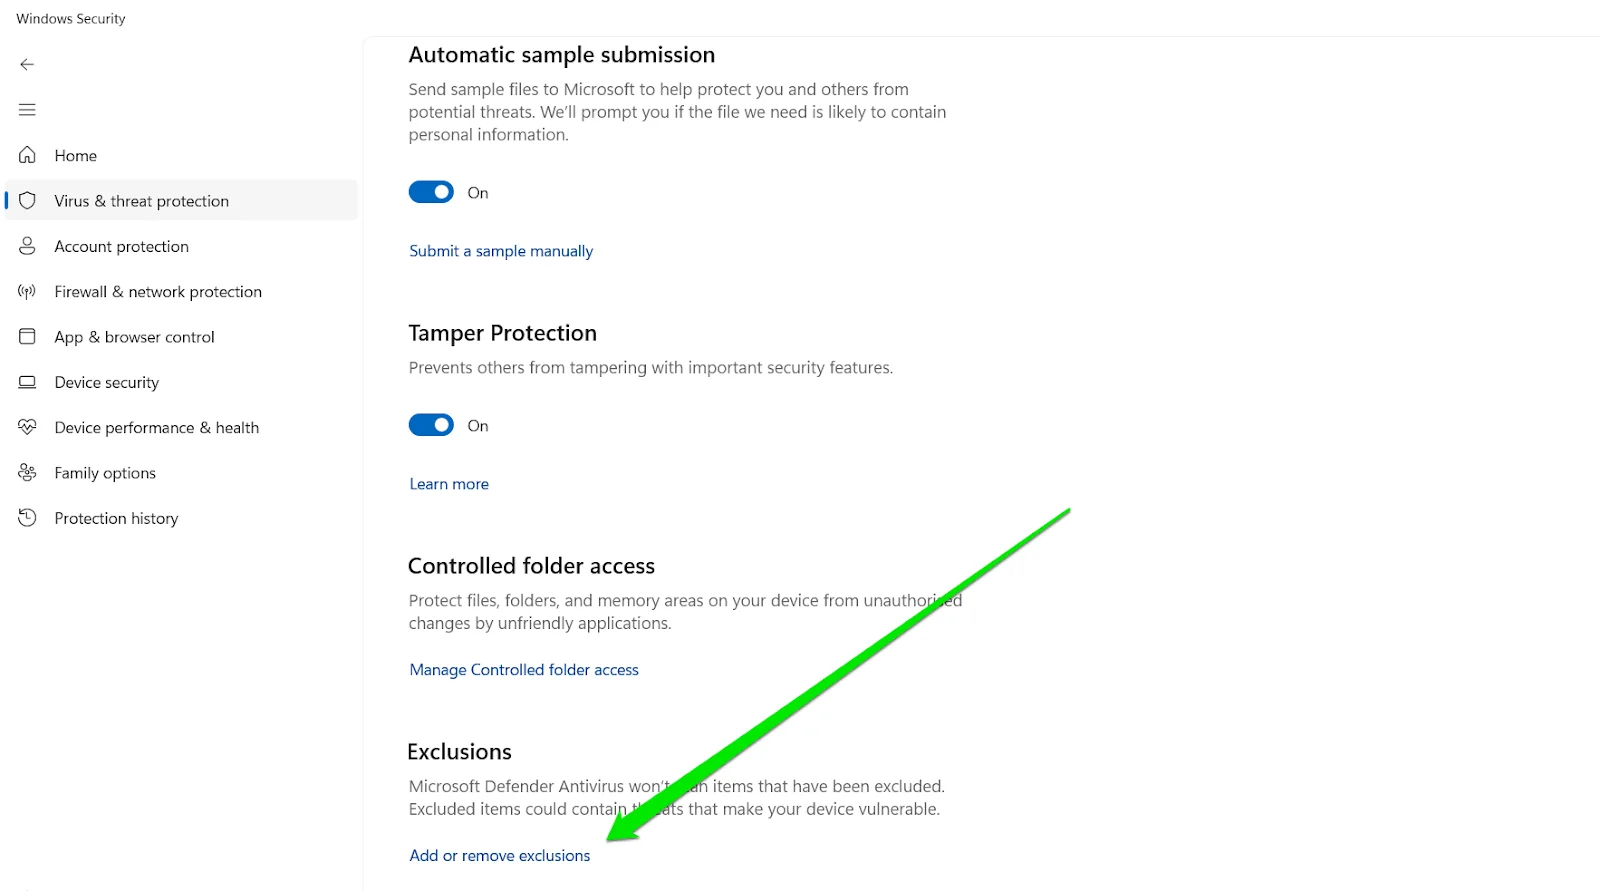
- Navigate to the program folder of the VPN and select it.
- Click on Select Folder.
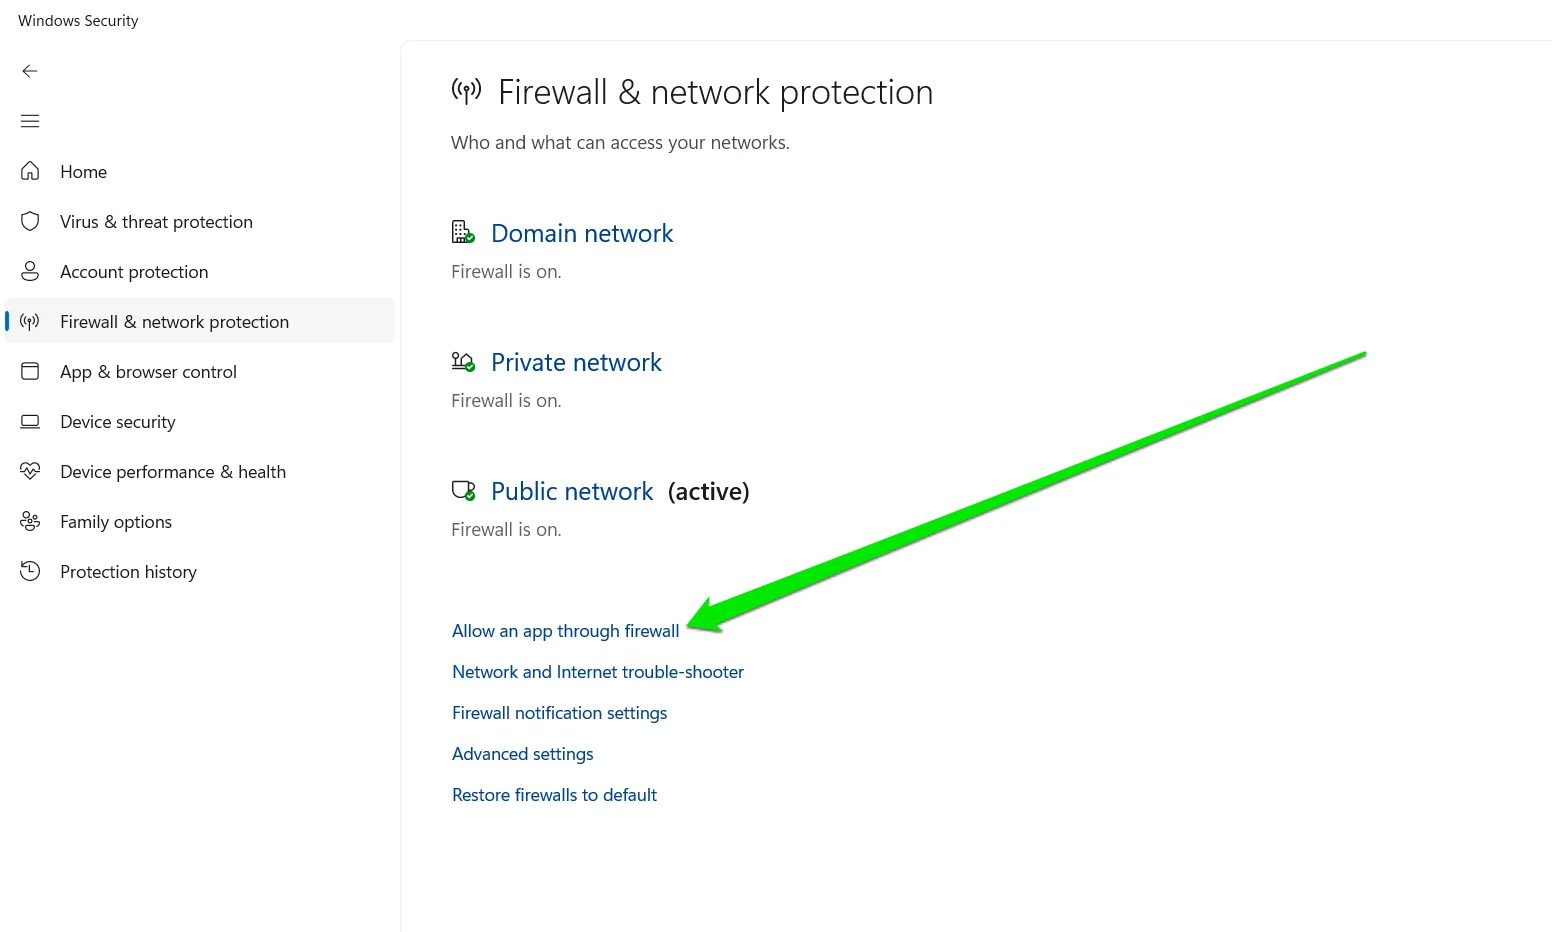
You may also have to allow the VPN through your firewall to grant it access to your computer’s network infrastructure. Follow these steps:
- Open Windows Security and click on Firewall & Network Protection.
- Scroll down and select Allow an app through firewall.
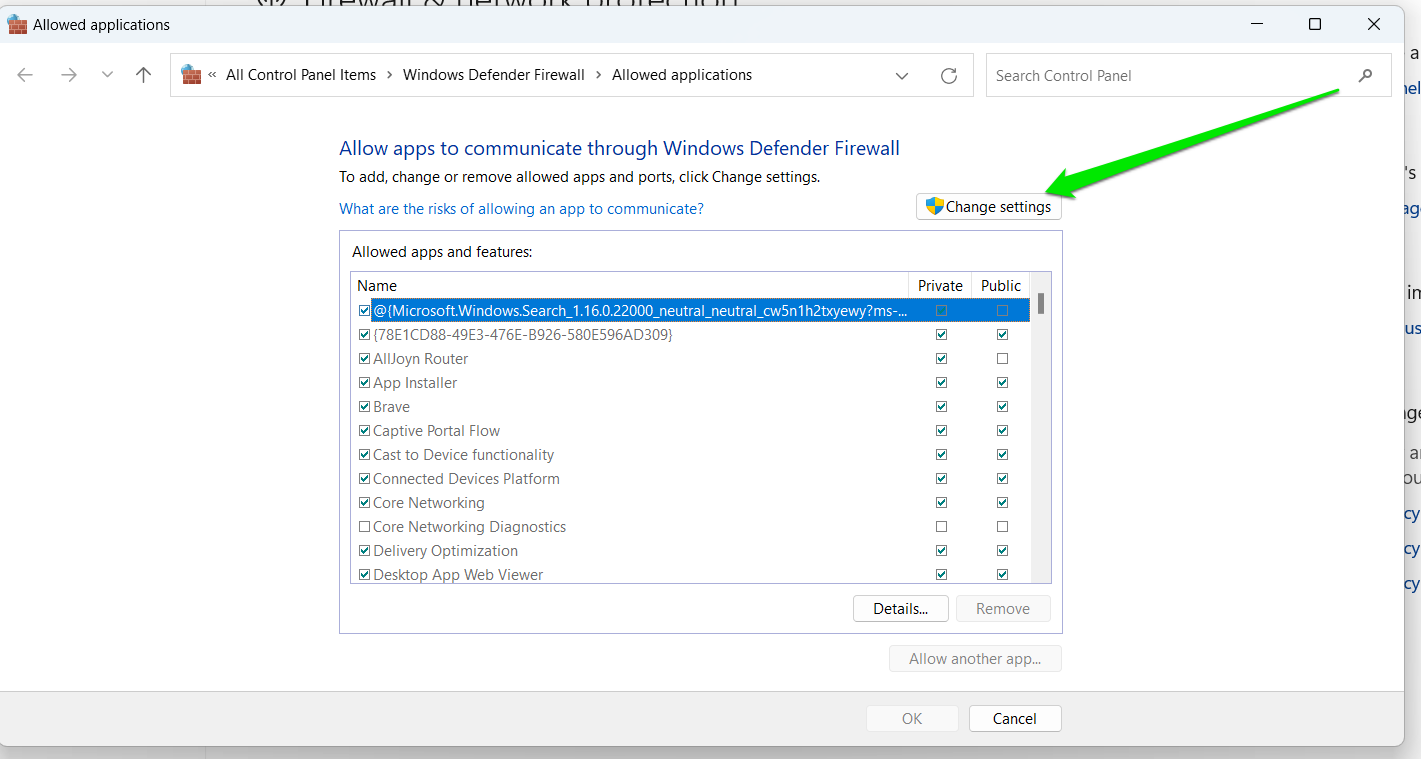
- Select the Change Settings button in the Allowed Applications dialog window. Make sure you’re using the admin account on the computer.
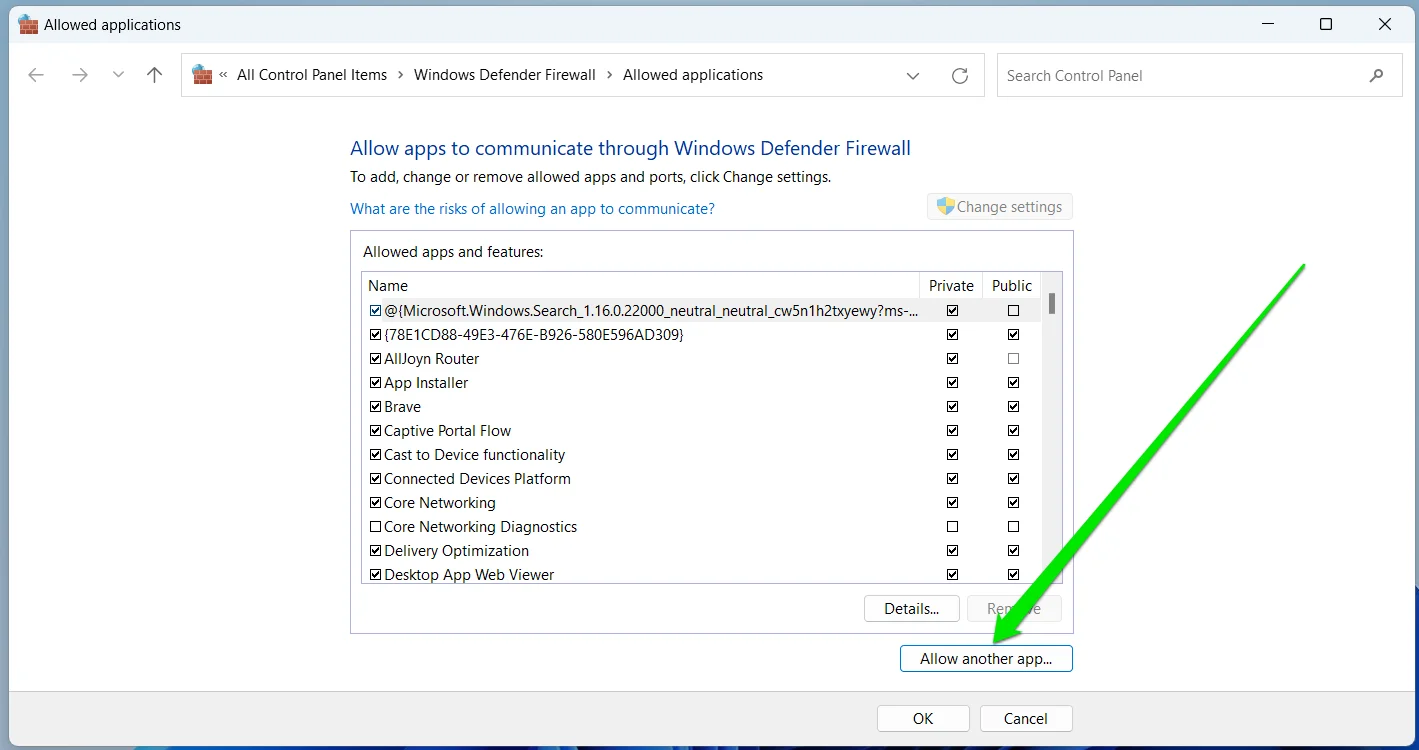
- Now, click the Allow Another App button in the bottom right corner.
- Click the Browse option next to Path and navigate to the VPN application.
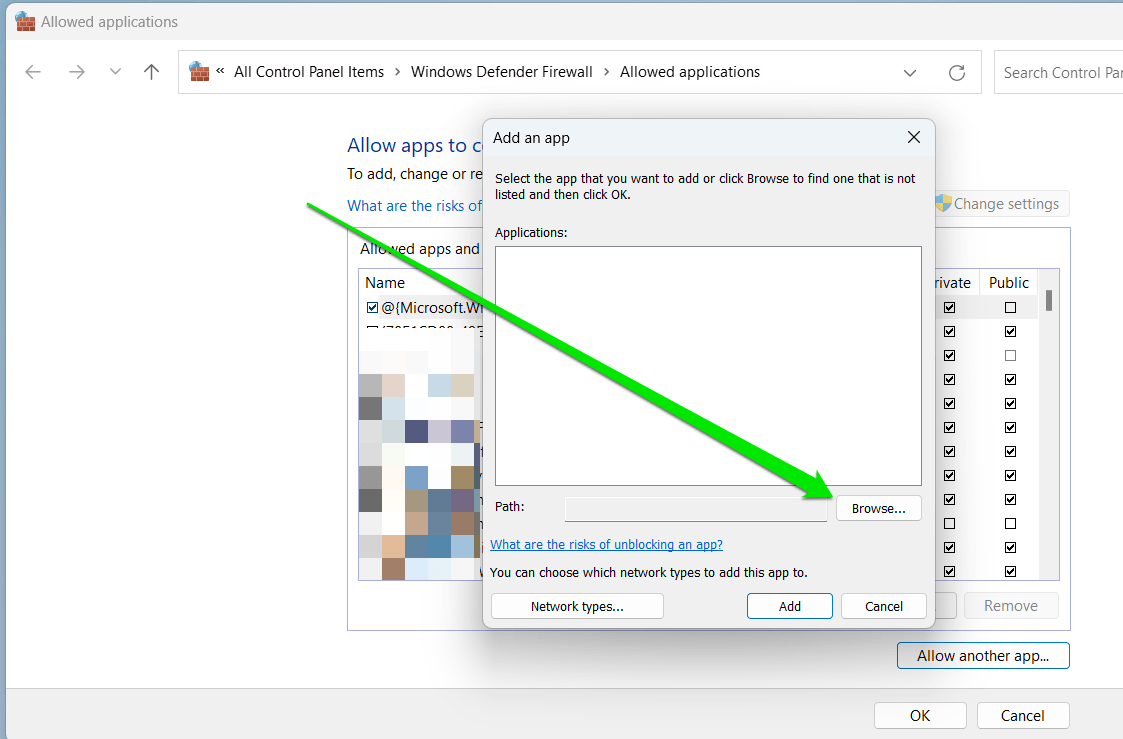
- Click OK.
Release and renew your IP address
Your router or network assigns your computer an Internet Protocol address through a DHCP lease. Your computer is essentially leased the IP for a limited period and may be given another IP address automatically, depending on the situation.
Sometimes, your router or the DHCP server may assign conflicting IPs, causing internet connection problems, especially when you use a VPN. You can resolve this problem by getting a new IP address for your PC. These steps will show you how to do that:
- Open Start, type
command promptand select Run as Administrator on the right.

- Click Yes in the UAC dialog.
- When the Command Prompt window launches, type
ipconfig /release, and pressEnterto release your PC’s current IP address.
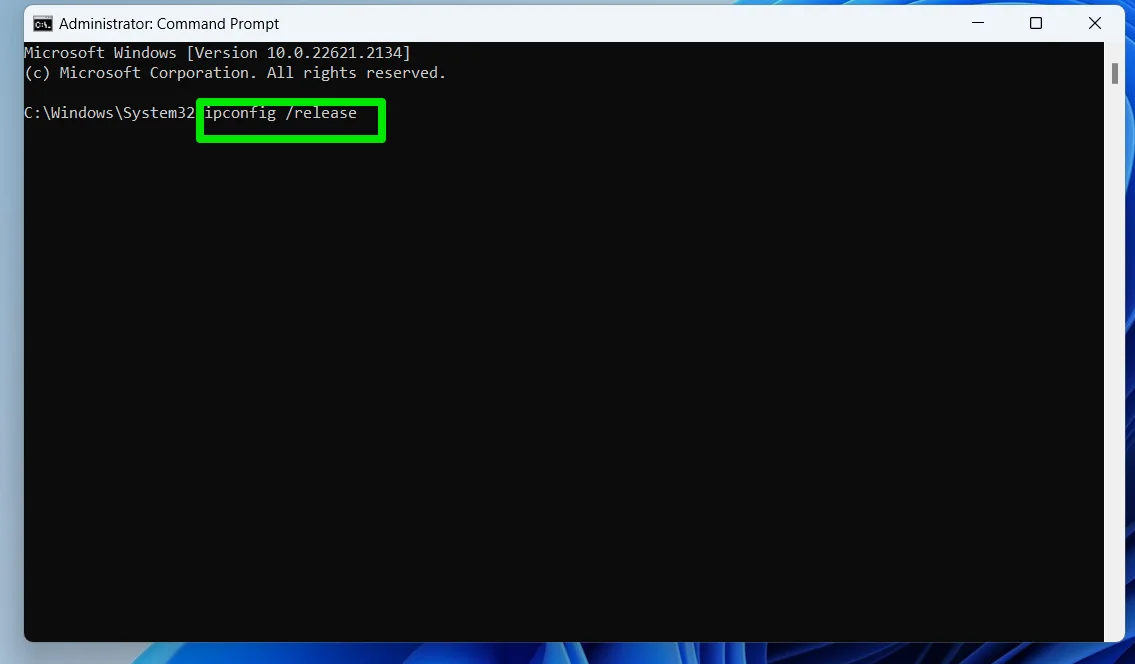
- Allow the command to complete, as it might take a few seconds.
- Once Windows releases the IP, go to the next command line, type
ipconfig /renew, and pressEnterto request a new IP address.
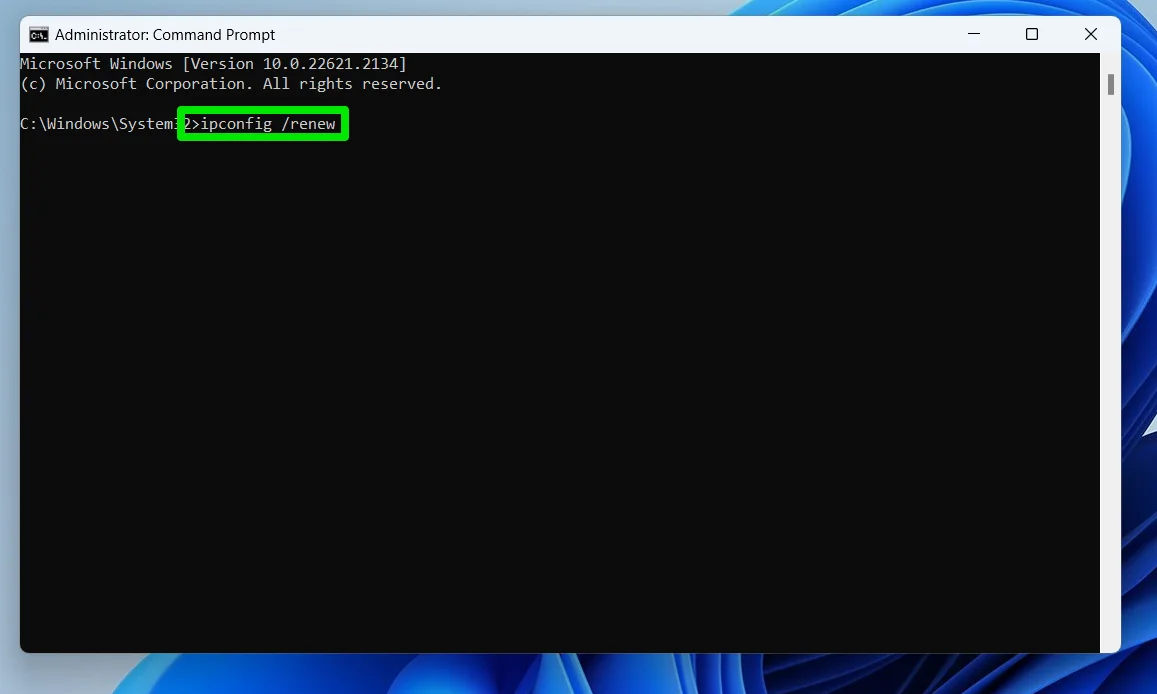
- You will see your new IP address information in the Command Prompt once the process completes successfully.
📌 Also read: Boost Internet on Your PC: Tips on How to Speed Up Your Internet Connection
Conclusion
We’d love to hear your thoughts! Comment below what you think about our solutions!
FAQ
There are VPN services and applications for mobile devices. They offer the same security and privacy benefits users enjoy on desktop devices.
Whether you need a VPN on your mobile device depends on your preference. You can use a reliable mobile VPN service to protect and secure your online activities or access geographically restricted websites.
As mentioned earlier, it’s perfectly normal to experience slower-than-normal speeds when connected to a VPN. That’s because the VPN initiates different processes before linking your device to the Internet.
It encrypts your data and internet traffic and then routes the information through a remote and secure server.
According to CloudFlare, things like Encryption, travel time, and server load can drop the speed of your internet connection.
However, other factors can further slow down your connection when you use a VPN. These include your device’s performance, background processes, and ISP throttling.
Some websites prohibit VPN servers and ban IP addresses they believe are associated with such servers.
So, you may be unable to access these websites using VPNs on their denylist. The location of the VPN server you’re using might also be banned from accessing the website.
On the other hand, some VPN networks blacklist websites they deem unsafe.
You can turn off the safety or threat protection feature in the VPN to prevent it from blocking sites you believe are safe to visit.