![[FIXED] Windows Cannot Complete the Extraction Error](https://www.auslogics.com/en/articles/wp-content/uploads/2018/03/IMG_3327-scaled-e1744113232428-568x359.jpeg)
- How to Fix the “Windows Cannot Complete the Extraction” Error
- Method 1: Restarting Windows Explorer
- Method 2: Restarting Your Computer
- Method 3: Changing the file name
- Method 4: Moving the Zipped File
- Method 5: Changing the name of the destination path
- Method 6: Repeating the download
- Method 7: Updating Windows
- Method 8: Preventing your antivirus program from tampering with the file
- Method 9: Performing a clean boot
- Method 10: Running the System File Checker
- Method 11: Use another application to extract the file
- Conclusion
- FAQ
Compression is the best option for reducing file sizes to make files easier to download, attach, back up, and transfer. But what would you do if you encountered an error message saying, “Windows cannot complete the extraction”?
This error can be caused by several issues, including:
- A destination path that is too long
- A destination file that cannot be created
- An invalid compressed (zipped) folder
- Antivirus interference
- Common system glitches, such as software conflicts
- Type of archived file
In some cases, you may also see the message that says, “The destination file could not be created” when the extraction process fails.
There are some methods you can apply to fix this issue. If you are experiencing the error “Windows cannot complete the extraction” in Windows 10 or 11, this article answers your problems. Follow the instructions we’ve listed below.
How to Fix the “Windows Cannot Complete the Extraction” Error
Method 1: Restarting Windows Explorer
File Explorer (formerly Windows Explorer)
is a Windows’s native file management program that helps users view and organize their files.
It handles different operations, such as renaming, deleting, and moving files. It is also the default program for extracting compressed files and folders.
The program may display the error because it is glitching due to software conflicts, a memory leak, and other OS bugs.
Restarting File Explorer can clear these issues and allow you to extract your files.
Related: Windows File Explorer Not Responding? Try These Solutions
Follow these steps to restart File Explorer:
- Open the Task Manager by right-clicking the taskbar and selecting Task Manager.
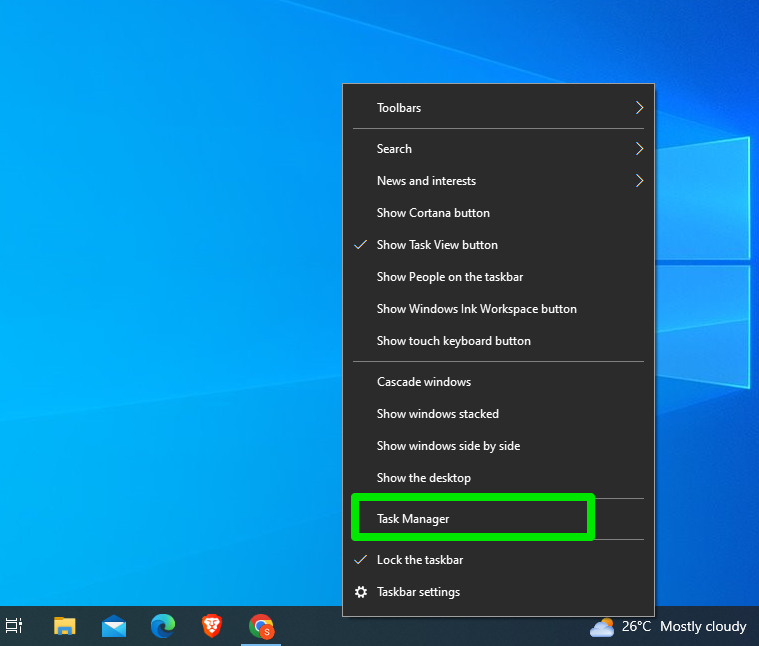
- Locate Windows Explorer under the processes tab, click it once, and select Restart in the Task Manager’s bottom-right corner. The explorer will automatically restart.
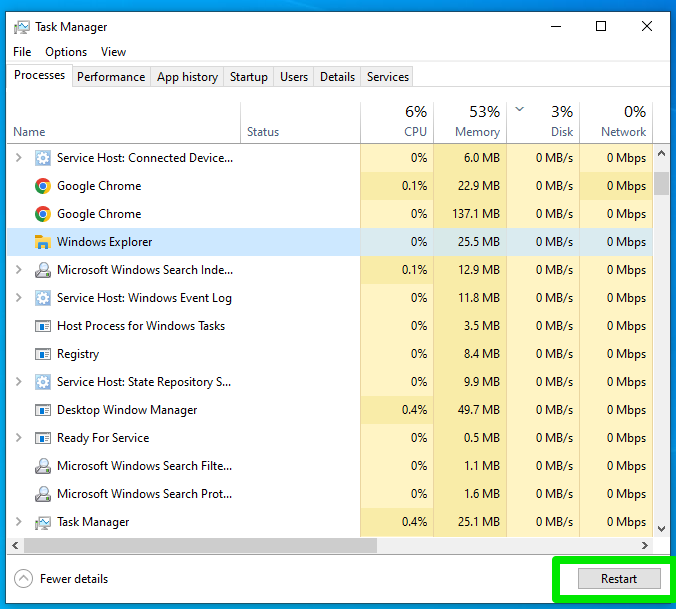
- If you’re running Windows 11, you’ll see the Restart task button at the top of the Task Manager window when you select Windows Explorer.
Also read: How to Fix File Explorer Lag in Windows 11
Method 2: Restarting Your Computer
Restarting your computer can resolve the problem due to several reasons.
Firstly, it can clear the system memory to remove the temporary files, cached data, or processes that may be clogging RAM space and preventing the extraction.
Secondly, rebooting frees up resources, especially from applications and services that have refused to release used memory allocation.
A reboot can also terminate the background processes disrupting the extraction.
Ensure you use the restart command instead of shutting down your computer and booting it back up.
Related: How to Stop Apps from Running in the Background on Windows 10 PC?
Method 3: Changing the file name
Windows will not allow you to use certain characters in filenames. The name you chose for the file may violate Windows’ policy or conflict with an existing file.
So, try changing the name of the archived file before you proceed with the extraction.
You can change the file name by right-clicking it and selecting Rename in the context menu. You can also select the file and then click it again to rename it.
Also read: How to Use Emoji to Name Files and Folders on Windows 10
Method 4: Moving the Zipped File
If the location of the compressed file is protected, move it to another folder. The ideal option would be to use one of your profile folders, such as Documents.
After moving the compressed file, try extracting its contents again.
Also read: How to Find Word Autosave Location on Windows 10/11?
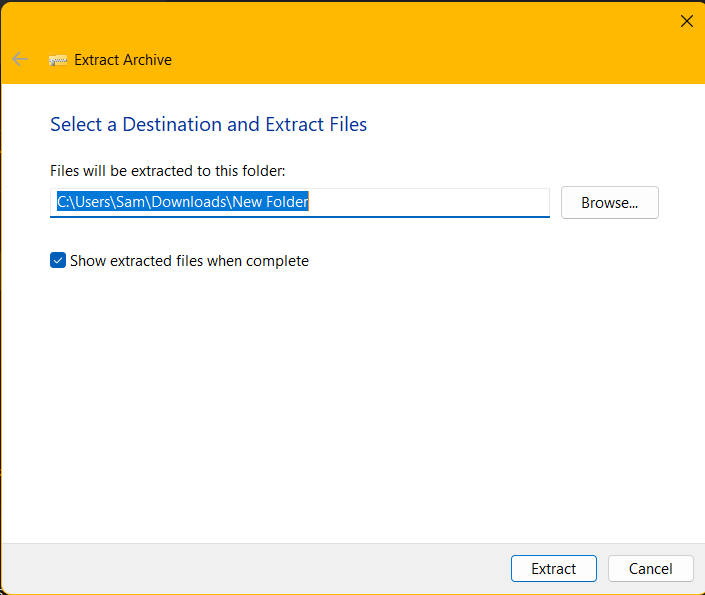
Method 5: Changing the name of the destination path
If you can’t extract the compressed file because the destination path is too long, you can shorten the name of the parent folders.
You can reduce the letters in the folder path by moving the archived file to a different folder, such as your Downloads, Documents, or even Desktop folder.
Method 6: Repeating the download
On the other hand, the “ZIP file not extracting” problem could be happening due to a corrupted or incomplete download.
In this case, you can download a fresh copy of the compressed file and save it to another location. Check if this step resolves the issue.
Method 7: Updating Windows
Microsoft deploys new features and functions to File Explorer through updates.
The program may be showing the “Windows cannot complete the extraction” error because it doesn’t have the software technology to decompress the file you want to extract.
So, open the Start menu, type “update,” and click Check for updates to download and install every update available for your computer.
Helpful read: Ultimate Guide: How to Manually Check and Install Windows Updates
Method 8: Preventing your antivirus program from tampering with the file
Most antivirus software aggressively scrutinizes files you download from the Internet to prevent you from introducing harmful programs to your computer.
Your security application may see the archived file as a threat and block it. This action can trigger the “Windows could not complete the extraction” error.
If you’re sure that the file you want to extract is safe, save it to a different folder, but first, ensure that the folder is added to your antivirus program’s exclusions list.
There are different ways to exclude a folder from scans, and the particular method you’ll use depends on your antivirus. We’ll use Windows Security as an example:
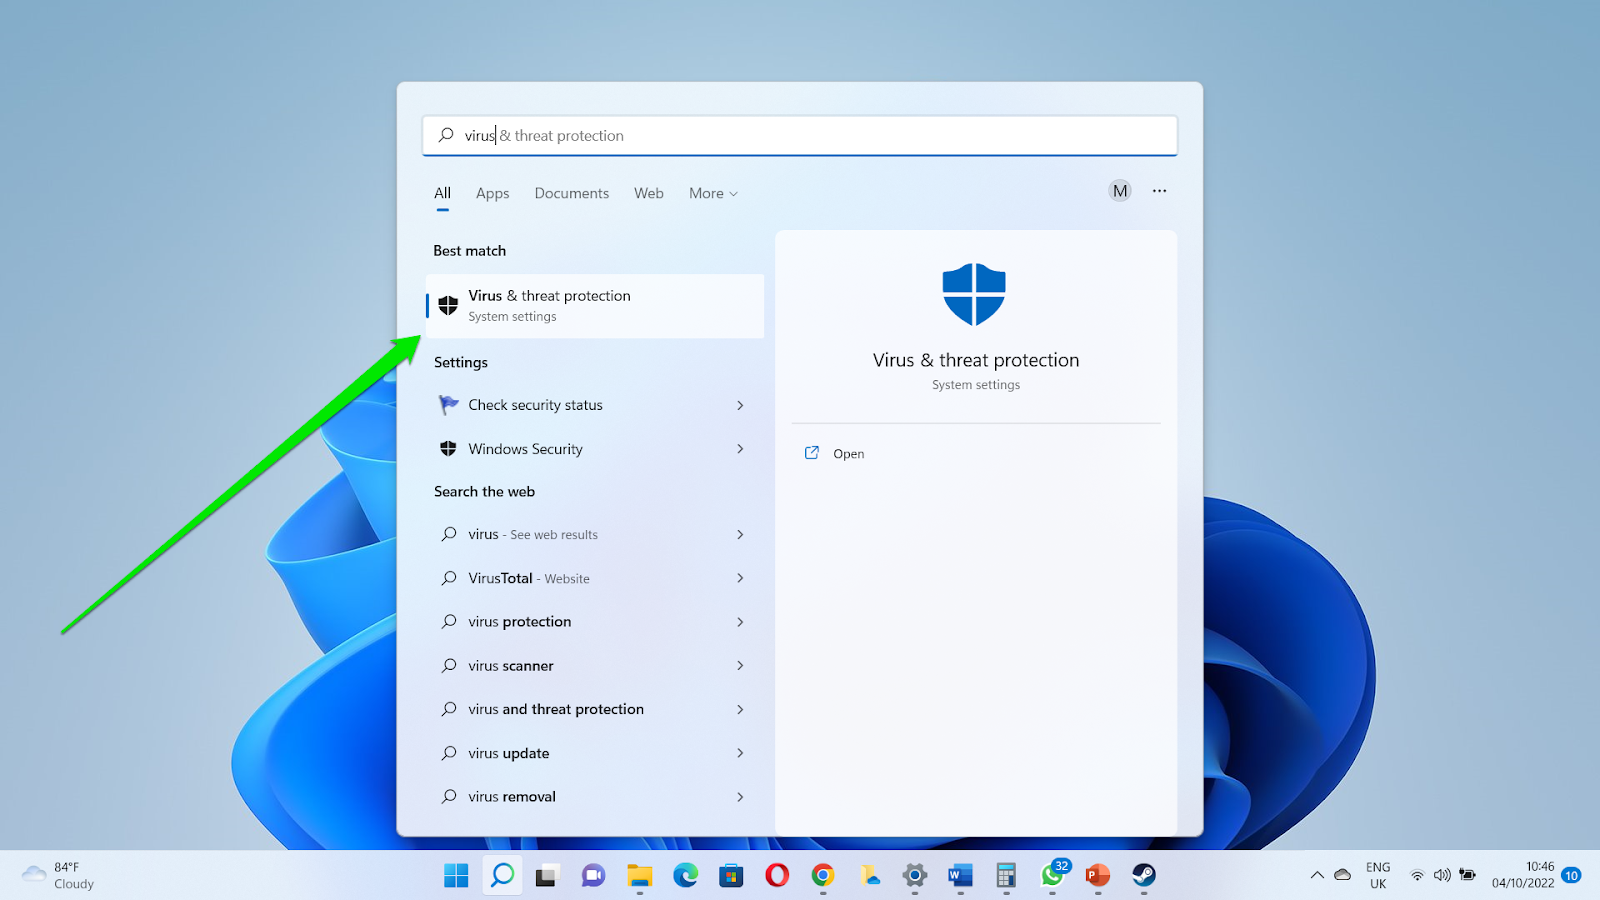
- Click the Start button and type Virus.
- Click Virus & threat protection in the search results.
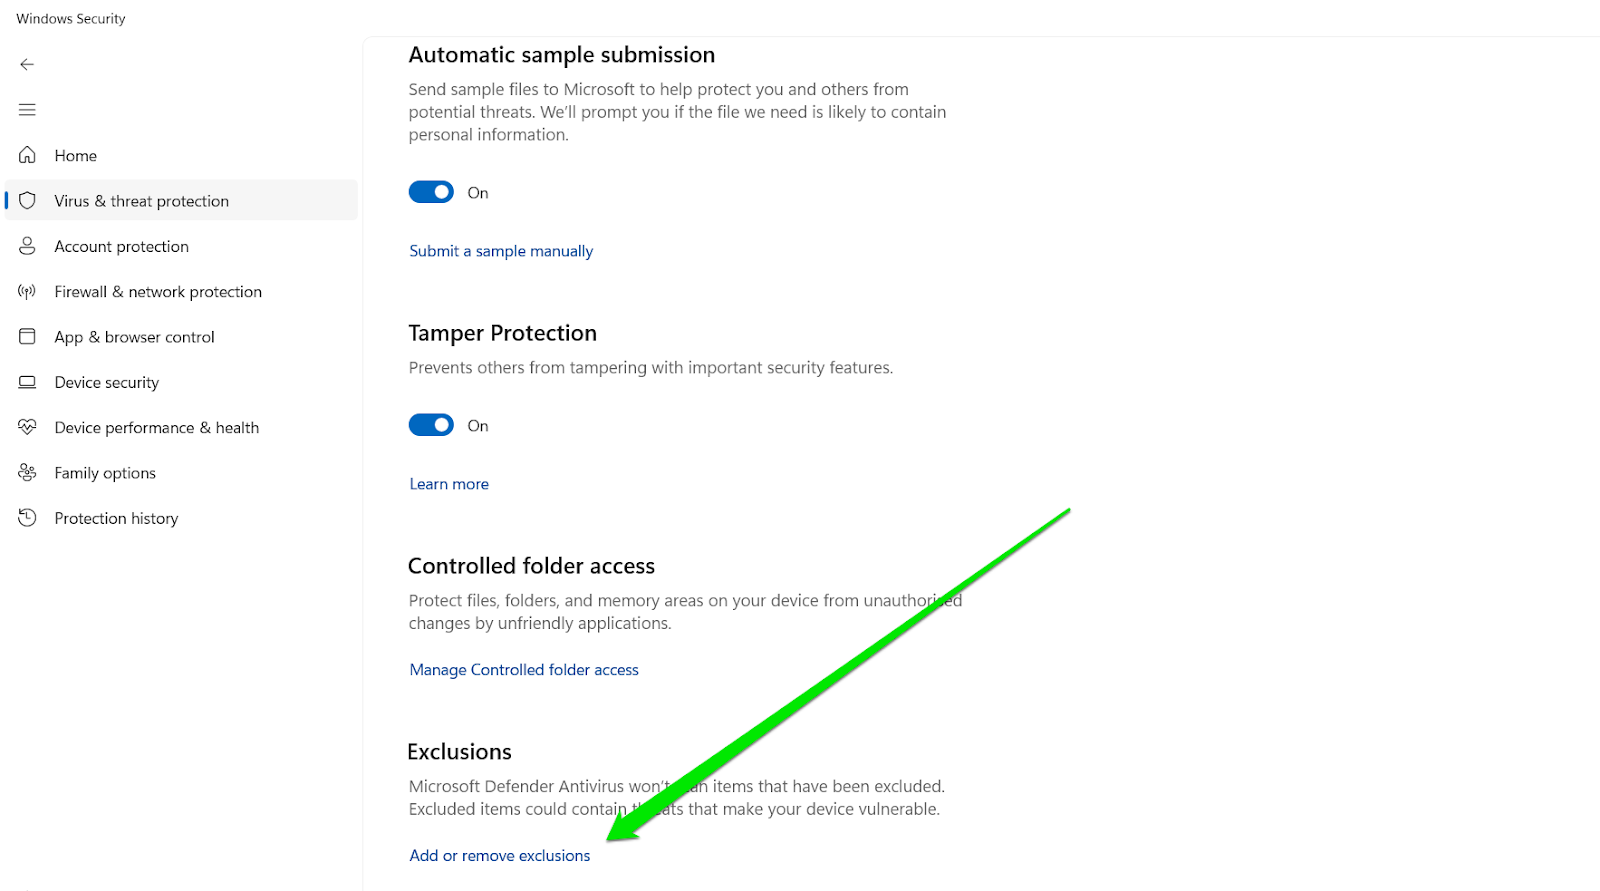
- Select the Manage settings option on the Virus & threat protection page.
- Scroll to Exclusions on the Settings page and click Add or remove exclusions.
- Click the “Add an exclusion” button and click Folder.
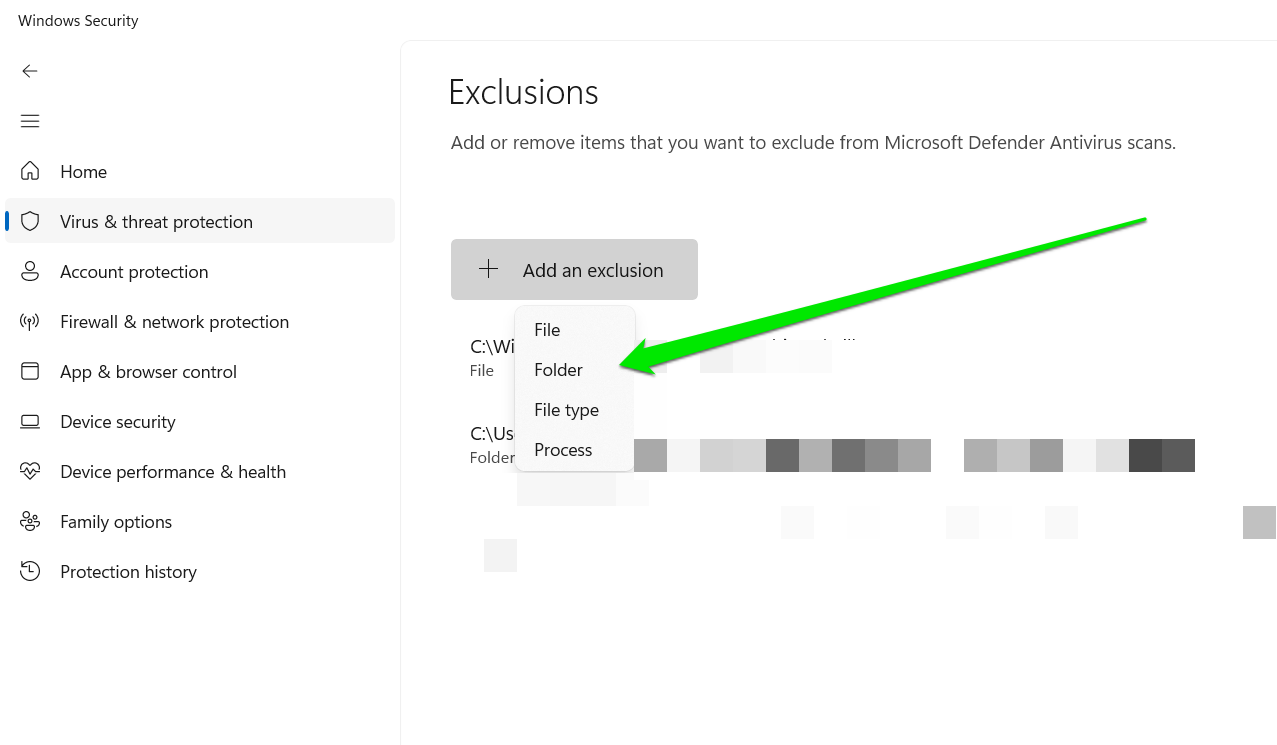
- Choose the Folder where you’ll download the file.
You can now download the file to the excluded folder and check if the problem persists.
Also read: Does Windows 10 Need Antivirus?
Method 9: Performing a clean boot
You can also enter a Clean Boot state and check if you can extract the files. This state deactivates applications and services that automatically run when Windows boots.
If you can extract the file after entering the clean state, one of the software components you turned off must be disrupting the extraction process.
In this case, you would have to troubleshoot to identify the root cause of the problem manually.
These steps will show how to start your PC in a clean state:
- Open the Start menu and type msconfig.
- Click System Configuration in the Start menu search results.
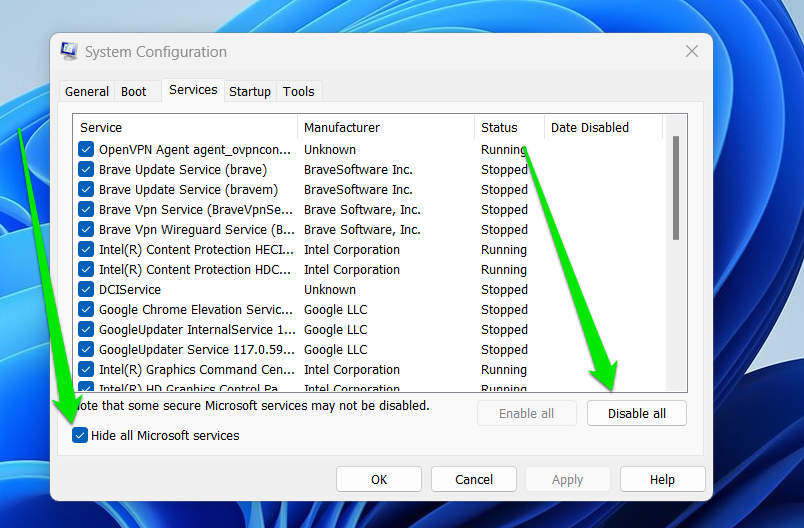
- Go to the Services tab after the System Configuration window appears.
- Next, check the box that says, Hide all Microsoft services.
- Click the Disable all button and select OK.
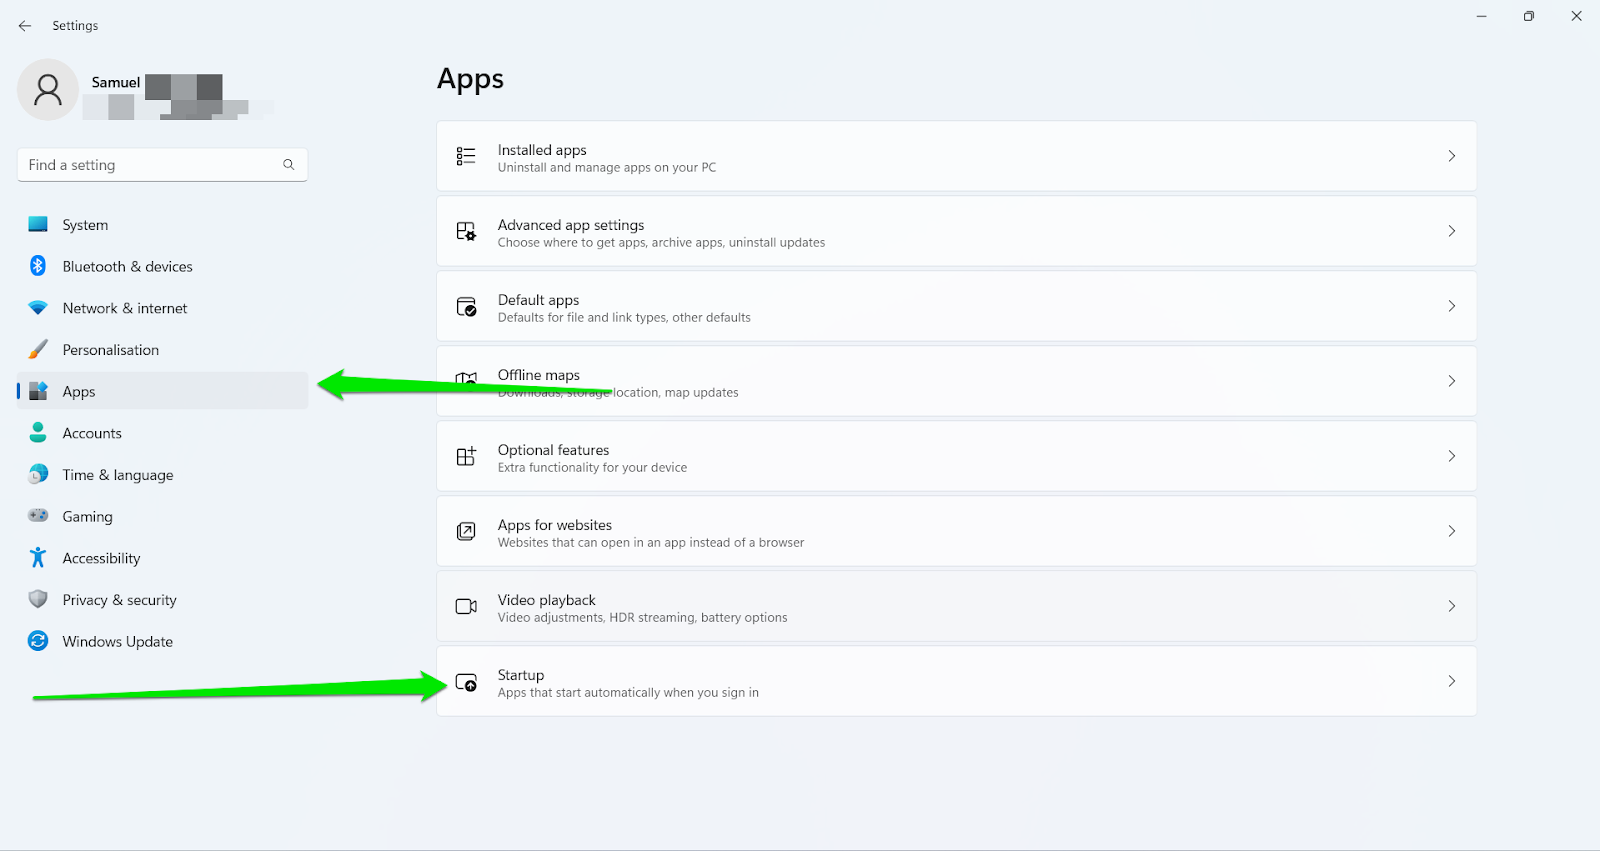
- Afterward, head to the Settings application, select Apps, and click Startup.
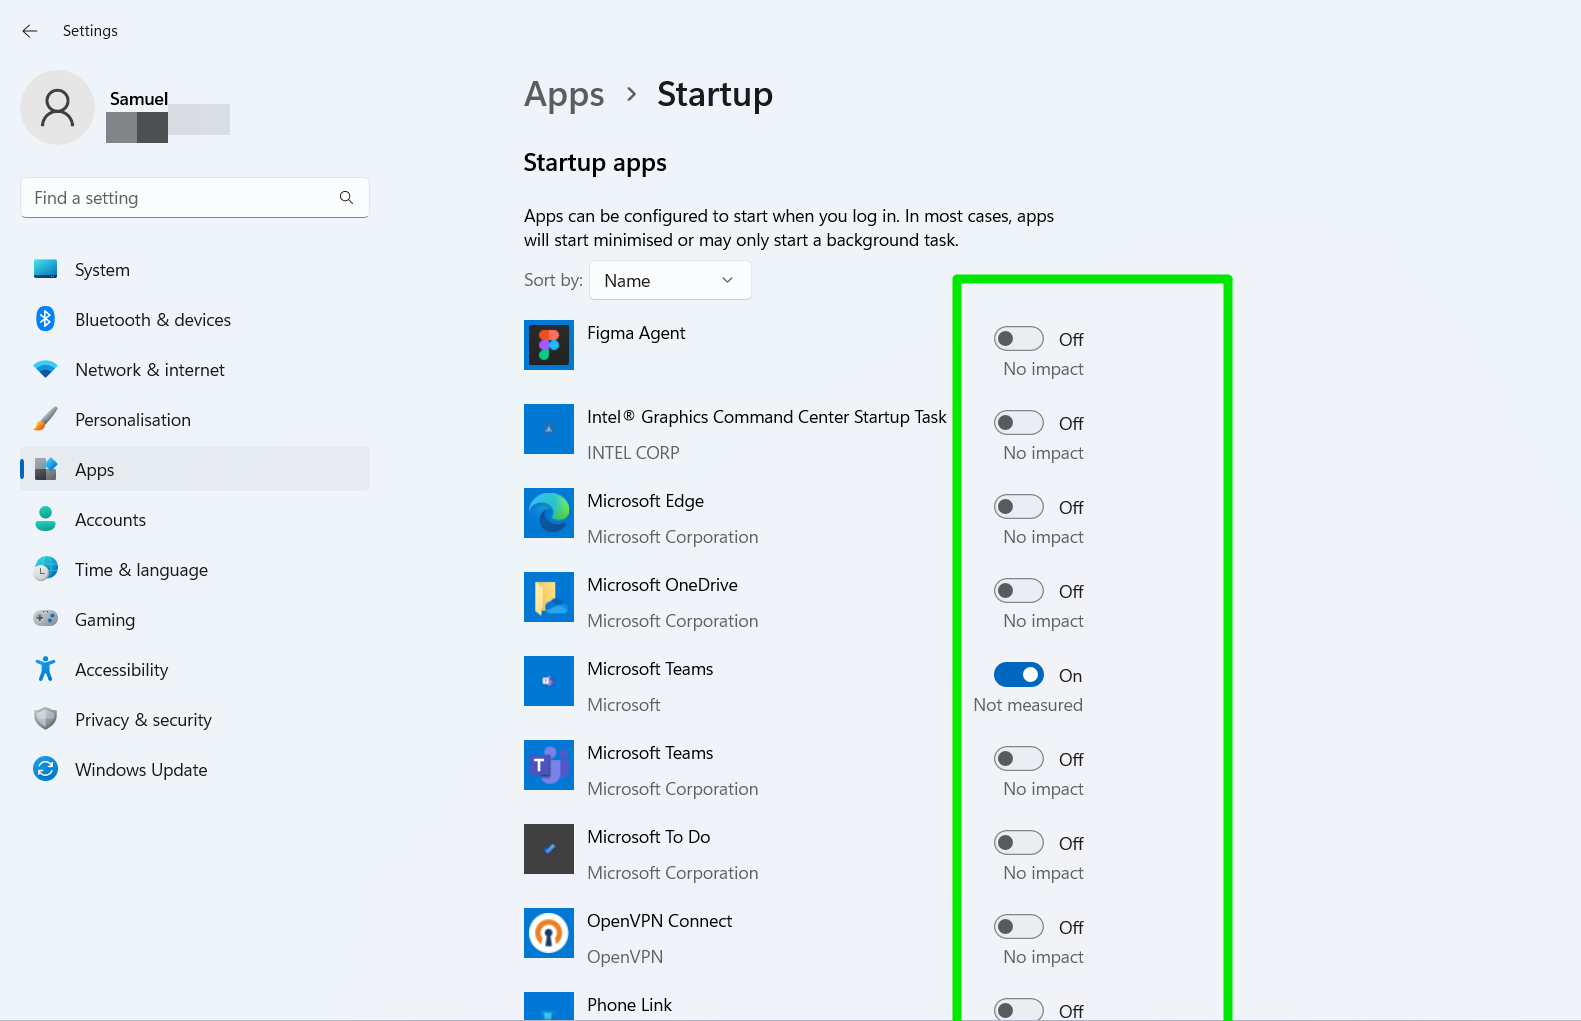
- Disable every app under the Startup screen.
- Now, restart your computer and try extracting the file again.
If you can extract the file without problems, it’s time to find the third-party application triggering the error.
To do that, you have to enable one service at a time, restart your computer, and check for the problem.
If the process seems too long, try enabling every startup app first and check for the issue. If the extraction problem recurs, then you don’t have to be bothered about the startup services.
Windows 10/11 (8, 7, Vista, XP)
Further reading: How to Perform a Clean Boot in Windows 10?
Method 10: Running the System File Checker
You will trigger some Windows utilities to do the job whenever you want to extract a file. These utilities are made up of protected system files.
The error may be showing up because the system files required to extract the file may be corrupt.
In this case, you should run the System File Checker. This tool, also called the Windows Resource Protection utility, is designed to identify and replace damaged and missing Windows files.
Also read: [FIXED] “Windows Resource Protection Cannot Perform the Requested Operation”
Follow the steps below:
- Click the Search box, type CMD, and hit Enter.
- Select Run as administrator when you see Command Prompt in the search result.
- After Command Prompt opens, type the following and tap Enter:
DISM.exe /Online /Cleanup-image /Restorehealth
The DISM tool will now provide the replacement files required for the repair process.
- Now, type sfc /scannow and press the Enter key.
- Let the System File Checker perform its scan. Corrupted files will be replaced on reboot.
Related: How to Find and Fix Corrupted Files in Windows 10
Method 11: Use another application to extract the file
While Windows File Explorer is quite capable of extracting files, it cannot extract specific types of archives.
If you can’t extract a ZIP file after applying the fixes above, File Explorer may not be equipped to decompress it due to its compression format.
So, consider using third-party freeware such as 7zip to extract the file.
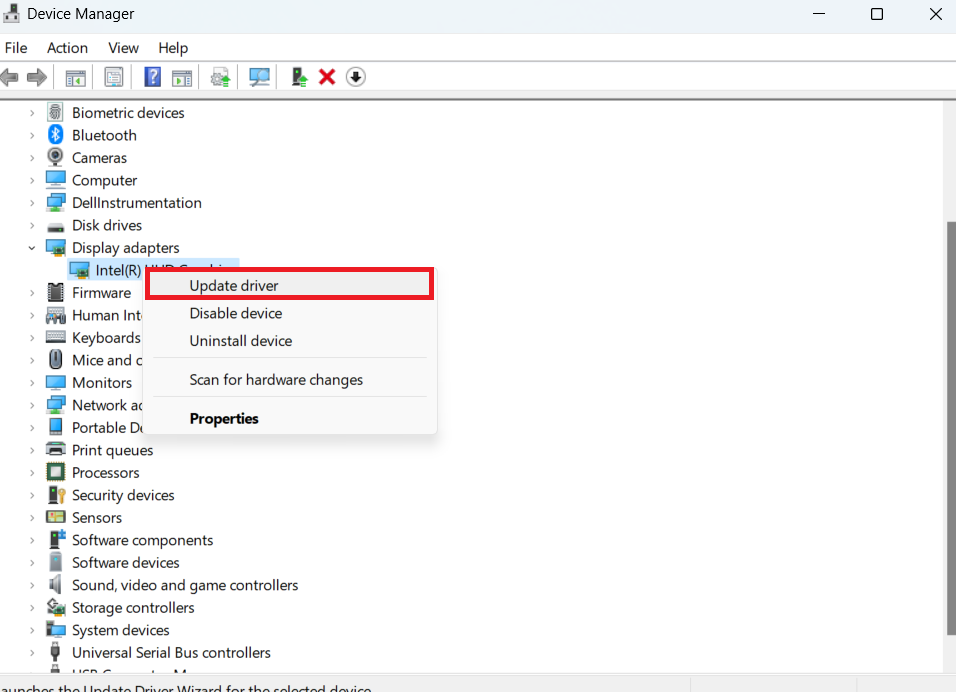
You can also update your drivers to ensure that they are all functioning properly, especially when you’re trying to extract compressed files from an external storage device.
You can conveniently do this by using Auslogics Driver Updater. This tool will detect damaged, incompatible, or missing drivers.
With one click, you can update your drivers to their latest manufacturer-recommended versions.
Conclusion
You shouldn’t lose sleep over the “Windows cannot complete the extraction” and “The destination file cannot be created” errors, as they’re easy problems to solve. We are confident that one of the proposed methods helped you resolve the issue for good.
Remember to always complete your downloads to avoid such issues in the future.