- What Does the “Can’t Record Right Now, Try Again Later” Notification Mean?
- How to Remove the “Can’t Record Right Now, Try Again Later” Error Message on Windows 10
- Use Another Shortcut for Recording
- Turn off Background Recording
- Erase the Microsoft Store Cache
- Run the Windows Apps Troubleshooter
- Update the Microsoft Store
- Change the Captures Folder
- Fix Windows Update and Restore Your PC
- Reinstall the Xbox App and Xbox Game Bar
- Remove Temporary Files
- Repair Your Game Files or Reinstall Your Game
- Conclusion
- FAQ
Have you been getting the “Can’t record right now, try again later” bug while trying to record a session of Minecraft or another game? If so, you don’t need to fret too much. This article was written with your problem in mind.
What Does the “Can’t Record Right Now, Try Again Later” Notification Mean?
The “Can’t record right now, try again later” error on Windows 10 is related to the Xbox Game Bar feature. After sounding out the preferences of PC gamers, Microsoft added the feature to Windows 10. Gamers use it to create, edit, and share gameplay sequences with others. This feature is built into the Xbox Game Bar app on Windows and automatically works in the background, no matter which game is being played.
The best thing about it is that you don’t need to pause your game and activate a key combination to start recording your game session. Just pressing Windows Key+Alt+R will make Game DVR automatically start recording your gameplay. Pressing the same combination again will stop the recording.
However, this feature has been known to work better on PCs with better specs. Game Bar uses a lot of system resources and causes high CPU usage, so it can cause some lag while it’s working in the background. Generally, a lot of gamers treated it as a necessary evil and didn’t mind too much.
📌 Helpful read: Winning Strategies: How to Optimize Your PC for High-Performance Gaming
Instead, what has got them annoyed is the “Can’t record right now, try again later” pop-up, which Game Bar often displays over a running game. Apart from being an annoying distraction, this notification also stops gamers from using the background recording feature. The unusual thing about this bug is that it seems to be related to a specific game. Most users who encountered it reported that it happened while playing Minecraft.
📌 Also read: How to Fix the Minecraft Connection Timed Out Error
Still, the “ Can’t record right now” Windows 10 issue is considered really irritating since it means gamers will miss the opportunity to record rare gaming sequences.
How to Remove the “Can’t Record Right Now, Try Again Later” Error Message on Windows 10
The Xbox Game Bar “We can’t record right now, try again later” problem can be the result of various misconfigurations and system glitches. The cause of the error message on one computer will likely be different on another PC. That said, issues known to trigger the error include:
- Problematic shortcuts
- Background recording
- Captures location
- Corrupt Microsoft Store cache
- Outdated Microsoft Store
- Xbox Game Bar malfunction
- Broken temporary and junk files
- Malware
- Game Files
The methods that follow will show you how to get rid of these underlying problems to eliminate the ” Xbox Game Bar not recording ” issue.
Use Another Shortcut for Recording
For some reason, using the default Windows+Alt+R keyboard shortcut to start and stop game recordings often results in the “ Can’t record right now, try again later” Windows 10 issue . Apart from being an inconvenience, this bug can also slow down gameplay. Some users reported that changing the shortcut stopped the error message from showing up again. If it can work for them, it can work for you as well. Here’s how to change the shortcut:
- Press the
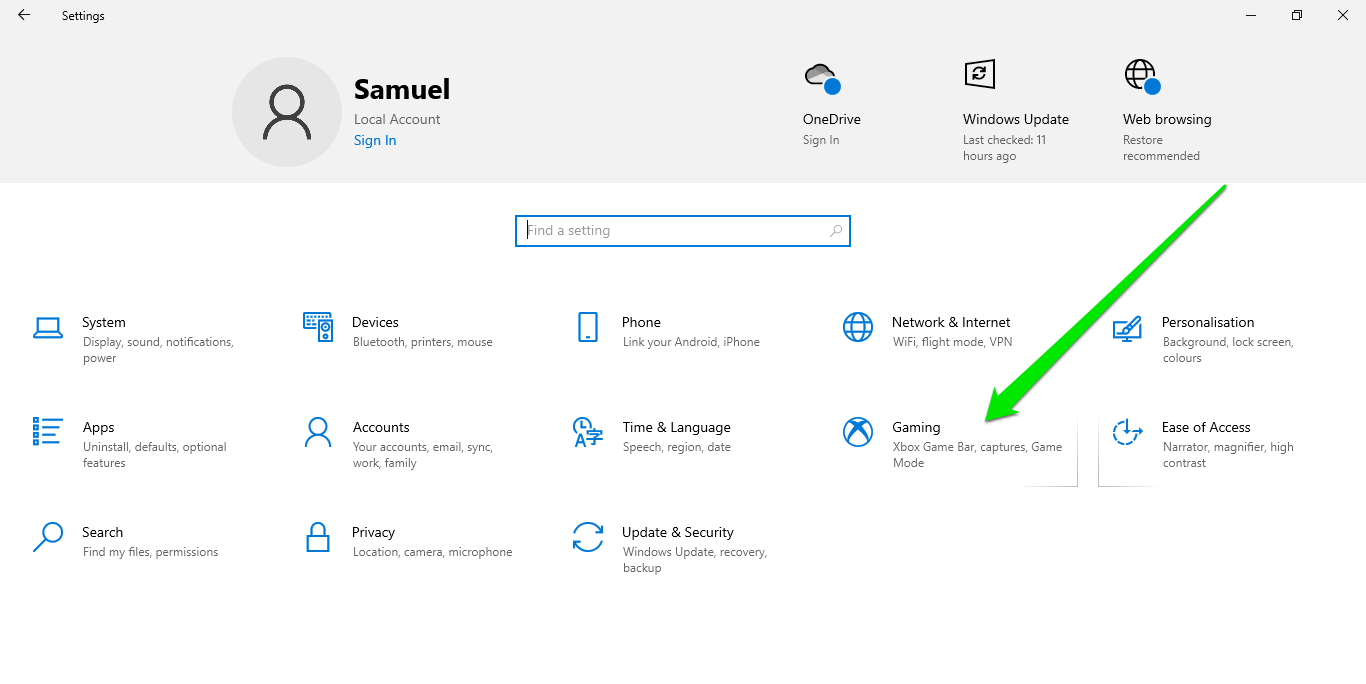
Windows Logo key, typesettings, and open the Settings app. - Click Gaming after the Settings window appears.
![]()
- Make sure you’re on the Xbox Game Bar page when the Gaming window opens.
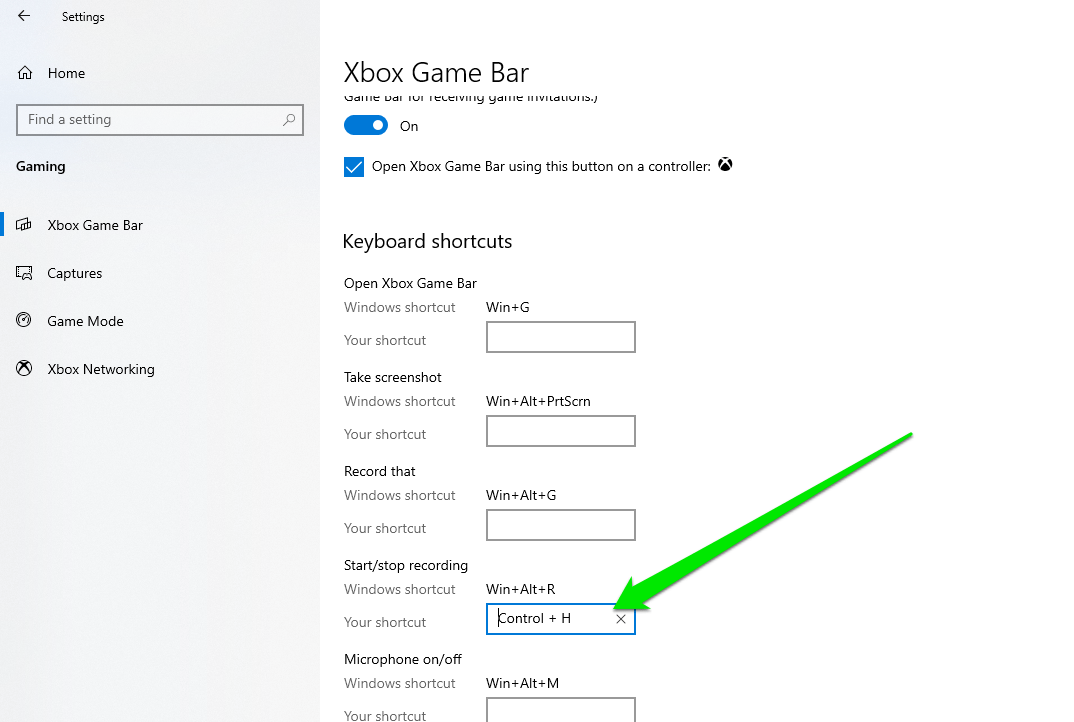
- Scroll down to the Keyboard Shortcuts section and tap the box beside Your shortcut under the control you want to change to activate the cursor.
- Once the cursor is activated, tap the combination you want to use. You have to simultaneously press your keyboard combo just like you would in-game. For example,
Ctrl + H.
![]()
Next time you’re playing a game and want to record a sequence, use the shortcut you’ve created rather than the default shortcut. This fix should stop the ” Xbox Game Bar shortcut not working ” error from showing up again.
Turn off Background Recording
The background recording feature is part of Game Bar’s Capture settings and acts as a rewind assistant. It allows you to capture what happened in the game a few moments ago. If the feature is turned on, it temporarily saves gameplay in the system memory so that you can save already-played sequences that are worth keeping.
Background recording can take up a chunk of your system resources and affect your gameplay. It could also impact how you record live game footage. So, turn it off and see if the problem is resolved. Here’s how to do that:
- Press the
Windows Logo key, typesettings, and open the Settings app. - Click Gaming after the Settings window appears.
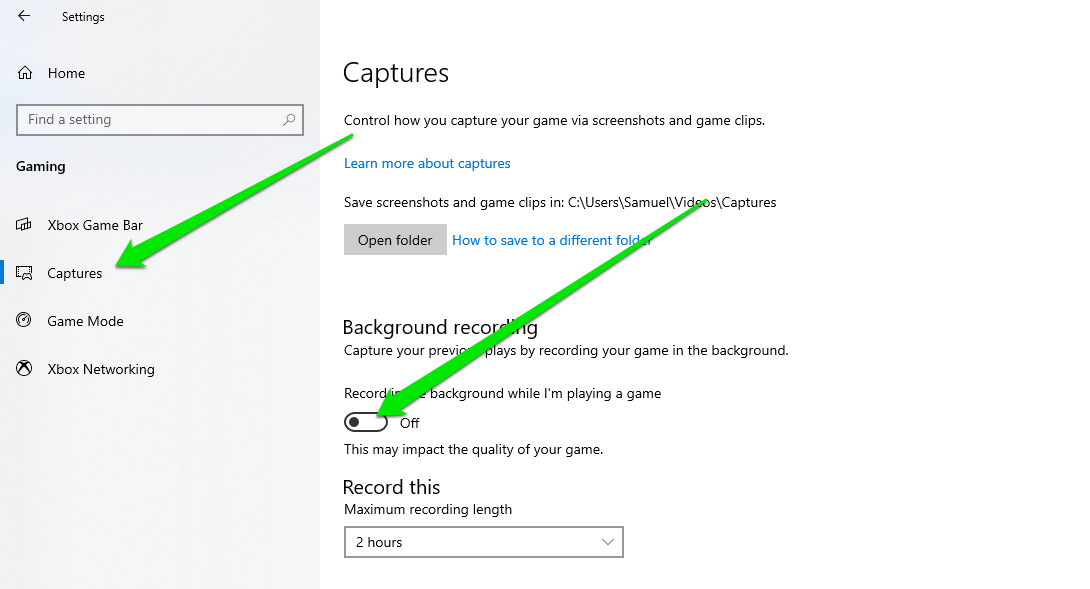
- Go to the left sidebar and select Captures under Gaming.
- Toggle off the switch under Background Recording.
![]()
Erase the Microsoft Store Cache
Several default programs like the Windows Update, Microsoft Store (formerly Windows Store), and Xbox Game Bar are somehow connected together on the operating system. Some of them share dependencies and component services.
Hence, a corruption or issue in one can affect other programs. Take the Microsoft Store and Xbox Game Bar, for example. Its issues can affect your PC’s Xbox Game Bar, causing the ” Xbox won’t record ” problem to mess up your gaming experience.
Resetting the Microsoft Store application can fix this error. When you reset the app, Windows will reinstall its files and preferences, clearing any error that may be affecting the dependencies it shares with Xbox Game Bar. Follow these steps:
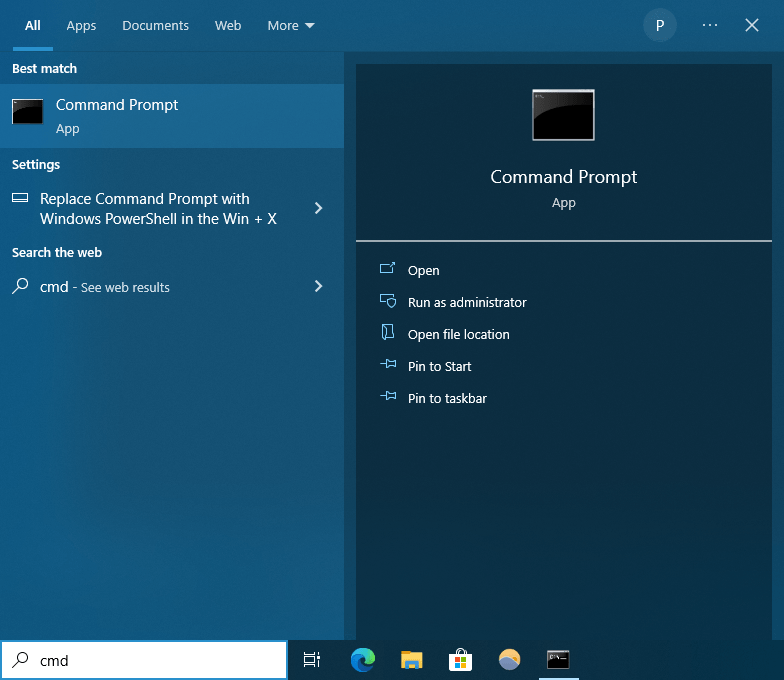
- Press the
Windows Keyand typeCMD. - Select the Run as Administrator option for Command Prompt in the result pane.
![]()
- Click Yes in the UAC pop-up.
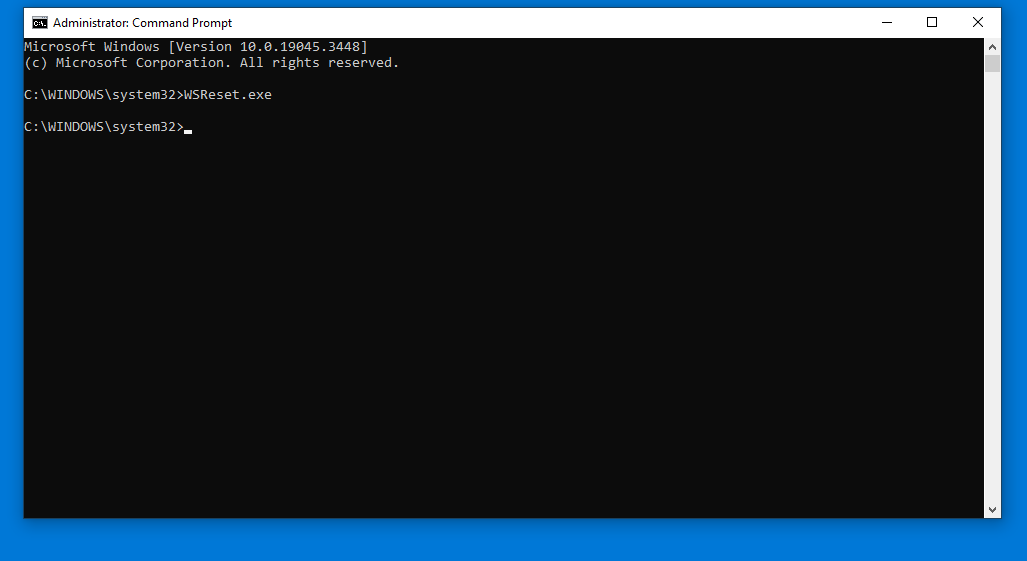
- After the elevated CMD window opens, type the following command and hit the
Enter key:
WSReset.exe
📌 Related: Windows Command Prompt: 28 Most Useful CMD Commands [with Examples]
Instead of opening an elevated Command Prompt window, you can use the Run tool to reset the Microsoft Store:
- Press
Windows Key+Ron your keyboard. - Type
WSReset.exeinside the Run dialog box, then click OK.
![]()
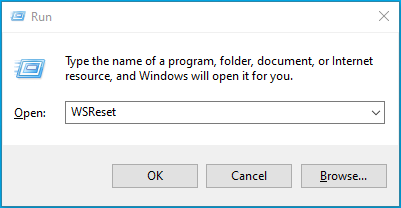
A Command Prompt window will open and carry out the reset operation. The Microsoft Store will open soon after. A third method involves clearing the store from the Settings app. This method performs a more thorough reset operation, as it practically reinstalls the entire application. Follow these steps:
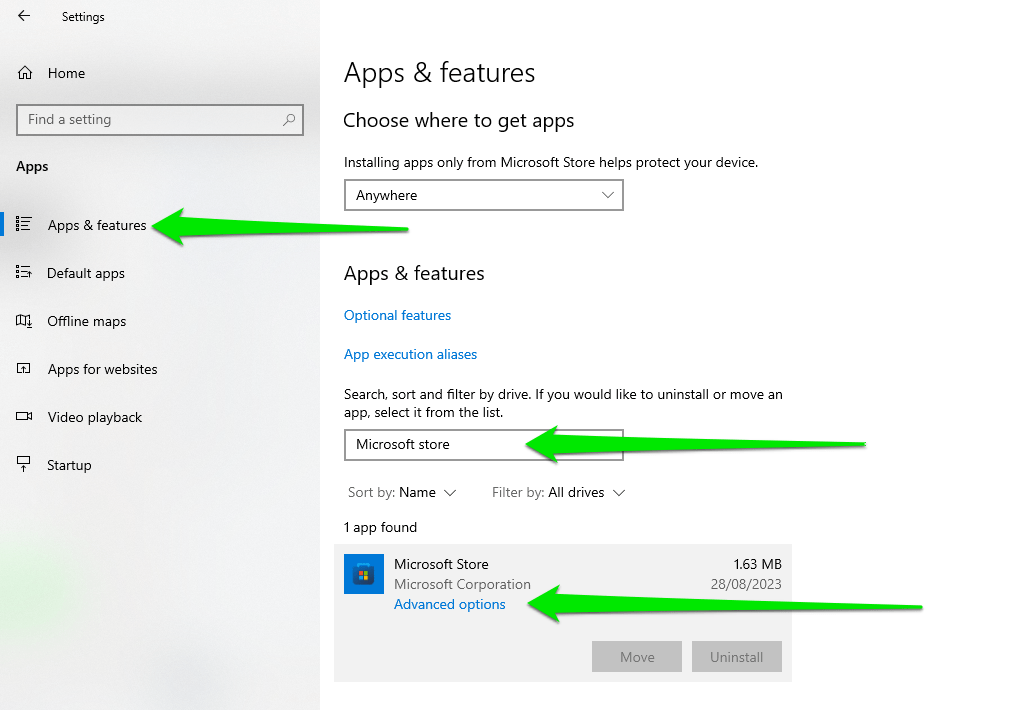
- Right-click the Start button and select Settings.
- Navigate to Apps.
![]()
- Go to the search box and type
Microsoft Store. - Once the app shows up in the results, click it once and select the Advanced button.
![]()
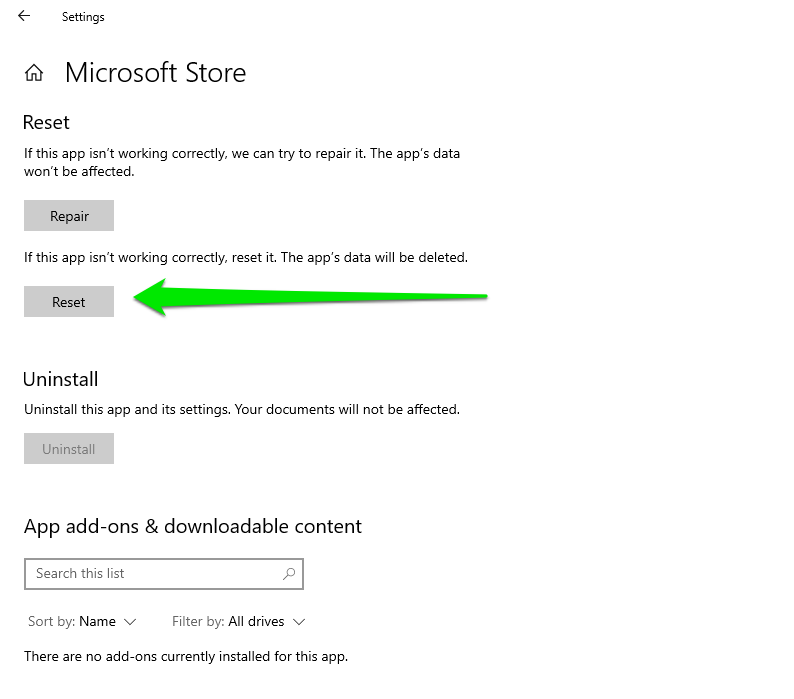
- Scroll down to the Reset section and click the Reset button.
![]()
- Click the Reset button again in the confirmation pop-up.
- Note that you will have to sign in again and apply your preferences.

You can now open your game and check if it works.
Run the Windows Apps Troubleshooter
Running the Windows app Troubleshooter is another possible fix. It’s a built-in tool designed to diagnose and resolve common problems that affect applications installed from the Microsoft Store.
It can identify issues related to software conflicts and malfunctioning services that may be causing the “ Game DVR not working ” Windows 10 problem. It then goes on to automatically fix these problems or provide you with instructions on how to resolve them manually.
Follow these steps to run the troubleshooter:
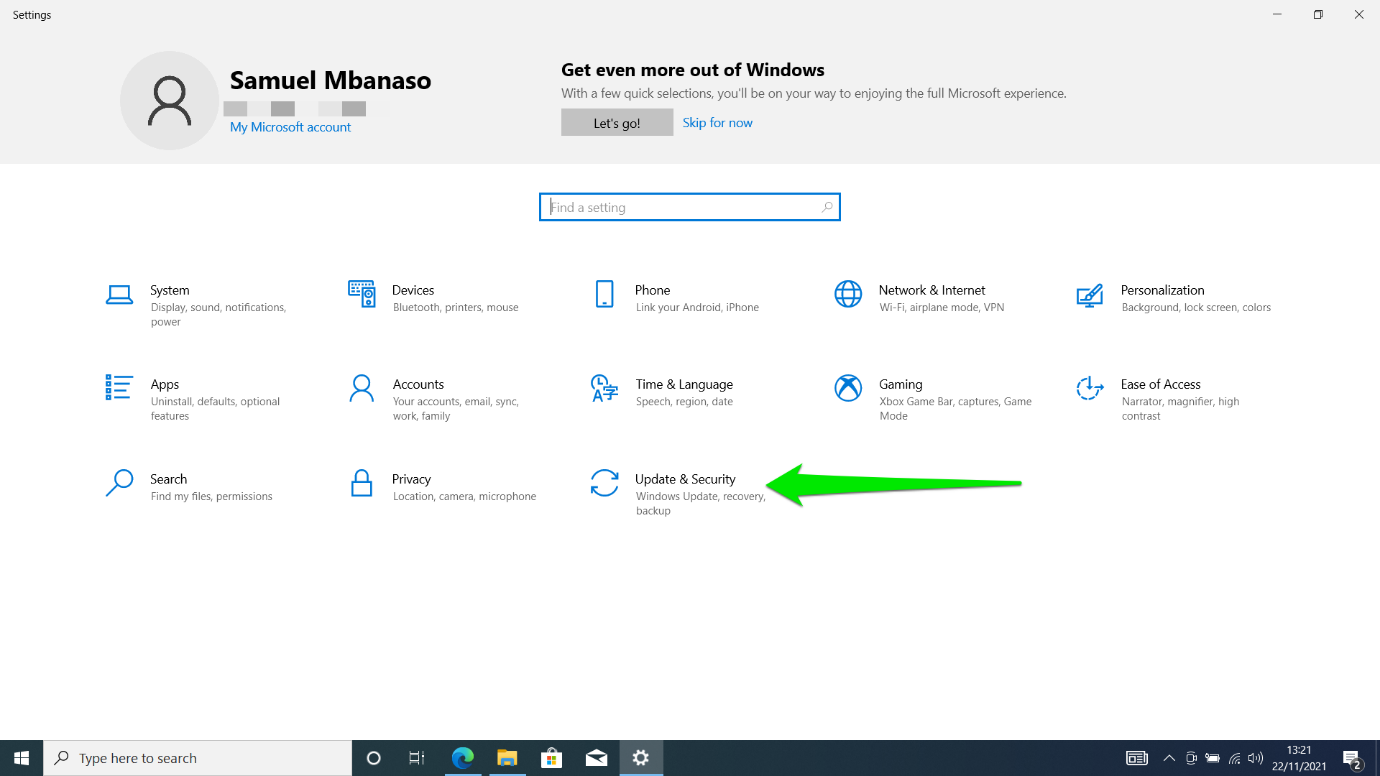
- Open the Settings application by holding down the
Windows key + Ion the keyboard. - Select Update & Security after Settings appears.
![]()
- Click the Troubleshoot entry in the left menu.
- Go to the Troubleshoot page and select Additional Troubleshooters.
![]()
- The tool will now check for issues with every app installed from the store, including the Xbox App, and attempt to fix them.
- If it suggests any fix, follow the instructions.

Update the Microsoft Store
Updating the Microsoft Store allows you to get the latest support features for every application downloaded through the platform. It will be able to track app updates better, detect faults, and implement hotfixes
By default, the store is configured to update apps automatically. That way, it receives updates in the background without you knowing.
That said, there’s a switch that can turn it off. So, follow these steps to ensure that Automatic Updates is turned on:
- Launch the Start menu and type
Store. - Click Microsoft Store on the results page.
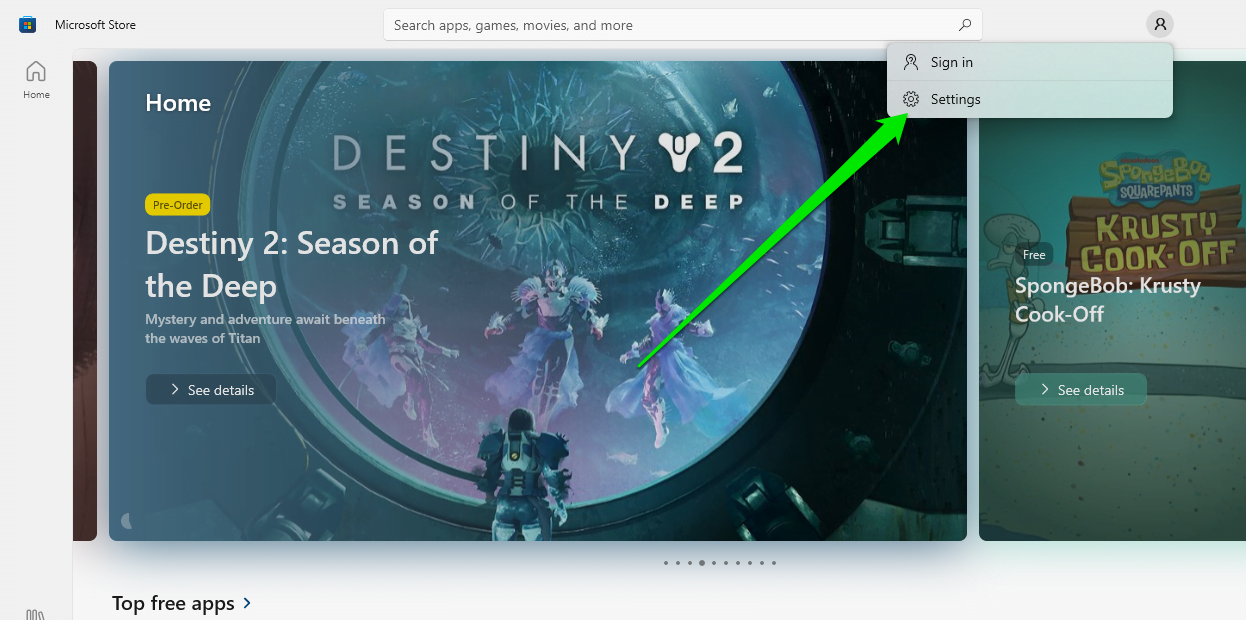
- After the store opens, click the profile icon and select Settings.
![]()
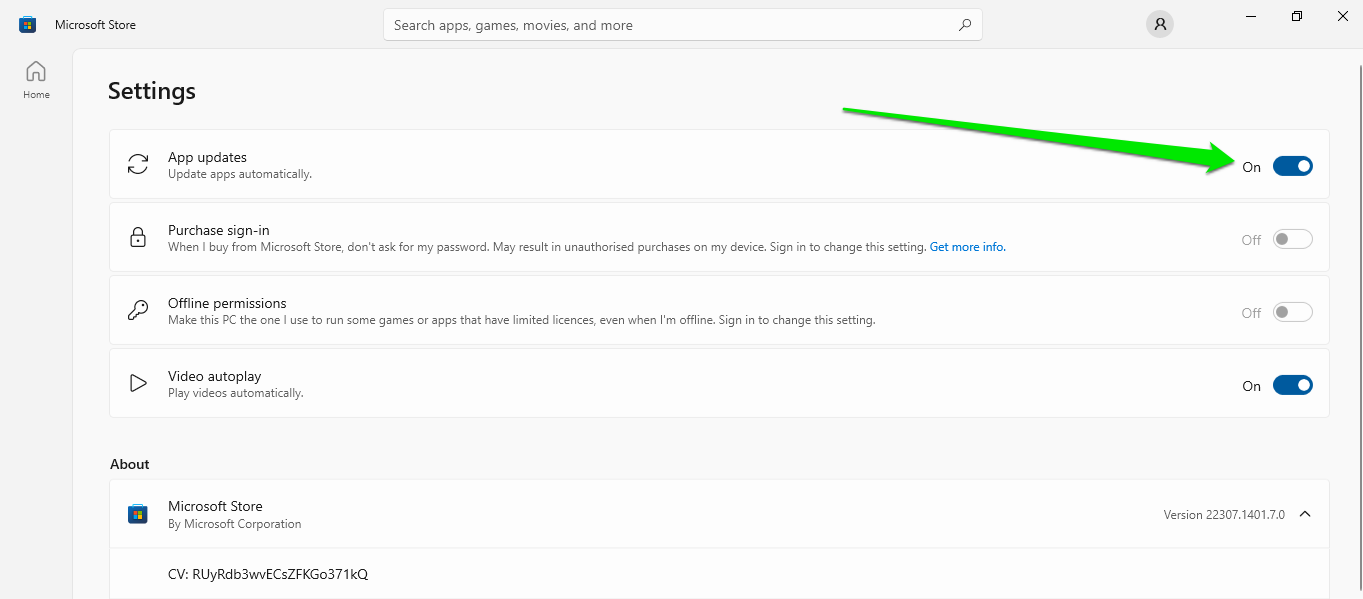
- Next, go to the right side of App Updates and toggle the switch on.
![]()
Change the Captures Folder
The recording feature may not be working due to its save folder’s current location. You may have altered the Capture folder’s path because you want to save your game footage directly to an external drive.
If the drive isn’t connected or its drive letter is changed, you will continue dealing with the ” Game DVR not working” Windows 10 problem. It’s also possible that the current location is on a drive with low available storage.
📌 Also read: How to Get More Disk Space on a PC or Laptop
So, change the path and check if that resolves the problem. Follow these steps:
- Press the
Windows Logo key, typesettings, and open the Settings app. - Click Gaming after the Settings window appears.
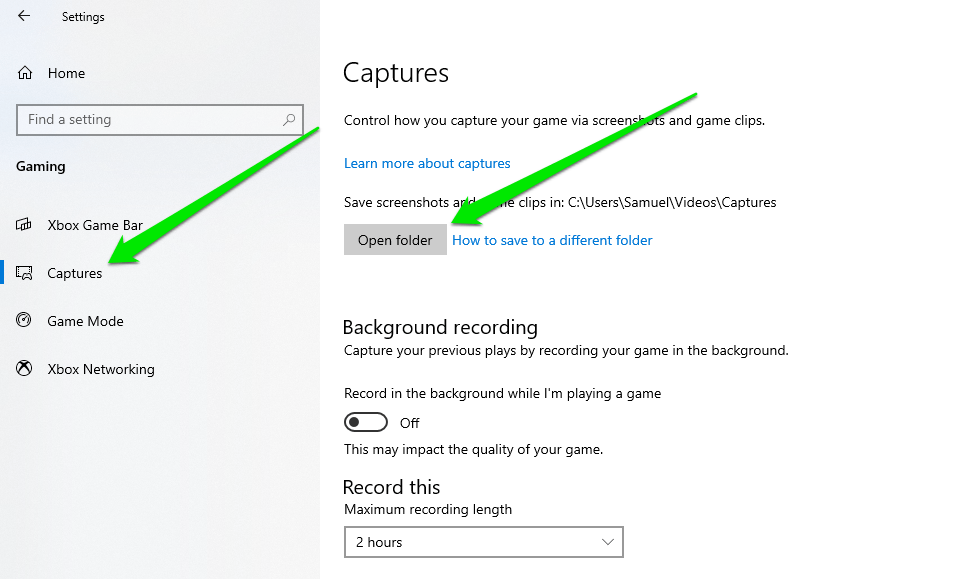
- Go to the left sidebar and select Captures under Gaming.
- Right under Captures, click the Open Folder button.
![]()
- Now, return to the folder where the Captures Folder is located. Select the folder and press
Win+X. - Go to the folder where you want to save your recordings and press
Win+Vto move the Captures folder there.
Now check if the issue has been resolved.
Fix Windows Update and Restore Your PC
Windows Updates are important to Game Bar. Microsoft deploys improvements and fixes to components that support the application through updates. Sometimes, those updates can also break Xbox Game Bar.
So, if you started noticing the problem right after you updated Windows, there’s a chance that the update is responsible. While uninstalling the update can fix the issue, you should first confirm that there are no pending updates.
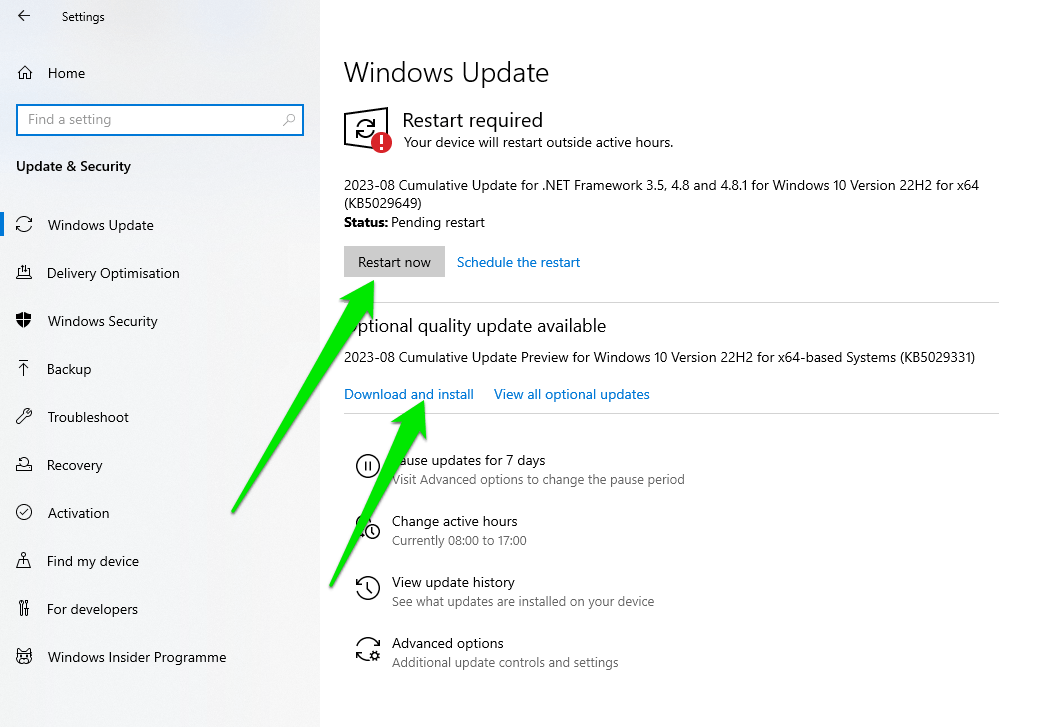
That’s because Microsoft may have released another update that fixes the issue since you installed the defective update. So, type updates in the Start menu and click Check for Updates to open the Windows Update client.
Allow it to install every update that is available, including the optional ones, and then check for the problem again.
📌 Read more: Ultimate Guide: How to Manually Check and Install Windows Updates
If your PC is up to date, uninstall the previous update and wait till Microsoft fixes the problem. Follow these steps:
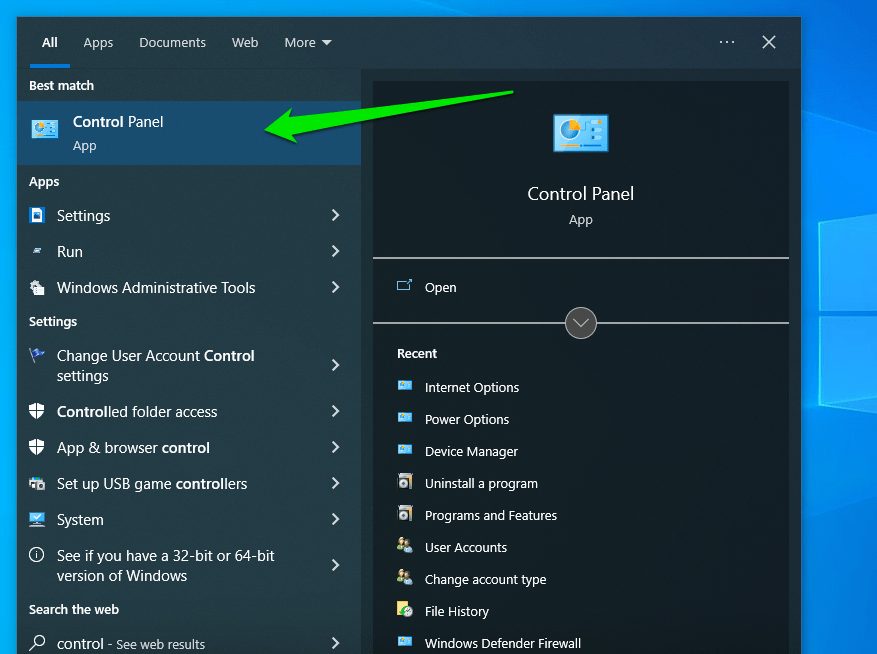
- Launch the Control Panel by typing
controlin the Start menu and clicking the first option.
![]()
- After the Control Panel window opens, click Uninstall a Program under Programs.
![]()
- Go to the left pane and select View Installed Updates.
- Now, click the last update you installed (you will see the dates on the right) and select Uninstall.

Open your game and try recording.
Reinstall the Xbox App and Xbox Game Bar
If the “Can’t record right now, try again later” error continues to affect your in-game recording, perhaps reinstalling the Xbox app could fix the issue.
You can install the Xbox app through the Microsoft Store and uninstall it whenever you wish through the Settings app. On the other hand, you can only reset Xbox Game Bar through the Settings app. That’s because the latter is a native Windows feature pre-installed alongside the operating system, just like the Microsoft Store.
However, you can remove the app via the Windows PowerShell.
It will be a good idea to reinstall both applications as Microsoft designed them to work together.
So, if you have the Xbox app, follow these steps to remove it:
- Launch the Settings app by right-clicking the Start icon and selecting Settings in the hidden menu.
- Click Apps.
- Type
Xboxin the search box under Apps and Features. - Now, click the Xbox app and select Uninstall.
![]()
- Allow Windows to remove the program.
You can now return to the Microsoft Store to reinstall the application. As for Xbox Game Bar, you can reset the app using the Settings app or completely remove it using a command in Windows PowerShell.
First, let’s show you how to reset the application.
Resetting the Xbox app through the Settings application is just like reinstalling it. When you choose the reset option, windows will completely reinstall the program, removing your preferences and erasing any file it created.
Follow these steps:
- Simultaneously tap the
Windows +Ikeyboard buttons. - Click the Apps entry after the Settings homepage shows up.
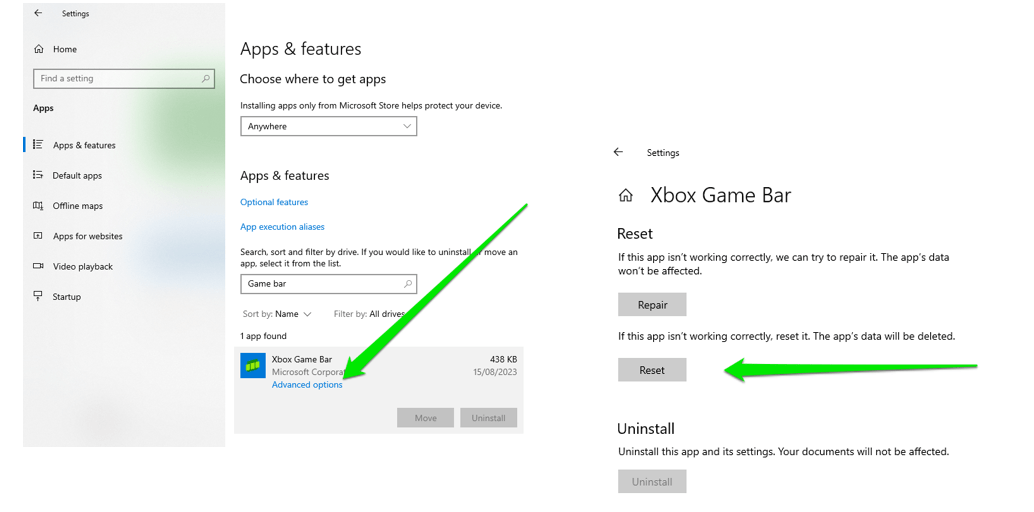
- Use the search box under Apps & Features to find the Xbox Game Bar app.
- Click the app and select Advanced Options.
- Scroll through the page that opens to the Reset section and click the Reset button.
![]()
- Click the Reset button again and allow Windows to reinstall the app.
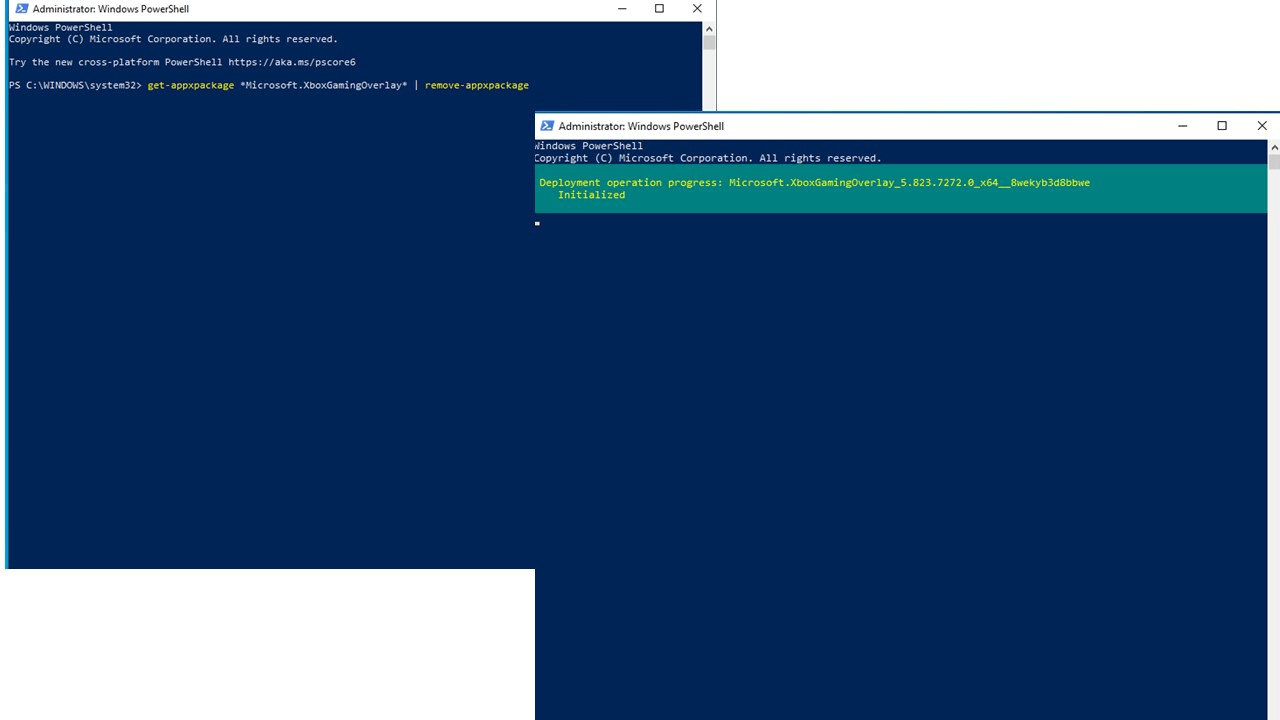
Launch your game and press the Game Bar shortcut to start recording to confirm whether the “Can’t record right now, try again later” notification still appears. If the issue persists, use the Windows PowerShell command to completely remove the app, then reinstall it from the Microsoft Store. Follow these steps:
- Simultaneously press the
Windows Logo + Xkeys to bring up the Power User Windows menu. - Select Windows PowerShell (Admin) to launch PowerShell with elevated privileges. If PowerShell isn’t there, search for it in the Start menu and select Run as Administrator.
![]()
- Copy the command below and paste it into the elevated PowerShell window. After doing that, press the
Enterkey:

get-appxpackage *Microsoft.XboxGamingOverlay* | remove-appxpackage
Xbox Game Bar has been removed from your computer. You can verify this by going into Programs & Features in the Settings app to look for it.
After you uninstall Xbox Game Bar, Windows 10 will remove all its files and settings. Now, open the Microsoft Store application and reinstall it.
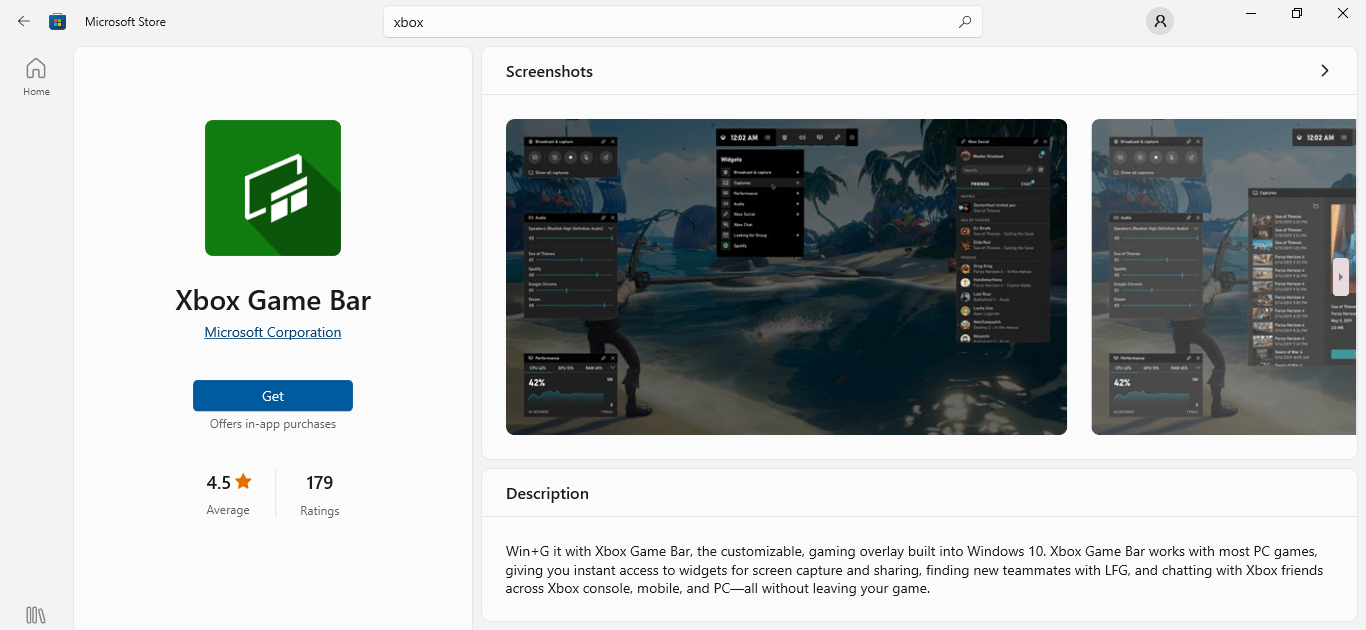
You can also enter another command in PowerShell to reinstall the app. Here’s how:
- Launch the elevated Windows PowerShell.
- Type or copy and paste the following command and press
Enter:
Get-AppXPackage *Microsoft.XboxGamingOverlay* -AllUsers | Foreach {Add-AppxPackage -DisableDevelopmentMode -Register "$($_.InstallLocation)\AppXManifest.xml"}
Launch your game — whether Minecraft or something else. The error will likely be gone.
Remove Temporary Files
Third-party applications, especially web browsers and games, and Windows programs and services create temporary files that they use for a short while. Most of these files are not discarded after and tend to occupy a lot of storage.
Apart from occupying space, they can become corrupt and cause all sorts of problems. The “Can’t record right now” error can also be the result of too many or corrupt temporary files. Try clearing them and check if that helps.
There are different ways to clear temporary files. You can use the Disk Cleanup tool, the Settings app, or a specialized third-party tool.
Let’s start with the Disk Cleanup Tool:
- Type
Clean-upin the Start menu and click Disk Clean-Up in the search result. - Choose the drive where the temporary files are located once the Drive Selection page opens and click OK.
![]()
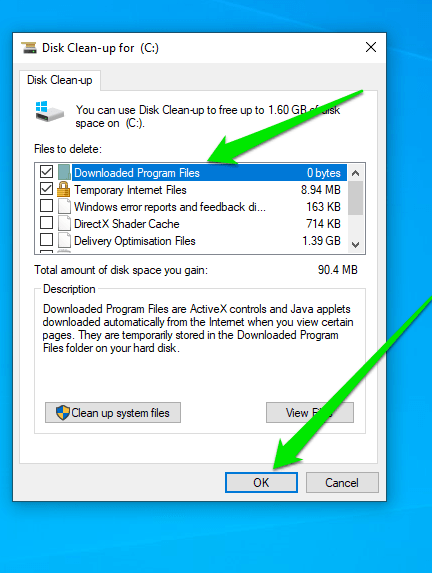
- The tool will now calculate and compile the temporary files on the drive and open the full Disk Cleanup dialog.
- You’ll see different categories of temporary files under Files to Delete. Select the type of files you want to remove and click OK.
![]()
- Return to the dialog and click the Clean Up System Files to find and delete temporary files created by Windows applications.
- Run your game and try running the Xbox game bar to check for the problem.

📌 Read more: How to Free Up Space on PC With Windows Disk Cleanup
Follow these steps to use the Settings app:
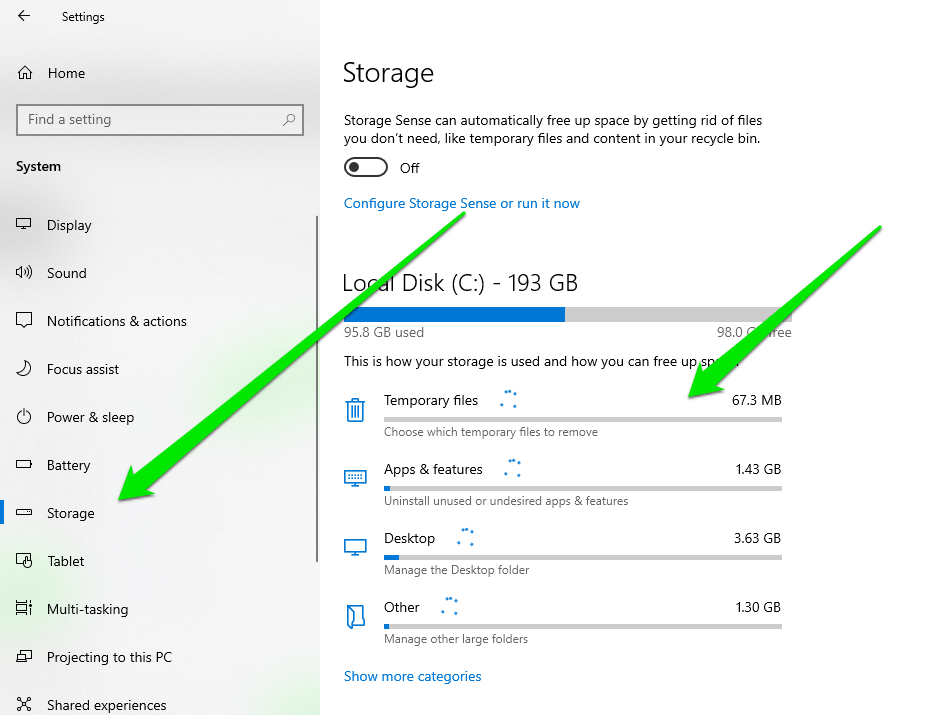
- Launch the Settings application and select System from the first screen.
- Go to the left menu of the System page and click Storage.
- The system will now calculate different file types and show you how much disk space is taken up by temporary files.
![]()
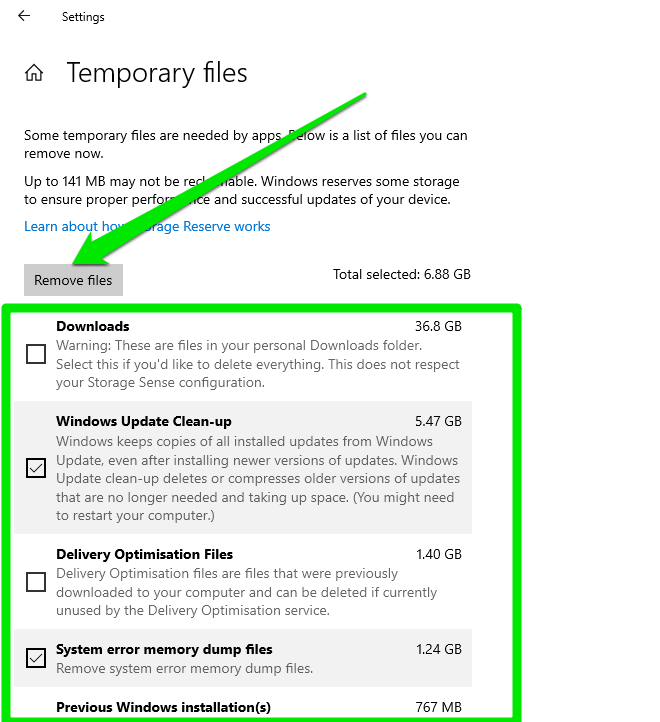
- Click Temporary Files and select the types of files you want to remove.
- Click the Remove files button.
![]()
Using a Specialized Third-Party Tool
You can also use Auslogics BoostSpeed to make sure your CPU never has to deal with the burden of temporary files. The tool will also make sure these files never take up too much space. It can automatically delete them when they’re no longer in use.
The good thing is that the program offers other system optimization tools that can help you do things like maintain your system’s health, delete duplicate files, and protect your hard drive from spyware.
Repair Your Game Files or Reinstall Your Game
If you’re only experiencing the problem within one game, then its files may be the problem. Minecraft seems to be the main problem for many users. However, others have complained about experiencing it exclusively on other games.
The “Xbox Game Bar not recording” problem is one of the symptoms of corrupt or missing game files. You can repair those files using your game launcher or completely reinstall the game.
📌 Also read: [FIXED] New Games Don’t Start or Are Not Working on Windows 10
Conclusion
You should now be able to record any game footage without problems. Remember to always keep your PC up to date and run the required maintenance. You can rely on Auslogics BoostSpeed since regularly cleaning up junk files and temporary files can be quite stressful.