
Minecraft remains one of the world’s best-selling and most popular video games. With more than 140 million active users, there’s no sign that the game will ever slow down. But like every gaming program, especially those that run on Windows, there’s always one bug or the other to deal with. Some users have complained about an issue that stops them from launching Minecraft on Windows. The problem is with the Minecraft Launcher. From time to time, it checks for and installs updates for improvements and bug fixes when users open it. Many gamers don’t know how to update the Minecraft Launcher because the process is usually automatic. That said, they can manually update it through the Launcher’s settings interface. When the update process fails or gets stuck, an error message in this form is usually displayed:
Unable to update the Minecraft Native Launcher.
After the error message appears, Minecraft typically initiates the update process again, but the update gets stuck again. The issue prevents the app from opening and keeps users locked out of their games.
If you’re one of those users experiencing the problem, this article contains all the fixes and suggestions to help you get rid of the error.
What Causes the “Unable to Update the Minecraft Native Launcher” Error Message?
Some different underlying processes and issues can break the Launcher’s update process and cause the “ Minecraft Launcher not opening” issue. Understanding them will help you know where to look. We’ll go through these likely causes one after the other.
- Lack of admin privileges. The Launcher needs to modify installation files whenever it attempts to download and install updates. If it does not have advanced permissions, Windows may block it from accessing those critical files.
- Irregularities in the new launcher. The problem may be related to Microsoft’s acquisition of the game from Mojang. A new Windows launcher that works with Windows 10 and Windows 11. The launcher may clash with files from the previous version, triggering the error whenever your computer wants to update the Microsoft Launcher.
- Disruptions from third-party security applications. Some third-party security solutions, especially antiviruses, are known to block processes used by games or disrupt their operations. Some protection utilities even stop applications from starting or disabling the components they rely on.
- Broken or missing Minecraft files. The launcher depends on its installation files to work correctly and fetch updates from its servers. If any of these files become broken or missing, the program will begin to experience issues.
Also Read: How to Find and Fix Corrupted Files in Windows 10?
- Problematic Windows updates. Some people found that the issue started immediately after they updated Windows. Updates have been known to cause occasional problems with certain programs. However, Microsoft always fixes the bug.
Also Read: Windows Update Troubleshooter: Easily Fixing Windows Update Issues
How to Fix the Unable to Update the Minecraft Native Launcher Error on a Windows 10 PC
We advise that you start with the first procedure on the list. If it fails to resolve the problem in your case, you must move to the second fix and continue to work your way through the solutions in the order they appear.
Fix 1: Run the launcher as an administrator
The Minecraft Launcher might be experiencing difficulties operating because it does not have the required permissions. Running the program as an administrator grants it those permissions.
To do that, right-click the Launcher whenever you want to open it and select Run as Administrator.
Also Read: [FIXED] You Need to Sign in as an Administrator to Continue
Fix 2: Repair the Minecraft launcher
We believe Windows keeps showing the “Unable to update the Minecraft Native Launcher” notification because the app’s files may be corrupted or broken. So, attempt to repair the launcher and check if that works.
Fortunately, Windows allows you to repair files for any program downloaded from the Microsoft Store. The repair utility checks for missing or corrupt files and automatically replaces them from the store’s servers.
Follow these steps to repair Minecraft through the Control Panel:
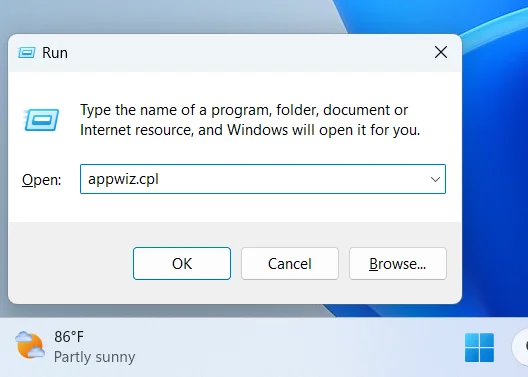
- Use the
Windows + Rshortcut to launch the Run dialog box. - Type
appwiz.cplinto the Run text box and hitEnteror click OK.
- After the Programs and Features window opens, scroll through your programs and right-click Minecraft.
- Click Repair.
- Follow the instructions that appear to repair the game.
- Now, restart your computer and run Minecraft.
You can also follow these steps, especially if you installed the launcher from the Microsoft Store:
- Right-click the Windows button from your taskbar or press the
Windows + Xhotkey. - Click Installed Apps if you’re running Windows 11 and Apps and Features if you’re running Windows 10.
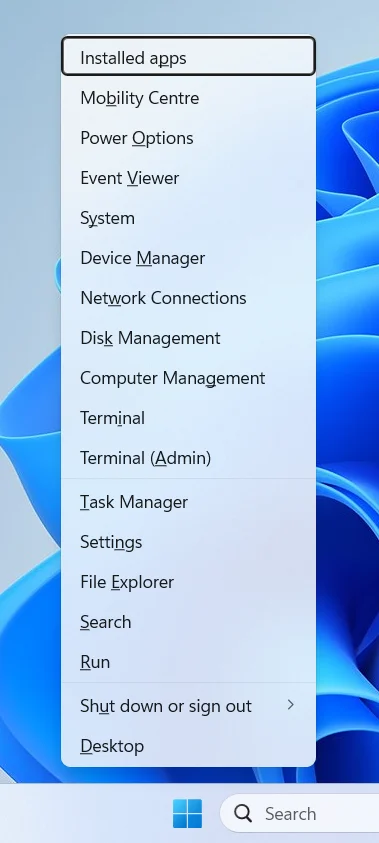
- Go to the search box and type
Minecraft. - If you’re on Windows 10, click the Minecraft Launcher entry and select Advanced Options. If you’re on Windows 11, click the three dots beside the launcher and choose Advanced Options.
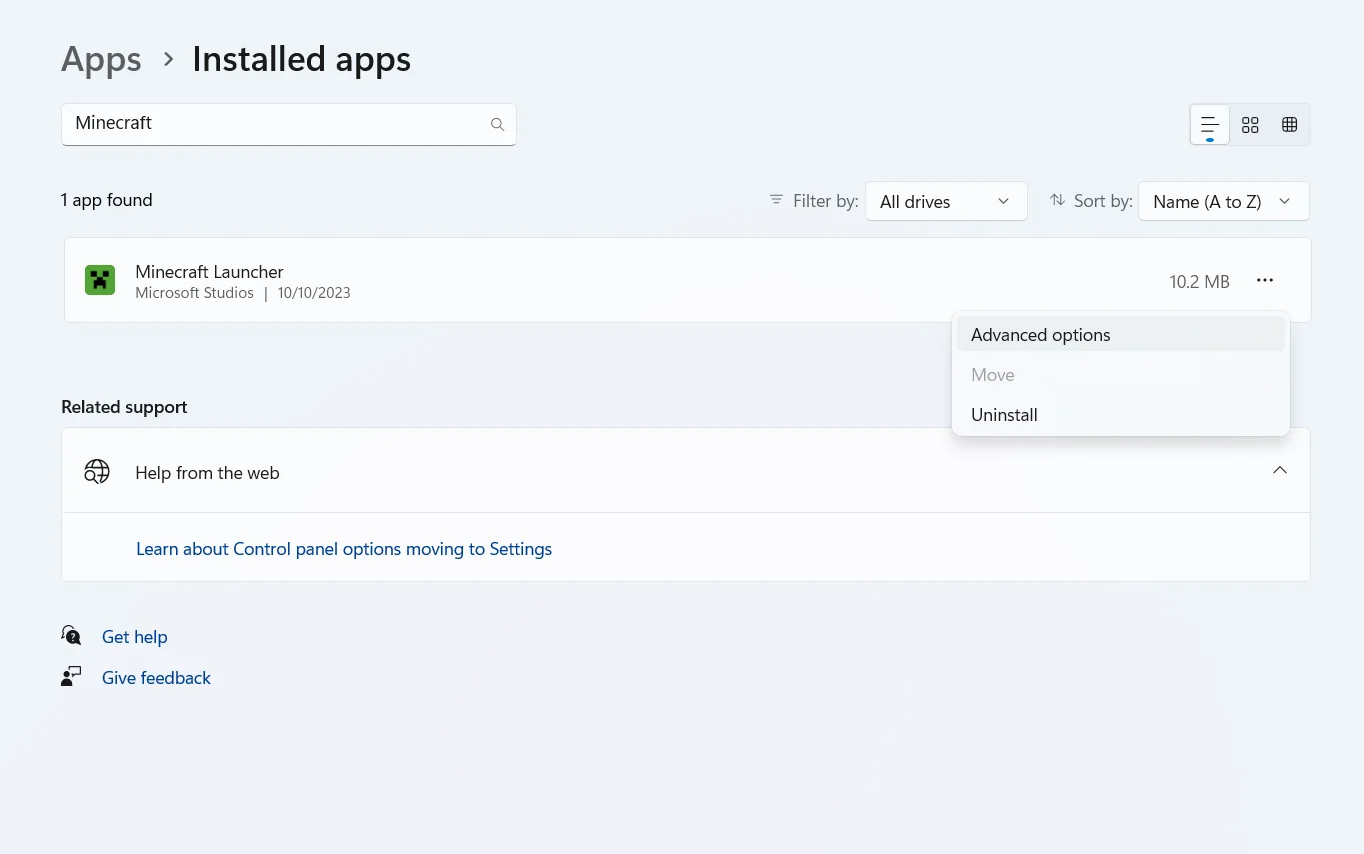
- Scroll down and select Repair.

- After Windows completes the repair process, restart your computer and try running the program to check for the “Minecraft launcher not updating” problem.
You should also ideally repair Windows’ Gaming Services. Return to the Installed Apps (or Apps & Features) window and use the search box to find the Gaming Services app. Select it and click Advanced options. Now scroll down and click Repair. Go to the next solution If the ”
Unable to update the Minecraft Native Launcher” error continues to appear.
Also Read: [FIXED] How to Fix the Minecraft Connection Timed Out Error
Fix 3: Disable your antivirus.
We earlier established that a credible link exists between the actions of antiviruses and the issues that trigger the “
Unable to update the Minecraft Native Launcher” error.
All your problems might be due to your antivirus overreaching by disrupting or interfering with the Minecraft Launcher.
You can discover the truth by disabling your antivirus to test things.
Fortunately, almost every antivirus vendor provides its customers with the means or options to disable security programs. Windows’ native antivirus program also has a switch.
You can go to your security application’s settings menu and activate the disable option or toggle an on/off switch.
If time-based options allow you to disable the application for a few minutes or an hour, choose one and run the launcher to check for the problem.
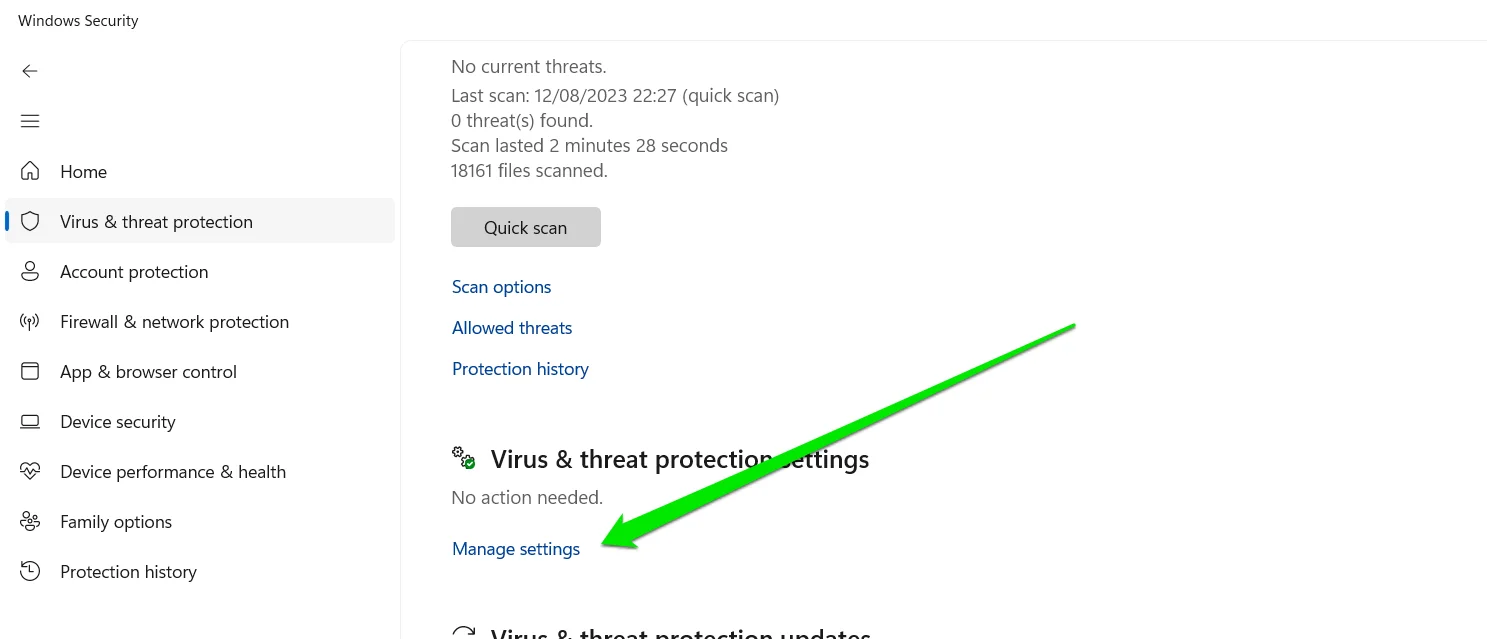
Follow these steps if you rely on Windows Security for your computer’s protection:
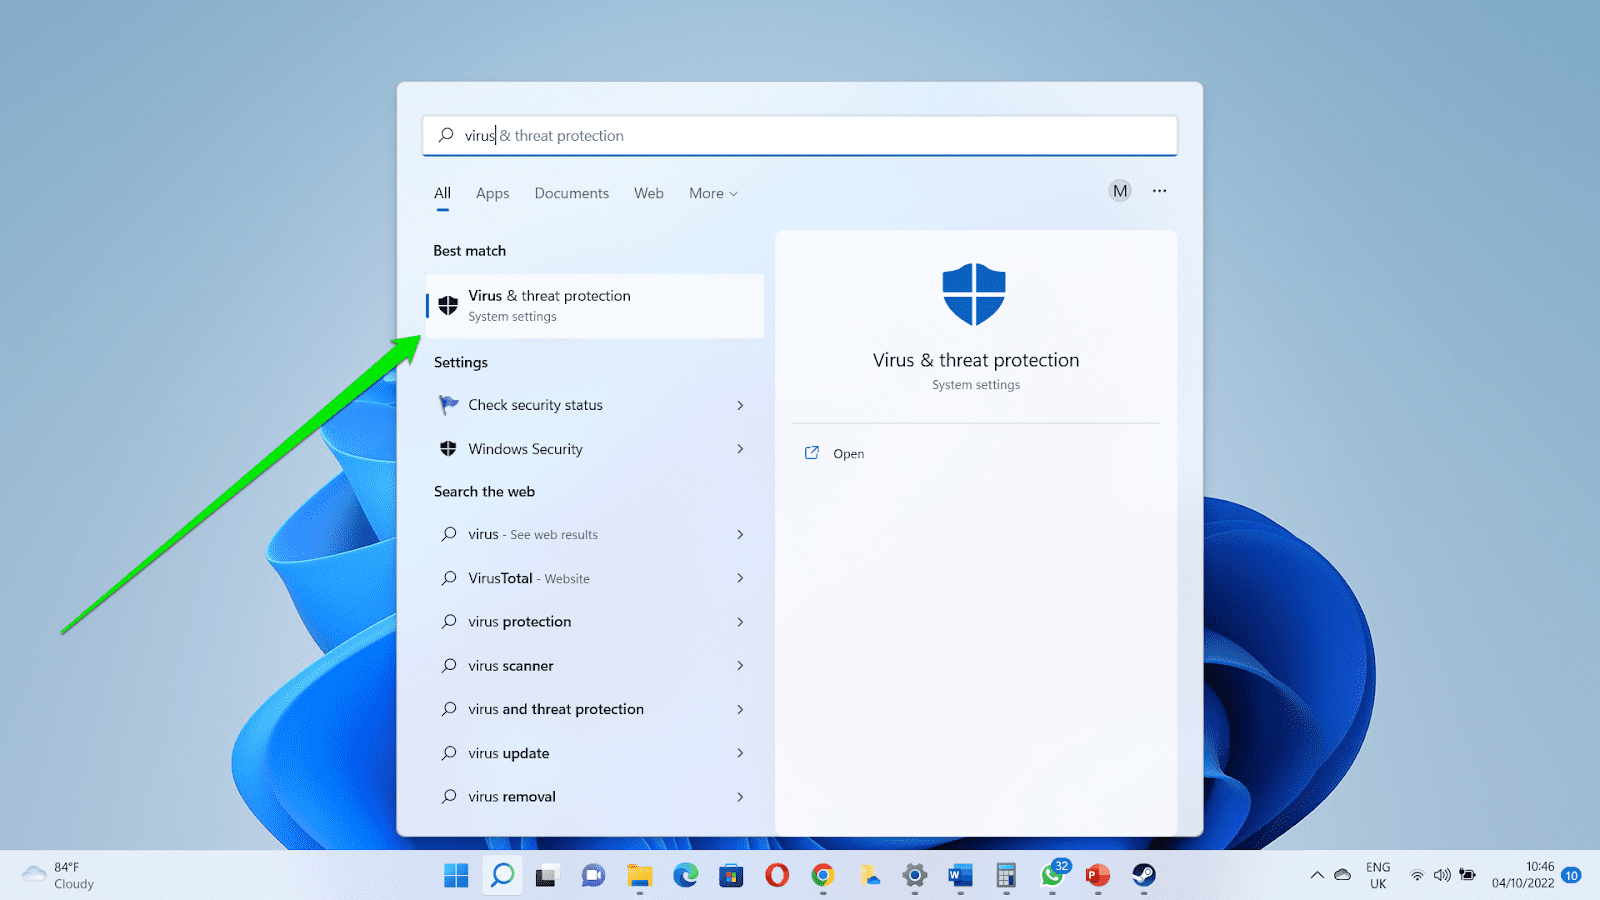
- Open the Start menu, type
virus, and launch the Virus & Threat Protection utility. - Scroll down and click Manage Settings.
- Turn off Real-Time Protection.
If you do not see options that allow you to disable your antivirus, you have to check for the ones that force it to limit its activities or locate the parameters for its most important functions. You will then have to turn off those options and parameters. In general, you must do what you can to reduce your antivirus capabilities for now. Now, restart Minecraft and check for the problem. If everything goes well, you must take the turn of events as confirmation that your antivirus played some role in causing issues for you. You will then have to decide what becomes of your antivirus.
Related:[EXPLAINED] Does Windows 10 Need Antivirus?
Fix 4: Add Minecraft to your antivirus’ whitelist
We assume you did not see the “
Unable to update the Minecraft Native Launcher” error after turning off your antivirus program.
Since it’s risky to keep your antivirus disabled forever, it makes sense to allow the security program and the launcher to coexist.
Here, we want you to add Minecraft to the whitelist provided by your antivirus. By default, your antivirus is programmed to ignore whitelisted programs (their processes, components, and services).
Once Minecraft is on the whitelist, your antivirus will no longer bother or disturb it.
The instructions on adding an application to the whitelist might vary depending on your antivirus solution. In general, the feature is called any of the following:
- Exemption
- Exclusion
When you see the option to whitelist or exempt a program, choose the folder option. That way, you’ll prevent the antivirus program from touching any of Minecraft’s files and components. The following steps will show you how to apply the setting in Windows’ native antivirus program:
- Open the Start menu, type
virus, and launch the Virus & Threat Protection utility.
- Scroll down and click Manage Settings.
- Next, go to the bottom of the Virus & Threat Protection Settings page and click Add or remove exclusions.
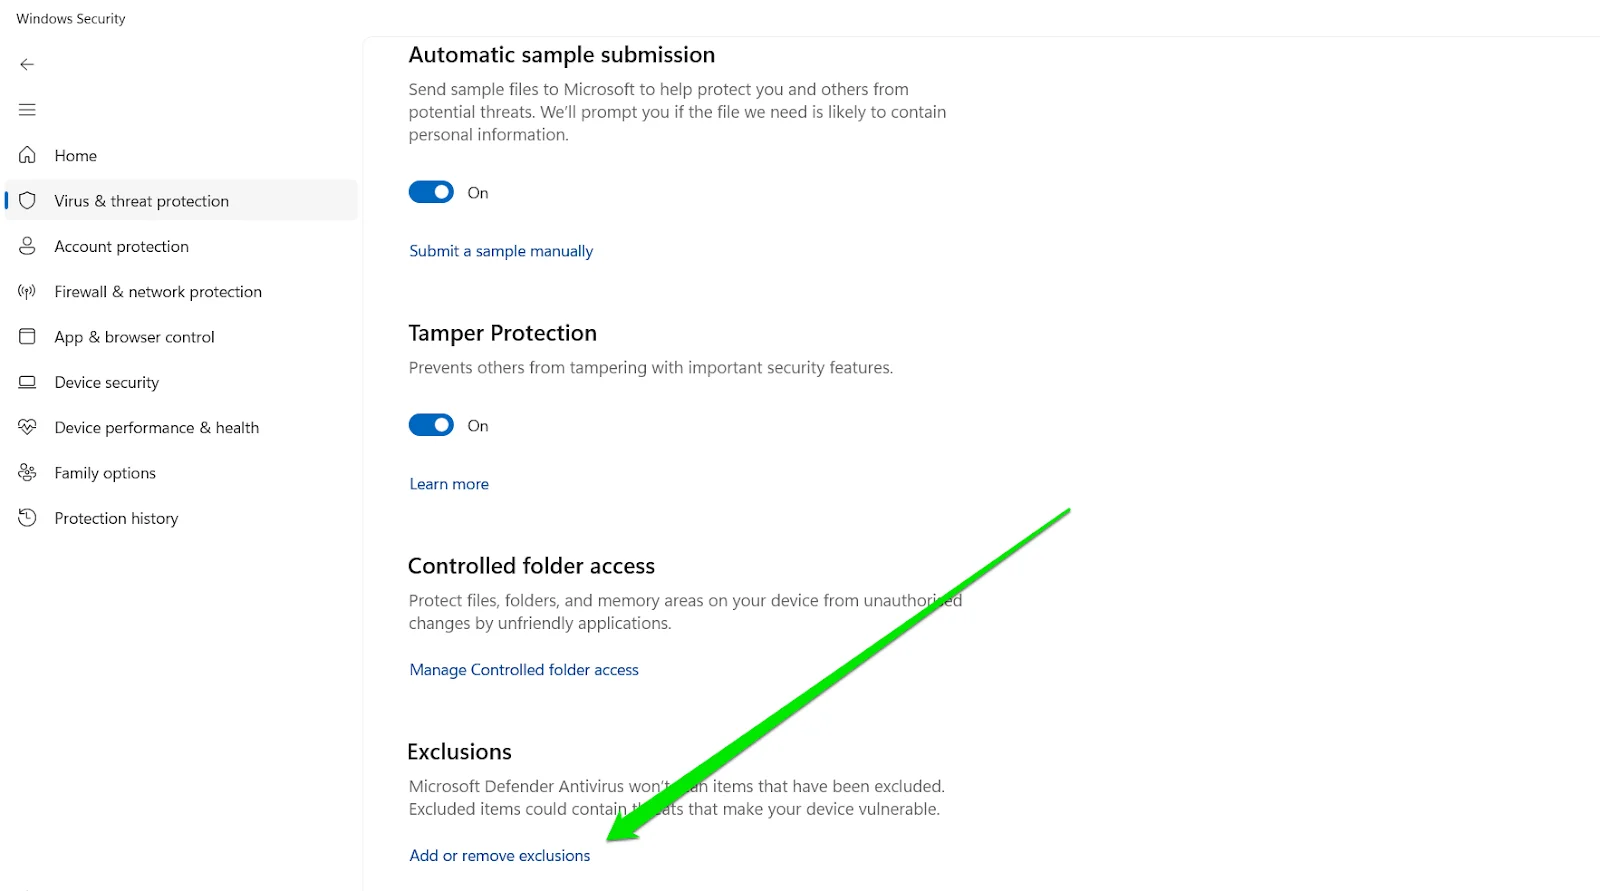

- Now, browse to the “.minecraft” folder, select it, and click the Select Folder button. You can find the Minecraft folder at C:\Users\YOUR_USERNAME\AppData\Roaming.
- You can now check if you can update the Minecraft Launcher without issues.
This first-rate protection program will keep your computer safe from all forms of threat without interfering with other programs’ harmless activities.
It can be an ideal replacement if you stop using your other antivirus.
Also Read: How to Remove Virus and Other Malware from Windows
Fix 5: Uninstall a problematic update
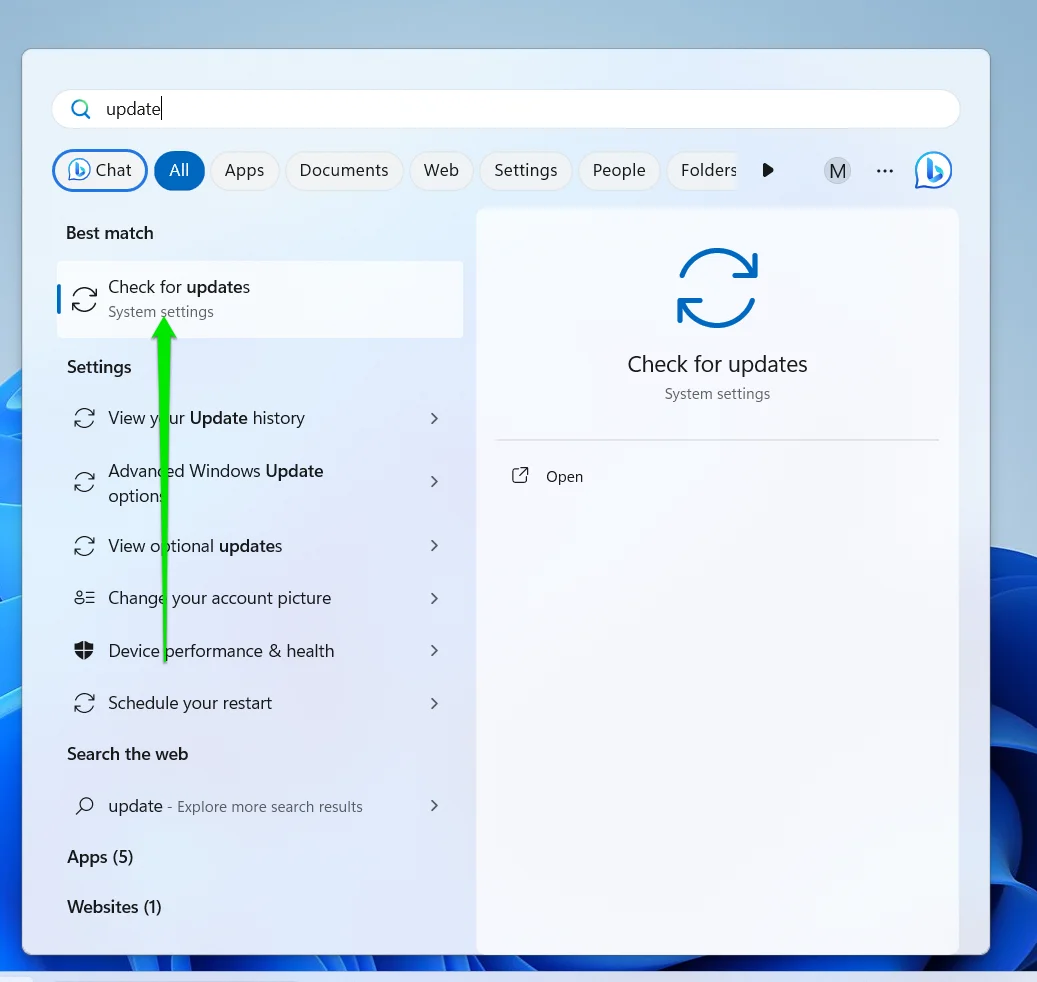
If you noticed that the problem started after you installed an update, it might be the reason you keep seeing the “Unable to update the Minecraft native launcher” error. It’s important to note that keeping your computer up to date is crucial. If it’s been a while since you installed the update, try installing the latest Windows updates again, as the bug causing the error might have been rectified in a new release. So, go to the Start menu, type update, and click Check for updates to find and install new Windows updates for your computer.
Related: Ultimate Guide: How to Manually Check and Install Windows Updates
If what you installed is the most recent release, then follow these steps to uninstall it:
- Use the
Windows + Rshortcut to launch the Run dialog box. - Type
appwiz.cplinto the Run text box and hitEnteror click OK.

- After the Programs & Features page appears, go to the left sidebar and click View Installed Updates.
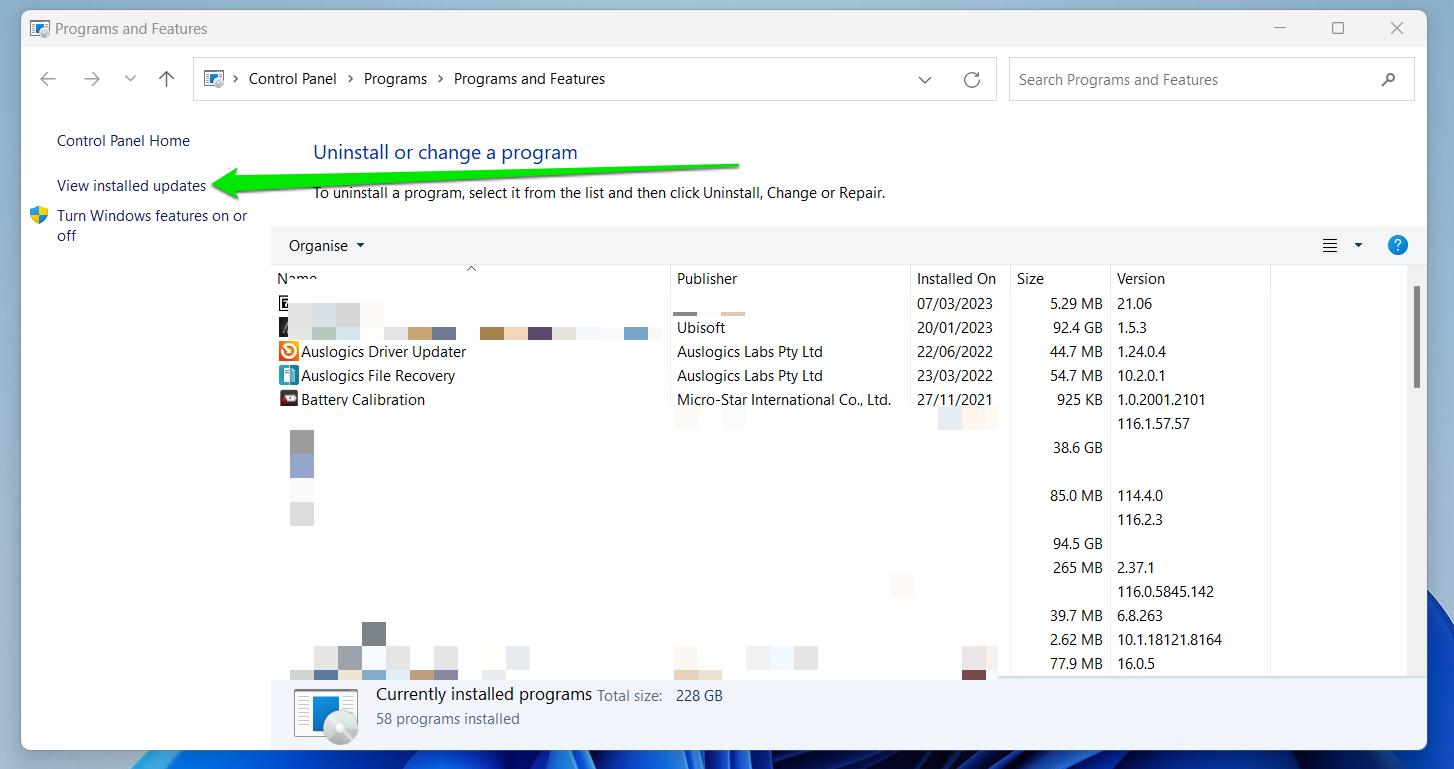
- If you’re on Windows 11, you’ll be redirected to the Settings page. If you’re on Windows 10, however, you will see your installed updates and the dates they were installed on the Programs and Features page.
- Uninstall the update causing the problem and check if the “ Minecraft launcher not working ” issue persists.
Also Read: The Ultimate Reset Guide for Windows Update: Fixing Update Problems
Fix 6: Reinstall Minecraft
We are considering the possibility that your computer’s Minecraft installation is broken. If nothing has fixed the problem by now, reinstalling the game should do the trick.
This process involves removing the app’s installation and saved files and installing it from scratch.
First, let’s show you how to reset the Launcher:
- Right-click the Windows button from your taskbar or press the
Windows + Xhotkey. - Click Installed Apps if you’re running Windows 11 and Apps and Features if you’re running Windows 10.
- Go to the search box and type
Minecraft. - On Windows 10, click the Minecraft Launcher entry and select Advanced Options. On Windows 11, click the three dots beside the launcher and select Advanced Options.
- Scroll down and select Reset.

- Click Reset again and allow Windows to reinstall the program.
- Launch the application and check if the issue has been resolved.
If the problem persists, you have to completely remove the launcher, clear its saved files, and then reinstall it from the Microsoft Store.
Also Read: So Easy to Do: How to Uninstall Programs and Apps on Windows 10/11?
Follow these steps:
- Press the
Windows key + Ishortcut to start the Settings application. - Click Apps after Settings appears.
- Click Installed Apps if you’re running Windows 11.
- Go to the search box and type
Minecraft. - If you’re on Windows 10, click the Minecraft Launcher entry and select Uninstall. If you’re on Windows 11, click the three dots beside the launcher and click Uninstall.
- Follow the on-screen instructions to remove the app.
- Next, start the Run dialog window by hitting the
Windows and Rkeys simultaneously. - Type
%appdata%into the text box and tapEnter.
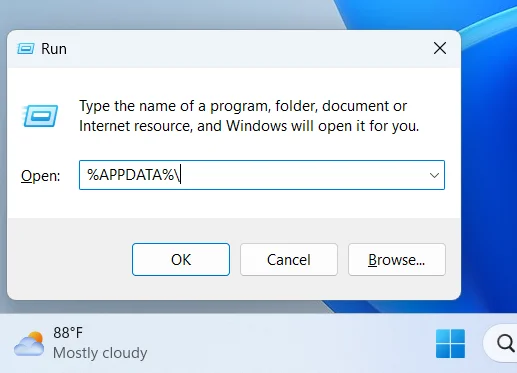
- After the Appdata folder shows up, open the Roaming folder.
- Locate the “.minecraft” folder and delete it. If you want to delete it permanently, hold the
Shiftkey while you select Delete or click theDeletebutton. Click Yes in the confirmation dialog. - Now, restart your computer, open the Microsoft Store, and search for the Minecraft Launcher.
- Make sure you’re logged into the Microsoft Store using your Minecraft account. The Store will recognize that you own the game.
- Click the Get button.
- Run the installed program to confirm that the “ Unable to update the Minecraft Native Launcher” error no longer comes up.
If you try installing the launcher from the Minecraft website, you will download an installer that connects to the Microsoft Store to fetch the program. So, ensure you have a stable connection and are logged into the store with your Minecraft account. Otherwise, you may experience the “ Minecraft installer not working ” problem.
Also Read: Boost Internet on Your PC: Tips on How to Speed Up Your Internet Connection
Conclusion
You should no longer see the error after applying the fixes we’ve provided. That said, you can check your network connection if the issue persists, as the Minecraft launcher requires a stable internet connection to fetch and install updates. You can follow our tips on troubleshooting your internet connection
.
FAQ
Launch the Run dialog by tapping the Win + R hotkey. Type shell:AppsFolder into the text box and hit Enter.
After the Applications folder opens, locate the Minecraft Launcher icon, right-click it, and select Create Shortcut. Click Yes when a prompt asks you to create the shortcut on the Desktop instead.