
- What Does “Waiting for Cache” Mean?
- What if Google Chrome Keeps Waiting for Cache and Freezing?
- Method 1: Prevent Google Chrome from writing on your SSD
- Method 2: Clear Google Chrome’s browser cache
- Method 3: Update your Google Chrome
- Method 4: Disable browser extensions
- Method 5: Resetting Google Chrome to the default settings
- Method 6: Create a new profile
- Method 7: Reinstall Google Chrome
- Method 8: Use alternative browsers
- Conclusion
- FAQ
Google Chrome has over 3.22 billion internet users, with a global market share of 63.56%, making it the most popular internet browser. This increases significantly even as you read this article.
However, many Chrome users experience the “waiting for cache” error message in the bottom left of the window when opening a webpage.
When the Chrome “waiting for cache ” issue occurs, the website briefly freezes, sometimes for several seconds or even minutes. Furthermore, because the “ waiting for cache” Chrome error uses system resources to create a connection, this problem may affect your computer’s overall performance.
In this guide, we’ll show you how to fix this issue. Let’s begin.
What Does “Waiting for Cache” Mean?
Here is the “ waiting for cache” meaning: When you see the message “ waiting for cache ” when browsing Google Chrome, the browser is temporarily paused. Instead of downloading the same content from the Internet again, it waits for previously seen web page data to be recovered from your computer’s cache.
As a result of using saved data, web pages load more quickly. However, if this process takes too long, it may cause the website to appear to freeze or become unresponsive briefly. So, the Google Chrome “waiting for cache” message only tells you that your browser is working to get the saved data from your computer.
Usually, if you patiently wait, the problem should resolve itself. If it doesn’t, follow the solutions in the next section to resolve the problem.
Related: Simple Guide: How to View and Clear DNS Cache on Windows 10/11?
What if Google Chrome Keeps Waiting for Cache and Freezing?
As said earlier, the “waiting for cache” Windows 10 issue should resolve itself. However, if it doesn’t, follow the methods below to fix the problem:
Method 1: Prevent Google Chrome from writing on your SSD
One way to fix the “waiting for cache” Chrome issue is to disable the disk write caching feature on Windows 10.
Although it’s a useful feature that improves performance and speed, it could cause unintended side effects like memory loss.
However, if you don’t mind your Windows 10 PC performing slightly slower so long as the cache error in Chrome is fixed, then disabling disk write caching is worth a try.
How to Stop Cache from Writing to Your SSD
- On your Windows 10 computer, type
Device Managerin the search bar. Launch the program. - In Device Manager, scroll to Disk drives and expand it. Now you can see all the drives on your computer.
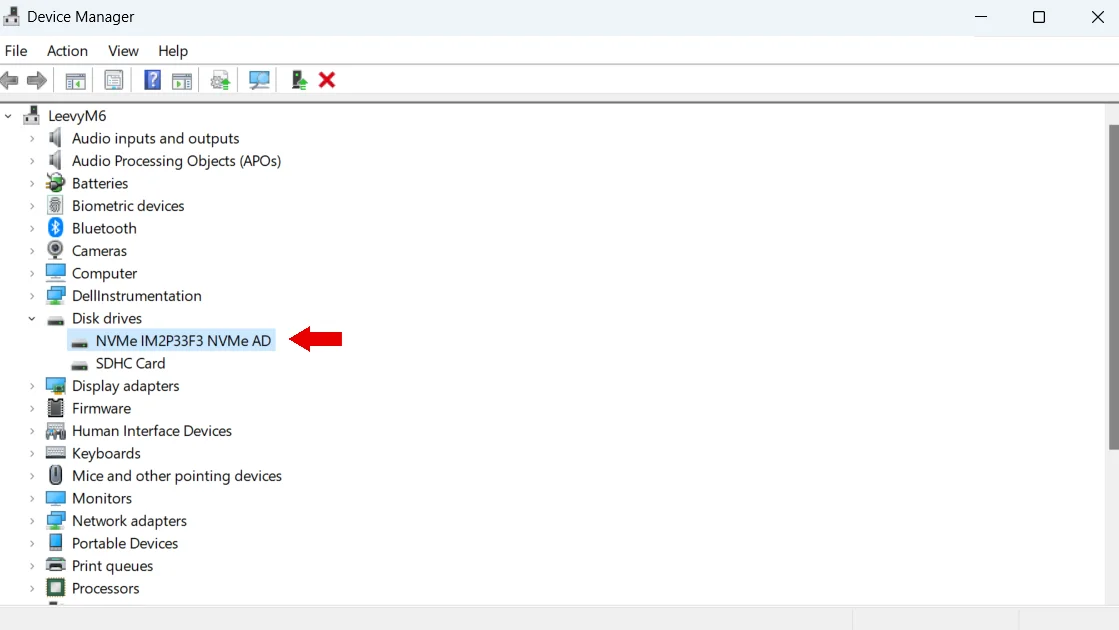
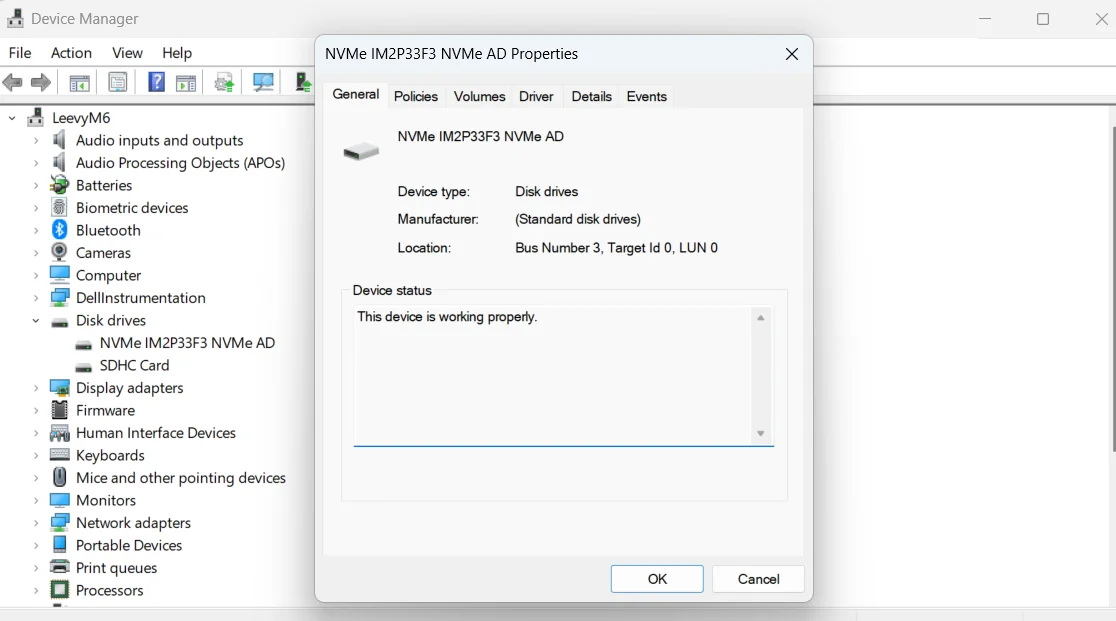
- Right-click the SSD on which Chrome is installed and click Properties.

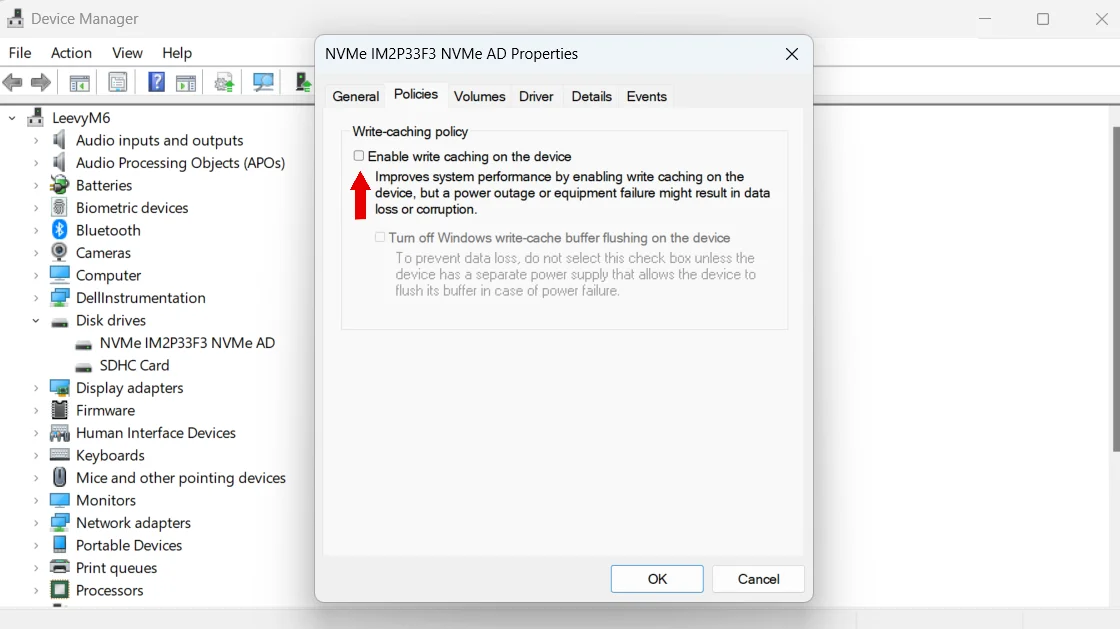
- In the Properties dialog that appears, click the Policies tab.
- Uncheck the Enable write caching on the device box and click OK.
Restart your Chrome to check if the issue has been resolved.
Related: SSD Optimization on Windows 10/11
Windows Disk Write Caching speeds up program performance by temporarily caching data write requests in your computer’s RAM rather than directly sending them to the hard disk.
This can significantly improve file transfer. If you use Auslogics BoostSpeed 13, you can safely optimize this feature and your entire system.
This way, you won’t encounter the Google Chrome “waiting for cache” error while improving your overall PC performance.
Method 2: Clear Google Chrome’s browser cache
More often than not, the “waiting for cache” Windows 10 error message is caused by corrupted cache files on your system.
Removing these files allows Chrome to create fresh caches, thus eliminating the problem. To clear your browser cache in Chrome on your Windows 10, follow these steps:
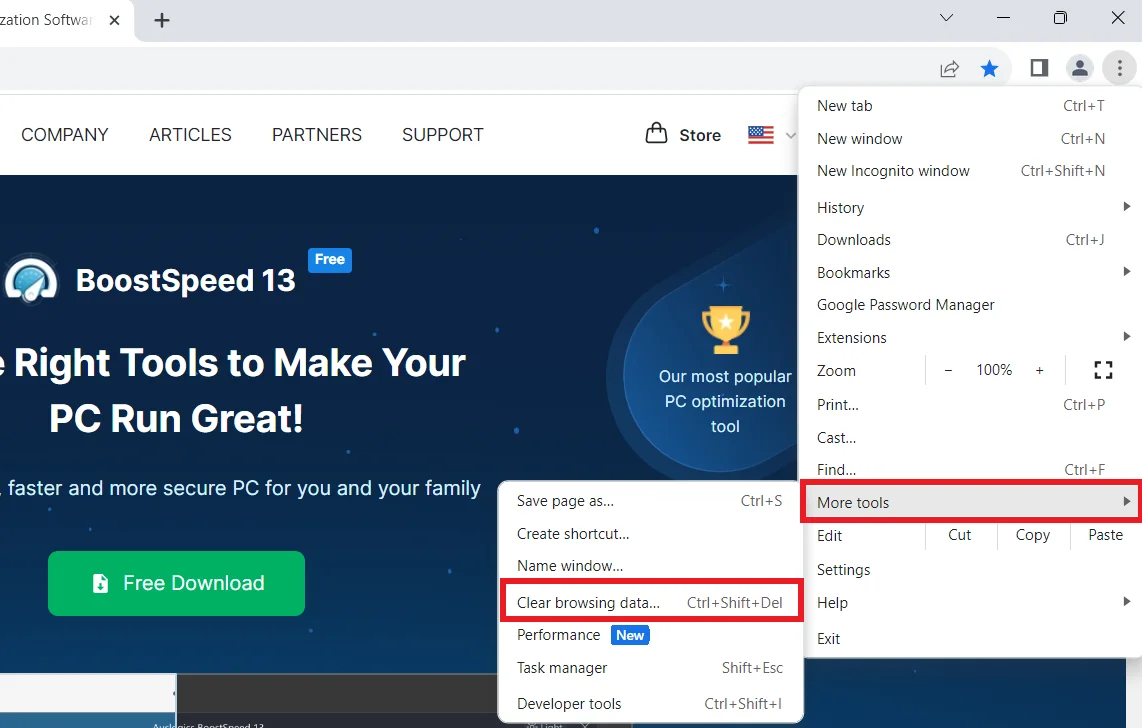
- In Chrome, click on the vertical ellipsis (three vertical dots) in the top right corner to bring up the Chrome menu.
- Scroll down the dropdown list to More tools and select Clear browsing data in the second dropdown that appears.
- In the Clear browsing data dialog, select All time in the time range dropdown.
- Next, tick all the boxes of the data you want removed. When you’re done, click Clear data.

- Restart Chrome and browse.
Also read: How to Delete Temporary Internet Files?
Method 3: Update your Google Chrome
You may fix the “waiting for cache” Chrome issue by updating the browser. Here’s how to do it:
- Open your Google Chrome browser.
- Click on the three vertical dots in the browser’s top-right corner to open the menu.
- Hover over Help in the menu, and a submenu will appear. Click on About Google Chrome.
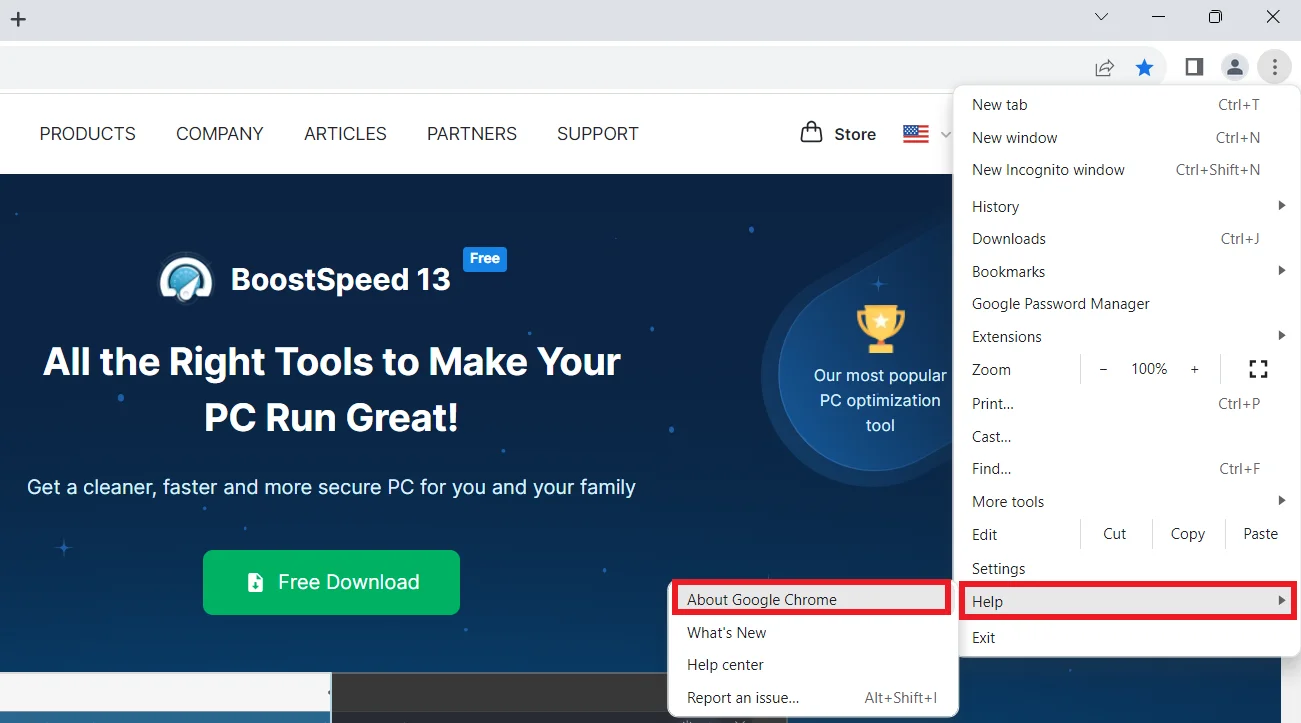
- Chrome will automatically check for updates. If a new version is available, it will download and install it.
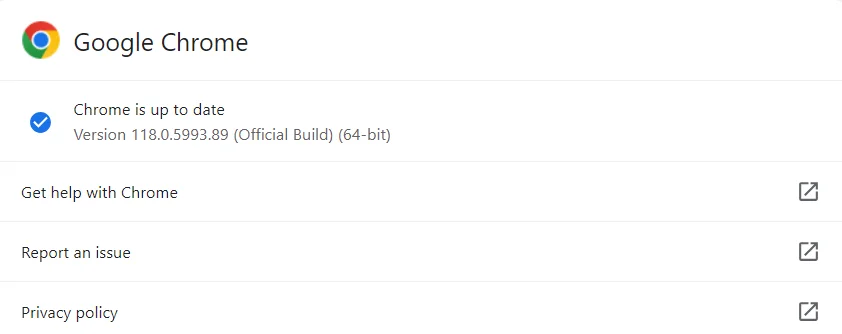
After the update, restart the browser and check if the problem has been resolved.
Windows 10/11 (8, 7, Vista, XP)
Also read: How to fix Chrome for Windows not saving passwords on Windows 10/11?
Method 4: Disable browser extensions
Some Chrome extensions may be causing the “waiting for cache” message to appear. Here’s how to disable browser extensions:
- Launch your Google Chrome browser.
- Click the three vertical dots in the top-right corner to open the menu.
- Hover on Extensions and click Manage Extensions.

- Disable the extension you want to delete.
Check if the “waiting for cache” Chrome error has been resolved.
Also read: Chrome Removed FTP Support: What Are the Alternatives?
Method 5: Resetting Google Chrome to the default settings
When you reset Google Chrome, it removes all your customizations and other settings you have applied in Chrome and reverts everything to how it was when it was newly installed.
Follow these steps to restore Chrome to default settings:
- In Chrome, click the vertical ellipsis (three vertical dots).
- Go to Settings, and click on Reset settings.
- Select Restore settings to their original defaults and click Reset settings.
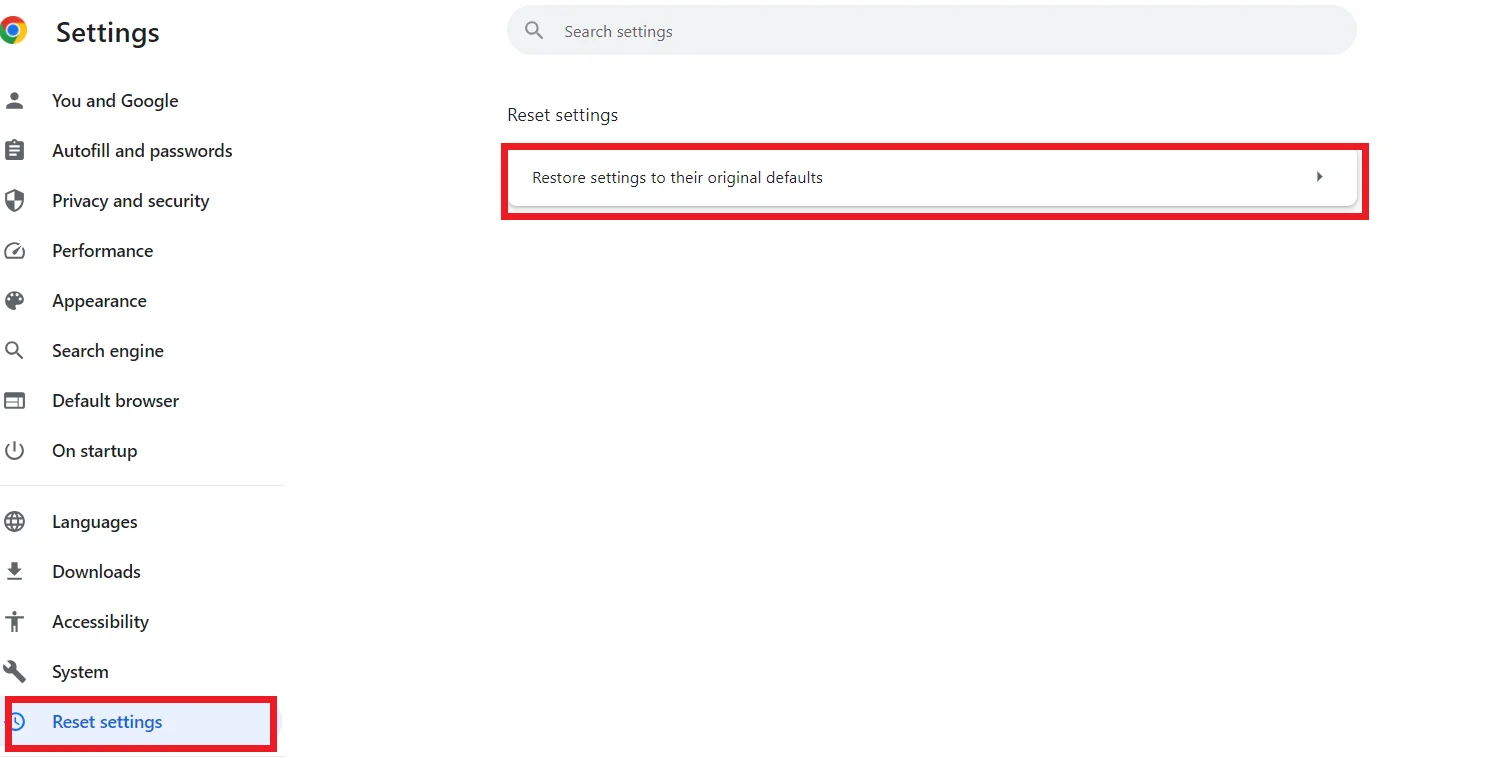
Check to see if the problem has been resolved.
Related: How to Completely Reset the Google Chrome Browser to Its Default Settings?
Method 6: Create a new profile
With this method, you can switch your current profile in Chrome for a new one and see if that resolves the Chrome “waiting for cache” error.
Here’s how to create a new profile in Chrome:
- Click on the current profile icon in the top right corner and click the Add button.

- Click Continue without an account.
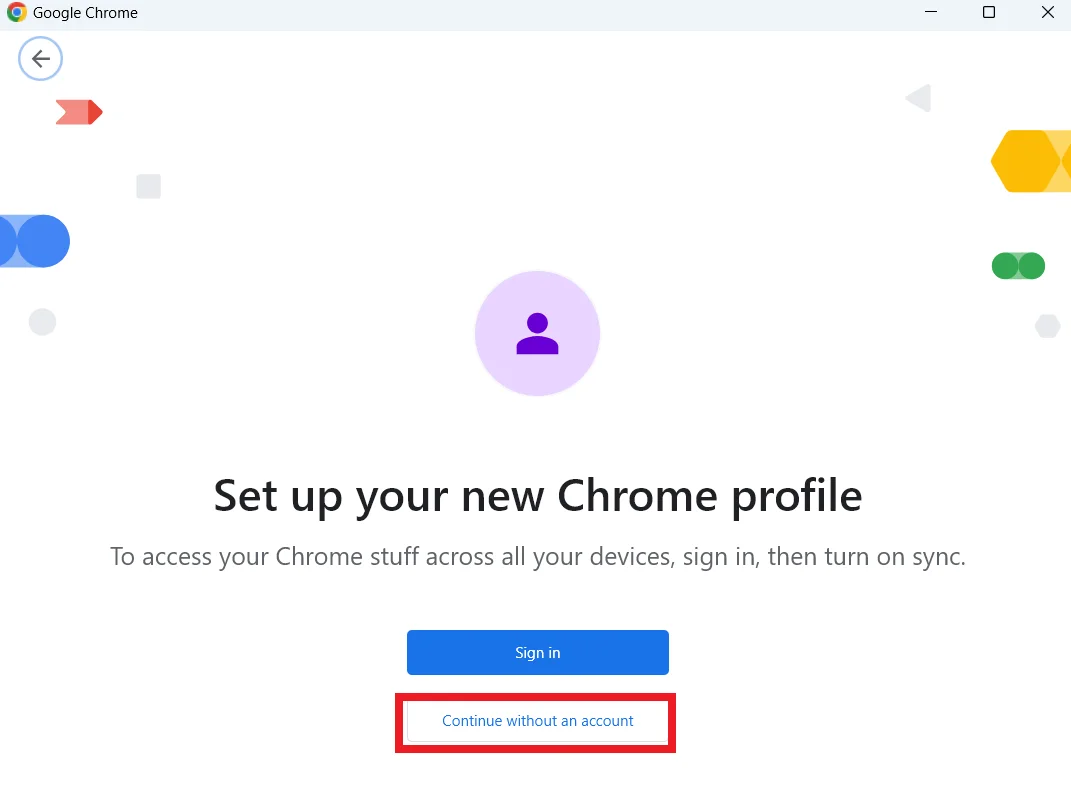
- Write your preferred name and click Done to proceed.

Chrome will restart with your new profile. If the issue is solved, you can sign in to Google to import your saved data to your new profile.
Method 7: Reinstall Google Chrome
If you want to resolve the Google Chrome “waiting for cache” error, follow the steps below:
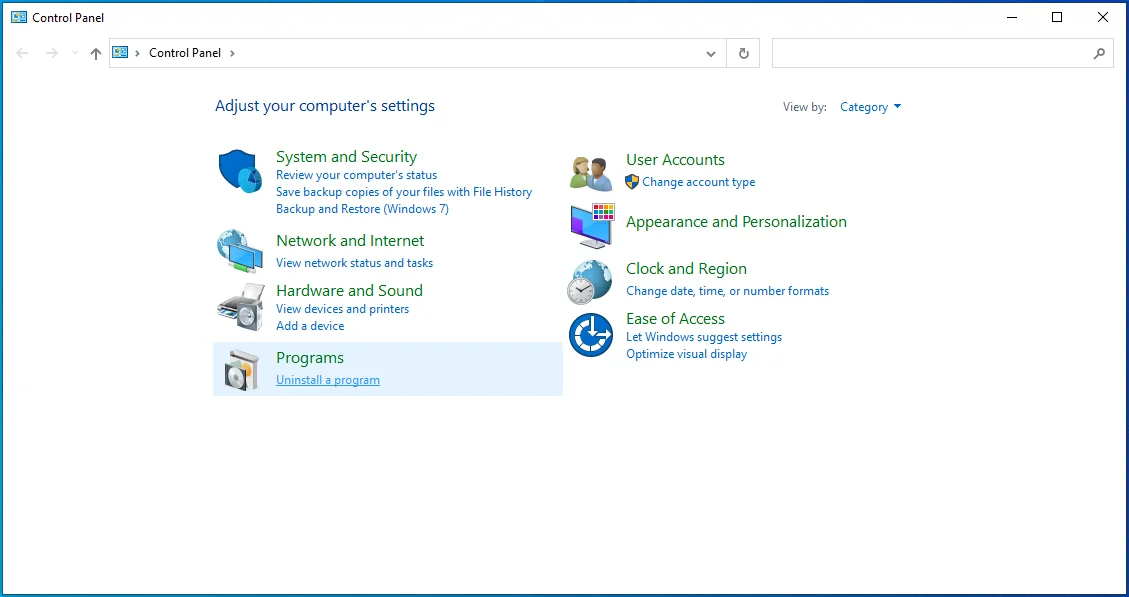
- Type
control panelin the search bar and click on it. - Click Category beside View by and select Uninstall a program under Programs.
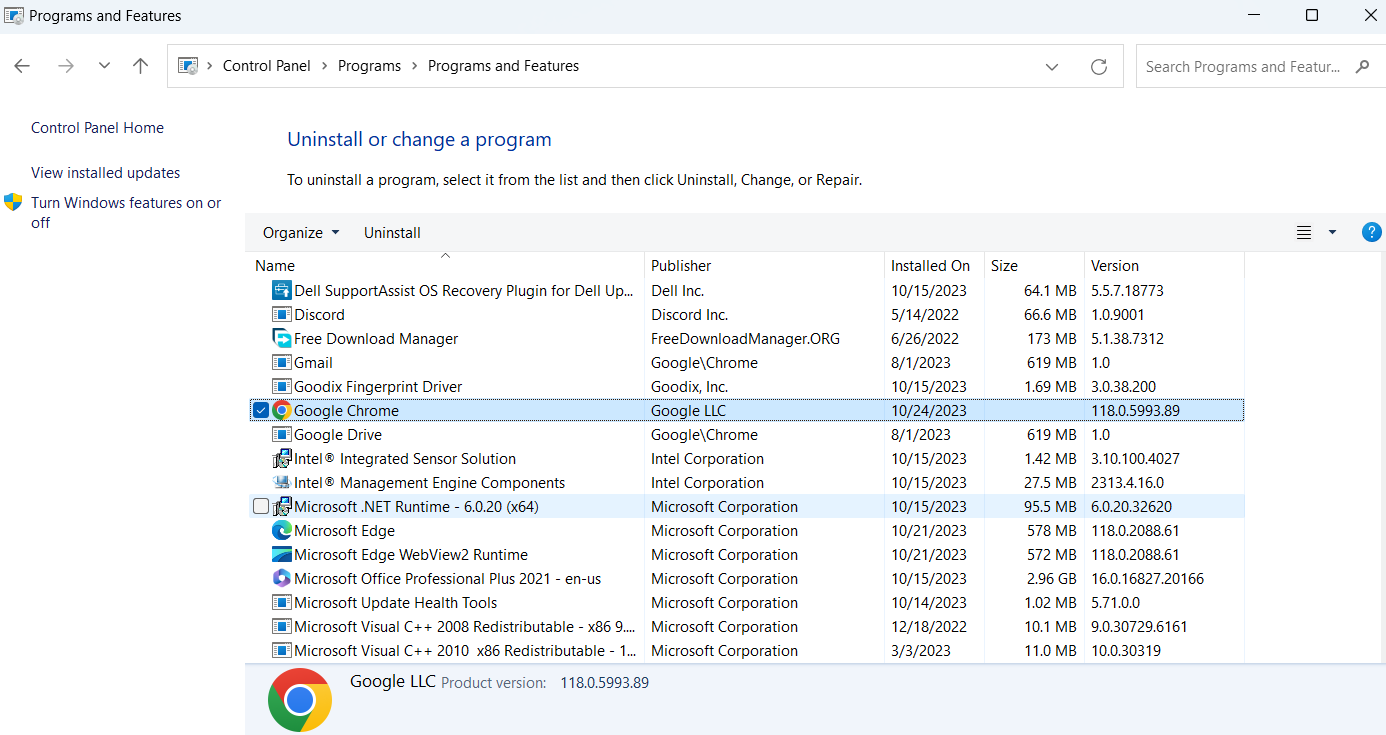
- Search for Google Chrome and click on Uninstall.
- Go through the steps to delete Chrome.
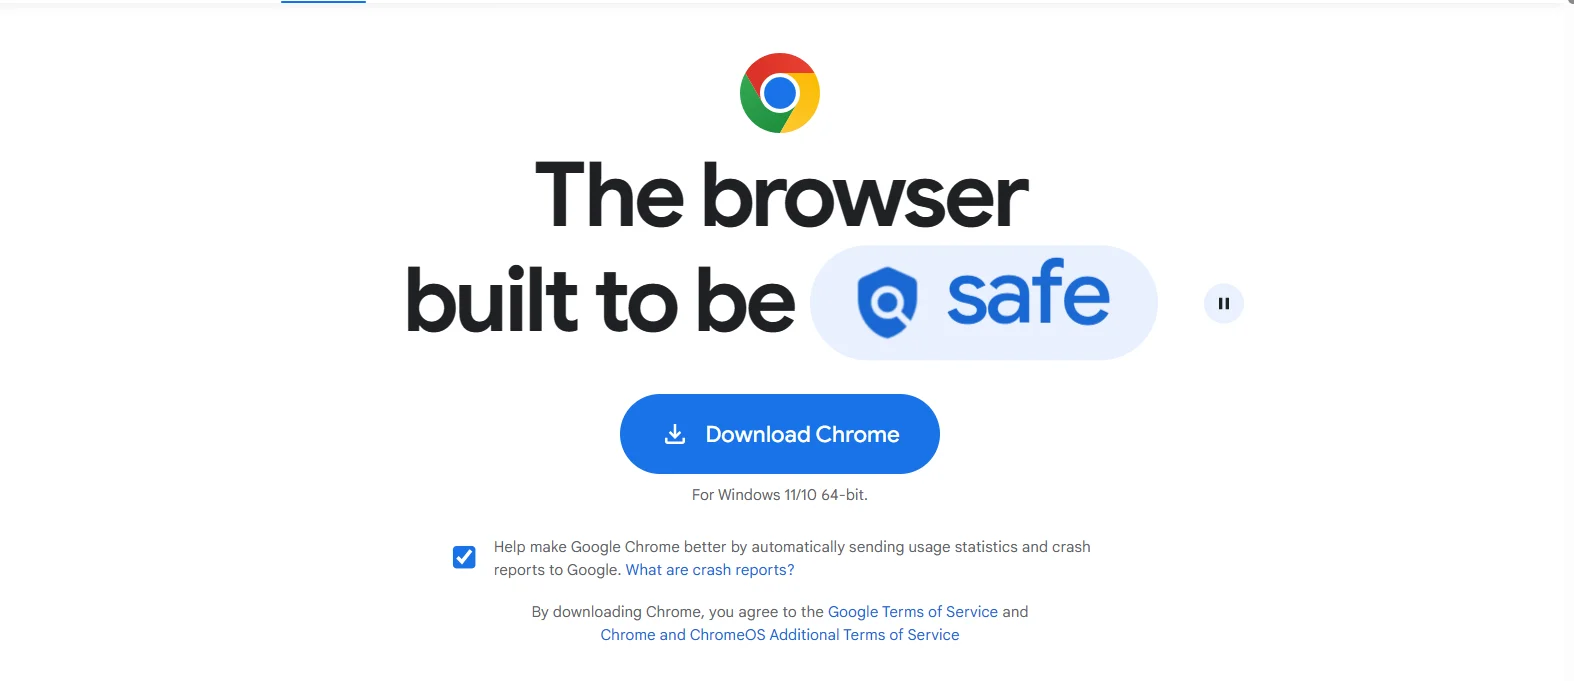
- Open another browser like Microsoft Edge and install Chrome again.
Check to see if the problem has been resolved.
Auslogics BoostSpeed makes it easy to uninstall programs quickly.
It also provides additional optimization tools to improve your PC’s speed, stability, and security, making it a complete solution for keeping your computer running at optimal performance.
Find out more: Speed Up Slow Computer as a Pro – Introducing Auslogics BoostSpeed 13
Method 8: Use alternative browsers
If you’re still facing the “waiting for cache” error, try using a different browser. For example, Mozilla Firefox is preferred because of its robust privacy protections and customization possibilities.
Also, Microsoft Edge provides a smooth experience with its current Chromium foundation.
Opera is unique because it has an ad blocker and an integrated VPN.
Brave goes beyond regarding privacy by default, banning trackers and advertisements and paying users with cryptocurrency for viewing ads that respect privacy.
You can choose any of these browsers as an alternative.
Windows 10/11 (8, 7, Vista, XP)
Related: What is the Best Internet Browser?
Conclusion
Google Chrome sometimes displays the annoying “waiting for cache” message. This issue might affect computer performance and briefly stop webpages.
You can review this guide and implement the various solutions we’ve discussed to resolve the problem. We’ve discussed how to disable disk write caching, clean the browser’s cache, and update Chrome.
If the issue continues, you can use other browsers like Brave, Microsoft Edge, Opera, or Mozilla Firefox.
FAQ
Clearing the cache on your Chrome browser once every few weeks is a good idea. Website files and other temporary data, such as images, are kept in your cache.
You can keep your browser running smoothly by clearing it and ensuring you view the most recent version of the website.
Yes. Your browser extensions can affect how the cache works. However, while some extensions can slow down the cache, others may optimize it to boost performance.
So, it depends on a specific browser. Try disabling each extension individually to determine if any are the source of troubles if your browser is running slowly or showing other issues.
First, launch the Chrome browser. Click on the three dots in the screen’s upper-right corner to access the menu. Choose “Settings.”
Proceed to the settings page and navigate to the “Privacy and security” section. You’ll find the “Clear browsing data.” Click on it.
A window will pop up, suggesting to delete the data you want. Check the box labeled “Cached images and files.”
Also, you can choose the clearing time range, like “All time” or “Last 24 hours.” Then, click on “Clear data.”