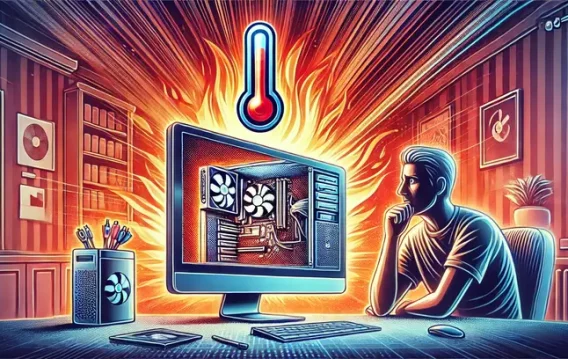
Overheating is often misunderstood, with many users unaware of its causes and the potential risks. It’s common knowledge that computers running high-end GPUs and CPUs pump out a lot of heat.
However, some temperature levels can harm PC internals, tank performance, and cause frequent crashes.This article will explore the common reasons behind a computer’s excessive heat build-up and provide practical ways to solve and prevent the issue.
We’ll also cover the signs and dangers of PC and laptop overheating to help you better understand the need for optimal thermal management.
📌 Also read: Intel 14th Gen Released: What’s New in the Latest Intel Processor?
Why Is My Computer Overheating
Numerous issues cause computer overheating. Understanding those causes can help you determine effective solutions. Here, we’ll cover several key factors that contribute to excessively high temperatures to answer your “Why is my computer so hot?” question.
- Running heavy applications
Demanding applications like video editing software, games, simulators, and data analysis tools require significant processing power. The intense workload from these applications can cause rapid heat build-up, pushing cooling systems to their limits.
- Background processes
Numerous background applications and processes can strain the CPU and GPU, leading to increased heat generation.
- Poor ventilation
Adequate airflow is essential for circulating air in the computer and dissipating heat. Blocked vents and fans hinder this process, as heat will struggle to leave the computer, and cool air may not enter.
Dust and debris accumulation around the vents and fans, using the laptop on soft surfaces like beds or couches, and working in environments with poor airflow can contribute to poor ventilation. Your environment also plays a significant role. Operating a laptop or desktop in a hot room or under direct sunlight can significantly increase heat generation. Insufficient space around the computer for air circulation can also lead to heat build-up.
- Overclocking
Overclocking involves manually increasing a CPU or GPU’s clock rate beyond the manufacturer’s specifications for enhanced performance. This practice causes the processor to consume more energy and generate more heat. Most laptops and desktop computers do not have cooling systems robust enough to handle this extra heat, leading to overheating.
📌 Further reading: How to Keep your Windows 10/11 Laptop Cool While Gaming?
- Disabled thermal throttling
Thermal throttling is a built-in safety mechanism that automatically reduces the processor’s speed when it reaches a critical temperature level. This mechanism is designed to prevent damage from overheating.
Some users turn off thermal throttling to keep their processors running at high speeds for extended periods. However, this can cause the processor to operate at dangerously high temperatures, significantly increasing the risk of overheating and component damage.
- Inadequate cooling systems
The cooling system includes fans, heat sinks, heat pipes, and thermal paste. Water-cooled computers use liquid tubes, radiators, reservoirs, and water blocks. Some cooling systems may be underpowered for the computer’s heat output, especially in models with high-performance components but compact designs. Sometimes, cooling components like thermal paste may be too aged and worn to adequately handle your laptop’s heat.
📌 Further reading to avoid overheating while gaming: Gaming Laptop vs. Desktop: Are Gaming Laptops Worth It?
Dangers of Overheating
When a computer overheats, it’s not just a matter of discomfort from a hot device; the implications can be far more severe.
Electronic devices don’t like heat. High temperatures can cause internal components like the CPU, GPU, hard drive, and motherboard to degrade faster than usual, shortening their lifespan.
📌 Also interesting: How to Check What CPU Do I Have on my Windows PC?
Prolonged exposure to excessive heat may lead to hardware malfunctions or complete failure, posing a risk of data loss. Additionally, overheating can trigger system instability, resulting in frequent crashes or freezes, disrupting workflow, and leading to a frustrating user experience.
Moreover, excessive heat accelerates chemical degradation within laptop batteries. This degradation can cause batteries to hold less charge over time, necessitating more frequent charging and eventually leading to complete failure.
In extreme cases, overheating can also increase the risk of battery swelling or leakage, which can be hazardous.
📌Further reading: How to Check Your Laptop Battery Health on Windows 10 and 11?
How Does Overheating Influence PC Performance?
Overheating can impact your computer’s performance and efficiency in the following ways:
- Thermal throttling: When a PC overheats, its safety mechanism kicks in to reduce CPU and GPU clock speeds. This leads to a noticeable slowdown in processing speed and overall performance.
- Hardware wear and tear: Consistent overheating accelerates the degradation of various components, including the CPU, GPU, and motherboard. This wear and tear can lead to more frequent hardware failures, causing apps and the operating system to freeze and crash in the middle of work.
- Data loss and corruption: When hardware suddenly fails, you risk losing important data. For example, files saved on your hard drive can become corrupted if the device fails during read/write operations.
- Reduced efficiency: Overheating can cause the power supply to work harder, decreasing energy efficiency and raising electricity costs.
📌 What to do if you start encountering errors? Check our guide on how to fix the CPU Over Temperature Error.
Overheating Laptop Symptoms
Knowing the answers to the “Why does my computer keep overheating?” question isn’t enough. Recognizing the signs of an overheating computer helps you intervene in time to prevent potential damage. Let’s go through some key indicators that signal overheating:
- Frequent crashes and Blue Screen of Death (BSOD): System crashes and BSODs typically appear when hardware fails. Overheating PCs often crash or display the BSOD, especially during high-performance tasks. That’s because some components do not respond well to heat and begin to malfunction once temperatures reach a specific level.
- Unusual fan noise: Fans working at unusually high speeds or making strange noises indicate they’re trying too hard to cool down overheated components.
- Slow performance: Since your computer throttles your CPU and GPU speeds when they overheat, significant drops in performance should alert you to high temperatures. These performance drops may manifest as non-responsive and freezing applications or reduced FPS and latency.
- System shutdowns or restarts: The computer may automatically shut down or restart to prevent hardware damage due to high temperatures.
- Hot to the touch: Excessive heat from the laptop or desktop’s surface, especially near the vents and the bottom panel, is a direct sign of overheating.
How to Check and Monitor CPU/PC Temperature
You don’t always have to wait for an overheating sign to protect your system against high temperatures. That said, you can better avoid and manage overheating by monitoring your computer’s temperature, especially when you use demanding programs.
- Use software tools: Applications like HWMonitor, SpeedFan, or Core Temp provide real-time CPU and GPU temperature readings.
- BIOS/UEFI check: You can also check the temperature in your computer’s BIOS/UEFI settings, though this doesn’t offer real-time monitoring.
- Check fan speeds: Cooling fans spin faster when heat increases. So, you can check your fan RPMs in your monitoring software to know when your temperature is reaching high levels.
- Understand normal ranges: Familiarize yourself with the standard operating temperatures for your specific hardware to better assess when there’s a problem. For example, hearing your fan spin to a specific extent should alert you to high temperatures. Touching your PC or laptop’s chassis is another way to check.
📌 Read more: How to Check and Monitor CPU Temperature on Your Windows 10/11 PC
How to Stop Your Computer from Overheating
Addressing computer overheating requires hardware and software interventions. Here’s a comprehensive guide on how to fix overheating computers:
📌 Further reading: Ultimate Guide: How to Stop a Laptop from Overheating
- Maintain PC fans
Maintaining your PC’s fans is crucial in preventing and stopping overheating, as debris and dust build-up can affect the fans’ ability to dissipate heat. You should check and clean out the fans routinely to ensure they are dust-free and operating efficiently.
When opening PC cases or laptop chassis, it’s important to proceed cautiously to avoid damaging sensitive components. Remember that tampering with hardware can void warranties, so consider professional assistance if you’re not confident doing it yourself.
- Improve ventilation
Good ventilation is critical to keeping your computer cool, as your system’s cooling unit requires cool air to keep the heat down. Ensure your PC’s case isn’t placed too close to walls or in tight areas where air circulation is restricted.
For laptops, avoid placing them on soft surfaces like beds or cushions, as these can block vents and obstruct optimal airflow. Instead, use them on hard, flat surfaces and consider investing in a laptop cooling pad or kickstand for better airflow.
- Clean out the water cooling kit
Regular maintenance is also essential for water cooling systems . If you use such a setup, clean it every six to twelve months to prevent blockages or leaks. Over time, coolants can become less effective, and the cooling unit, including the radiators, can build up gunk and other blockages. So, they should be replaced periodically to maintain optimal cooling efficiency.
Our complete guide on how to clean your water cooling system will show you what to do, from flushing the system to cleaning components such as the water blocks and radiators. Remember that you can always seek professional help if you’re not confident about dismantling hardware.
- Replace defective cooling system components
Faulty cooling components can significantly contribute to overheating. If your computer’s cooling system isn’t functioning properly, consider reapplying thermal paste on the CPU and GPU, replacing malfunctioning fans, or changing the coolant or radiators in water cooling systems.
- Reduce the load on the CPU and GPU
Overworking the CPU and GPU is a common cause of overheating. The more they work, the more heat they generate. That is why one of the most effective ways to address overheating is making your processors work less. Try using less demanding applications and avoid opening too many browsing tabs simultaneously, especially if your PC has a low configuration.
Additionally, managing your computer’s startup and background applications can help reduce unnecessary strain on the processors. Whenever you want to run heavy programs like games and simulators, ensure you close every other app to limit the burden on your hardware resources.
- Keep drivers up to date
Outdated or malfunctioning drivers, especially for CPUs, GPUs, RAMs, and hard drives, can lead to inefficient operation and overheating. Ensuring that your drivers are up to date can help optimize hardware performance and prevent excessive heat generation. Since tracking every piece of driver software on your computer can be difficult, you can get help from third-party software.
Auslogics Driver Updater checks for outdated, corrupt, and malfunctioning device drivers and automatically installs their latest official versions. The tool can send notifications when updates become available, ensuring your system never experiences driver problems.
You can also use other software programs provided by GPU and CPU manufacturers, such as NVIDIA GeForce Experience, to keep drivers updated. However, unlike Auslogics Driver Updater, these programs mainly focus on a limited number of hardware devices.
- Change power options
Adjusting your computer’s power options can significantly impact its temperature. Switching to a more energy-efficient power plan can reduce the operational load on your system, thus lowering heat production. If you’re running Windows 10, you can click the battery icon in the notification area and use the slide to quickly change power options. That said, you can always go to Control Panel and select Power Options to switch.
- Use software for optimization
Various software solutions can assist in managing your computer’s temperature. You can use overclocking tools and fan control programs to adjust CPU and GPU frequencies, reducing heat output. However, it’s important to use these tools judiciously, as improper settings can lead to instability.
- Advanced operating system solutions
You can tweak low-level system settings in the Windows Registry to limit CPU clock speed and effectively reduce heat. However, modifying registry settings has risks, including potential system instability or crashes. Always back up your registry and set a system restore point before making such changes. You should also proceed only if you’re comfortable with advanced system configurations. Our complete guide on reducing heat through the system registry will show you what to do.
📌 Further reading: How to Cool Down Your Laptop: Overview of Methods with Pros and Cons
Conclusion
Managing computer overheating is about balancing maintenance with smart usage and system optimization. Regular hardware upkeep, mindful usage habits, and strategic software interventions can collectively help you observe your computer temperature and keep it cool. With these practices, you’ll no longer have to ask, “Why is my laptop overheating?”
You can comment below to tell us how you deal with your computer’s temperatures.