
The “Wi-Fi doesn’t have a valid IP configuration ” error is a common problem many users face. Luckily, that also means there are various effective ways of resolving the issue.
I’ll guide you through different methods of fixing the error. Go through the various solutions and choose the one that works for you.
Let’s begin.
What Does “Wi-Fi Doesn’t Have a Valid IP Configuration” Mean?
The “ no valid IP configuratio n for your Wi-Fi” issue usually happens when your computer can’t obtain a valid IP address from a network.
It assigns an IP address to your PC and sets other essential network details like gateway, subnet mask, and DNS server addresses.
This error prevents you from connecting to the Internet through Wi-Fi. Below are some of the causes of this error:
- Driver issues. You can experience IP configuration failure if your wireless network adapter is corrupted or outdated.
- IP address conflict. Sometimes, multiple devices can have the same IP address, causing the error.
- DHCP issues. Think of the Dynamic Host Configuration Protocol (DHCP) as your network’s postal address because it assigns IP addresses. So, if there is an issue with your device or router, it won’t be able to obtain the required IP addresses for a successful network connection.
- TCP/IP stack corruption. The TCP/IP stack takes care of the network communication. When it becomes corrupted, it can lead to connectivity issues.
Further reading: Windows Computer Won’t Connect to Wi-Fi: What to Do?
Windows 10/11 (8, 7, Vista, XP)
How to Fix the “Wi-Fi Doesn’t Have a Valid IP Configuration” Issue?
The first step I’d recommend you take is to restart your computer. The IP configuration failure could be a simple glitch that a reboot may resolve.
Did you know:Keyboard Magic: How to Shut Down, Restart, or Put Windows PC to Sleep with a Keyboard
If the PC restart doesn’t work, follow the solutions that I’ve laid out below:
Fix 1: Reset your wireless network adapter
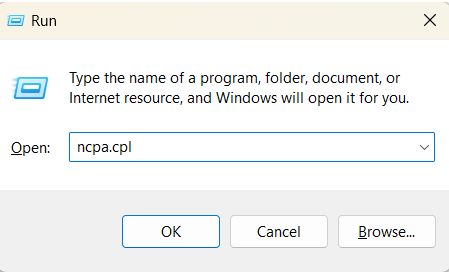
- Open the Run dialog box by pressing
Windows + R. - Then, type
ncpa.cpland pressEnter.
- When the window opens, right-click on the wireless network adapter and select Disable .

- Wait for a few seconds, right-click on it again, and select Enable .

Check to see if there is a valid IP configuration now. If not, proceed with the next solution.
Also read: “Windows Could Not Find a Driver for Your Network Adapter” Error
Fix 2: Reset the TCP/IP stack
Since the “Wi-Fi doesn’t have a valid IP configuration” error means that your TCP/IP setting is configured improperly, resetting may resolve the issue.
Follow the steps below:
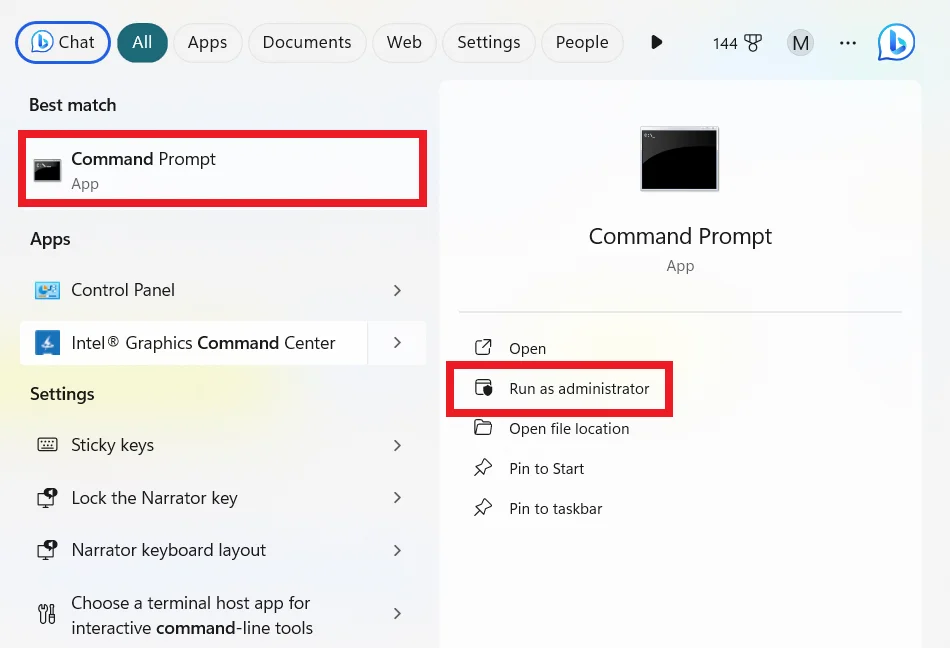
- Open the Command Prompt with administrative privileges.
- Type the following command and press
Enter:
netsh winsock reset

- After that, type the following command and press
Enter:
netsh int ip reset

- Close the Command Prompt and restart your computer. Then, check to see if the problem has been resolved.
If it doesn’t work for you, use the following commands instead:
-
ipconfig/release
-
ipconfig/flushdns
-
ipconfig/renew
Make sure to press Enter after each command.
Fix 3: Assign IP addresses manually
On Windows 10
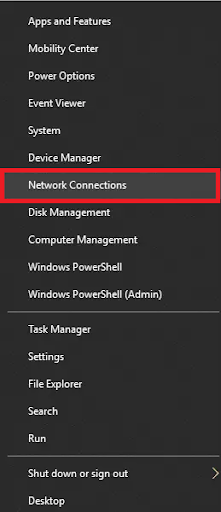
- Right-click on your Windows logo and select Network Connections .
- Click on Change adapter options.

- Right-click on your Wi-Fi connection and choose Properties .
- Right-click on Internet Protocol Version 4 (TCP/IPv4) and select Properties.

- Select Use the following IP address and input your subnet mask, IP address, default gateway, preferred DNS server, and alternate DNS server.
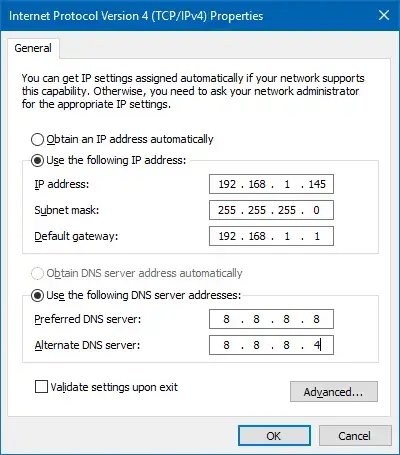
- Click OK , restart your PC, and check if the error “ Wi-Fi doesn’t have a valid IP configuration ” has been resolved.
Windows 10/11 (8, 7, Vista, XP)
On Windows 11
- Press
Windows + Ito open Settings. - Then, click Network & internet and select Wi-Fi.

- Click on your network connection.

- Click the Edit button under the IP assignment .

- Choose the Manual option.

- Then, toggle on IPv4 .

- Input your preferred IP address, subnet mask, default gateway, preferred DNS (required), and alternate DNS (optional).

- Keep the DNS over HTTPs option at Off for both the preferred and alternate addresses.
- Off: When you turn off DoH, it’ll transmit DNS traffic without encrypting it.
- On (automatic template): DoH sends all DNS traffic with encryption.
- On (manual template): This option allows you to specify a particular template. You can use this option if the DNS service doesn’t work automatically or has a template that works as it should.
When you enable the DoH, any DNS traffic will be encrypted but queries are sent without encryption. Also, remember to turn off Fallback to plaintext if you enable DNS over HTTPS .
Fix 4: Update your network drivers
- Right-click on the Start button (or press Windows + X) and select Device Manager from the menu.
- Expand Network adapters when the Device Manager window opens.
- Right-click on your Wi-Fi adapter and select Update driver.
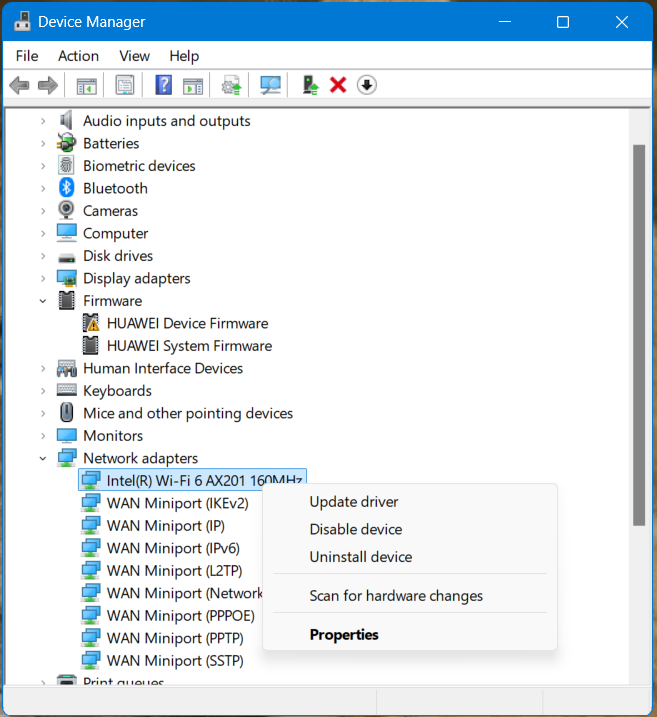
- Select Search automatically for drivers from the window that opens and follow the instructions to update your drivers.

Restart your computer and check whether the “ Wi-Fi doesn’t have a valid IP configuration” error is gone.
You don’t have to go through numerous steps. Just download and install the software. The program will automatically diagnose your system to find corrupt and missing drivers.
You can update all of them with just one click. You also have the option to back up your drivers in case you want to revert the changes.
Fix 5: Start DHCP & WLAN AutoConfig services
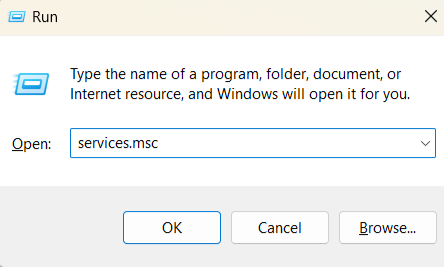
- Open the Run dialog box by pressing
Windows + R. - Type
services.mscinto the search box and pressEnter.
- Make sure the DHCP Client and WLAN AutoConfig services are Running and Startup Type is set to Automatic .

- If any of the services is set to Manual , right-click on it and select Properties .
- Set Startup type to Automatic , and select the Start button.
- Click Apply and OK to save the changes.
Restart your computer and check to see if the IP configuration failure has been fixed.
Also read: DHCP Is Not Enabled for Wi-Fi on Windows
Windows 10/11 (8, 7, Vista, XP)
No Valid IP Configuration: Fixed
I’ve discussed different ways to fix the “Wi-Fi doesn’t have a valid IP configuration” error. Go through the solutions and choose the one that fits the problem.
If none of the fixes work, scan your system for malware and viruses. These malicious programs can sometimes mess with the internet settings.
If this article has helped you, consider sharing it with people who might need it. Plus, if you have additional tips, share them in the comments below!
FAQ
This is because it assigns IP addresses to devices on a network automatically. It makes the process more convenient and easier.
However, if you want your devices to always have the same IP addresses, like network printers, go for static IP.
You essentially remove any misconfigured or corrupted settings when you reset the TCP/IP stack. This helps you to set up a fresh network connection.