
- Why Won’t My Computer Connect to Wi-Fi?
- Basic Wi-Fi Troubleshooting
- Advanced Wi-Fi Troubleshooting
- Method 1: Changing your settings for Group Policy
- Method 2: Reinstalling your Wi-Fi driver
- Method 3: Removing all saved Wi-Fi networks
- Method 4: Making some changes in your registry
- Method 5: Disabling the Fast Startup feature
- Method 6: Removing files from the Wlansvc directory
- Method 7: Changing the security permissions
- Method 8: Changing the properties of your Wi-Fi connection
- Method 9: Creating a new wireless network connection
- Method 10: Replacing your wireless adapter
- Windows Computer Won’t Connect to Wi-Fi: Fixed
- FAQ
Whether it’s a problem that started after a Windows update or a persistent issue, there are steps you can take if your laptop won’t connect to Wi-Fi.Here’s a quick guide to get your Wi-Fi connection back up and running.
Why Won’t My Computer Connect to Wi-Fi?
Here’s a closer look at some of the most common reasons for a PC not connecting to Wi-Fi:
- Airplane mode or Wi-Fi disabled: It’s easy to overlook, but sometimes the issue is as simple as having your device in Airplane mode or the Wi-Fi turned off. Both settings disable wireless communications to save battery or during flights.
- Router issues: If your router is experiencing problems or is down, no device in its range will be able to connect to the Internet. This could be due to a technical fault, a need for a restart, or connectivity issues from your internet service provider.
- Incorrect Wi-Fi password: Entering the wrong Wi-Fi password is a common mistake. Wi-Fi passwords are case-sensitive and can be complex, making it easy to enter them incorrectly.
Also read: How to Check Wi-Fi Password on Windows 10/11 Computer in Seconds
- Distance from router: The further your laptop is from your router, the weaker the signal strength. Obstacles like walls and doors can further impede your connection. Ideally, you should be within a reasonable distance for a stable connection.
- Incompatible Wi-Fi network: Sometimes, your device may not support the specific Wi-Fi network it’s trying to connect to. This is often the case with older devices trying to connect to newer, more advanced networks that use different wireless standards.
Basic Wi-Fi Troubleshooting
Here are a few basic steps to troubleshoot Wi-Fi connectivity issues on a Windows laptop.
Ensure Wi-Fi is enabled:
- Click on the Wi-Fi icon in the system tray at the bottom right of your screen.
- If Wi-Fi is off, click on the Wi-Fi button to turn it on.
Restart your router:
- Unplug your router from the power source, wait for about 30 seconds, and then plug it back in. Wait a few minutes for it to restart and try connecting again.
Verify your Wi-Fi password:
- Ensure you are entering the correct password for your Wi-Fi network. Remember, passwords are case-sensitive.
Move closer to your router:
- Wi-Fi signals can be weak at long distances or with physical obstructions. Move closer to your router to improve signal strength.
Connect to a compatible network:
- Make sure the network you are trying to connect to supports your laptop’s Wi-Fi adapter. Older devices may not support newer Wi-Fi standards (like Wi-Fi 5GHz bands).
Use Windows Network Troubleshooter:
- Right-click the Wi-Fi icon in the system tray and select Diagnose network problems. Follow the on-screen instructions to let Windows diagnose and potentially fix any detected issues.
Advanced Wi-Fi Troubleshooting
Method 1: Changing your settings for Group Policy
Many users reported that they had been able to fix the Wi-Fi connectivity problem by making some changes, using the Group Policy Editor .
That said, here are the steps you have to follow:
- On your keyboard, press
Windows key + R. This should open the Run dialog box. - Type
gpedit.msc, then hitEnter.

- Once the Group Policy Editor is up, go to the left pane and navigate to the following path: Computer Configuration -> Administrative Templates -> System -> Internet Communication Management -> Internet Communicating Settings.
- Go to the right pane and double-click Turn off Windows Network Connectivity Status Indicator active tests.
- From the menu, select Not Configured.
- Save the changes by clicking Apply and OK.
Method 2: Reinstalling your Wi-Fi driver
Some users mentioned that one of the temporary workarounds for this problem is reinstalling the Wi-Fi driver. To do this, just follow the instructions below:
- On your keyboard, press
Windows key + X. - From the list, select Device Manager.
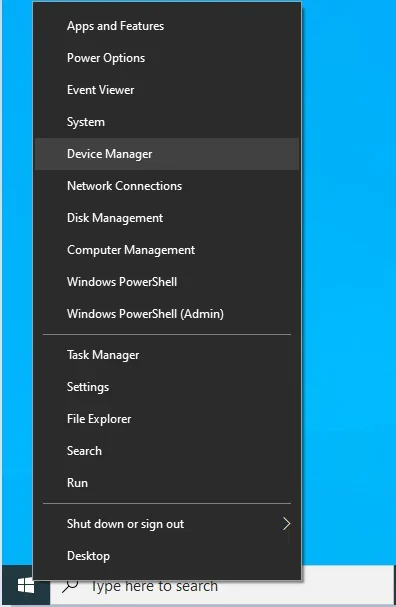
- Once Device Manager is up, look for your Wi-Fi device. Right-click it, then choose Uninstall device.
- You will see a confirmation message. Just click Uninstall to proceed.
- Now, click the Scan for hardware changes icon. Your system will automatically install the missing drivers.
By reinstalling your driver, you should be able to resolve the Wi-Fi problem temporarily. As we’ve mentioned, this is just a workaround. So, if you notice the issue reappearing, it would be advisable to update your Wi-Fi adapter’s driver.
Method 3: Removing all saved Wi-Fi networks
If your Wi-Fi doesn’t connect automatically after Windows 10 update, you might want to try removing all your saved networks . Simply follow the steps below:
- Click the Search icon on your taskbar.
- Type
settings, then hitEnter. - After launching the Settings app, you should go to the Network & internet section.
- Go to the left pane and click Wi-Fi .
- Go to the right pane, then look for Manage Wi-Fi settings and click it.
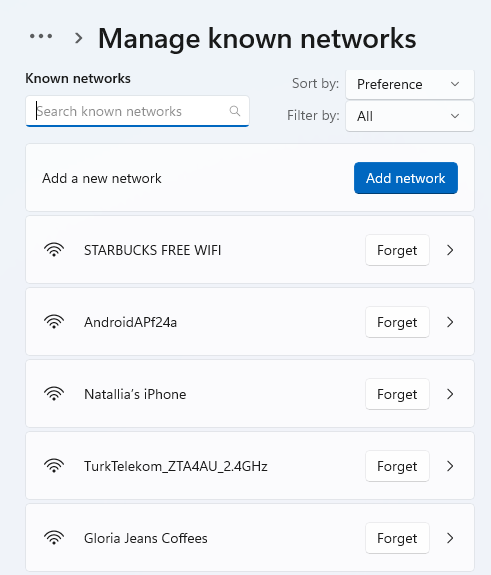
- Search for Manage known networks and click it.

- You will be able to see a complete list of all the networks you’ve connected to in the past. You can remove a network by selecting it and clicking Forget . You can do these steps on all the networks on the list.
You can also remove all the saved networks through the Command Prompt. However, before you proceed with this option, you must know that the solution might be for more tech-savvy individuals. So, if you are not confident with your troubleshooting skills and knowledge, you might want to skip this method. Here are the instructions:
- Right-click the Windows logo on your taskbar.
- Choose Command Prompt (Admin) or Powershell (Admin) from the menu.
- Once Powershell or Command Prompt is up, type
netsh wlan show profilesand pressEnter. - You will now see the list of networks you’ve connected to in the past. You can delete a network by entering the following command:
netsh wlan delete profile name='Name of the Wi-Fi network'
As you can see, this method requires a higher level of tech skills. However, the process is faster, especially when you’re familiar with using the Command Prompt . Either way, you will be able to resolve the Wi-Fi issue.
Method 4: Making some changes in your registry
On the other hand, if you know that you can carefully follow the instructions below, feel free to make the changes in your registry. That said, it would be best to create a backup before modifying the registry. Here are the steps:
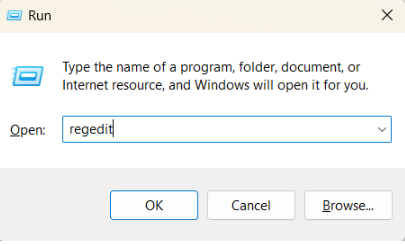
- On your keyboard, press
Windows key + R. - Type
regeditthen hitEnter.
- Once you’ve opened the Registry Editor, go to File and select Export.
- Set the range to All and type your preferred file name. Select a safe destination folder, then click Save. You now have a backup of your registry. Should you experience problems after making the changes, you will be able to undo them by running this file.
- Go to the left pane and navigate to the following path:
HKEY_LOCAL_MACHINE\SOFTWARE\Policies\Microsoft\Windows\WcmSvc
- Expand the WcmSvc key, then locate the GroupPolicy key. If you do not see this key, you have to manually create it. Just click WcmSvc, then select New and Key from the menu. Type
GroupPolicyas the name of the new key. - Select the GroupPolicy key, then go to the right pane and right-click an empty space.
- Select New, then choose DWORD (32-bit) value from the list.

- Name the new DWORD value as MinimizeConnections .
- Exit the Registry Editor and restart your computer.
- Once you’ve restarted your computer, check if your PC automatically connects to the available Wi-Fi network.
Method 5: Disabling the Fast Startup feature
By default, the Fast Startup feature is enabled on your PC. It can be useful for ensuring that your computer will boot faster. However, it can also cause certain problems to appear. In some cases, Fast Startup can prevent your system from automatically connecting to a Wi-Fi network. You can resolve this by disabling the feature. To do that, just follow the steps below.
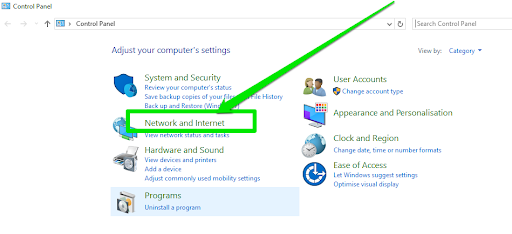
- Go to your taskbar and click the Search icon.
- Type
control panel, then hitEnter.
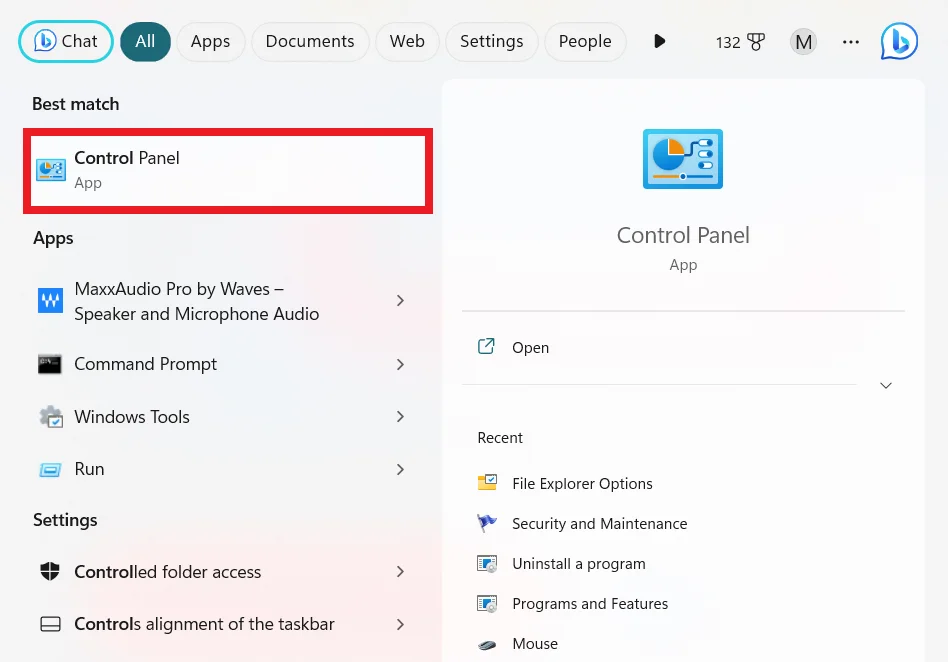
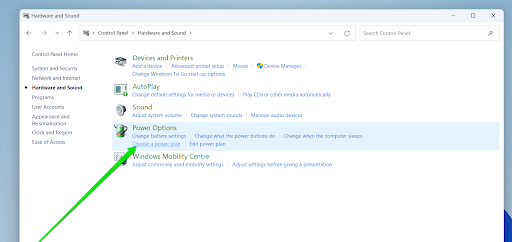
- Once you’ve opened Control Panel, click System and Security and select Power Options.
- Go to the left pane and select Choose what the power buttons do.

- Select Change settings that are currently unavailable.
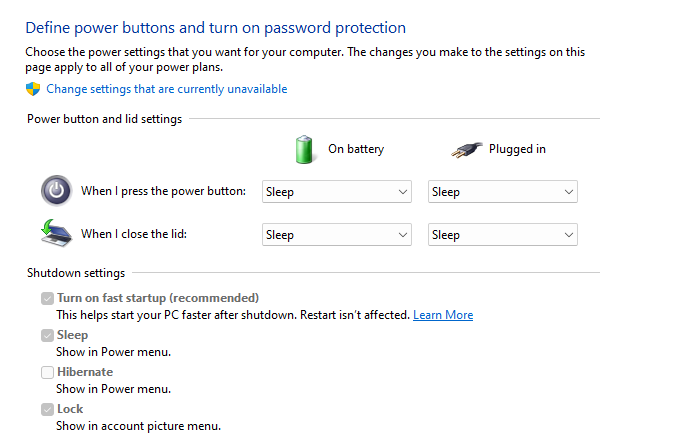
- Scroll down to the Shutdown settings section and make sure that the Turn on fast startup (recommended) option is not selected.
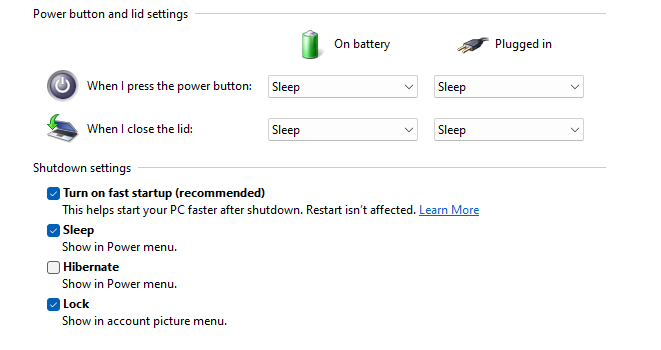
- Click the Save changes button.
After following the instructions above, you will notice that your PC boots a bit slower than usual. However, this should resolve your Wi-Fi problems.
Windows 10/11 (8, 7, Vista, XP)
Method 6: Removing files from the Wlansvc directory
In some cases, the problem is caused by certain files from the Wlansvc directory. You can fix this issue by disabling the WLAN AutoConfig service and removing the problematic files. Simply follow the instructions below:
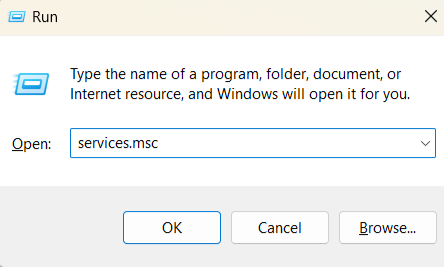
- On your keyboard, press
Windows key + R. - Type
services.msc, then pressEnter.
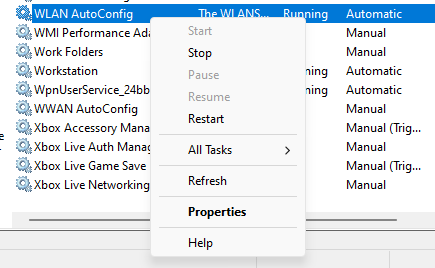
- You should now be able to see the list of available services. Look for the WLAN AutoConfig service and right-click it.
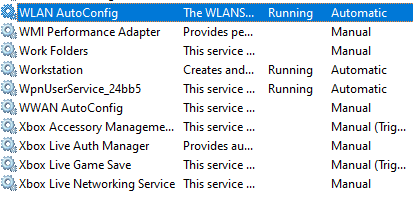
- Select Stop from the options.
- Once you’ve disabled the service, minimize the window.
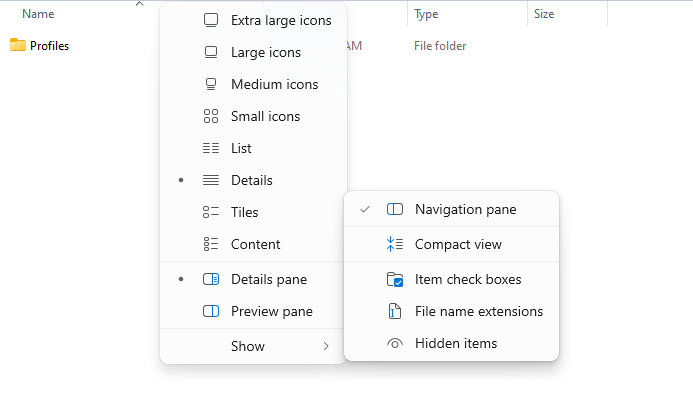
- Press
Windows key + Eon your keyboard, then navigate to the C:\ProgramData\Microsoft\Wlansvc directory. Make sure you reveal the hidden files and folders to avoid having problems finding this directory. You can do that by clicking the View tab and selecting the Hidden items option.
- Once you’re inside the Wlansvc directory, delete all the files and directories, except for the Profiles directory.
- Navigate to the Profiles directory. Keep the Interfaces folder, but delete all the files and directories in it.

- Open the Interfaces folder, then delete its contents.
- Go back to the Services window and look for the WLAN AutoConfig service. Right-click it, then select Start from the menu.
- Try connecting to your wireless network. Don’t forget to select the option for automatically connected to your preferred network.
- Once you’ve done that, restart your PC and check if the problem has been resolved. Some users also suggested going back to the C:\ProgramData\Microsoft\Wlansvc\Profiles\Interfaces directory and looking for the newly created .xml file in one of the folders. This file represents your network connection, and you can make some changes in it to resolve the problem.
Once you’ve found that file, just follow the instructions below:
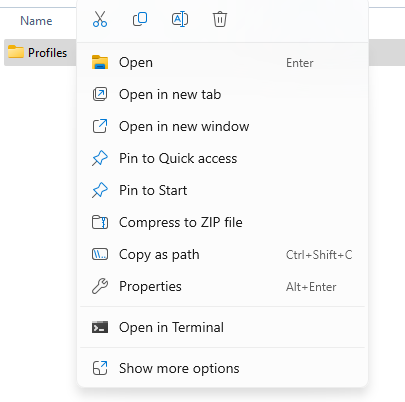
- Right-click the newly created .xml file and select Properties from the menu.
- Go to the General tab, then go to the Attributes section and select the Read-only option.
- Save the changes by clicking Apply and OK.
Method 7: Changing the security permissions
As we’ve mentioned, the Profiles folder can sometimes cause certain Wi-Fi connectivity issues. You can try changing the security settings to get rid of the problem. To do that, simply follow the instructions below:
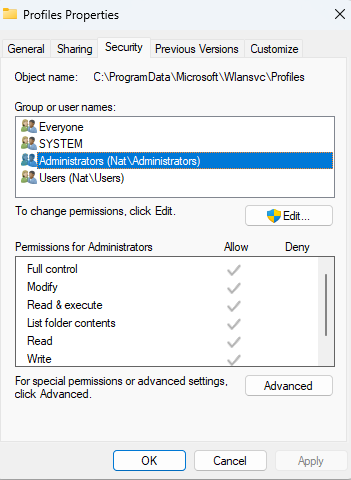
- Navigate to the C:\ProgramData\Microsoft\Wlansvc directory. Look for the Profiles directory, then right-click it. Select Properties from the menu.
- Click the Security tab, then go to the Group or User Names section to see if Administrators group is available. If it is, go to Step 7. If the Administrators group is not available, click the Advanced button.
- Click the Add button followed by the Select a Principal option.
- Go to the Enter the object names to select field and enter
Administrators. - Click the Check Names button and make sure that everything is in order. Click OK.
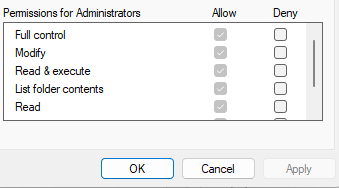
- Select the Full Control option, then click OK to save the changes.
- Select Administrators, then click Edit.
- Ensure that Allow is selected in the Full Control option.
- Go to Network and Sharing Center, then try adding your wireless connection.
Method 8: Changing the properties of your Wi-Fi connection
One of the simplest ways to fix your Wi-Fi issues is by changing the properties of your wireless connection. To do that, simply follow the steps below:
- Go to your taskbar and click the Internet Access icon. You will see the list of available wireless connections.
- Right-click your preferred network, then select Properties from the menu.
- Once the Properties window is up, go to the Connections tab. Ensure that the option to ‘Connect automatically when in range’ is selected.

- Save the changes and restart your PC to check if the problem has been resolved.
Method 9: Creating a new wireless network connection
Still wondering “why won’t my PC connect to Wi-Fi? ” Creating a new wireless connection can help. If you want to try this solution, make sure you remove your wireless connection first. Here are the steps in setting up a new wireless connection:
- Click the Search icon on your taskbar.
- Type
control panel, then hitEnter. - Select Network and Sharing Center.
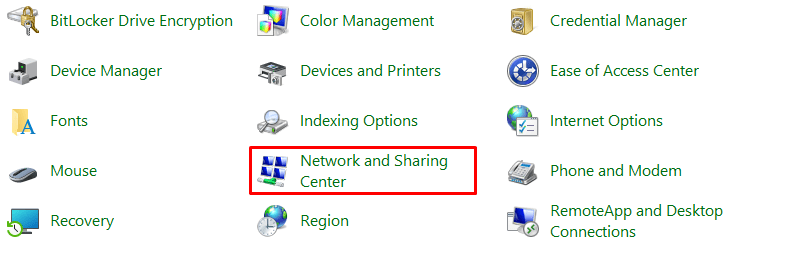
- Click the Set up a new connection or network link.

- Select the Manually connect to a wireless network option, then click Next.

- Submit the network name and the required settings. Aside from that, remember to select the Start this connection automatically and Connect even if the network is not broadcasting options.
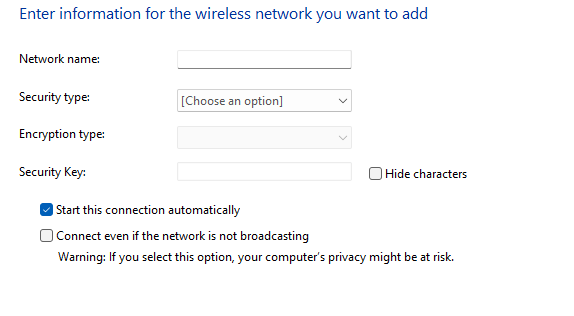
- Click Next, then follow the on-screen instructions to finish the process.
After following the steps above, you should have a new connection ready. Windows will now automatically connect to it.
Method 10: Replacing your wireless adapter
Finally, if none of the fixes above have been helpful, replacing your Wi-Fi router is pretty much a foolproof solution to the problem.
Keep in mind that you should only resort to this solution if the other methods in this article do not work for you.
Did you try any of our solutions?
Share the results in the comments below!
Windows 10/11 (8, 7, Vista, XP)
Windows Computer Won’t Connect to Wi-Fi: Fixed
We hope that with this guide, you no longer will no longer need to Google what to do if ‘my laptop won’t connect to Wi-Fi’. Remember, the key to successful Wi-Fi not connecting troubleshooting is a systematic approach: start with the simplest solutions and work your way up to the more complex ones.
By following the steps outlined, you’re equipped to tackle most Wi-Fi connectivity problems, ensuring you stay connected to the digital world.
Whether it’s adjusting your laptop’s settings, updating drivers, or even considering hardware replacements, there’s a solution to fit nearly every scenario.
FAQ
- Press the Windows key to open the Start menu.
- Click on Settings (the gear icon).
- Navigate to Network & Internet.
- Scroll down and find the Network reset option.
- Click on Reset now button next to Network reset.
Confirm the action by clicking Yes when prompted.
- The Wi-Fi driver on your laptop might be outdated, corrupted, or incompatible with your current system version.
- Incorrectly configured network settings on your laptop can prevent it from connecting.
- There could be an issue with your laptop’s Wi-Fi adapter.
- Sometimes, antivirus or firewall software can interfere with Wi-Fi connectivity.