![[FIXED] Unable to Save Display Settings Issues on Windows](https://www.auslogics.com/en/articles/wp-content/uploads/2023/10/shutterstock_2151732823-1-568x359.jpg)
Struggling with the ‘Unable to Save Display Settings’ problem on your Windows PC? We’ve got you covered.
This guide offers quick fixes to help you overcome this issue and get your display settings back on track.
Understanding the “Windows Unable to Save Display Settings” Error
The “Unable to Save Display Settings” error is a common issue encountered by Windows users, and it can be quite frustrating.
This error typically occurs when you’re trying to change your display settings, such as screen resolution or multiple monitor configurations.
It often indicates a problem with your graphics drivers, display hardware, or system settings. Understanding the underlying causes of this error is crucial to resolving it effectively.
In this article, we’ll delve into the possible reasons behind this issue and provide step-by-step solutions to help you get your display settings back on track.
What Causes the Error?
The “Unable to Save Display Settings” error can be caused by several factors:
- Incompatible or outdated graphics drivers are a common trigger for this error. The drivers that control your graphics card need to be up-to-date to ensure proper communication with your display.
- Sometimes, incorrect display settings can lead to this error. If you’re trying to set a screen resolution or multiple monitor configuration that your hardware doesn’t support, Windows will be unable to save these settings.
- Faulty hardware components, such as a damaged graphics card or loose cables, can also result in this error. It’s essential to check your hardware connections and the condition of your graphics card.
- Conflicts with third-party software or changes made to system settings can disrupt the display settings. Identifying and resolving any software-related issues is important in troubleshooting this error.
- In some cases, malicious software can interfere with system operations, including display settings. Performing a malware scan is a good practice when encountering persistent errors.
📌 Quick fix: How to Remove Virus and Other Malware from Windows
Understanding these potential causes will help you diagnose and fix the “Unable to Save Display Settings” error effectively.
How to Fix the Display Settings Could Not Be Saved Error?
Fix 1: Adjust screen resolution
There’s a high probability that your graphics hardware has failed to reach a consensus on which resolution to output, thus causing the unable to save display settings error.
As a solution, check your screen resolution settings and opt to use the lowest units.
In layman’s terms, if you’re in possession of 3monitors with these resolutions, i.e., 1900 x 1200, 1600 x 900, 1280 x 800, make sure you select the lowest screen resolution and set it to 1280 x 800 for a successful setup.
Follow these steps:
- Go to the desktop and right-click on any empty space. Click Screen Resolution
- The Resolution window opens up, click the drop-down menu then select the lowest resolution of all connected monitors. Click Apply>OK.
- To check whether the “unable to save display settings” error has been fixed, restart your If the error doesn’t appear after switching on the screen, the error has been fixed, but if it still appears, try the next solution.
📌 Also read: How to Set a Dual Monitor Wallpaper on Windows 10 and 11?
Fix 2: Change monitor order (if you are using multiple monitors)
If you’re facing the “Unable to Save Display Settings” on 2 or 3 monitors, one potential solution is to change the monitor order.
Here’s a step-by-step guide on how to do it:
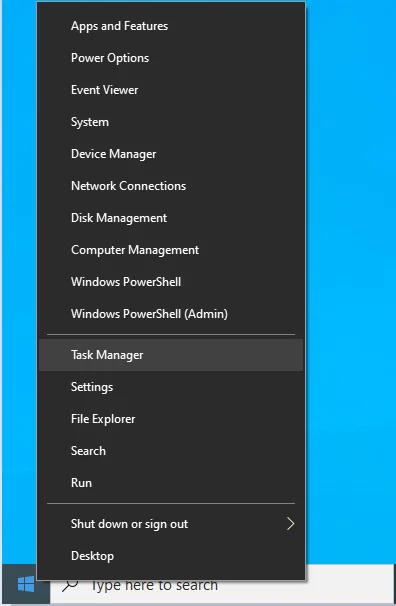
- Right-click on the desktop and select Display settings from the context menu.
- Scroll down to the Multiple displays section. Windows should display all the monitors connected to your computer.
- Each monitor will be labeled with a number (e.g., “1,” “2,” etc.) and a representation of their relative positions.
- To change the monitor order, simply click and drag the monitor icons to rearrange them as needed. You can drag them left, right, up, or down to reflect your physical monitor setup accurately.
- After rearranging the monitors to match their physical positions, scroll down and click on the Apply button. Windows will ask if you want to keep the changes. Click Keep Changes to confirm.
- Once you’ve confirmed that the monitor order is correct and the issue is resolved, click the Save button in the Display Settings window to save the changes permanently.
- Sometimes, a system restart can help ensure that the changes are saved and applied correctly. Restart your computer to make sure everything works as expected.
Fix 3: Disable third-party software
Sometimes, third-party software can conflict with your display settings. Try disabling or uninstalling recently installed applications to see if this resolves the issue. You can do this with Windows Task Manager. Here are the steps to take:
- Open Task Manager: press the keyboard shortcut
Ctrl + Shift + Esc.
- In the Task Manager window, look through the list of running applications.
- You can sort the list by various columns like CPU, Memory, or Name to find the problem-causing software more easily.
- Click on the software/application that you suspect is causing the problem to highlight it. Make sure it’s selected.
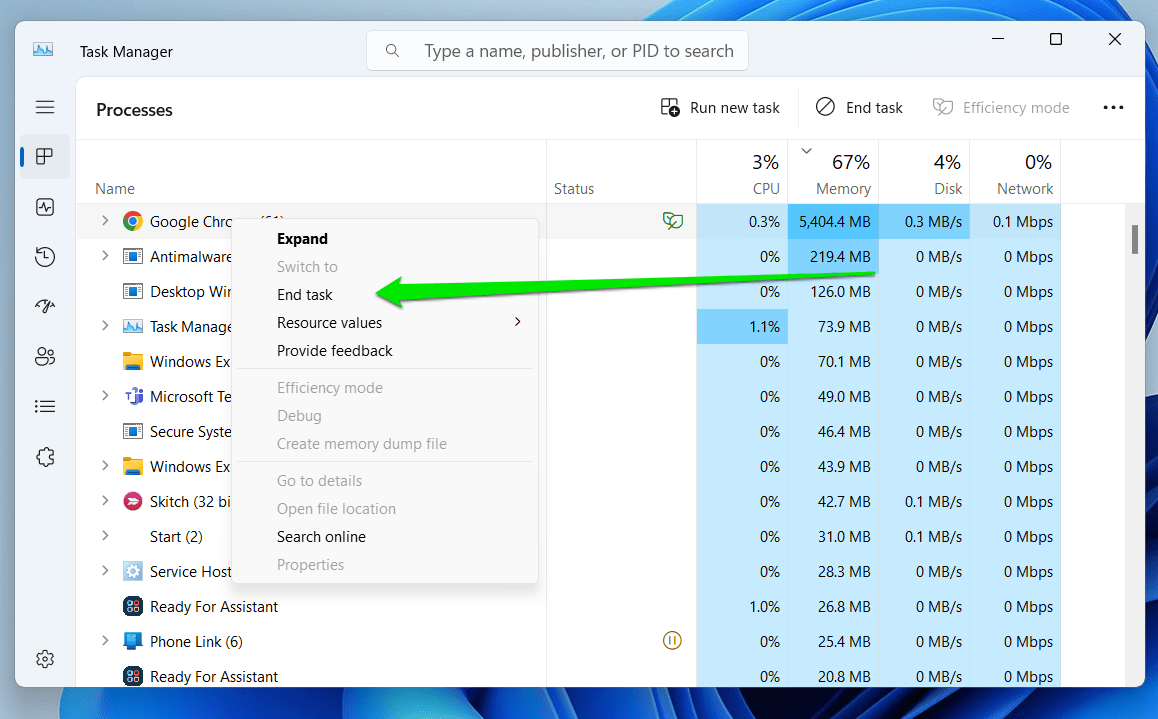
- With the problematic software selected, click the End Task button located in the lower-right corner of the Task Manager window.
- A confirmation dialog will appear, asking if you want to end the task. Confirm that you want to end the task by clicking End Process.
After disabling or uninstalling the software, reboot your computer. Upon restarting, check if the “Unable to Save Display Settings” error persists.
If the error is gone, you’ve likely identified the culprit.
If not, you can proceed to disable or uninstall other recently installed applications one by one, testing for resolution after each step. If you’ve identified a specific application causing the conflict, check if there are updates available for it
. Sometimes, software updates address compatibility issues.
Alternatively, if the software isn’t crucial, consider finding alternatives that don’t conflict with your display settings.
📌 Also read: How to Uninstall Programs and Delete Unnecessary Files in Windows 10
Fix 4: Check hardware connections
Ensure that all hardware connections, including cables and monitor connections, are secure. Loose or damaged hardware connections can lead to display problems.
- Examine all the cables associated with your display setup. This includes power cables, video cables (such as HDMI, DisplayPort, VGA, or DVI), and any other peripheral connections.
- Ensure that all cables are securely plugged into their respective ports.
- If you’re using an external monitor or multiple displays, check the connections on the monitor(s) and your computer. Additionally, verify that your computer recognizes the external monitor if you’re using one.
- If you suspect a cable might be faulty, consider swapping it out with a known working cable of the same type.
- Access your computer’s display settings to ensure that it’s configured to use the correct display or multiple displays if applicable.
Fix 5: Update Your Graphics Driver
If your screen resolution was not the issue, then you’re still looking for how to fix the unable to save display settings error on Windows 10.
The issue might be because you’re not using the correct graphics driver, or maybe the graphics driver is outdated.
To see if your problem will be solved, update the graphics driver. Now, this can be done either manually or automatically.
The manual update needs time and proficiency, as well as full attention to detail, whereas the automatic update can be done in a matter of a few clicks and strokes.
To manually update your graphics driver:
- To download the necessary driver, go to the official website of the graphics card manufacturer. Remember to take note of the make and model of your graphics card, as you will need this information when searching for the required software.
- After you’ve located the correct driver for your graphics card on the manufacturer’s website, proceed to download it. Once the download is complete, run the driver package by double-clicking it.
- After successfully installing the graphics card driver, it’s essential to restart your computer to ensure that the changes take effect and your graphics card functions optimally.
To maintain your graphics card’s performance and reliability, it’s important to install regular driver updates. If you’re using AMD or NVIDIA software, you may receive automatic updates for your device. These updates help keep your graphics card in excellent condition.
📌 Quick fix: Step-by-Step Guide: How to Update AMD Drivers
You can also update your drivers via Device Manager:
- Pressing
Windows + Xand select Device Manager from the menu that appears.
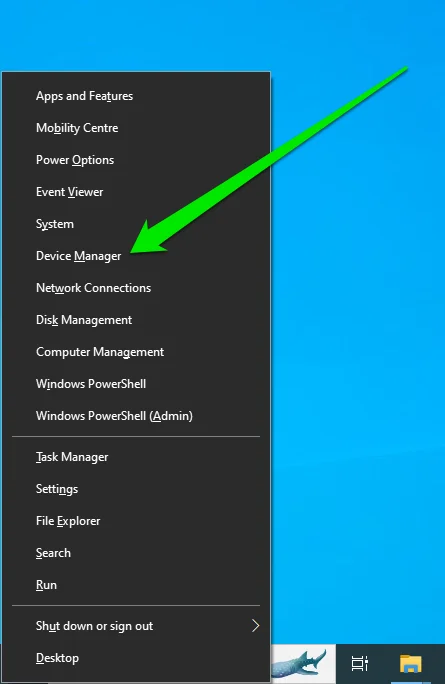
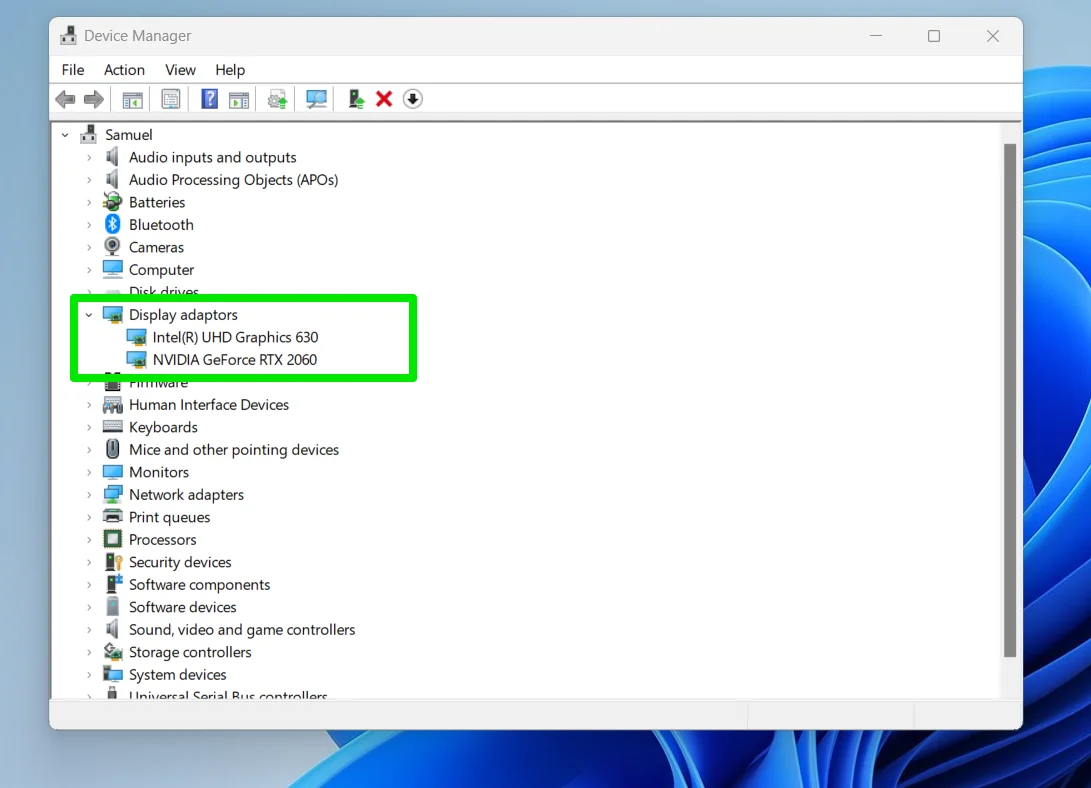
- In Device Manager, you’ll see a list of categories with hardware devices listed beneath them. Expand the category that corresponds to the device you want to update. For example, if you want to update your graphics card driver, expand the Display adapters category.
- Right-click on the specific device for which you want to update the driver. A context menu will appear.
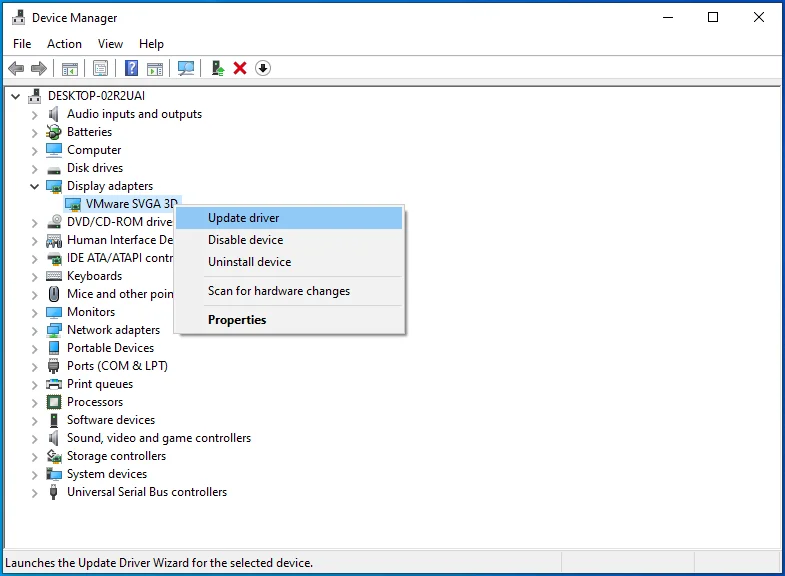
- In the context menu, select Update driver. This will open the Update Drivers wizard.
You’ll have two options here:
- Search automatically for updated driver software: This option will let Windows search online for the latest driver software. If it finds a newer driver, it will automatically download and install it.
- Browse my computer for driver software: Use this option if you have downloaded the driver software manually from the manufacturer’s website and want to install it from a specific location on your computer. You’ll need to browse to the location where you’ve saved the driver files.
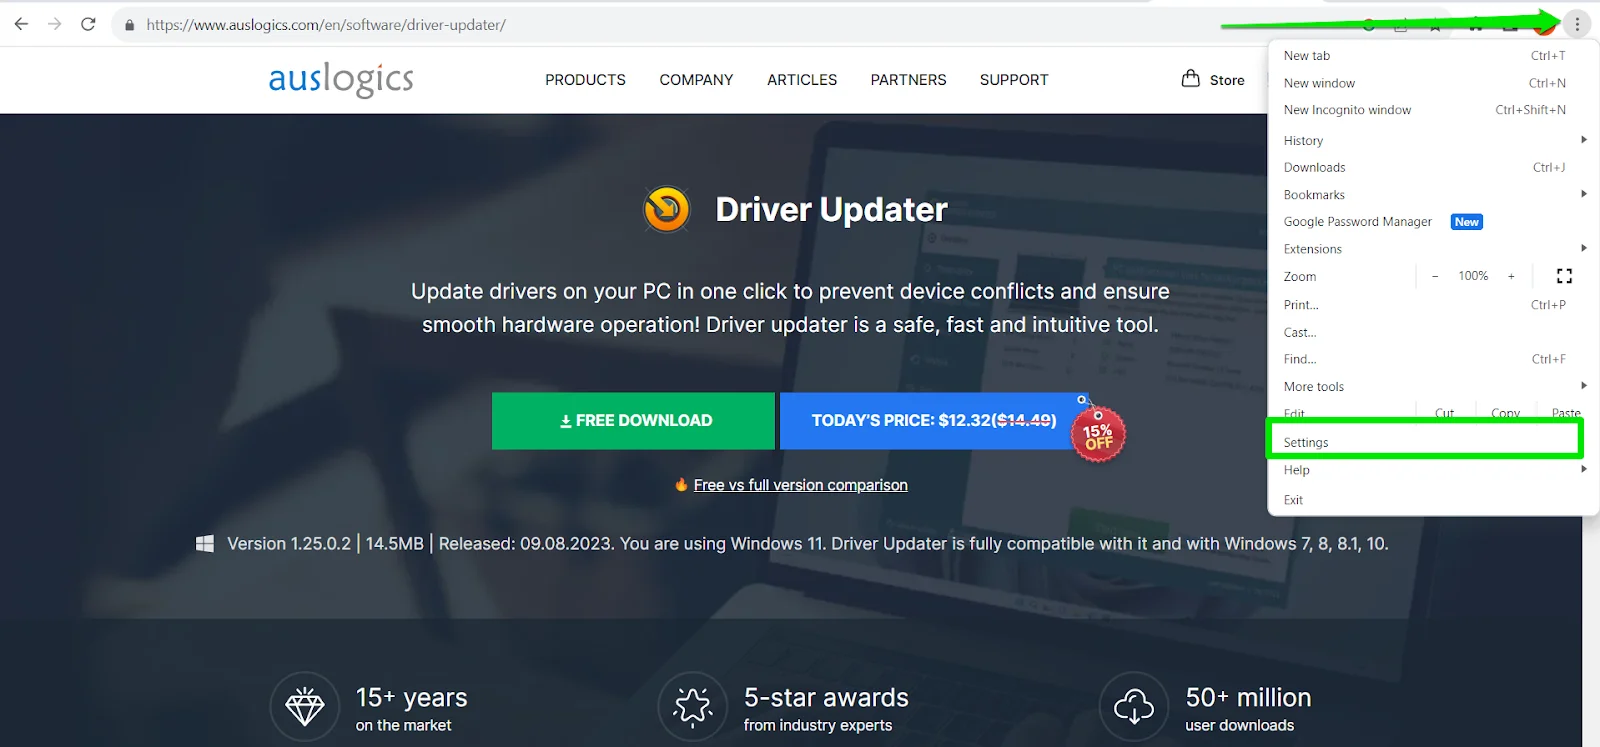
After the driver installation is complete, it’s a good idea to restart your computer to ensure that the changes take effect. Should you be out of time or not proficient enough to conduct driver update manually, you can download Auslogics Driver Updater for automatic update.
Auslogics Driver UpdaterIt offers you an intuitive one-click tool to prevent device conflicts and leave your system with smooth hardware operation.
With the Auslogics Driver Updater tool, there’s no need for you to know the specifics. Also, it helps eliminate the risk of downloading the wrong drivers.
There are no mistakes since the process happens automatically. What’s more, Auslogics Driver Updater automatically backs up your drivers, making it effortless to roll the process back should anything go wrong.
- Visit the official Auslogics Driver Updater site and install the tool.
- Run Auslogics Driver Updater and click the Scan Now option. The tool will scan your PC and detect all driver problems.
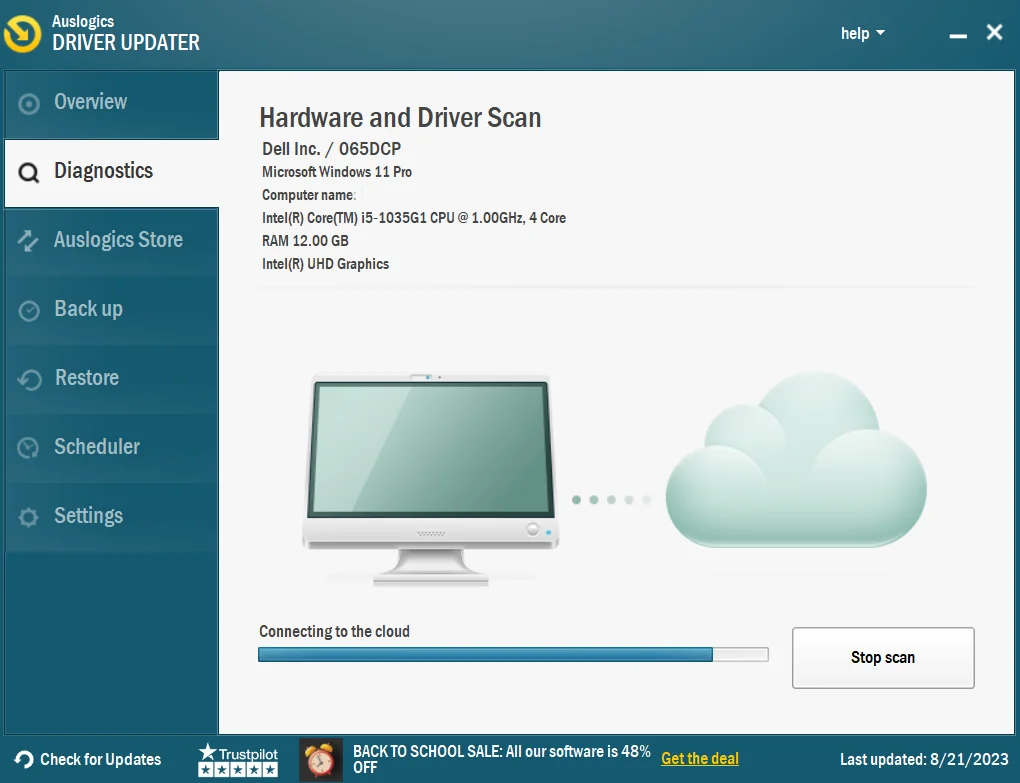
- Once the scan is completed, click the option to Update All, and the tool will automatically download and install the correct versions of all misbehaving, outdated or wrong drivers. (If you had downloaded the trial version, this is where you need to upgrade to the full version to get the automatic driver updates)
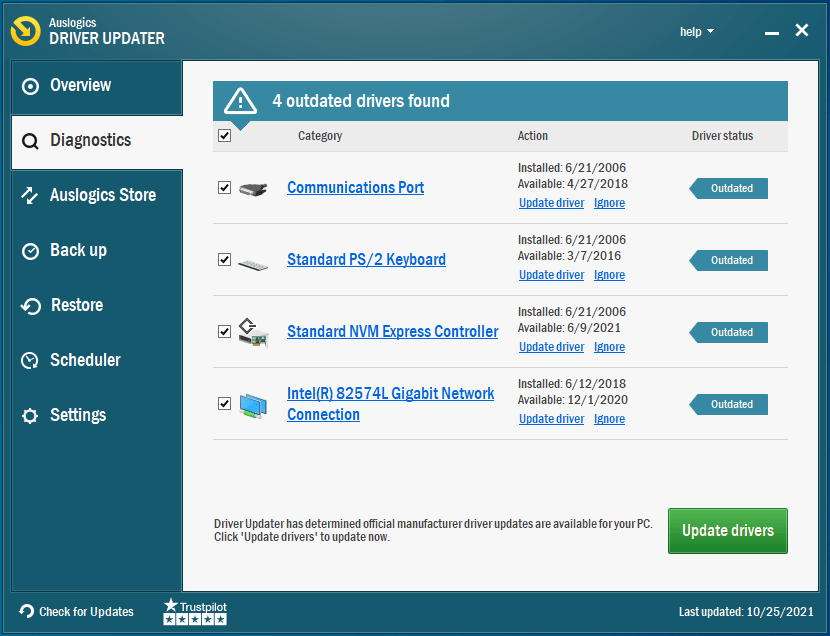
- To check that the issue has been resolved, restart your computer.
Another great thing about Auslogics Driver Updater is that you can also schedule automatic driver scans, which can help you eliminate problems like these in the future.
📌 Learn more: Auslogics Driver Updater: Update Your Drivers in One Click!
Fix 6: Run hardware diagnostics
Most PCs have built-in hardware diagnostic tools
. Run these diagnostics to check for any hardware issues, especially related to your graphics card. Fixing or replacing faulty hardware may resolve the problem.
- On most Windows PCs, you can access hardware diagnostics through the BIOS or UEFI firmware settings. To do this, restart your computer.
- During the boot process, you’ll need to press a specific key to enter the BIOS or UEFI settings. Common keys include F2, F10, Delete, or Esc. The exact key may vary depending on your PC’s manufacturer; check your PC’s documentation for guidance.
- Once you’re inside the BIOS or UEFI settings, navigate to the section that contains hardware diagnostics. This section might be labeled as “Diagnostics,” “System Tests,” or something similar.
- Start the hardware diagnostics utility. Depending on your PC, you may have options to run a quick test or a more comprehensive one.
- Select the test related to your graphics card and display components. This test will examine the hardware for any potential issues.
- Allow the diagnostic tool to complete its tests. It will provide you with a detailed report of the results.
Pay close attention to any errors or issues identified during the test. If the diagnostic tool detects problems with your graphics card or display hardware, it’s crucial to take note of them. If the hardware diagnostics tool finds any faults or errors, you’ll need to take appropriate action to resolve them.
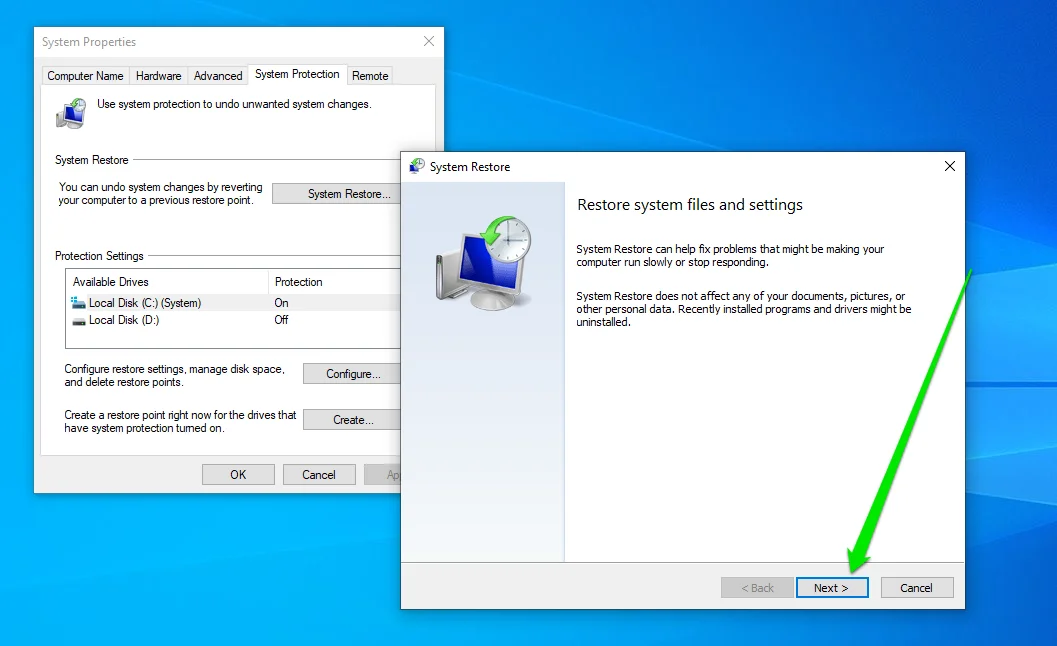
Fix 7: System Restore
If you recently made system changes or installed updates that triggered the error, you can perform a system restore to revert your system to a previous state when the display settings were functioning correctly. Note that this option is only available if you have previously created a system restore point.
- Press the Win key on your keyboard.
- Type in system restore.
- In the System Restore window, click the Next button to begin the restoration process.
- You’ll be presented with a list of available restore points. These are snapshots of your system’s state at different points in time.
- Choose a restore point that predates the changes or updates that led to the display error. Typically, you’ll want to select the most recent restore point before the issue occurred.
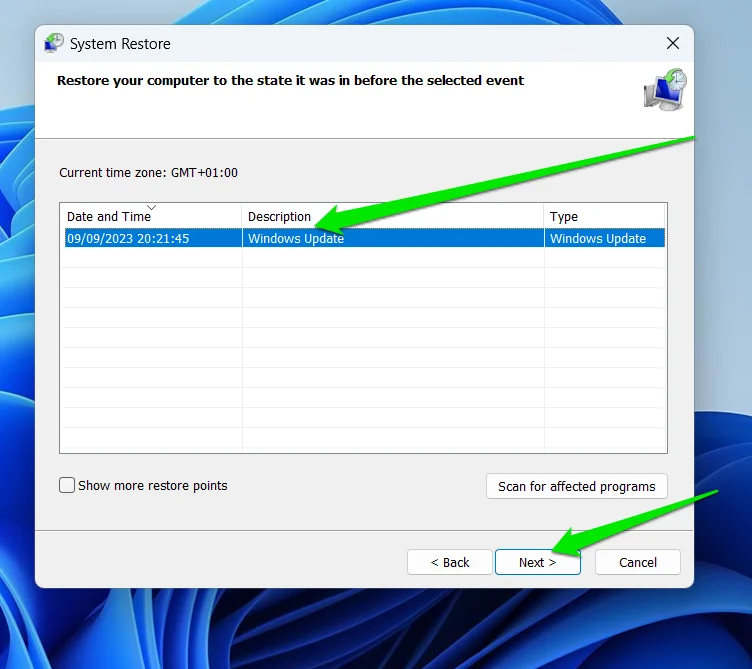
- Click Next.
- Review the details of the selected restore point to ensure it’s the correct one.
- Click Finish to confirm your selection.
- The System Restore process will begin. Your computer will restart and roll back to the chosen restore point.
Once the restoration process is complete, your computer will reboot. Check if the “Unable to Save Display Settings” error has been resolved. Attempt to adjust your display settings as needed.
📌 Also read:[FIXED] System Restore Not Working in Windows 10
Fix 8: Scan Your PC for Malware
If you are frequently running into errors as this one, there is a chance your PC may be infected with malware.
To be on the safe side, run a scan of your system using reputable antivirus software such Auslogics Anti-Malware.

📌 Also read: How to Prevent Malware: Lock Down Your Online Safety
Conclusion
Resolving the “Unable to Save Display Settings” issue on Windows can be achieved through a systematic troubleshooting approach.
By following the steps outlined in this guide, you can address the problem effectively and regain control over your display settings.
Remember to update your graphics drivers, check for hardware issues, and adjust your display settings as needed to ensure a seamless and hassle-free computing experience.
FAQ
To reset display settings to default on Windows, go to “Display settings” (as mentioned in the previous answer), scroll down to “Advanced display settings,” and click on “Display adapter properties.”
In the new window, go to the “Driver” tab, and click “Roll Back Driver” if available. This can revert your display settings to a previous state.