
Power plans are the configurations that determine your computer’s power consumption and performance. You’ll have a problem conserving energy or improving your PC’s performance through the Control Panel if the default power plans are missing.
While you can customize your power plans how you see fit, the default power plan options make it easier to pick one scheme and get on with your business.
This article contains different solutions detailing how to restore missing Windows power schemes. So, is your Windows 10 or Windows 11 High Performance power plan missing ? Continue reading to find out how you can get it back.
Why Are Power Plans Options Missing?
Windows always offered users three different power options to choose from for a long time. They are:
- Balanced: This plan attempts to provide users with all the performance they need for their regular computer use while conserving energy.

- High Performance: This power scheme keeps the CPU and other components running at full power. Using it can drain laptop batteries and drive up the power consumption of Desktop computers. That said, it still tries to maintain a small level of energy conservation, albeit minimal.

- Power Saver: This plan is a set of configurations that conserve battery life, especially on laptops and mobile devices. It reduces the CPU speed and other system settings to minimize power consumption.

- Ultimate Performance: The Ultimate Performance power plan is classed as an additional plan. It is reserved for resource-hungry purposes when users want their system components running at full tilt.
📌 Related: What is the Ultimate Performance Power Plan and How to Enable It
After using the High Performance plan, you might find yourself asking, ‘Why is my Windows 11 High Performance Power plan missing?’ or ‘Why can I only see the Balanced Power plan?’
As it turns out, a Windows 10 update removed users’ ability to toggle between the default power plans on the Power Options page. Only the Balanced power option was left.
That said, if the Windows 10 or Windows 11 Ultimate Performance power plan is missing , do not panic. It is only a default power option on the Windows 10 and Windows 11 Pro for Workstations editions.
This article will also show you how to unlock the Ultimate Performance power plan in Windows 10 and Windows 11.
Introducing the Power Mode
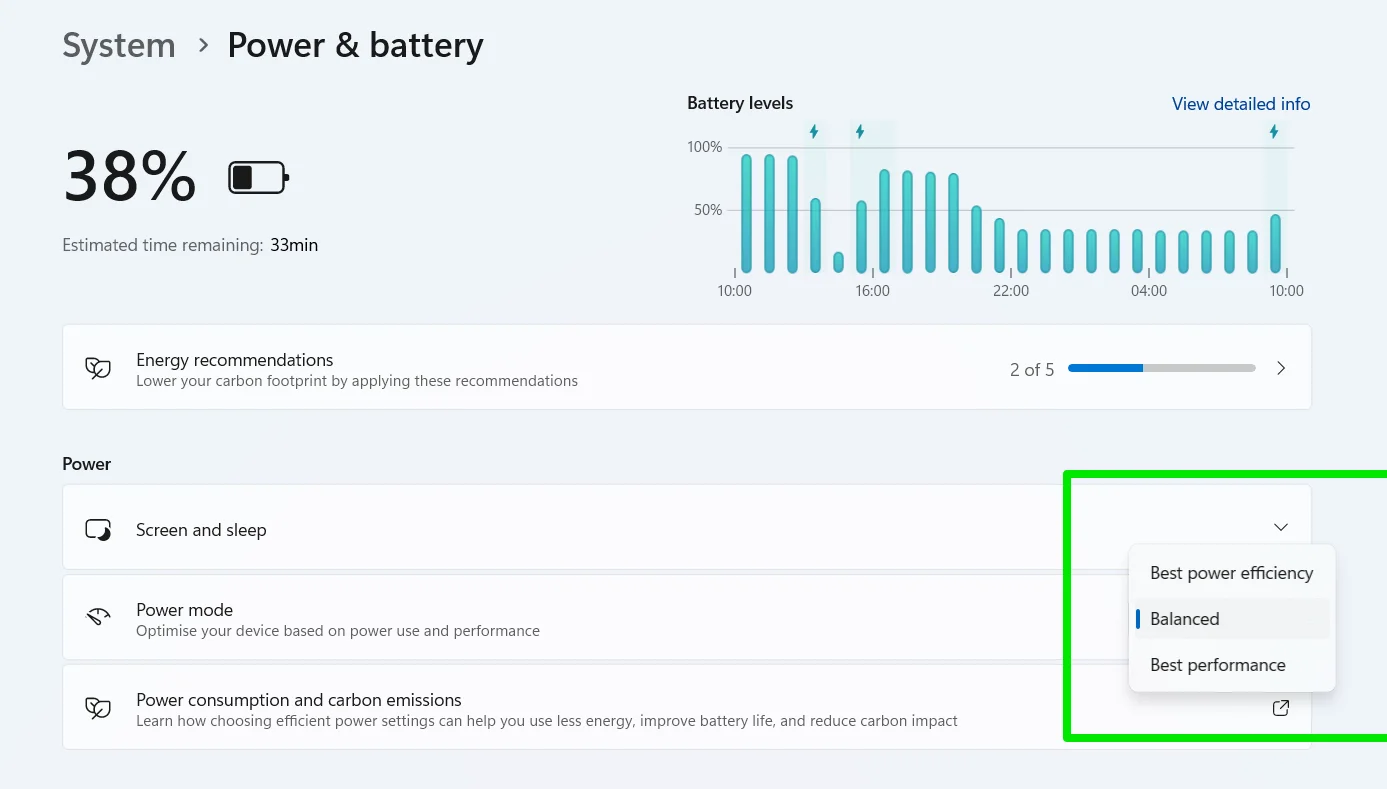
Microsoft renamed the power plan options to Power Mode. You can access the new selection feature in the Settings application if you use Windows 11 or the system tray if you use Windows 10. The Power Mode on Windows 11 includes three different plans that mirror the traditional power plans. They are:
- Best Power Efficiency
- Balanced
- Best Performance
For Windows 10, the modes are:
- Battery Saver
- Better Battery (or recommended)
- Better Performance
- Best Performance
How to Switch Between Power Modes
There are different ways to
change your Power Modes, depending on your operating system. However, you must select the Balanced plan from the Control Panel Power Options page before these methods can work.
Using a Custom Plan will prevent you from applying the changes.
If you use Windows 11, follow these steps:
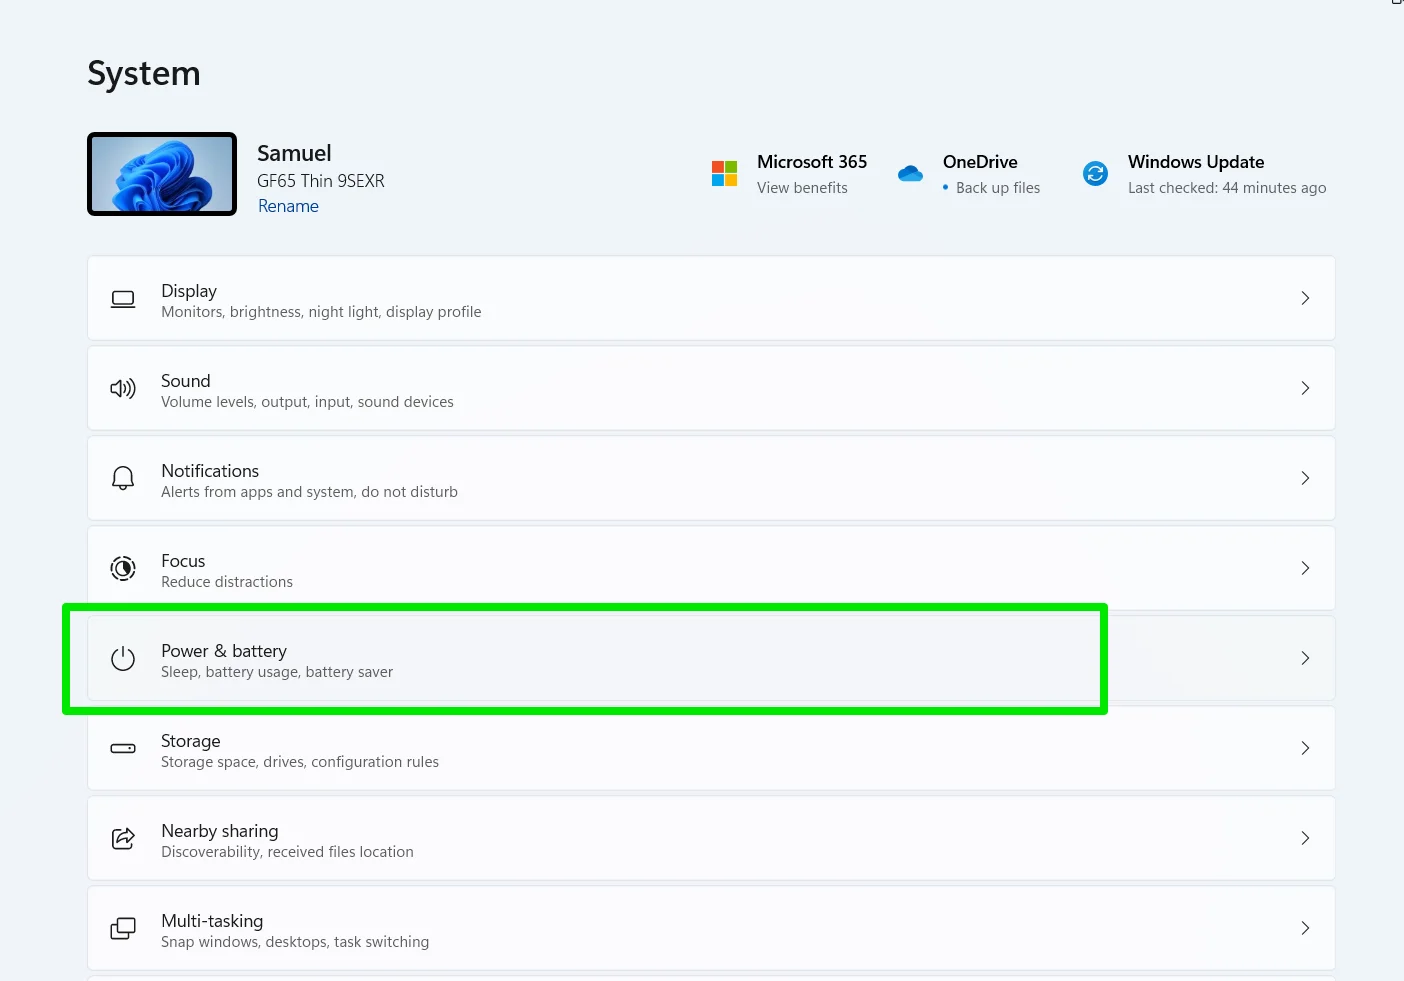
- Open the Settings application, scroll down under System, and click Power & Battery.
- Go to the drop-down menu to the right of the Power Mode entry and select your preferred power mode.
If you use Windows 10, follow these steps:
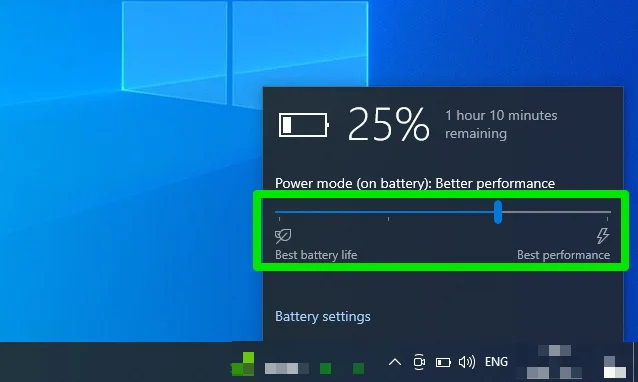
- Click the battery icon in the system tray. The icon is next to your computer’s time and date display.
- Use the slider to switch between the four modes on Windows 10.
How to Restore the Missing Power Plans
If you’re more comfortable with the previous traditional power plans and want to
change your power plans like you used to, there are different things you can do to restore the Control Panel options.
You can use the Command Prompt, download a zip file, or go through the Registry Editor to fix the “Windows 11 or Windows 10 High Performance Power Plan missing” issue or bring back the rest of your default power plans.
Let’s go through the different methods.
Method 1: Use the Command Prompt
Using the Command Prompt involves launching it as an administrator. Follow these steps:
- Tap
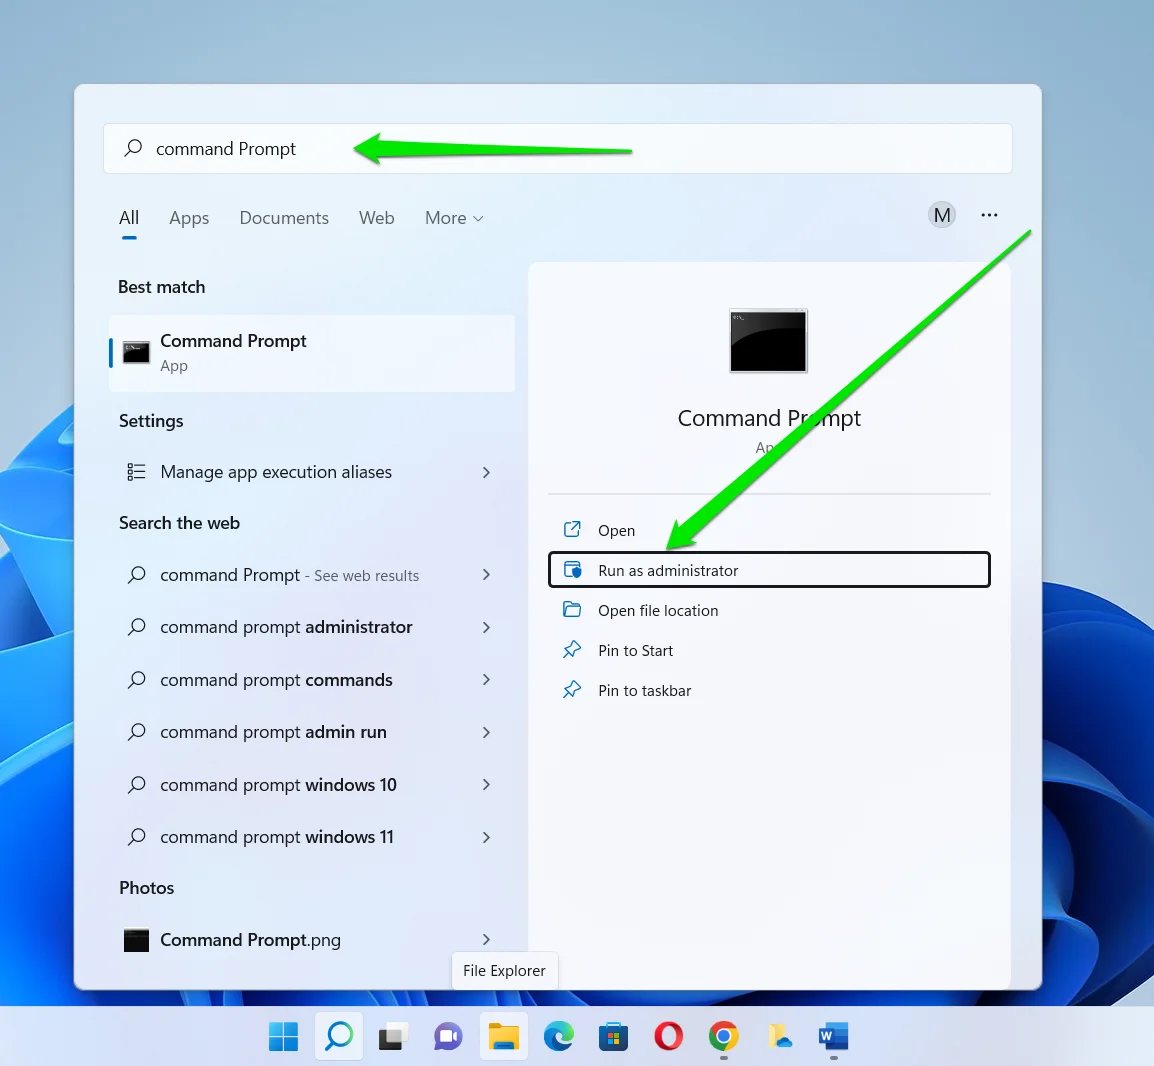
Windows + Sor click the search box next to the Start button. - Type
command promptorCMDwhen the search interface opens. - Click Run as Administrator under Command Prompt.
- Select Yes when the UAC dialog window appears.
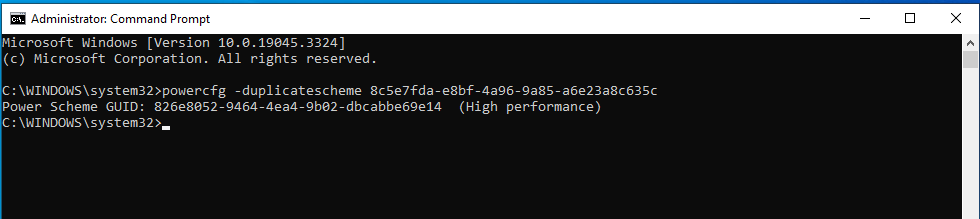
After the Command Prompt opens in elevated mode, follow these steps to restore the High Performance and Power Saver power plans. Press Enter after typing or pasting each code:
- High Performance:
powercfg -duplicatescheme 8c5e7fda-e8bf-4a96-9a85-a6e23a8c635c
- Power Saver:
powercfg -duplicatescheme a1841308-3541-4fab-bc81-f71556f20b4a

- Ultimate Performance
powercfg -duplicatescheme e9a42b02-d5df-448d-aa00-03f14749eb61

If you want to also duplicate the Balanced plan, enter the following code:
powercfg -duplicatescheme 381b4222-f694-41f0-9685-ff5bb260df2e

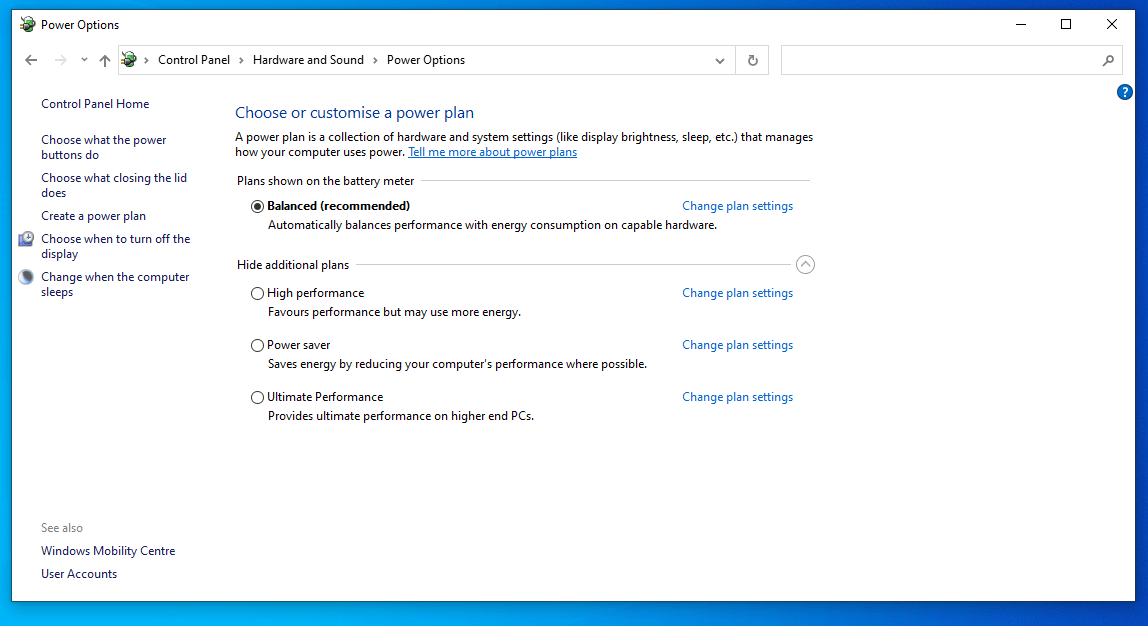
You should now be able to see the plans under Additional Plans on the Power Options page.
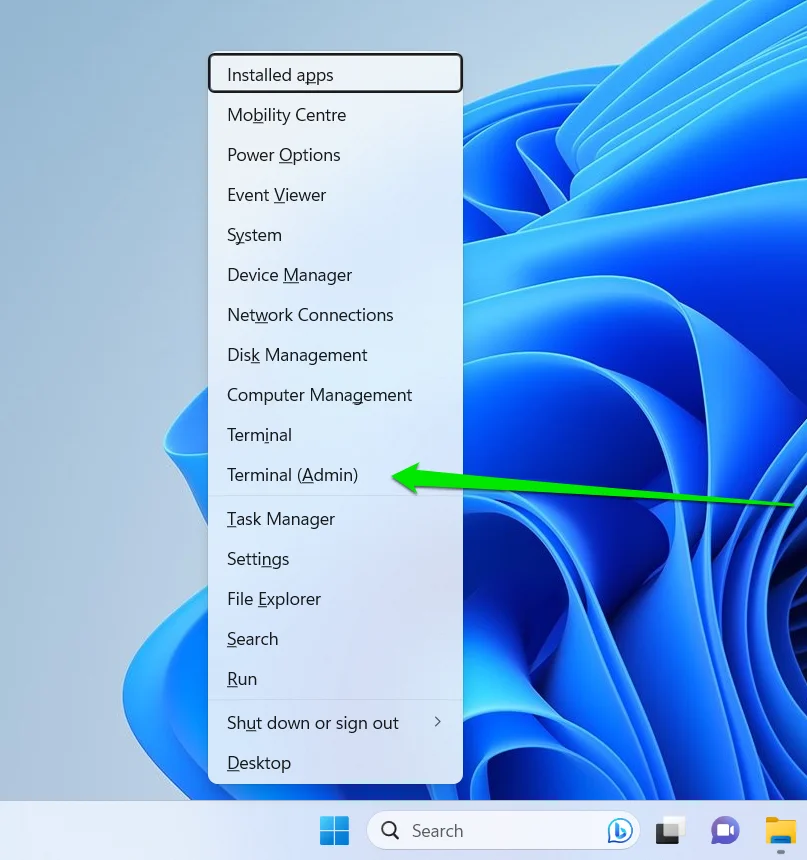
You can also run the commands in Windows PowerShell or Terminal (Windows 11).
Right-click the Start button or tap the Windows + X keyboard combo and select Terminal (Admin) or Windows PowerShell (Admin). Now, type any of the commands listed above to restore your power plans.
Do you want to restore the original High Performance mode under the Balanced mode?
The following steps will show you how to add High Performance plan under “Plans shown on the battery meter.”
- Select the Balanced plan.
- Launch the Command Prompt Window.
- Type the following and hit
Enter.
powercfg /s SCHEME_MIN
After hitting Enter, the High Performance mode will appear.

📌 Also read: CMD Navigation: How to Change Directory in CMD (Command Prompt)
Method 2: Using configuration files
This method involves using the Command Prompt to import .pow files to activate the missing power plans. Follow these steps:
- Download the ZIP file containing the power plan files.
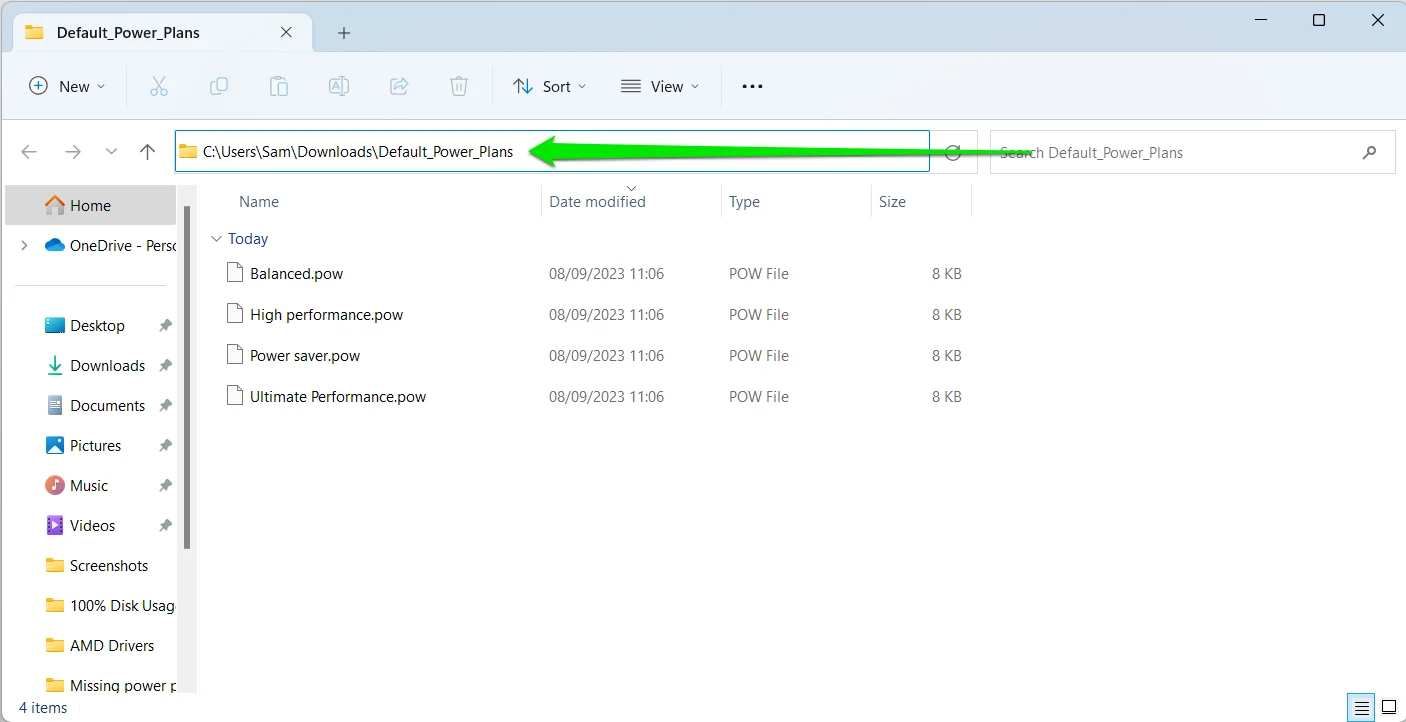
- Extract the files to a folder and take note of the path to the folder.
- You can open the folder, head to the address bar in the File Explorer, click the path, and press
Windows + Cto copy the path.
- Next, launch Command Prompt as an administrator.
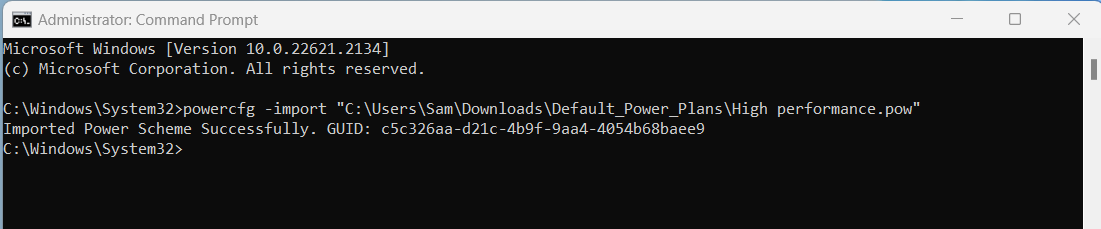
- After the Command Prompt window opens, type the following:
powercfg -import "<Folder Location>\<power plan filename>.pow"
You must replace <Folder Location> and <power plan filename> with the path to the folder and the name of the power plan file, respectively. For example, the following command will add the High Performance power plan:
powercfg -import "C:\Users\Sam\Downloads\Default_Power_Plans\High performance.pow"
- Repeat the process for the remaining plans.
Method 3: Create a custom Power Plan
Despite reworking the Power Options window, Microsoft still maintained users’ ability to use the traditional power schemes. You can still create a new plan that mirrors any of those schemes.
Whenever you start creating a power plan, you’re required to choose one of Balanced, Power Saver, or High Performance as the power scheme before you can go on to edit the default settings. So, if you want any of those power plans back, you can create a custom plan, choose one of the former default plans, and name it accordingly.
Here’s how to do that:
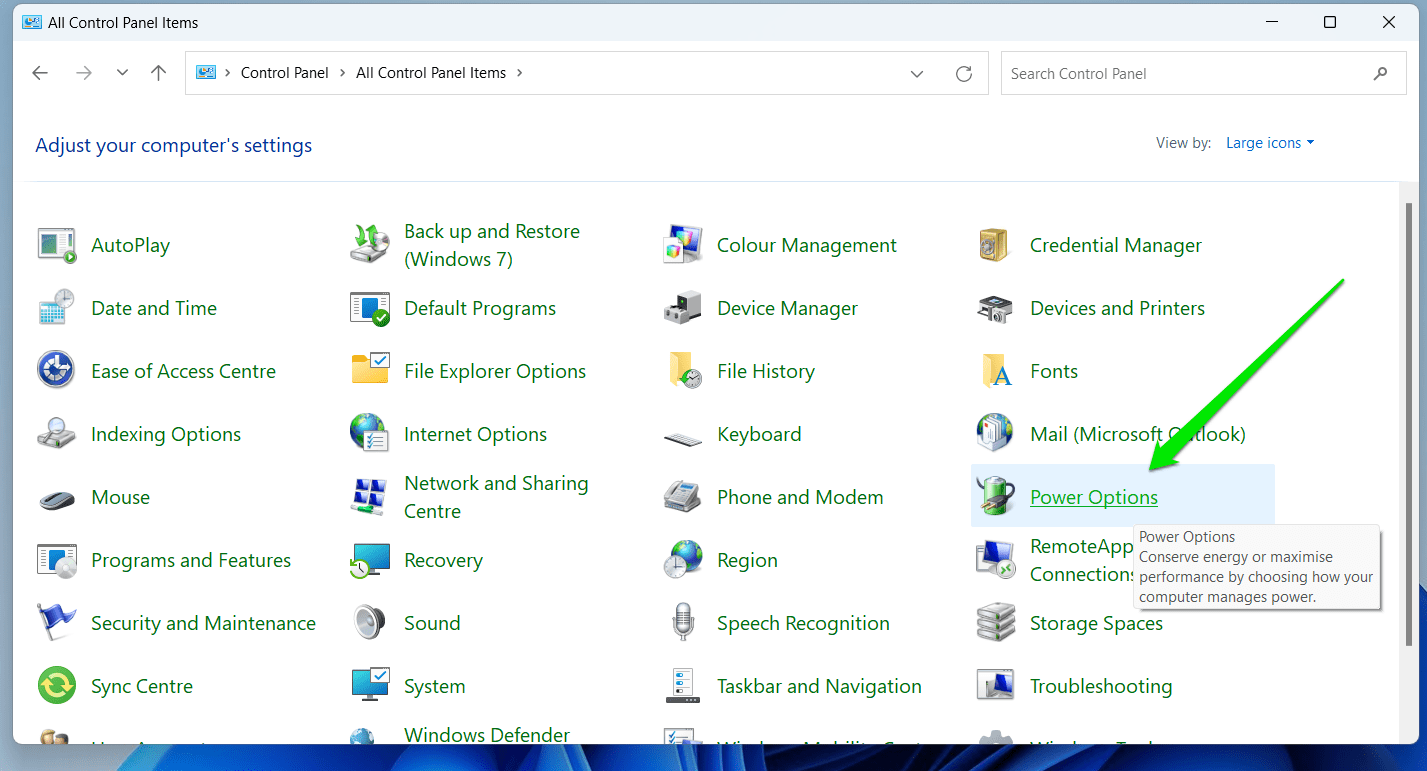
- Launch the Control Panel. Type
Controlin the Start menu and click the Control Panel. - Go to the View By drop-down menu and select Large Icons.
- Click the Power Options icon.
- Go to the left side of the screen and click the Create a Power Plan link.
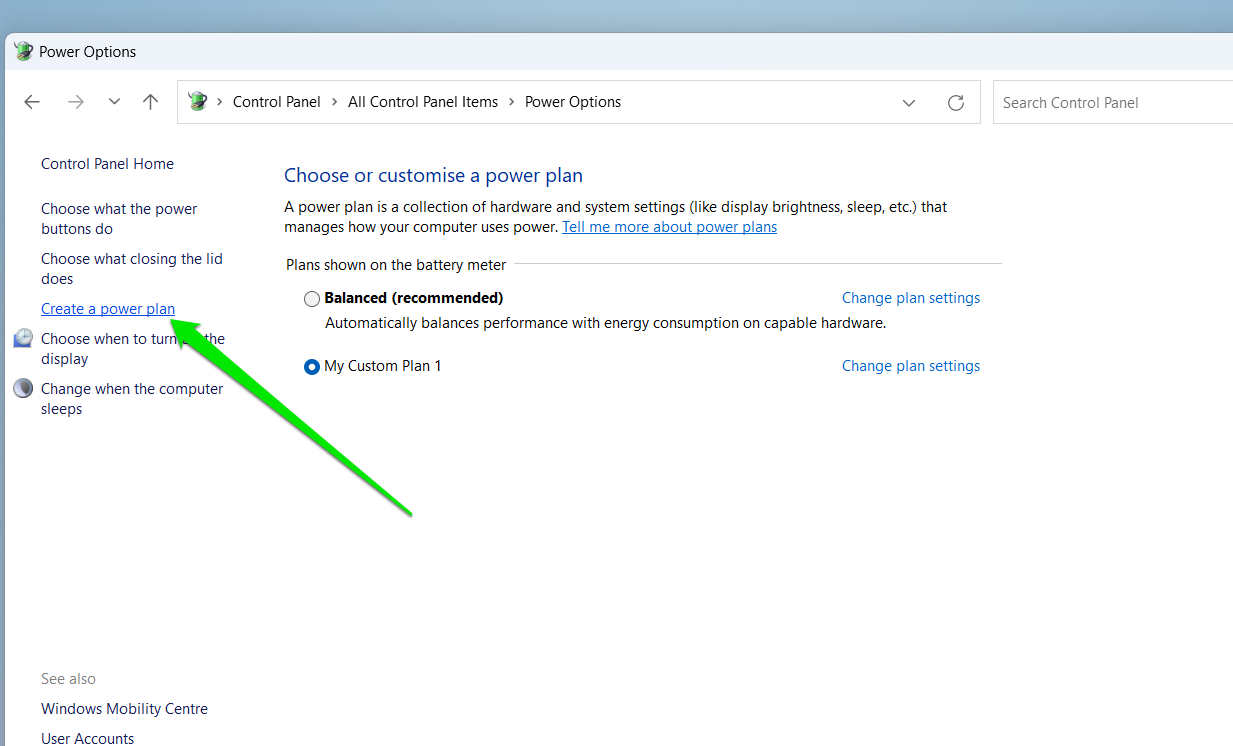
- Next, select one of the power options and enter its name. For example, change the name of your new power plan to High Performance if you’re choosing the High Performance option.

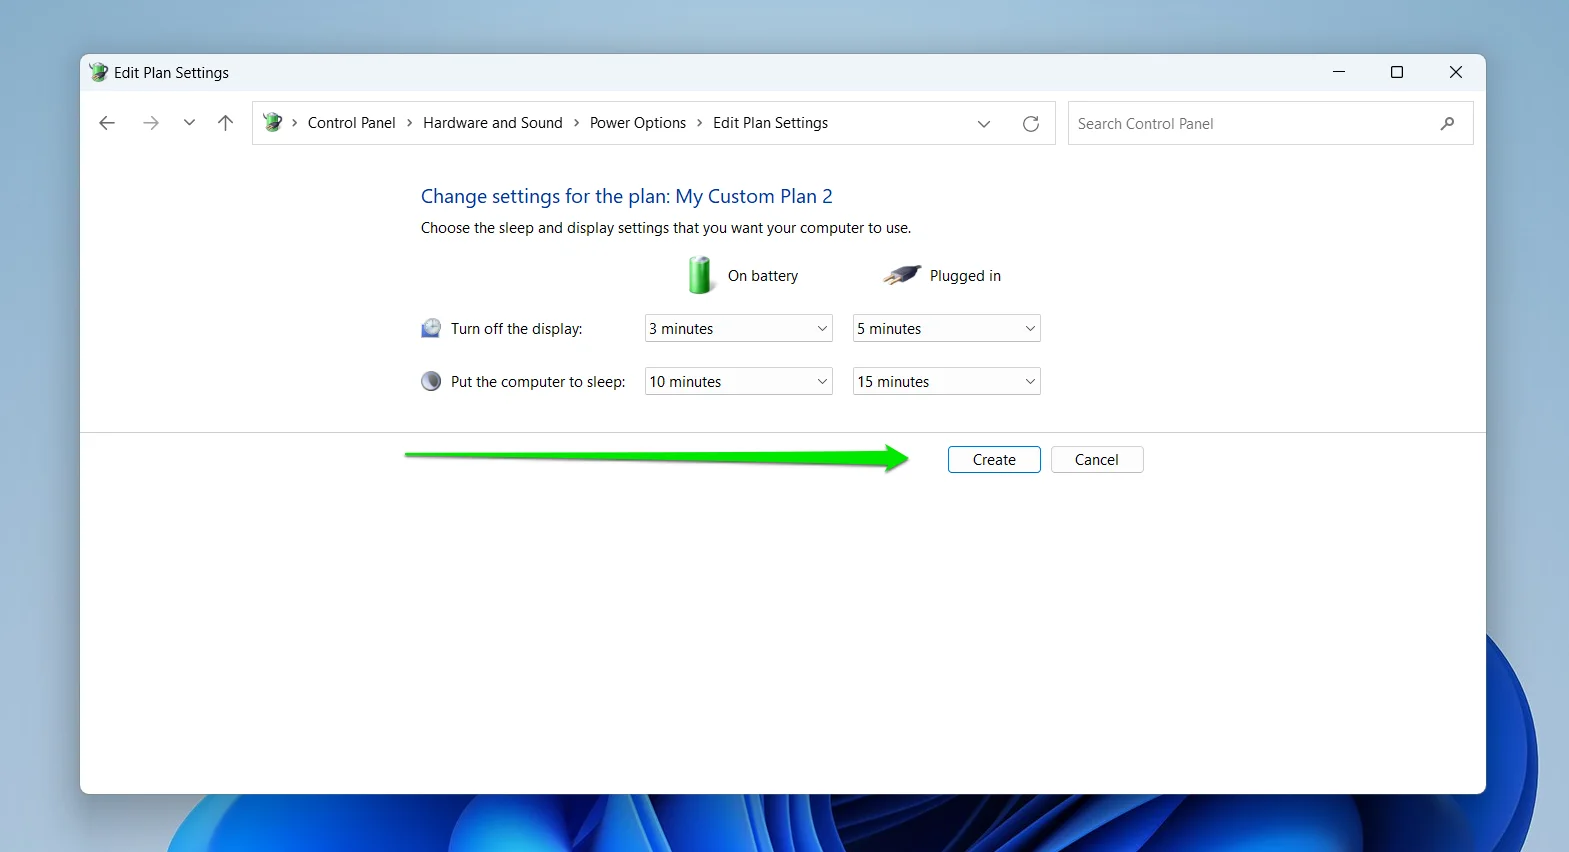
- Click Next.
- Choose when Windows should turn off your display and put your computer to sleep after inactivity and click Create.
📌 Related: Windows 10 Control Panel: Where to Find It and How to Use It
Method 4: Use the System Registry
Another way to activate the missing plans is tweaking Windows’ registry using the Registry Editor.
So, make sure you know what you’re doing and follow the steps carefully. We also recommend that you back up the registry.
Follow these steps:
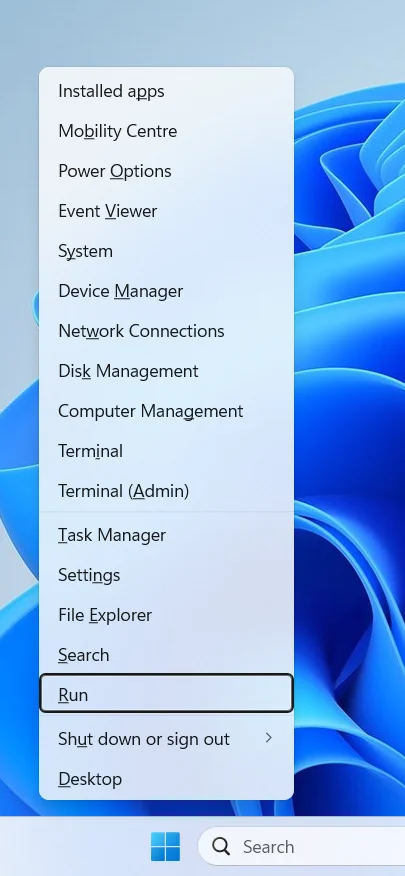
- Right-click your Start button on your taskbar and select Run in the Power User menu.
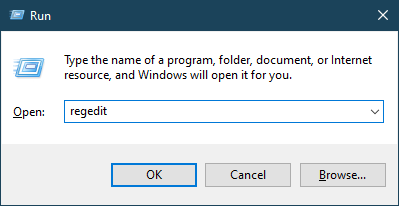
- Type
regeditinto the text box and click OK.
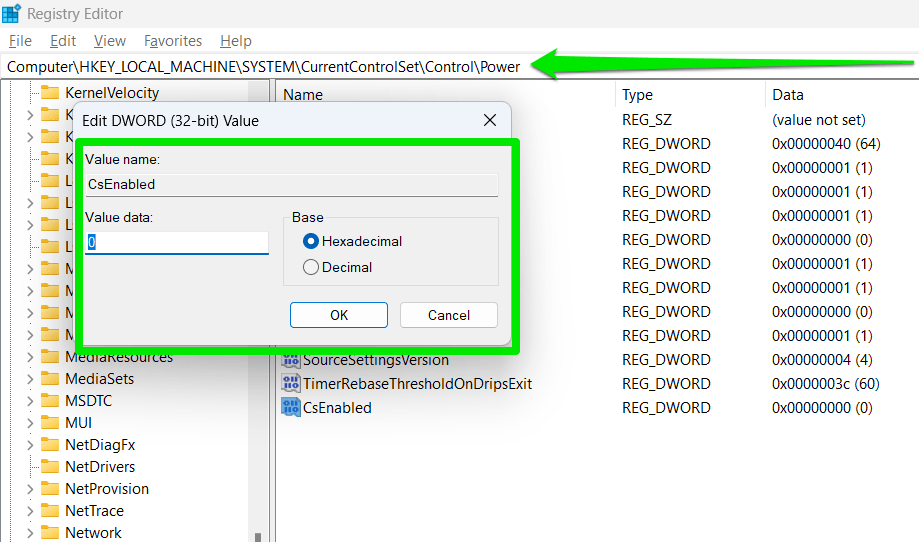
- Navigate to the following location when the Registry Editor opens:
HKEY_LOCAL_MACHINE\SYSTEM\CurrentControlSet\Control\Power
- Next, click the Power folder, go to the right side of the screen, and double-click CsEnabled.
- Enter 0 in the Value Data text box and make sure the Base is set to Hexadecimal.
- Click OK.
- Now check the Power Options window.
📌 Related: Auslogics Registry Cleaner
Get More From Your PC
What if you could get more power plans adapted for various needs? While users alternate between power consumption and performance, they can benefit from other streamlined power plans. You can always use the advanced power settings option, but it requires a lot of time.
Upon downloading and installing the program, you’ll see different power plans under the Additional Plans section. They are built on the default schemes but with more targeted settings.
They include:
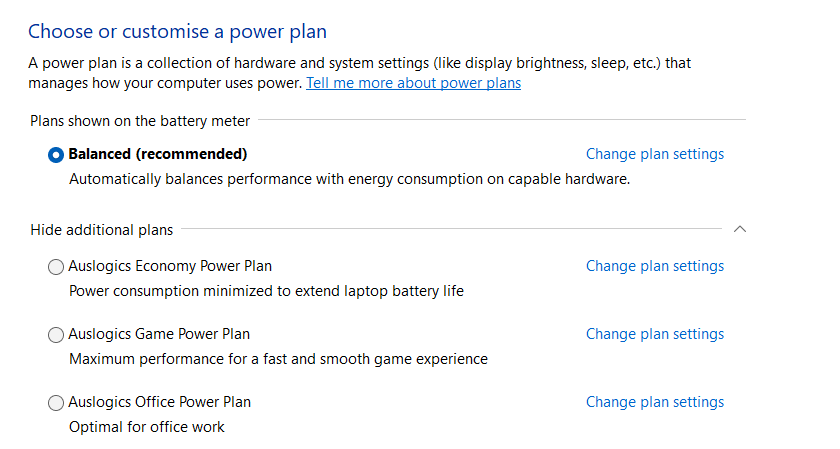
- Auslogics Economy Power Plan: The Economy power plan disables applications and features that require your CPU and other components to draw too much power. It activates and improves the Windows Power Saver to prolong laptop battery life.
- Auslogics Game Power Plan: This plan deactivates non-gaming features, closes most background tasks, and sets your PC to maximum performance.
- Auslogics Office Power Plan: The Office plan disables gaming features and closes other non-essential apps to allow sufficient performance for work and prolonged battery life.
Conclusion
That is how to add the Ultimate Performance plan and other missing default power plans on Windows 10 and Windows 11. You can now switch between plans with ease if you do not want to move on from the Control Panel interface just yet.