
While you likely have to sacrifice some performance to keep your system quiet, the trade-off isn’t always steep or too costly. Most PCs are equipped to handle normal day-to-day processes without producing heat.
You need faster fans when running heavy applications like simulators, 3D rendering programs, and games. That’s because your CPU and GPU will produce hazardous levels of heat that could damage the processors and other internal components if not expelled.
This article will cover the significance of monitoring CPU fan speed, how to check the current fan speed, and ways to control fan RPMs (revolutions per minute).
Understanding the Roles of Different Fans
Before learning how to control CPU fan speeds, it’s important to understand how fans work. They are a crucial part of your PC configuration because, without them, your PC is vulnerable to the risks of overheating.
📌 Further reading: Ultimate Guide: How to Stop a Laptop from Overheating
Knowing how these fans work will inform your GPU fan control decisions, ensuring you know which fans to control and where to stop. If your computer is water-cooled, there is no need for CPU fan control since your processor depends on a liquid cooling system.
That said, you may need to slow down your case fan if it is loud. There are different types of fans in an air-cooled computer. Typical PCs have case (or exhaust), power supply unit, CPU, and GPU fans.
- CPU Fans: CPU fans sit atop the central processing unit and blow air away from the processor. Sometimes, they take in cool air to keep the unit cool while blowing out hot air.
- GPU Fans: GPU fans are similar to CPU fans in some cases. They are designed to draw in cool air to the unit. The hot air is then expelled through hollow compartments or specialized pathways.
- Case Fans: They are responsible for expelling the hot air released into the PC casing by the GPU and CPU fans. If these fans don’t release the air, your PC will remain unsustainably hot.
- PSU Fans: Finally, you have the power supply unit (PSU) fan. Computers with components that require a lot of power, such as high-end GPUs, demand a lot from the power supply unit. This high demand causes the PSU to generate a lot of heat. That’s where the PSU fan becomes important. It blows cool air into the unit and forces heat away.
Some PCs are also fitted with extra fans for RAM and other motherboard components, although this is rare. Laptop fans work quite differently. Depending on the system, they are usually located beneath the computer and may be one or two.
Some laptop fans are configured to blow air into the unit, while others blow out hot air released through heat pipes.
However, some laptops rely on different cooling technologies without fans. People also use other methods, such as external cooling pads, to enhance their laptop’s thermal management.
📌 Read more: How to Cool Down Your Laptop: Overview of Methods with Pros and Cons
Why Should You Control CPU Fan Speed?
Controlling fan speeds involves manually tweaking each fan’s RPM. RPM measures how many times a fan spins each minute.
In most cases, people looking to engage in CPU fan speed control want to find the right balance between system acoustics and heat management. In other situations, they want faster fans to push their CPUs or GPUs beyond their limit without frying them.
You may also want to control fan RPMs if you notice that your current configuration isn’t properly dissipating heat. You can use monitoring software to assess your cooling unit’s effectiveness and determine if you must step in.
📌 Further reading: Why Is My Computer Overheating? Top Reasons and Effective Fixes
Monitoring Your Current Fan Speeds
You must monitor your fan speed to know when and how to manually control it. Sometimes, you may need to slow your fans down if they are spinning too fast and your CPU and GPU are relatively idle. In this case, there’s no need to keep the fans running at full speed.
On the other hand, you may need to allow the fans to spin as fast as possible if your processors handle heavy tasks and produce a lot of heat. Faster fans are also necessary if you want to overclock any of your processors.
Additionally, monitoring your fan speed tells you whether your current modifications effectively keep your system cool, especially when you want to reduce fan noise.
📌 Also read: Why Is My Computer Fan So Loud? Proven Solutions to Stop Fan Noise
Using BIOS/UEFI Settings
While your system’s BIOS/UEFI doesn’t typically offer real-time monitoring, it provides a snapshot of fan speeds at startup. You can access the BIOS/UEFI by restarting your computer and pressing the designated key (often F2, F10, or Delete) as it boots up. Within the BIOS/UEFI, navigate to the hardware monitoring or system status section, where you can view the current speeds of the fans connected to your motherboard.
Software Solutions for Monitoring Fan Speeds
Various software solutions are available for monitoring your computer’s fan speeds in real time. These programs usually have better interfaces and provide more helpful information.
It’s always essential to use applications that show your fan speeds alongside each processor’s temperature. That way, you can adequately evaluate your fans’ effectiveness.
- OEM-Provided Software:
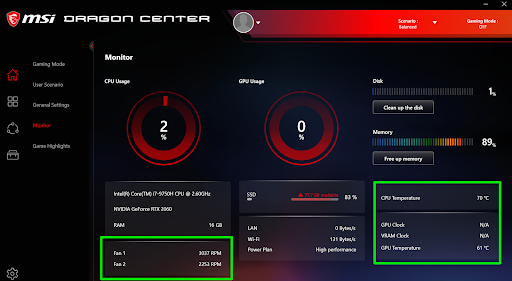
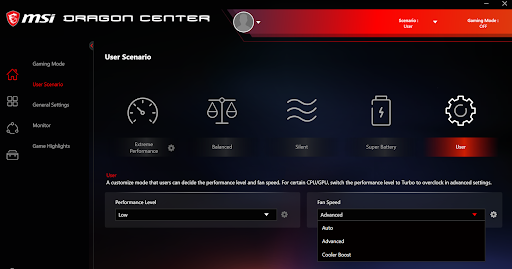
Many computer manufacturers include proprietary software specifically designed for their hardware. Dell’s “Alienware Command Center,” HP’s “ OMEN Command Center,” and MSI’s “Dragon Center” are some examples. These applications provide detailed system monitoring, such as fan speeds, temperatures, and other vital stats.
- Third-Party Software:
Programs like SpeedFan, HWMonitor, and MSI Afterburner are equipped with advanced system monitoring capabilities. SpeedFan, for instance, can display fan speeds, voltages, and temperatures. MSI Afterburner , although designed primarily for GPU overclocking, also shows fan speeds for many systems.
- Integrated Motherboard Software:
Some motherboards come with their own software utility, like Gigabyte’s “System Information Viewer” or ASUS’ “Fan Xpert.” You can use these to monitor fan speeds, especially for fans connected to the board.
How to Control Your Fan Speed
Now that you know the nitty-gritty about PC air cooling, it’s time to get into how to change CPU fan speeds to suit your cooling and acoustic needs. Please note that not every method may work for you, as most computers come with different configurations and sensors.
Move on to the next method immediately after noticing some settings in your computer’s interface are absent.
Using Control Panel Options in Windows
In some cases, Windows Control Panel may offer limited options to control fan speeds, particularly with laptops. Don’t panic if you don’t see the option on your computer. You can always use a different method.
Follow these steps:
- Open the Start menu, search for Control Panel, and open the application.
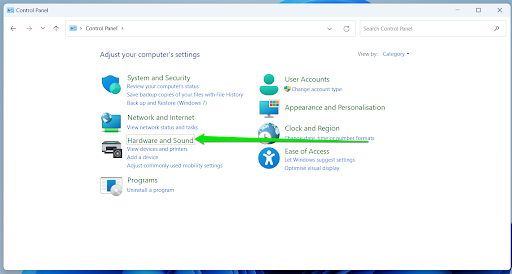
- Click Hardware and Sound.
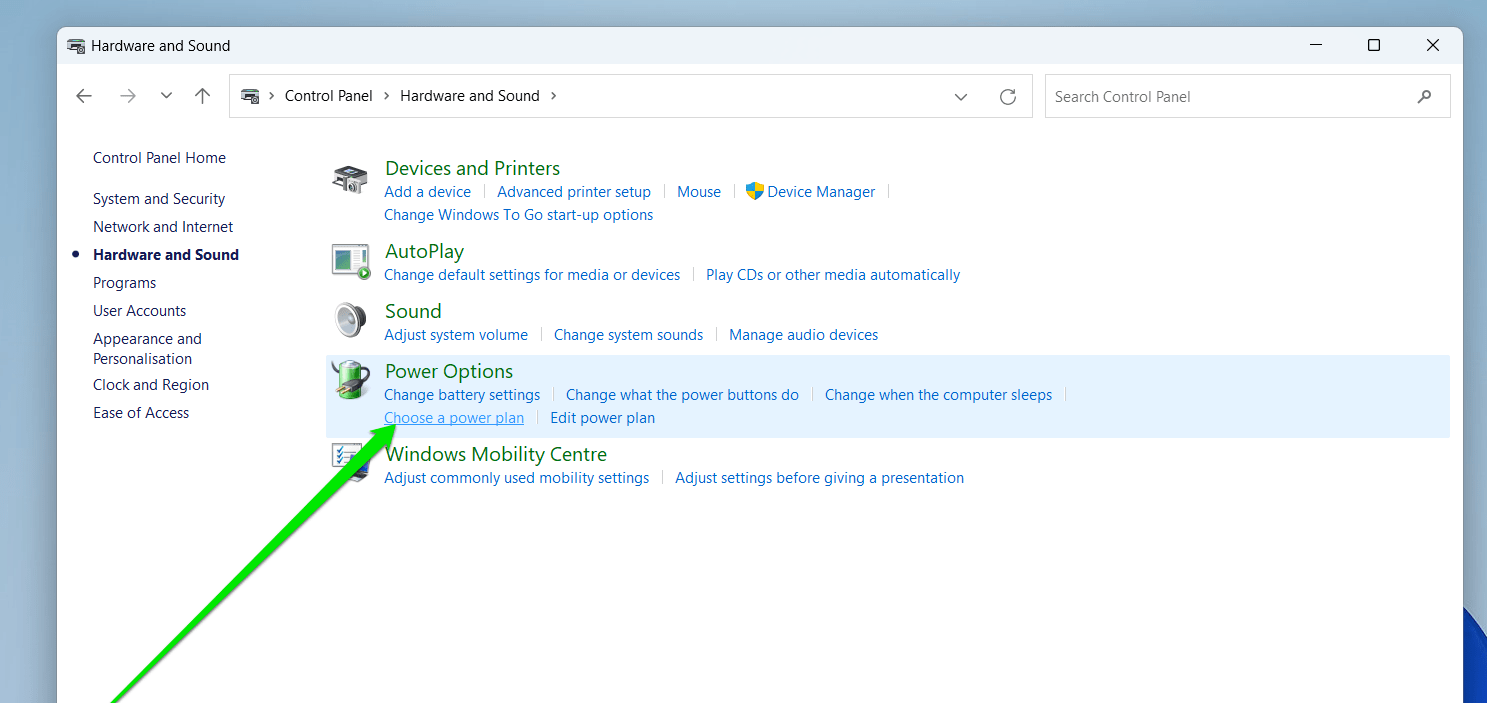
- Select Power Options.
- Select your current power plan and click on Change plan settings.
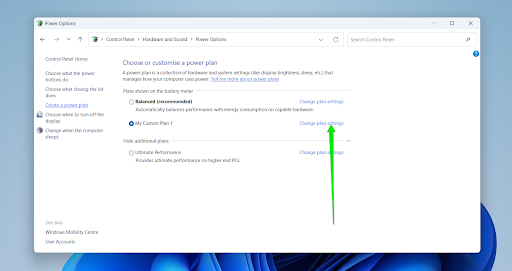
- Click Change advanced power settings.

- In the Advanced settings window, you might find options related to cooling policy, where you can set it to passive (slower fan speeds) or active (faster fan speeds) to manage the system cooling.
Controlling Fan Speeds Through BIOS/UEFI Settings
The BIOS or UEFI firmware offers a fundamental way to control fan speeds. Here’s how to change fan speeds in your BIOS:
- Access BIOS/UEFI: Restart your computer and enter the BIOS/UEFI setup by pressing a specific key (like
F2, F10,orDelete) during boot-up. You can also hold the Shift key and click Restart in the power menu. After that, select Troubleshoot > Advanced options > UEFI Firmware Settings.
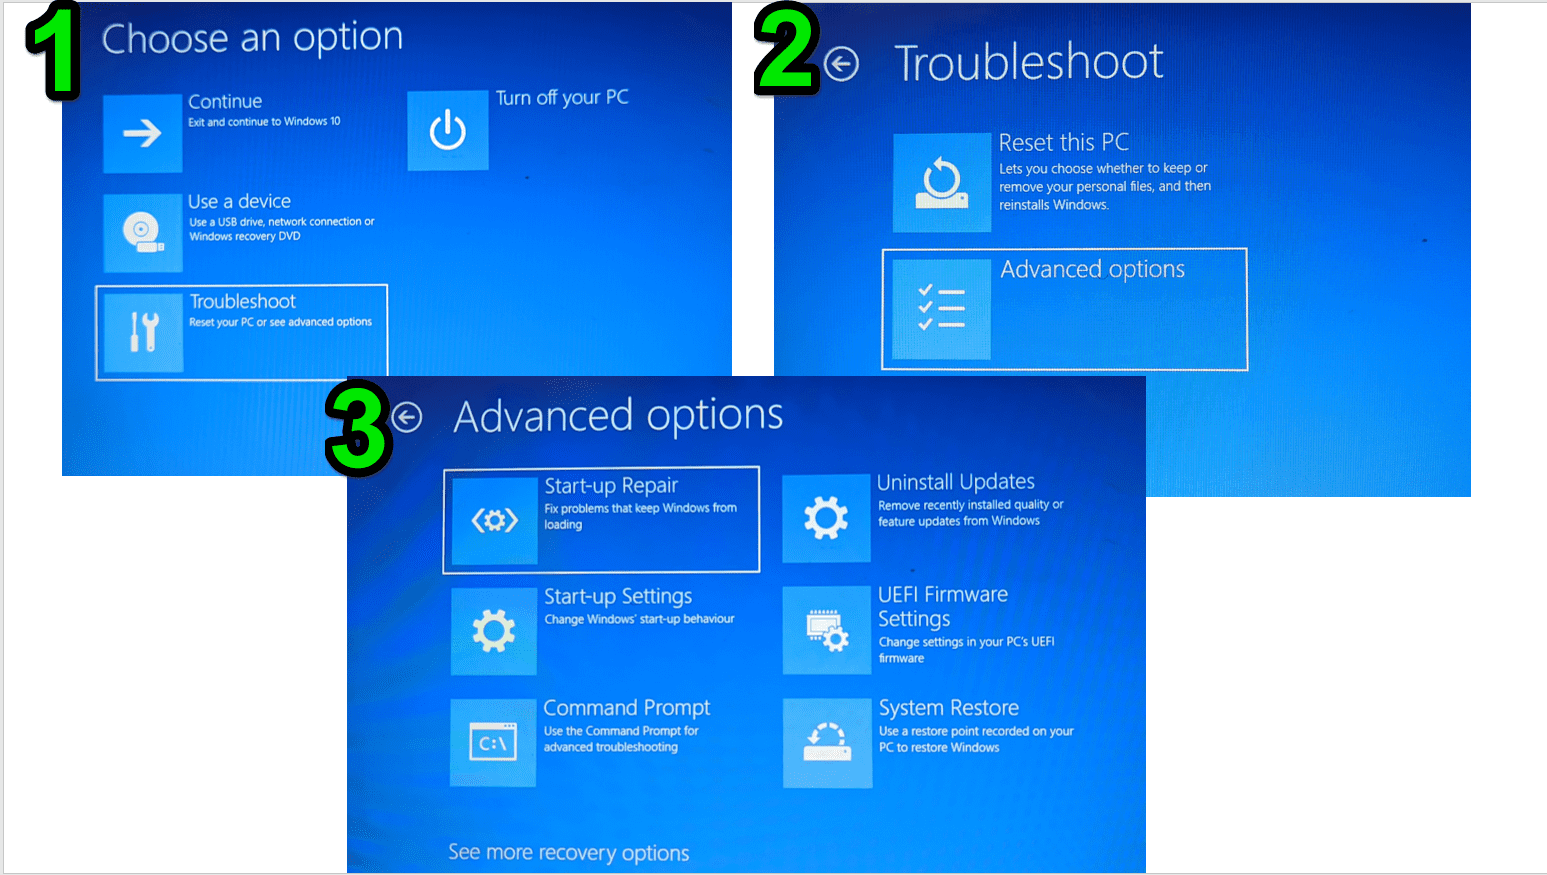
- Locate Fan Control Settings: Look for a section named “Hardware Monitoring,” “Fan Control,” or something similar once your BIOS interface appears.
- Adjust Fan Settings: You will find options to set fan speed modes (like silent, standard, and performance) or create custom fan curves based on temperature triggers.
- Save and Exit: After making your changes, save them and exit the BIOS. These settings will persist until you return to the BIOS interface to change them again.
If you can’t find the options above, your computer likely doesn’t have BIOS fan settings. You can move on to the following method to learn how to change CPU fan speeds without BIOS .
Software Solutions for Fan Speed Control
Software tools provide a more user-friendly and detailed approach to controlling fan speeds. There are different options, depending on your computer.
- OEM Software:
Many computer manufacturers offer software solutions (like MSI’s “Dragon Center”) that allow fan speed adjustments. Most gaming laptops and some desktop configurations come with these products out of the box.
- Third-Party Applications:
Programs like SpeedFan, Argus Monitor, or MSI Afterburner offer detailed control over fan speeds. They provide features like setting custom fan curves, creating profiles, and more.
You must find the best fan control software for your computer before choosing which one to use. Always be cautious when using third-party software. Make sure to download them from official websites and understand their settings to avoid causing harm to your system.
- Motherboard Utilities:
If your motherboard has its own software (like ASUS’ AI Suite or Gigabyte’s System Information Viewer), these often include sophisticated fan control options.
Conclusion
Controlling your computer’s fan speeds involves finding a balance between keeping it cool and minimizing noise. You can make it work by using BIOS/UEFI settings, Windows’ advanced power settings, or specialized software. Continually monitor temperatures to ensure your adjustments keep the system within safe operating limits.
Let us know in the comment section below if you have any questions. You can also share your fan control experience with us.