
When you go to Task Manager, you may notice that the process runs several instances and controls too much of your CPU resources (it could even be as much as 50%).
The problem may have begun after the installation of some programs or Windows updates.
But it’s been reported that malware could be disguised as RAVBg64.exe.
Also read: Signs of Malware: How to Know if Your Computer Is Infected
If this is the case, then it will probably be in a different location than indicated above. To check, here’s what you should do:
- Go to Task Manager (press
Ctrl + Alt + Deleteand select the option). - Locate the process and right-click on it. Select Open file location.
After you’ve determined that the file is genuine, it is not advisable to terminate the process in Task Manager since it’s necessary for managing audio on your PC.
So, let’s go ahead and look at how to fix the high CPU usage by RAVBg64.exe.
How to Resolve RAVBg64.exe Causing High CPU Usage
There are three solutions to this problem:
- Disable and enable Realtek audio programs;
- Uninstall and update Realtek audio drivers;
- Make a registry modification.
You might not need to try them all before the issue is resolved.
Let’s begin, shall we?
Fix 1: Disable and enable Realtek audio programs
This may just be sufficient to resolve the issue.
You’ll have to disable the Realtek startup items in System Configuration and then go to Device Manager and disable the Realtek audio device.
Follow these easy steps to get it done:
- Open the Run dialog. An easy way to do this is to press the
Windows logo + Rcombination on your keyboard. - Enter
msconfigin the text field and press Enter or click OK.

- In the System Configuration window that opens, move to the Startup tab and mark the checkbox for all the Realtek listings.
- Now click the Disable all button.
- Click OK to effect the change.
To disable the Realtek audio device:
- Go to the Start menu.
- Type Device Manager in the search bar and click on the option from the results list.
- In the window that opens, scroll down and locate the Sound, video and game controllers category. Expand it.
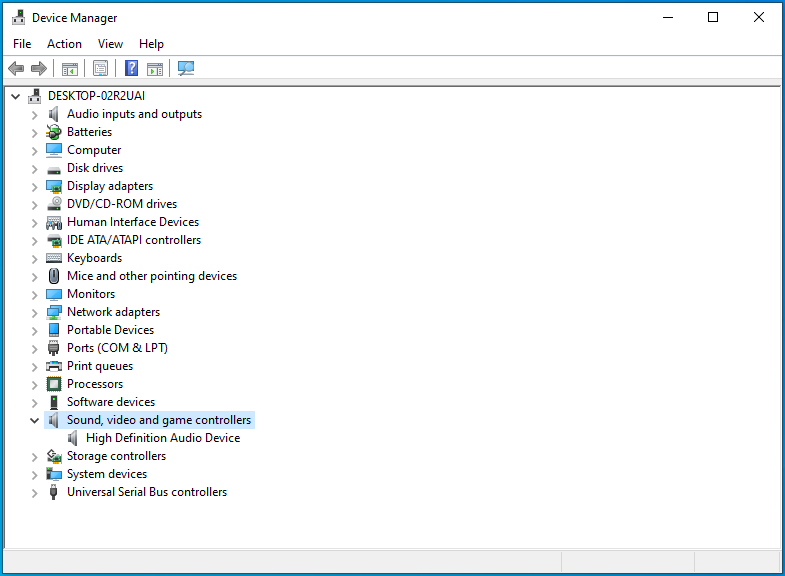
- Right-click on the Realtek audio device. Click Disable from the context menu.
After you’ve completed these steps, repeat them again and instead choose Enable for both the Realtek startup items and audio device.
You can then go to Task Manager and check if the high CPU usage issue has been resolved.
Also read: Where’s the Windows 10 Startup Folder Located?
Fix 2: Uninstall and update the Realtek audio driver
If your Realtek audio driver is outdated or faulty, it could be the cause of the problem you’re facing.
To resolve the issue, uninstall the driver and then install the latest version.
Follow these easy steps to get it done:
- Press
Windows logo key + Xon your keyboard to invoke the Power Menu. - Locate Device Manager in the list and click on it.
- Scroll down to Sound, video and game controllers and expand it.
- Right-click on Realtek High Definition Audio. Select Uninstall from the context menu.
- Click OK when presented with a confirmation prompt.
- Close all windows and restart your system.
- Now, open Device Manager as explained above.
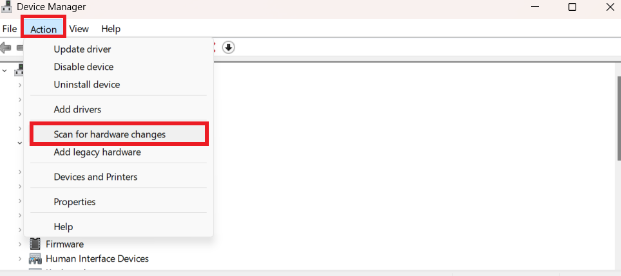
- Click Action, which is displayed on the toolbar at the top of the window.
- Click on Scan for hardware changes.
- Wait for the process to complete. The system will detect the missing Realtek driver. Then click Install Driver for the latest version to be installed automatically.
If the installation is not successful, you’ll have to visit the manufacturer’s website and download the driver manually.
The tool will recognize your system specs and then perform a full scan to detect any missing, outdated, or faulty drivers.
Afterwards, it downloads and installs the latest manufacturer-recommended versions without any effort on your part.
Also read: [EASY GUIDE] How to Update Device Drivers on a Windows 10 PC?
Fix 3: Make changes to the Windows Registry
The high CPU usage could be due to some missing registry keys: SRS Labs and APO. If so, you’ll have to add them manually to rectify the issue.
So, follow these easy steps:
- Press
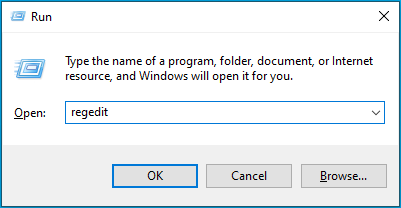
Windows key + Rto invoke the Run dialog. - Type
regeditin the text box and click OK or press Enter.
- Click the Yes button when presented with the User Account Control (UAC) prompt.
- In the Registry Editor window, click File and select Export.
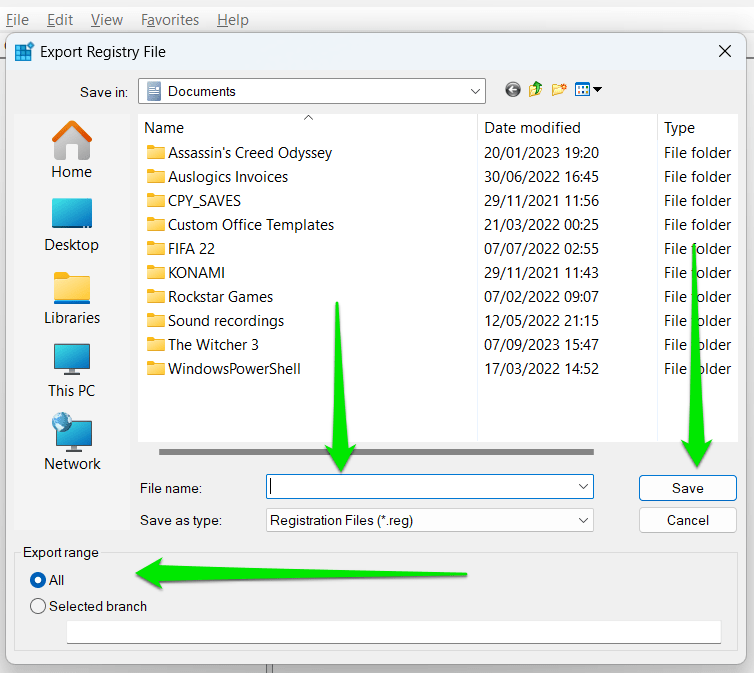
- Enter a name for the file and choose a safe location to save it in.
- Click Save.
We can now go ahead with the fix:
- Press the
Windows logo + Rcombination on your keyboard to invoke the Run dialog. - Type
regeditin the text box and press Enter or click OK to open the Registry Editor.
- Click the Yes button when presented with the User Account Control (UAC) prompt.
- Expand HKEY_LOCAL_MACHINE.

- Expand SOFTWARE.
- Check if you’ll find a key named SRS Labs. If you do, then you don’t have to continue with this fix. But if the key is missing, continue to the next step.
- Right-click on SOFTWARE.
- Hover over New in the context menu, and then click on Key.
- Rename the new key to SRS Labs (ensure you don’t make a mistake in the name).
- Right-click on the SRL Labs key and hover over New. Click Key to add a new subkey.
- Rename the subkey to APO (again, ensure you get the name right).
- Close the Registry Editor and restart your computer.
You can now check if the issue has been resolved.
Also read: How to Cool Down Your CPU Through the Windows Registry: Pro Tip