
When OneDrive fails to sync, you can no longer back up files from your computer and access them across different devices. This setback is usually related to the desktop client, and it can halt important work and waste valuable time.
But you mustn’t panic, as the issue is 100% fixable. And you don’t have to call Microsoft Support just yet.
This article will show different ways to fix the “ OneDrive not syncing on Windows 11 and 10” issue.
📌 Also read: Windows 10 Backup Guide: Backing Up to an External Hard Drive
What Causes the “OneDrive not Syncing on Windows” Problem?
One of the common causes of the problem is a faulty internet connection. Since the service relies on the Internet to sync your files, it will malfunction when you have network issues.
It’s natural to panic when your internet connection is fine and the app still refuses to synchronize your files. In this case, the issue may result from software conflicts, incorrect configurations, problematic file parameters, account problems, and an outdated OneDrive desktop client or operating system.
How to Fix OneDrive Not Syncing
There are different ways to fix the syncing issue because there are different root causes. We’ll walk you through the various solutions, from the basic fixes to the more complex ones.
Fix Network Problems
It’s completely normal to notice that OneDrive is not syncing on Windows 10 or 11 when your internet connection is down. The issue will be resolved immediately after you get the connection back up. Many things can disconnect your PC from the web, from DNS and network adapter issues to IP address conflicts and ISP downtime. You can follow our guide on fixing internet problems on Windows to pinpoint and resolve the issue.
📌 Also read: Boost Internet on Your PC: Tips on How to Speed Up Your Internet Connection
Update Windows
Your OneDrive syncing problems could be due to your system’s lack of essential updates. In such a scenario, it is recommended to update Windows manually. If you’re running a Windows version below Windows 10, we recommend upgrading immediately.
Microsoft only supports Windows 10 and Windows 11, as all other versions have reached their end-of-life.
Now, we’ll show you how to update Windows 10 and Windows 11.
Windows 10:
- Press the
Windows logo + Ikeyboard shortcut. - Select Update & Security.
- Click Check for updates.
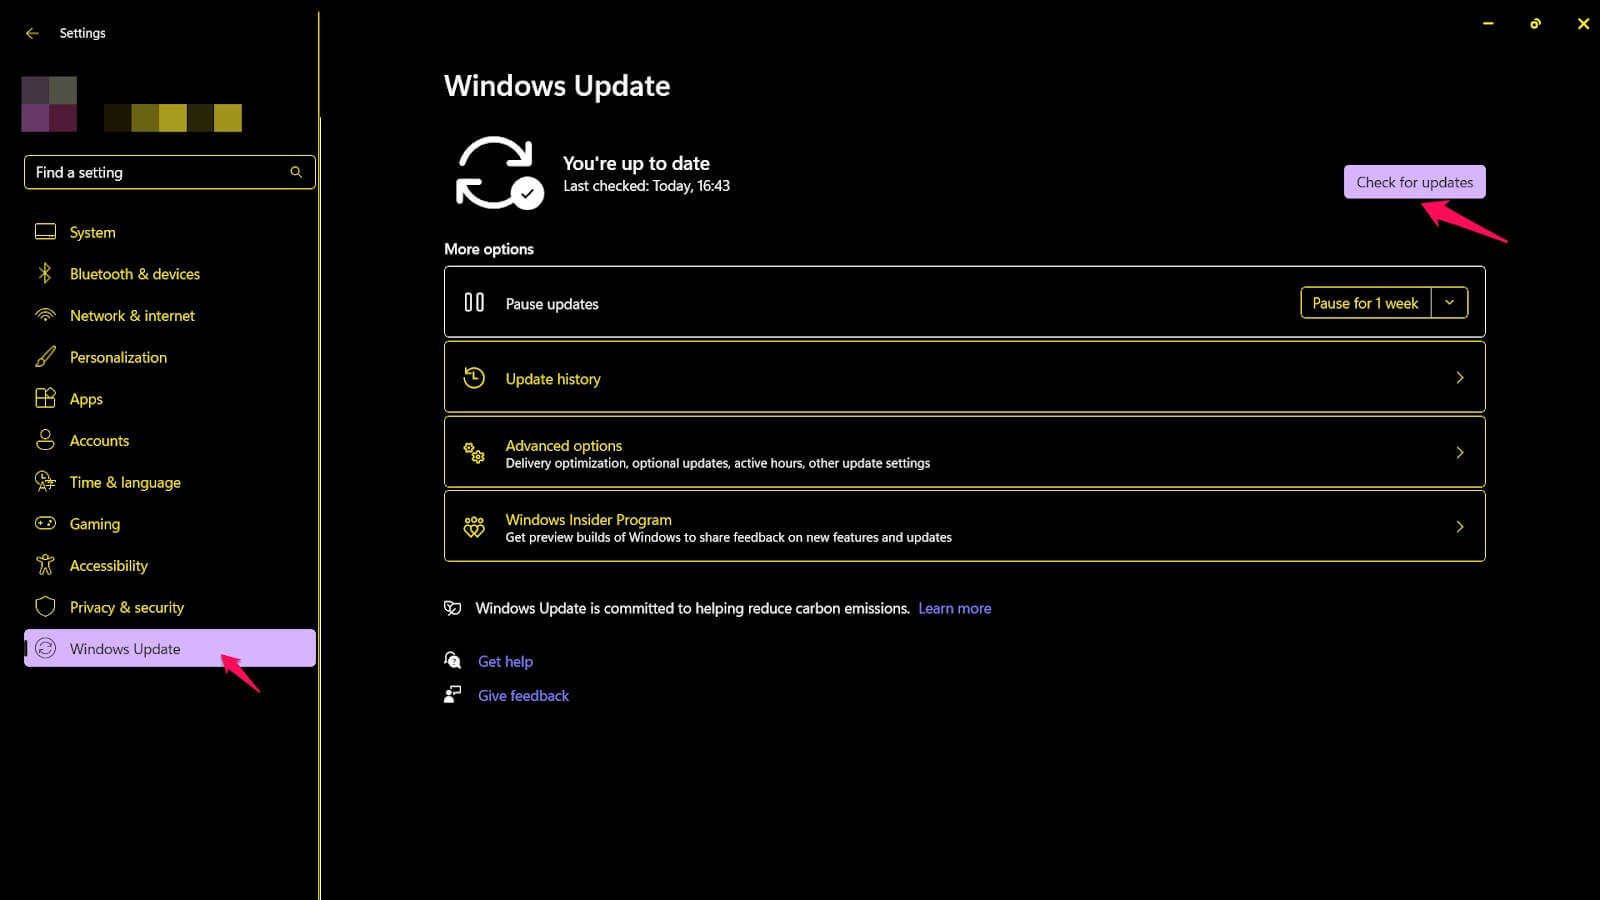
Windows 11:
- Hold down the
Windows logo key and press Xon your keyboard. - Select Settings from the Power User menu.
- Select Windows Update on the left-side menu in Settings.
- Click the Check for updates button.
We hope your OneDrive syncing issues are resolved.
📌 Also read: How to Reset Windows Update: Fixing Update Problems
Allow OneDrive to Run on Startup
The “ OneDrive not syncing on Windows 10 and 11” issue may occur because the desktop app is not allowed to run at startup. Many Windows users disable startup programs to improve Windows’ boot speed.
While such settings are effective, they may impact some apps. You can use other means to make your computer boot faster and enhance performance.
Follow these steps to allow Microsoft OneDrive to start when your PC boots:
- Launch the Settings app and click Apps.
- Select Startup once the Apps page opens.
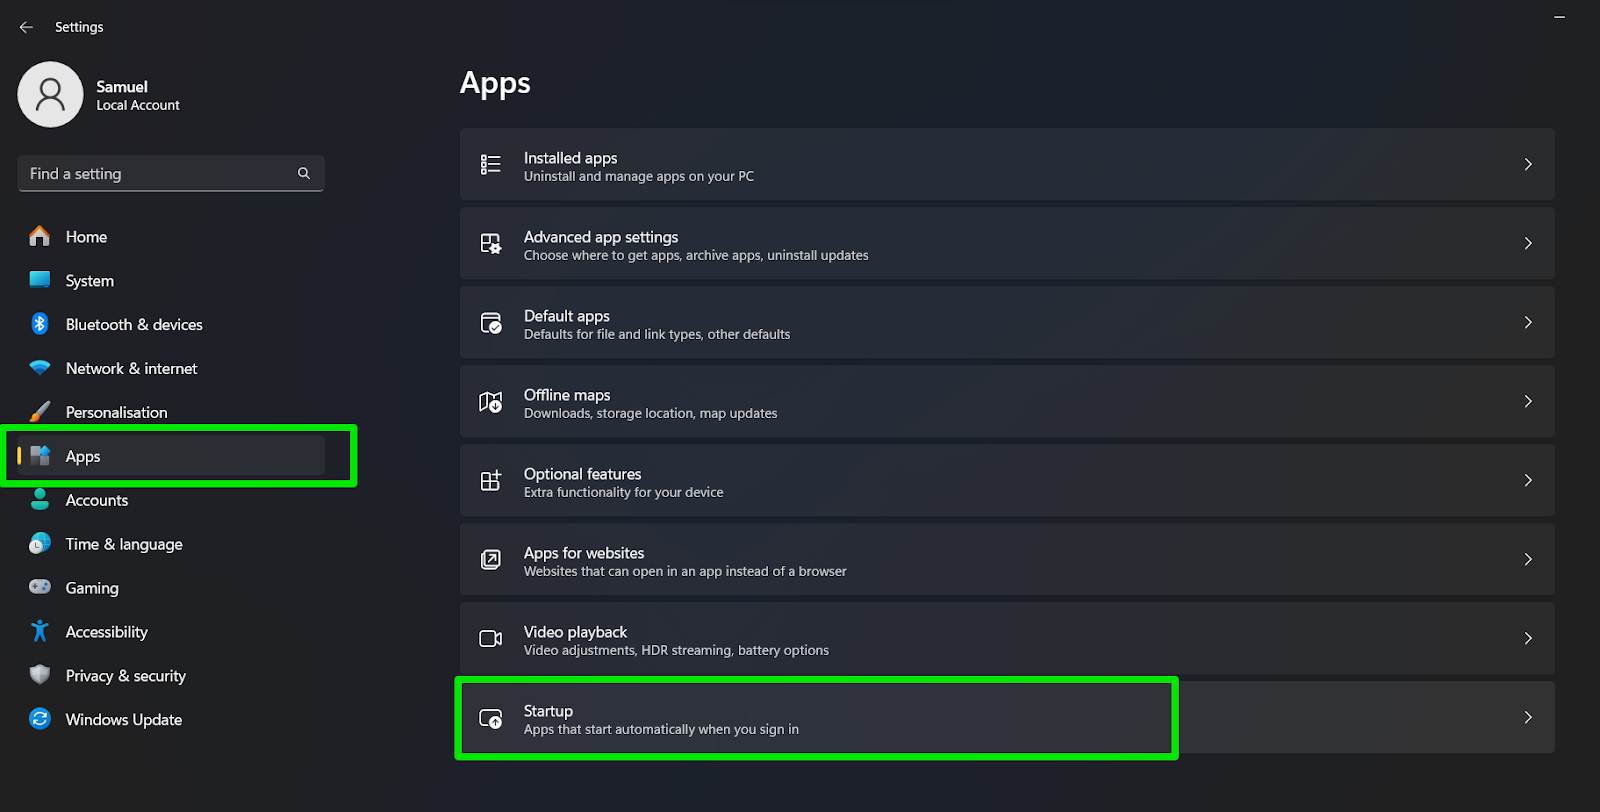
- Next, use the search box to find Microsoft OneDrive.
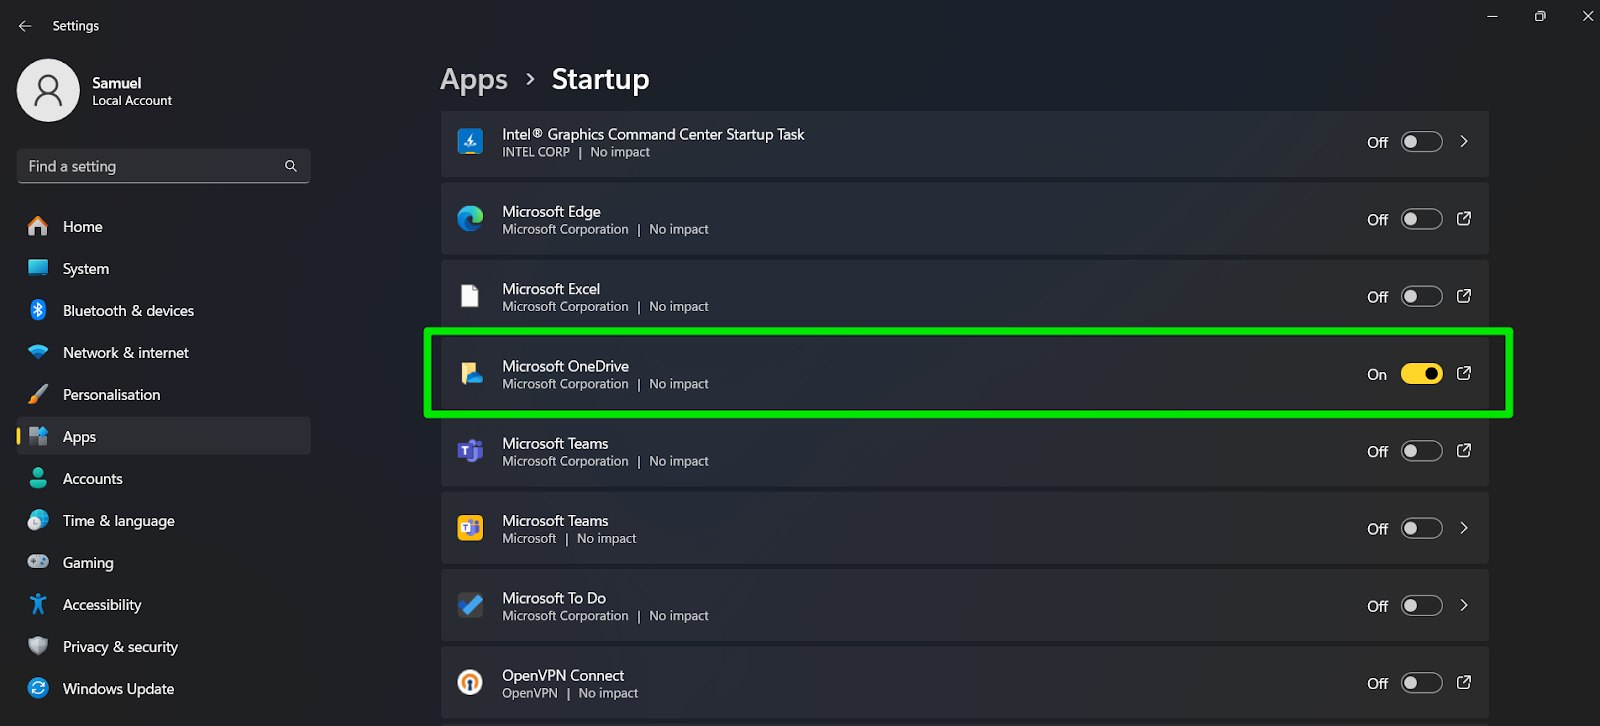
- Now, toggle on the switch.
Resync OneDrive
Whatever caused the “OneDrive won’t sync issue,” syncing it back again can fix things. Doing this is as simple as closing the app and starting it again. Here’s how:
- Check your notification area on the right of your taskbar for the OneDrive icon. Expand the system tray to show hidden icons if it isn’t there.
- When you see the OneDrive icon, click it and select the Settings icon in the top-right corner.
- Select Pause syncing and click Quit OneDrive.
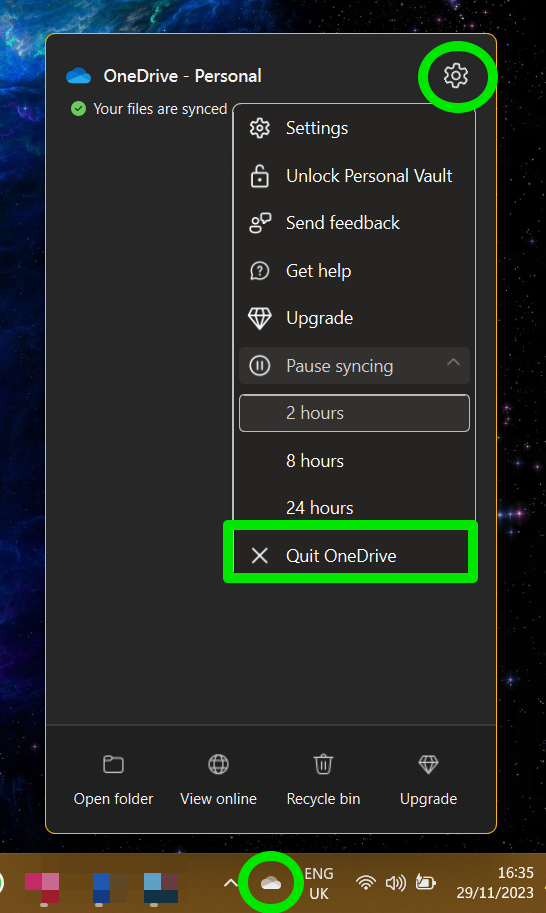
- After that, start OneDrive again and check if it will sync without problems.
Reset OneDrive
Many users have reported that resetting OneDrive eliminates its syncing issues, so let’s try this fix out.
First, start with resetting the Microsoft Store and check if that resolves the problem. Here’s how to do that:
- Open the Run dialog box using the
Win + Rhotkey. - Type
wsreset.exeinto the text box and click OK. - A Command Prompt window will now flash on your screen.
- Launch OneDrive and check if the syncing issue has been resolved.
📌 Also read: How to Reinstall Microsoft Store on Windows 10?
Now, follow these steps to reset the OneDrive app:
- Launch the Run dialog window again.
- After Run opens, type the following and hit the
Enterkey:
%localappdata%\Microsoft\OneDrive\onedrive.exe /reset
- In some cases, you may see a message telling you that Windows could not find the app, you can use different commands such as:
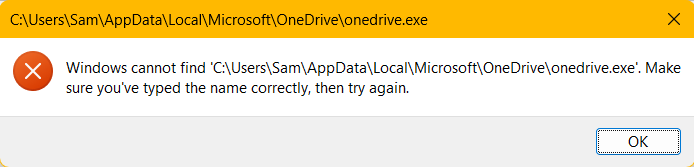
C:\Program Files\Microsoft OneDrive\onedrive.exe /reset
Or
C:\Program Files (x86)\Microsoft OneDrive\onedrive.exe /reset
Follow these steps if you use the OneDrive store desktop app:
- Launch the OneDrive app.
- Go to the top-right corner and click the three dots.
- Select Settings.
- Next, click the Reset now button under Reset the app.
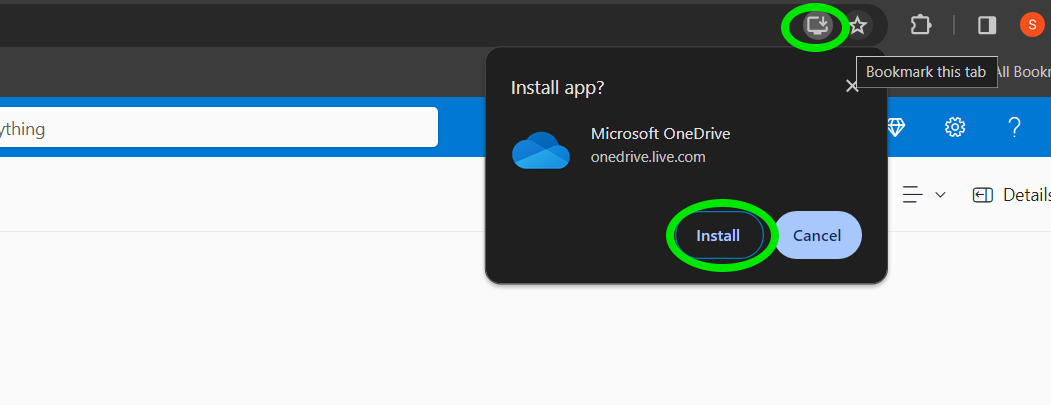
If you rely on the OneDrive app you downloaded from the Microsoft Store, we recommend also using the OneDrive web application. Go to the OneDrive website, log into your account, and install the web application.
You can install the app by clicking the app icon in the address bar. Note the icon may be different for different web browsers.
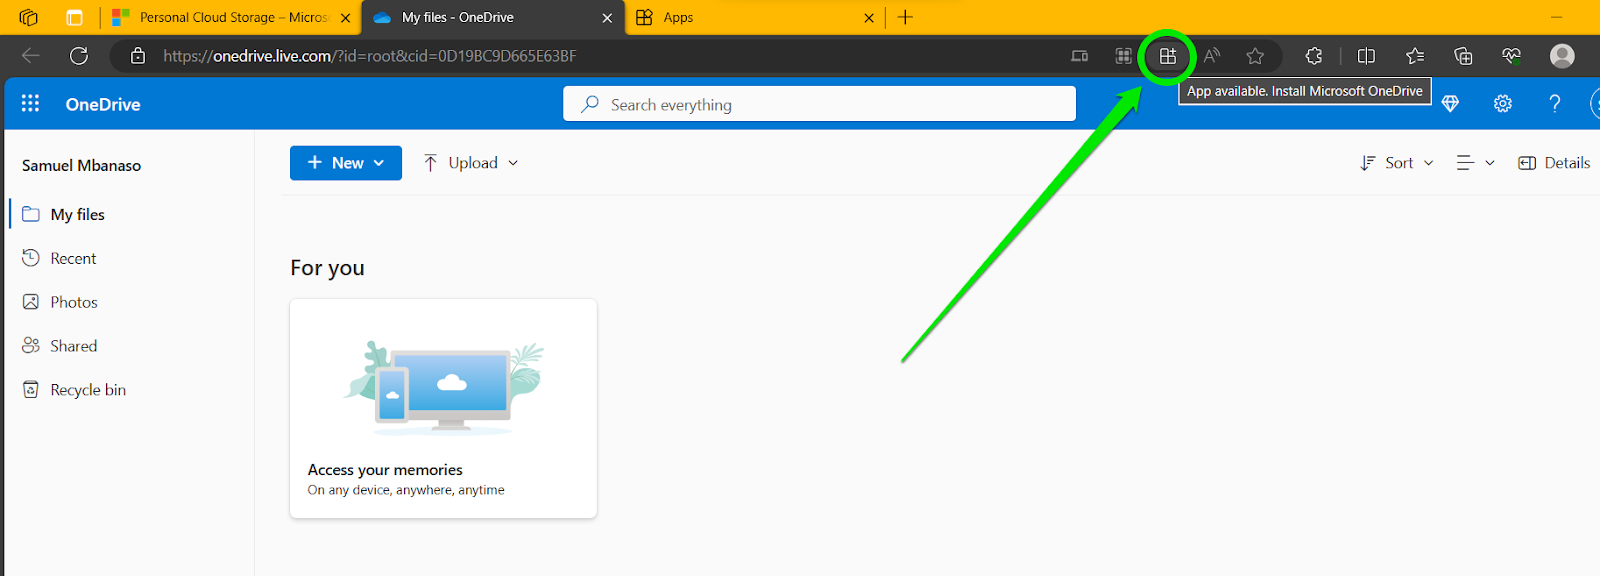
- Click Install once the flyout appears.
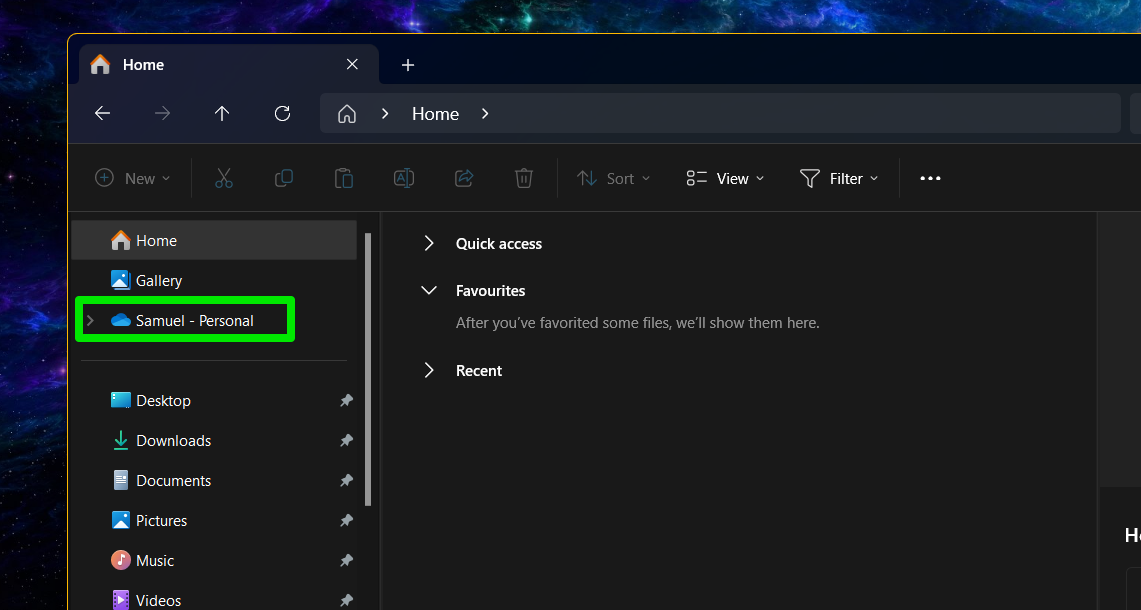
This application allows you to download and upload synced files and folders instead of syncing them directly from your computer.
Windows 10/11 (8, 7, Vista, XP)
Check Your Files
If you notice OneDrive is not syncing on Windows 11, your files and folders may be violating one or more OneDrive restrictions and limitations. OneDrive prohibits syncing files and folders with specific sizes, names, and characters.
Also, you cannot sync some file types and files from certain locations.
File Size
The max single file upload limit on a premium OneDrive plan is 250 GB. So if the individual files or folders in question are that size or bigger, automatic sync won’t work. You can get around this by compressing the file or folder. You can do this with the native Windows compressor on Windows 10 and 11.
- Navigate to the file(s) or folder(s) you wish to compress.
- Right-click the item(s) and select Add to archive or Send to > Compressed (zipped) folder, depending on your Windows version.
- Select your compression settings on the archive name and parameters popup and click OK.
You can now upload the compressed file to OneDrive or let the program sync the file automatically.
📌Also read: Disk Cleanup Tips: How to Compress a Drive to Save Disk Space in Windows 10
File or Folder Path
You should also ensure that the file’s or folder’s entire path is less than 400 characters. If it is equal to or more than that, change the file’s or folder’s location so it has a shorter path. A typical file path looks like this: C:\Users\Sam\AppData\Local\EADesktop\cache\qmlcache
File of Folder Names
OneDrive also prohibits using certain characters it refers to as invalid or illegal. These characters include: | / < * \ : > ?Starting or ending the file name with a space is also prohibited. Additionally, OneDrive will not sync files and folders with the following names:
Manually Select the Folders to Sync
You should know that OneDrive cannot sync everything on your computer. This is simply impossible due to cloud storage constraints. To make the app’s job easier, you can manually choose the folders OneDrive should sync. Here’s how to do it on Windows 10 and 11:
- Right-click the OneDrive shortcut in the notification area/tray and select Settings.
- Switch to the Account tab.
- Click the Choose folders button.
- The Sync your OneDrive files to this PC popup will open.
- Tick the checkbox next to all the folders you wish to sync. Untick the folders you wish to exempt from OneDrive sync.
- Click OK to confirm your changes.
You can also add the folder to the OneDrive folder on your PC. Launch a File Explorer window and drag and drop the file or folder you want to sync to the OneDrive folder.
Check Your Storage
OneDrive will no longer sync your files once you reach your plan’s storage limit. Every account has a free 5 GB allocation, but users must pay for more storage. So, it is time to upgrade if you notice that you have been syncing many files.
You can follow these steps to confirm your storage details:
- Locate the OneDrive icon on the taskbar and right-click it.
- Hit the Gear icon and then select Settings.
- You will see your total and used Storage on the left side of the OneDrive Settings window. Similarly, the OneDrive web app shows your storage details on the left side of the screen once you open it.
- You can click the Upgrade or Buy more storage button to get more storage.
You can also delete unneeded files from your OneDrive cloud account to free up space for important uploads.
Reconnect to Your Microsoft Account
You can reconnect your Microsoft account to your Windows computer and check if that fixes the issue. Please try to use the same Microsoft account as the OneDrive account logged into the desktop client.
Follow these steps if you’re on Windows 10:
- Go to your Settings.
- Proceed to Accounts.
- Open the Your info tab.
- Sign in with your local account.
- Then, switch to your Microsoft account.
Follow these steps if you run Windows 11:
- Launch the Settings app and click Account in the left sidebar.
- If you’re already logged into a local account, click the Sign in button under the Microsoft account.
- If you’re currently logged into a Microsoft account, click Your info and select Sign in with a local account instead.
- After logging in with a local account, return to the Settings app and sign in with your Microsoft account.
Hopefully, this trick has proved helpful.
Temporarily Disable Your Antivirus and Firewall Software
If OneDrive is still struggling to sync your files, you should check your security software – the thing is, it might be overreacting.
Third-party antivirus and firewall tools often interfere with OneDrive settings, so chances are you have run into this very issue. To check if that is your case, turn off your non-Microsoft solution and see what happens.
If your syncing problem vanishes after you turn off the tool, report the problem to its manufacturer. If there is no way to configure the software not to block the OneDrive functionality, consider switching to another product.
For instance, the powerful and reliable Auslogics Anti-Malware tool is designed not to tamper with other programs, so you will have neither malware items nor software conflicts in your system.
Perform a Clean Boot to Check for Conflicts
The next solution involves starting Windows in a clean state. It helps you confirm software conflicts from third-party applications that may be preventing OneDrive from syncing.
You’ll be preventing third-party startup services and programs from launching when Windows boots. If OneDrive starts syncing your files after the reboot, a software conflict is responsible for the issue.
You can find the conflicting program by reactivating the startup apps one after the other until the issue reoccurs.
Windows 10/11 (8, 7, Vista, XP)
Conclusion
You should now be able to sync your files through OneDrive without issues. Ensure your files and folders don’t break OneDrive’s restriction rules, and always maintain a stable internet connection to prevent future issues.