
- How to Fix a Hotspot Not Working on Windows 10/11
- Method 1: Make sure the wireless adapter is enabled
- Method 2: Confirm that your system supports Hosted Network
- Method 3: Run the Network Adapter Troubleshooter
- Method 4: Enable Microsoft virtual adapters
- Method 5: Enable the internet connection sharing service
- Method 6: Update your network adapter driver
- Method 7: Temporarily disable your firewall program
- Method 8: Delete the HostedNetworkSettings registry entry
- Method 9: Perform a clean boot
- Method 10: Reset network settings
- How to Fix a Hotspot Not Showing Up on Your iPhone and Android Devices
- Fix 1: Restart your phone
- Fix 2: Make sure your internet connection is working
- Fix 3: Turn off power-saving mode
- Fix 4: Enable both the personal hotspot and mobile data
- Fix 5: Turn off your phone’s Wi-Fi and turn it on again
- Fix 6: Change the hotspot bandwidth
- Fix 7: Update the carrier settings
- Fix 8: Update your phone to the latest version
- Fix 9: Delete APN certificates
- Fix 10: Reset network settings
- Fix 11: Reset your phone
- Why Isn’t My Hotspot Working?
- Hotspot Not Showing Up: Fixed
- FAQ
Is your hotspot not working ? This shouldn’t disrupt your workflow. This guide offers comprehensive yet easy fixes to resolving the problem on your Windows PCs, Android, and iPhone devices.
Don’t worry, we’ll cut through the technical jargons and give you actionable steps to avoid wasting your time. With that said, let’s start.
How to Fix a Hotspot Not Working on Windows 10/11
For Windows 10 and 11 users, this section is for you. Go through the various methods outlined below and carefully implement them:
Method 1: Make sure the wireless adapter is enabled
If your hotspot is not showing up on your laptop, you may have forgotten to enable it. Just to be sure, follow the steps below to verify if it’s turned on:
For Windows 10
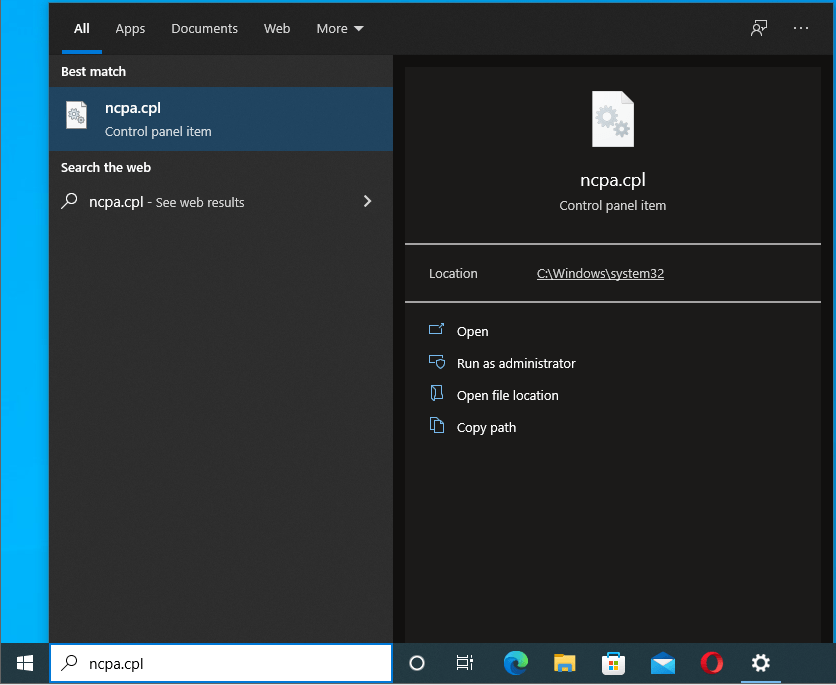
- Type
ncpa.cplin the search results and click on it to open.
- Check your wireless adapter.
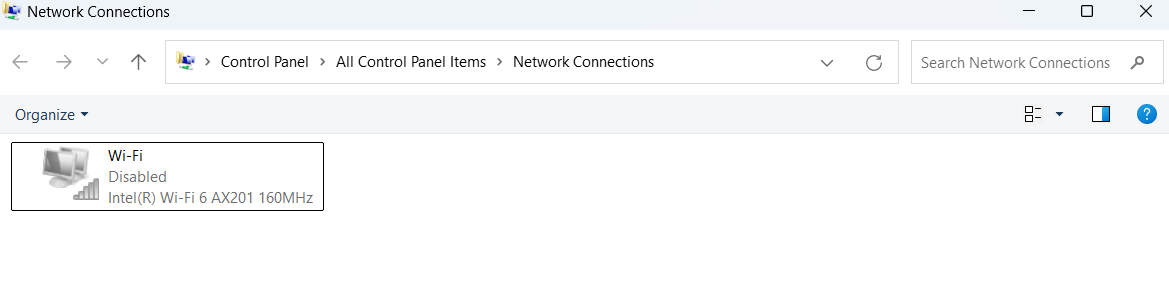
- If it’s turned off, right-click it and select Enable.
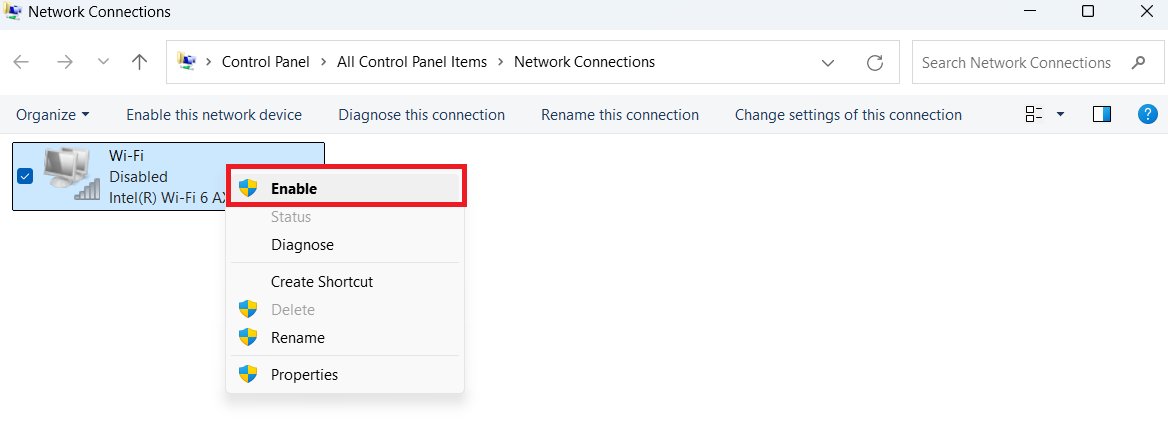
- Now, start your mobile hotspot to see if it’s working.
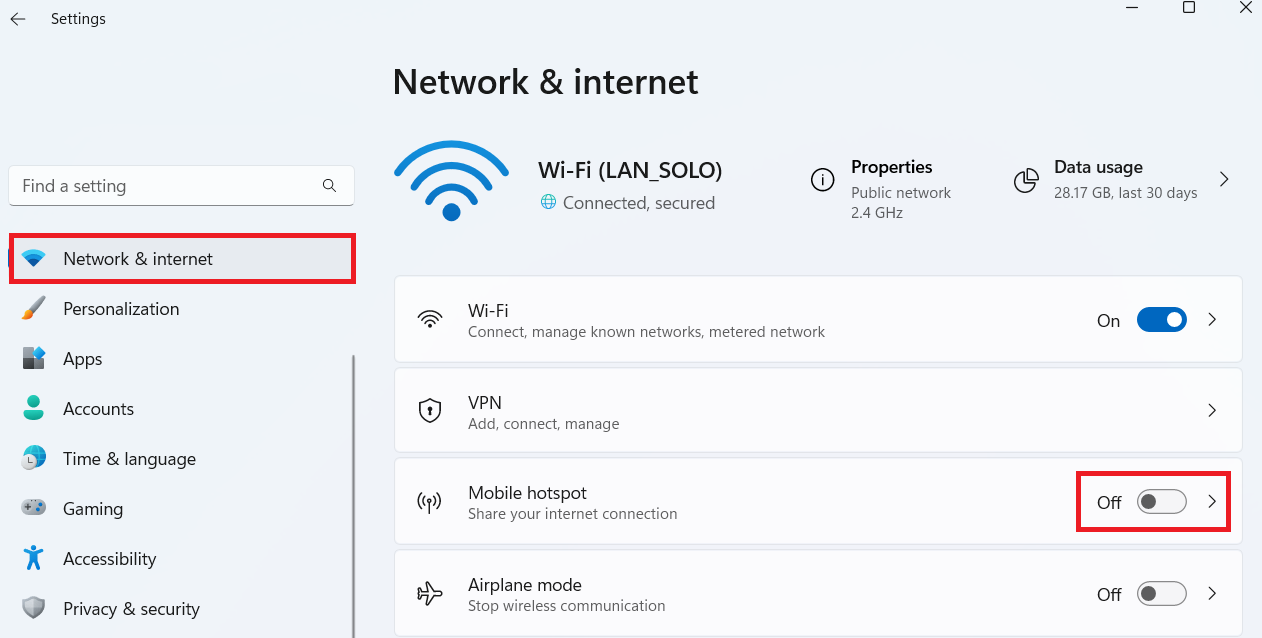
For Windows 11
- Press
Windows + Ito open the Settings window. - Go to Network & internet and check if the toggle beside Mobile hotspot is enabled. If not, click on it to activate.
Method 2: Confirm that your system supports Hosted Network
Hosted Network is a component that allows you to create a mobile hotspot on your computer. If your system doesn’t support the infrastructure, you won’t be able to share your internet connection.
Follow these steps to check if your system supports the feature. The steps below work on both Windows 10 and 11:
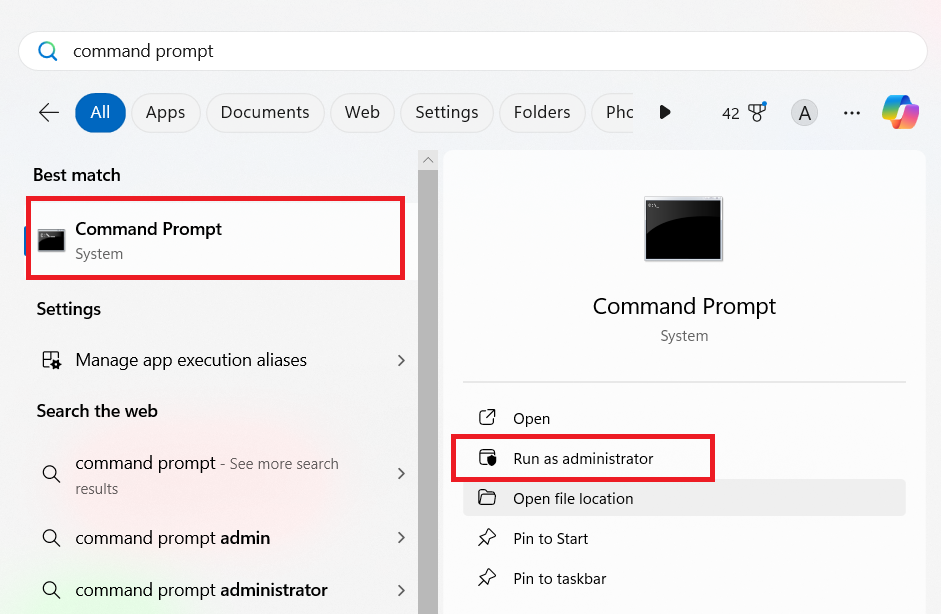
- Use the
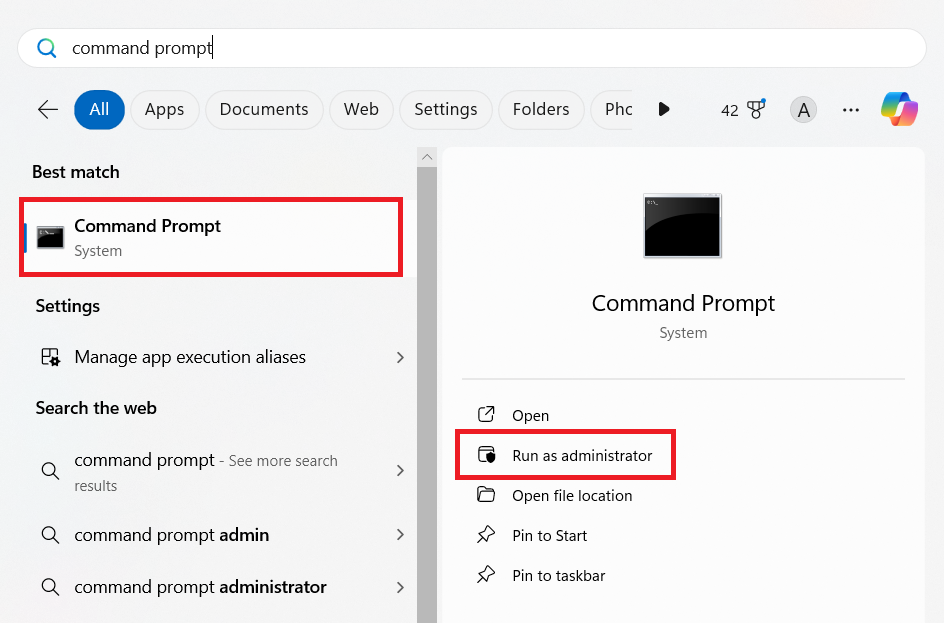
Windows logo key + Skeyboard combo to open the search box. - Type
cmdorcommand promptonce the search bar opens. Then, select Run as administrator from the right-side menu.
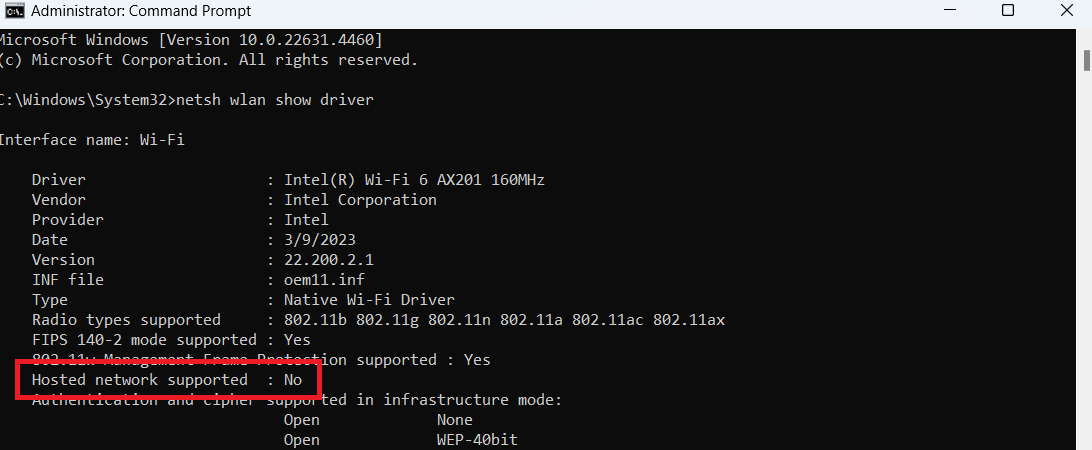
- After the Command Prompt opens, type netsh wlan show driver and hit
Enter - Navigate to Hosted network supported and check if it says Yes or No . If it’s Yes , you’re safe. However, if it’s No , it means your wireless adapter doesn’t support the feature. Unfortunately, this is a hardware limitation, and there’s no software to fix it. The only solution is to change your adapter.
Method 3: Run the Network Adapter Troubleshooter
The Network Adapter Troubleshooter is a built-in utility that looks out for and resolves issues plaguing the network adapter. The program will disable the adapter, enable it, and restart some services related to the network connection.
These steps will show you how to run it:
On Windows 10
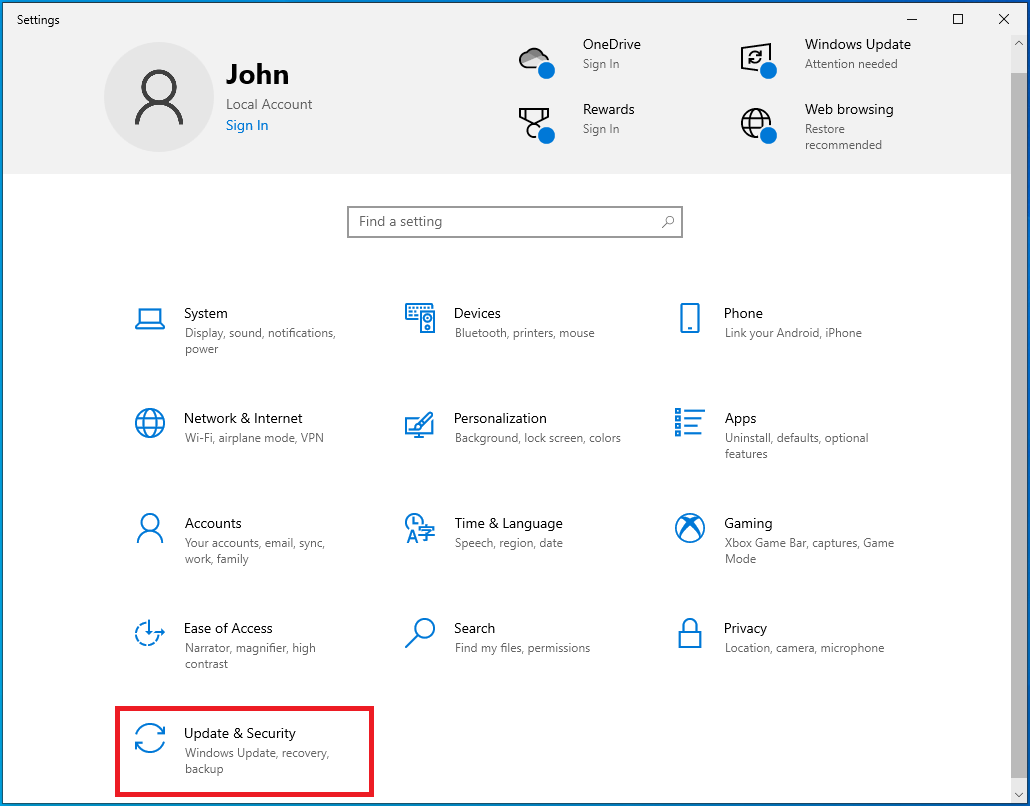
- Go to Settings and click on Update & Security.
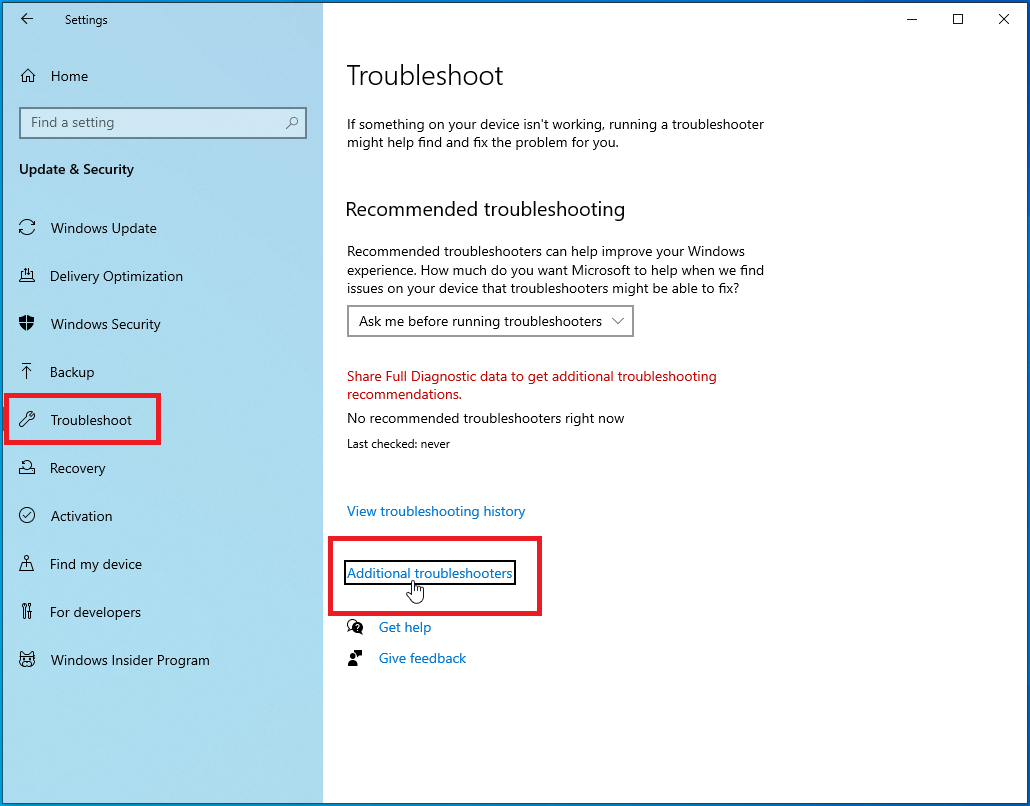
- Head to the left pane of the next window and click on Troubleshoot.
- Then select Additional troubleshooters .
- Navigate to the Find and fix other problems section and choose Network Adapter.
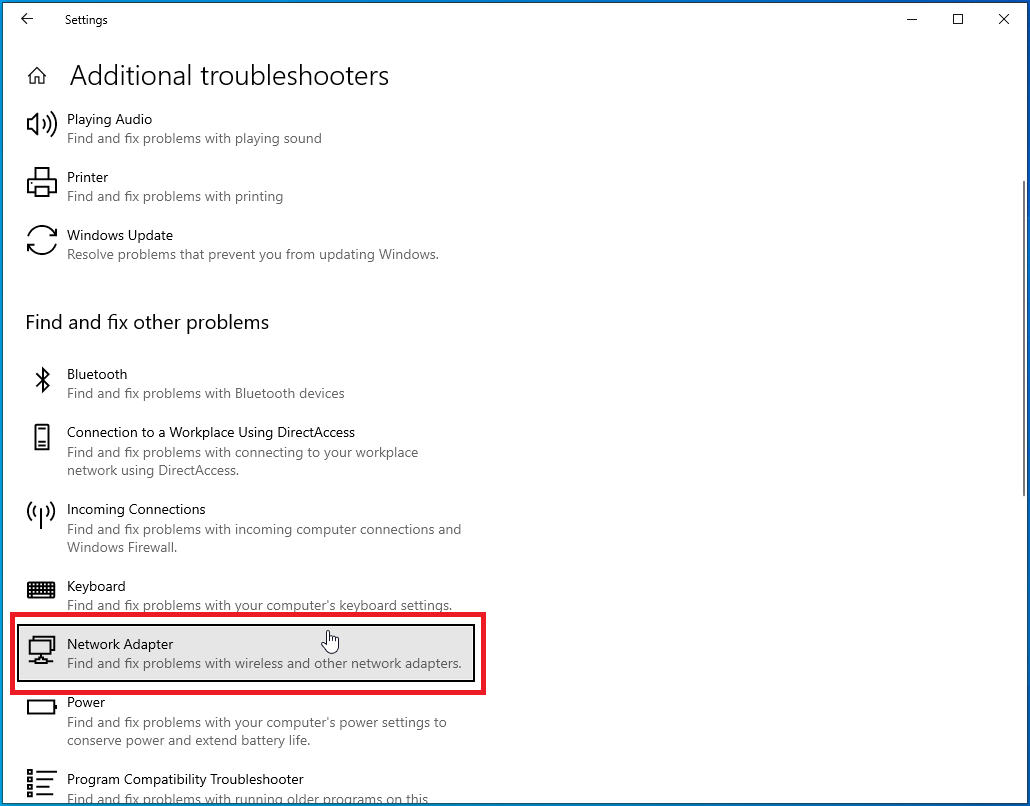
- Then, click on Run the troubleshooter.
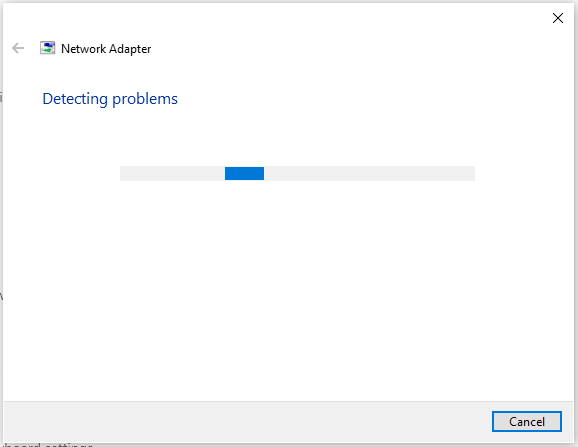
- Allow the tool to search for problems and apply fixes.
You can also run the Incoming Connections Troubleshooter and check if that helps. For Windows 11
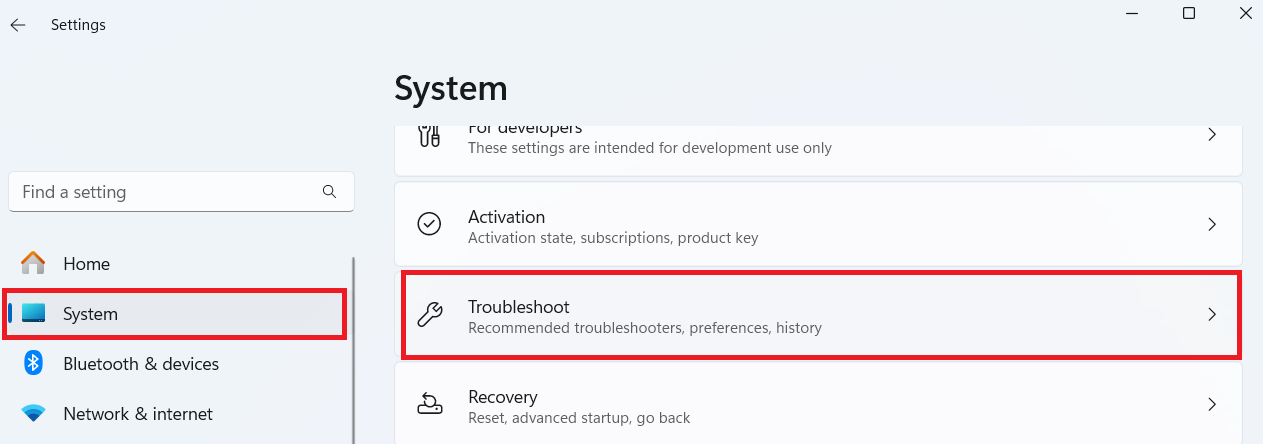
- Press
Windows + Ito open the Settings window. - From there, go to System and select Troubleshoot.
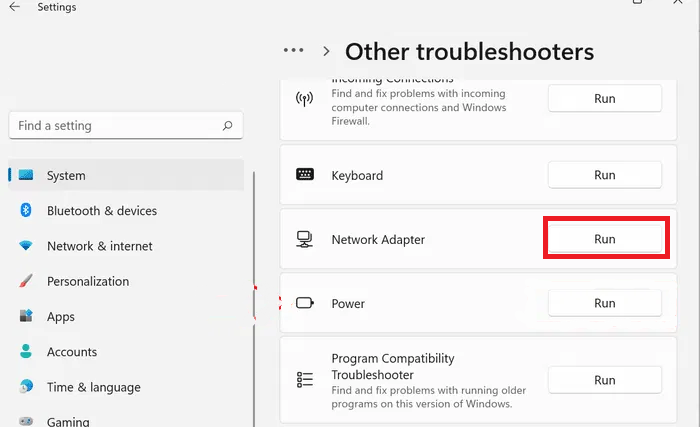
- Then, click on Other troubleshooters.
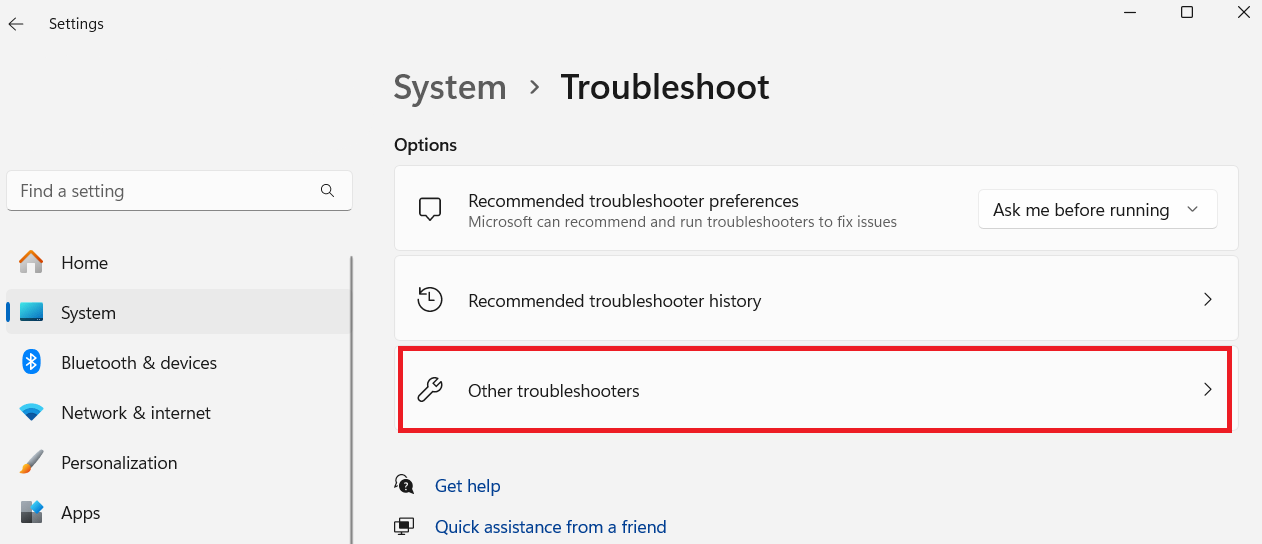
- Scroll down to Network Adapter and click Run.
If this doesn’t work, move to the next solution.
Method 4: Enable Microsoft virtual adapters
The Microsoft Wi-Fi Direct Virtual Adapter is a component that allows your computer to share its internet connection with other devices.
The adapter is often hidden, so you won’t see it when you open the Device Manager unless you turn on the “Show hidden devices” feature. Sometimes, there are two virtual adapters.
If your adapter is turned off, your system can’t serve as a mobile hotspot. In some situations, you have to reset all your adapters by disabling and enabling them to get them to work.
These steps will show you what to do. Keep in mind that this works on both Windows 10 and 11:
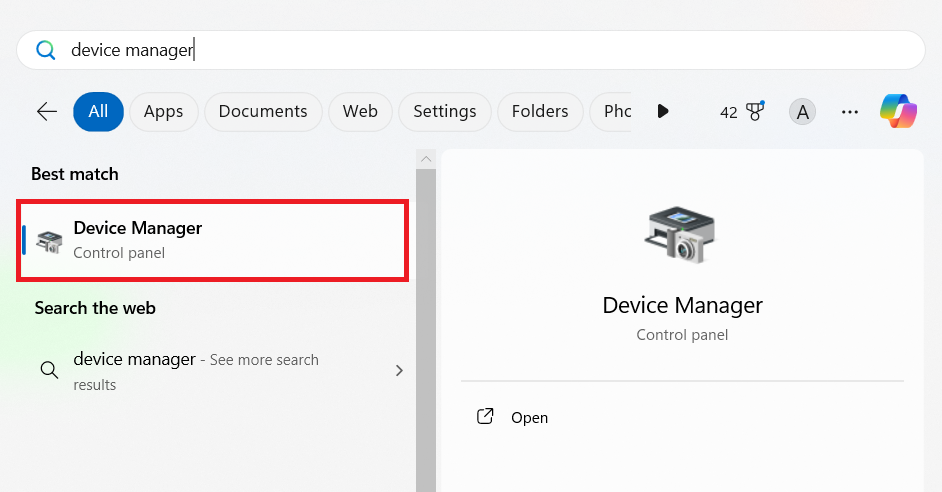
- Type
device managerin the search bar and click on it to open.
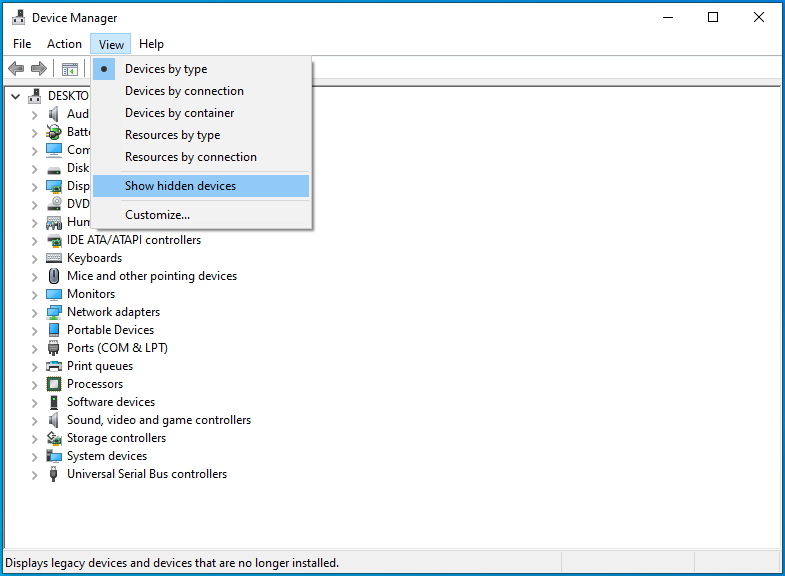
- Once the Device Manager window appears, go to the top of the page, click on View , and then click on Show hidden devices .
- Now, go to the Network adapters section and expand it. Right-click on Microsoft Wi-Fi Direct Virtual Adapter and click on Disable device .
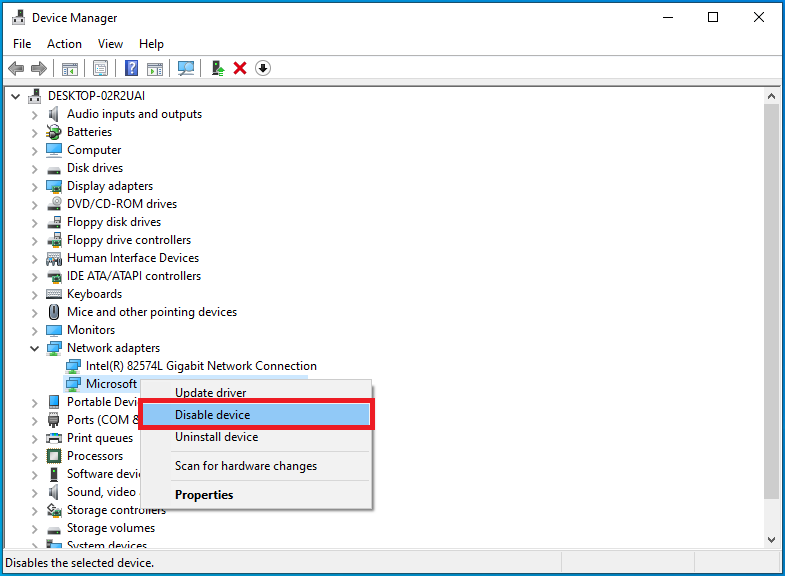
- Right-click it again and click on Enable device .
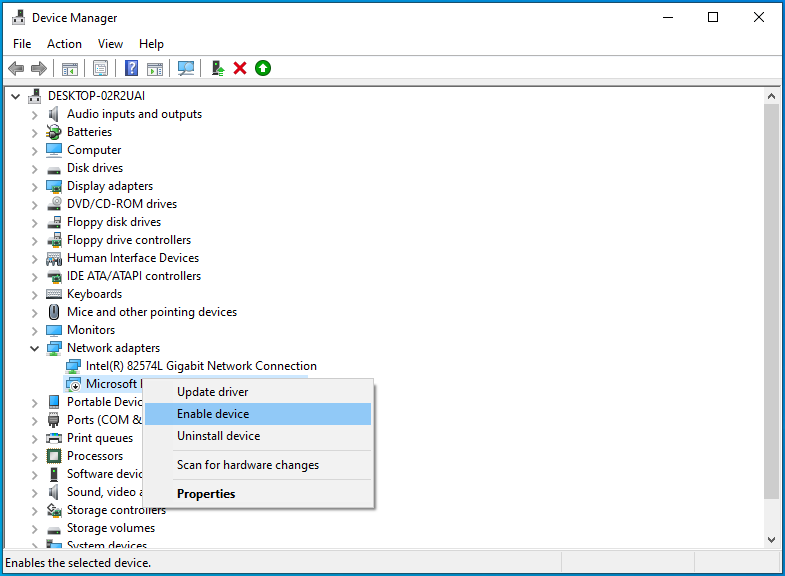
- If there’s another virtual adapter, disable it and then re-enable it as well.
After that, try turning on your computer’s mobile hotspot.
Method 5: Enable the internet connection sharing service
If the mobile hotspot is not working, it may be because the Internet Connection Sharing service is turned off or set to Manual. It’s also possible that the service is stuck, even if its status says “Running.”
So, turn it off, set it to Automatic, turn it back on, then check if your system can share its internet connection.
Here are the steps you should follow:
For Windows 10
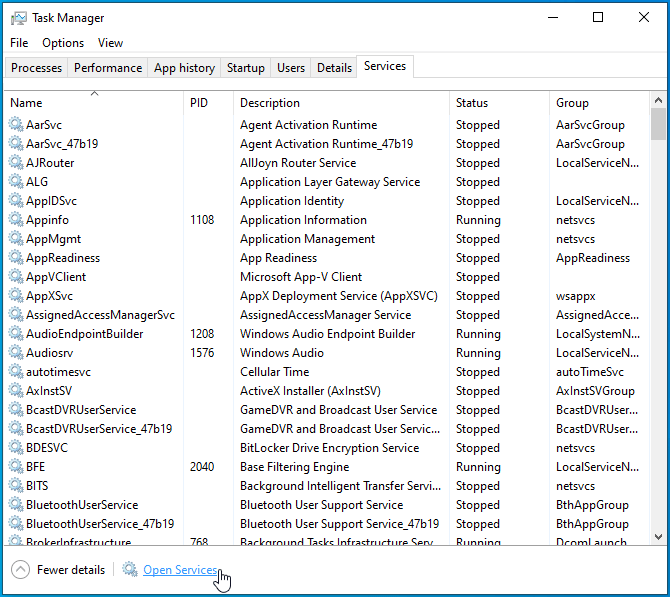
- Right-click on the taskbar and click on Task Manager . You can also press the
Ctrl, Shift, and Escbuttons at the same time to launch the Task Manager. - Go to the Services tab and click on Open Services at the bottom of the window.
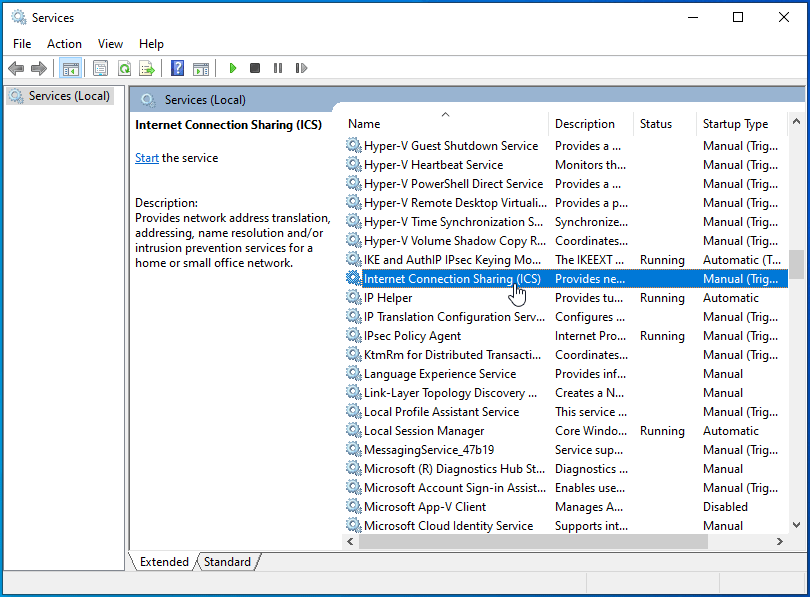
- Once you see the Services application, head to the Internet Connection Sharing (ICS) service and double-click it.
- After the Internet Connection Sharing (ICS) Properties dialog window opens, click on Stop if the service is currently running.
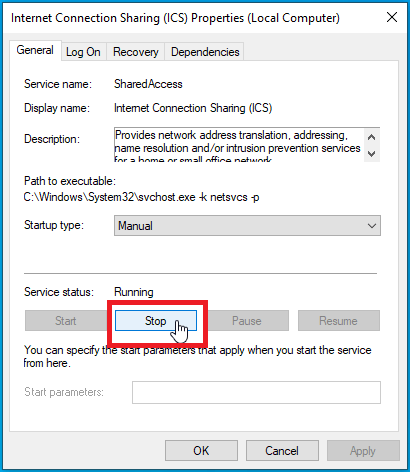
- Then, select Automatic in the Startup type drop-down menu.
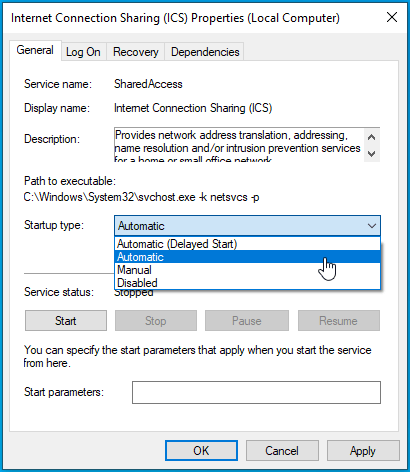
- Next, click Start again, select Apply , and click OK to save the settings.
If the h otspot is still not workin g, the next method may resolve the problem.
- Open the Task Manager and click on Services.
- Then search for SharedAccess or Internet Connection Sharing (ICS).
- When you find it, right-click and select Open Services .
From there, you can follow the steps I’ve already gone through above.
Method 6: Update your network adapter driver
Your network adapter communicates with the operating system through its driver. So, if the hotspot is not showing up, it may be an indication that the adapter’s driver is damaged or out of date.
Installing the latest version of the driver should resolve the problem. Here’s how to update your drivers :
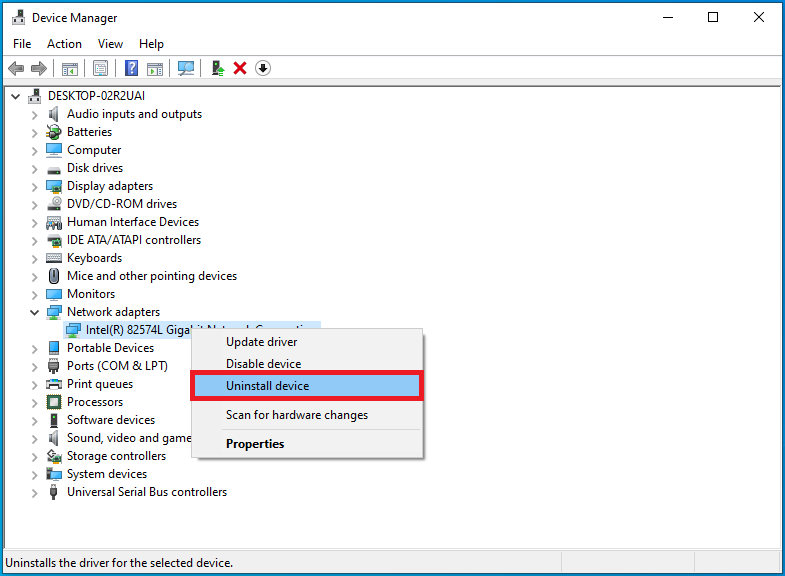
- Open the Device Manager, go to the Network adapters section, and expand it.
- Then, right-click on your network adapter and select Uninstall device .
- Since you’re installing the updated version from scratch, check the box beside Attempt to remove the driver for this device once the confirmation dialog pops up. Click on Uninstall .
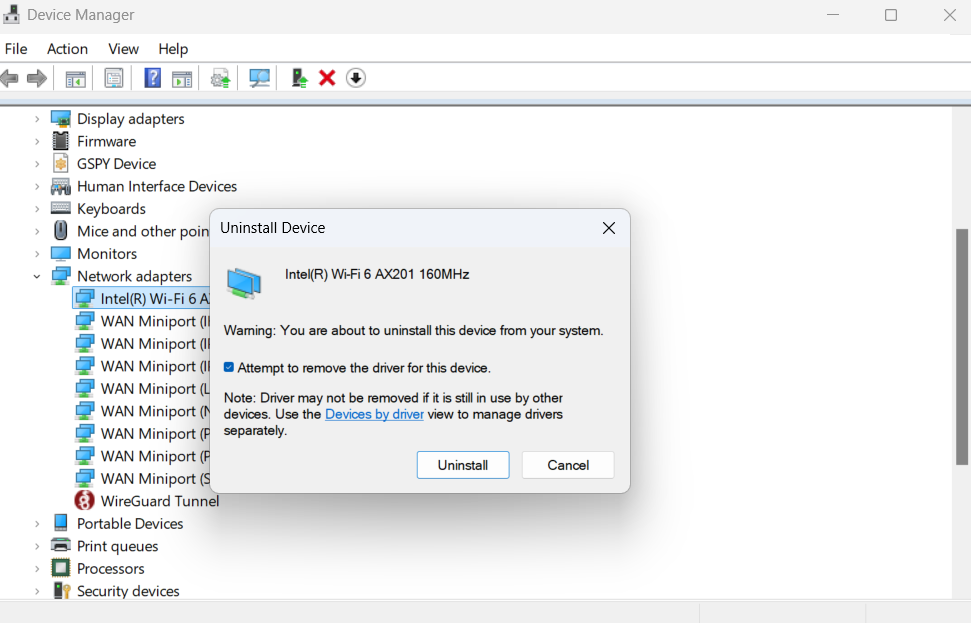
- Restart your computer. This will automatically reinstall the driver. You can check to see if you’re still experiencing the problem.
And it’s always compatible with your system.
Method 7: Temporarily disable your firewall program
There’s a chance that your firewall program is preventing you from using your mobile hotspot. You can try turning off the firewall and restarting the mobile hotspot.
To turn off Windows Defender Firewall, follow these steps on both Windows 10 and 11:
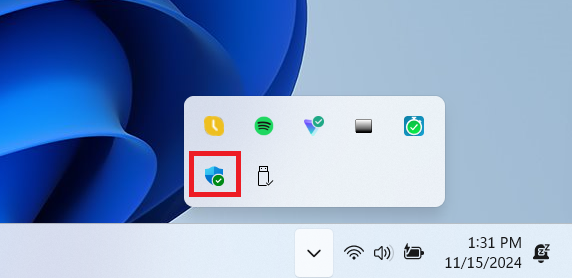
- Head to the right side of the taskbar, where you’ll find the date and time display.
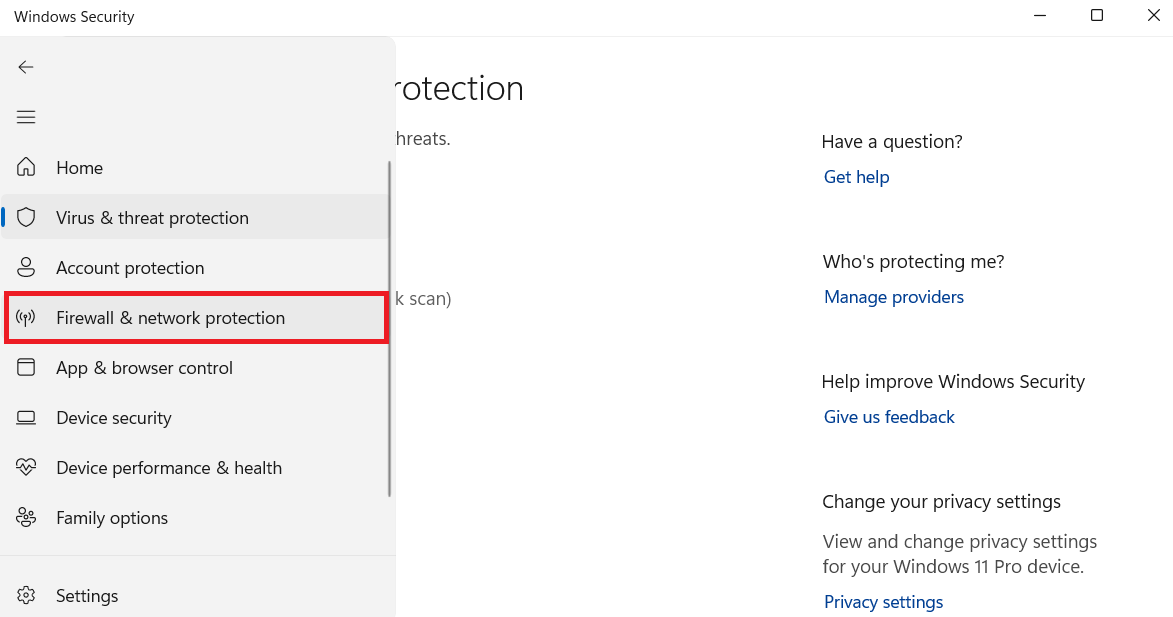
- Then click on Windows Security . If you can’t find it on the taskbar, click on the Show hidden icons arrow.
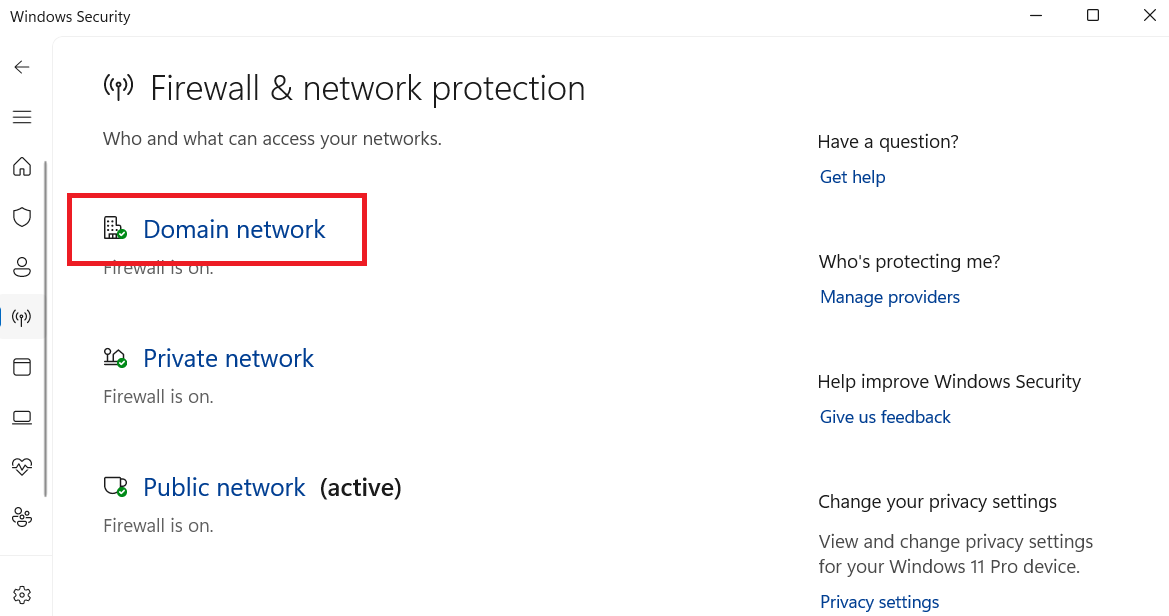
- After Windows Security opens, click on Firewall & network protection.
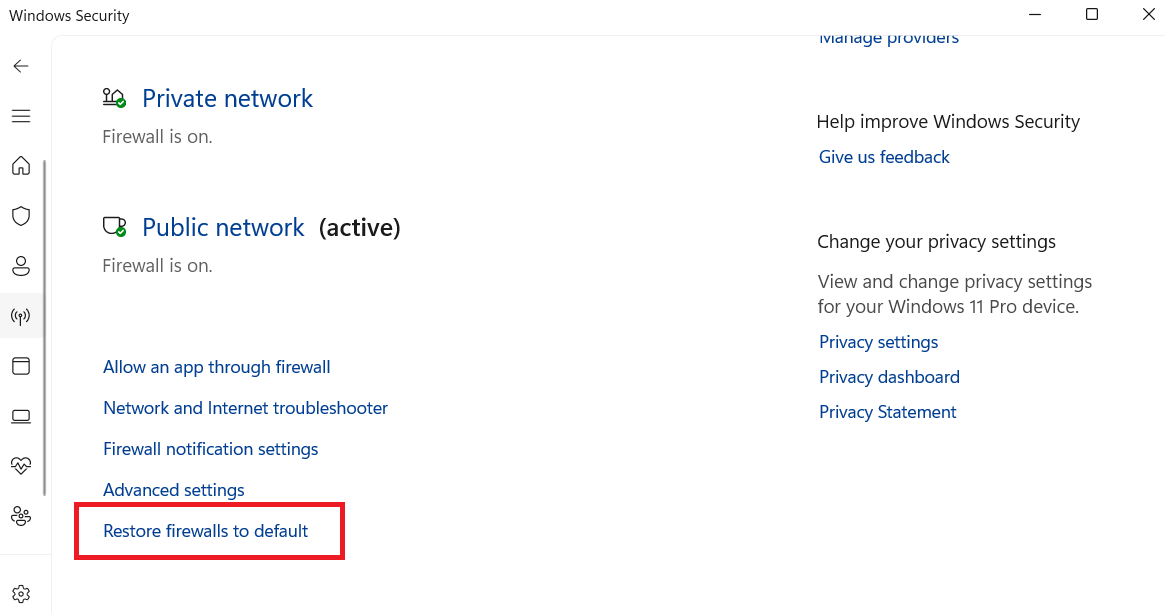
- Once it appears, go to the bottom of the window and click on Restore firewalls to default.
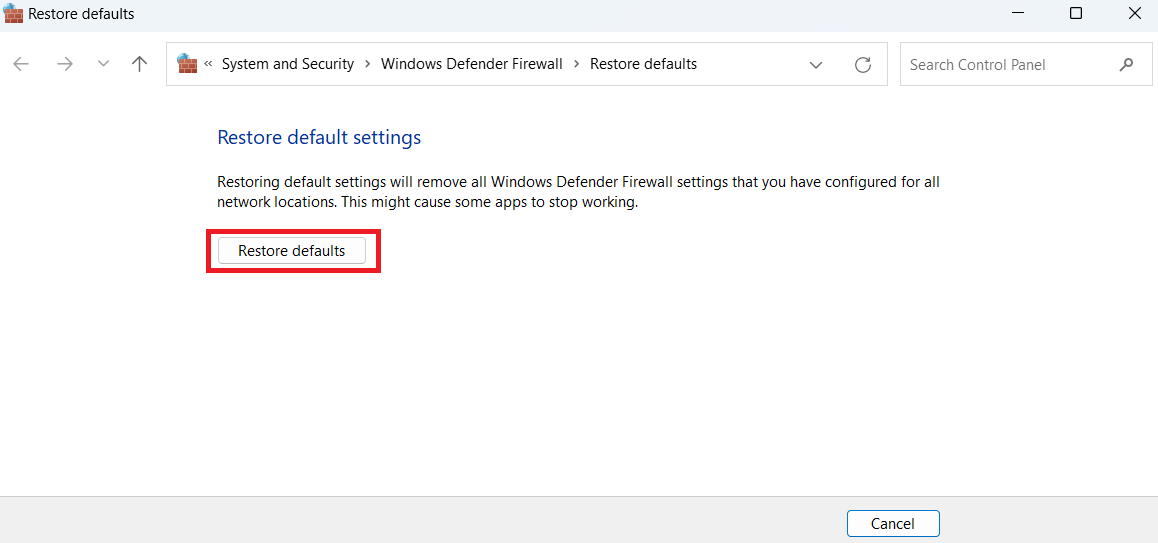
- After that, click Restore defaults when the window opens.
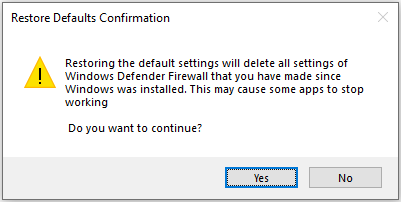
- Confirm your choice and try starting your mobile hotspot.
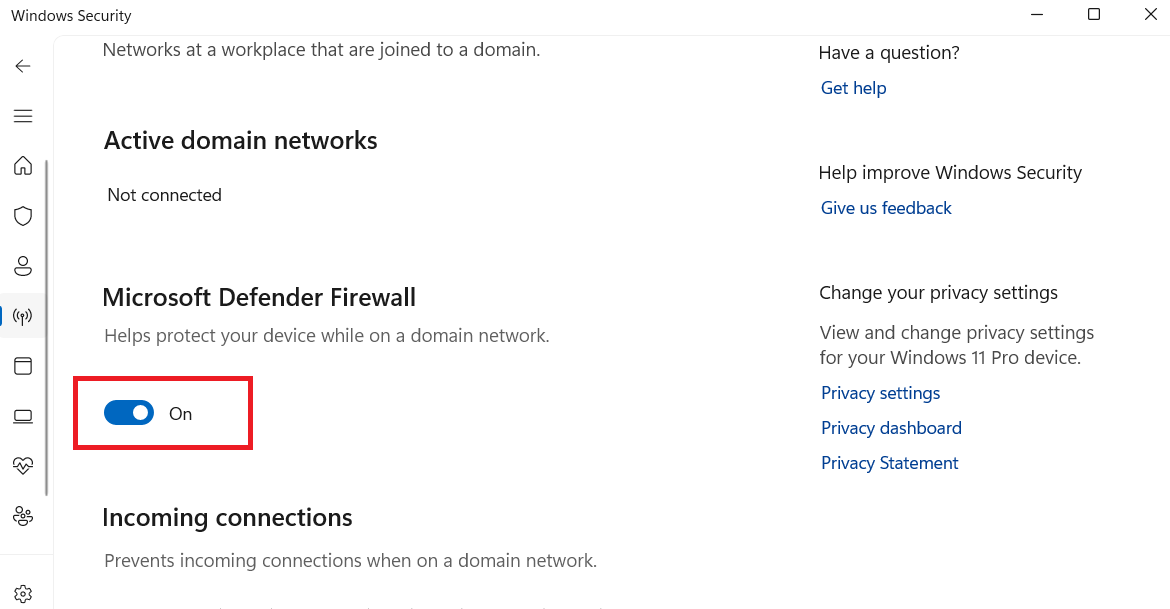
- If the problem doesn’t go away, go to the Firewall & network protection window and select Domain network.
- Turn off Microsoft Defender Firewall on the following page.
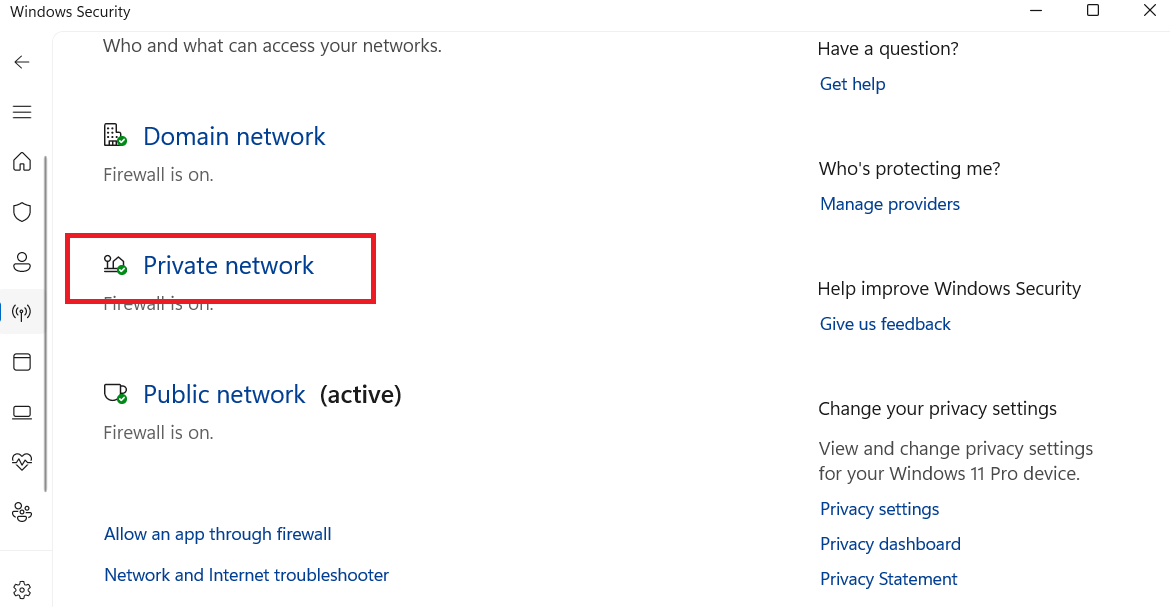
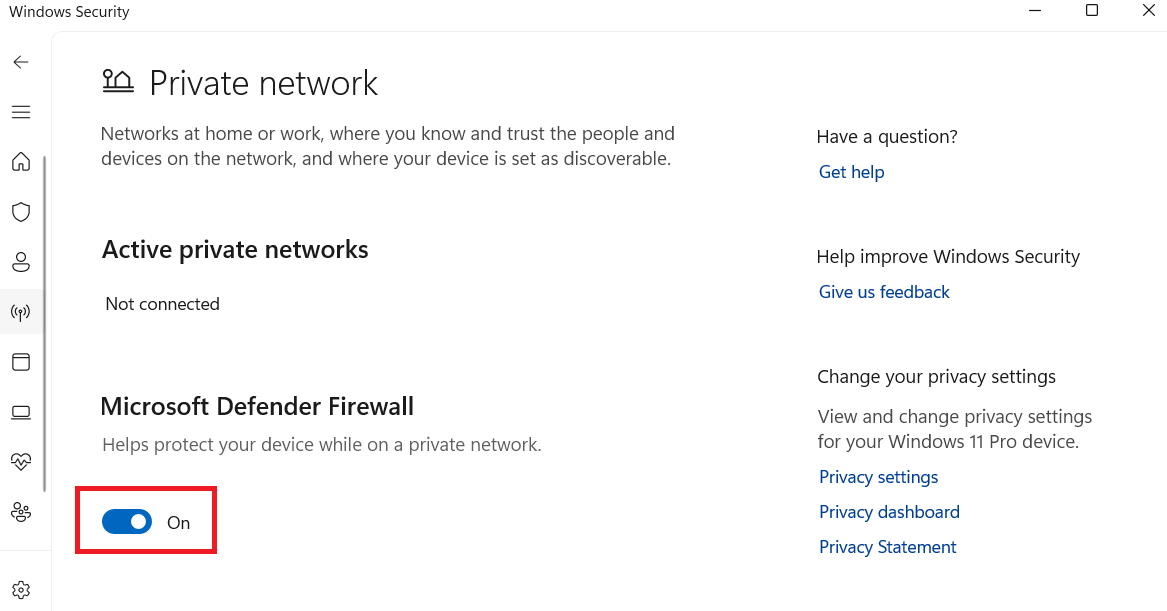
- Head back to the Firewall & network protection page and click on Private network.
- Turn off Microsoft Defender Firewall once the Private network page opens.
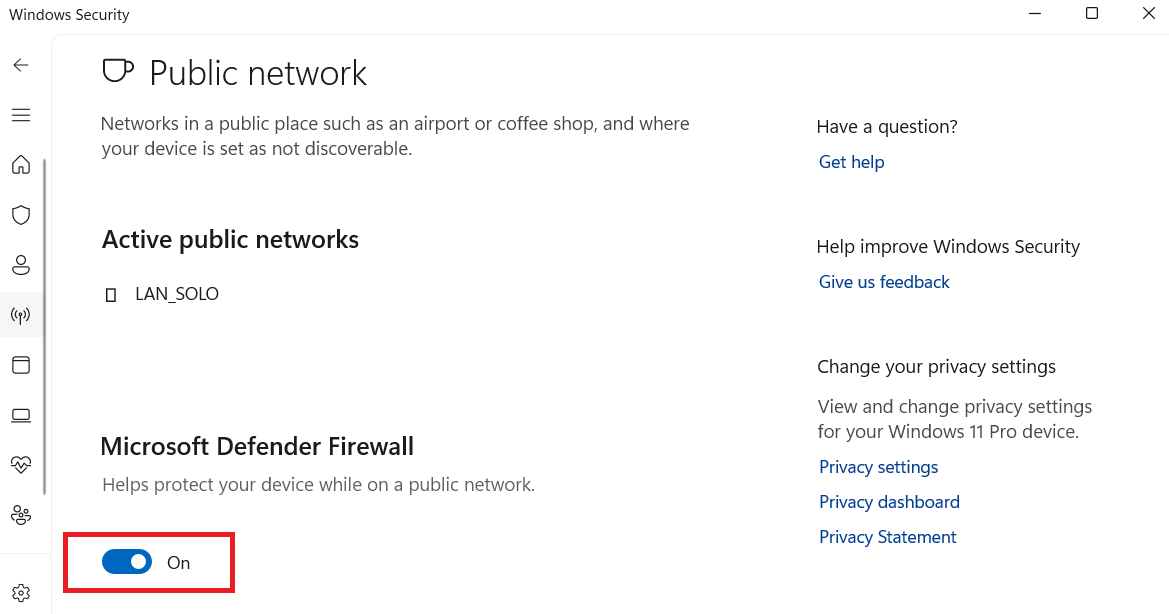
- Next, click on Public network in the Firewall & network protection interface.
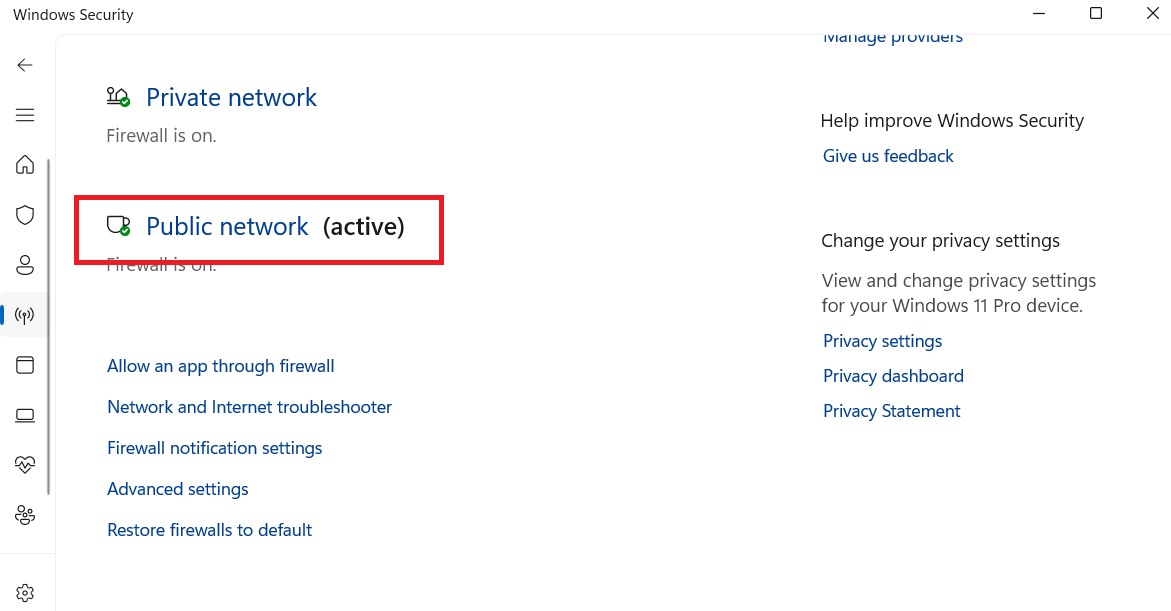
- Turn off Microsoft Defender Firewall for it as well.
Now, try starting the mobile hotspot.
Method 8: Delete the HostedNetworkSettings registry entry
Some users managed to get their mobile hotspots to work again by removing the entry from the system registry. You can use the Registry Editor to apply this fix.
Here’s how to delete the HostedNetworkSettings registry entry:
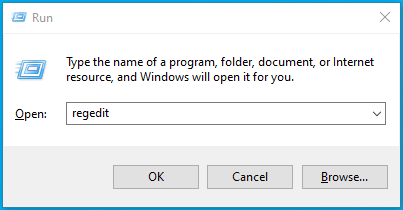
- Open the Run dialog window by tapping the
Windows logo and Rkeyboard buttons. Then, typeregeditand hit theEnterkey.
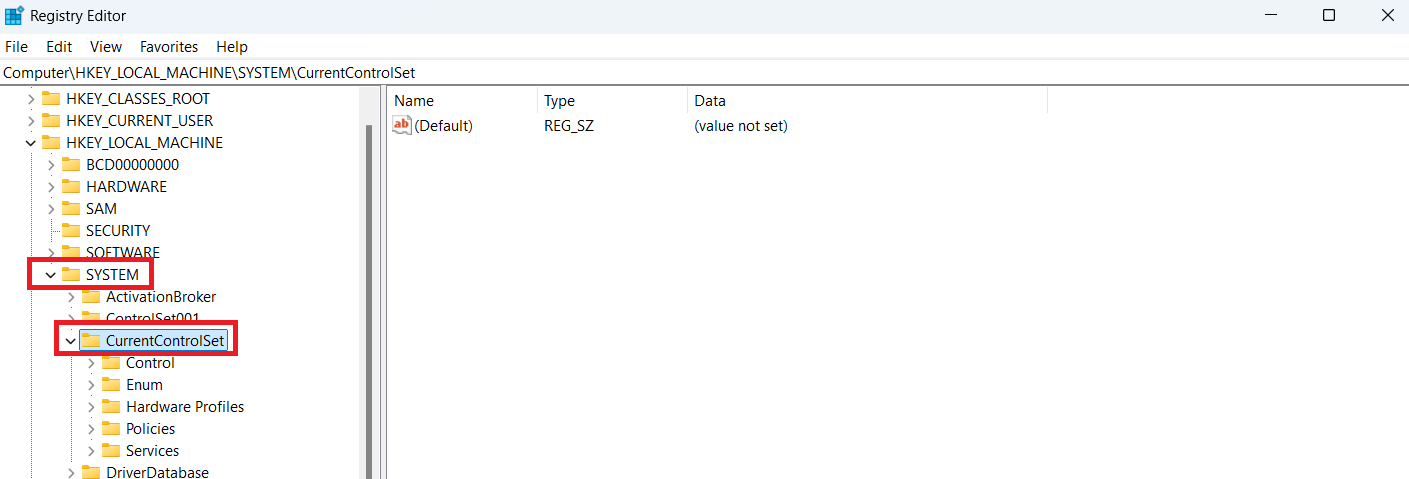
- Head to the left pane, and then expand HKEY_LOCAL_MACHINE.
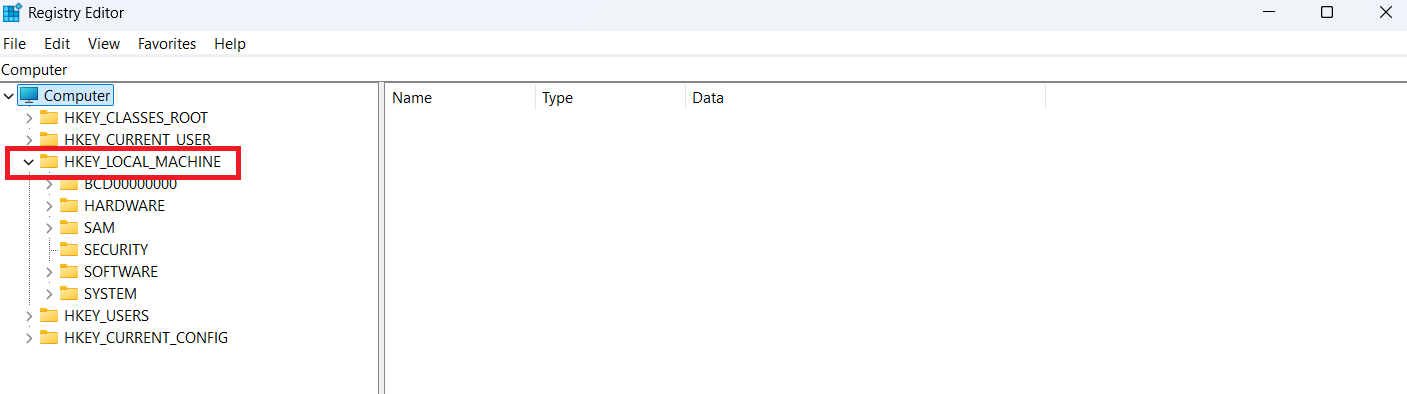
- Double-click SYSTEM and expand CurrentControlSet .
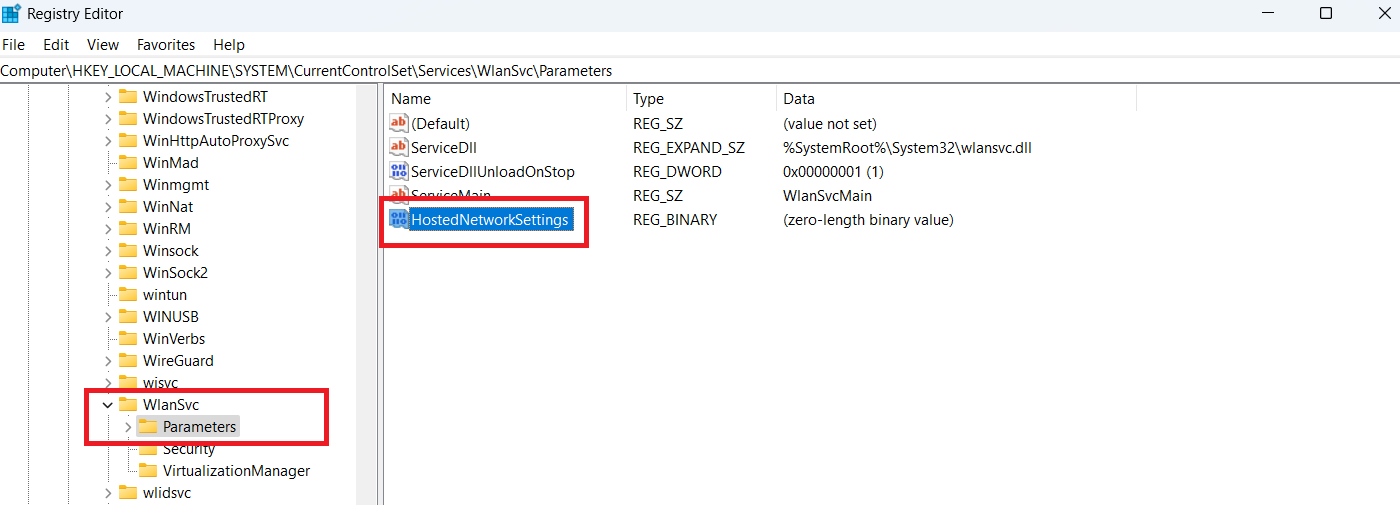
- Next, go to Services and search for WlanSvc . When you find it, double-click and select Parameters . You’ll find HostedNetworkSettings on the right.
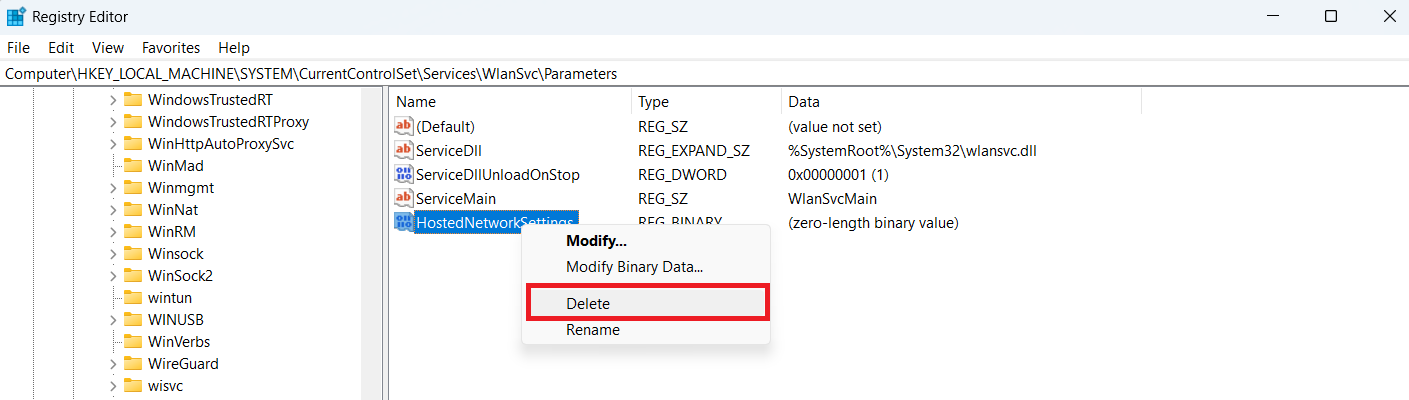
- Right-click on the HostedNetworkSettings entry and select Delete.
Restart your computer to see if the h otspot is now showing up on your laptop.
Method 9: Perform a clean boot
Sometimes, the startup applications can conflict with other Windows services. If the h otspot is not showing u p, performing a clean boot by disabling them might fix the problem. Here’s how to do it:
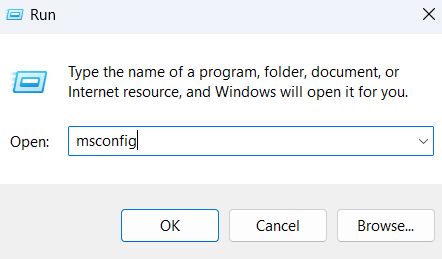
- Open the Run dialog window and type
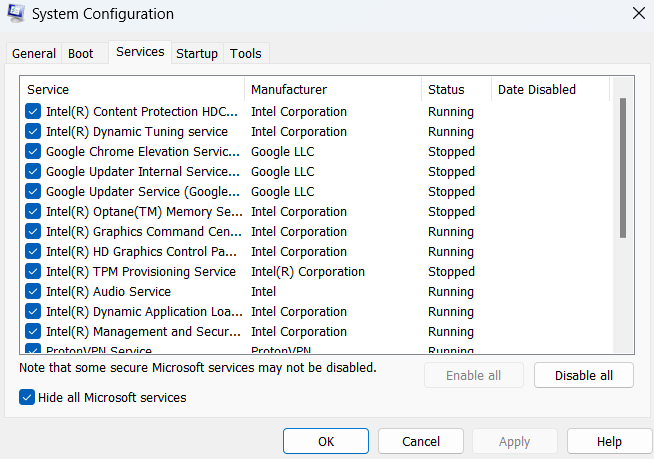
msconfig. Then, press OK.
- Click the Service tab, and select the Hide all Microsoft services box. Then, click Disable all.
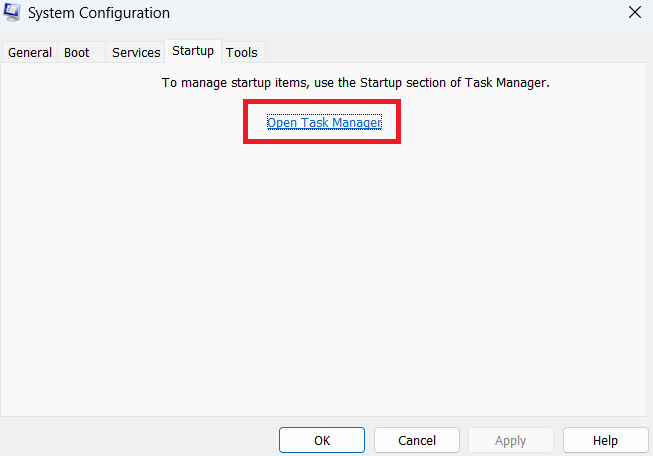
- Then, select the Startup tab and choose Open Task Manager.
- Go through each program under Startup apps and select Disable . Do that for all the programs in that tab.
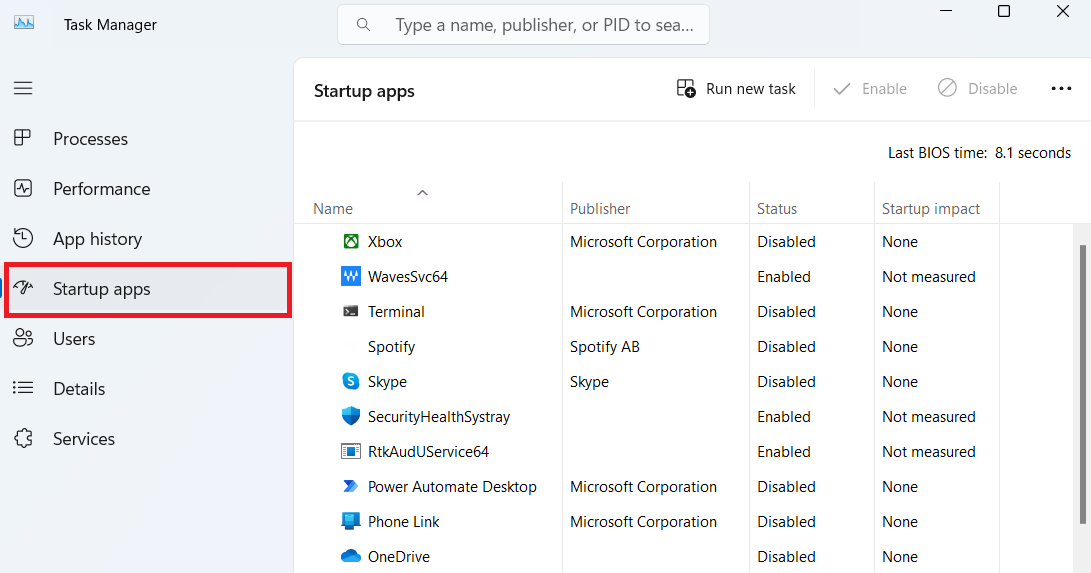
- Close the Task Manager to go back to the System Configuration window and select OK.
- Restart your system.
Method 10: Reset network settings
Maybe you installed some programs that changed your network settings, which has resulted in your mobile hotspot not working. Let’s restore the network to its original settings to see if that fixes the issue:
- Open the Command Prompt with administrative privileges.
- Type the following commands one after the other and press
Enter:
netsh int ip reset

netsh winsock reset

How to Fix a Hotspot Not Showing Up on Your iPhone and Android Devices
Is your Android or iPhone hotspot not working? Here is what Auslogics experts recommend that you do. Keep in mind that these methods are effective when your mobile data is working but the hotspot is not working.
| Solutions | iPhone | Android |
|---|---|---|
| Restart your phone | Press Home + Sleep/Wake until the Apple logo appears | Hold the Power button > Tap Restart/Reboot |
| Ensure internet works | Check Cellular Data in Settings | Verify Mobile data in Settings |
| Turn off battery saver mode | Go to Settings > Battery > Toggle off Low Power Mode | Open Settings > Battery > Toggle off Power saving mode |
| Enable hotspot and data | Settings > Cellular Data > Toggle on Allow Others to Join under Personal Hotspot | Settings > Connections > Enable Mobile data and Hotspot under Hotspot & tethering |
| Switch off/on Wi-Fi | Toggle Wi-Fi off/on via Settings or Control Center | Use Quick Settings to toggle Wi-Fi off/on |
| Change hotspot bandwidth | Settings > Personal Hotspot > Toggle on Maximise Compatibility for 2.4 GHz support | Settings > Hotspot settings > Select 2.4 GHz under AP Band |
| Update carrier settings | Settings > General > About > Check for updates | Settings > About phone (or System > About phone) About phone > Look for Software update |
| Update your phone | Settings > General > Software Update > Download and Install if available | Settings > About phone > Tap Check for updates and install |
| Delete APN certificates | Settings > General > VPN & Device Management > Delete profiles | Settings > Mobile networks > APNs > Delete or reset profiles to default |
| Reset network settings | Settings > General > Transfer or Reset iPhone > Choose Reset Network Settings | Settings > System > Reset options > Select Reset Wi-Fi, mobile networks, and Bluetooth |
| Reset your phone | Settings > General > Reset > Tap Reset All Settings | Settings > Backup & reset > Choose Factory data reset |
Fix 1: Restart your phone
Restarting your device is a simple troubleshooting tip that may work if there are minor glitches.
Restart your phone, and after it, check if the mobile hotspot is working again.
Fix 2: Make sure your internet connection is working
Check your phone’s settings app to see if your cellular network is enabled. If it’s on, check your internet connection to make sure that poor or slow reception isn’t the issue. Another thing to check is to verify that you haven’t exceeded your data limit for the month.
Fix 3: Turn off power-saving mode
Sometimes, disabling the power-saving mode can do the trick. Go to your settings menu and disable this feature if it’s turned on. The easiest way is to pull down the notification shade and tap on the power-saving mode feature. It should work for both iPhone and Android devices.
For iPhone
If you don’t have it at your Control Center:
- Open Settings and tap on Battery .
- Toggle off Low Power Mode .

For Android
- Open Settings and tap on Battery.
- Turn off the power-saving mode ( Battery saver in this case).

Fix 4: Enable both the personal hotspot and mobile data
If you turn on the cellular data without enabling the mobile hotspot, your iPhone hotspot won’t work. Here’s how to activate both options:
For iPhone
- Head to Settings and tap on Cellular/Mobile Data.
- Then, toggle on Mobile Data.

- Following that, go back to the Settings menu and tap on Personal Hotspot.
- Finally, toggle on Allow Others to Join .

For Android
- Go to your Settings and select Connections or Network & internet.
- Tap on the Mobile data or Cellular data option and toggle it on.
- Go back to Settings, select Hotspot & tethering or Mobile/Portable hotspot , and turn it on.

Fix 5: Turn off your phone’s Wi-Fi and turn it on again
Bugs in the system can also be the reason why your phone hotspot is not working. Just to be clear, your device’s Wi-Fi is usually not the problem, but on rare occasions, it can be. So, switch it off and back on again and check if that corrects the issue.
Fix 6: Change the hotspot bandwidth
Modern devices are currently using 5 GHz Wi-Fi signals to boost their network speed, but this may pose a problem for older devices. Luckily, you can switch to a 2.4 GHz bandwidth to see if that fixes your mobile hotspot not working.
For iPhone
- Go to your Settings , then go to Personal Hotspot.
- Toggle on Maximise Compatibility.

For Android
- Open Settings and tap on Wi-Fi hotspot.
- Go to Hotspot settings.
- Then, tap on AP Band and select 2.4 GHz Band.

Fix 7: Update the carrier settings
If you’re not aware, your carrier or phone company releases a new version of the settings from time to time that help your device work better on their network. Now, it doesn’t happen often, but it could be the cause of your phone hotspot not working.
Here’s how to check it (but first, make sure your phone has a cellular or Wi-Fi connection):
For iPhone
- Head to Settings and tap on General .
- Tap on About . If there’s any update, it’ll display here.

For Android
- First, connect to your Wi-Fi or cellular data.
- Go to Settings and tap on About phone (or System > About phone ).
- Look for Software update and tap on it to download and install any updates, if available.

Fix 8: Update your phone to the latest version
Both Android and iOS have issues, like bugs that need fixing. You can update your phone to the current version and see if that fixes whatever is causing your mobile hotspot to not work. Here’s how to do it:
For iPhone
- Open Settings and tap on General .
- Go to Software Update and check if there’s any update available. If so, download and install it.

For Android
- Go to your Settings menu.
- Tap on About phone and then on Check for updates .

- If there are any, download and install them.
Fix 9: Delete APN certificates
This option only works for some users, especially those outside the U.S. If you installed any APN certificates to permit your iPhone to work with specific cellular networks, deleting them might fix your problem with the hotspot not working.
Follow the steps below:
For iPhone
- Open Settings and tap on General .
- Scroll down and tap on VPN & Device Management .
- Tap on the profile you want to remove.

- Tap on Remove Profile to end the process. You may have to enter your iPhone passcode to confirm the action.
If your iPhone has iOS 16 and lower, go to Settings > General > Profiles , and select the profile you want to delete.
H owever, remember that if you don’t have profiles or certificates on your iPhone, you won’t see the Profiles or VPN & Device Management option in the General settings. Essentially, it means the APN certificate is not the reason your hotspot is not working.
For Android
- Open Settings and go to Network & internet or Connections .
- Tap on Mobile networks and choose APNs .
- Search for any custom APN profiles, tap on them, and select Delete APN or Reset to default .

Fix 10: Reset network settings
Another way to resolve the issue with your phone hotspot not working is by resetting your network settings. If none of the solutions I’ve already talked about haven’t worked for you, follow the below steps:
For iPhone
- Go to Settings and tap on General.
- Go down and tap on the Transfer or Reset iPhone option.
- Choose Reset Network Settings.

You can now check to see if your hotspot is working.
For Android
- Open Settings and go to System . Then, tap on Reset options . You can also just type
Resetin the Settings search bar. - Tap on Reset Wi-Fi, mobile networks, and Bluetooth (the option name may be different from one device to another).

- Confirm the password and wait for the process to complete.
- After it’s complete, reconfigure your hotspot settings and see if it’s working.
Fix 11: Reset your phone
The last solution is to reset your phone. If this doesn’t work, you may have to contact an expert to have a professional look. Here’s how to reset your phone:
For iPhone
- Head to Settings and tap on General.
- Then, go to Transfer or Reset iPhone and tap on Reset.
- Lastly, select Reset All Settings. This will reset your iPhone’s settings to their default without deleting your data.

For Android
- Go to Settings.
- Go to Back up and reset/restore.
- Tap on Factory reset.

- Select Reset device and select Erase everything.
Why Isn’t My Hotspot Working?
Let’s quickly go through the reasons why your hotspot does not work. Or, in the case of mobile devices, why your mobile data is working but the hotspot is not working. Here is a table comparison to make things easier:
| Reason | Windows | iPhone/Android |
|---|---|---|
| Power-saving mode is enabled | Applies when low power mode or battery saver disables connectivity features like hotspots | Same thing occurs here: power-saving mode may restrict background processes or limit hotspot performances |
| Outdated or corrupted network driver | Network drivers may need updating to ensure proper interaction with network hardware | This doesn’t work here; phone firmware generally manages these automatically |
| Service interruptions | Temporary outages from the network provider can impact hotspot functionality | Same applies to iPhones and Androids: network maintenance or congestion can cause issues |
| Critical network services are disabled | Certain background services are important, so it shouldn’t be disabled, for example, WLAN AutoConfig must be enabled for hotspots on Windows | Not applicable here |
| DNS settings are not correct | Misconfigured DNS settings can prevent hotspot connections | Similar issues may occur; resetting network settings or using alternate DNS (e.g., Google: 8.8.8.8) can help |
| Hotspot connection limit is reached | Windows hotspots have a connection limit; exceeding it prevents new devices from connecting | Phones also have device limits for connected users; disconnecting unused devices can resolve the issue |
| Internet Connection Sharing (ICS) is disabled | ICS service must be enabled for hotspots to function | Not applicable to phones, as they use built-in connection-sharing capabilities rather than ICS services |
Hotspot Not Showing Up: Fixed
By now, you’ve probably noticed that the solutions to the issue of your mobile hotspot not working are straightforward, if you know where to look. Go through the guide and implement the fixes. And remember to check basic things like entering the correct password or checking the device limits.
If it’s a hardware problem, contact a professional to look into it for you. If you have any suggestions or tips, go ahead and let us know in the comments below.