
Have you experienced logging into your user profile on Windows 7 and not seeing your personalized settings? It seemed as if someone set your customized desktop back to its default state.
There are many cases like this wherein the operating system fails to properly read the right user profile.
If this happened to you, your computer may have loaded a temporary profile which looks like a newly created one in default settings. If this happens, you may need to fix temporary profile on Windows 7.
You’d probably see a message on the right side of the taskbar saying, “You have been logged on with Temporary profile.”
Don’t worry because this does not necessarily mean that you’ve lost all your files, programs, and personalized settings.
In this article, we will teach you how to fix temporary profile on Windows 7.
What is the Temporary Profile Error on Windows?
A User Profile is a library of customized data and preferences, stored on the user’s computer for easy access.
A Temporary User Profile may be created as an alternative if there are any errors that prevent loading the original profile.
However due to its temporality, all changes made by users such as in desktop settings or files will not be saved upon logging off.
If you get the ‘We can’t sign into your account’ message or the ‘You’ve been signed in with a temporary profile’, don’t panic.
This is simply due to issues accessing your regular user folder (usually located at C:\Users\<user-name>); any changes made using the temporary profile will, unfortunately, be lost when logging out.
This error was rampant in Windows 7, but users also reported getting this issue when using Windows 10 and 11. If this problem is troubling you, here are our fixes.
Why does Windows 7 Load a Temporary Profile
There are many reasons why this happens, but mainly, it is the result of corrupted profile files and folders.
On the other hand, certain anti-virus programs or operations can be delaying the loading of the profile. As such, Windows loads a temporary profile to give the user access to the system.
Once the temporary profile loads, it will become the default boot setting for the computer.
This means that whenever you start your unit, you will only be able to log into the temporary profile.
If you want to retrieve your personalized settings, finding the temporary profile fix on Microsoft Windows 7 is the ideal course of action.
But before you do so, you will need to enable the built-in administrator account to use admin rights for some troubleshooting steps.
- Press the
Windows Key + Xtogether. Select Command Prompt (Admin). - Type the following command into the black window and press Enter: net user Administrator /active:yes
- Restart your computer now. A new account named Administrator will now appear on the login screen.
- Log in using it.
- After troubleshooting, type the following in the Command Prompt (reopen it using the
Win + X keys): net user Administrator /active:no
Steps to Resolve Windows 10/11 Temporary Profile Error
Signing out and back in should usually resolve the problem. If that doesn’t work, try these top ways to fix the temp profile Windows 10/11 issue.
Fix 1: Restart your computer several times.
- Restart your device in safe mode and sign in with your default profile. Examine to see if your settings and files have been restored.
- Restart your device normally and sign in with your original profile. Examine to see if your settings and files have been restored. (You may need to restart your device several times.)
- If multiple restarts do not help, try temporarily disabling your antivirus software and disabling Windows Defender services (Change the Startup type of the Windows Defender Advanced Threat Protection and Microsoft Defender Antivirus services to Disabled and restart your PC), which may scan your device during sign-in.
Fix 2: Run the SFC scan.
Because the temporary profile problem is caused by a corrupt file of some kind, you can first try to identify and repair it by running the System File Checker (SFC) scan. This is how:
- Click the Start button and type cmd. Select Run as administrator to launch Command Prompt with administrative privileges.
- Type the following command and press Enter: SFC /scannow.
- Wait for the process to finish, then restart your PC to see if Windows allows you to log in with your profile rather than a temporary one.
Fix 3: Use the registry editor.
Was the SFC scan unsuccessful? The Windows 10 system registry will then be examined. Because an incorrect registry entry can mislead Windows as to the location of your profile, forcing you to log in with a temporary profile.
Note: Keep in mind that this step is for Windows 10 and 11 users. If you’re still using Windows 7, refer to the instructions below.
- Click Start, type cmd, and then open Command Prompt as administrator from the right pane.
- Type
whoami /userand press Enter in the Command Prompt window to obtain SID (security ID). Make a note of that ID. - To open the Run dialog, press
Windows key + R. Enter regedit into the search box. - In Registry Editor’s address bar, copy and paste the address given below to open the ProfileList subkey: HKEY_LOCAL_MACHINE\SOFTWARE\Microsoft\Windows NT\CurrentVersion\ProfileList
- Expand the ProfileList subkey to see the SID keys of all the PC’s users. Find and click the SID you noted in Step 2 earlier. Then, on the right, look at the data under the ProfileImagePath entry.
- If you see two identical SID keys under the ProfileList subkey, choose the one without the ‘.bak’ extension.
- The ProfileImagePath data will be displayed as C:UsersTEMP. Double-click the ProfileImagePath entry to edit the value data. Enter the correct profile path and press OK. C:Users’YourProfileName is your profile path, and you should see the profile path that corresponds to your profile name.
- Now, right-click on the SID key (with the.bak extension) and select Delete.
That’s all there is to it. After restarting your computer, Windows should allow you to sign in to your account using a local profile rather than a temporary one.
Fix 4: Boot into Safe Mode.
Users have reported success in removing the temporary profile error by entering Safe Mode in some cases. Here are the steps:
- To open Settings, press the
Windows key + I. Then click on Update & Security. - Navigate to the Recovery section on the left, and then click the Restart now button under Advanced startup on the right.
- Then select Troubleshoot > Advanced options > Startup Settings.Then select the Restart option.
- After your computer restarts and the Startup Settings menu appears, select any Safe Mode version by pressing the appropriate key (4, 5, or 6) to enter Safe Mode.
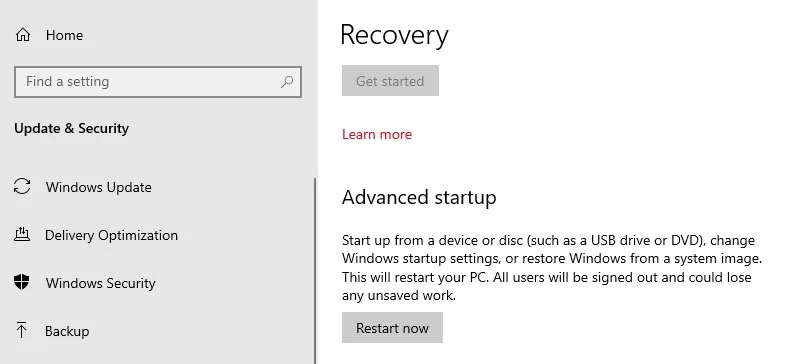
Once in Safe Mode, use your computer for a few minutes before restarting it to see if you can log in with your profile.
Related: Safe Mode Made Easy: How to Boot Windows 10 in Safe Mode?
Fix 5: Disable antivirus temporarily.
Antivirus software on your computer can sometimes interfere with the system and force it to log in with a temporary profile.
Surprisingly, disabling antivirus worked for many users to resolve the temporary profile issue. After you’ve disabled it, restart your computer and see if you can log in with your profile.
Related: [EXPLAINED] Does Windows 10 Need Antivirus?
Fix 6: Update your PC.
Keeping your computer up to date is considered good practice. Following this practice will, more often than not, solve any problems you are experiencing.
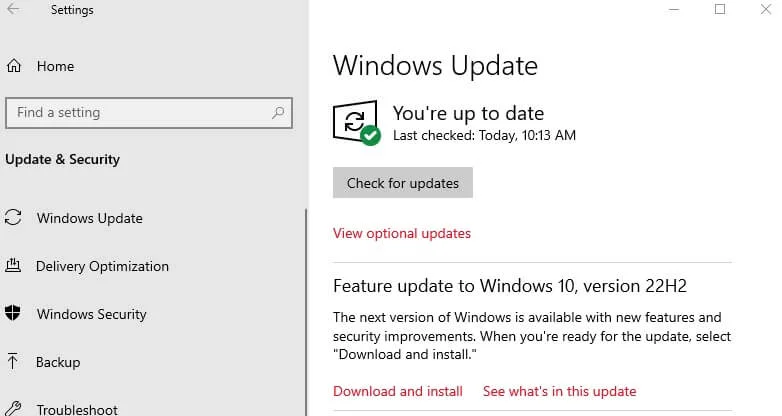
- To open Settings, press
Windows key + I. Then click on Update & Security. Now, click Check for updates to see if any new updates are available. - If an update is available, download it first. After installing the updates, restart your computer to see if the problem has been resolved.
Related: Ultimate Guide: How to Manually Check and Install Windows Updates
Fix 7: Perform a disk check.
If the corruption is not too severe, it can be repaired by using the check disk tool to link the files to their correct location. Log in using the default Administrator account.
- To open Windows Explorer, hold down the
Windows key + E. If you don’t see the C: drive, click This PC from the left pane, then select the C: Drive (which is where your Windows is installed). - Select Properties.
- Select the Tools tab. Click Check now under Error checking. To begin scanning, click the Start button. If it says it can’t scan because the drive is in use, click Schedule disk check and Restart your system. It will scan and repair itself after restarting, so do not press any keys to stop disc checking.
Allow the scan to run, and it will automatically restart when it is finished. Try logging in with your original account now. If the problem persists, proceed to the next solution.
How to Fix Temporary Profile in Windows 7
In some cases, it helps to try restarting the computer. It is possible for Windows to boot in your old profile. However, if this does not resolve the issue, you can follow the instructions below to get rid of the problem.
Note: Before you perform any changes in the registry, make sure you are confident that you can accurately complete the process.
This database is sensitive, and making even a punctuation mistake can damage your computer. As such, we recommend using Auslogics Registry Cleaner.
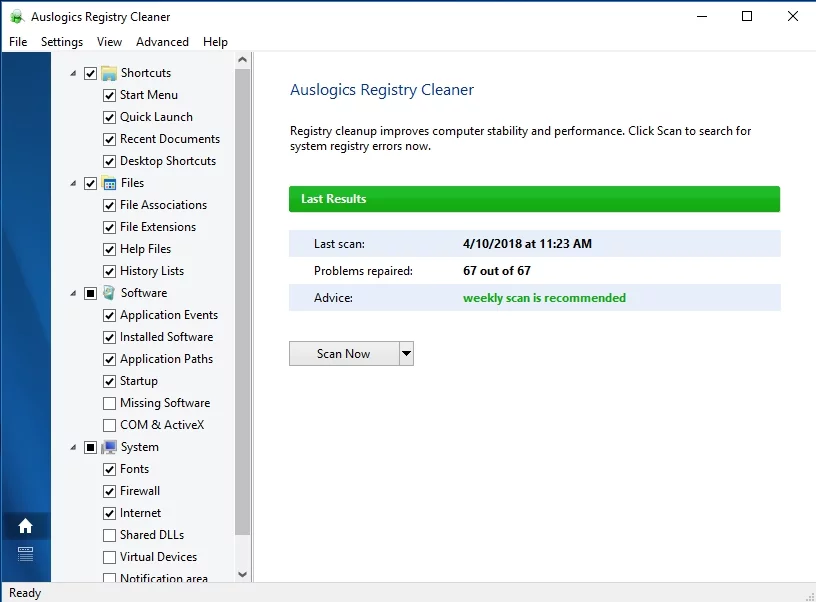
This tool will automatically search for duplicate and corrupted registry files. Once Auslogics Registry Cleaner has completed the scan, you can go through each item and carefully delete the ones you don’t need.
But if you want to do it manually, here are the steps on how to modify the profile list in Registry:
- Boot your computer and log into the temporary profile.
- Click the Start button.
- Launch the registry editor by typing regedit in the Search box.
- Right-click regedit, then select Run as Administrator.
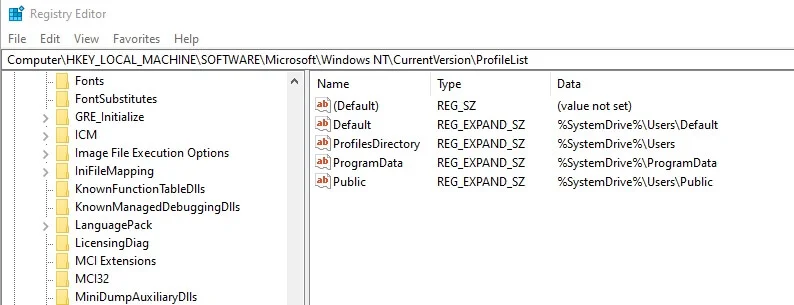
- Navigate to this path:
Computer \HKEY_LOCAL_MACHINE\ SOFTWARE\ Microsoft\ Windows NT\ CurrentVersion\ ProfileList
- You should be able to see the list of profile names.
- Find the two profiles with the same name. One of those should end with .bak.
- Note that the key with .bak at the end is your correct, personalized profile. You are currently logged into a new profile with the same key. As such, you have to rename the two files. Add “_new” (no quotes) at the end of the key for the temporary profile. After that, remove the .bak from the correct profile key.
- Once you’ve completed the previous step, you can now log off from the temporary profile.
- Restart your computer and log in to your correct profile.
After getting your old user profile back, we suggest that you use Auslogics Disk Defrag Ultimate. As we’ve mentioned, certain programs might be slowing your profile’s loading process.
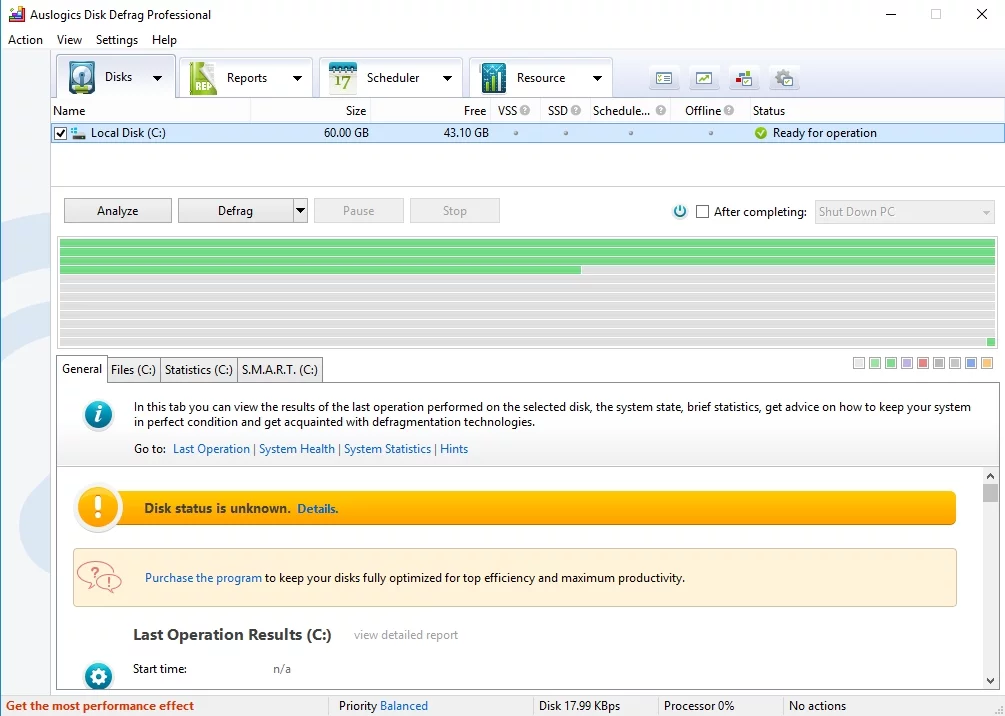
It would be ideal to optimize your hard drive to ensure that you wouldn’t experience long startup times on your applications.
Auslogics Disk Defrag Pro lets you maintain high HDD speeds through smart algorithms and boot-time defrag technology.
In this way, programs will run smoothly and you can prevent your system from creating a new temporary user profile.
Another Temporary Profile Fix on Microsoft Windows 7
If you’ve tried the method we shared and yet your Windows 7 computer still loads a temporary profile, this means that your user profile is corrupted.
Your unit might be creating a new .bak registry key, preventing the operating system from reading your user profile properly.
The possible solution for this is repairing the files by running Check Disk. Simply follow the steps below:
- On your keyboard, press
Windows Key + R. - Type chkdsk /f /r C:. Note: “C:” represents the drive where your user profile files are saved.
- Wait while the program is scanning and repairing the corrupted system files.
If Check Disk is able to find and fix the affected files, especially the Ntuser files, you have a good chance of getting your old profile back. Otherwise, you would have to resort to the next method.
Creating a New User Account
In this method, you have to create a new user account, log into it, and then move the data from your old user profile to the new one.
In a workgroup environment, you would only have to locally create a new user name. It goes without saying that it is easier to follow the steps for this scenario.
On the other hand, it can get a bit tricky when you create a new profile in a domain environment.
This is because the old profile already exists on the domain server and there’s nothing wrong with it.
Aside from that, creating a new domain profile might cause problems on shared permissions, corporate emails, and domain group memberships.
As such, we’re going to discuss the cases separately.
Creating a new profile in a workgroup environment
- Go to the Control Panel or Computer Management and create a new user profile. Do not forget to add the new profile to the Administrators Group.
- Log into the new profile and copy your data from your old profile. Typically, all you need is the following:
- My Documents
- Desktop
- Favorites
- Outlook PST files
- Outlook archive files
- Outlook Signature folder
Creating a new profile in a domain environment
- Create a new profile through the Control Panel or Computer Management.
- Log into the new profile, and then transfer the necessary data from your old profile to a new location. Make sure that you’ve copied all the files and folders because you’re going to delete your old account.
- In Control Panel, click System.
- Select Advanced System Settings under the left-bar menu.
- Once the System Properties window is open, click the Settings button under the User Profiles section.
- Select the corrupted user profile, and then click the Delete button. This should remove the data from your old profile, including the problematic registry keys.
- Make sure that the old account has been properly removed by checking the C:\Users folder.
- Restart your computer, then log in with the same user name (the one not loading earlier).
- Your system will create a new user profile. Move your old data to this profile.
Fixing this issue may get a bit tricky, but the first method has been proven to work in most cases. And probably your PC turns off itself? We also have some tips on resolving this issue.
Conclusion
Which of the solutions worked for you? Let us know in the comments below. If you have other suggestions on easily fixing the temporary profile in Windows 7, let us know in the comments below!
3 replies on “How to Fix Temporary Profile in Windows 7?”
Sir my Facebook account password & temporary problem plz this is my solve problem. ..
Great, thank you so much for this,
This worked, without me messing around the registry! Thank you