![[FIXED] How to Fix ‘The Default Gateway Is Not Available’ Error in Windows](https://www.auslogics.com/en/articles/wp-content/uploads/2023/11/FIXED-How-to-Fix-‘The-Default-Gateway-Is-Not-Available-Error-in-Windows-568x359.png)
- What Is the Default Gateway?
- How to Fix the Default Gateway is Not Available Error
- Solution 1: Check the Network Connections
- Solution 2: Disable Your Antivirus Software Temporarily
- Solution 3: Reset TCP/IP With the Netsh Command
- Solution 4: Update Your Network Adapter Drivers
- Solution 5: Change the Gateway Settings Manually
- Solution 6: Change the Wireless Router Frequency
- Solution 7: Change the Power Management Settings for Your Network Adapter
- Solution 8: Perform a Clean Boot Configuration
- Conclusion
- FAQ
There are several reasons why the “Default gateway is not available” error occurs in Windows 10.
It could be that your drivers are outdated, or your router uses a Wi-Fi frequency incompatible with your PC.
Regardless of the cause, this guide will show you how to fix the default gateway is not available error.
Let’s begin.
What Is the Default Gateway?
The default gateway acts like a guide in a computer network. When the routing database doesn’t have a specific IP address for the next hop, the router or node helps to direct the data packets.
The default gateway serves as the entry point for networks to communicate with each other. This includes changing network addresses, subnet masks, and IP addresses.
Every network component has a routing table that determines how and where a communication occurs. A data packet turns to the default gateway for direction if it can’t find the correct path.
The router that connects the LAN network to the Internet usually serves as the default gateway for all network components for home networks.
How to Fix the Default Gateway is Not Available Error
Here’s a detailed guide on fixing the Default gateway is not available error. Go through them and use the solution that works in your situation.
Solution 1: Check the Network Connections
Before proceeding with anything, check your computer to ensure it’s correctly connected to your router or network device.
For example, make sure your network router is operating properly and check the connection cable.
You can also restart your PC and network routers to update the network services. If it doesn’t resolve the issue, proceed with the following solutions.
📌 Also read: How To Fix Can’t Connect To This Network Error On Windows 10/11
Solution 2: Disable Your Antivirus Software Temporarily
Antivirus software can sometimes cause network and internet connection issues on Windows 10. You can turn off your antivirus program to see if that’s the problem.
Here’s how to disable your antivirus program:
- Press
Ctrl + Shift + Escto open Task Manager. - Click Mode details to expand details if the Task Manager opens in compact mode.
- Click on the Start Up tab, search for the antivirus application, and select it.
- You’ll see a Disable button on the bottom-right window. Click to disable the program from running when you start your device.
- Restart your computer and connect to your network again.
Auslogics BoostSpeed offers other advantages, like optimizing your PC performance, improving your system’s security, and ensuring your PC is much faster, smoother, and more responsive.
📌 Find out more: Speed Up Slow Computer: Auslogics BoostSpeed 13
Check if the “Default gateway is not available” error still occurs in Windows 10. If the problem persists, proceed with the next solution.
📌 Related: What if Windows 10 Prevents Antivirus Installation?
Solution 3: Reset TCP/IP With the Netsh Command
The Transmission Control Protocol/Internet Protocol (TCP/IP) allows communication between a system and a network. You can reset the TCP/IP to resolve network connectivity issues because the TCP/IP can sometimes get corrupted.
When you reset the TCP/IP, it restores the default configuration and settings, giving it a fresh start. This can resolve any network-related issues. Here’s how to reset the TCP/IP:
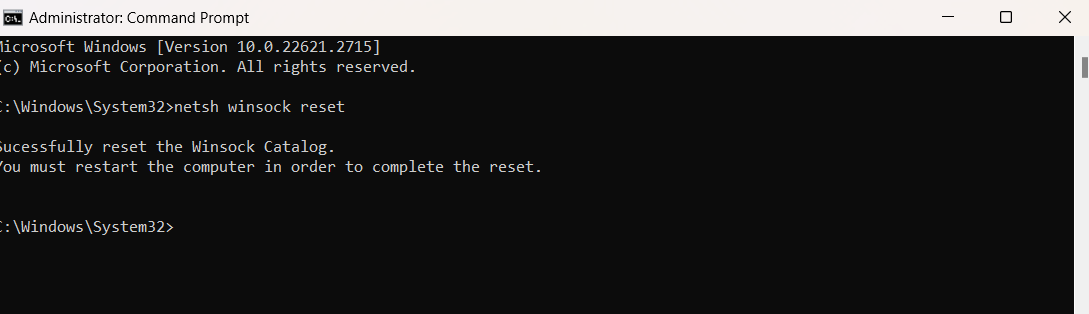
- Type
Command Promptin the search bar, right-click, and select Run as administrator. - Type
netsh winsock resetand pressEnter.
- Wait for the previous command to finish processing, type
netsh int ip resetand pressEnteragain.
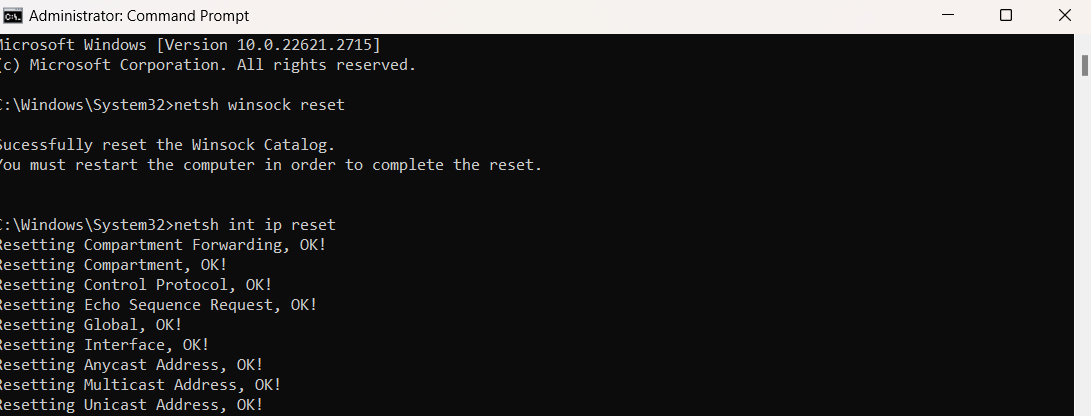
Restart your computer to implement the changes. Then, check if the problem has been resolved.
Solution 4: Update Your Network Adapter Drivers
It’s important to make sure your drivers are up to date. Manufacturers respond to problem reports and provide updates, which can fix the “Default gateway is not available” issue in Windows 10.
When you update your system regularly, it helps your PC to operate at its best performance and solve any recurring issues.
Here’s how to update your network adapter drivers:
- Type
Device Managerin the search bar and click to open. - Expand the Network adapters by clicking the arrow beside it
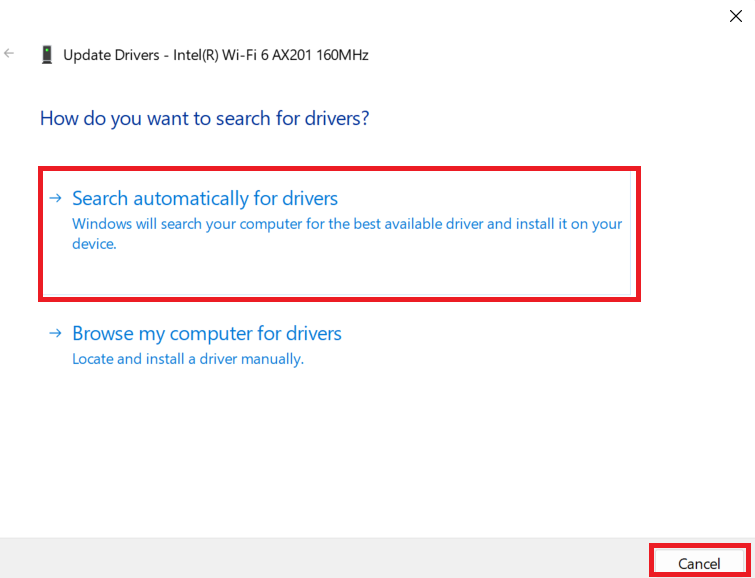
- Right-click on your adapter and select Update driver.
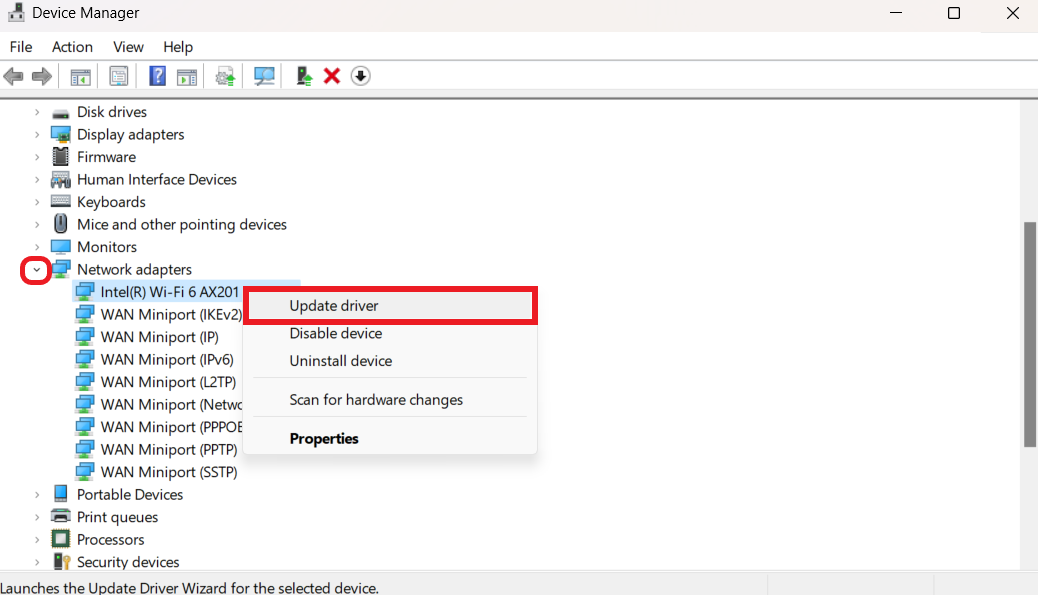
- Select Search automatically for updated driver software and follow the on-screen instructions to update your drivers.
Restart your computer after the update and verify if “ the default gateway is not available” issue has been resolved.
📌 Related: Fixing Windows Did not Detect a Properly Installed Network Adapter Error
Use Auslogics Driver Updater to Update Drivers
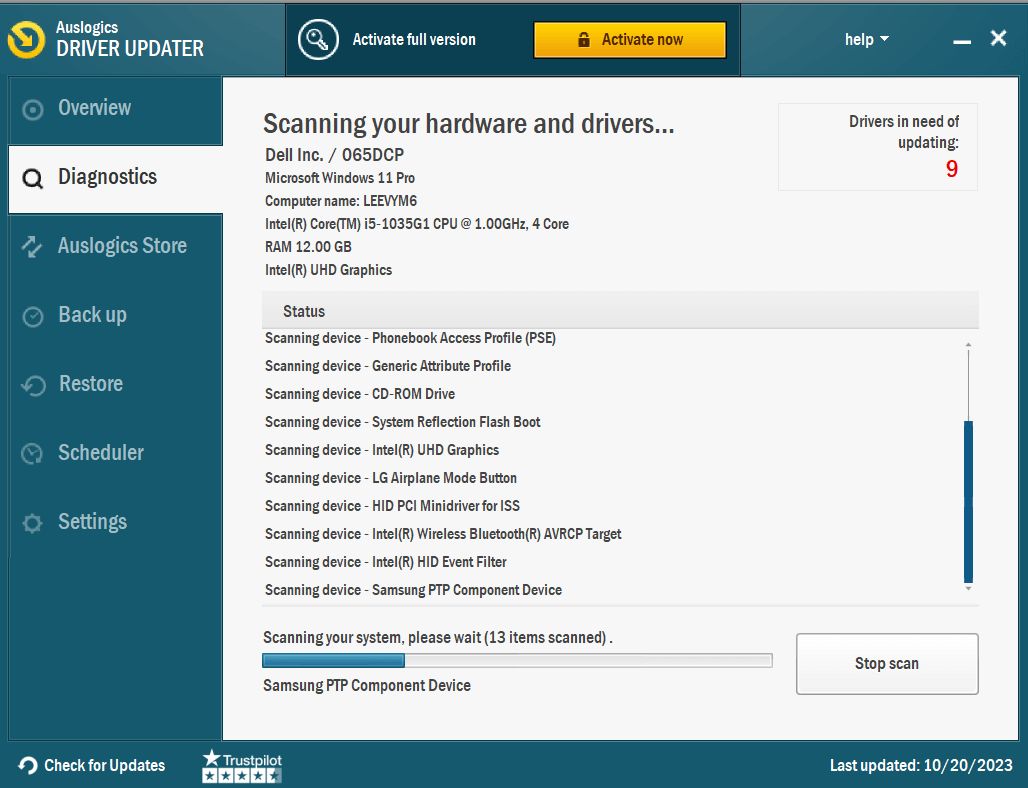
As soon as it detects outdated drivers, it offers an extensive list of accessible updates.
Thanks to the one-click update option, your network adapters will always have the most recent manufacturer-recommended versions.
📌 Find out more: Auslogics Driver Updater: New Drivers in One Click!
Solution 5: Change the Gateway Settings Manually
Sometimes, resetting the TCP/IP using the Command Prompt may not work. You can change the settings manually to see if it fixes the “Default gateway is not available” issue in Windows 10. Here’s how to do it:
- Type
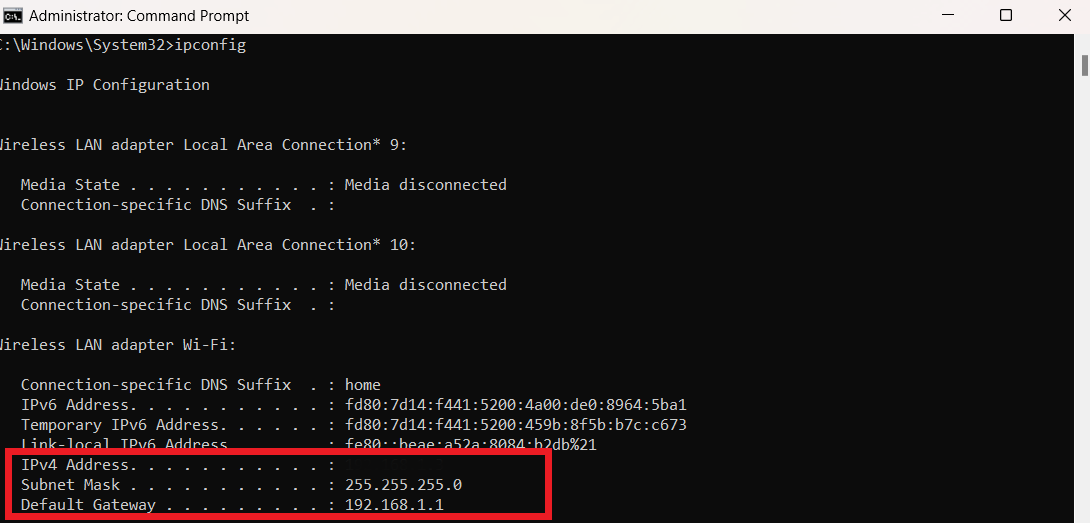
command promptin the search bar, right-click, and select Run as administrator. - Type
ipconfigand copy the IP address, subnet mask, and default gateway because you’ll use it later.
- Press
Windows + Rto open the Run dialog and typeControl Panelto open.
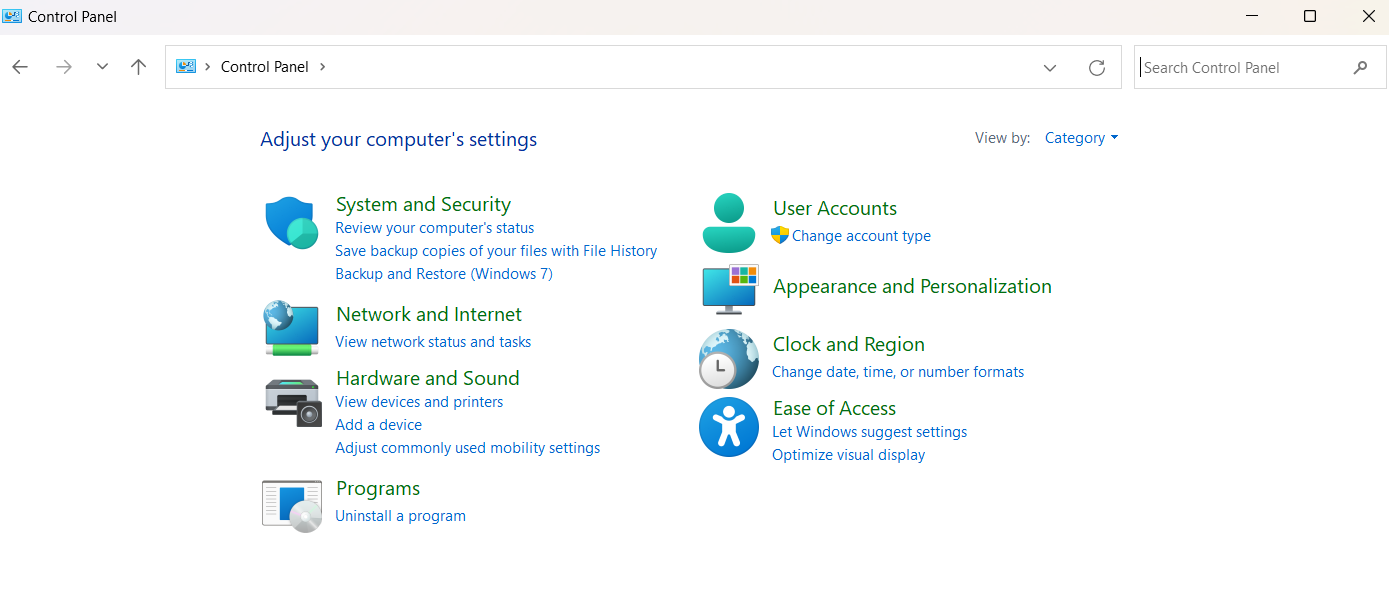
- Click on Network and Internet.
- Click Network and Sharing Center.
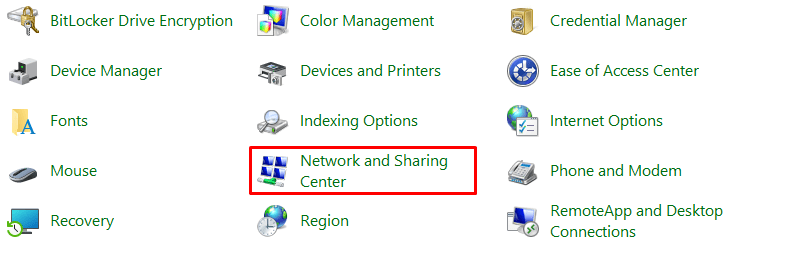
- Select Change Adapter Settings.
- Right-click on your connection and select Properties.
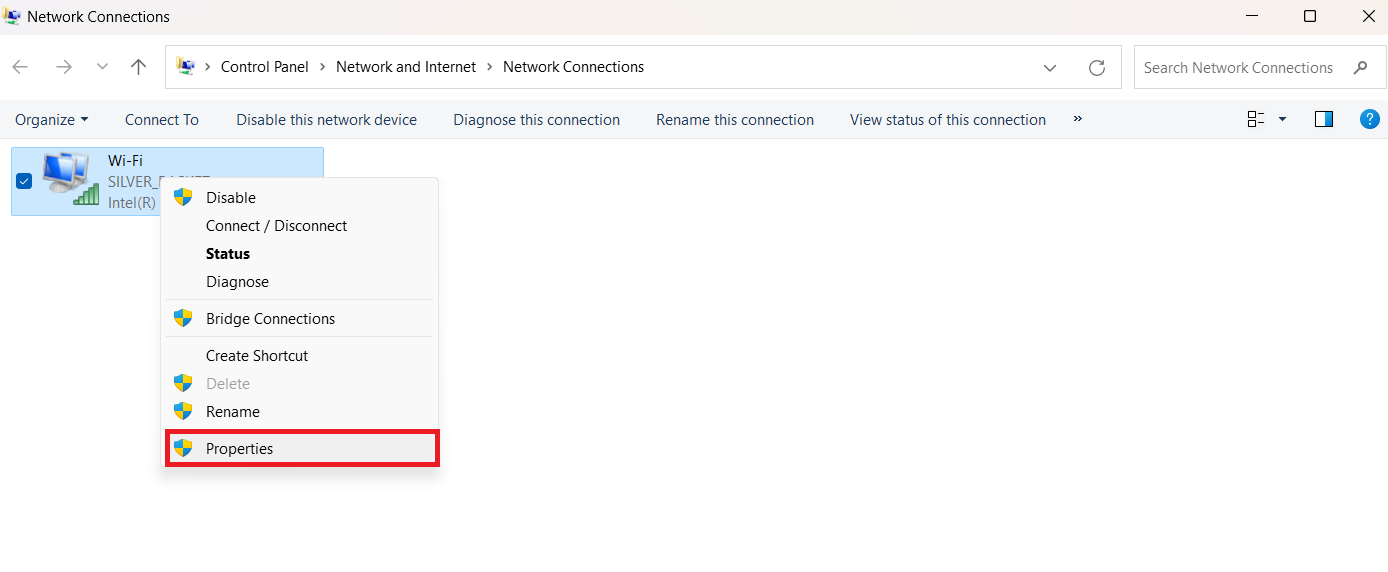
- Double-click on TCP/IPv4 or TCP/IPv6.
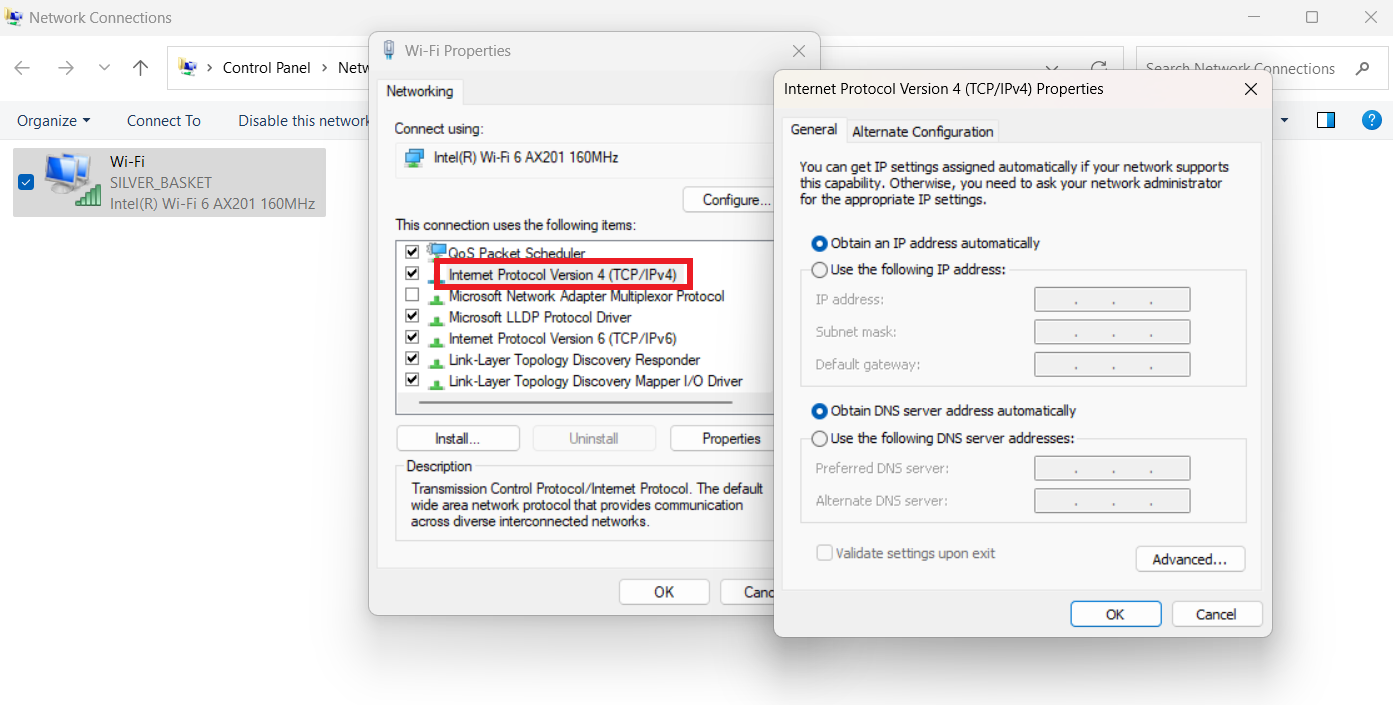
- Check Use the following IP address and enter the required fields’ IP address, subnet mask, and default gateway. In the DNS section, use the
8.8.8.8for the Preferred DNS server and8.8.4.4for the Alternate DNS server.
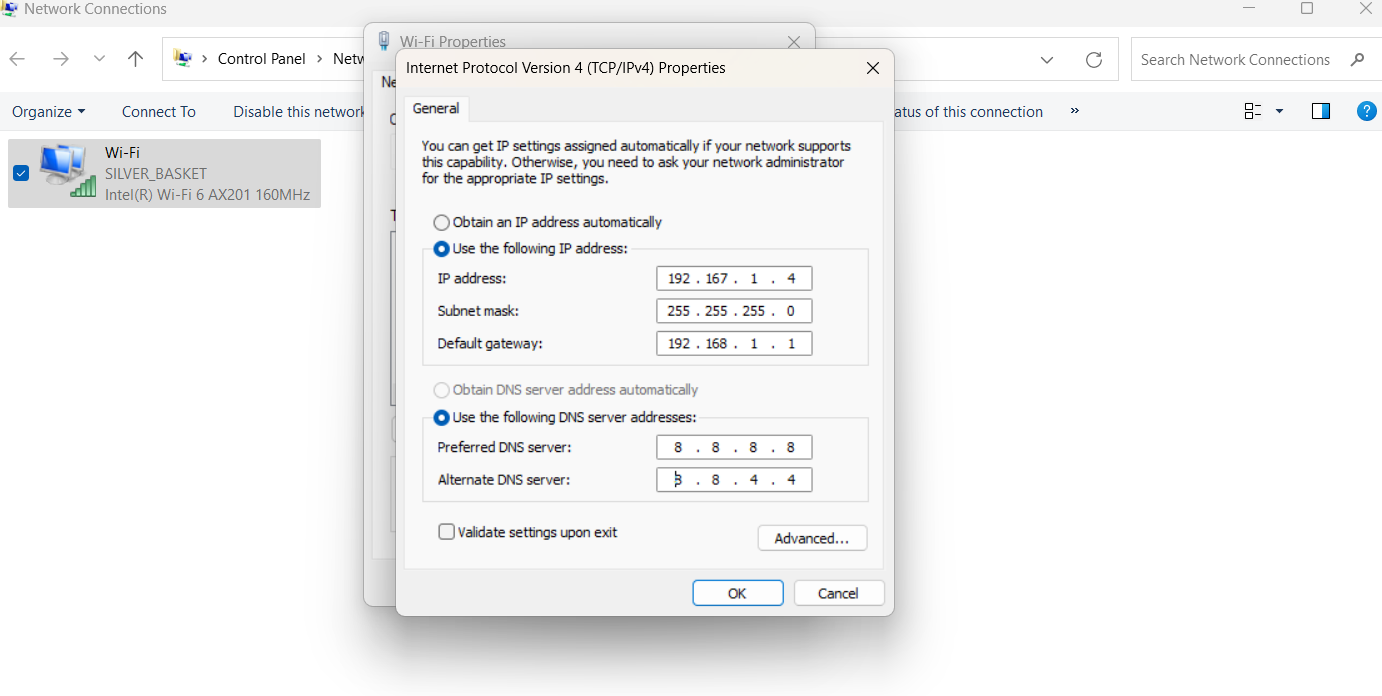
Save changes and close the control panel. Then, check to see if the default gateway is not available has been resolved.
📌 Related: Server DNS Address Could Not Be Found on Windows 10/11
Solution 6: Change the Wireless Router Frequency
Most modern routers run on the 5GHz frequency, but your adapter may not support this frequency. This can use the default gateway is not available error.
Fortunately, many routers let you change to the 2.4GHz frequency. This allows your network adapter to be compatible with the network.
Access your network’s settings menu and change your wireless network frequency. Connect to your router and type 192.168.1.1 in your Chrome browser. This should work for most browsers.
If it doesn’t work, check your router’s manual to learn how to change the wireless router frequency.
Solution 7: Change the Power Management Settings for Your Network Adapter
Some users have observed that a specific power management setting may cause problems with internet connections. This happens when your system momentarily disables your network adapter. It can prevent connectivity and cause the “Default Gateway Is Not Available ” issue. Here’s how to check:
- Type
Device Managerin the search bar and click to open. - Expand the Network adapters by clicking the arrow beside it
- Right-click your adapter and select Properties.
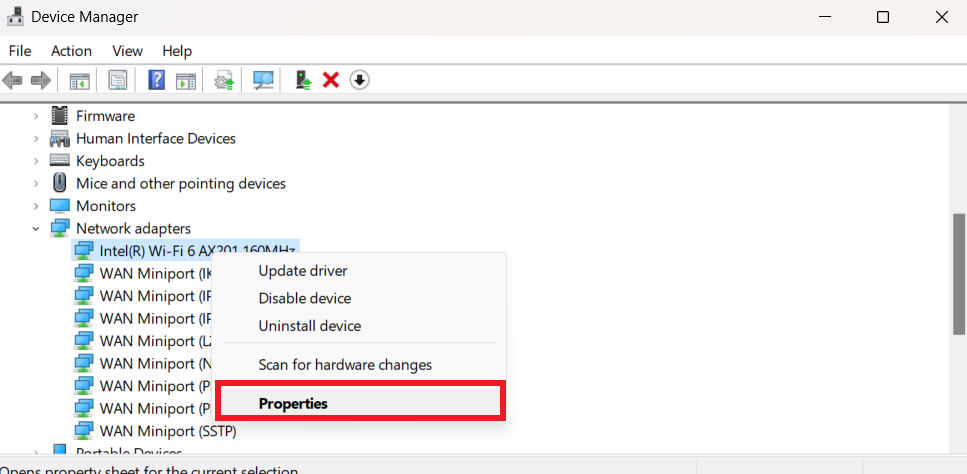
- Switch to the Power Management and enable Allow the computer to turn off this device to save power.
Click the OK button to complete the changes. Check whether the “Default Gateway Is Not Available” issue on Windows 10 is resolved.
📌 Also read: Why Is My Internet Not Working? Pro Tips for a Quick Fix
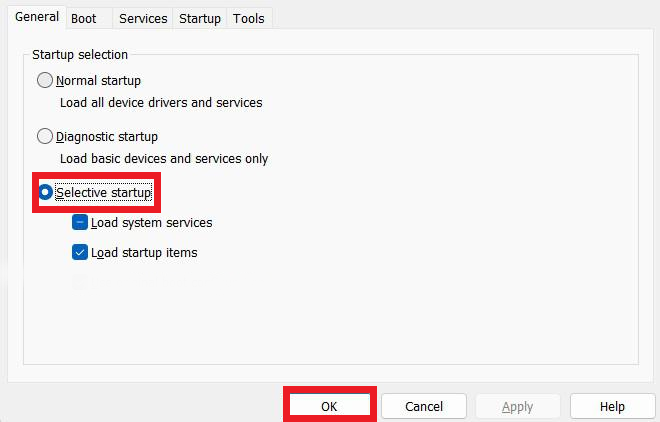
Solution 8: Perform a Clean Boot Configuration
A clean boot is a Windows mode that starts the system with minimum services. This allows you to troubleshoot network and performance-related issues. Windows only uses necessary Microsoft services in this mode. This makes it easy to resolve any issues you might have. Here’s how to run the clean boot:
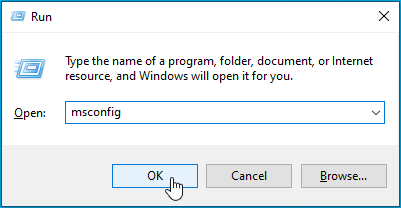
- Press
Windows + Rto open the Run dialog box. - Type
msconfigand pressEnter.
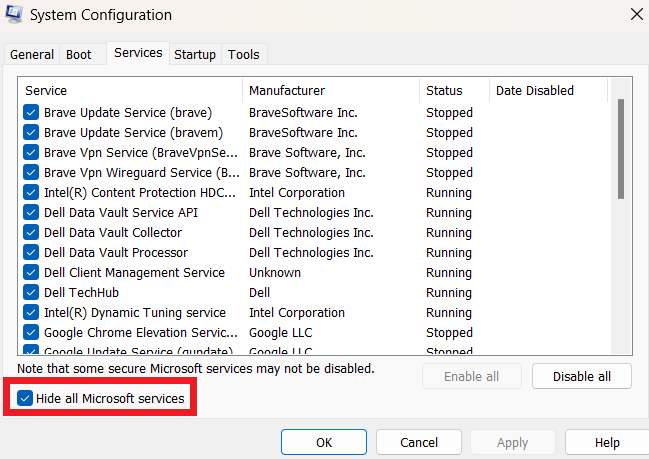
- Check the Hide all Microsoft services under the Services tab. This ensures that you don’t disable required Microsoft services.
- Select the Startup tab and click Open Task Manager.
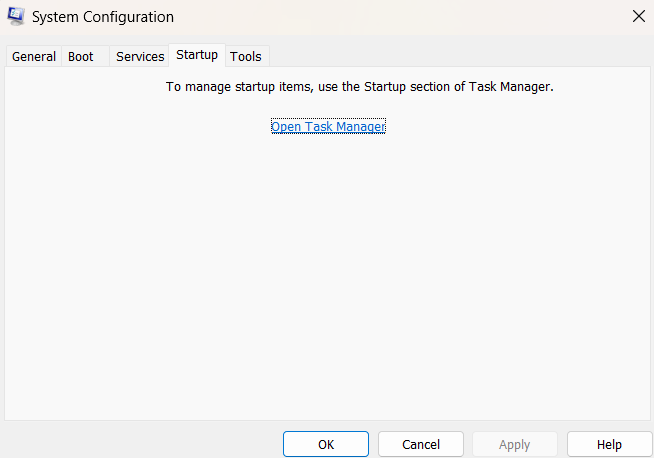
- Right-click and select Disable to turn off the startup services.
- Return to System Configuration and select OK to complete the changes.
- Click Restart when the prompt appears for a clean boot.
- After the reboot, troubleshoot network conflicts. Then, open System Configuration, select General, and click Normal startup.
After, check to see if the “default gateway is not available” error has been resolved.
📌 Also read: Quick Fix: Why Does My Internet Keep Going In and Out?
Conclusion
It’s possible to resolve the “default gateway is not available” issue.
Just remember that when you get this error, it means your PC is finding it difficult to determine the standard path for connecting to the Internet through your router.
However, you can fix the problem by taking the solutions discussed in this guide, such as updating your drivers, reinstalling your network adapters, etc.
These fixes should resolve the problem and have a smooth, uninterrupted online experience.
FAQ
Think of the default gateway as a traffic cop. It acts as a link between your computer and the Internet. The default gateway routes traffic when you send a request to access a website or any other online resource.
This ensures that data travels between your PC and the Internet without interruption. The default gateway is vital for easy access to online services and seamless communication.
The “default gateway is not available” error is like a digital highway barrier. This means that your computer can’t find the standard path to connect to the Internet using the default gateway. The default gateway is usually your home router.
The error prevents you from accessing the Internet. Check this page to find solutions to resolve the problem.
The best way to prevent the “default gateway is not available” Windows 10 error is to update your drivers regularly. You can use Auslogics Driver Updater to check and update the drivers automatically. Also, make sure your PC and router are compatible with the same Wi-Fi frequency.