
Entering a web address is the first step of opening a website. It triggers another set of processes that must be completed before you can view the webpage. Your browser has to understand what you typed to connect to the website.Web browsers do not see web addresses the same way we do.
While humans use a combination of numbers and alphabets, called domain names, to identify websites, browsers rely on number-based IP addresses.
Thanks to DNS servers, we do not have to worry about how our computers understand and fetch the information we want so easily. The DNS server works as the Internet’s interpreter, translating those domain names we type to IP addresses.
Just like traditional language interpreters, DNS servers offer different services. At some point, you may need to change your DNS.
In this article we’ll talk about changing DNS servers: why you should switch and all the different ways you can do it.
What Is a DNS Server?
DNS is short for Domain Name System. It is a database that matches IP addresses to hostnames (domain names). Every device connected to the Internet is assigned an IP address, which other devices (and web browsers) use to find and connect to it. Since memorizing – and calling out – IP addresses is difficult for humans, domain names were introduced to make things easier.
So, each domain name is tied to an IP address, which can be found on the DNS database. DNS servers host these databases, and there are different servers out there offering different services.
Some DNS servers focus on speed and stability, while others specialize in security and safety.
Why Should You Change Your DNS Server?
Sometimes, it’s difficult to realize you need to change your DNS server. So, let’s point out what to look out for to know when the time is right.
As mentioned earlier, some DNS servers offer specialized services. So, it depends on what you’re looking for and how well your current server is working for you.
But how do you know whether something else will work better? Here are some pointers:
- Internet speed: Some DNS servers resolve domain names faster than others. If you notice that your browser is taking time to load websites when you know for sure that it should be faster, your DNS might be the reason.
- Content regulation: You can use DNS servers to filter internet content. Some of these services block offensive and inappropriate content so they don’t load on your website. So, if you’re looking for a way to block adult content, gambling websites, and offensive internet pages for parental control or discipline, you can change your DNS to achieve that.
- Security: Some DNS servers can identify and block sites that distribute malicious programs and steal information. If you notice that malware has somehow found its way to your system, it’s time to think about changing your DNS.
- Internet Connection issues: If your browser keeps returning DNS errors, such as ” Your DNS server might be unavailable,” it’s time for a change.
Once you change DNS servers Windows 10 and your web applications will go through the new server whenever they want to resolve any hostname.
How to Change DNS Server on Windows 10
Now that you know why and when to change your DNS server, it’s time to show you how to do it on Windows 10.
You can go through your user interface or use the Command Prompt to change DNS Windows 10 settings. Both methods allow you to change your primary DNS server and add an alternate one, whether you use Internet Protocol Version 4 or 6.
Changing Your DNS Server through the Windows GUI
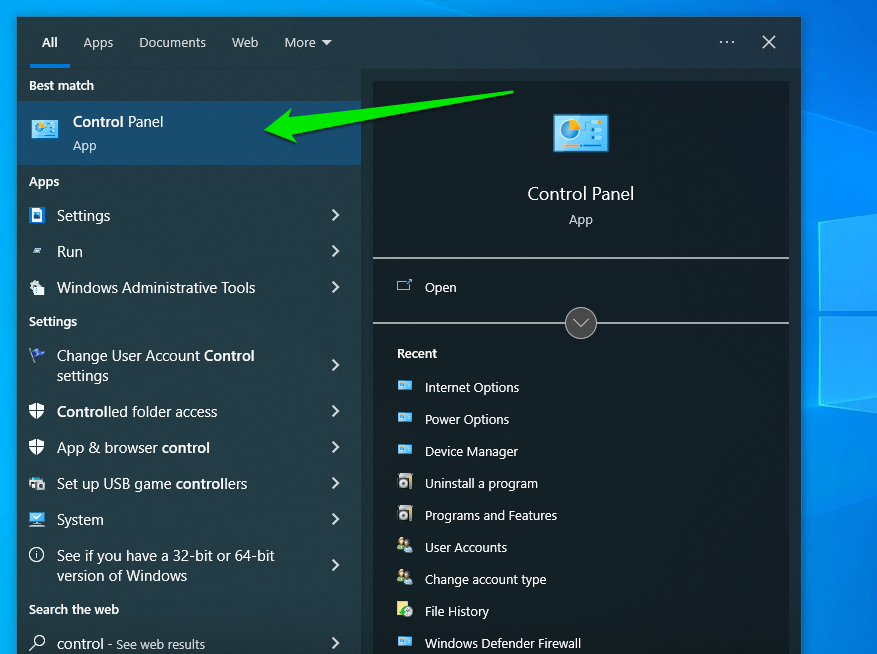
- Open the Start menu and type
Control. - Click Control Panel when it appears in the Start search results.
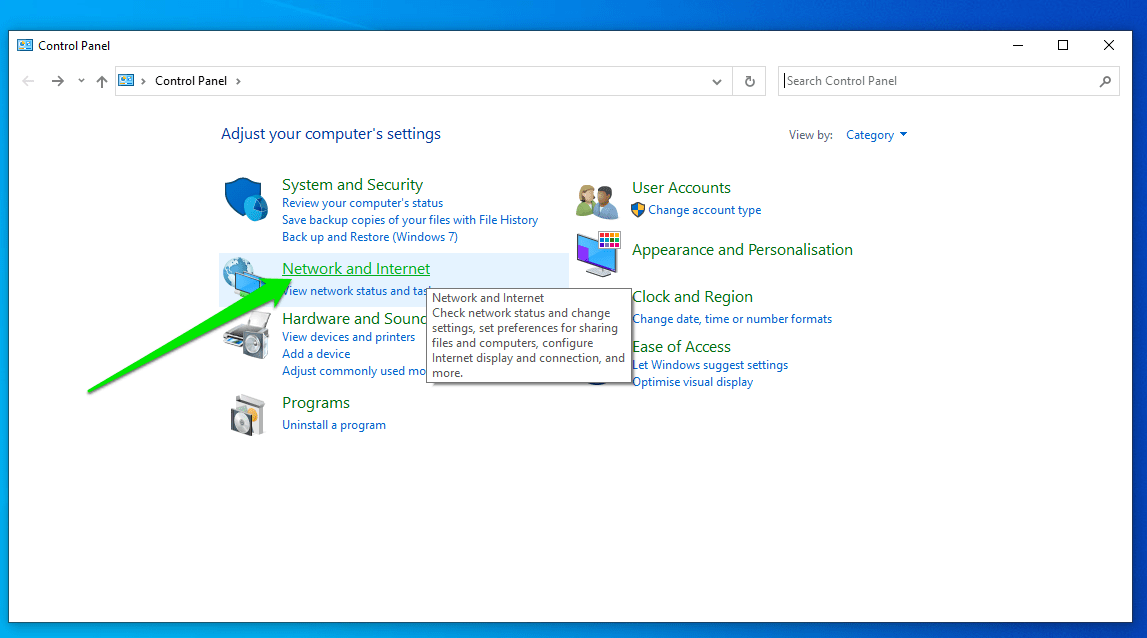
- After the Control Panel window appears, select Network And Internet.
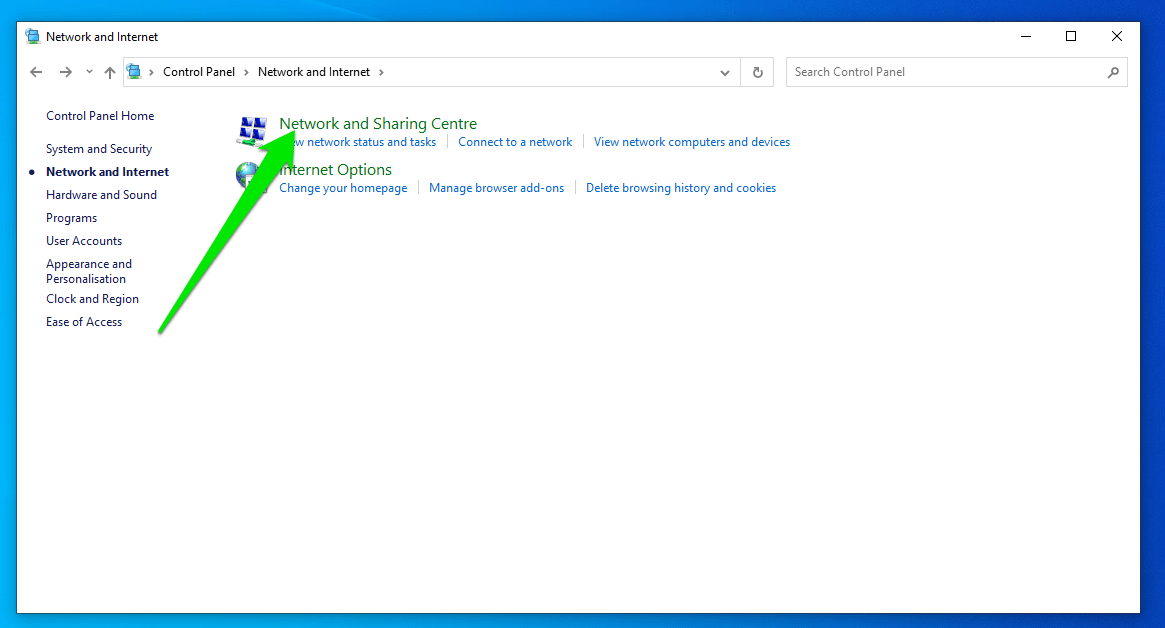
- Click Network and Sharing Center after the Network and Internet page appears.
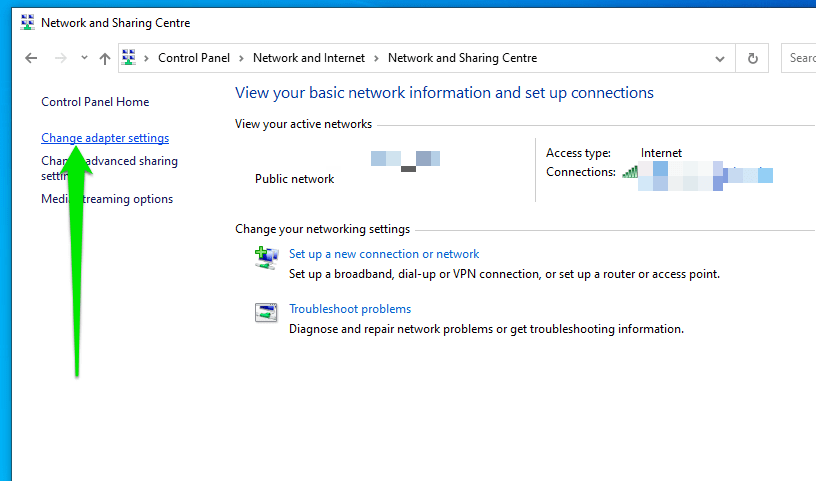
- Switch to the left side of the next page and click Change Adapter Settings.
- Now, right-click the device that provides your internet access and select Properties in the context menu.
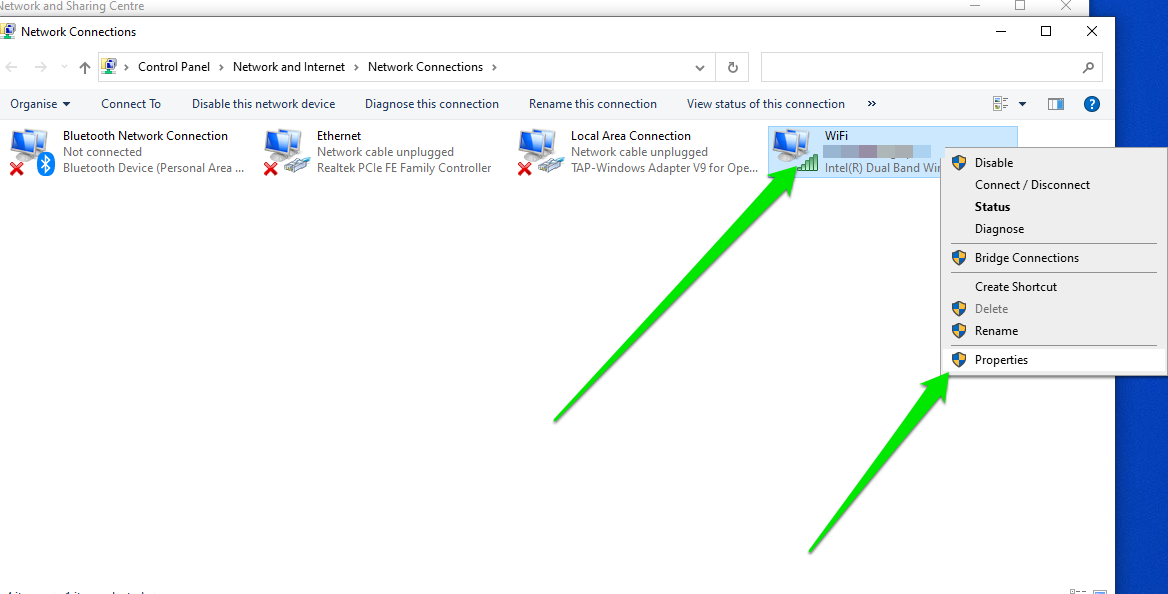
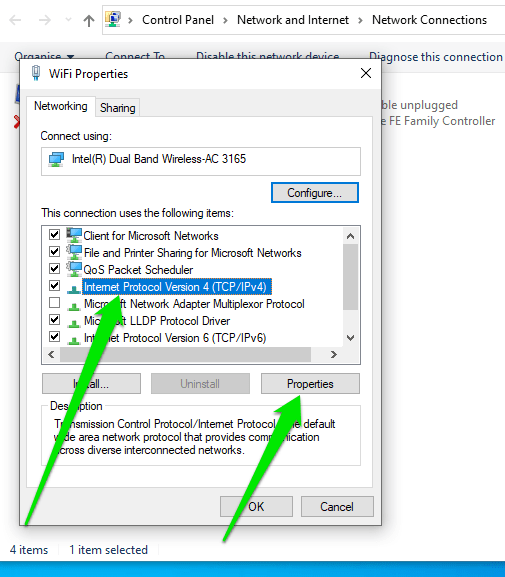
- After the Properties dialog of your internet device appears, scroll through the items below “The connection uses the following items” and click Internet Protocol Version 4 (TCP/IPv4) once to select it.
- Click on Properties right under the list after selecting the item.
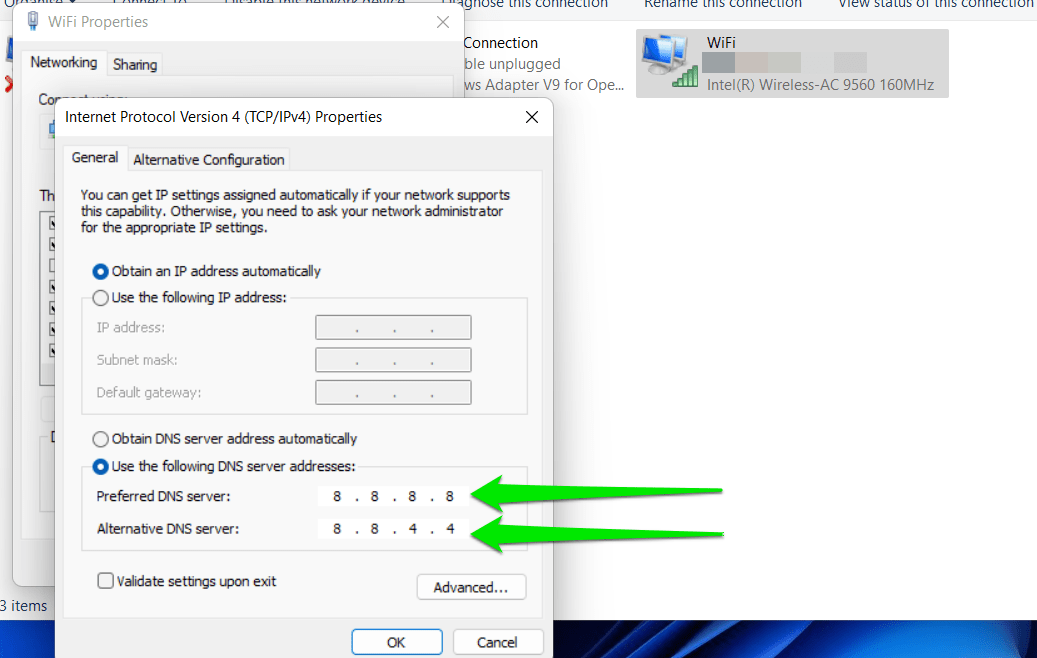
- Select “Use the following DNS server addresses” when the TCP/IPv4 Properties dialog appears.
- Enter the following digits to use Google’s Public DNS:
8.8.8.8 (preferred DNS server)

8.8.4.4 (alternate DNS server)
- Enter the following digits to use Cloudflare’s DNS resolver:
1.1.1.1 (Preferred DNS server)

1.0.0.1 (Alternate DNS Server)
- Click on the OK button.
- If you use IPv6, return to your internet device’s Properties dialog, select Internet Protocol Version 6 (TCP/IPv6), and click Properties.
- Select “Use the following DNS server addresses.”
- Enter the following addresses to use Google’s Public DNS:
2001:4860:4860::8888 (Preferred DNS server)

2001:4860:4860::8844 (Alternate DNS server)
- Enter the following addresses to use Cloudflare’s DNS resolver:
2606:4700:4700::1111 (Preferred DNS server)

2606:4700:4700::1001 (Alternate DNS server)
- Click the OK button in both dialog boxes.
How to Change Your DNS Server With Command Prompt
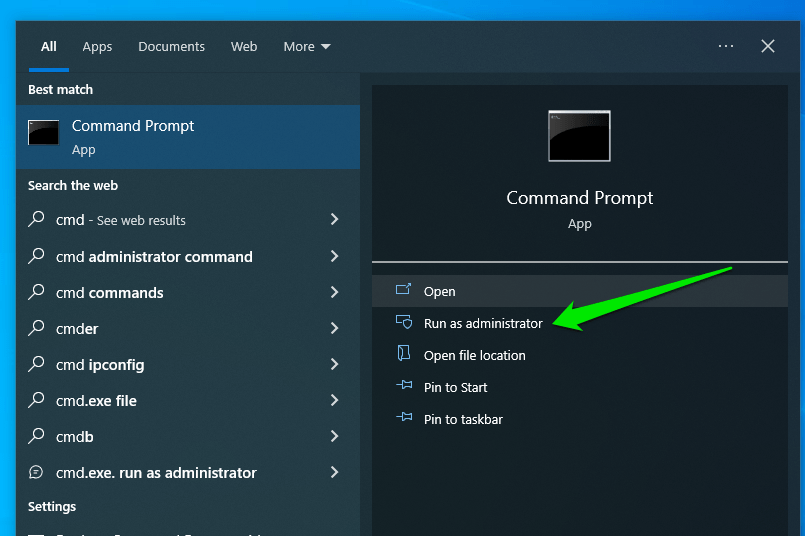
- Open the Start menu and type
commandorcmd. - Click Run as Administrator on the right side of the Start search results under Command Prompt.
- Click Yes under the UAC prompt.
- After the elevated Command Prompt window appears, type
netshand hit theEnterkey.
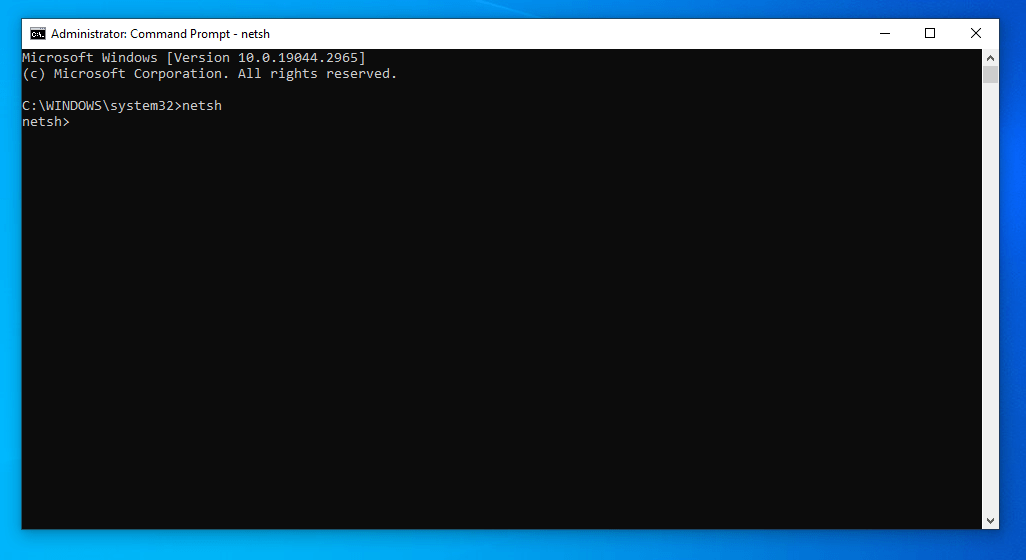
- Go to the netsh> line and type
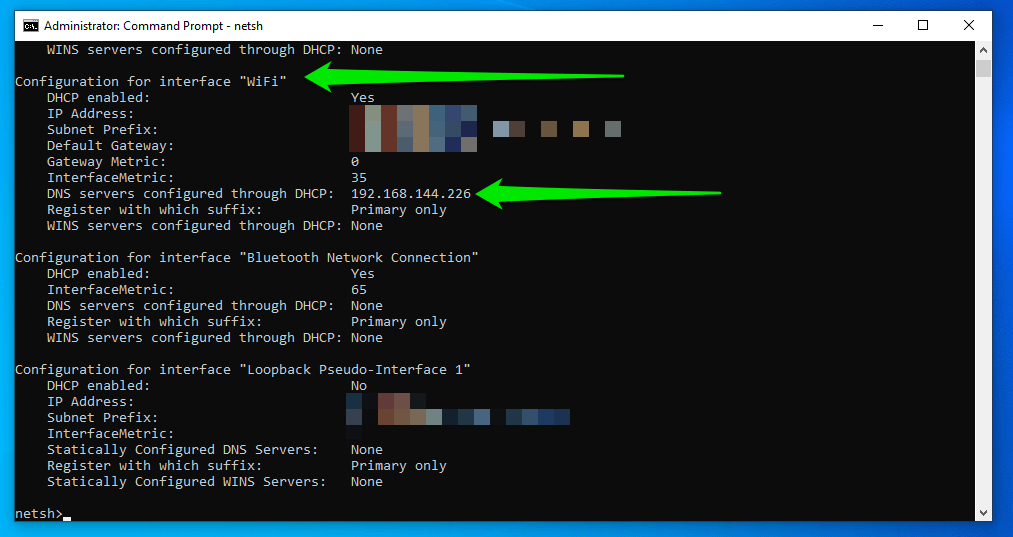
interface ip show configand hit theEnterkey. - This command will display your current connections. Identify the connection you want to modify and take note of its name, as you’ll be using it for the next command. In our case, it’s “WiFi,” and you’ll find that our current DNS address is 192.168.144.226.
- Now, type
interface ipv4 set dns "ConnectionName" static 8.8.8.8and hitEnter. This will change your current DNS server address to Google’s Public DNS (8.8.8.8). - Ours will look like this:
interface ipv4 set dns "WiFi" static 8.8.8.8

- If you want to add a secondary (alternate) DNS server address, type
interface ipv4 add dns "ConnectionName" 8.8.8.8 index=2, and hitEnter. - In our case, it will be:
interface ipv4 add dns "WiFi" 8.8.4.4 index=2

- For IPv6, type
interface ipv6 add dns "ConnectionName" 2001:4860:4860::8888, and pressEnter. - Type
interface ipv6 add dns "ConnectionName" 2001:4860:4860::8844 index=2, and hitEnterto add the secondary (alternate) DNS server. - After changing or adding your new DNS server, check to see if your DNS server settings changed correctly. To do that, type
byein the netsh> line to exit the program. - After that, type
ipconfig /alland hitEnter.
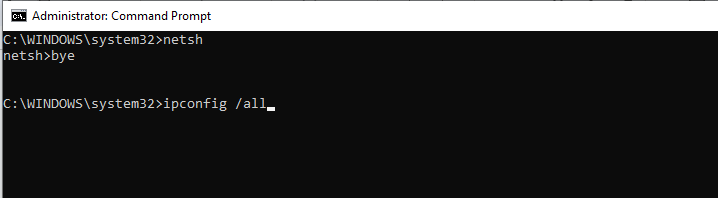
- The command will display your network configuration.

Changing Your Browser’s DNS Server
While your browsers use your operating system’s DNS server to resolve domain names, you can choose another DNS server in most modern web browsers. This way, you can enjoy different DNS services, especially if you use multiple web browsers. Using a browser-based DNS server means you don’t have to modify the DNS settings that Windows 10 may need to perform some operations, such as updating the operating system.
Follow these steps to use a custom DNS in Mozilla Firefox:
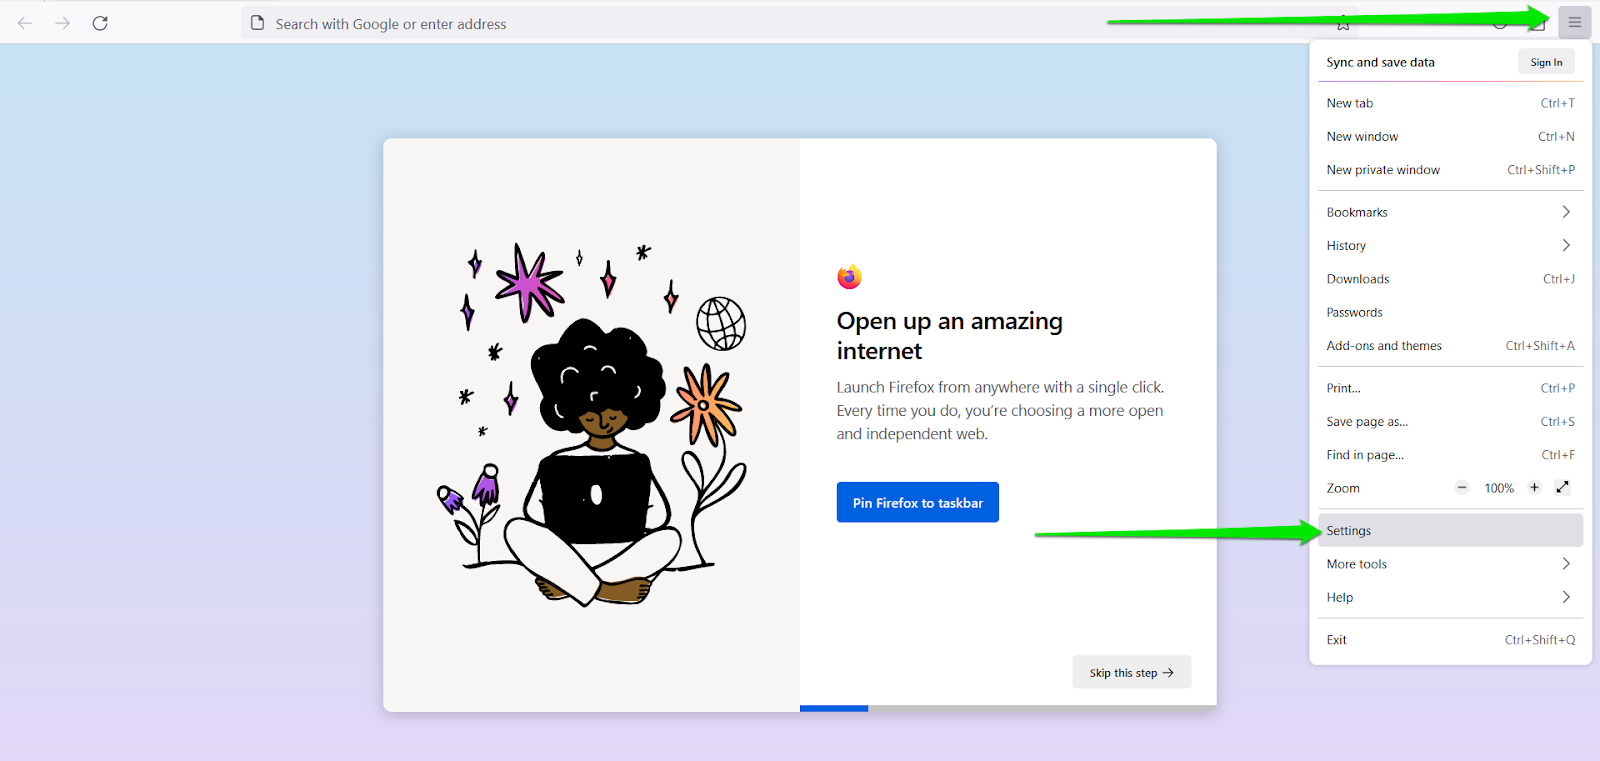
- Launch Mozilla Firefox.
- Go to the top-right corner and click the three lines.
- Select Settings from the menu.
- After the Settings page appears, go to the left side of the screen and click Privacy & Security.
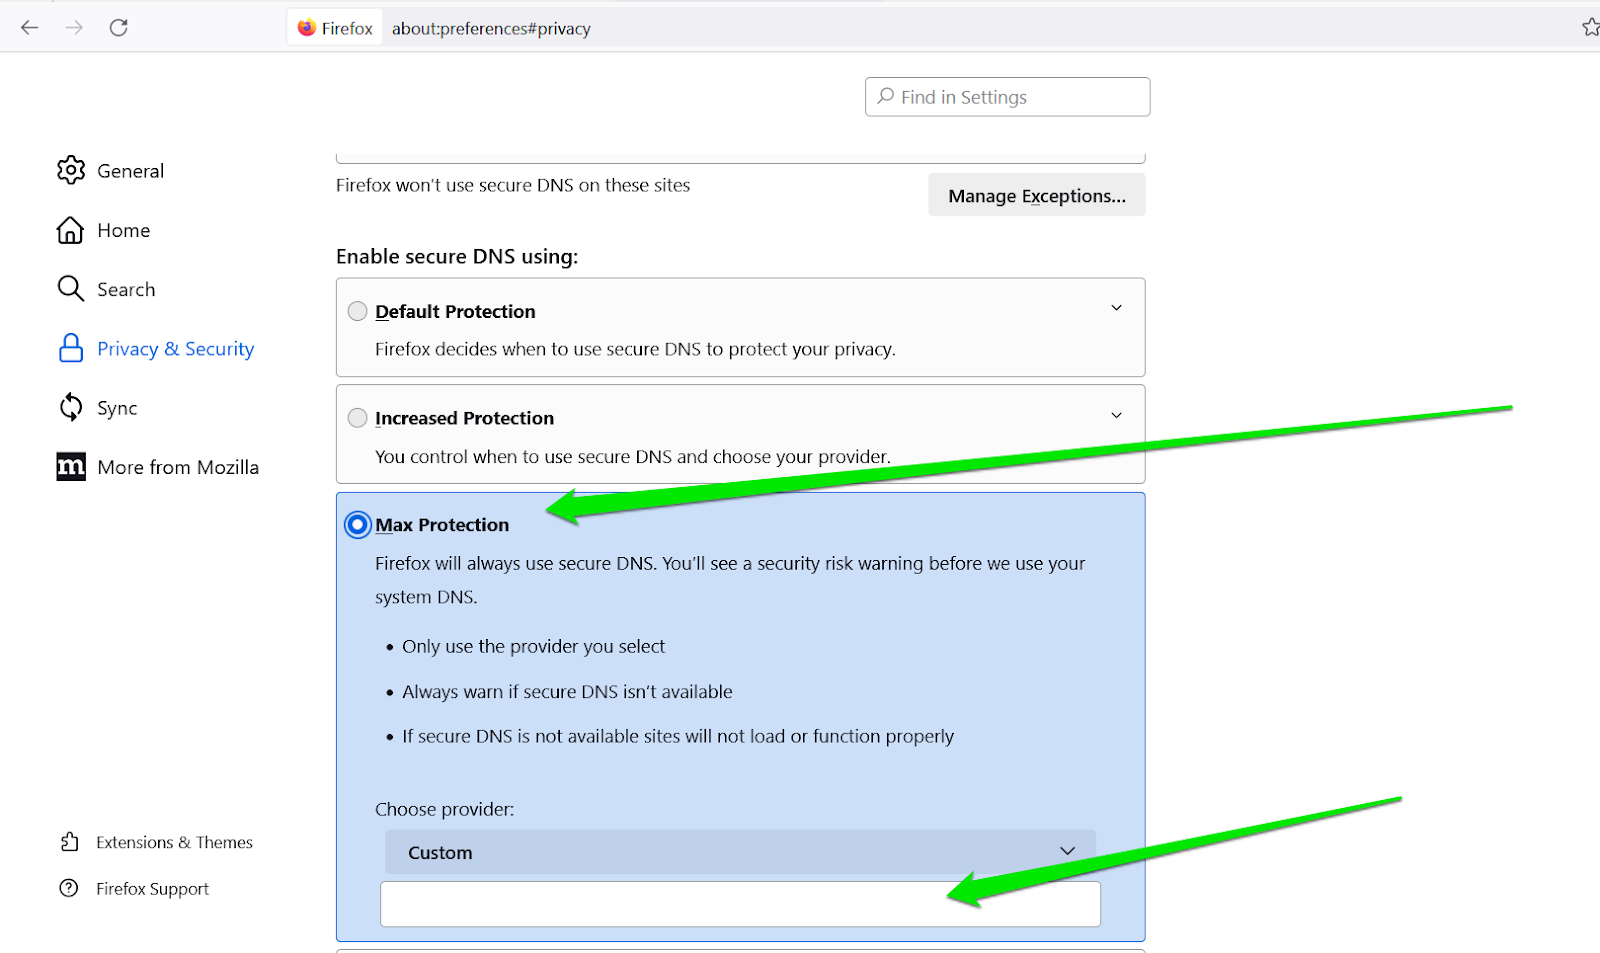
- Scroll down to the DNS over HTTPS section and select Increased Protection under “Enable Secure DNS Using.”

- You can then enter a custom provider in the text bar or use Firefox’s default, which is CloudFlare, if that is your choice.
- Note that this option allows the browser to use your system’s default DNS server if your custom server encounters a problem.
- If you do not want Firefox to ever use your system’s default DNS, choose Max Protection and enter your custom DNS.
- You can go back to Default Protection or select Off if you want the browser to start using your DNS again.
Follow these steps to use a custom DNS in Google Chrome:
- Launch Google Chrome.
- Click the three dots in the top-right area and click Settings in the menu.
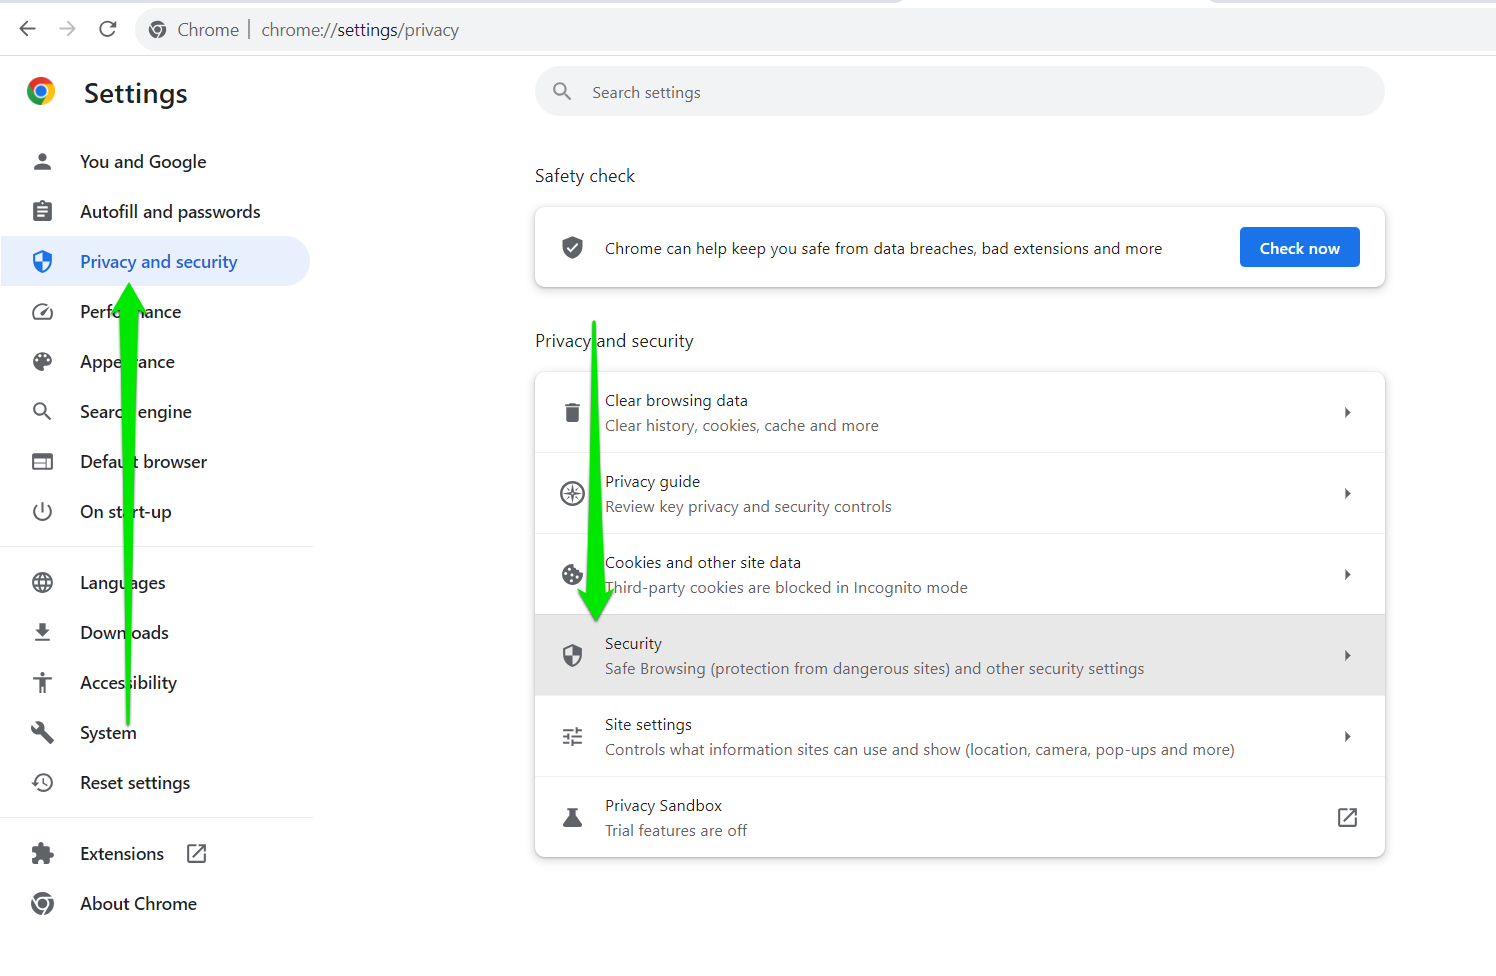
- Click Privacy and Security on the left side of the Settings page.
- Go to the right side of the screen and click Security.
- Scroll through the Settings page until you see the Advanced section.
- Under Use Secure DNS, select the radio button next to “With” and choose an option from the drop-down menu. You can choose Customized if you have a DNS you want to use that isn’t on the list.
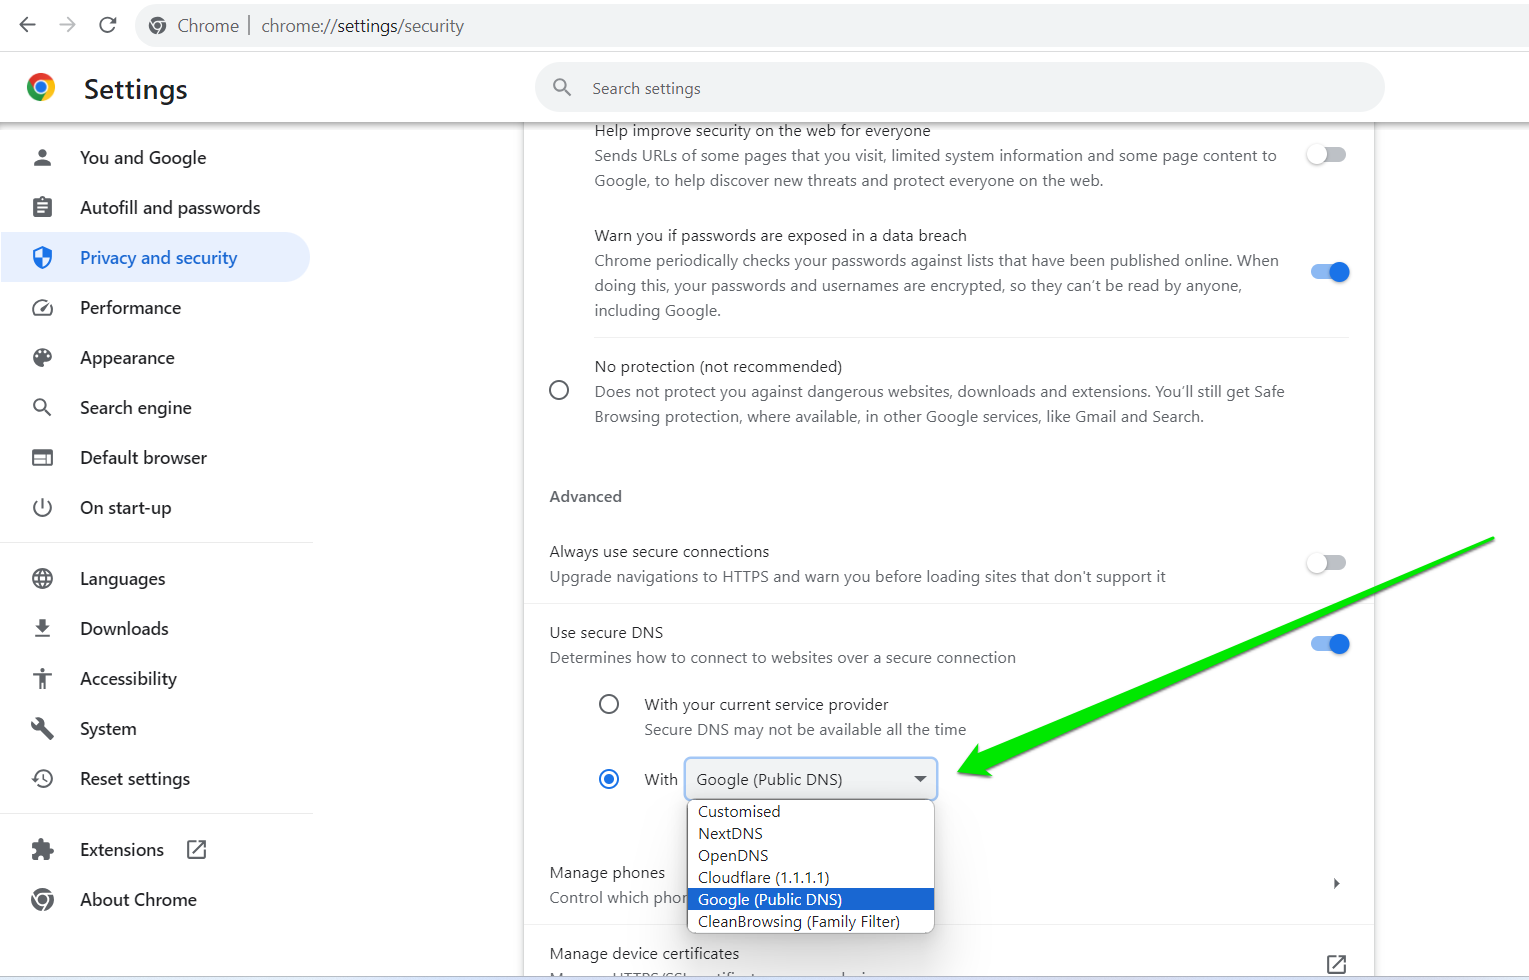
- You can choose “With your current service provider” whenever you want to switch back to your system’s default DNS.
Follow these steps to use a custom DNS in Microsoft Edge:
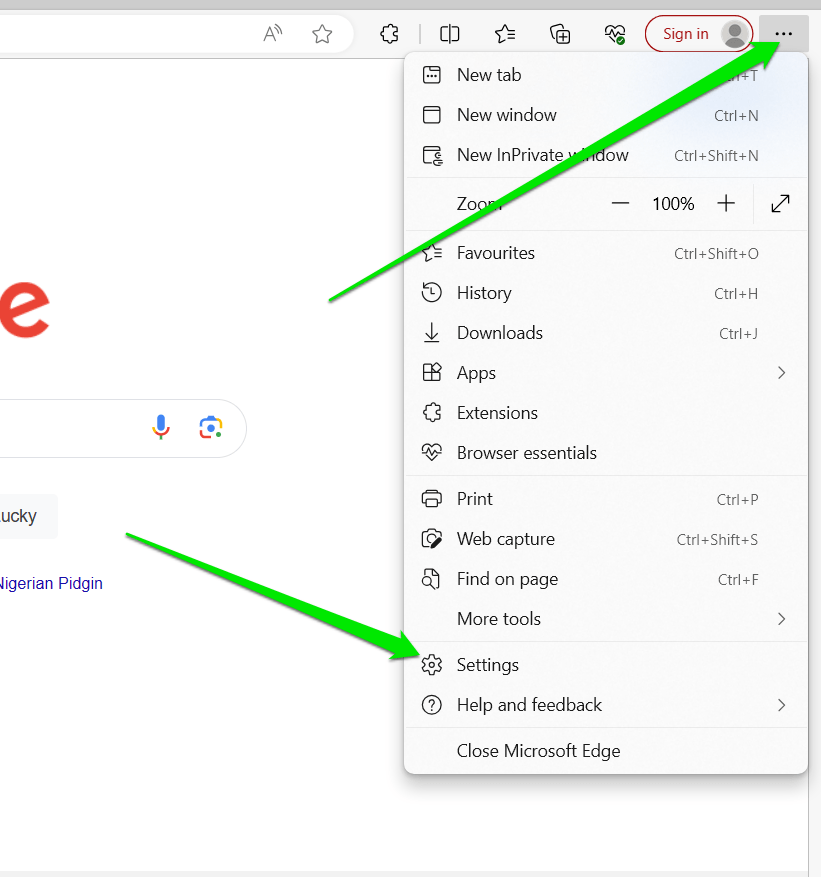
- Open Microsoft Edge.
- Go to the top-right corner, click the three dots, and select Settings.
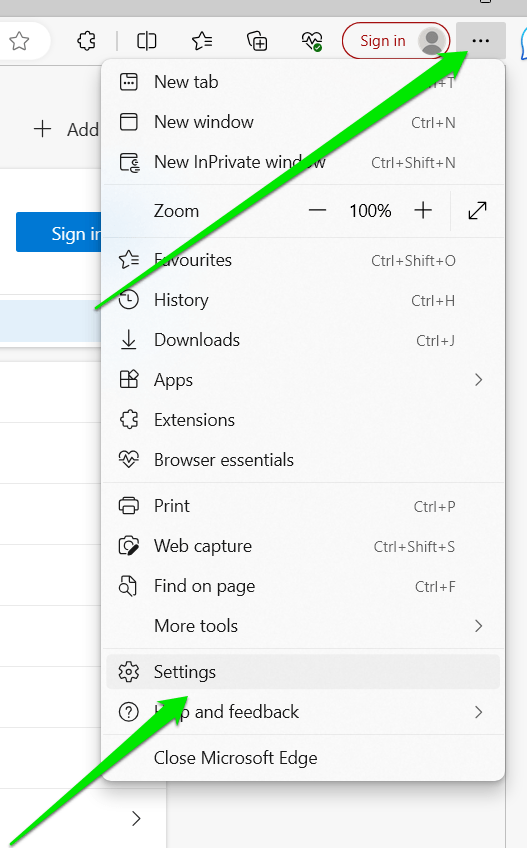
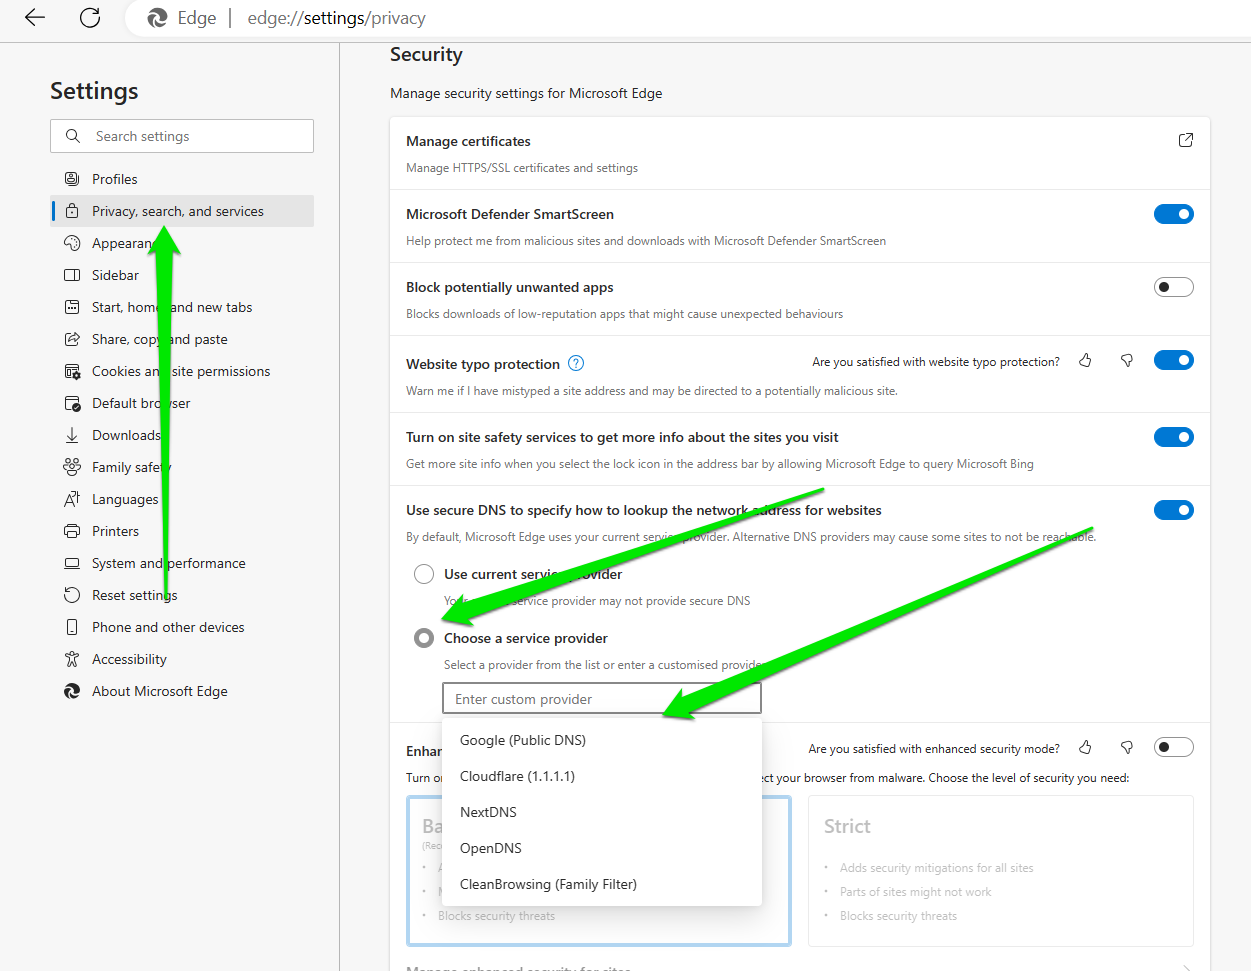
- After Settings opens, click “Privacy, search, and services.”
- Go to the right side of the screen and scroll to Security.
- Select “Choose a service provider” and pick a DNS server.
Flush your DNS Cache
Applying your DNS settings may not be complete without flushing your DNS cache . Your system’s DNS cache is a temporary storage area that stores recently accessed domain names and their corresponding IP addresses.
The cache helps to speed up the process of resolving domain names to IP addresses, as the device can quickly access the cached information instead of querying a DNS server every time.
Flushing your DNS cache gives it a clean slate and allows it to rebuild information using your current DNS.
Follow these steps to flush the cache:
- Open the Start menu and type
commandorcmd. - Click Run as Administrator on the right side of the Start search results under Command Prompt.
- Click Yes under the UAC prompt.
- After the elevated Command Prompt window appears, type
ipconfig /flushdnsand hit theEnterkey.
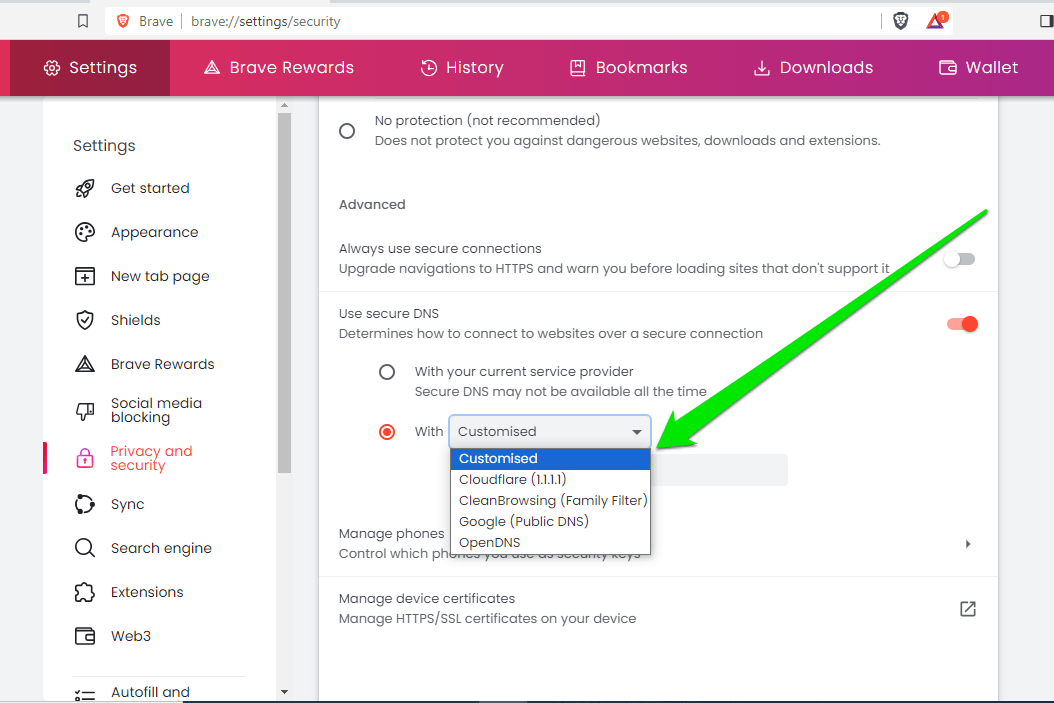
Follow these steps to change your DNS in the Brave Browser:
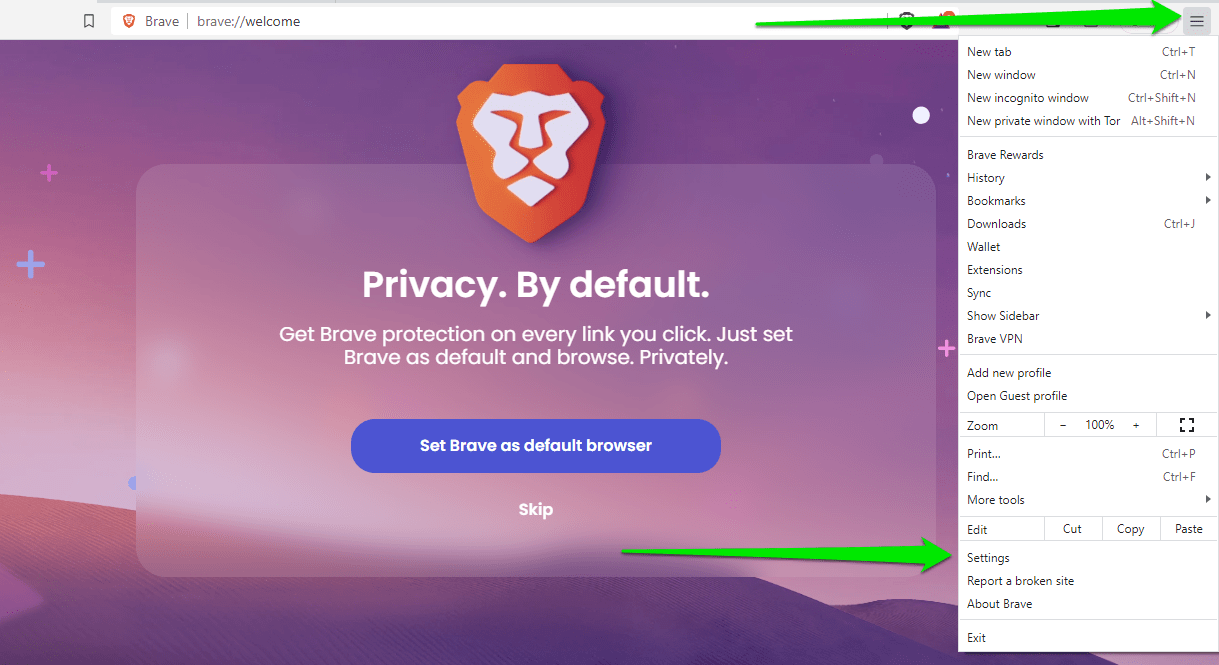
- Launch Brave.
- Go to the top-right corner, click the three lines, and select Settings from the menu.
- After the Settings page appears, go to the left side of the screen and click Privacy and Security.
- Click on Security.
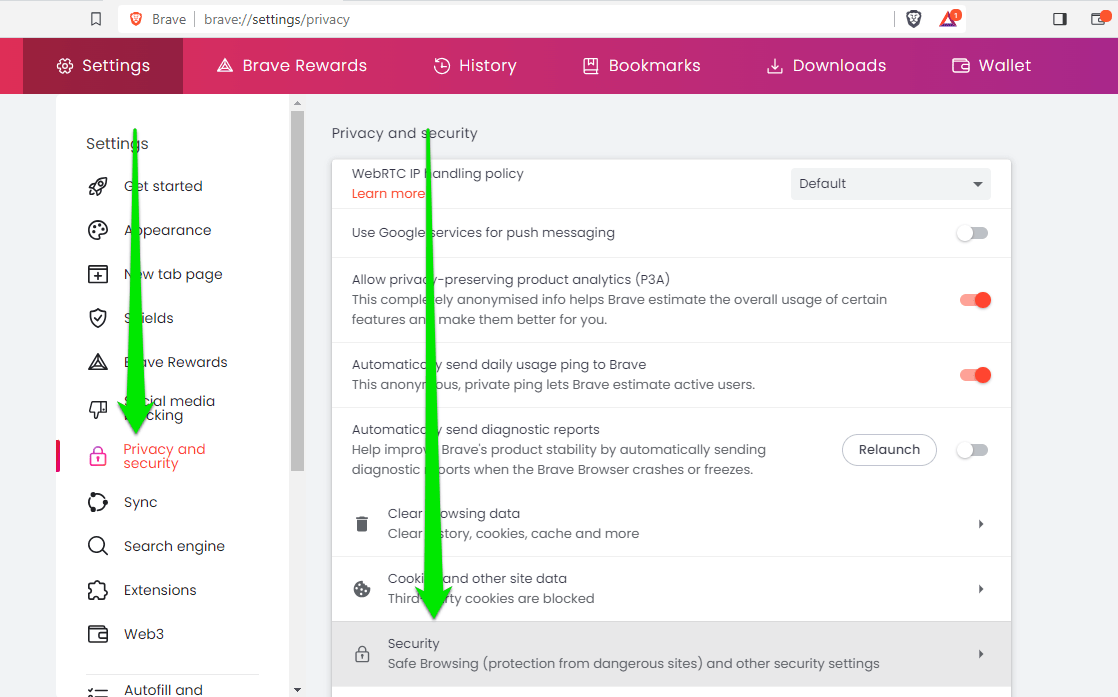
- Scroll down to Advanced, select “With,” and choose an option from the drop-down menu.
Conclusion
After changing DNS servers Windows 10 will route your internet traffic through your preferred domain name system, allowing you to enjoy a smoother service or cleaner internet browsing experience, depending on what you choose.
Let us know in the comments section if you’ve had any issues with your DNS and how you solved them.
FAQ
ipconfig /flushdns
You can remove the adware application by going to the Control Panel, clicking on Uninstall a Program, and removing the application.
You can also run a full scan using your antivirus program.