
Windows has made it easy, especially in Windows 10 and 11, to work with multiple windows at the same time. This guide will show you h ow to split screen on Windows 10 and 11 so you won’t have to switch between windows to view two items simultaneously. Here’s how to do a split screen on Windows 10 and 11 to improve your organization, increase productivity, and simplify your multitasking.
Tips Before Splitting Screens: Adjust Your Settings
Before you learn how to split screen, there are some tips to keep in mind.
Windows has a built-in feature called Snap that helps you position your windows without manually changing the shape and size of each.
Regardless of where you drag a window, it’ll snap into place. You can adjust the feature in the Settings.
Here’s how:
- Press “Windows logo + I” to open the Settings window.
- Click on “System” and select “Multitasking.”
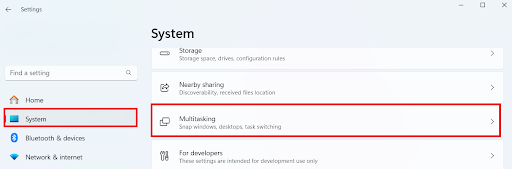
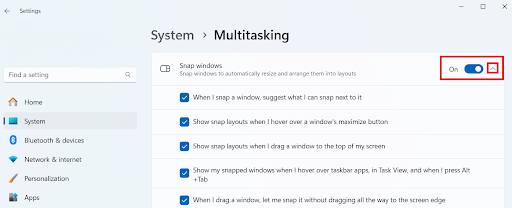
- You can switch the “ Snap windows” on or off. You can also click the drop-down menu beside the on and off button and adjust the settings.
You can also consider personalizing your taskbar settings to simplify switching between open windows.
Depending on your option, you can show all open windows on the taskbar or just those currently on your desktop.
In the following sections, we’ll discuss how to split screen on your PC , whether Windows 11 or 10.
How to Split Screen on Windows 10
Here’s how to split your computer screen using Snap Assist:
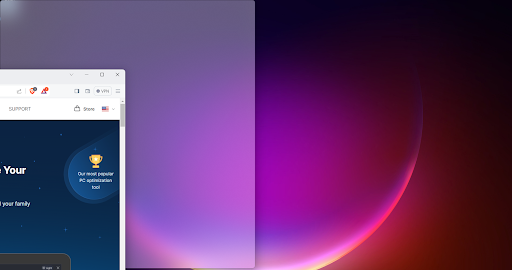
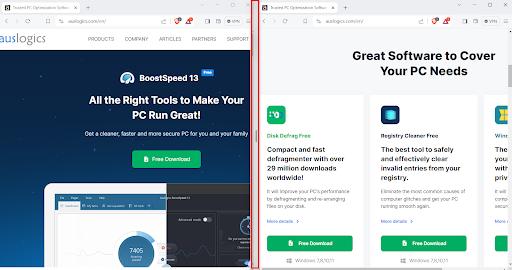
- Select the window to snap to one side of the screen. Then, drag it to the edge.
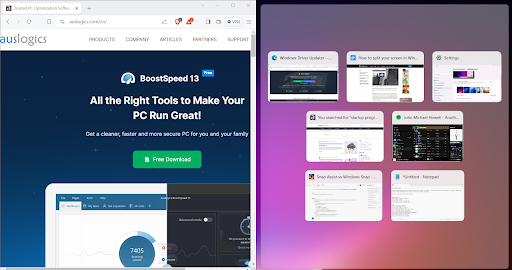
- After snapping the window, you can select other applications that are opened to move them to the second half. When you click on one, it’ll immediately snap into position.
- Place your cursor over the dividing line until it turns into two arrows to resize the two windows. Click and hold the divider to adjust the windows. However, remember that there is a limit to how small a window can be.
We recommend using Auslogics Driver Updater to update your drivers automatically. For the scaling issues, go to display settings to fix the problem.
Check this guide to manage startup programs: How to Disable Startup Programs in Windows 10.
How to Split Screen on Windows 11
With Windows 11, you can split their screens more efficiently thanks to a new productivity-boosting feature called Snap Layouts.
Snap Layouts offer up to six ways to arrange Windows, just like Snap Assist in Windows 10.
These layouts include three side-by-side windows on large landscape displays and stacked top or bottom windows on portrait screens.
They are optimized for different screen sizes and orientations. Here’s how to do a split screen on Windows 11:
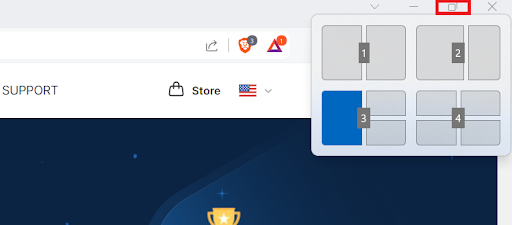
- Press “Windows key + Z” or hover your cursor to the “Maximize” button.
- You’ll see a box display at the top right corner of your screen. Choose one of the available options to start the split screen.
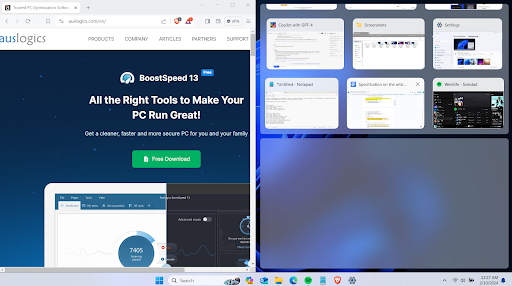
- Windows will launch the task switcher and allow you to select another open window. When you select an open window, it’ll snap into place.
Related: How to Fix Windows 11 Snap Layouts Not Working
Shortcut Keys for Quick Split Screen on Windows
Windows offers useful keyboard shortcuts to split your screen. Check the shortcuts below to learn how to split the screen on Windows 10 using your keyboard. However, remember that you can also use these keyboard shortcuts in Windows 11.
Windows key + Left arrow: Shifts the window to the left.
Windows key + Up arrow: Moves the window upward.
Windows key + Down arrow: Moves the window downward.
Pressing the Windows key plus the right or left arrow keys causes the window to move and divides the screen in half. That’s how to open two windows side by side.
In the same way, you can divide the window into quarters by pressing the Windows key plus the up or down arrow key.
Once the first window is in place, just click on another one to have it appear next to it, or choose an open window to make it appear first.
Continue doing this until the screen arrangement suits your preference.
How to Snap More Than Two Windows in Windows 10 or 11
You can divide your large or high-resolution screen into four sections with Corner Snap. Here’s how to do a split screen on your laptop with high-resolution screens:
- First, drag and drop your first window into any corner.
- Drag and drop your second window into any available corner. Remember: you can’t select a specific corner.
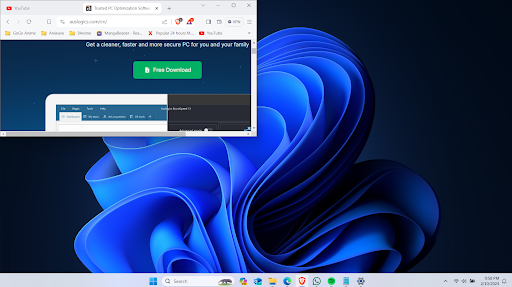
- Repeat step 2 to fill the remaining two corners.

So, if you want to know how to split one monitor into two screens or four, you can do it without any challenges.
This is a helpful feature since the snapped windows stay as a unit. So, you can open a different program, and the snapped windows will still stay together until you return.
How to Divide Screen on Windows with Third-Party Apps
Although Windows 10 and 11 have an excellent split-screen feature, third-party apps offer more functionality. Some of the apps include Spectacle, AquaSnap , GridMove, etc. For example, GridMove was designed to make window management easier. It makes your desktop look like a visual grid to snap windows to specific places quickly. The application offers tools to create custom grids, share other people’s grids, and preset grid designs. With just a drag and drop, you can resize, relocate, and maintain windows at the top of the screen.
Conclusion
Learning how to split screen on Windows 10 or 11 can significantly improve your productivity and workflow.
Throughout this guide, we’ve discussed various ways of how to divide screens on Windows. We’ve also included keyboard shortcuts and tips to streamline your multitasking experience!
You can also experiment with third-party apps like AquaSnap to customize the grids.
How are you using the split screen to your advantage? Let us hear your thoughts, suggestions, tips, etc., in the comments section below!
FAQ