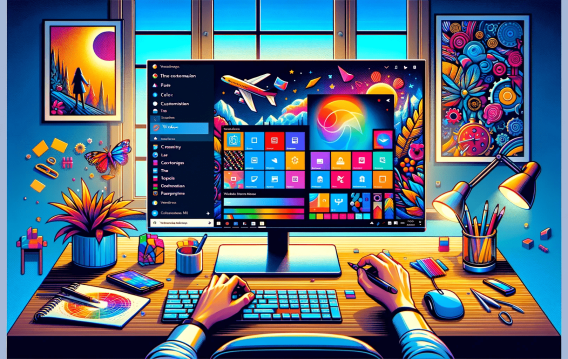
These latest iterations of the OS provide users with an extensive array of options for creating custom themes, allowing for an even more tailored computing experience.
Whether you’re aiming to enhance the aesthetic appeal of your desktop or seeking a setup that aligns with your workflow preferences, Windows 10 and 11 cater to a diverse range of customization needs.
Why Create Custom Themes in Windows?
Creating custom themes in Windows 10 and 11 is much more than just altering the color scheme and desktop backdrop. It also includes fully customizing the music settings, the appearance of the mouse cursor, and the system mode (light or dark). With this degree of personalization, users can design a computer environment that suits their needs for comfort and productivity in addition to aesthetics.
- A person who spends a lot of time at their computer might, for example, choose a dark theme to lessen eye strain, while someone else would go for a bright and colorful theme to keep their workstation interesting and energetic.
- By making windows and icons simpler to view and use, custom themes can significantly enhance user engagement.
- By improving accessibility to regularly used materials, they can also lessen cognitive burden and increase productivity.
More importantly, having the option to design a custom theme brings a personal touch of originality and fun to the user experience. It enables people to use their computing environment to express their personality and preferences, which enhances and personalizes every encounter with a PC.
📌 Also read: Windows 10 Display is Too Big for a Monitor
How to Create Themes in Windows 10
Creating a custom theme in Windows 10 allows you to personalize your digital environment to suit your preferences for visuals, sounds, and overall usability. Follow these instructions to craft a theme that reflects your style:
- Press Win + I to open the Settings app.
- Once in Settings, click on Personalization. This section houses all the tools you need to start creating your custom theme.
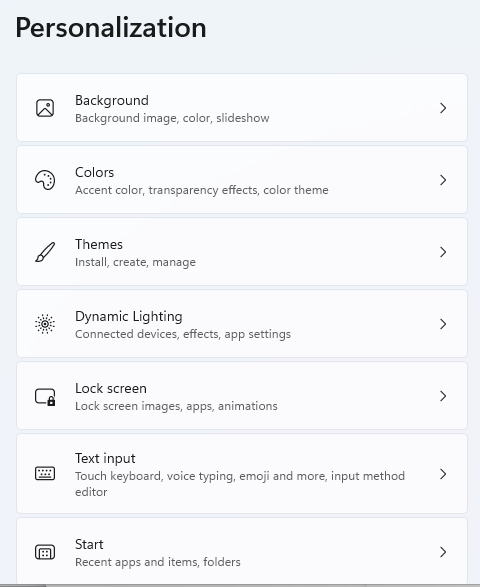
- In the Personalization menu, select Themes from the left pane. Here, you can see your current theme and other available themes.

- To start customizing, you can either select an existing theme to modify or click on Theme settings to start from scratch.
Here’s how to edit a theme in Windows 10:
Customizing Background
Under Background, you have three options:
- Picture: Select an image from your collection or use one of the Windows defaults. Click Browse to choose an image from your files.
- Solid color: Choose from a palette of colors to set as your desktop background.
- Slideshow: Select a folder with images, and Windows will cycle through them at an interval you specify.
Choosing Colors
Moving to Colors, you can select a Light, Dark, or Custom theme. The Custom option allows you to mix and match colors for a more personalized look. Further down, you can choose an accent color or let Windows pick an accent color from your background.
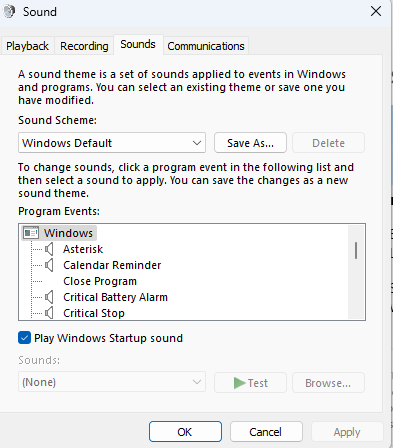
Adjusting Sounds
For sounds, navigate to Sounds within the Personalization > Themes section. Here, you can select a sound scheme that changes all system sounds at once or customize each event sound individually. Choose Sounds to open a dialog where you can assign different sounds to program events.
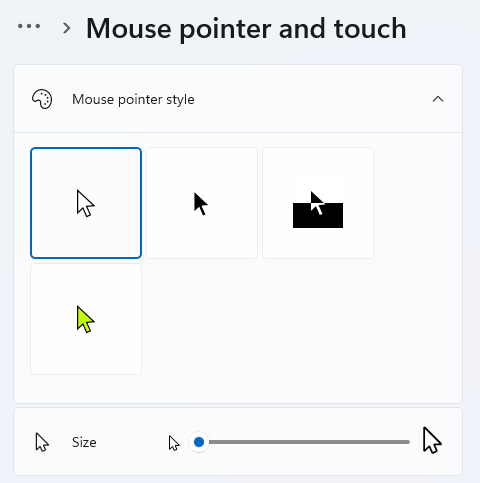
Modifying Mouse Cursor
The Mouse cursor option is found under Mouse settings in the main Settings app.
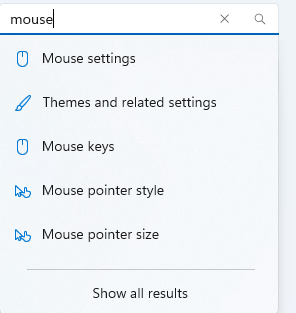
You can change the cursor’s appearance by selecting from a variety of schemes or customize each cursor action (like text selection or hyperlink hover) in the Pointers tab.
Saving Your Theme
Once you are satisfied with your customizations, go back to the Themes section in Personalization.
- Click Save Theme, give your theme a name, and it will be saved for future use or sharing.
Creating a custom theme in Windows 11 shares many similarities with the process in Windows 10, reflecting Microsoft’s commitment to maintaining a consistent user experience across its operating systems. However, Windows 11 introduces a more streamlined interface and additional customization options that cater to the evolving tastes and preferences of users. Here’s how to navigate the theme creation process in Windows 11, along with tips for further personalizing your operating system.
📌 Also read: How to Customize Your Microsoft Edge Homepage and Settings
How to Create Themes in Windows 11
Similarities with Windows 10The foundational steps for creating a custom theme in Windows 11 are virtually identical to those in Windows 10.
Additional Customization Steps Specific to Windows 11
Windows 11 builds on the customization options available in Windows 10 and adds several new options for tailoring your experience.
- One notable addition is the enhanced range of themes directly accessible from the Personalization menu, designed to complement Windows 11’s modern aesthetic.
- Additionally, Windows 11 introduces more granular controls over system and app light/dark modes.
- Adding virtual desktops with different backgrounds and changing how the taskbar looks and works gives users more ways to make their computer feel personal.
📌 Also read: Windows Tweaks: How to Customize Your Windows 10/11
Downloading Themes from the Microsoft Store
Looking to refresh your Windows theme without the effort of crafting one from scratch? The Microsoft Store is your go-to, offering an array of both free and premium themes to effortlessly enhance your desktop’s look. This convenient option is available on both Windows 10 and 11, with the download process being straightforward across both versions.
Here’s how to how to install Windows themes:
- Hit Win + I to open the Settings menu.
- Once in Settings, select the Personalization option.
- In the Personalization menu, click on Themes from the list on the left. Then, find and select the option to Get more themes in the Microsoft Store, which is typically located on the right.

- You’ll be directed to the Microsoft Store, where a variety of themes are displayed. Browse through the selection and click on a theme that catches your eye.
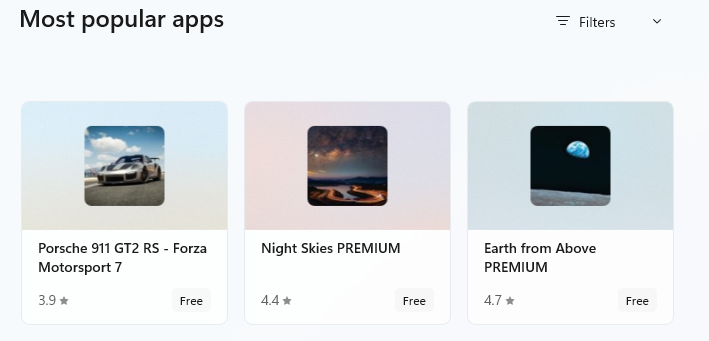
- Click the Get button to initiate the download of your chosen theme.
- Return to the Personalization settings, where your newly downloaded theme will be listed. Click on it to apply and transform your desktop instantly.
Extra Tip: Personalizing Your Windows Operating System Further
Windows 10 and 11 let you change your computer’s look a bit, but you can do much more with extra programs. For example, you can use programs like Rainmeter for custom desktop widgets. Websites for Windows customization offer lots of cool stuff like new icons, mouse cursors, and themes that can make your computer look unique. Playing with these tools can really change how your desktop looks and works, making it fit your style and how you like to do things.
Also Read:How to Set a Dual Monitor Wallpaper on Windows 10 And 11?
Creating Custom Themes in Windows
Whether you’re updating an existing Windows 10 theme or diving into the new features of Windows 11, the journey to a more personalized computing experience is both accessible and rewarding. With a mix of built-in options and third-party enhancements, your Windows operating system can become a reflection of your personality and a workspace that inspires productivity and creativity.