
- What Is the Error Code 0x426-0x0?
- How to Fix the Microsoft Office Error Code 0x426-0x0
- First fix: Repair Office
- Second fix: Enable the Click-to-Run service
- Third fix: Add Microsoft Office as an exception in your antivirus
- Fourth fix: Uninstall AVG TuneUp
- Fifth fix: Allow Microsoft Office through your firewall
- Sixth fix: Find and replace faulty Windows files
- Seventh fix: Remove the old Office installation
- Eighth fix: Perform a clean boot
- Ninth fix: Reinstall Microsoft Office
- Conclusion
It’s hard to live without some Microsoft Office applications if you use a Windows PC. Often, the stress of finding their replacements won’t be worthwhile if you weigh the pros and cons. Even if you encounter an error, the practical course of action would be to rectify it.
Being on this web page means you’re seeing the Microsoft Office error code 0x426-0x0 whenever you try to install or open an Office application.
What Is the Error Code 0x426-0x0?
The error is usually an indication that something has gone wrong with files and processes related to the installation or update process. Normally, it shows up when you try to launch an Office program. The issue might be connected to that particular program, but in certain cases, it signals something might be wrong with the entire Office suite.
The common causes of the problem include:
- Broken office installation files
If installation files go missing or become corrupt, it will be impossible to start any program. In this case, the files of the app you’re trying to launch might be the affected ones. It’s also possible that all the Office have gone bad. This might have happened due to a problematic shutdown or virus infection.
There are other reasons that could explain the situation, but what’s important is to replace those damaged files.
- Disabled Microsoft Office Click-to-Run Service
The Click-to-Run service is critical for streaming Microsoft updates while the program is running. Disabling the service might trigger the error.
- Old Office installation
A previous Microsoft Office installation might be conflicting with the latest version. Are you one of the users who like to enjoy the features of two different versions? If you are seeing the error, then this might be the issue.
- Firewall or antivirus interference
Antivirus and firewall programs often block legitimate processes that they consider to be threats.
- Conflicting third-party applications
Software conflicts are another issue to be looked at. Some third-party applications or services might be interfering with the Office process, causing the error to appear.
We’ll be showing you how to deal with these issues to get rid of the problem.
How to Fix the Microsoft Office Error Code 0x426-0x0
To get rid of the error code, you have to resolve every underlying issue. The solutions in this article have helped many users remove the error message for good.
So, follow the fixes one after the other.
First fix: Repair Office
Since faulty installation files are one of the reasons for the problem, fixing them is one way to go about getting rid of the error. For many users, this was the effective solution.
There are two main ways to repair Microsoft Office. You can go through the Control Panel or through the Settings app.
If your Office installation is Click-to-Run-based, then using the Apps and features section of the Settings app is the right thing to do.
The steps below will walk you through the process of repairing Office via Settings.
- On your taskbar, right-click the Windows logo.
- From the menu, click on Apps and features.
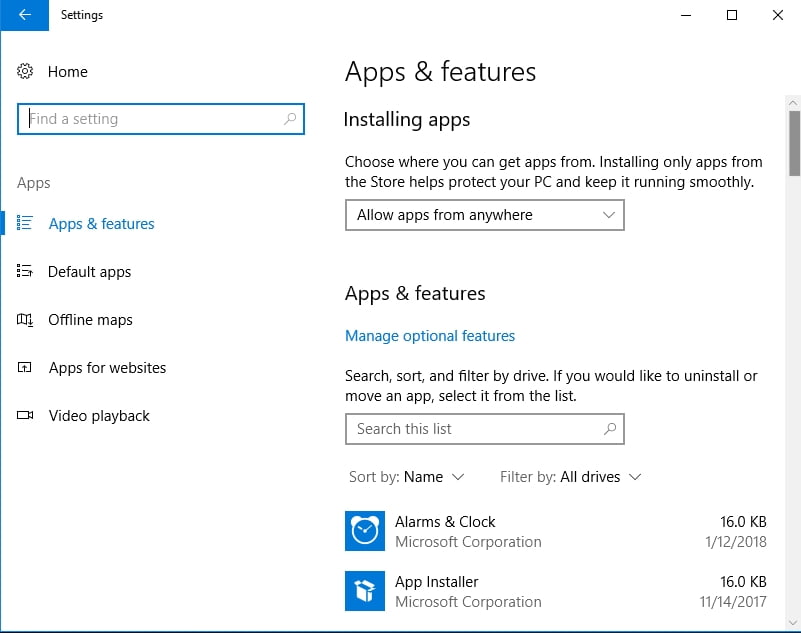
- After the Apps & features interface opens, use the search box to summon Microsoft Office.
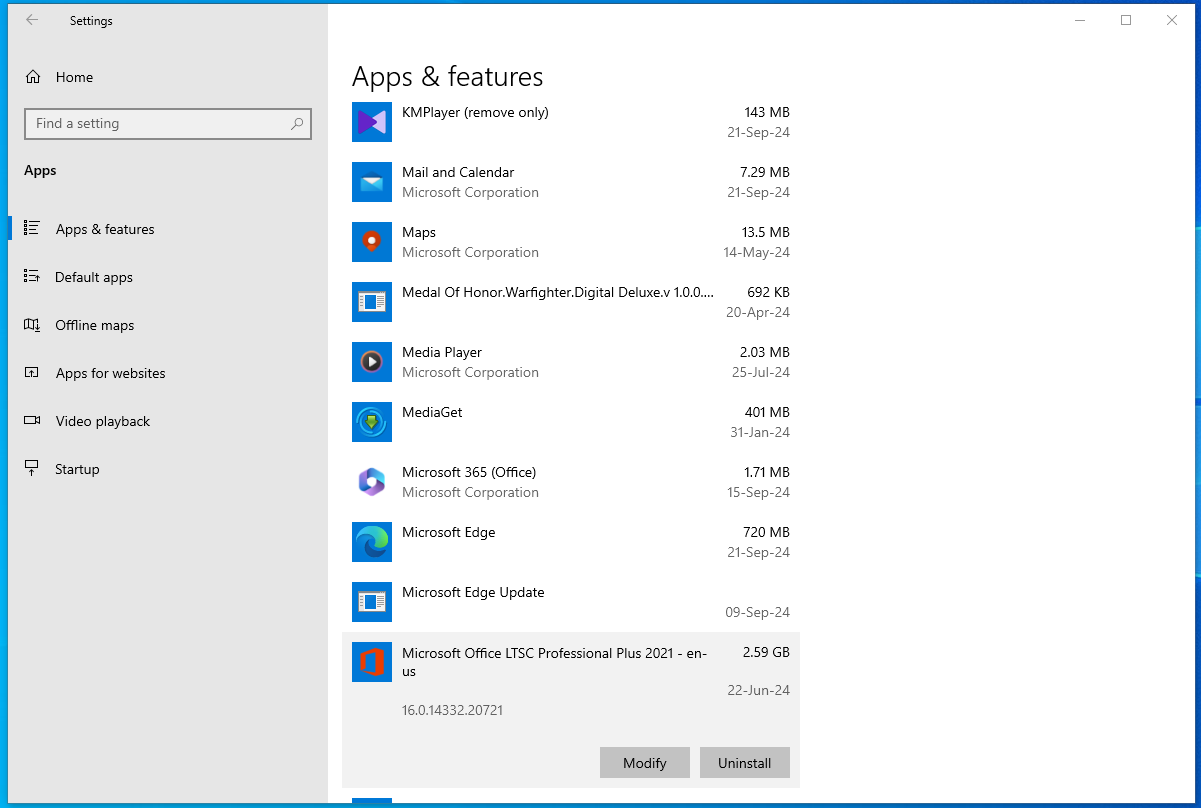
- Once you see Microsoft Office, click on it, and then click on the Modify button.
- Click on Yes once the User Account Control dialog opens.
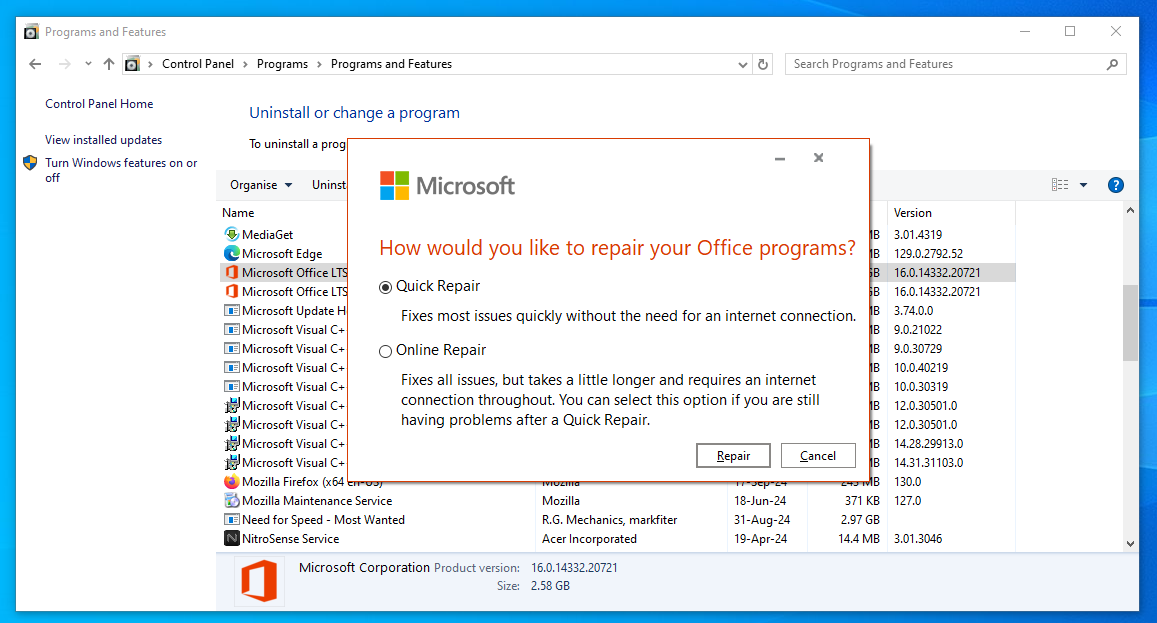
- A dialog window will now open asking how you’d like to repair your Office programs.
- Going for Quick Repair will use the offline utility that resides in your system to check for common problems and fix them. If that doesn’t resolve the issue, go ahead and run Online Repair.
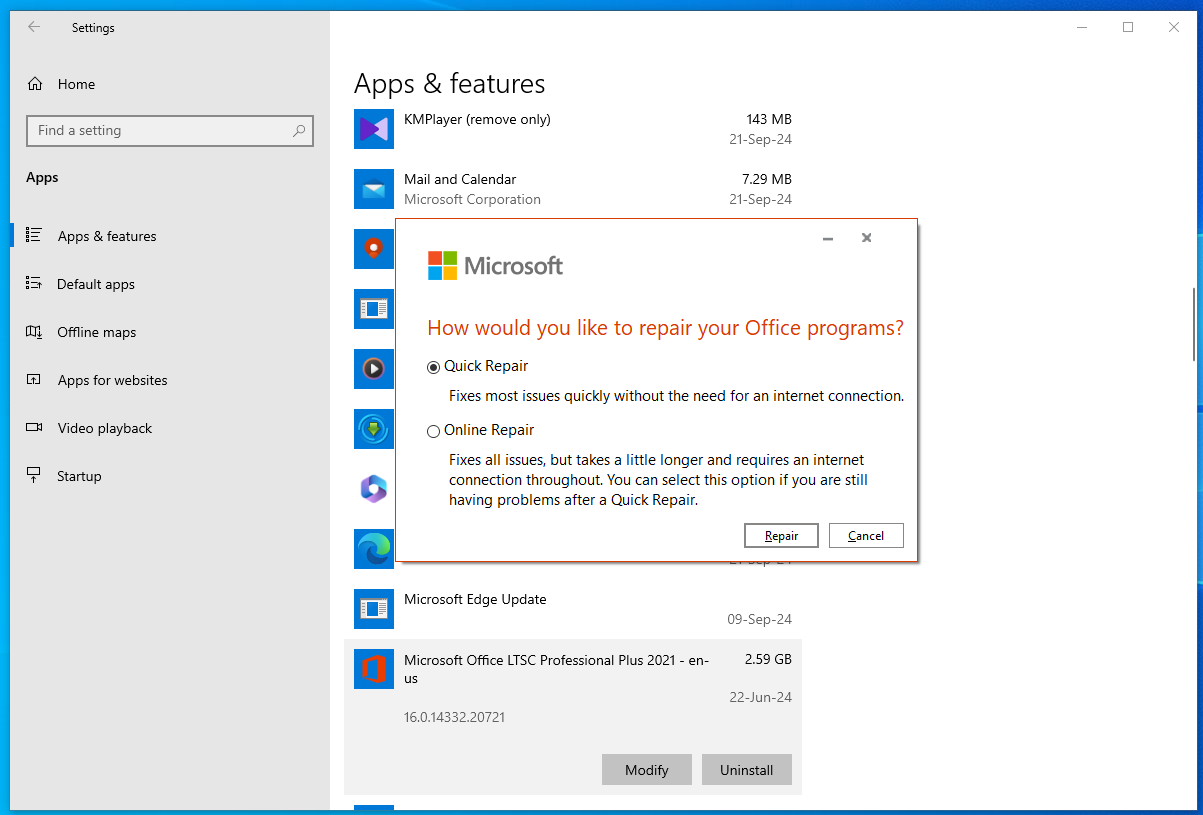
If your Microsoft Office is MSI-based, you’ll see the Change your installation dialog instead. If that’s the case, click on Repair.
- After the process is complete, restart your system and check if the error persists.
Follow these steps to use the Control Panel:
- Launch the Run dialog window by pressing the
Windows and Rkeyboard buttons together. - Once Run opens, type
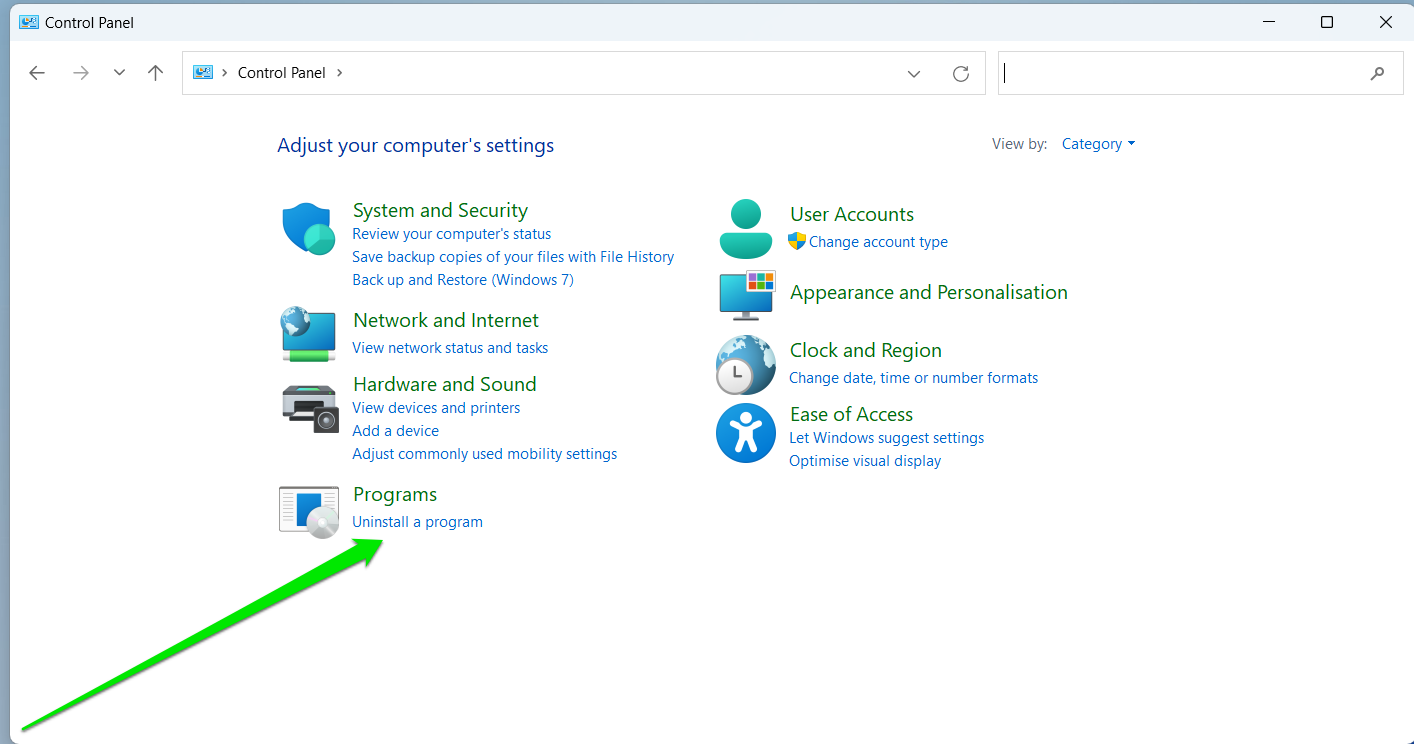
control panelinto the text box and hit theEnterbutton. - After the Control Panel window shows up, click on Uninstall a Program under Programs.
- The Apps and features window will now appear.
- Your next move is to find Microsoft Office, right-click it, and then click on Change.
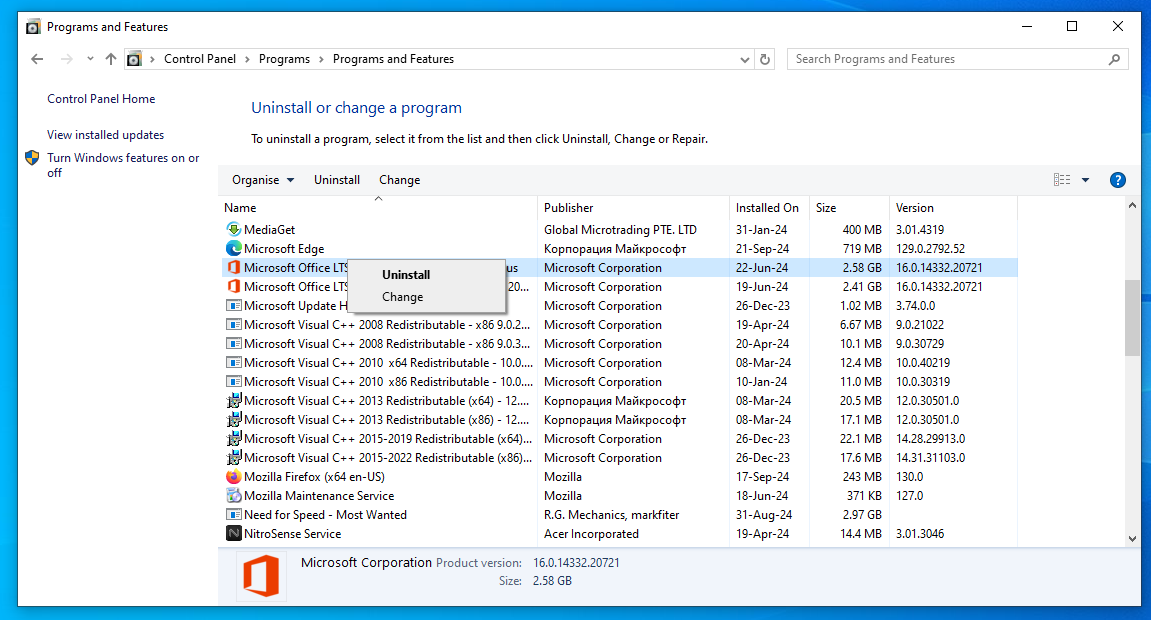
- Click on Repair in the dialog that shows up, then follow the subsequent instruction to complete the process.
Second fix: Enable the Click-to-Run service
The Click-to-Run service is a technology that helps Microsoft Office install faster. It’s mainly used to deploy Office updates. The service makes it possible to continue using your applications while the updates are being implemented. It facilitates the download and installation process in the background and allows you to get on with your job without disruptions.
The service has to be enabled to perform its functions. If it’s turned off and Office needs to install certain updates, you won’t be able to run any Office program as normal. So, if you’re still seeing the error code 0x426-0x0, go to the Click-to-Run service and make sure it’s functioning.
The following steps will show you what to do:
- Open the search function by pressing the
Windows and Skeyboard buttons simultaneously or by clicking on the magnifying glass in the taskbar. - Once the search box appears, type
servicesinto the text box. - Click on Services in the search results.
- After you see the Services application, go to where the services on your system are listed and scroll down till you find Microsoft Office Click-to-Run Service.
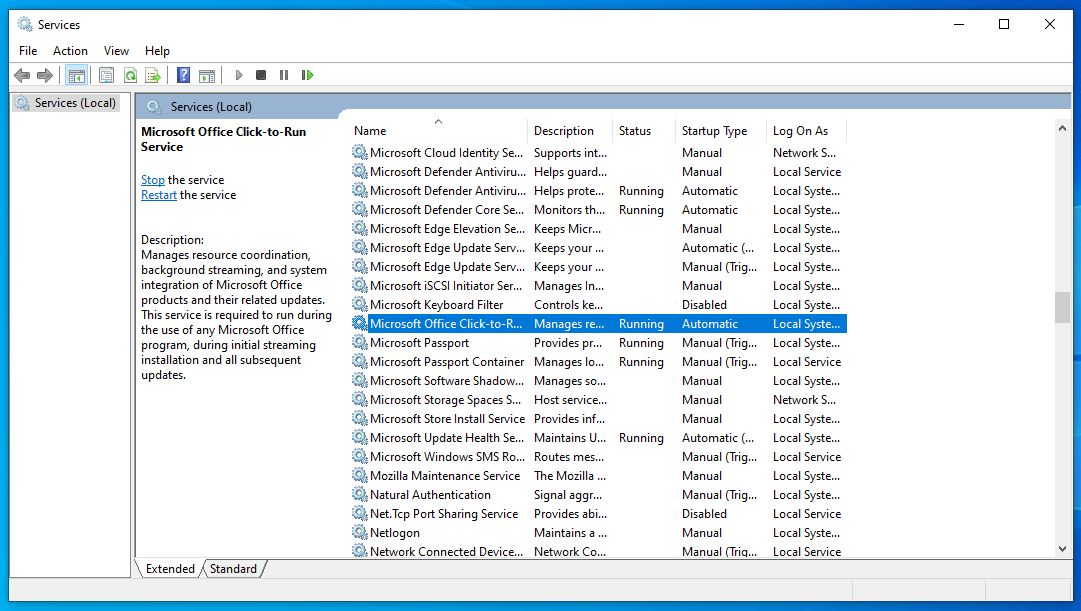
- Once you get to the service, double-click it.
- After its Properties dialog window opens, stay in the General tab.
- Now, go to the Startup type drop-down menu and select Automatic. Doing this will make sure the service starts on whenever it’s needed.
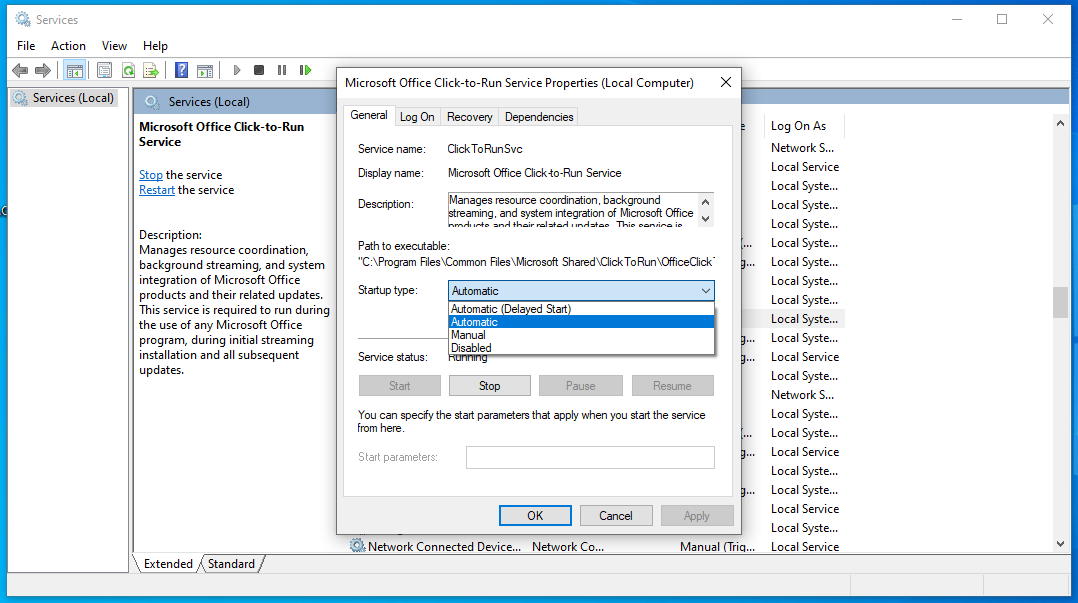
- If the service isn’t running, click on the Start button in the Service status section right under the Startup type drop-down menu.
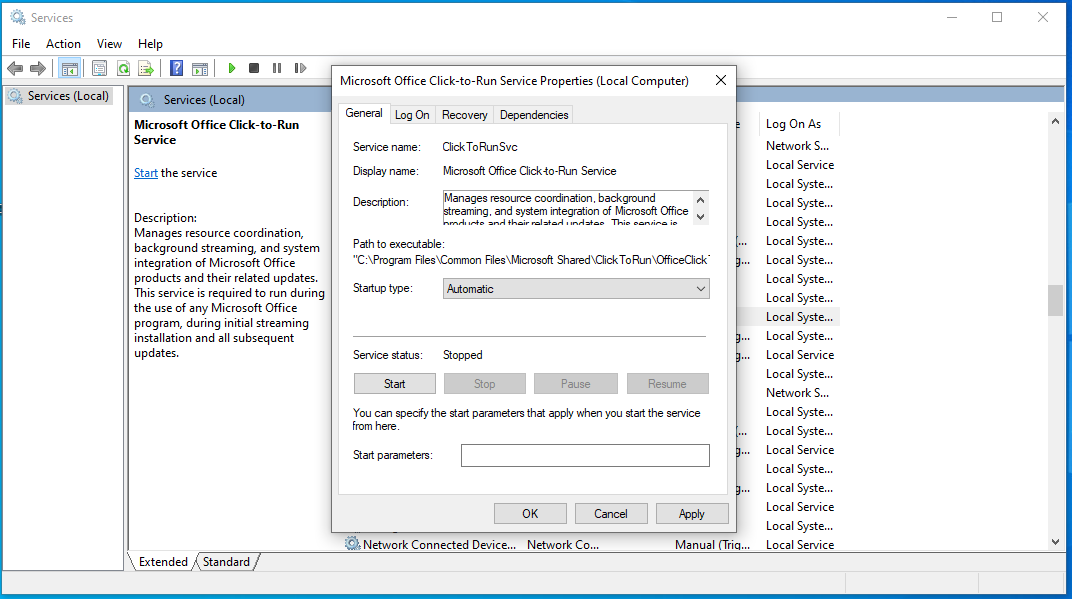
- Click on the OK button to save your changes, then try running the Office program to check if the error shows up again.
If you still see the error code, head to the next solution.
Third fix: Add Microsoft Office as an exception in your antivirus
For some bizarre reason, the error code might be appearing whenever you try to launch an Office application because your antivirus program is interfering with the process.
Normally, antivirus programs take action when they sense a threat. That’s what makes this odd, because Microsoft applications are generally safe.
Before resorting to turning off your antivirus, consider preventing it from interfering with Microsoft’s processes. To do that, you have to add the installation folder of Microsoft Office as an exception.
In some security programs, the exception feature can be called Exclusions or Exemptions. Meanwhile, in others, you have to look for the Whitelist or Safelist.
If you don’t know how to add an exception (or exclusion or whitelist, as it’s called on other programs), go to the website of your antivirus to find a guide.
The steps below will show you how to add Microsoft Office as an exclusion in the Windows Security application:
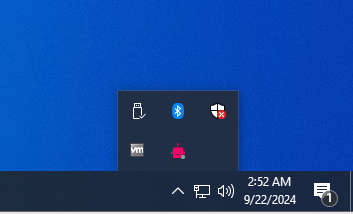
- Go to the right side of the taskbar and expand the system tray by clicking on the Show hidden icons arrow.

- After the hidden icons appear, click on the white shield, which represents the Windows Security app.
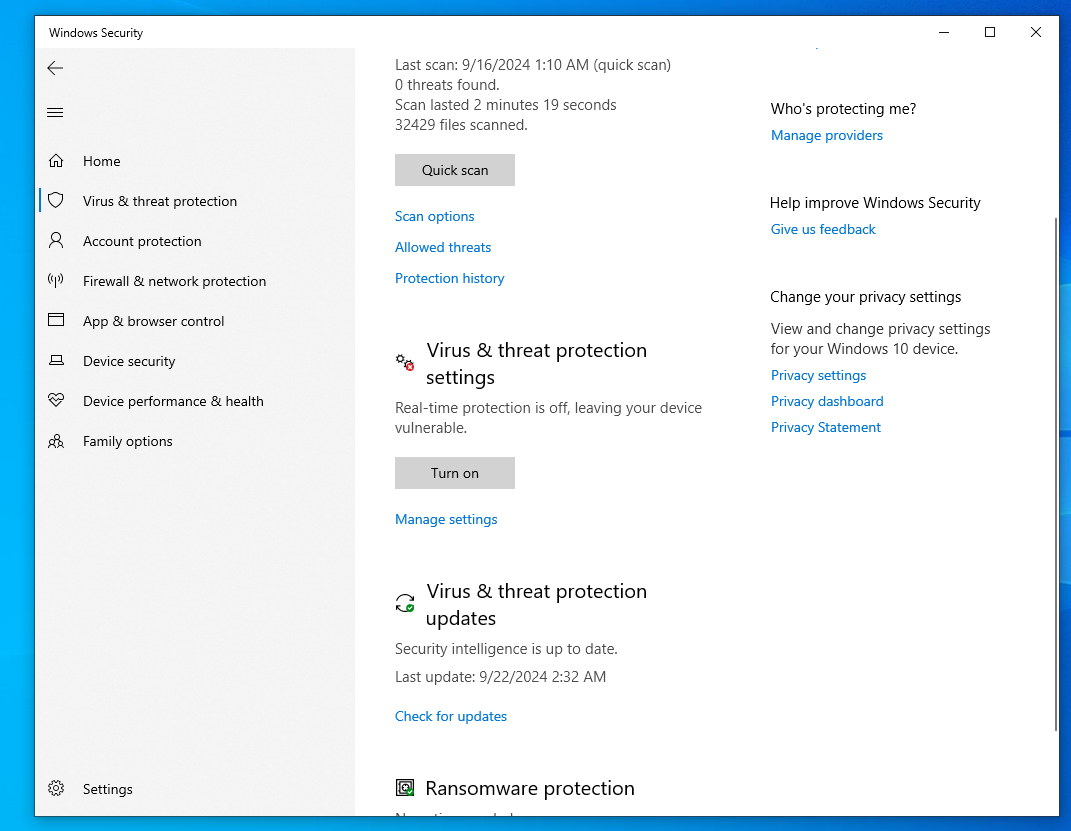
- Once the app opens, click on Virus & threat protection.
- Scroll down to Virus & threat protection settings and click on Manage settings.
- Once the Virus & threat protection settings interface opens, scroll down to Exclusions and click on Add or remove exclusions.
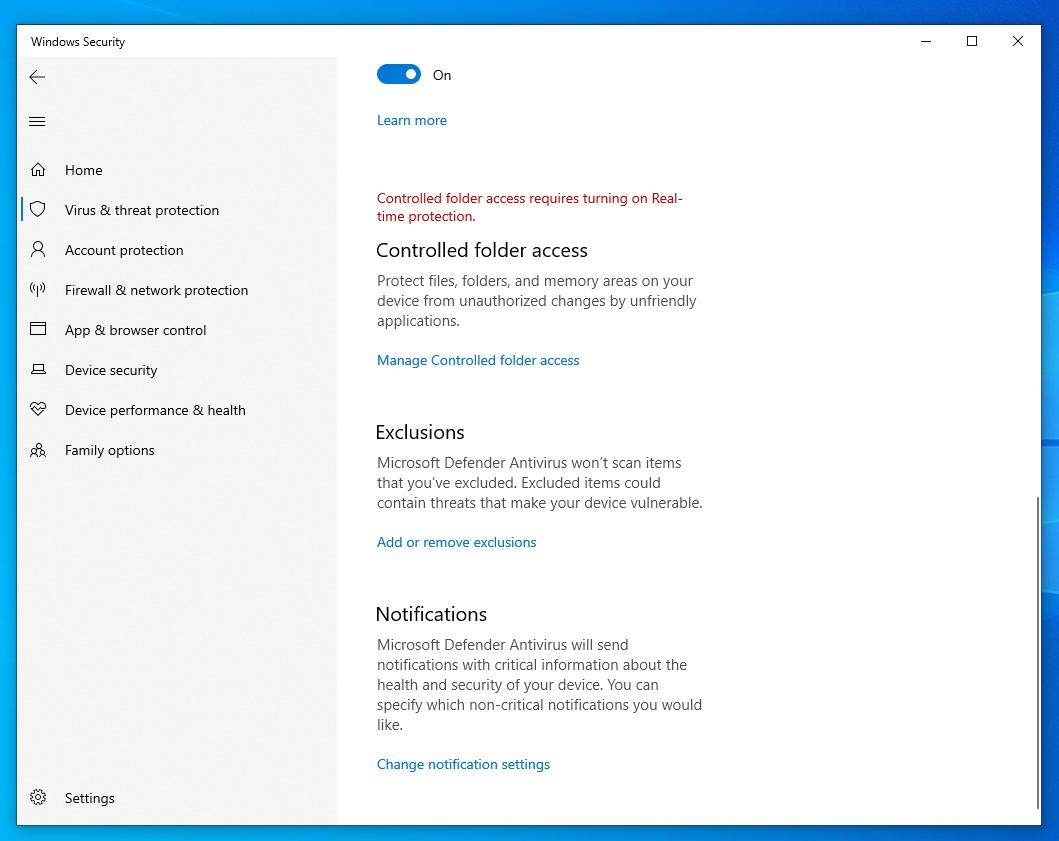
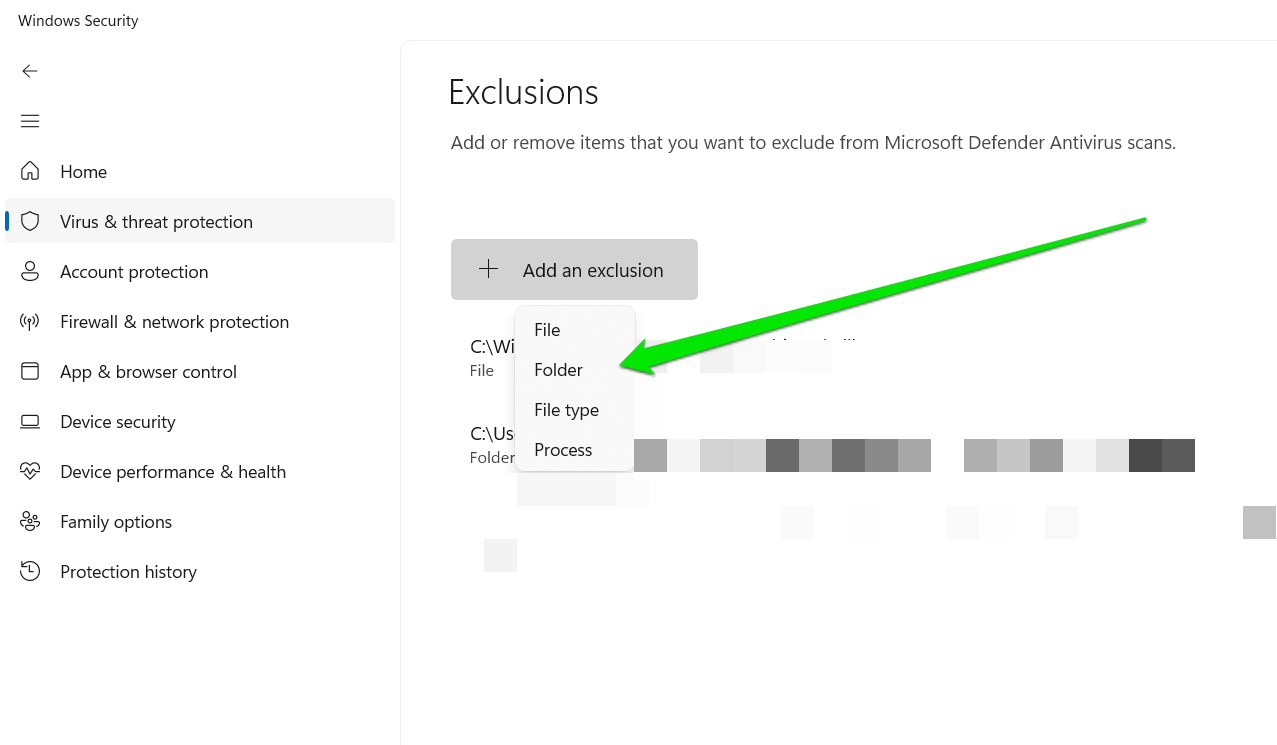
- On the Exclusions page, click on the plus sign beside Add an exclusion, and then click on Folder in the context menu.
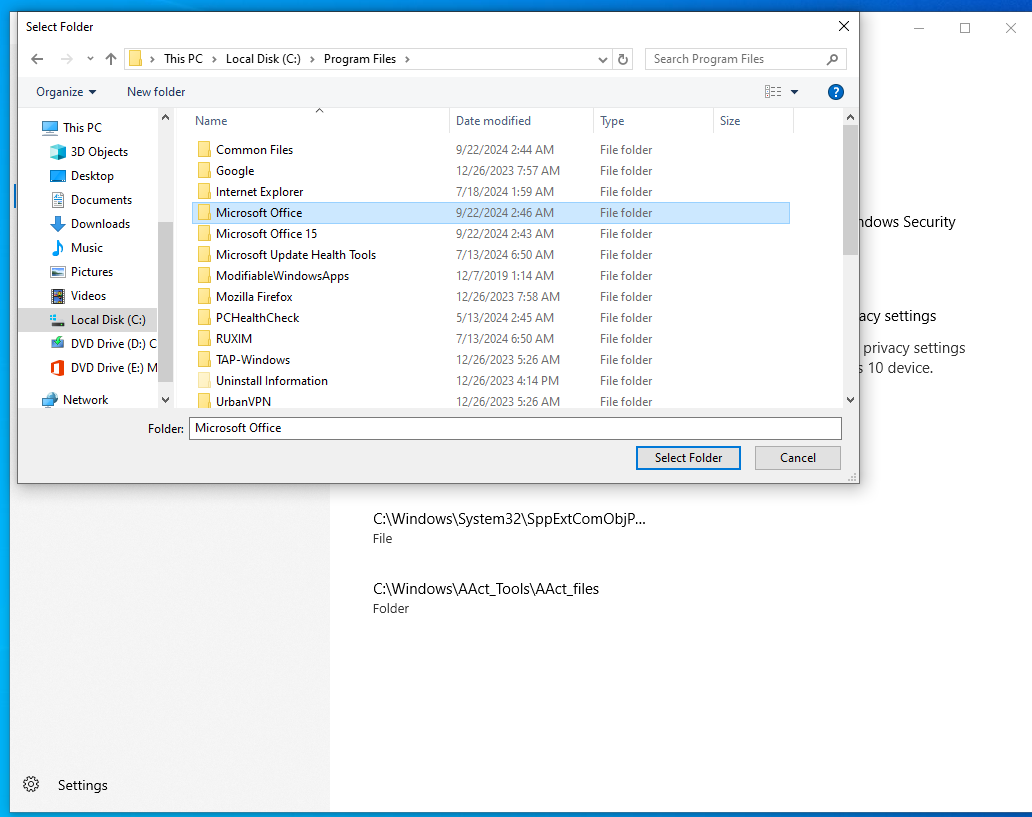
- After the Select Folder dialog window opens, navigate to your Program Files folder and select the installation folder of Microsoft Office.
- Click on Select Folder.
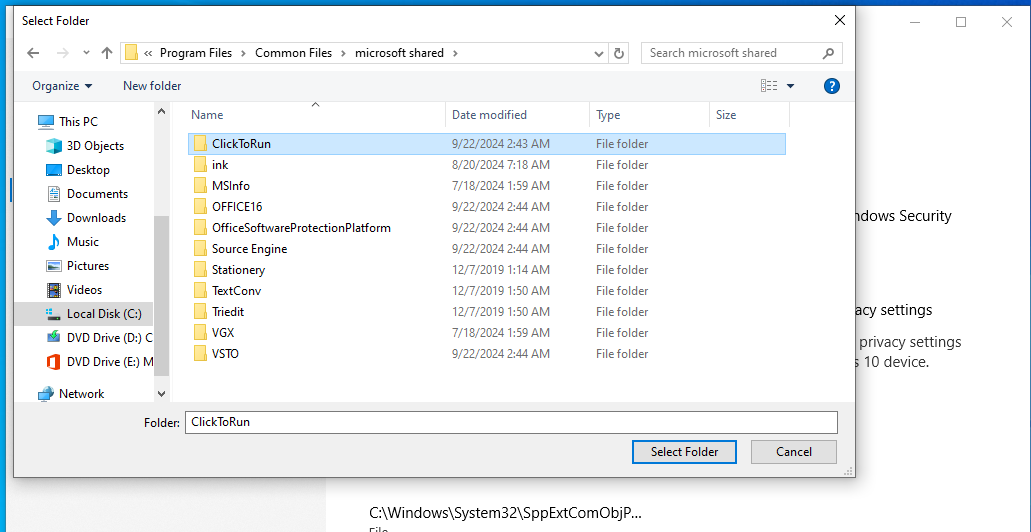
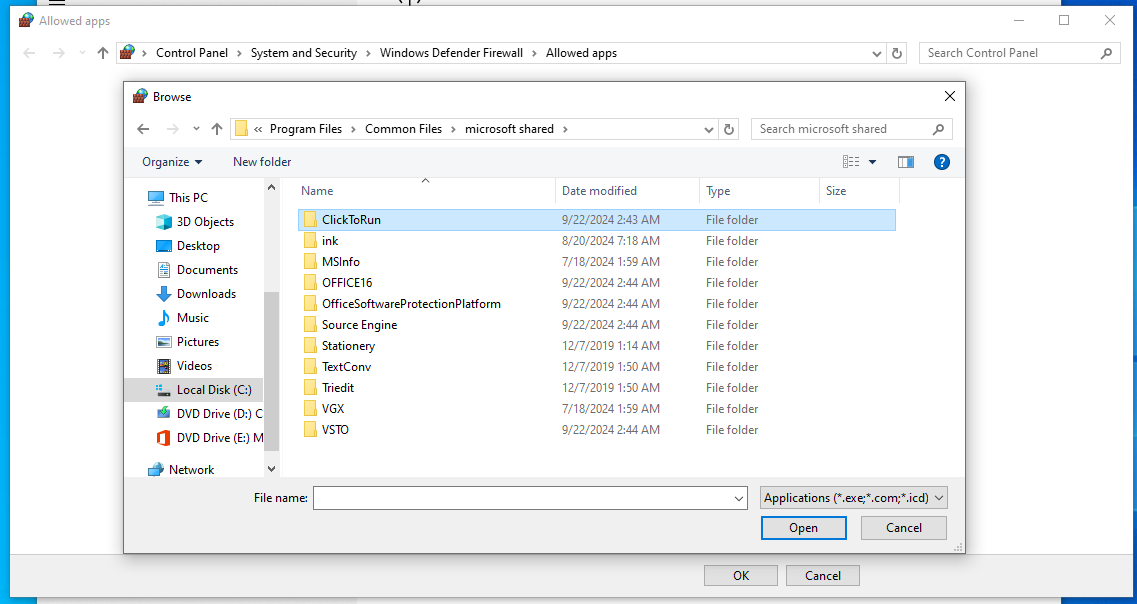
- You can also add the ClickToRun folder as an exclusion. Once you click on the Add an exclusion icon and choose folder, navigate to C: >> Program Files >> Common Files >> Microsoft Shared and select the ClickToRun folder, then click on the Select Folder button.
- You can now try running the program.
If that doesn’t solve the problem, disable the antivirus program. Follow these steps:
- Go to the right side of the taskbar and expand the system tray by clicking on the Show hidden icons arrow.
- After the hidden icons appear, click on the white shield, which represents the Windows Security app.
- Once the app opens, click on Virus & threat protection.
- Scroll down to Virus & threat protection settings and click on Manage settings.
- On the next screen, turn off Real-time protection.
- Run the program and check for the error.
The program can work alongside your main antivirus application and cover for it while it’s turned off. It also doesn’t cause conflicts with legitimate programs as other antivirus applications.
Fourth fix: Uninstall AVG TuneUp
AVG TuneUp is a PC optimizer that is advertised to clean up junk from the system and make it run faster. According to some users, the tool can do some damage. It tries to reduce the load on your CPU and boost your system’s speed. With this, the program might put some Office components that run in the background to sleep. Consequently, it causes the error to occur when you try to start a program.
As it turns out, some users uninstalled it, and everything began to run smoothly. So, if you use the AVG TuneUp application, uninstall it and check for the issue.
The guide below will show you how to do that:
- Press the
Windows and Rkeyboard buttons together to open Run. - After the Run dialog box shows up, type
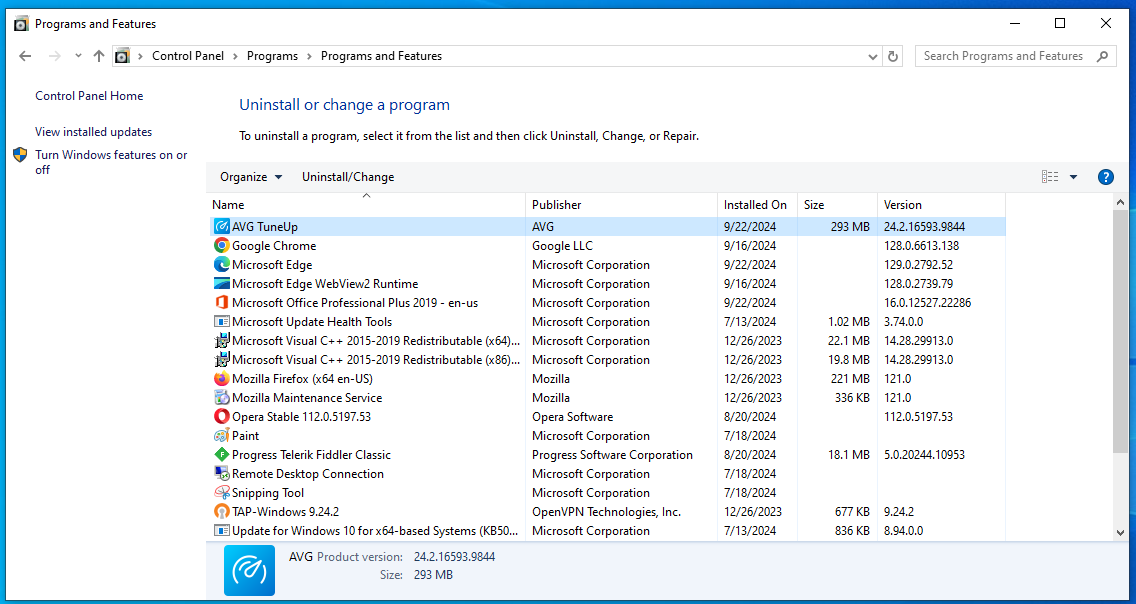
control paneland pressEnter. - Once the Control Panel opens, click on Uninstall a Program under Programs.
- In the Apps and Features window, locate the AVG TuneUp application, click on it, and then click on Uninstall.
- Click Yes in the User Account Control dialog window.
- Now, follow the subsequent instructions that appear on the screen to complete the process.
Also Read: So Easy to Do: How to Uninstall Programs and Apps on Windows 10/11?
Fifth fix: Allow Microsoft Office through your firewall
Your firewall program is another protection app that you have to look at. As you know, Microsoft Office often connects to the Internet when it’s updating or if it needs to fetch files that you saved to OneDrive. The application could also access Microsoft servers to confirm that your license is still valid.
If the firewall blocks its access, then you might have a problem on your hands. This is often the cause of the error code.
So, to solve the issue, the straight solution would be to disable the firewall so that it doesn’t block the program. However, that might be a nuclear option that would allow your system to be compromised. The safer thing to do will be to allow Microsoft Office through the firewall. You can also allow the Click-to-Run service to make sure it isn’t being blocked.
There are different ways to let a program through the firewall, depending on the application you use. If you use a third-party program, you can check out how to do that by going to the website of the app’s developers. If you use the Windows Defender Firewall, however, these are the steps that you should follow:
- Go to the right side of the taskbar and click on the Show hidden icons arrow to expand the system tray.
- Once the icons appear, click on the symbol for Windows Security, which is a white shield.
- Once Windows Security shows up, click on Firewall & network protection.
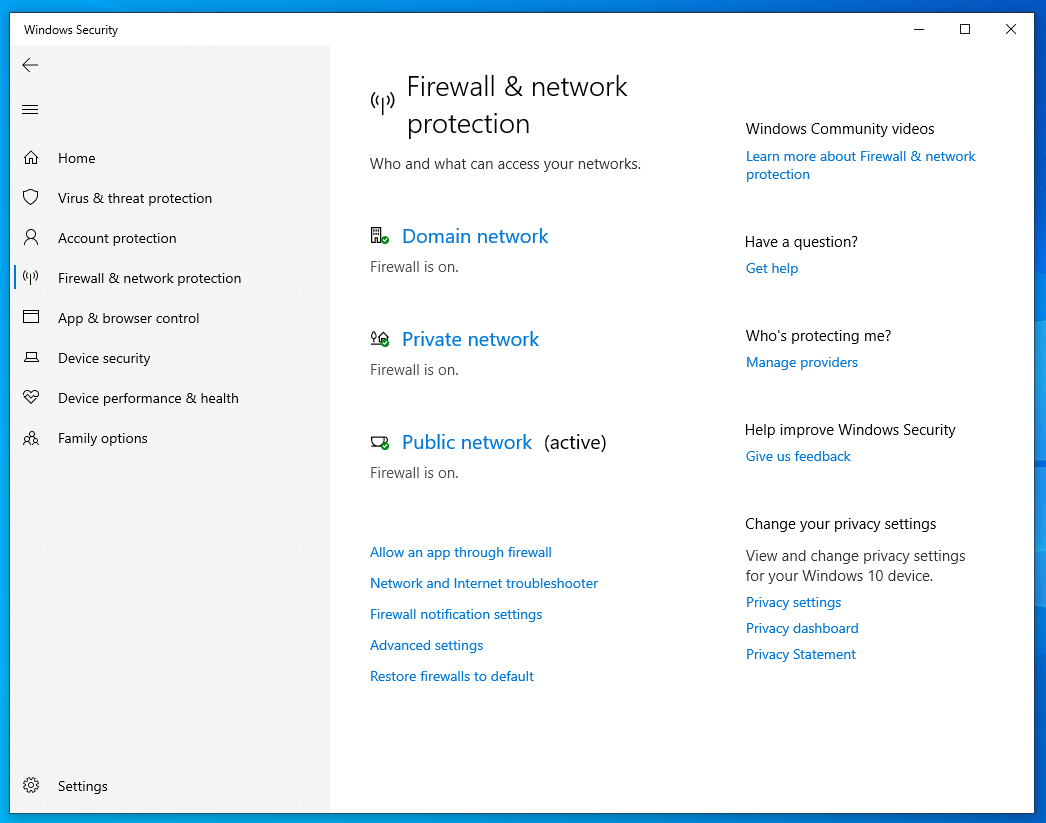
- Now, click on Allow an app through firewall once the Firewall & network protection page opens.
- Once the Allowed apps dialog window opens, click on the Change settings button.
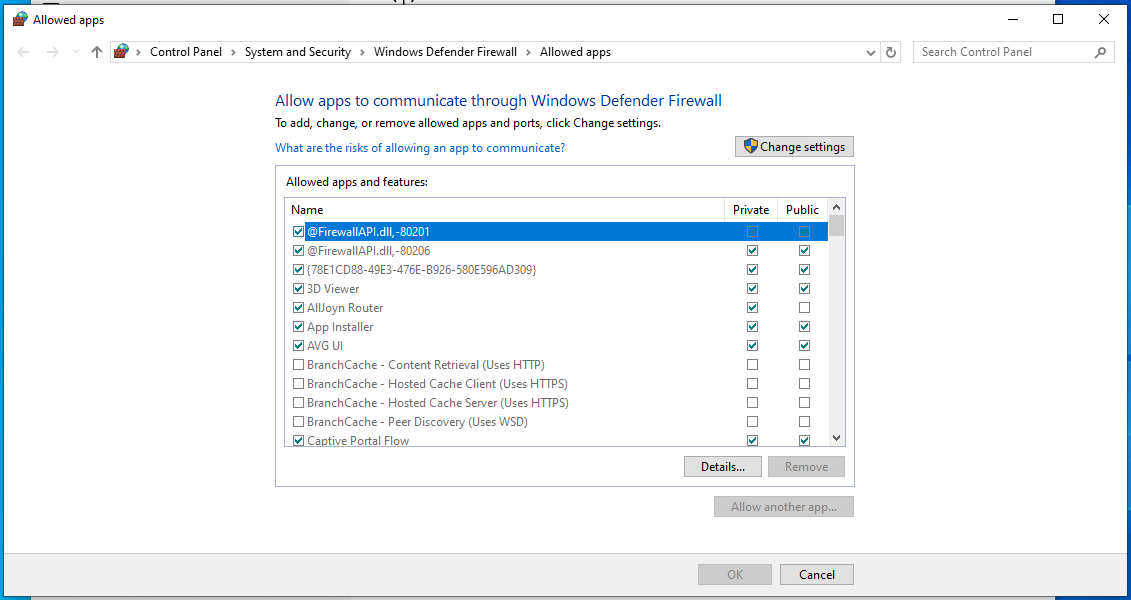
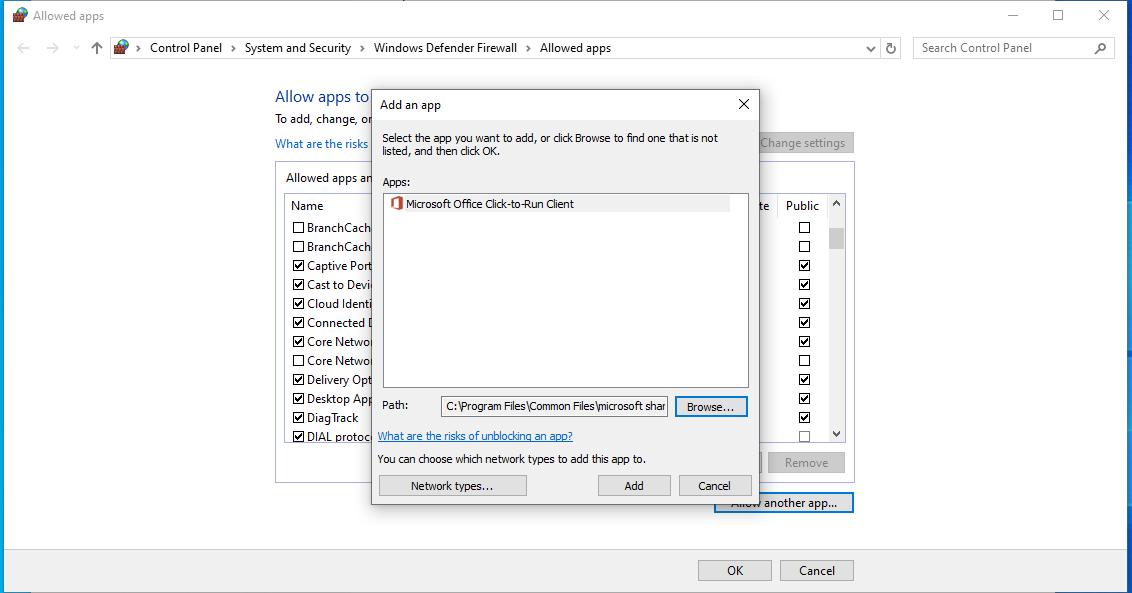
- Go to the Allowed apps and features list and locate ClickToRun. If you don’t see it on the list, click on the Allow another app button, located in the bottom-right corner of the window. Navigate to the installation folder of ClickToRun as shown above.
- Once you find the folder, double-click the OfficeC2RClient file. Click on Add.
- After adding it, click on the boxes to its right, under Private and Public.
- Click on OK, and then check if the program can now open without issues.
Sixth fix: Find and replace faulty Windows files
You shouldn’t be surprised that bad Windows system files can prevent you from using an application. Some of these files are so important that you need them to do virtually anything on your system.
To make sure you’re not dealing with corrupt system files, run the System File Checker (SFC) tool. If the tool finds damaged or missing files, it will attempt to automatically replace them. However, you need to run the inbox Deployment Image Servicing and Maintenance (DISM) tool to provide the replacement files that SFC will use.
If you don’t know the process, these steps will guide you:
- Connect your system to the Internet.
- Press
Windows + Sto open the search box. - Type
CMD. - Once Command Prompt shows up on the search results, right-click it and select Run as administrator from the context menu.
- Click on Yes in the User Account Control pop-up.
- After Command Prompt opens, type the following and press
Enterafterward to run DISM:
DISM.exe /Online /Cleanup-image /Restorehealth
- After the command executes, type
sfc /scannow, then hit theEnterkey. - If you see a completion message that says, “Windows Resource Protection found corrupt files and successfully repaired them,” restart your system and check for the error.
Seventh fix: Remove the old Office installation
New and old Office installation files often clash with each other and cause problems. It’s understandable that you might not yet want to give up some features in previous Microsoft Office versions, so you decided to prevent the new installation from replacing the old one.
The reality is that, in more cases than not, the registry entries of these programs are identical, which happens to be a recipe for software conflicts.
Some users already attested that getting rid of one installation removed the dreadful error code. You should try that if you’re in the same boat. The steps below will show you how to remove the program:
- Open Control Panel.
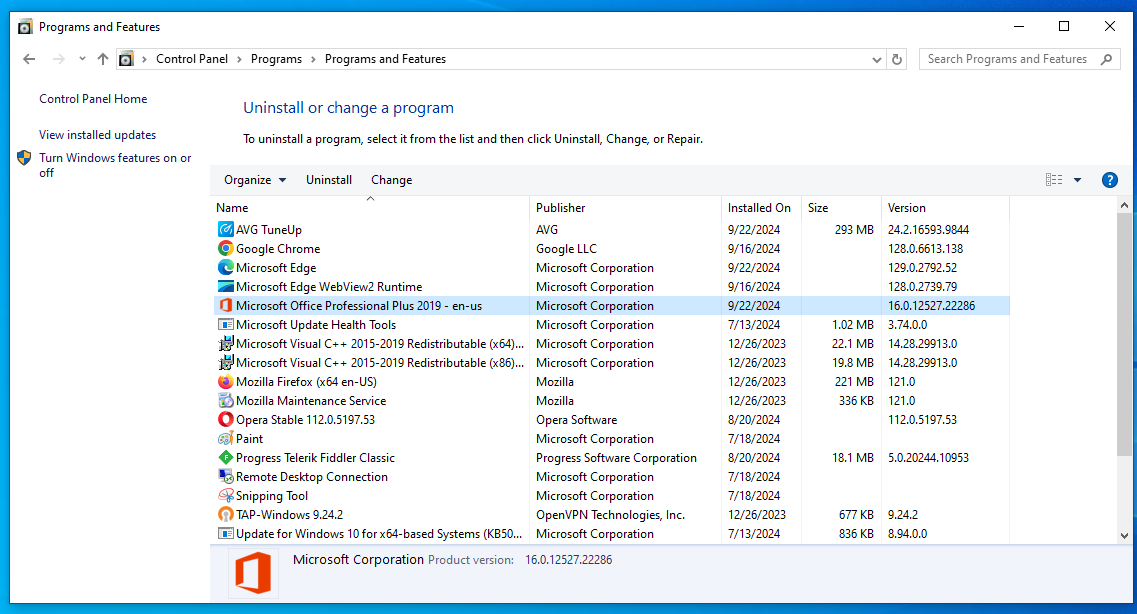
- Click on Uninstall a program under Programs.
- In the Programs and Features window, locate the previous version of the Microsoft Office application, click on it, and then click on Uninstall.
- Click Yes in the User Account Control dialog window.
- Now, follow the subsequent instructions that appear on the screen to complete the process.
Eighth fix: Perform a clean boot
Still on software conflicts, other third-party services and applications can also clash with Microsoft Office or the Click-to-Run service and produce the error. To confirm this and fix the problem, perform a clean boot.
If that works, you can then go ahead to find out the application that is responsible for the problem. These steps will show you what to do:
- Launch the Run dialog box by right-clicking the Start button and selecting Run from the Quick Access menu or by pressing
Windows + R. - After the dialog box appears, type
msconfiginto the text field and click on the OK button. This will launch the System Configuration dialog window. - Once the System Configuration dialog appears, switch to the Services tab.
- Under the Services tab, mark the checkbox that reads, “Hide all Microsoft services,” then click on the Disable all button. Check the box for the Click-to-Run service and enable it.
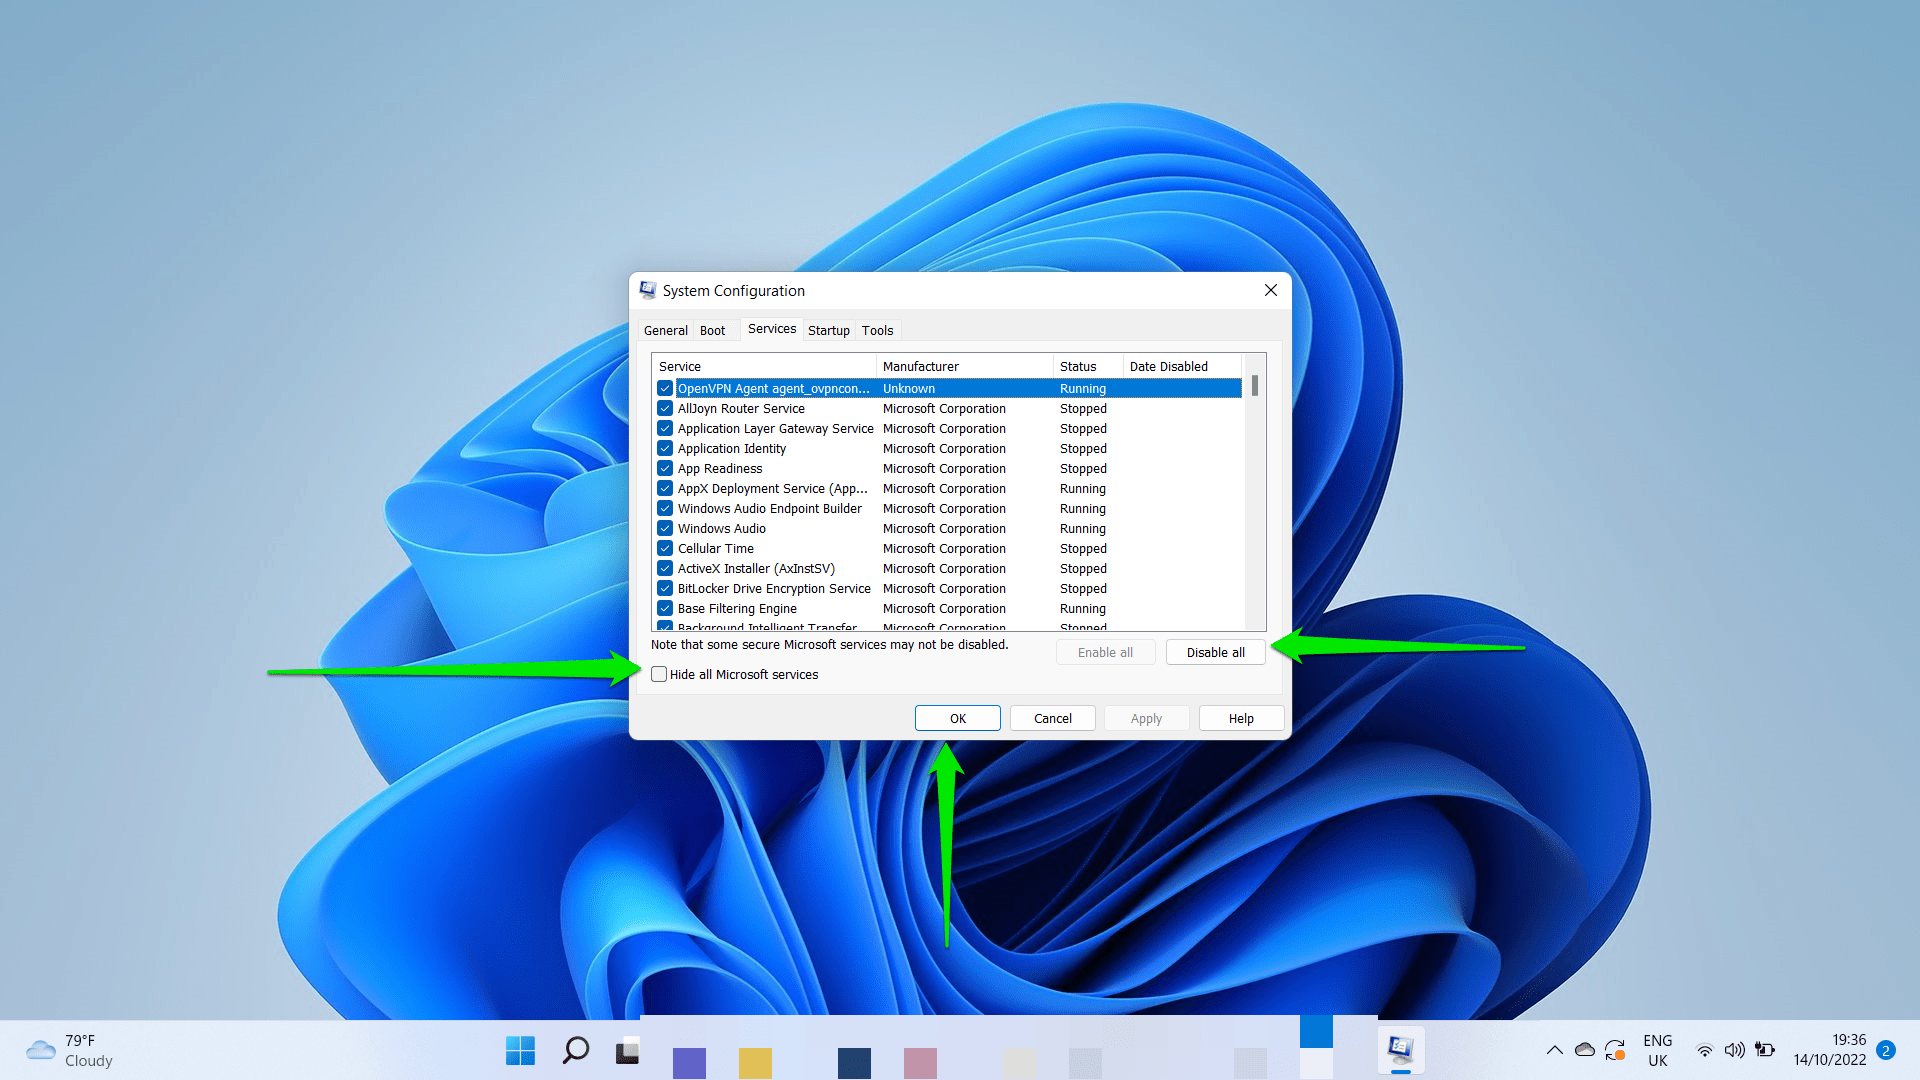
- All the services in the tab, except Microsoft services and the Click-to-Run service, will no longer run the next time your computer starts.
- Now, switch over to the Startup tab and click on the Open Task Manager link.
- Once the Startup tab of Task Manager opens, disable all the listed programs. To disable a startup program, click on it, then click on the Disable button located in the bottom-right corner of the window.
- Next, go back to the System Configuration dialog and click on the OK button. Exit Task Manager, then reboot your system.
- Run the Office program.
For more details:How to Perform a Clean Boot in Windows 10?
If the error code 0x426-0x0 does not show up again, then it confirms that one of the startup items you disabled has been the problem all along.
To identify the program, you have to go back to the System Configuration window and enable these services and applications one after the other until the error appears again. The last startup program you enable before seeing the error is what you’re looking for.
You can remove the program or keep it disabled until you really need to enable it.
Ninth fix: Reinstall Microsoft Office
If the problem persists, your next move should be to remove Office and reinstall it. Hopefully, this will reset the program and fix the entire problem. The process involves removing Office, deleting some registry keys, and then reinstalling Office.
Uninstall Office
- Right-click the Windows logo in the taskbar and select Programs and Features (or Installed apps in Windows 11).
- Search for Microsoft Office in the Apps and features window, click on it, and then select Uninstall.
- Click on Yes in the User Account Control dialog, then follow the subsequent instructions to uninstall the program.
Delete Microsoft Office registry entries
The problem could very well be residing in your system registry. Some entries might be corrupt, broken, or misconfigured. Following the uninstallation, it’s recommended that you remove some of these potentially bad registry keys that Office will leave behind so that they can be replaced when you install the new version.
The steps below will show you how to fix the registry problems that might be triggering the error.
Before you start making changes to your system registry, it’s important to note that things can easily go wrong, so you have to tread with a high level of caution. To be on the safe side, back up the entire registry before you apply the fix that we’ll be showing you. If you don’t know how to perform the backup, follow these steps:
- Type
registryinto the search box and click on Registry Editor in the search results. - Click on Yes once the User Account Control window pops up.
- When the Registry Editor opens, click on File in the top-left corner.
- Select Export in the menu that drops down.
- Once the Export Registry File dialog box appears, type a name for the file, select your desired location, and choose All under Export range before hitting OK.
Now follow these steps to get rid of the registry keys:
- Open the Registry Editor and navigate to the following path in the left pane:
HKEY_CURRENT_USER\SOFTWARE\Microsoft\Office
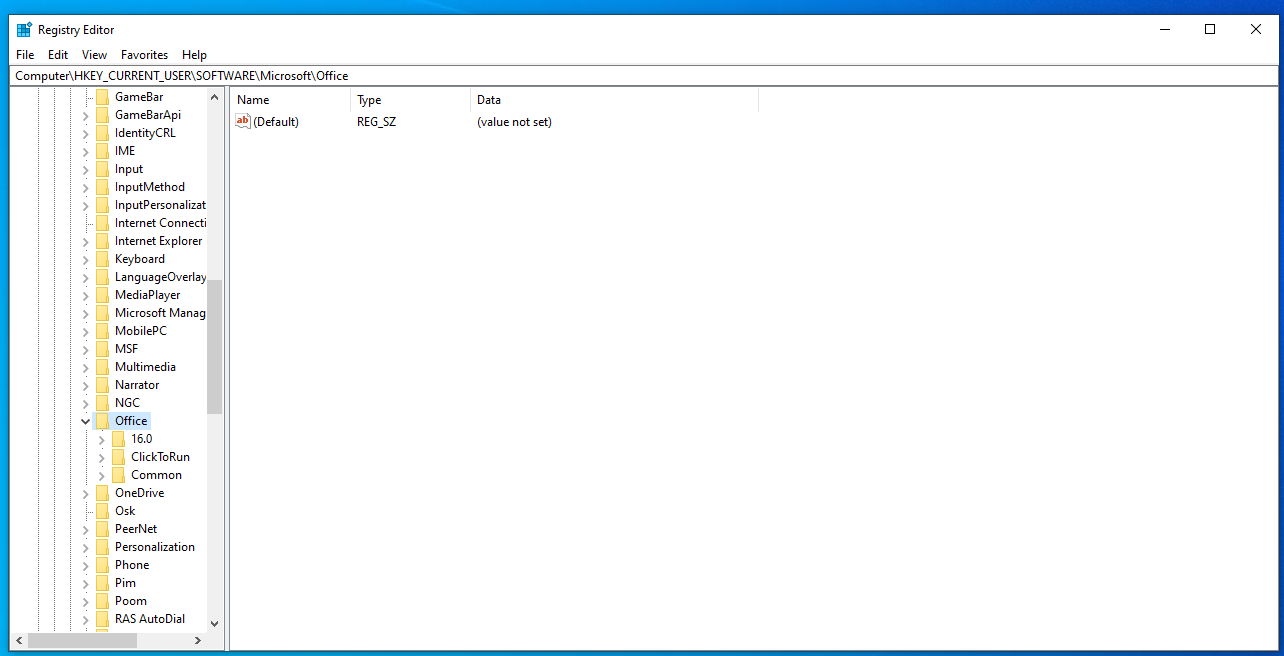
- Delete all the sub-keys under the Office tree.
- Restart your system and install Office.
Now that you’ve uninstalled Office and all its leftover files, move on to reinstall it:
- Head to the official Microsoft Office website .
- Log in with the Microsoft account you used to purchase Office.
- Once logged in, go to the “My Account” page and download Office.
- Click Download.
- Once the Microsoft Office installer is downloaded on your PC, double click the installer file and follow the on-screen prompts.
- Once the installation is complete, open any Office app – and check if the error is now resolved.
Conclusion
Dealing with the Microsoft Office error code 0x426-0x0 can be frustrating. But, armed with the right solutions, it’s very manageable. Look into repairing Office, enabling necessary services, adjusting your security settings, or even reinstalling the software.
That’s it! Try to go over the solutions one more time to make sure you didn’t miss anything. If you have questions, you can use the comments section below.