
Are you experiencing random issues on your Windows 10 PC? If so, then the Reliability Monitor can help boost performance. The Reliability Monitor identifies recurring problems and their possible causes, enabling you to resolve them.
In this article, we’ll explain what the Windows Reliability Monitor is and how to check the reliability history in Windows 10 .
What is Reliability Monitor?
The Windows 10 Reliability Monitor is a great tool for troubleshooting Windows 10 issues, as it efficiently tracks random errors and failures. It even provides insight about recurrent issues, helping you develop a permanent solution.
For example, say you installed an application and soon after, your operating system started to malfunction or fail several times a week. The Reliability Monitor allows you to establish if the application installation is related to the recurring failures.
Think of it as a simpler version of Event Viewer as it’s easier to navigate, so you can quickly pinpoint errors.
The tool collects performance data of critical system components, such as the CPU, data drives, memory, and fans. It then creates a visual summary of performance-relevant events in a format we can easily understand.
How to Check the Reliability History in Windows 10
There are different ways to check the reliability history on a Windows 10 computer. We’ll discuss all of them so you can choose the easiest one. Check the reliability history using Windows Search Here’s how:
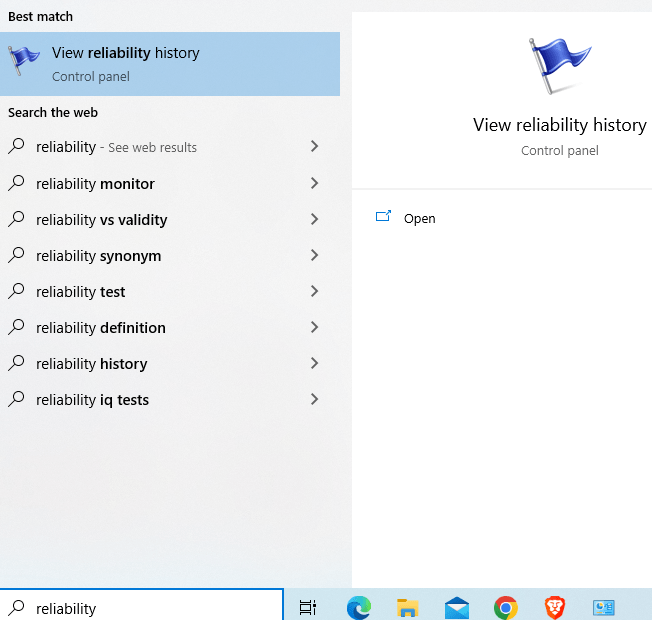
- Go to the search bar in the bottom left corner and click the Search box.
- Type in reliability.
- Select the View reliability history search result.
Check the Reliability History in Windows 10 Via Control Panel
Follow these steps:
- Press Windows Key+S to launch Search.
- Type in control panel and choose Control Panel.
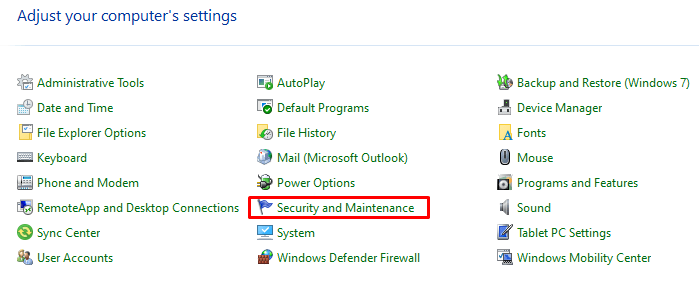
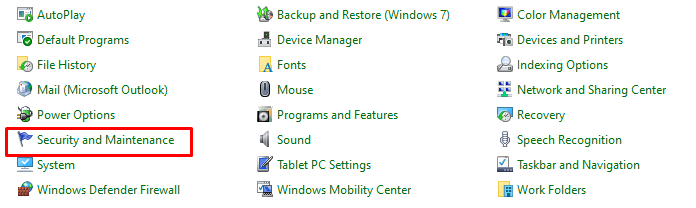
- Click the drop-down arrow next to View by: in the top-right corner of the Control Panel and select Small icons.
- Select Security and Maintenance.
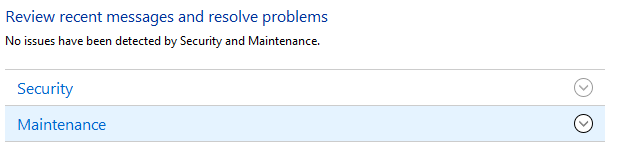
- Click on the dropdown arrow for Maintenance to expand it.
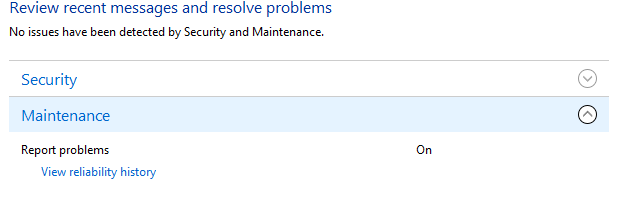
- Click the View reliability history link under the “Report problems” section.
Check the Reliability History in Windows 10 Via the Run Feature
Proceed as follows:
- Press Windows Key+R on your keyboard to launch Run.
- Type in perfmon /rel.
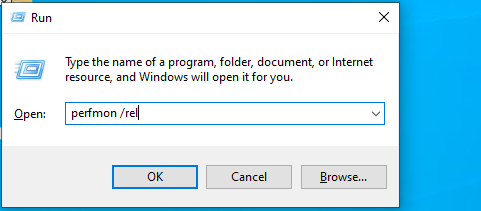
- Then press Enter on your keyboard.
Whichever method you use to open the Reliability Monitor, you’ll discover plenty of useful information about your PC’s behavior. The tool uses different icons to indicate errors, failures, and successful software installations or uninstallations. Here’s what the Reliability Monitor interface looks like: 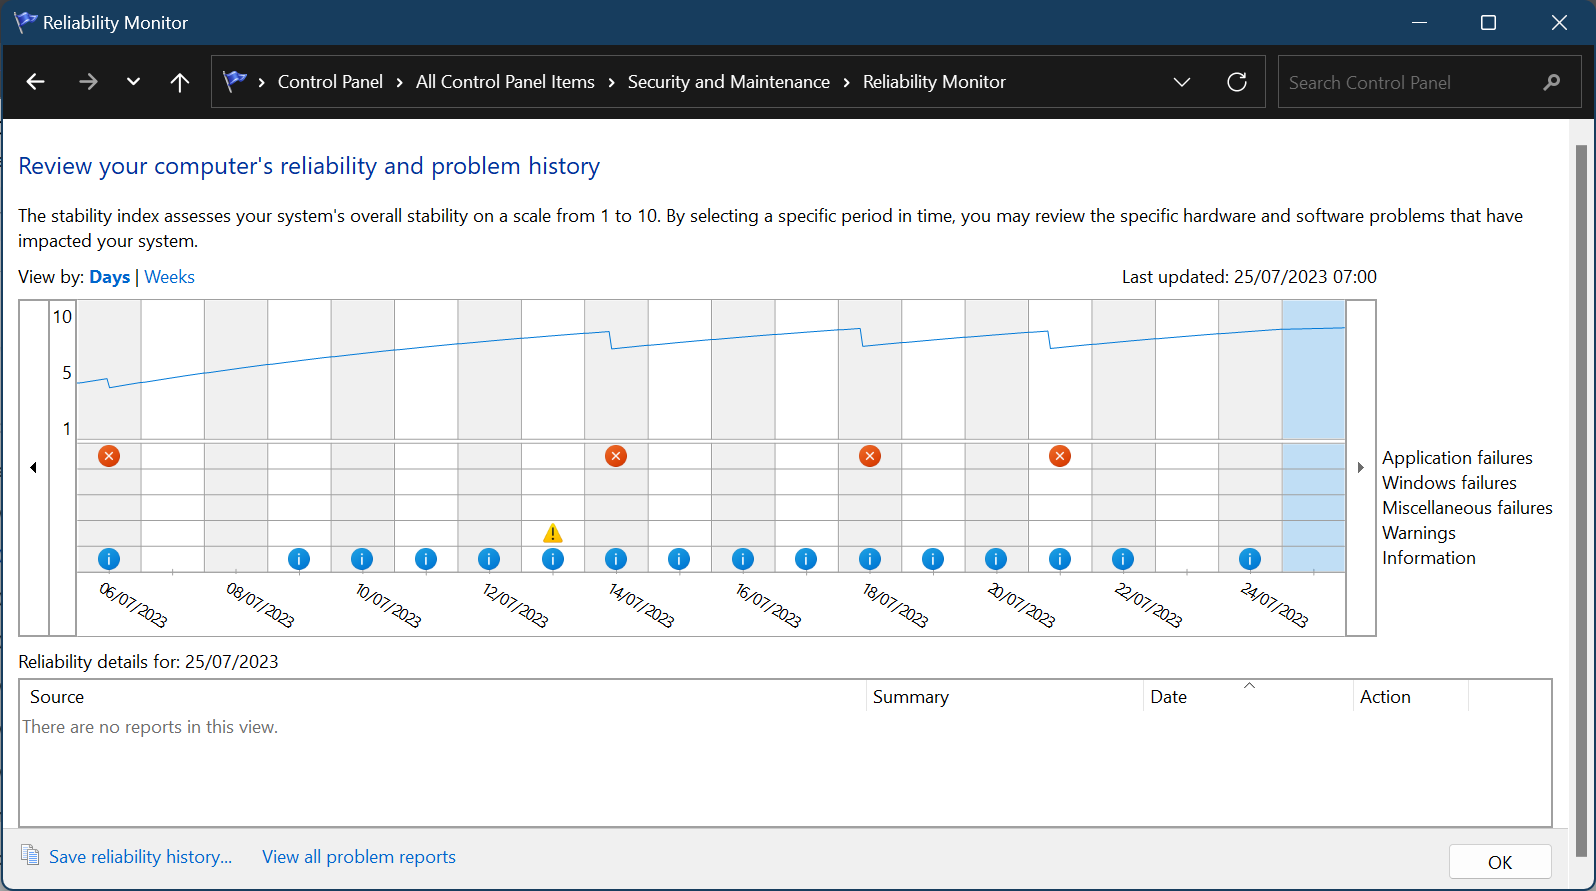 You can click on any of the icons to see when an issue occurred and perform other actions, such as view the technical details and problem reports at the bottom.
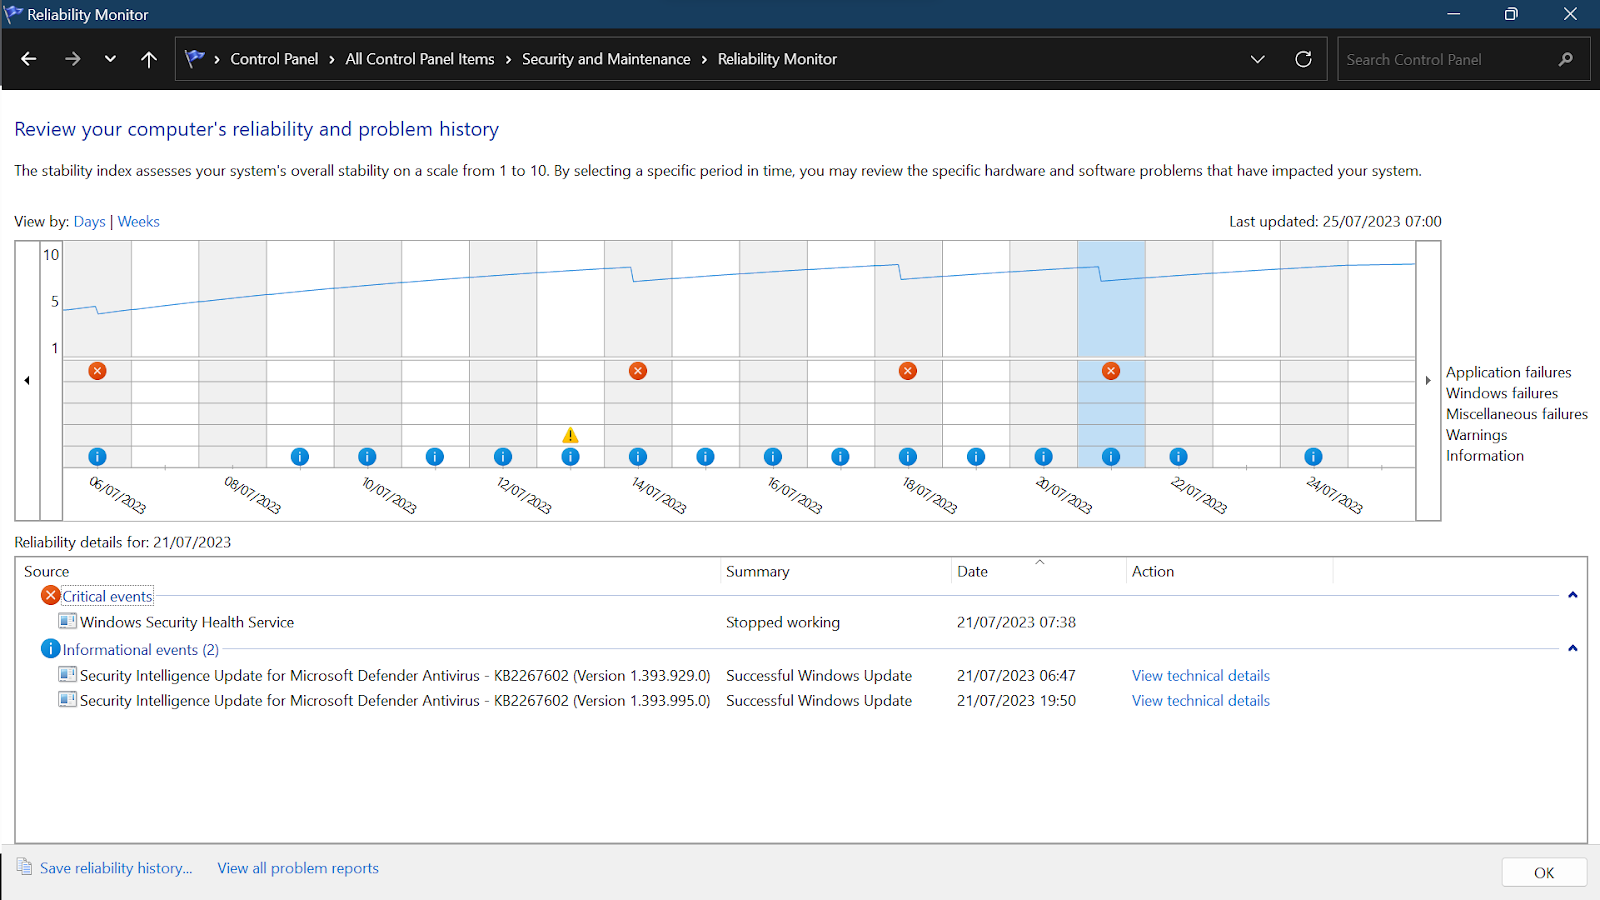
How to Work with Reliability Monitor on Windows 10
The Reliability Monitor is a useful tool that constantly monitors critical performance metrics of your operating system from the moment you turn it on to shutdown. It uses Windows Event Manager to gather data about system reliability and performance. You can track five types of information with this tool:
- Application failures, such as software problems.
- Windows failures, including hardware issues.
- Miscellaneous failures, including peripheral problems like disk-related issues.
- Warnings, including errors or failures that don’t affect system behavior.
- Information about system updates and other changes.
The Reliability Monitor uses a stability index of 1 to 10 to measure your system’s stability. Stable systems usually have a stability index of 10, while heavily used test systems might score around 1.7. The graph’s upper half displays the reliability score of the OS. The lower half shows the events that the Reliability Monitor identified. The “X in red circle” entries denote critical events that require further investigation. To find out more about each of these issues indicated, go to the Source section in the lower part of the graph.
The Windows Reliability Monitor allows you to save these reports in XML format by clicking the “Save reliability history” link at the bottom left side of the window.
To ensure your computer remains stable over time, watch out for sudden drops in your system’s stability index rating, as this could indicate an issue with your software or hardware components.
To ensure maximum performance, consider installing a professional malware removal tool to help identify malware that may affect your machine’s efficiency. Auslogics Anti-Malware is one of the best malware removal tools we recommend.
📌 Also read: Auslogics Anti-Malware: Features and Reviews
How to Troubleshoot Windows 10 with the Reliability Monitor
Here is a quick way to troubleshoot your computer using this tool:
- Open the Windows search box and type in reliability history.
- Press Enter to launch the Reliability Monitor.
- Click on the “View all problem reports” link at the bottom of the new window.
- Go through the list that appears and review the discovered issues.
- Select the problem you want to troubleshoot and double-click on it to open the Problem Details window. Here you can check for Problem Event Name and error codes and use these details to search for solutions online.
For the example in the figure below, you’ll notice that Windows recently reported a critical event.  Looking at the Source section, we discover that the Windows Security Health Service stopped working on 21/07/2023. On the same date, there are two informational events presented. Both relate to the Security Intelligence Update for Microsoft Defender Antivirus and it shows that installations were successful.
 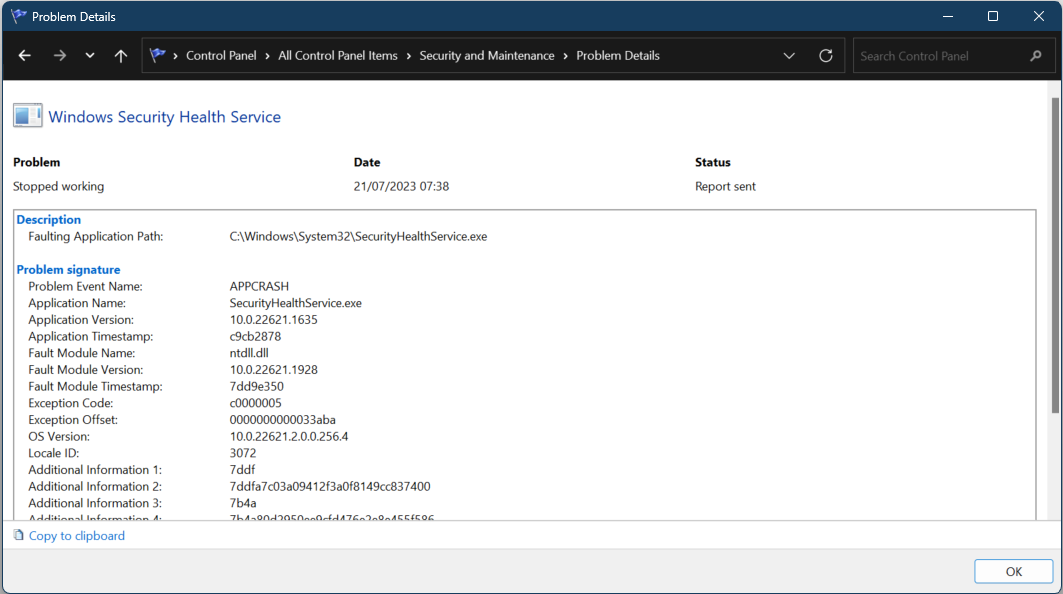 Double-clicking the Windows Security Health Service launches a more detailed window with a description of the problems. Let’s investigate the problem further. You can see that it reports the Problem Event Name APPCRASH, which means that Security Health Service crashed on an initial attempt.
You can head on to the Microsoft Support Community and search for the Problem Event Name: eventname (in this case SecurityHealthService.exe) to see what it means and possible solutions. Let’s consider another scenario. Recently, this laptop (Lenovo c340) experienced a “black screen with cursor” error. The Windows 10 Reliability Monitor reports the problem event name as LiveKernelEvent, Code 1a8. 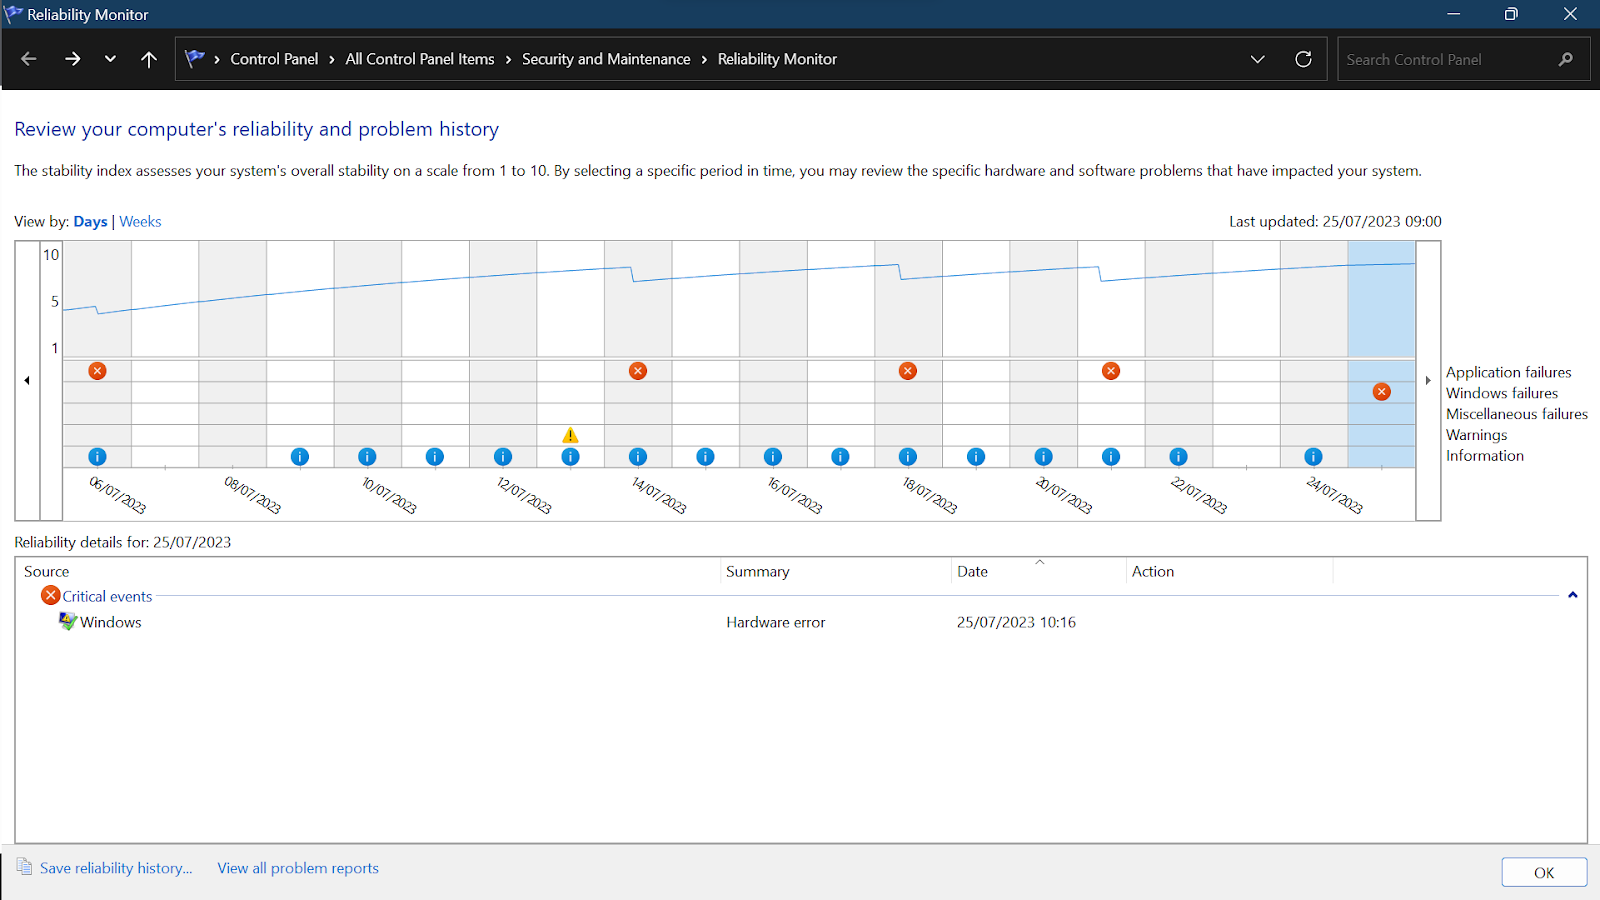 Usually, display errors are related to the PC’s display cards, which is why it’s reported as a hardware error.
 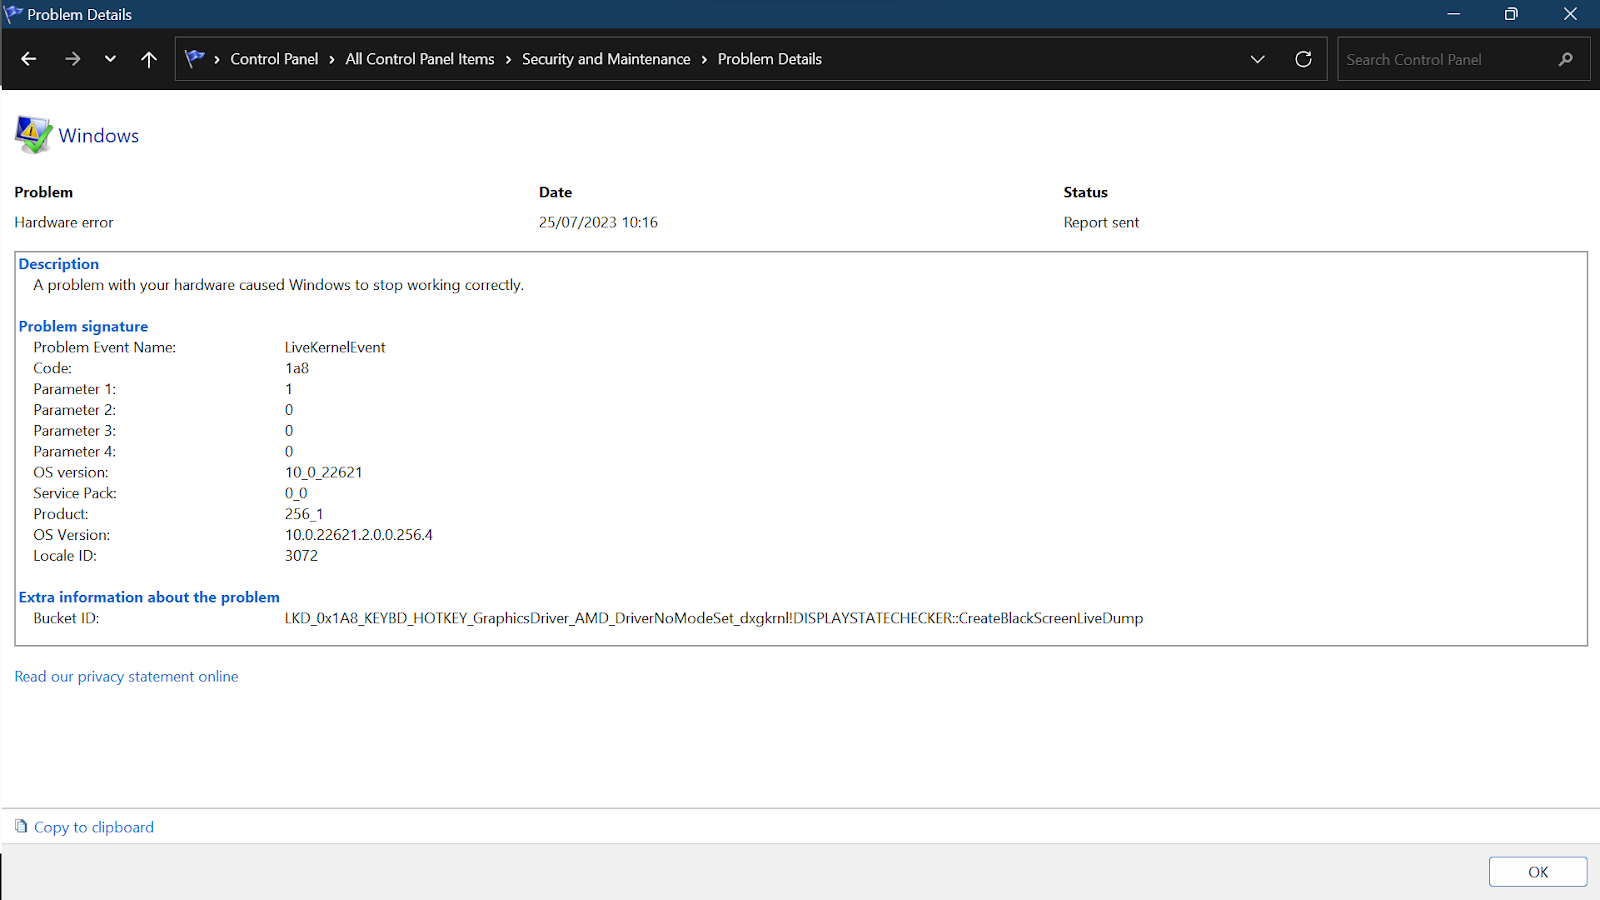 The next step is to find out how to fix LiveKernelEvent: Code 1a8. A quick search on the internet recommends updating, repairing, or reinstalling the device drivers, running the Windows Memory Diagnostics, or running hard drive diagnostics.Using Auslogics Driver Updater makes the process of updating device drivers seamless.
The tool runs a quick scan of the available device drivers and then checks for errors or drivers that are outdated.
Clicking on the Update Drivers button initiates the process of installing the latest versions of all the outdated device drivers. Another article suggested using the Win + Ctrl + Shift + B hotkeys to reset the video driver.
The screen blanks for a few seconds and a beep sound is heard. The graphic s driver is restarted and the issue, hopefully, is resolved. In some cases, if the error source is in apps you rarely use, your best option is to uninstall them. If the errors originate from your operating system’s components or executables, uninstalling them isn’t an option.
📌 Related: How to Uninstall Programs on Windows 10/11
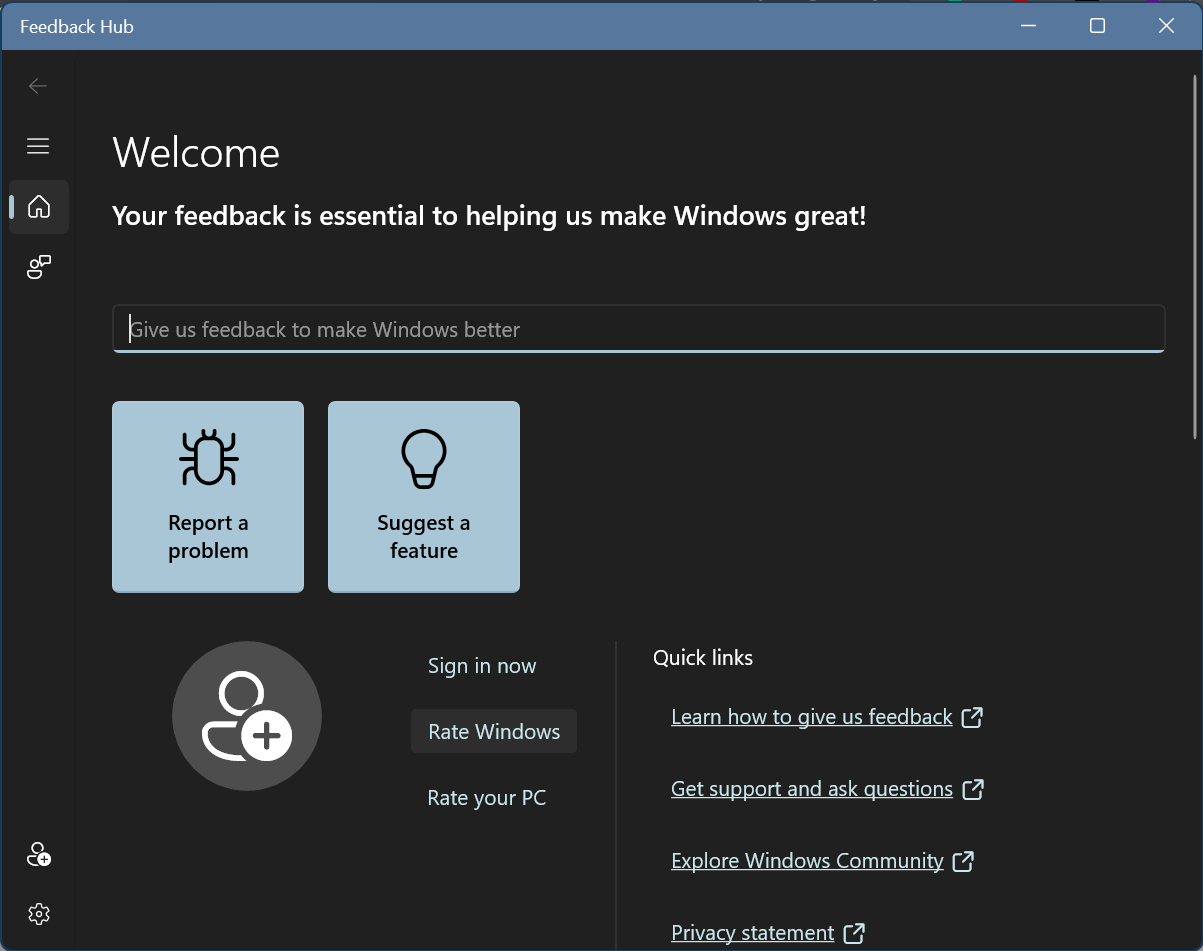 In such cases, you can use the Microsoft Feedback Hub, where you’ll include the Reliability Monitor detail s , to see if Microsoft can help fix the problem. All in all, we recommend carrying out regular system and application updates on your Windows 10 PC to keep everything functioning as it should.
How to Customize Reliability Monitor Settings
The Windows Reliability Monitor helps you view your machine’s:
- Application failures
- Windows failures
- Miscellaneous failures
- Warnings
- Information
You can sort the history by days or weeks. It lets you click on a particular category or date column to see more details about specific events that have occurred over time. It even lets you view the technical details of each issue. Besides that, the tool does not let you customize different settings. However, it offers different options depending on the action you want to perform, such as saving the reports.
Conclusion
Windows 10 Reliability Monitor helps you to identify and troubleshoot unexpected system crashes or freezes easily. This feature is simple to use, and you can access it using different methods on a Windows 10 PC.
The reliability history stores records for up to one year, allowing you to view a detailed report of your computer’s reliability over time. Therefore, it’s a perfect option to help resolve any issues on your PC before they escalate .
To keep your PC running optimally, we recommend installing a professional PC optimizer like Auslogics BoostSpeed 13. This unique app thoroughly scans your computer and removes junk, file duplicates, and useless software that could be filling up valuable space.
It also scans the registry and clears out corrupt or broken registry keys that could be causing annoying issues on your PC.
FAQ
How Do You Clear the Reliability History on Windows 10?
The Windows 10 Reliability Monitor allows you to clear the reliability history if need be. Here is how to go about it:
- Use the Windows Key + R combination to open the Run dialog box.
- Type control panel, then hit Enter.
- Choose Security and Maintenance in Control Panel .
- Click on Maintenance, then choose View reliability history.
- Head to the bottom and select “View all problem reports.”

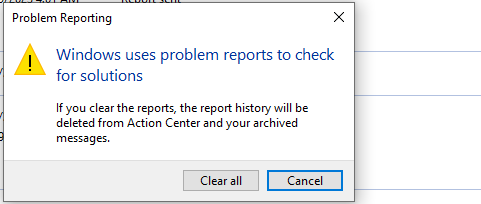
- Select “Clear all problem reports” in the bottom right corner.
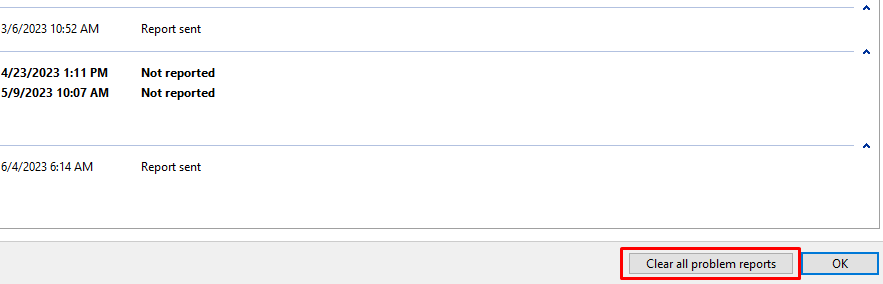
- Choose “Clear all” to complete the process.
How Do I Create a Shortcut for Reliability Monitor on Windows 10?
Windows 10 does not allow you to quickly search for the Reliability Monitor in the search bar. So, here is how to add its shortcut to the desktop to make it easily accessible:
- Right-click anywhere on your desktop and go to the New option.
- Select Shortcut from the dropdown menu.
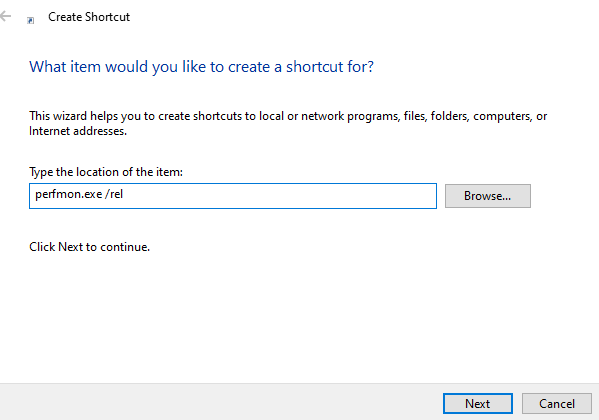
- Type perfmon.exe /rel in the new window and then click Next.
- I n the next window, type the desired name for the shortcut, in this case, Reliability Monitor.
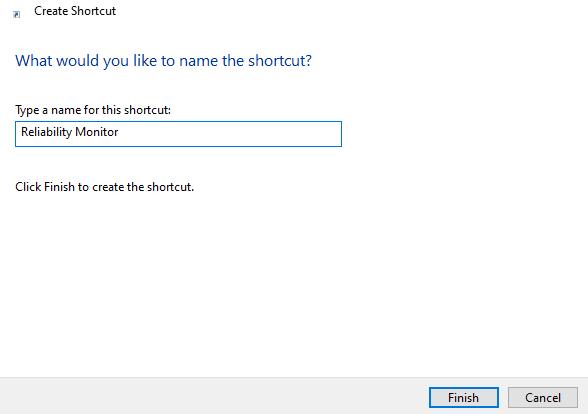
- Click on the Finish button. The shortcut will be added to your desktop with the Performance Monitor icon. So, you might need to change the icon to prevent confusion.
- Right-click on the created shortcut and choose Properties.
- Click on the Change Icon button.
- Type %SystemRoot%\system32\werconcpl.dll into the “Look for icons in this file box.” Then hit Enter.
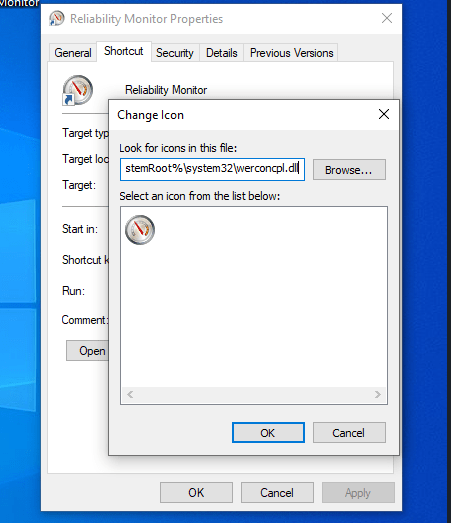
- Choose the flag icon, then click OK.
![]()
- Select OK in the next window.