
- How to Open Windows Disk Management in Windows 11?
- Method 1: Use the search bar to open Disk Management
- Method 2: Use Computer Management to launch Disk Management in Windows 11
- Method 3: Use PowerShell to open Disk Management
- Method 4: Use the Run dialog box
- Method 5: Use the Task Manager to launch Disk Management
- Method 6: Use Windows Settings to access Disk Management
- Conclusion
- FAQ
Disk Management is an inbuilt tool in Windows that you can use to initialize hard drives, resize, create, change drive letters, and more. It’s an essential tool, especially if you have multiple partitions or hard drives.
We’ll show you how to open Disk Management in Windows 11.
Let’s begin.
How to Open Windows Disk Management in Windows 11?
If you want the answers to the question, “Where is Disk Management in Windows 11?” follow the methods discussed below. Most of these methods are easy and only take a few steps.
Method 1: Use the search bar to open Disk Management
One easy way to learn how to open Disk Management in Windows 11 is to search for it. This method helps to avoid clicking through menus.
Here are the steps:
- Click the search bar on the taskbar and type
Disk Management. - Click Create and format hard disk partitions.
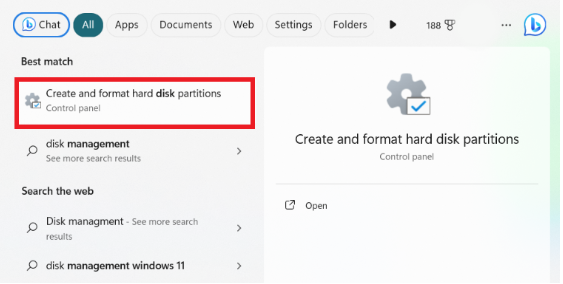
This will directly open Disk Management.
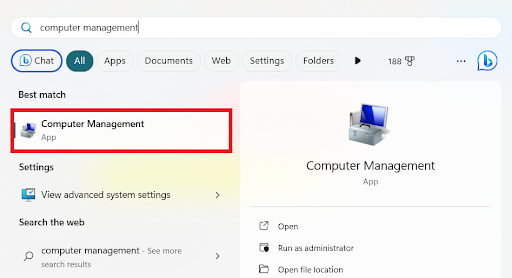
Method 2: Use Computer Management to launch Disk Management in Windows 11
Another way to answer the question, “Where is Disk Management in Windows 11?” is to use Computer Management. Here’s how to do it:
- Click the Start menu or the search bar on your taskbar.
- Type
computer managementin the search field.
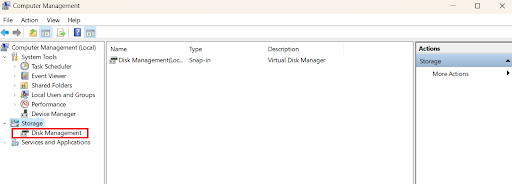
- Expand the Storage section on the left column, and click Disk Management. This will open the Disk Management utility.
Also Read: [Quick Fix] How to Free Up Space on C Drive on Windows 10/11
Method 3: Use PowerShell to open Disk Management
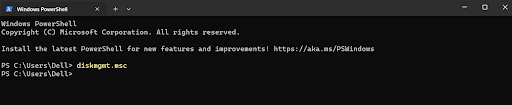
You can also use the Windows Disk Management command in PowerShell or the Command Prompt to open Disk Management. Here’s how it works:
- Type
Windows PowerShellin the search bar and click to open.
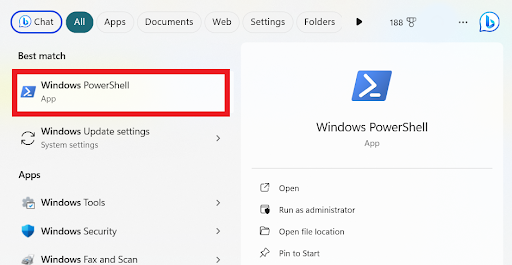
- When the window opens, type
diskmgmt.mscand pressEnter.
diskmgmt.msc) discussed above. Method 4: Use the Run dialog box
Another way to open Windows 11 Disk Management is to use the Run dialog box. Here’s how it works:
- Press
Windows + Rto open the Run dialog box. - Type
diskmgmt.mscin the search field and press OK.
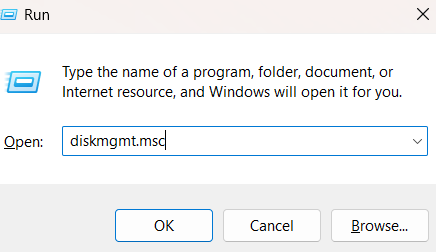
This will run the Disk Management utility instantly.
Related: A Beginner’s Guide to Disk Defragmentation
Method 5: Use the Task Manager to launch Disk Management
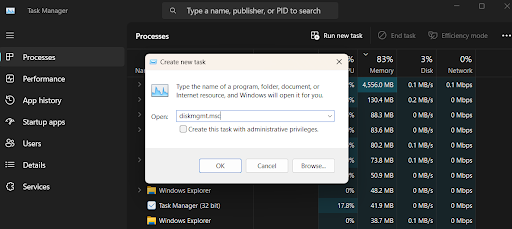
Here’s how to use the Task Manager to open Disk Management:
- Right-click the taskbar and select Task Manager.
- Click Run new task.

- Type
diskmgmt.mscand click OK.
Method 6: Use Windows Settings to access Disk Management
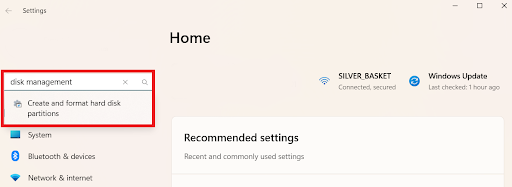
You can use Windows Settings to open Disk Management. The only difference is that it’s named differently. Here’s how to do it:
- Press
Windows key + Ito open the Windows Settings app. - Type
disk managementin the search field. - Click the Create and format hard disk partitions option from the results. This will open the Disk Management window.
Conclusion
Everyone can benefit from understanding how to use Disk Management in Windows 11. This article provides the basics, regardless of whether you are a tech enthusiast or want your computer to perform better.
Windows 11’s Disk Management is easy to use. You can quickly manage your computer’s storage using the methods discussed in this guide.
Feel free to share your questions or experience about Disk Management in the comments below!