
Have you ever wondered “What is Camera Roll ?” Simply put, it is a collection of photos and videos arranged chronologically based on when they were captured. In the digital world, the Camera Roll meaning is the primary storage for photos and videos on a device. For those unfamiliar with the terminology, the question “ What is the Camera Roll folder ?” might arise; it’s the primary storage in Windows for photos and videos captured on the device. Understanding the Windows 10 Photos app location is crucial if you search for your media, as it points directly to the Camera Roll and Saved Pictures folders by default. These folders are permanent and cannot be deleted by right-clicking. You have to go through the associated apps to delete Camera Roll and saved pictures in Windows 10. By default, these folders exist in your user profile’s Pictures library and are associated with the Photos and Camera apps. We will show you how to manage your media. Be careful, though, and make sure your settings can be restored. In case you accidentally delete your photos, don’t panic – there are ways to recover lost files
.
How to Manage Camera Roll and Saved Pictures in Windows 10
We will take a look at how you can hide, move, or successfully delete the Camera Roll and Saved Pictures folders.
Relocating the Camera Roll and Saved Pictures folders
You can move the Saved Pictures folder and Camera Roll folder away from your user profile’s Pictures library to any other location.
- Open File Explorer (
Windows key + E). - Navigate to Pictures, right-click Camera Roll, and choose Cut.
- Navigate to the desired new location and right-click > Paste.
- Repeat the procedure for the Saved Pictures folder.
After you’ve moved the folders to a new location, their paths will be automatically updated in the Windows Registry, and the Camera app and Photos app will detect the change.
So if you use the apps to create photos and videos, the media will be saved to the respective folders in the new location and no longer to the Pictures library.
Cleaning out unwanted files and optimizing your hard drive can significantly improve performance. Consider using Disk Defrag to rearrange files on your hard drive for maximum efficiency.
Hiding the Camera Roll and Saved Pictures Folders
If you don’t want to move the Camera Roll and Saved Pictures folders to another location, you can force them not to show:
- Open File Explorer (
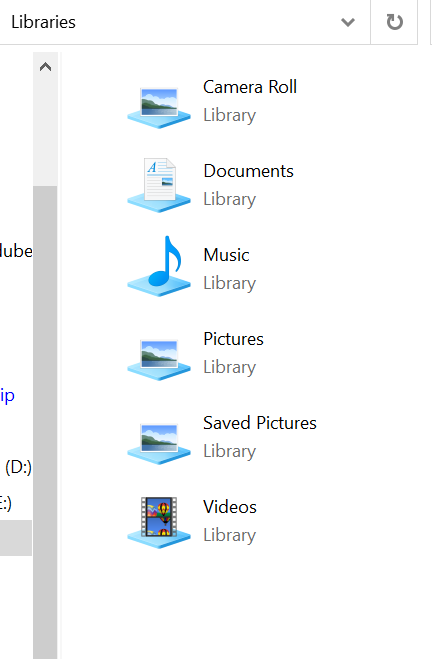
Windows key + E). - Navigate to Libraries > Pictures.
- Select Camera Roll, then hold Ctrl and click on Saved Pictures.
- Under the View tab, click Hide selected items.
- Disable the Hidden items option in the View tab if the folders appear faint.
Hiding the Camera Roll and Saved Pictures Libraries
- Open File Explorer (
Windows key + E). - Navigate to Libraries > Pictures.
- Locate Camera Roll & Saved Pictures.
- Hide the Libraries:
Right-click on Camera Roll and select Properties.
In the properties window, check the Hidden box under the “Attributes” section.
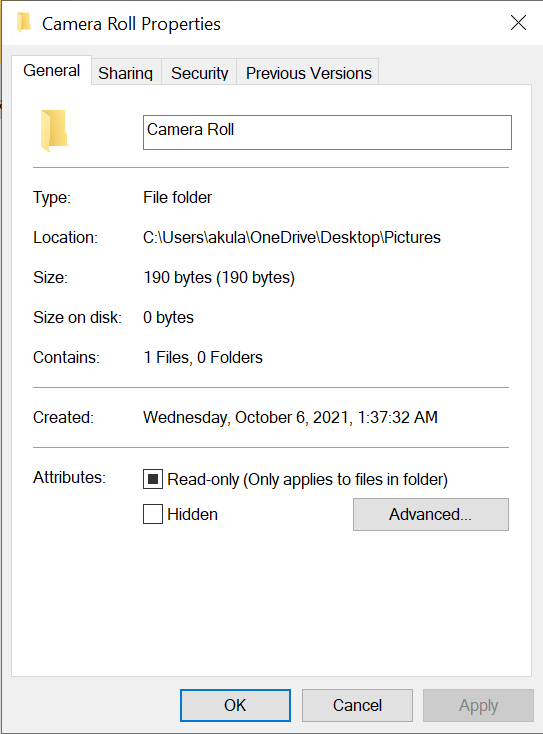
- Click on Apply, then OK to apply the changes. Choose the appropriate option if a confirmation window appears (usually “Apply changes to this folder only“).
- Repeat the same steps for the Saved Pictures library.
If you encounter any challenges while making changes in Windows 10, check this guide on how to get help in Windows 10
.
How to Delete Camera Roll and Saved Pictures in Windows 10
There is no way to delete the Saved Pictures and Camera Roll folders from your PC. This is because the apps they are associated with (the Photo app and Camera app, respectively) come with your Windows OS. The comprehensive guide by Microsoft
explains why the Camera Roll folder cannot be deleted due to access-denied issues.
If you want to optimize your PC further, you should also clear any lingering temporary files. The only way to permanently remove the folders is to uninstall the Camera and the Photo apps.
owever, the apps cannot be uninstalled via the Control Panel or the Start menu. We’ll have to do it via PowerShell.
There are many ways you can access your PowerShell console. Here’s what we suggest:
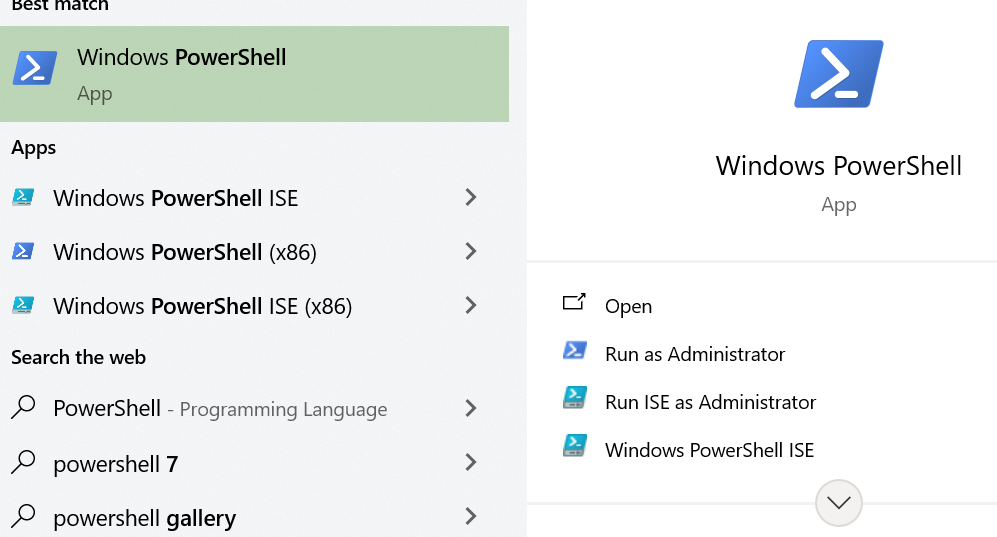
- Open the Start menu.
- Type powershell in the Search bar.
- Right-click on the option from the results list and select Run as Administrator.
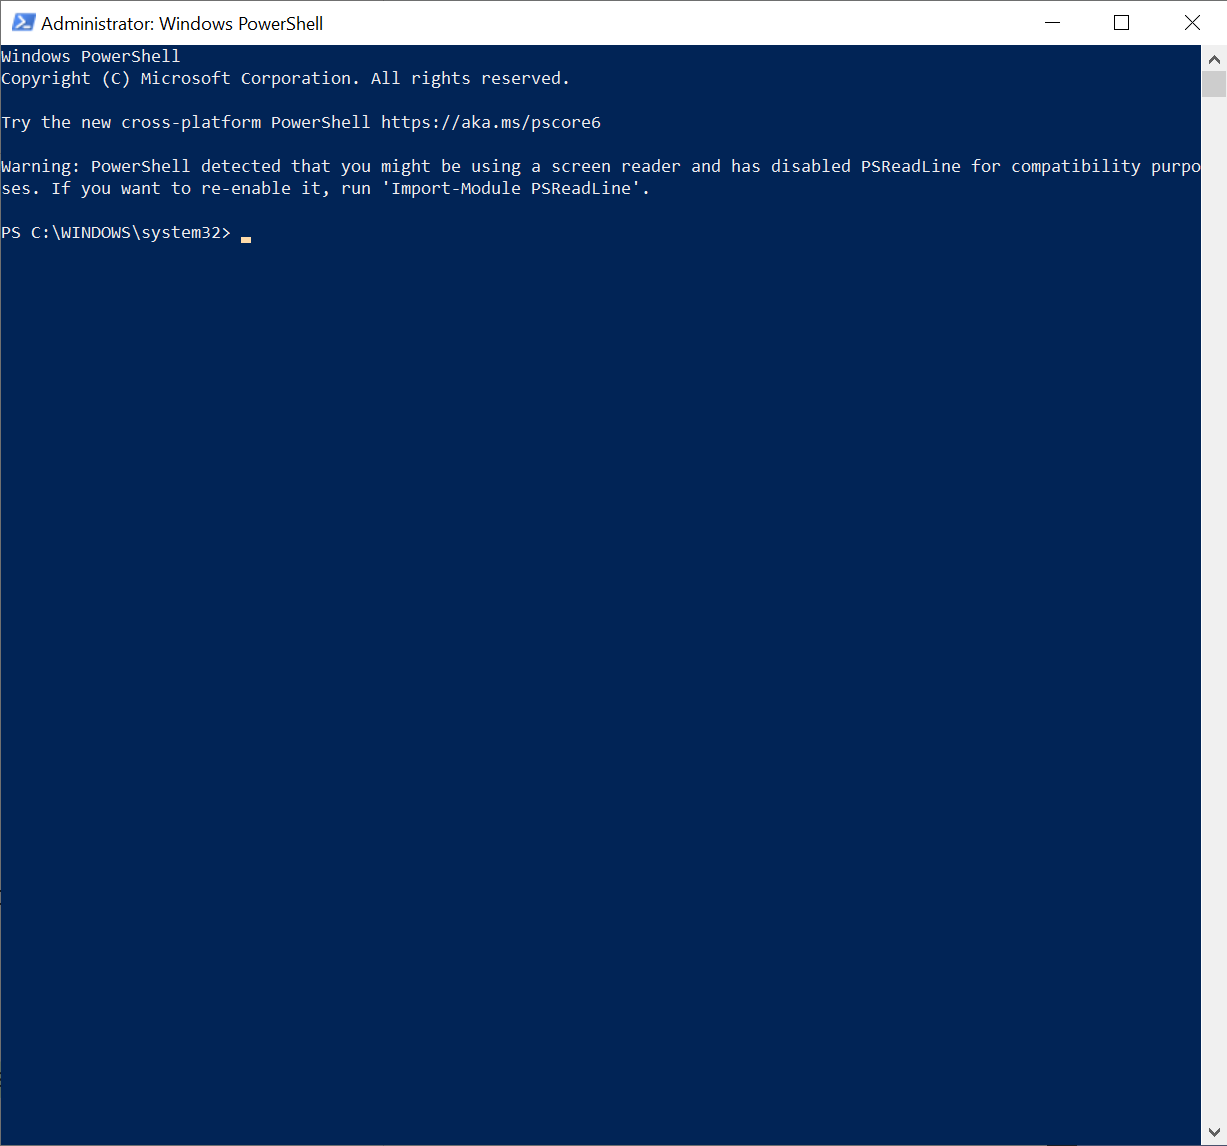
- Click the Yes button when the User Account Control prompt comes up.
- Copy the following line, paste it into the PowerShell (Admin) window, and press Enter to uninstall the Camera app:
Get-AppxPackage *windowscamera* | Remove-AppxPackage
- Copy and paste the following line and press Enter to uninstall the Photos app:
Get-AppxPackage *photos* | Remove-AppxPackage
- Close the PowerShell (Admin) window.
If you’d like to reinstall the apps, go back to PowerShell (Admin), paste the following line, and then press Enter to execute it:
Get-AppxPackage -AllUsers| Foreach {Add-AppxPackage -DisableDevelopmentMode -Register “$($_.InstallLocation)AppXManifest.xml ”}
Also Read:Most Useful Powershell Commands: Cheat Sheet with Examples
We, therefore, recommend you run a full system scan with Auslogics BoostSpeed to clean out junk files and fix other speed-reducing issues on your computer.
The tool improves system speed, restores stability, and ensures smooth performance so you can use your PC with a smile on your face again.
Also Read: Speed Up Slow Computer as a Pro – Introducing Auslogics BoostSpeed 13
FAQ
- The Camera app is available in the Microsoft Store if you haven’t installed it.
- Once the Camera app is open, you’ll see a preview of what the camera sees.
- To take a photo, click the Take Photo button or the camera icon. Depending on your device, there might also be a physical button that can be used.
- Photos are by default automatically saved to the Pictures > Camera Roll folder.
If your camera doesn’t work, check this tutorial.
- Open File Explorer.
- Go to This PC or My Computer.
- Navigate to Pictures and then Camera Roll. All your photos and videos will be there.
- It is In use by another program
(Check if another application is using your camera).
- Permission issue – administrative rights required.
- File/folder corruption.
- Syncing with cloud service.
- Backup software monitoring the folder.
Close all open apps and restart your computer if you’re having problems. If the problem persists, consider seeking expert assistance or look for specific error messages. For those aiming to boost their PC’s performance further, here is an excellent tool – Auslogics File Recovery. It is perfect for those unexpected moments when you lose crucial files.