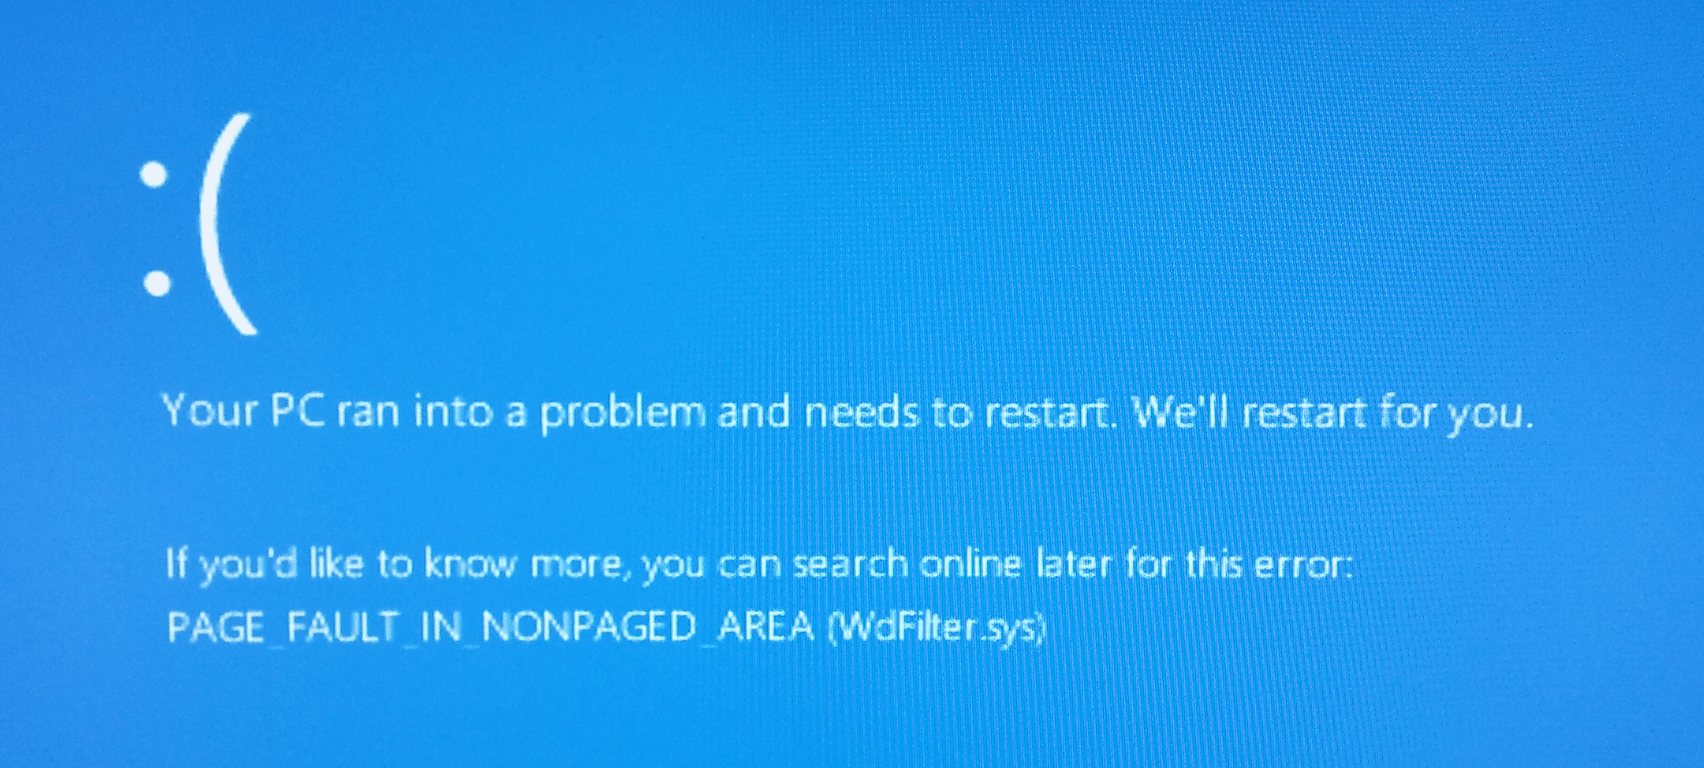
If you’re running into the frustrating error message “Page Fault in Nonpaged Area: ” on your Windows system, here is your go-to solution. Learn the causes behind the issue, explore troubleshooting methods, and learn preventive measures to restore stability and performance.
Let’s conquer the blue screen page fault in nonpaged area error together.
What Is a Page Fault in the Nonpaged Area Windows 10?
A page fault in the nonpaged area is an error in Windows when a program tries to access data that should be in the computer’s memory (RAM), but it’s not there.
📌 Also read: How to Clear RAM and Reduce RAM Usage in Windows 10
This causes system crashes and instability. To fix it, you need to identify the cause and take appropriate actions like updating drivers or checking hardware. Resolving this error helps restore stability and smooth operation on your Windows computer.
Causes of Page Faults in Nonpaged Area
Page faults in the nonpaged area can be caused by various factors. Here are some common causes:
- Issues with RAM modules, hard drives, or other hardware components can lead to page faults in the nonpaged area.
- Outdated or incompatible drivers can conflict with the system, resulting in page faults.
- Certain software programs or applications may clash with the operating system, causing page faults.
- Problems with the page file, which acts as virtual memory, can trigger page faults.
- Malicious software can corrupt system files and lead to page faults.
How to Fix Page Faults in Nonpaged Area Issue
1. Check Hardware Connections
Make sure that all hardware components, such as RAM modules, hard drives, and graphics cards, are properly connected. If you suspect a loose connection, reseat the components by carefully removing and reinserting them. Ensure that everything is securely in place.
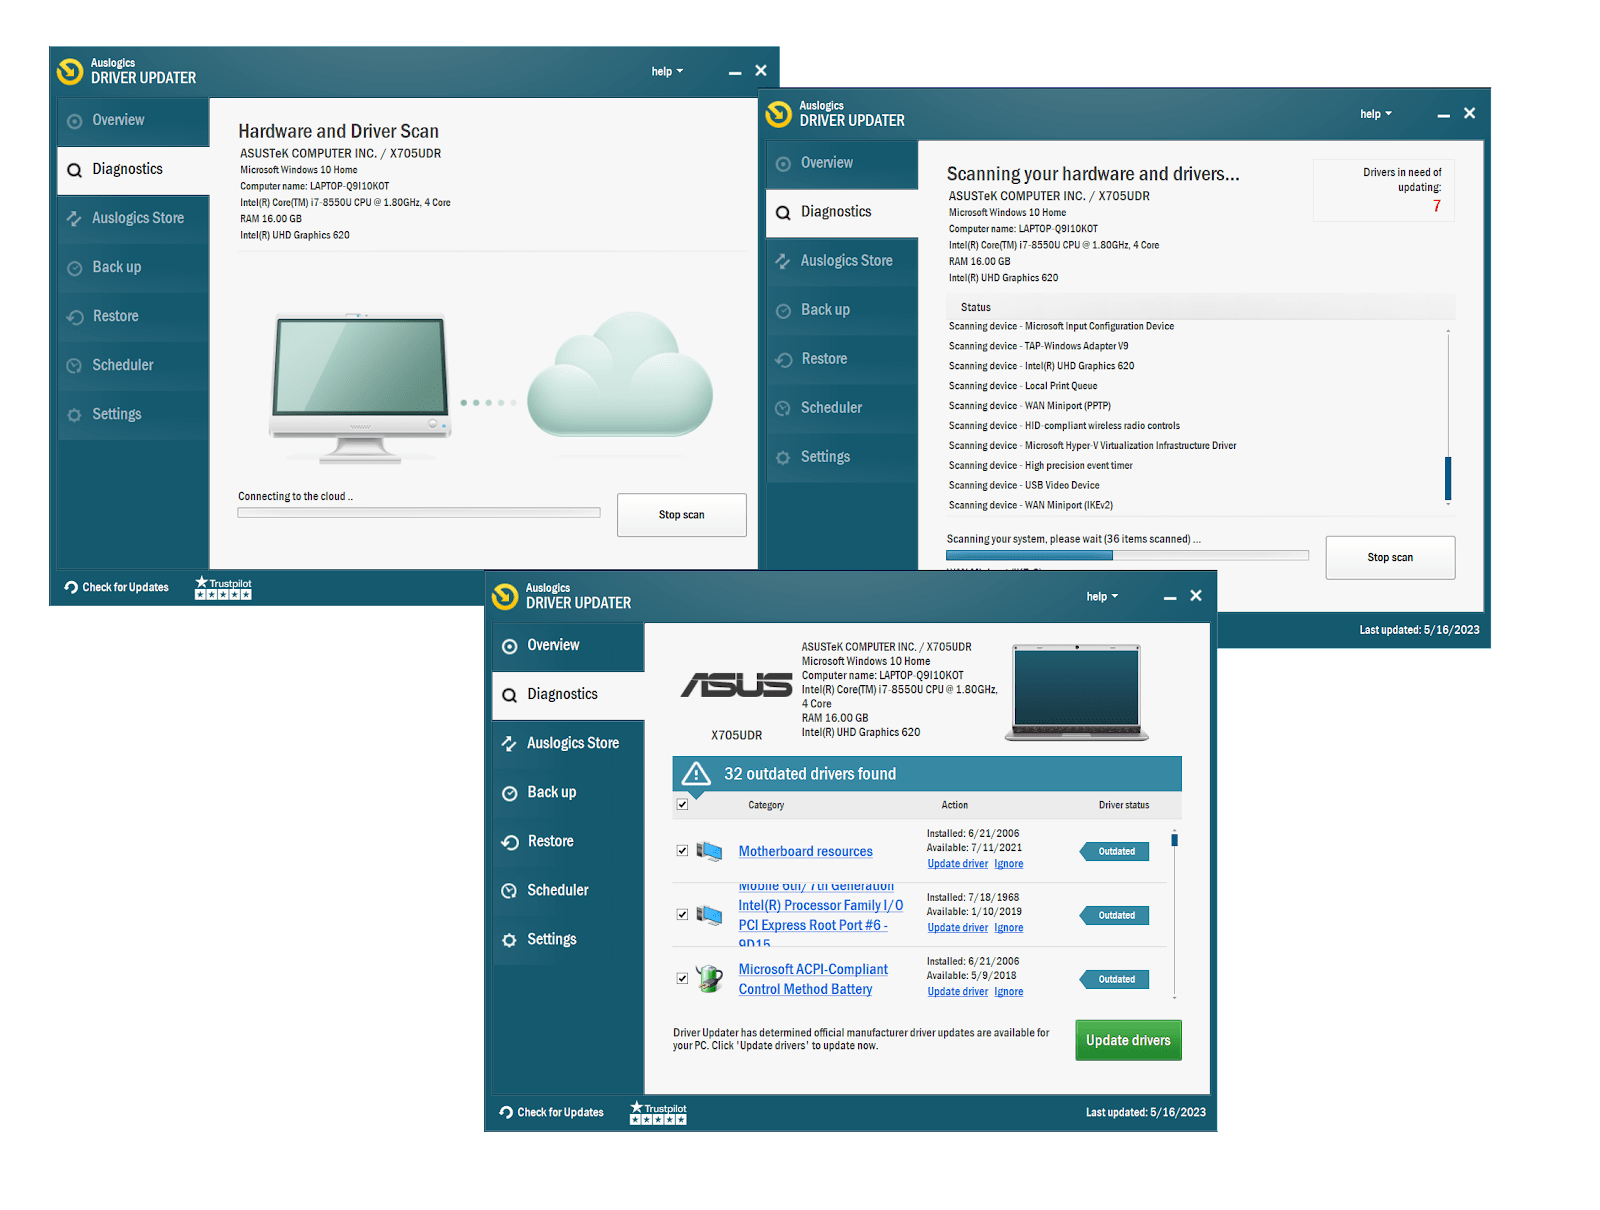
2. Update Device Drivers
Outdated or incompatible device drivers can often be the cause of page faults. To resolve this, update your drivers, especially those related to the problematic hardware:
- Identify the hardware causing the issue: Review the error message or consult system logs to determine the specific hardware that might be causing the page faults.
- Download and install updated drivers: Look for the latest drivers compatible with your operating system and hardware model. Download the appropriate driver files and follow the installation instructions provided by the manufacturer.
- Restart your computer: After installing the updated drivers, restart your computer to apply the changes effectively.
📌 Also read: [EASY GUIDE] How to Update Device Drivers on a Windows 10 PC?
3. Run Memory Tests
Utilize tools like Windows Memory Diagnostic or Memtest86 to perform memory tests. These tools will help identify any faulty RAM modules. If any defective modules are detected, it is recommended to replace them with new ones to resolve the issue.
4. Check Disk Integrity
Use the built-in Windows utility, CHKDSK, to scan and fix disk errors:
- Open Command Prompt as administrator.
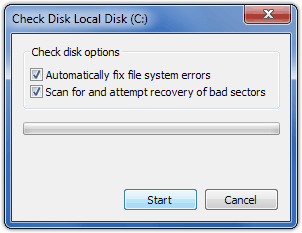
- Type
chkdsk /f /r C:to initiate the process. - This will check the integrity of your disk and repair any errors found.
📌 Also read: How to fix disk errors in Windows 10 using manual commands?
5. Disable Automatic Paging
Access the Advanced System Settings and disable automatic paging file size management:
- Open the Control Panel.
- Click on the System or System and Security option.
- Within the System settings, click on the Advanced system settings link.
- In the System Properties window, navigate to the Advanced tab.
- Under the Performance section, click on the Settings button. This will open the Performance Options window.
- In the Performance Options window, go to the Advanced tab.
- In the Virtual memory section, click on the Change button. This will open the Virtual Memory window.
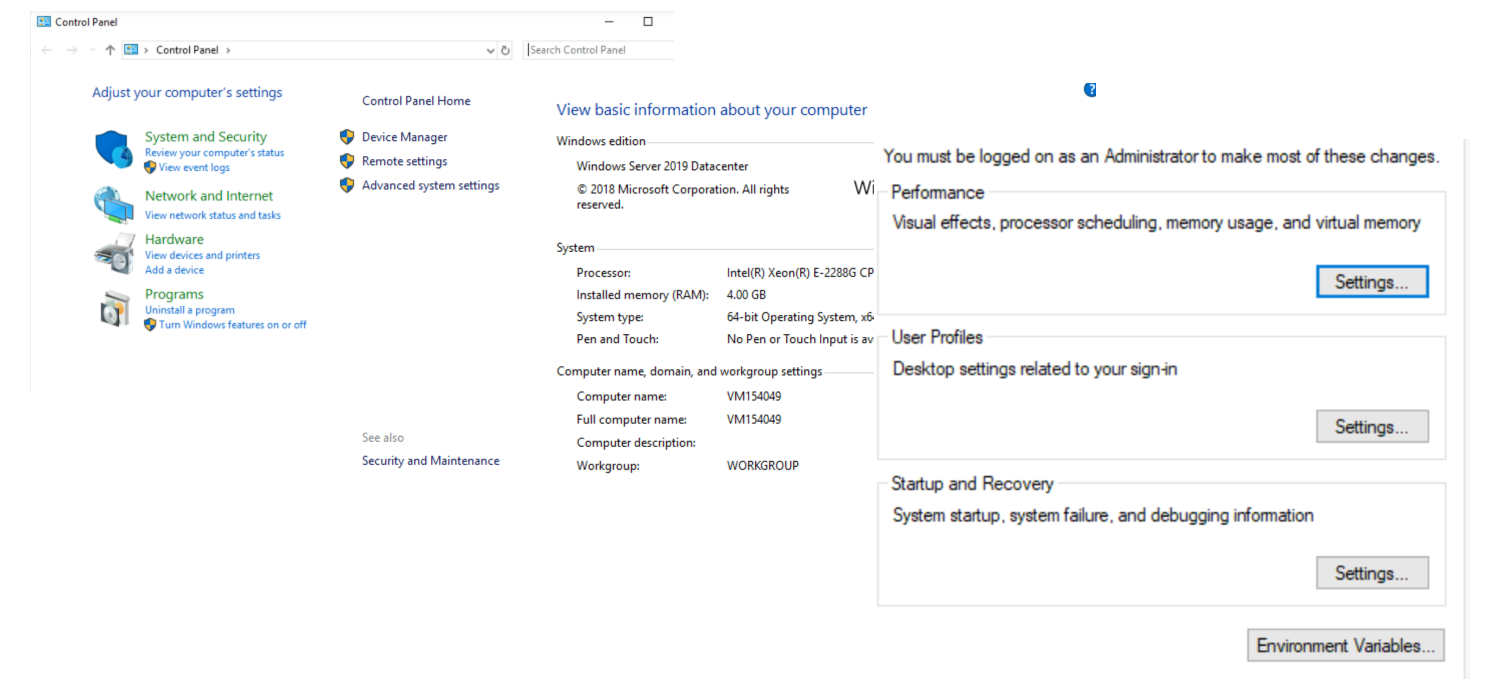
- Uncheck the option that says Automatically manage paging file size for all drives. This will allow you to manually configure the paging file size.
- Select the drive for which you want to modify the paging file size. By default, this is usually the C: drive.
- Choose the Custom size option.
- Enter the desired values for the Initial size (MB) and Maximum size (MB) of the paging file. It is generally recommended to set both values to the same size, which should be equal to the amount of physical RAM installed in your computer.
- Click on the Set or OK button to apply the changes. Finally, restart your computer for the changes to take effect.
📌 Also read: How To Check Your RAM Size, Speed, and Type
6. Resolve Software Conflicts
Uninstall recently installed programs or updates that might conflict with your system.
📌 Here’s your step by step guide: How to Uninstall Programs on Windows 10/11?
7. Check for Malware
Perform a thorough scan of your system using reliable antivirus software.
- Open your preferred antivirus software or download and install Auslogics Anti-Malware if you haven’t already done so.
- Launch the antivirus software or Auslogics Anti-Malware.
- Locate the option to run a scan or perform a custom scan. The location of this option may vary depending on the software you are using. Look for a Scan or Scan Now button or a similar option.
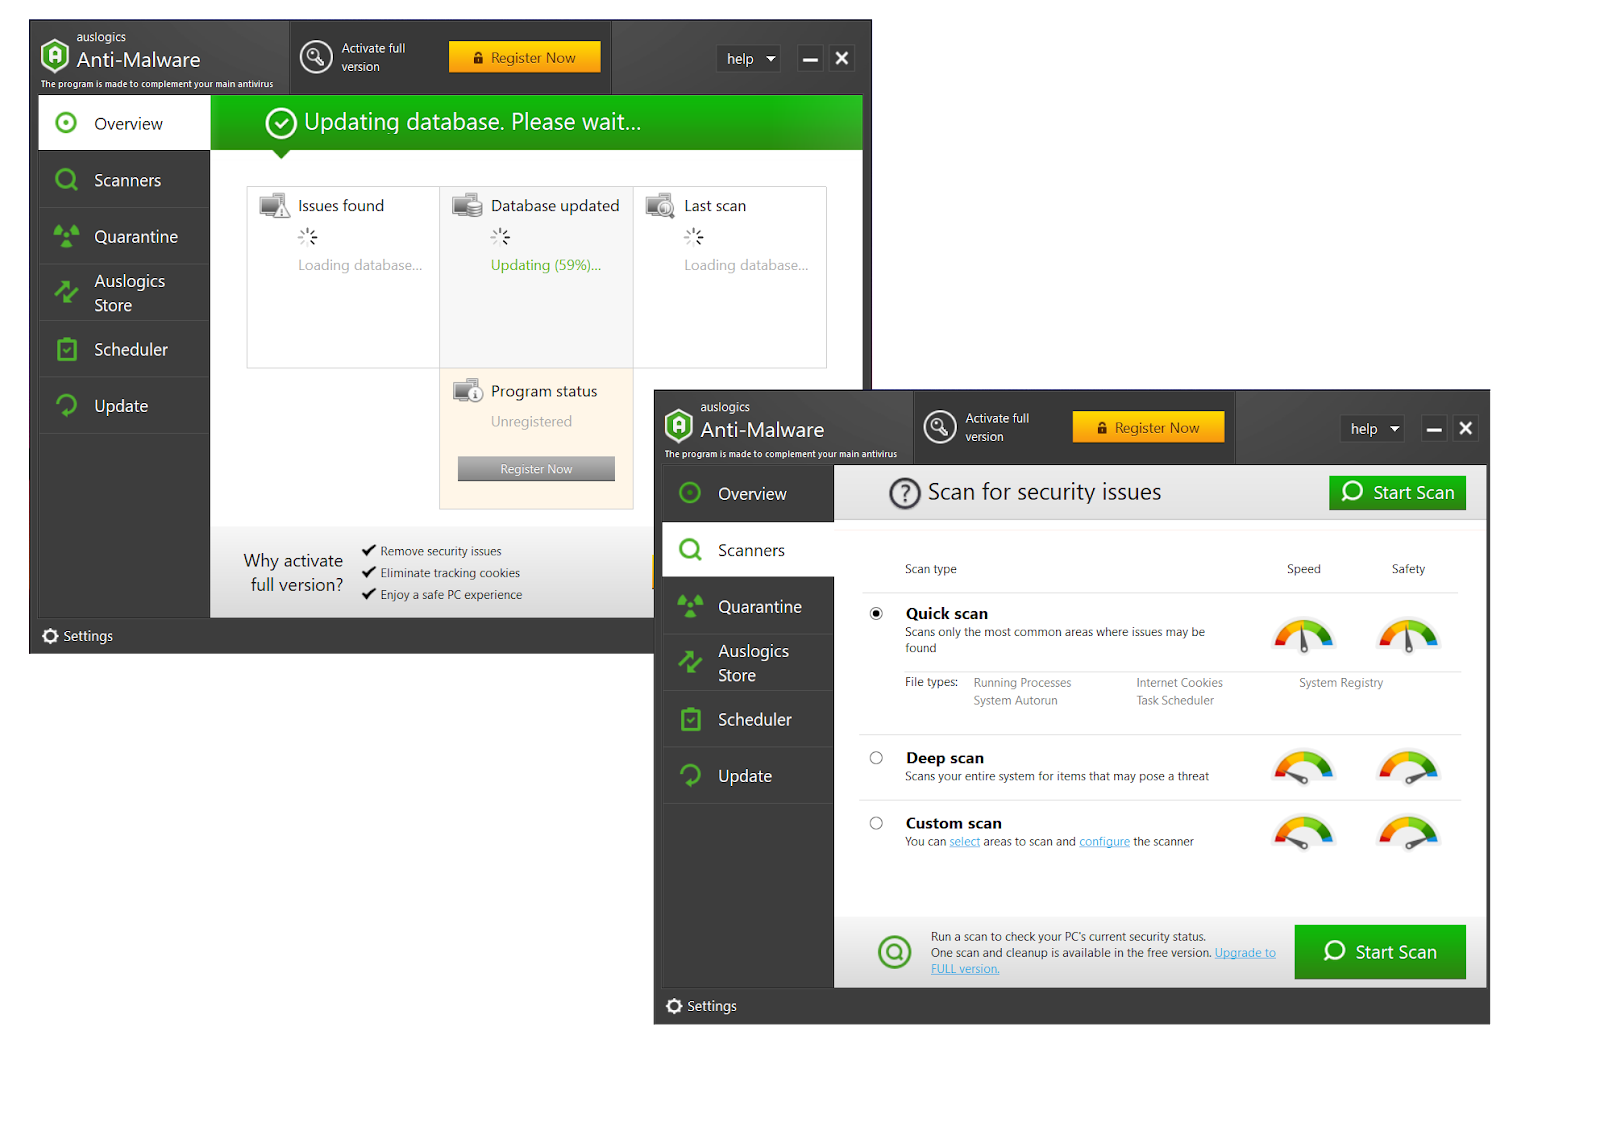
- Select the type of scan you want to perform. For a thorough scan, choose the option that scans the entire system or all files and folders.
- Start the scan by clicking on the Scan or Start Scan button. The antivirus software will now begin scanning your system for malware, viruses, and other threats.
- Wait for the scan to complete. The duration of the scan will depend on the size of your system and the speed of your computer.
- Once the scan is finished, review the scan results. The antivirus software will display a list of any detected threats or suspicious files.
Also read: How to Remove Virus and Other Malware from Windows
8. Update BIOS/UEFI
Visit the manufacturer’s website and check for BIOS/ UEFI updates for your motherboard. Install the latest version if available. Before proceeding with the update, carefully read any accompanying instructions or documentation provided by the manufacturer. Pay attention to any specific steps or precautions mentioned.
📌 Also read: What is BIOS on a Computer: Everything You Need to Know
9. Fix the Page Fault in Nonpaged Area Right After Booting Your Computer
There are some cases when a blue screen of death appears right after you start your computer. In this case, we recommend you to boot into safe mode and follow the instructions below:
- On the lock screen, click the Power button.
- Press and hold the
Shift keyand then click Restart. Hold theShift keyuntil you see changes. - You might see a message such as Please wait or something else.
- After a few seconds, you will be taken to a new window. Follow this thread: Troubleshoot ->Advanced Options ->Startup Settings.
- This command should restart your computer.
- After restarting your computer, you will see basic options for safe mode.
- You would then have to configure your PC to create a minidump. If you do not know how to create a dump file, you can consult the moderators in the Microsoft Answer Forum.
- Restart your computer.
- You will be able to return to normal boot mode. If you encounter the Page Fault in Nonepaged Area error again, your computer will create a minidump file.
- Once more, boot into safe mode.
- On the Bluescreen viewer, open the dump file.
You should be able to see the driver or services that caused the issues on your computer.
From here, you can use a driver updater or a program like Auslogics Registry Cleaner. You should be able to fix faulty drivers or clean repetitive or invalid entries on your Windows registry.
📌 Also read: Auslogics Registry Cleaner: The Best Tool to Optimize Your Windows Registry
Prevention and Best Practices
Regular System Maintenance
Performing regular system maintenance is crucial to prevent errors such as the BSOD page fault in nonpaged area. One effective tool that can aid in system maintenance is Auslogics BoostSpeed
. This comprehensive software provides a range of features designed to optimize your system’s performance and improve its overall health. It includes disk cleanup tools to remove unnecessary files and free up disk space, which can reduce the likelihood of encountering memory-related errors. The software also provides a registry cleaner to fix invalid entries, ensuring the integrity and efficiency of the Windows registry.
📌 Also read: How to Improve Computer Performance?
Keeping Drivers Up to Date
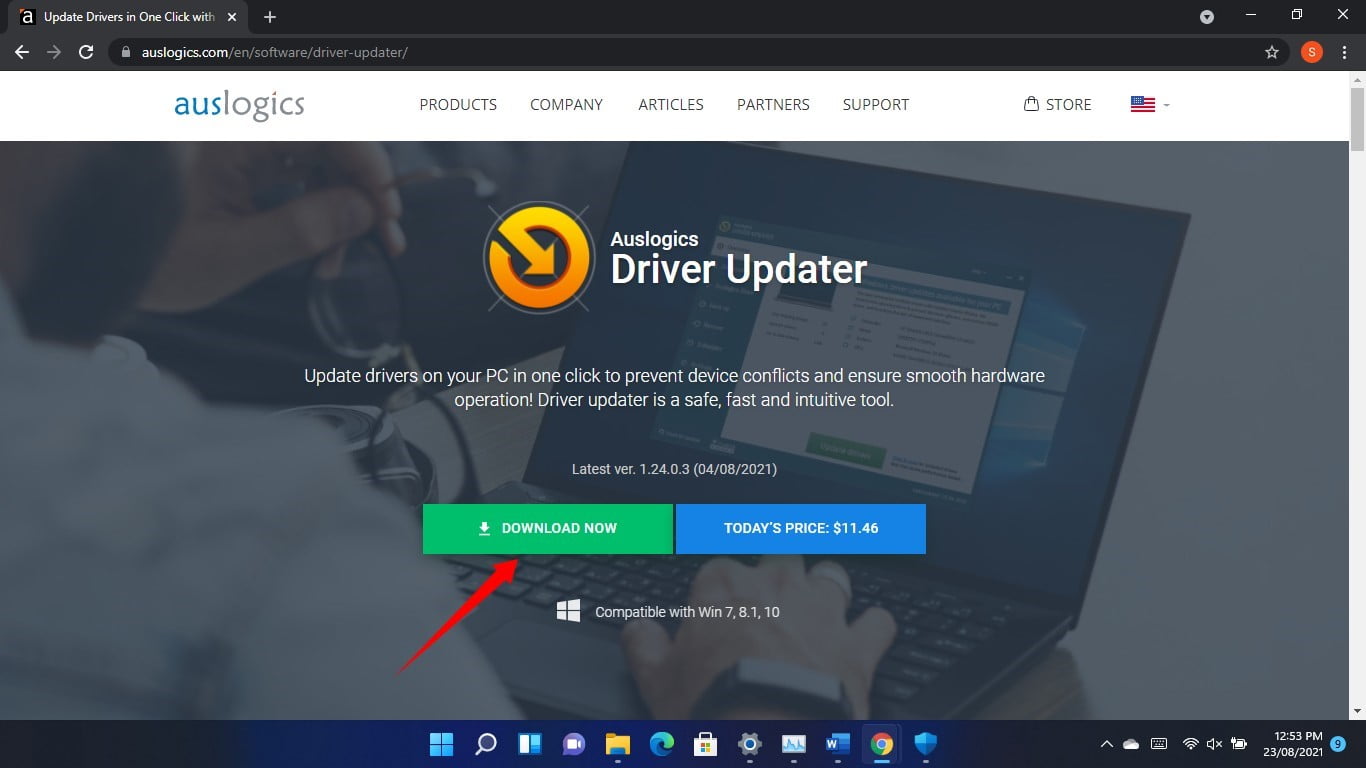
Updating drivers is very important to avoid errors such as the “Page Fault in Nonpaged Area.” Outdated or incompatible drivers can often be the root cause of this error, leading to system instability and crashes. Auslogics Driver Updater is a valuable tool that simplifies the driver update process.
This software scans your system, identifies outdated drivers, and automatically downloads and installs the latest versions from reliable sources. Using Auslogics Driver Updater as part of your regular maintenance routine can significantly reduce the risk of driver-related issues and improve system stability.
📌 Also read: How to Update Device Drivers on a Windows 10 PC?
Installing Reliable Security Software
Malware infections can lead to system instability and cause various errors, including the “Page Fault in Nonpaged Area.” Use reliable security software to proactively protect your computer against malware threats and minimize the risk of encountering such errors.
How to Recover Unsaved Or Lost Data Due to Page Fault In Nonpaged Area Error?
Recovering unsaved or lost data due to the “Page Fault in Nonpaged Area” error can be a challenging task. However, here are some steps you can take to attempt data recovery:
- Restart your computer: the “Page Fault in Nonpaged Area” error may be temporary, and restarting can help resolve the issue.
- Check for automatic backups: If you have automatic backup solutions enabled, such as Windows File History, OneDrive, or cloud-based backup services, check if your data is backed up and can be restored.
- Use data recovery software: Install and use reliable data recovery software such as Recuva, EaseUS Data Recovery Wizard, or Stellar Data Recovery. These tools can scan your storage devices for deleted or lost files and attempt to recover them.
- Take professional help: If the above steps do not yield satisfactory results, you may consider seeking assistance from professional data recovery services.
In Summary
The “Page Fault in the Nonpaged Area” Error is an crucial indicator that you computer urgently needs soma actions and maintenance. Take this note seriously and follow suggested steps to take care about your computer performance.