
Windows 10 has over one billion users. However, not all Windows users have an error-free experience when using the operating system.
In fact, we’ve covered quite a few typical Windows bugs and errors in our articles — and today we are looking at another one.
Today, we are looking into how to fix the Error 0xc0000409 on Windows 10.
We will do our best to explain what may be causing the error and go into more detail about the several methods you can try to fix it.
Finally, we will offer you an automated solution for getting rid of similar issues and keeping your Windows PC running fast and smoothly.
However, let’s not get ahead of ourselves. First, let’s see why you are getting this annoying error code in the first place.
What Is the Error Code 0xc0000409?
The Error Code 0xc0000409 is reported by some Windows users and seems to be related to
Windows 10 Insider Preview build 19624. The error seems to be triggered by different issues and there is no detailed error message to help you figure out what course of action to take.
And as there are no clear instructions on how to fix the error, it’s perfectly understandable that you may have no idea what to do or where the error code came from.
There can be many things causing the 0xc0000409 error code. This error could be related to registry entries, corrupted files, settings conflicts — and a lot more.
All this uncertainty makes dealing with the 0xc0000409 error code quite overwhelming.
Fortunately, we have handpicked a few fixes that can set things right.
So, how to troubleshoot error 0xc0000409 in Windows 10? There are several things we suggest you try — and, hopefully, one of the fixes will do the trick and help you resolve the error code.
Here are the solutions we suggest you try:
- Updating Windows 10
- Running a System File Checker scan
- Performing a repair install
- Restoring your system
- Performing a clean boot
Obviously, updating your Windows OS is the easiest possible solution — so, this is where we will start first. If updating your system doesn’t work, simply move on to the next fix on the list — until you find a solution that finally rids you of the error.
Let’s begin.
How to Fix Error Code 0xc0000409
Fix 1: Update Your Windows 10 OS
In most cases, Microsoft is well aware of the errors and glitches affecting Windows 10 and is constantly working on solutions.
These solutions are released with every new version and update. This is why keeping your Windows updated is essential for having an error-free experience.
In most cases, Windows should install its updates automatically.
However, sometimes you may need to check for an update manually to make sure you haven’t missed one.
Here’s how to update your Windows OS:
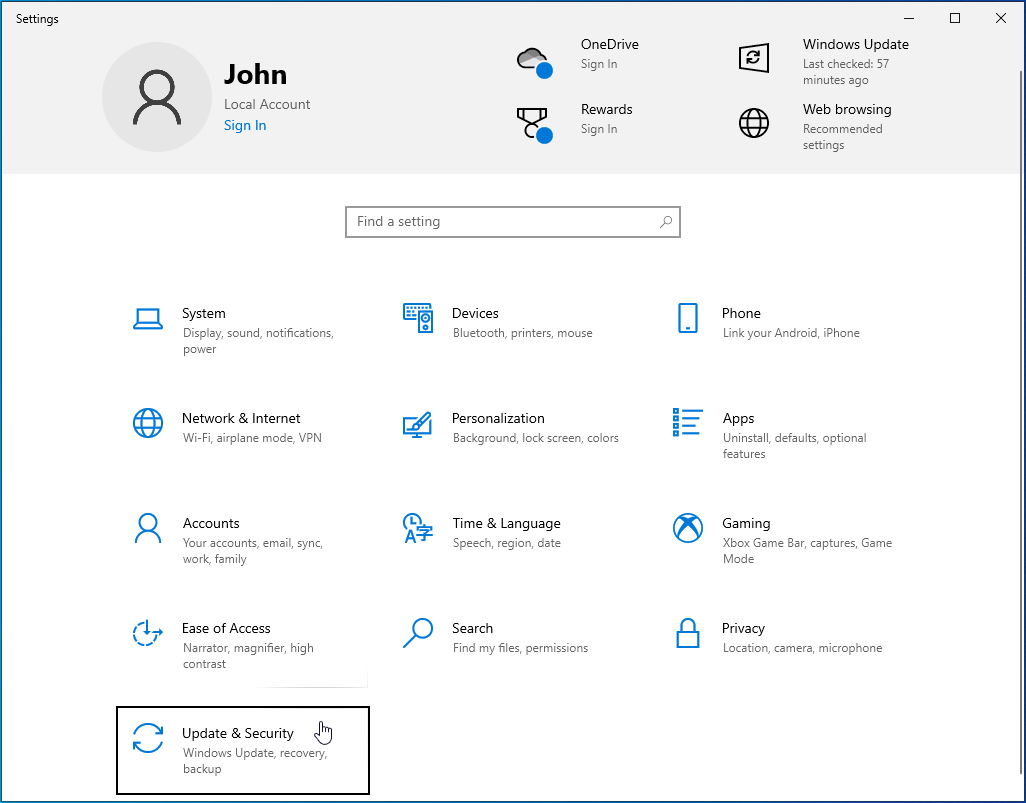
- Click the Start button in the bottom left corner.

- Navigate to Settings.

- Click the Update & Security icon.
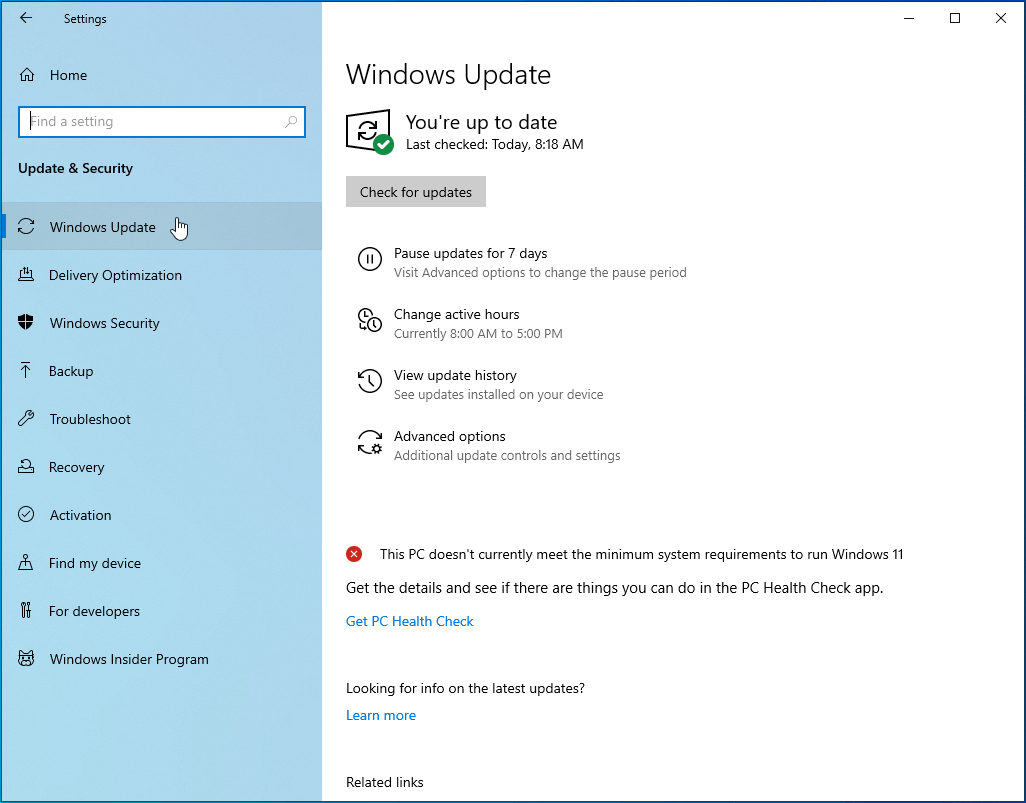
- Go to the Windows Update tab in the left sidebar.
- Click the Check for updates button.
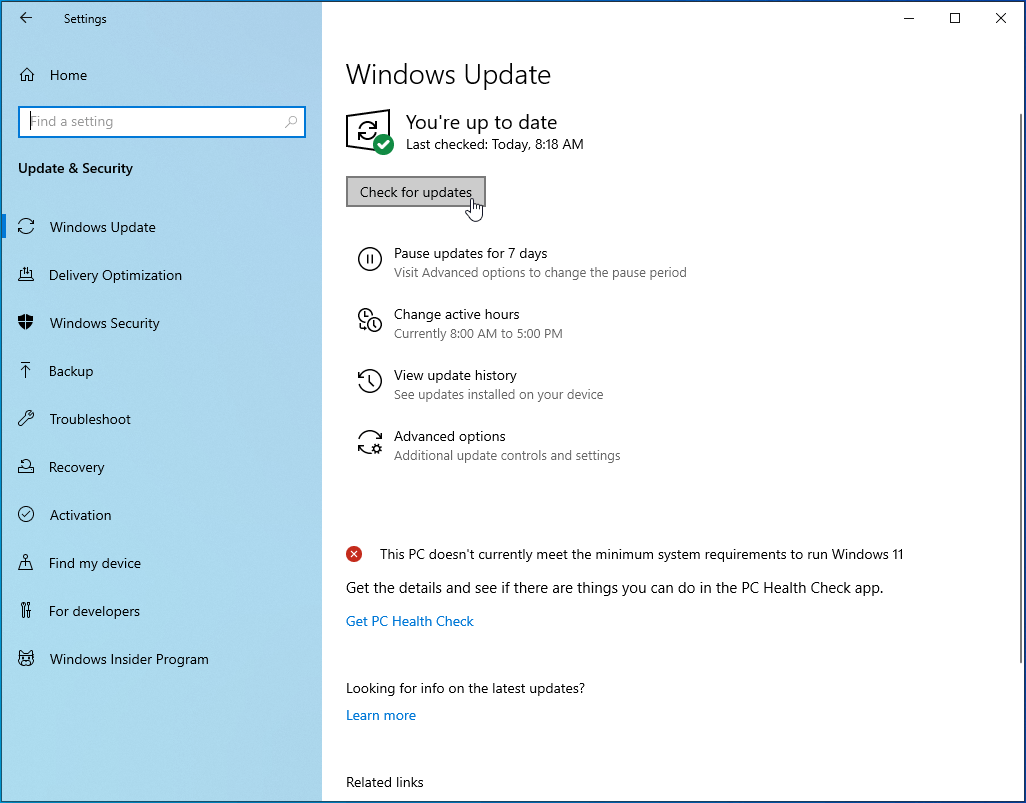
Your system will check for new Windows updates and if any are available, they will be installed automatically.
Once the update is installed, you can go ahead and check if the error message is showing up again.
If you are still running into the 0xc0000409 error code, try the fix below: use System File Checker to scan your system for errors and glitches.
Related: Ultimate Guide: How to Manually Check and Install Windows Updates
Fix 2: Run a System File Checker Scan
System File Checker is a built-in utility on Windows 10 designed to help users scan for and locate possible corruptions in system files and restore damaged items.
There is a good chance that you will be able to resolve the error code by running a System File Checker scan on your PC. Here’s how to do it:
- Type cmd into Search.
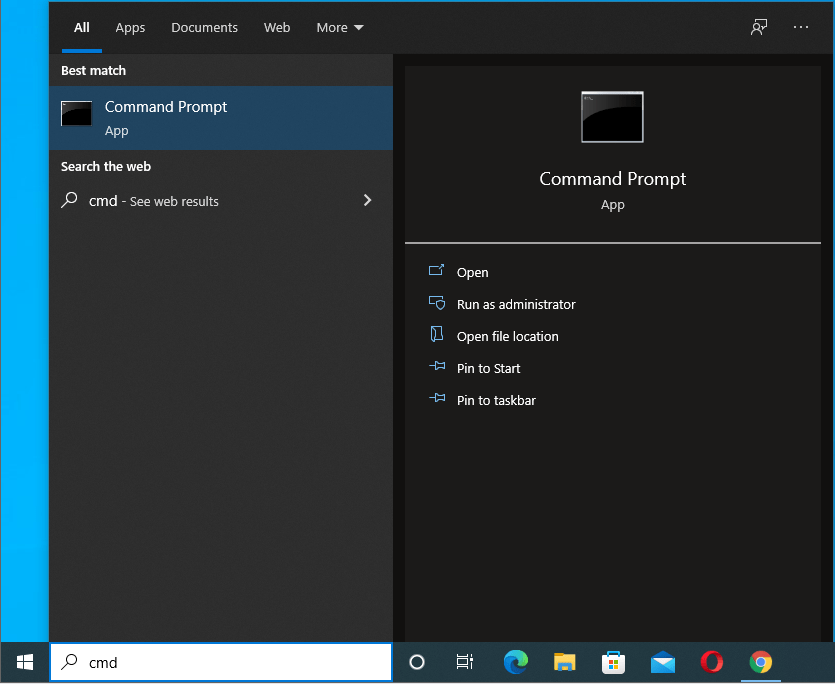
- Launch the program as an administrator.

- When Command Prompt launches, type
sfc /scannowcommand and press the Enter key on your keyboard.
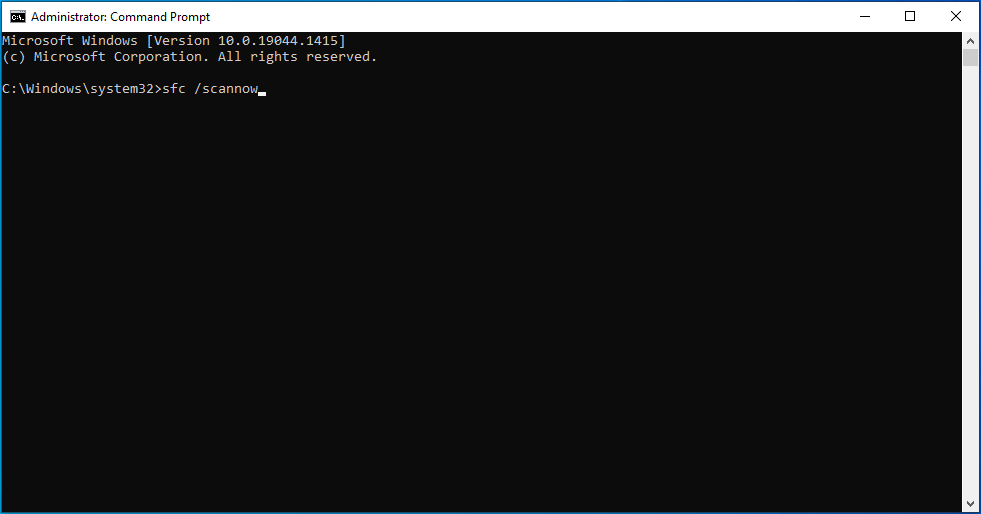
- This will launch the scan and repair processes.

- Make sure to keep the program open until the scan completes.
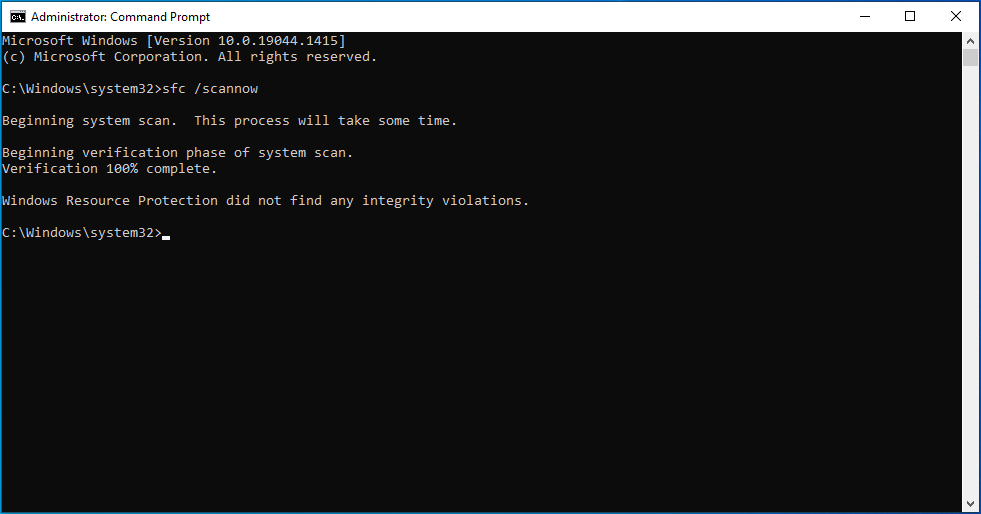
- Once the scan is complete, restart your computer.
If the scan has identified the 0xc0000409 error code, the SFC scan should handle it automatically. You should no longer be running into it on your PC.
However, if the problem persists, move on to the next solution.
Further Reading: Windows Command Prompt: 28 Most Useful CMD Commands [with Examples]
Fix 3: Perform a Repair Install
If the above fixes haven’t worked, consider performing a repair install of your OS.
This method installs Windows over your existing OS on your hard disk via your installation DVD or Installation media file.
A repair install will repair broken system files while keeping your healthy folders intact.
Here’s how to perform a repair install on your PC:
- Launch your Windows 10 installation media.
- Once you run the setup.exe file, the Windows 10 Setup process will begin.
- In the User Account Control window, click Yes.
- On the Windows 10 Setup screen, select the Upgrade this PC now option.
- Click Next.
- You will then see a percentage meter informing you of the progress of the process.
- On the next page, click Download and install updates.
- Click Next.
- Note that your PC will restart during this process.
- Accept all license terms.
- When you are on the Ready to install page, click Install.
- Make sure that you also select Windows 10 Home and Keep personal files and apps.
- Once the process is complete, log into your system and follow the on-screen prompts.
- That should be it. Your system should now be running a clean installation of Windows 10.
This means that you shouldn’t be running into the 0xc0000409 error code anymore, nor any other errors and glitches that were bugging your system earlier.
If, for some reason, this method didn’t work or you prefer not to perform a repair install of your system, try the next fix.
Also Read: [SOLVED] Main Problems With Windows 10 Installation
Fix 4: Restore the System
A system restore will take your PC to a previous state when you were not troubled by the 0xc0000409 error code.
To try this fix, you need to have the system restore option enabled on your PC. Moreover, you need to have created a system restore point prior to all of this happening.
If this is the case and you do have a system restore point to roll back to, here are the steps to take:
- Log into your PC as an administrator.
- Go to Start and select All Programs.
- Navigate to Accessories and click System Tools.
- Next, select System Restore.
- A new window will open. Click the “Restore computer to a previous date” option and click Next.
- Now, select a system restore point from the list. Make sure to select the point in time when you were not bothered by the error code.
- Once you’ve selected the restore point, click Next.
- You will see a confirmation window. Click Next again.
- Restart your PC and check if the error has been resolved.
Now, if you haven’t created a restore point before running into the error code, we suggest you create one now — it can be of great help in fixing a wide range of system issues.
First, make sure that System Restore is enabled on your PC. On most computers, it should be on by default but it could have been accidentally disabled.
Here are the steps to take:
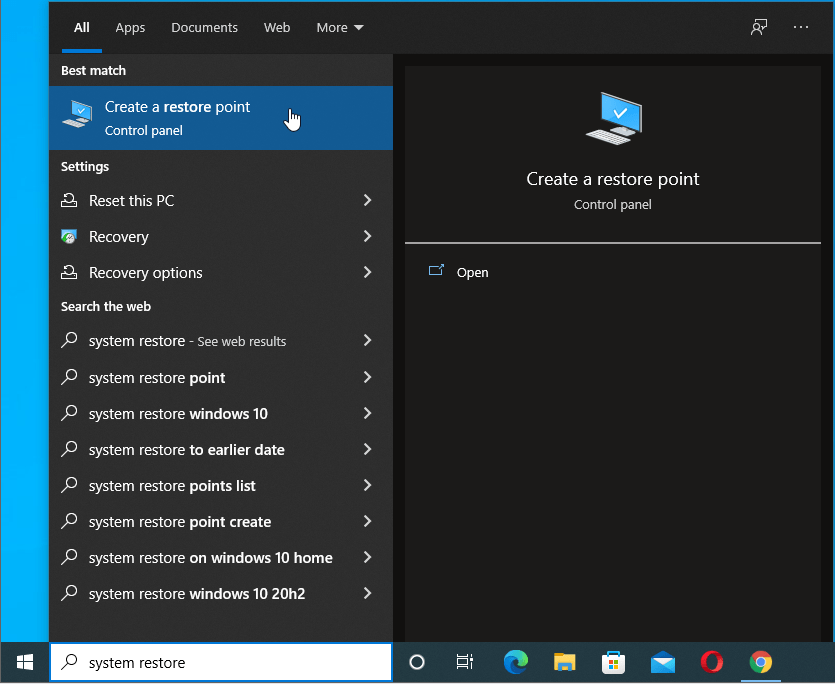
- Go to Search.
- Type system restore
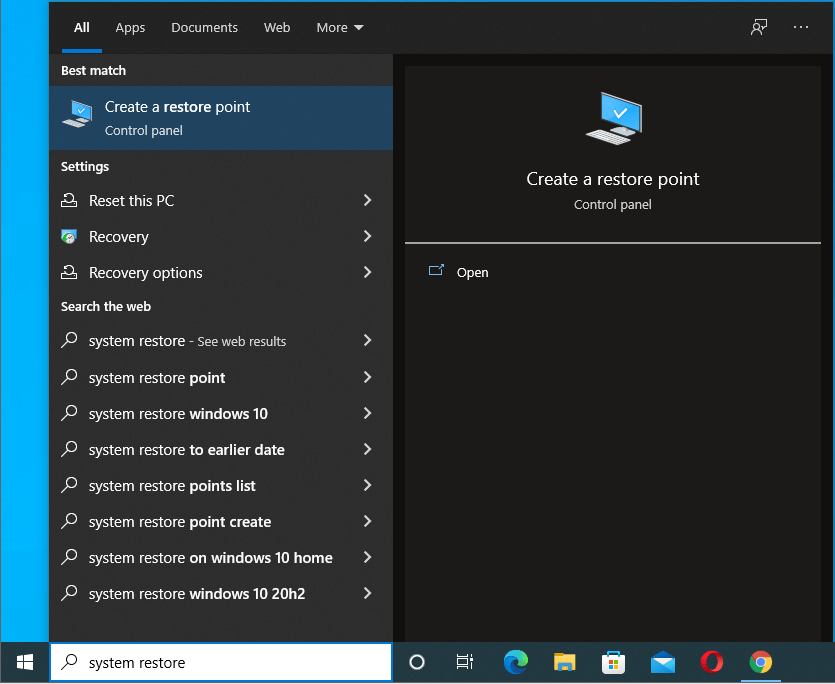
- Click Create a restore point.
- Go to System Protection.
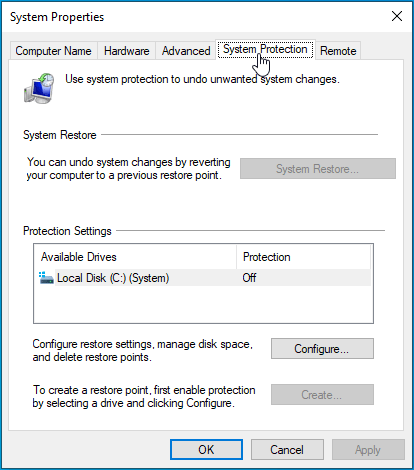
- Select the needed drive and click Configure.
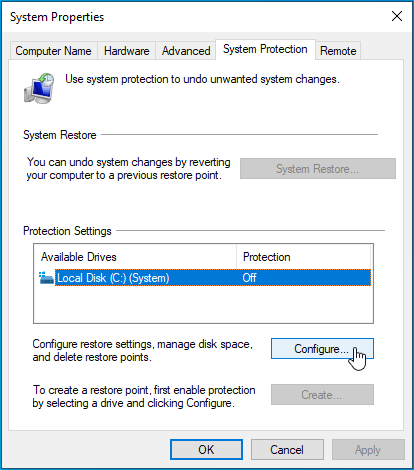
- Toggle this option on: Turn on system protection.

Now you can proceed to creating a System Restore Point. Here’s how to do it:
- Locate the Start button and right-click it.
- Navigate to the Control Panel.
- Select System and Maintenance.
- Go to System.
- On the left side, find System protection and click it.
- Under the System Protection tab, go to Create.
- Enter a description for your new system restore point. You can use a date on which you are creating the restore point or use an event that you are creating it for, for example, “before clean boot”.
- Once you’ve entered the description, select Create.
Now that you’ve created a system restore point, you will be able to use it in any situation when you run into an “unsolvable” error.
You will simply be able to take your system back in time to a point when this error was not a problem.
Related: Ultimate Windows Recovery Guide: How to Restore Your Windows System
Fix 5: Perform a Clean Boot
Finally, if none of the solutions above have worked, we suggest performing a clean boot of your system. Here is how you can do it:
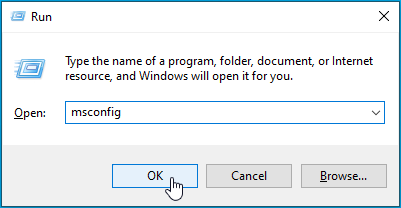
- On your keyboard, press the Windows and R keys at the same time. This will bring up Run.
- Type
msconfigin the search bar and click OK.
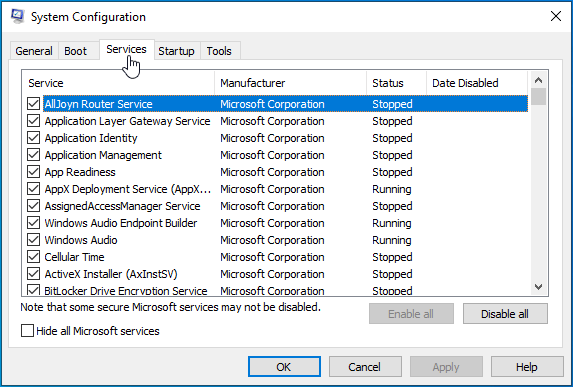
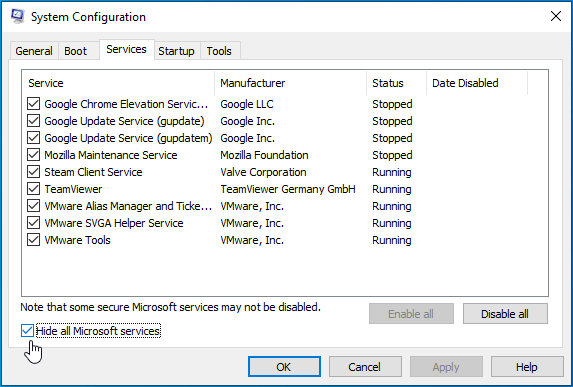
- Navigate to the Services tab.
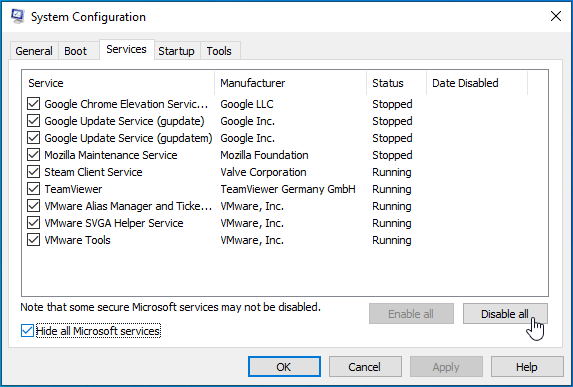
- Find Hide all Microsoft services and check this option.
- Click Disable all.
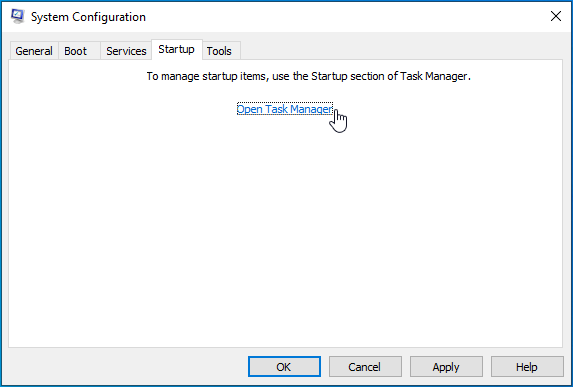
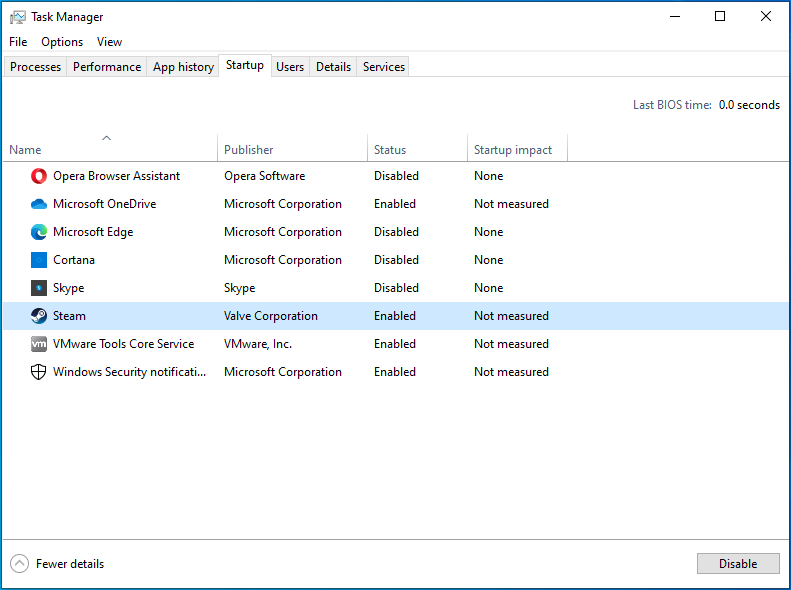
- Next, go to the Startup tab and click Open Task Manager.
- Select the startup programs you are not using and click Disable.
This is the final fix in our list and we hope that by now you know how to fix the unknown software exception on Windows 10.
Also Interesting: How to Perform a Clean Boot in Windows 10?
Trying one or two of the fixes should prevent the 0xc0000409 error code from bugging your system.
Unfortunately, as we’ve mentioned at the very start of this article, the 0xc0000409 error code is not the only frequently encountered issue on Windows OS.
If you are running into errors and glitches quite often and don’t want to waste time going through all of these solutions trying to fix them — there may be a better way.
You could try using a specialized program like Auslogics BoostSpeed.
This software has been specifically designed for Windows OS and is meant to boost your system by offloading unnecessary and damaged files that may also be the cause of errors and bugs.
Auslogics BoostSpeed is really easy to use. Once you download the software from the official website, simply click the Scan Now button to give your system a quick checkup.
The scan will start aiming to locate any files that may be causing slowdowns in performance and other issues.
In most cases, this will include temporary user files, web browser cache, unused error logs, leftover update files, unnecessary Java files, and more.
You will then be given the option to have Auslogics BoostSpeed safely remove these files from your system without any risk of damage to your other data.
Once the junk is removed, you should notice a significant increase in speed on your PC — and generally better performance.
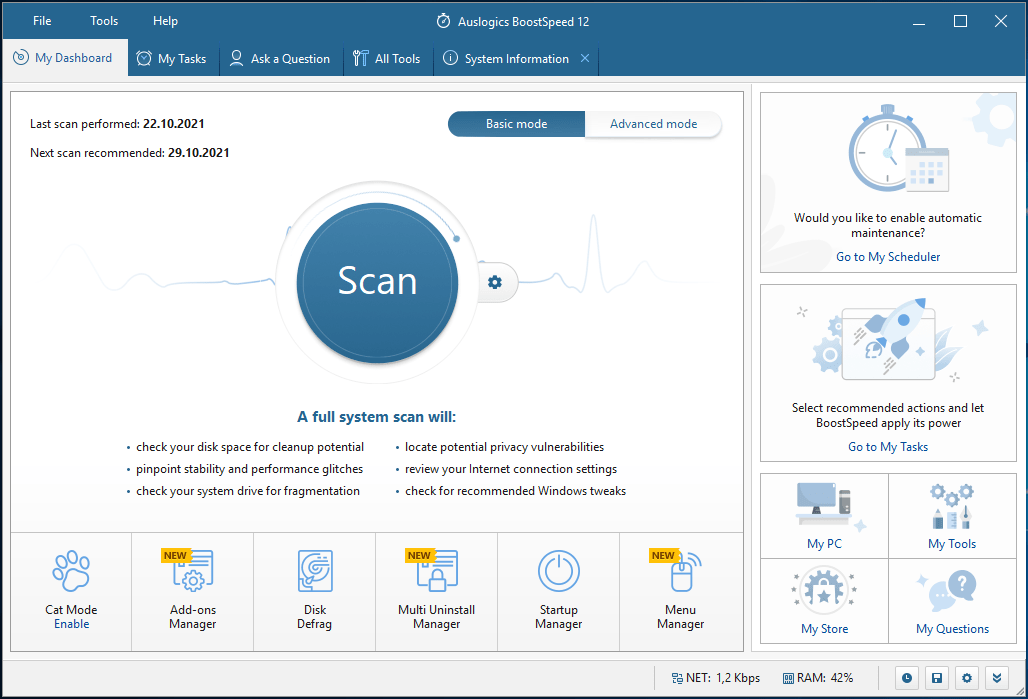
In addition to the quick scan feature, Auslogics BoostSpeed comes with a whole toolkit of useful programs onboard.
There is BoostSpeed’s Registry Cleaner that has been designed to fix corrupt or broken Registry entries. You also get:
- a tool for protecting your privacy online;
- an automatic memory and processor management feature that will ensure that the apps you run always have maximum system resources allocated to them;
- scheduled automatic maintenance that can detect and get rid of issues in real-time;
- a tool to tweak non-optimal PC settings for a faster speed — and a lot more.
In short, using Auslogics BoostSpeed can help you save a lot of time that you would otherwise need to spend reading articles like these to find a fix for yet another system glitch. Download Auslogics BoostSpeed today!