
It is possible to connect more than one recording device to your Windows PC. After doing so, you have to choose which device your system and apps will use.
Let’s assume that you connected a Bluetooth headset, and later on, you set up a webcam with an integrated microphone. Meanwhile, a friend of yours just paid you a visit and brought along this cool wired headphone, and you decide to see how it sounds. So you plug it into your computer’s headphone jack.
Can you now see that you have multiple recording devices connected to your PC at the same time? And that’s in addition to the microphone that’s built into your computer. But Windows will use only one of these sound input devices at a time. So you have to indicate the one you prefer.
In this guide, we will show you the different ways of selecting the default recording device in Windows 10. Let’s go.
How to Set the Default Microphone in Windows 10
Here are the options:
- Use the Sound option in the Control Panel to choose your default sound input device
- Set your default input device via Windows Settings
Here is a step-by-step guide on how to apply each of the above options.
Option 1: Select the Default Input Device Using the Control Panel
Here’s how to choose your preferred microphone:
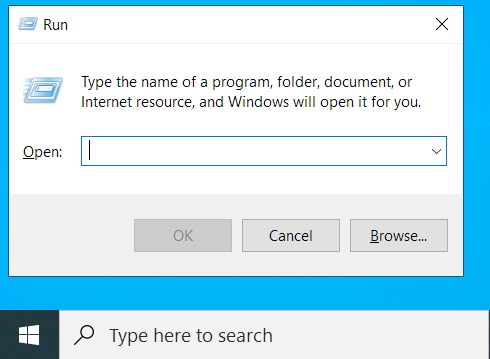
- Open the Run dialog box: Hold down the Windows logo key and press R.

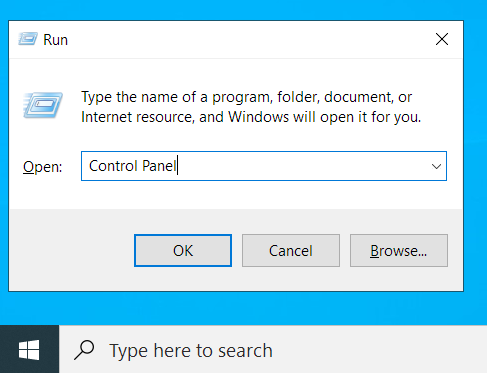
- Type ‘Control Panel’ into the text field and press Enter or click the OK button.

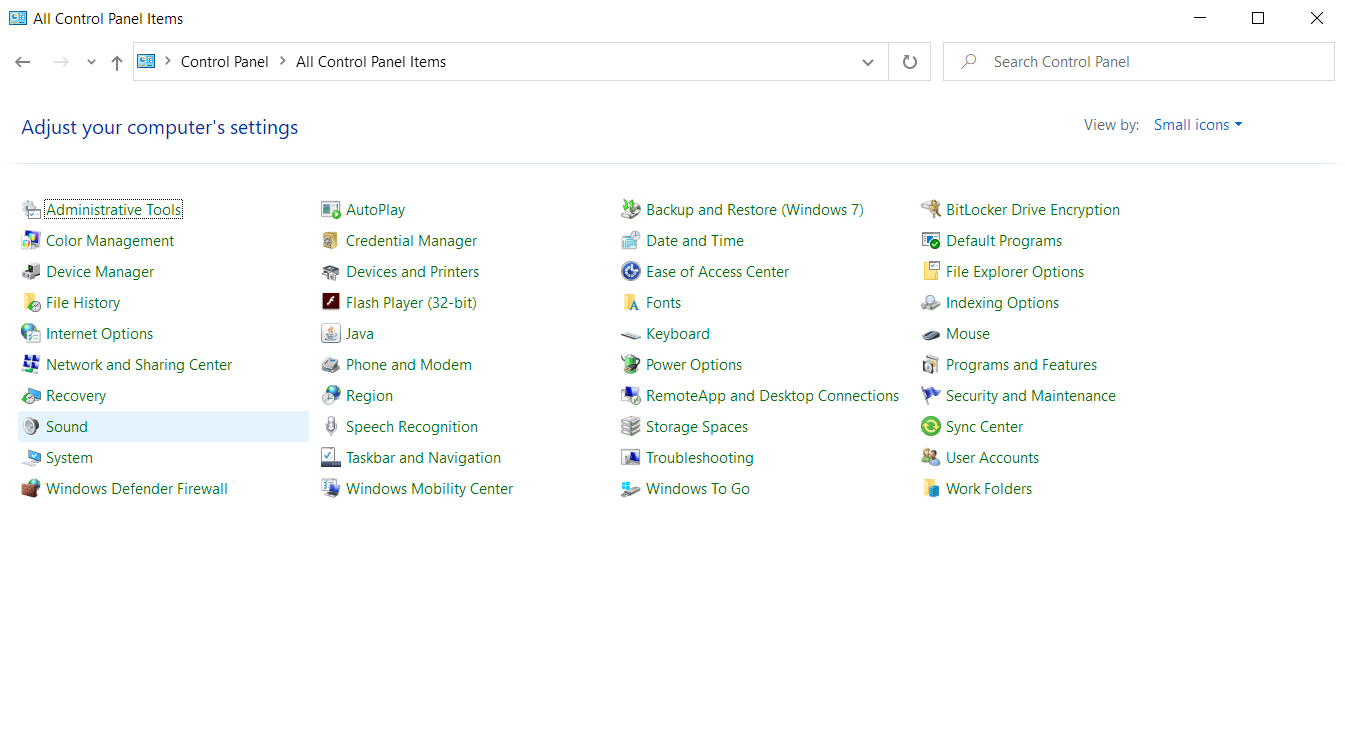
- Once you are in the Control Panel window, click on the ‘View-by:’ drop-down in the top-right corner of your screen and select ‘Small icons.’

- Click on Sound from the list of options.

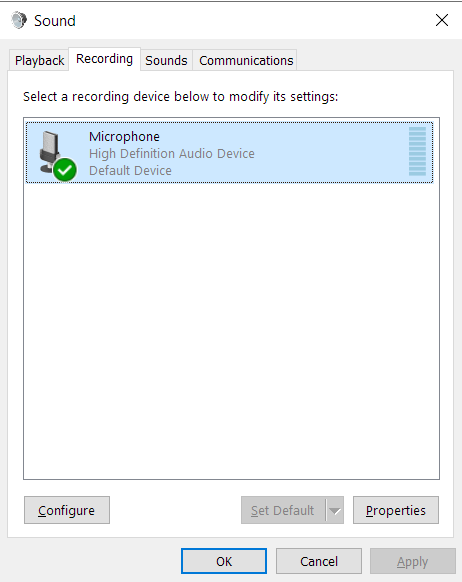
- Switch to the Recording tab.

Tip: There are other alternatives for opening the Sound panel:
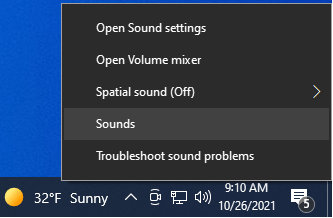
Using the Sound icon on the system tray:
- Right-click on the Sound icon (the speaker) in the bottom-left corner of your screen (the system tray or notification area).

- Click on ‘Sounds’ from the context menu. Then open the Recording tab on the Sound panel.

Using the Run dialog box:
- Press and hold the Windows logo key on your keyboard and press R to invoke the Run dialog.
- Type the following command into the text field and click OK or press Enter:
rundll32.exe shell32.dll,Control_RunDLL mmsys.cpl,,1

- The command will open the Recording tab of the Sound panel.

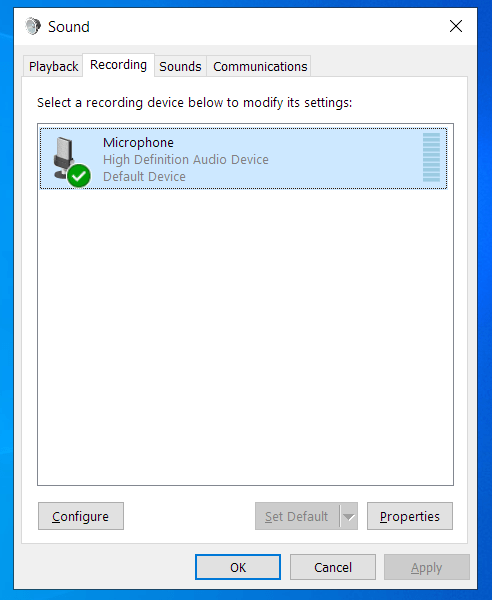
- Right-click on your preferred device and select ‘Set as default device’ from the context menu.
Note: When you get to step 6, you have the option of choosing your microphone as the default communication device. In that case, communication platforms, such as Skype or Zoom, will use that microphone during video and audio calls, but the system will use another recording device on other occasions.
Select your preferred microphone and click the Set Default button to set the microphone as both the default device and the default communication device.
If you want to set your microphone only as the default communication device, select the microphone and click the drop-down arrow beside the Set Default button. Then click on Default Communication Device.
If you’d rather set your microphone as the default device and not the default communication device, then click the drop-down arrow beside the Set Default button and click on the ‘Set as default device’ option.
- Click the OK button and close the Sound panel.
Option 2: Select the Default Input Device in Windows 10 Using the Settings App
If you are a fan of the Windows Settings app, you can use it to change the default sound input device on your Windows 10 computer. Here’s how to get it done:
- Open the Settings app. To open Windows Settings, go to the Start menu (press the Windows logo button on your keyboard or click the Windows logo icon in the lower-left corner of your screen) and click on the cogwheel icon.

Alternatively, you can invoke the Windows Settings app by pressing the Windows logo key + I combination on your keyboard.
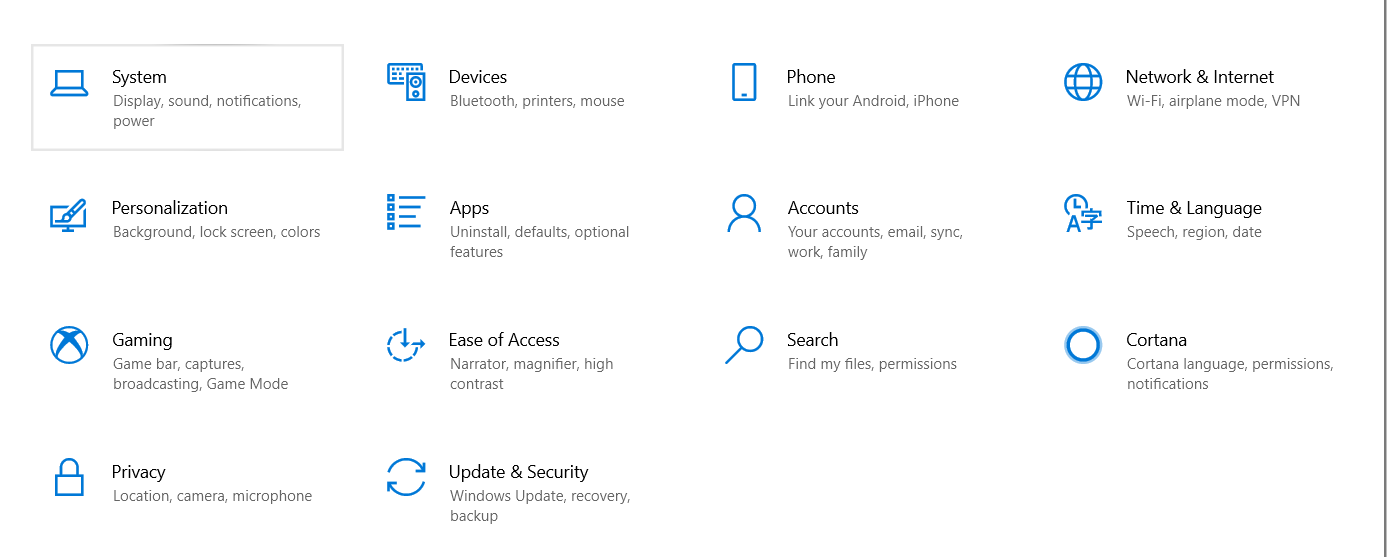
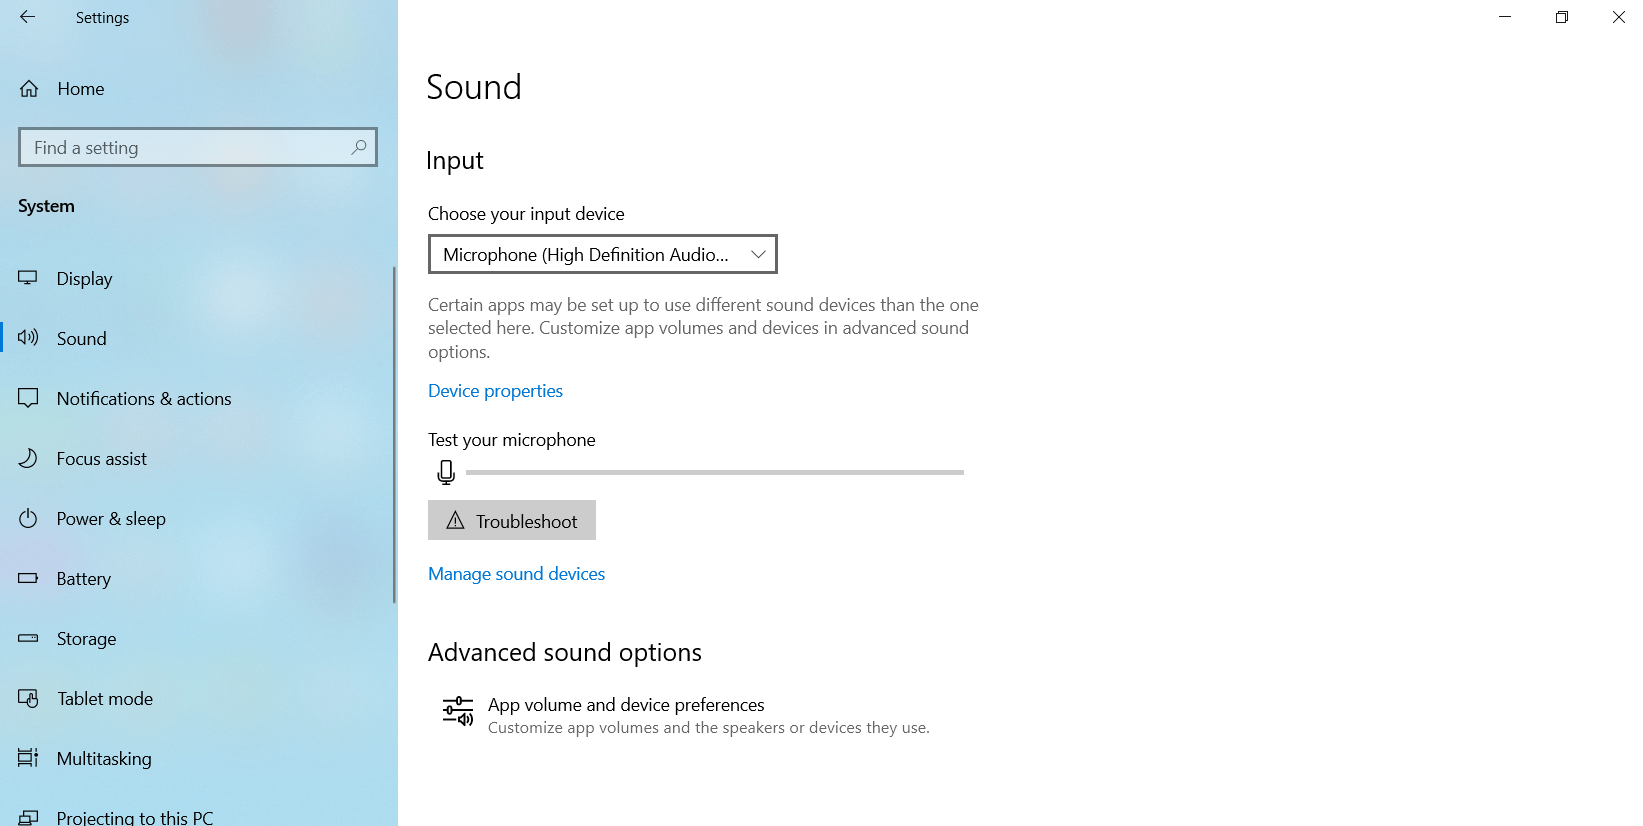
- Click on System on the Settings home page.

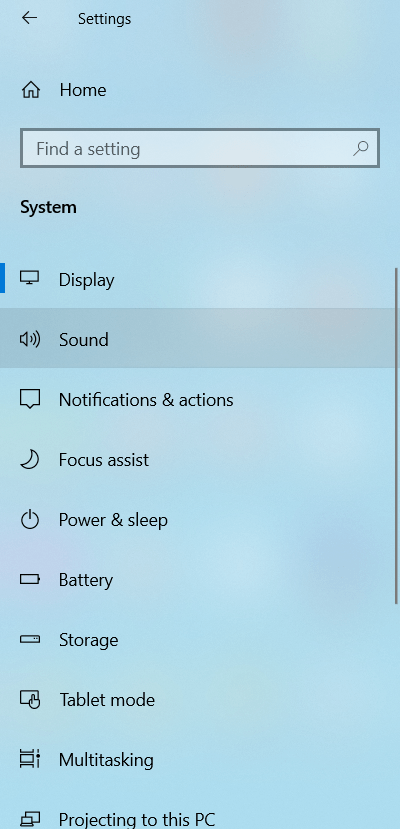
- Click on Sound in the left pane of the System page.

- Expand the ‘Choose your input device’ drop-down on the right-hand side of the screen and select the microphone you want to use.

- Exit the Settings screen.
You can use either of the two options to choose your default recording device on Windows 10. However, you can make an app neglect the system-wide settings and use a different default recording device instead. If that’s what you want, you’ll have to set your preferred device within the application’s settings.
For instance, if you want to set the default microphone on Skype, these are the steps to take:
- Launch Skype.

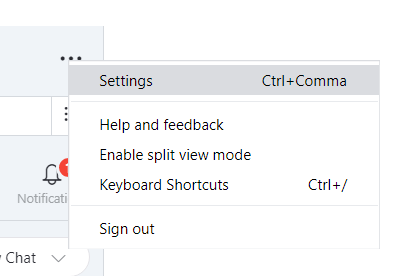
- Click the Settings icon (the three dots).

- Click Settings.

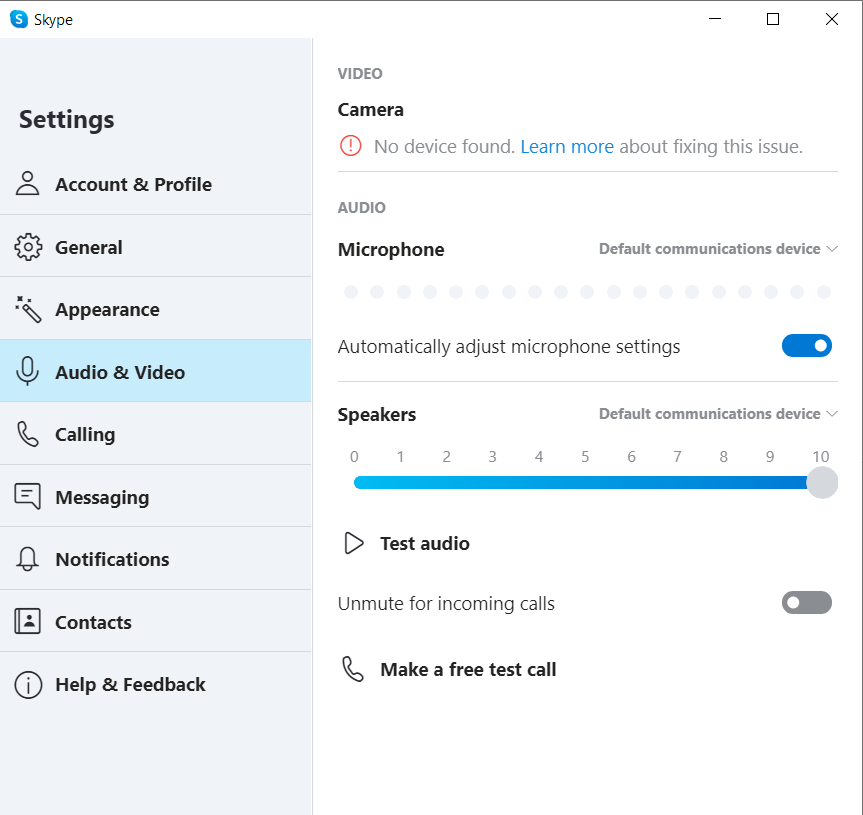
- Select Audio & Video.

- Go to Audio and click on ‘Default communications device’.

- Select the microphone you wish to use for Skype audio calls.

Conclusion
Connecting one or more external recording devices to your computer necessitates choosing the default device. Otherwise, the device you wish to use will probably not work when you need it to.
In this guide, we’ve shown different methods of selecting the default sound input device on Windows 10.
It is also important to note that your preferred microphone will not work if the required drivers are not available on your PC. When that happens, you’ll have to update the drivers via Device Manager, or you can use a third-party driver updater, such as Auslogics Driver Updater.
Auslogics Driver Updater will scan your PC for missing, outdated, incompatible, and corrupt drivers.
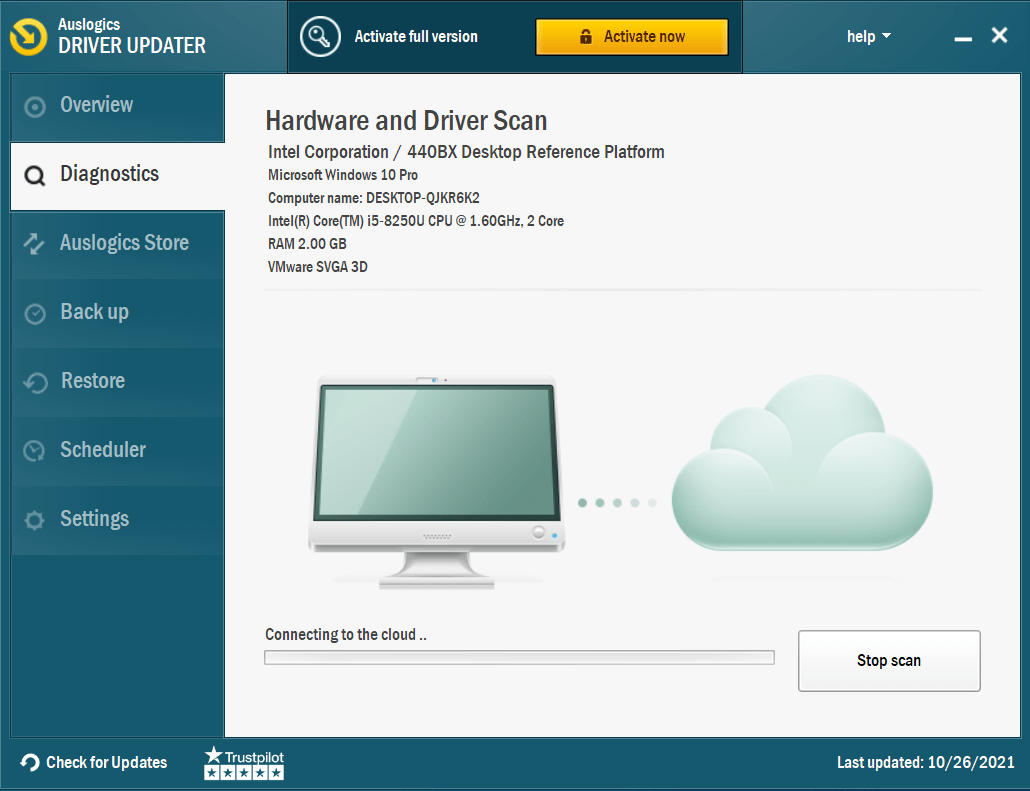
Afterward, it updates the drivers automatically, ensuring that it installs driver software that matches the specs of your PC. You can also roll back your drivers if you need to.