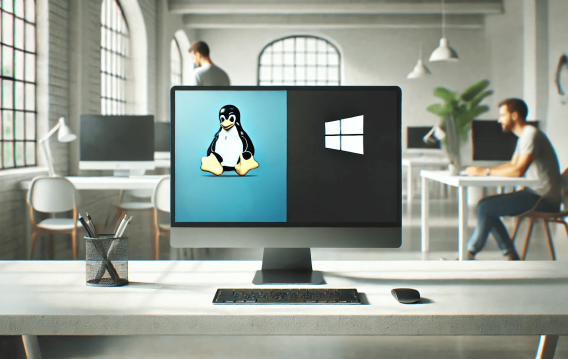
While earlier versions of Linux required a fair bit of knowledge to navigate the command interface, modern versions now sport user-friendly GUIs and skins.Nothing is stopping you from experiencing the operating system’s many advantages as far as installation is concerned. The best way to go about it is dual-booting. That way, you’ll enjoy the best of both worlds, as you can switch between Windows and Linux. I’ll give you the complete run-down on how to dual-boot Windows 11 and Linux . The process also works for Windows 10, and we’ll also cover the pros and cons of using both operating systems on one computer.
What Is a Dual-Boot?
A dual-boot is a system configuration that allows you to run two operating systems on one computer. It lets you choose which OS to boot and use whenever you turn on your device. This way, you’ll have the flexibility of switching between these operating systems without purchasing a different device.
Dual-Boot Windows 11 and Linux: Checklist
I’ll focus on dual-booting Linux on a computer already running Windows 11. But as I mentioned, you can use the same process to dual-boot Windows 10 and Linux.
You’ll need to get some things done before you start. These include backing up your data, preparing the Linux installation media (requires an 8 GB or larger USB drive), partitioning your hard drive , and turning off secure boot.
Backing up your data
While the process is quite straightforward and safe, backing up your data is recommended to account for the unexpected. It’ll be wise to move your important files to an external drive or use cloud storage.
Also read: How to Back Up and Restore the Windows 10 Registry
Turning off Secure Boot
Secure Boot is a BIOS-level setting and one of the stringent requirements for installing Windows 11. It is designed to boost security so unrecognized software doesn’t load at the kernel level. However, the same feature prevents Linux from booting. So you have to turn it off.
Follow these steps to disable Secure Boot through your BIOS :
- Launch the Start menu and click the power icon.
- Press and hold your keyboard’s shift button and select Restart in the power menu.
- Select Troubleshoot when the Choose an option interface appears.
- Click Advanced options and select UEFI Firmware Settings.
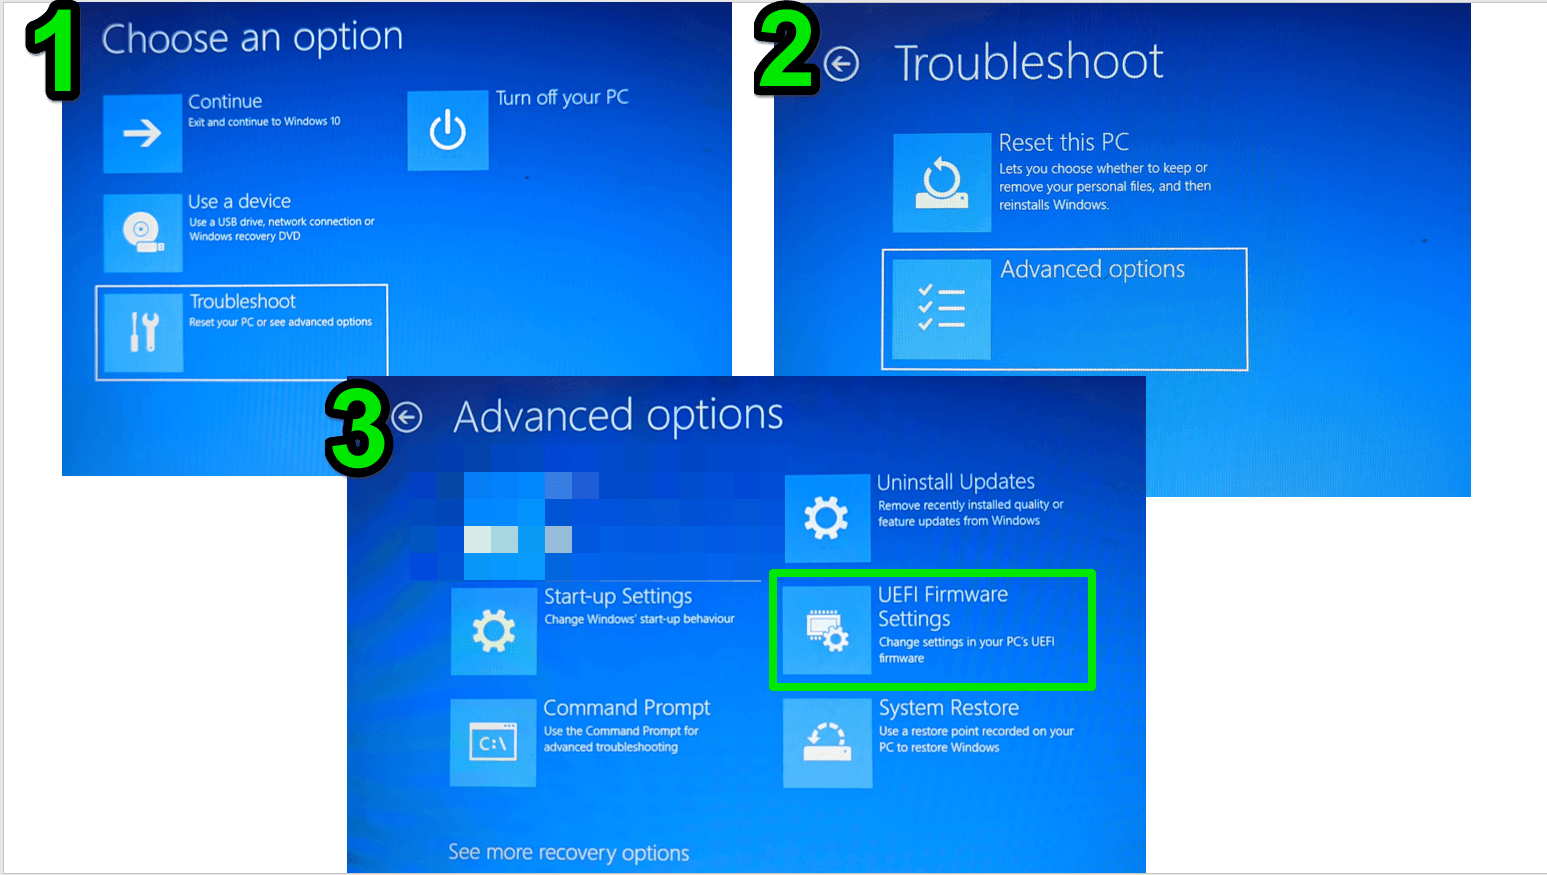
- Your system will now reboot to your BIOS environment.
- You can now go to the Boot Options section to turn off Secure Boot .
Partitioning your hard drive
You cannot install Linux on Windows 11’s hard drive. If you have two separate physical drives, you can move on and install Linux on your secondary storage device. If you have just one, you must create a new partition.
You can create the new partition while setting up Linux (and I’ll show you how to). However, splitting your hard drive before installation will make things less complicated.
Follow these steps to create the partition:
- Tap
Win + Xto open the Power User menu. - Select Disk Management.
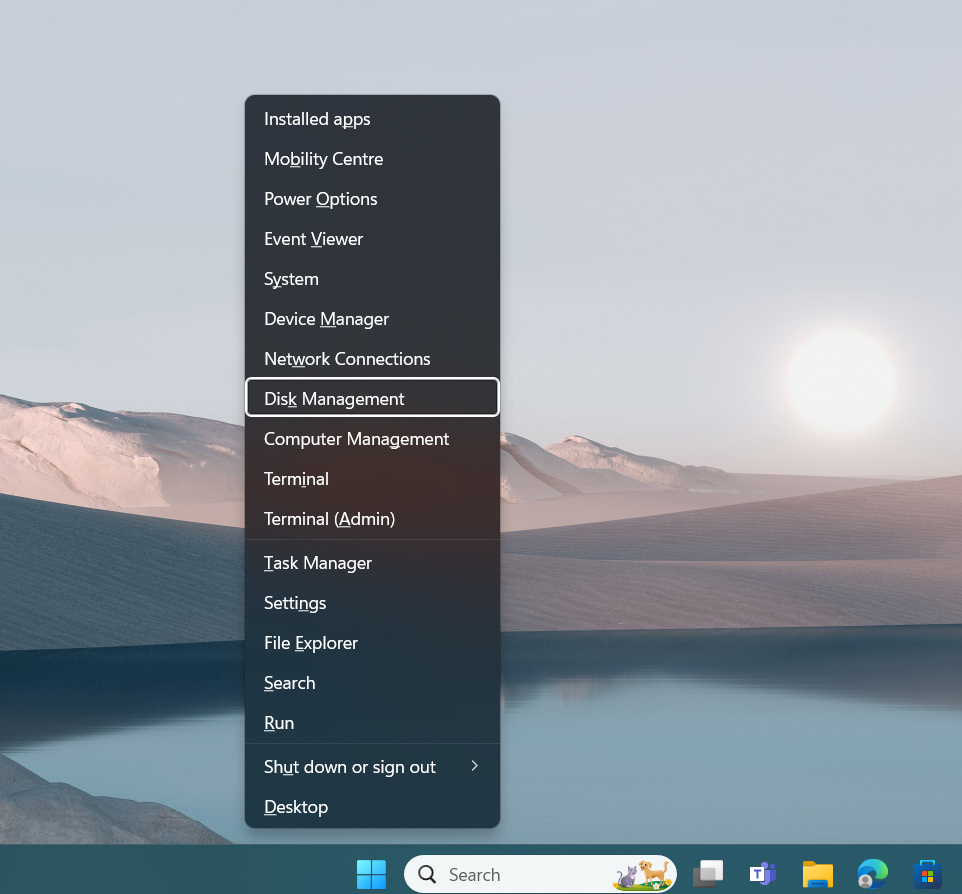
- Once the window opens, right-click your C: partition and select Shrink Volume .
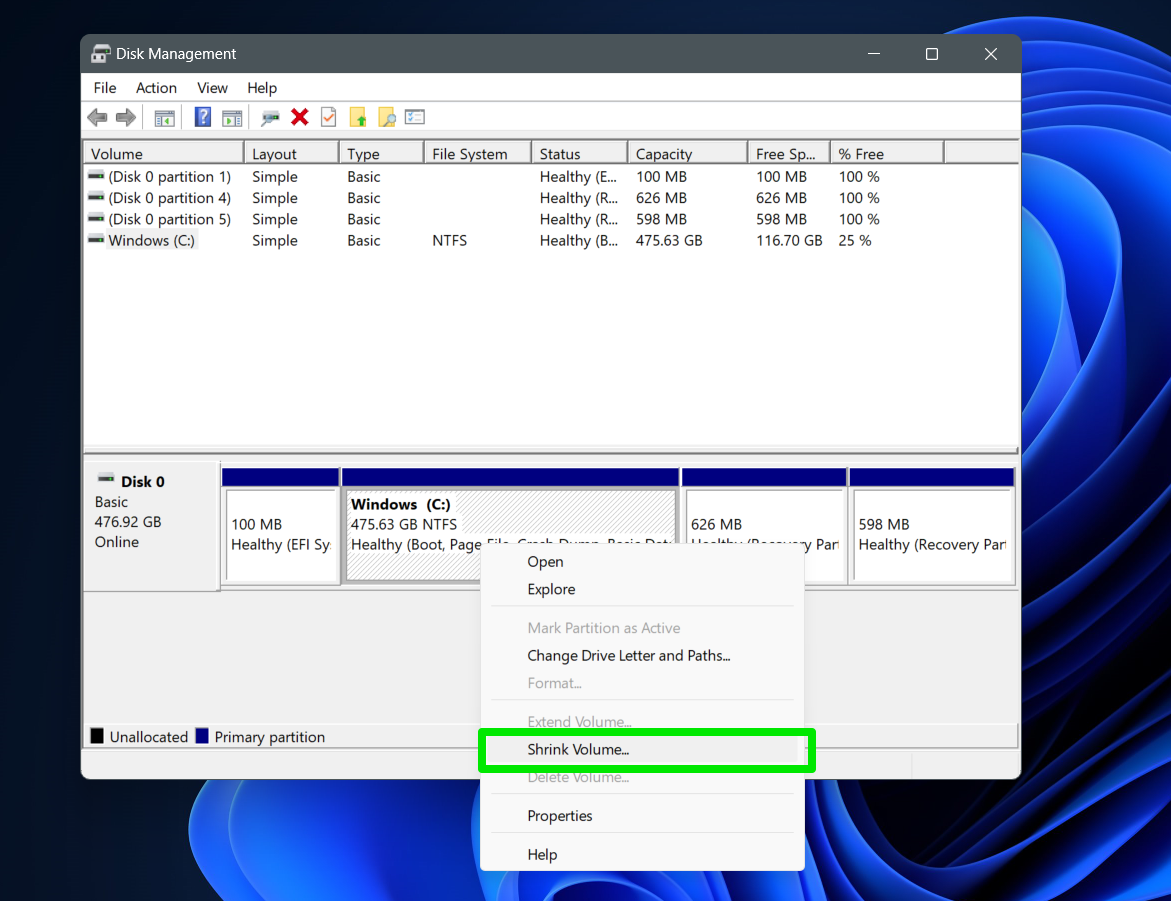
- Type the amount of space (in megabytes) you want to allocate to your new partition and select Shrink .
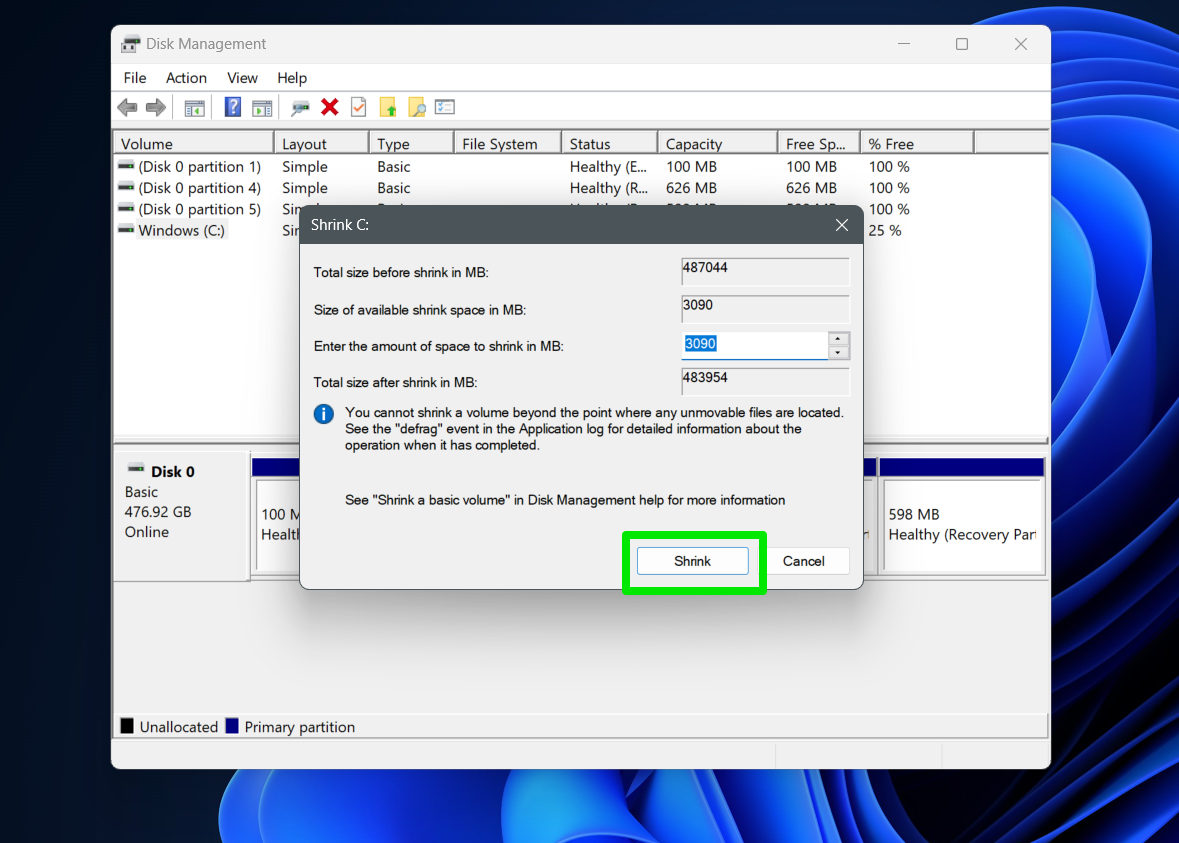
- The new space will be listed as unallocated, and the size will be deducted from your main hard drive. Close the Disk Management window.
Creating the installation media
It’s time to create your Linux installation media. Ensure your USB flash drive has at least 8 GB of space and does not contain important files, as the process will wipe the drive.
The first step involves downloading the Linux distro you want to install. As mentioned, there are many to choose from. In my case, I’m going for the popular option: Ubuntu . The latest version is free to download and just a few gigabytes large.
The next download is Rufus . While there are other tools, Rufus is widely trusted and easy to use.
Now, follow these steps:
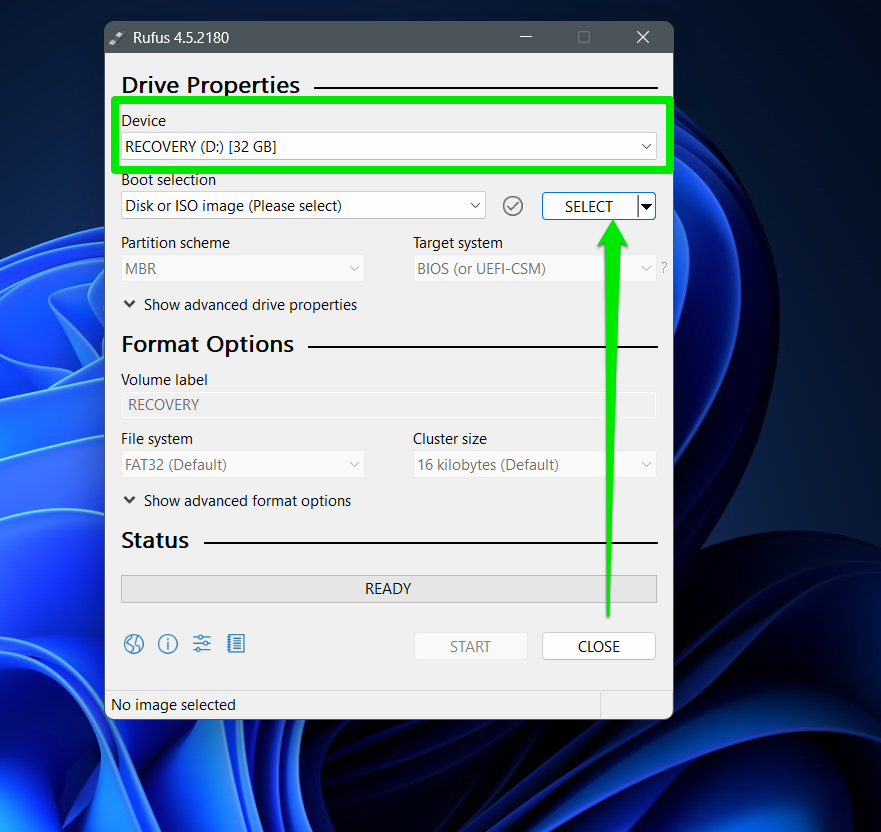
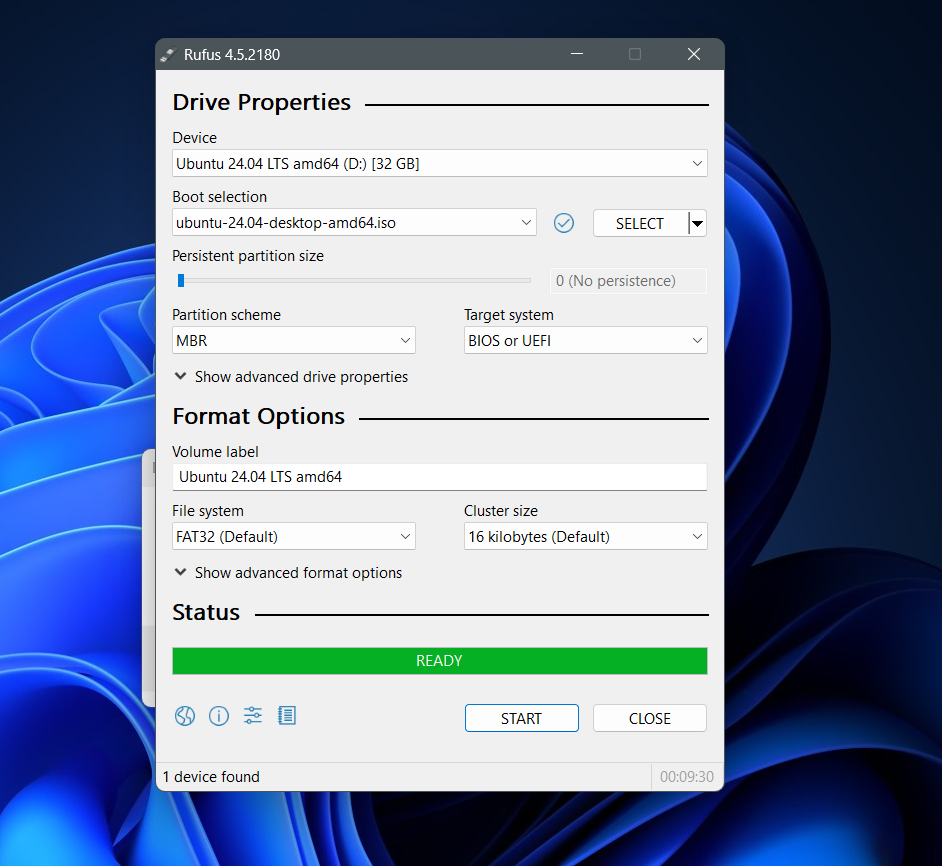
- Connect your USB flash drive to your computer and run Rufus.
- Make sure the drive is selected under Device . Rufus should detect and select it by default. However, you can click the Device drop-down menu and choose the drive if it doesn’t appear.
- Click the Select button next to the Boot selection box and choose the Ubuntu ISO file you downloaded.
- Leave other options in Rufus as-is and click the Start button.
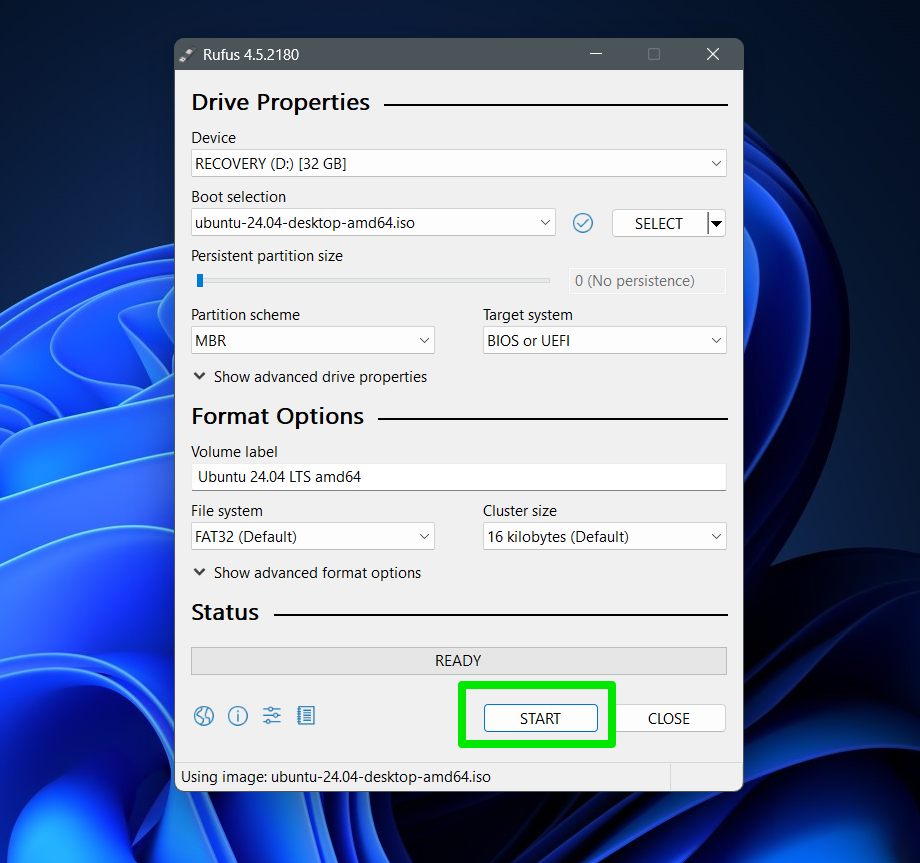
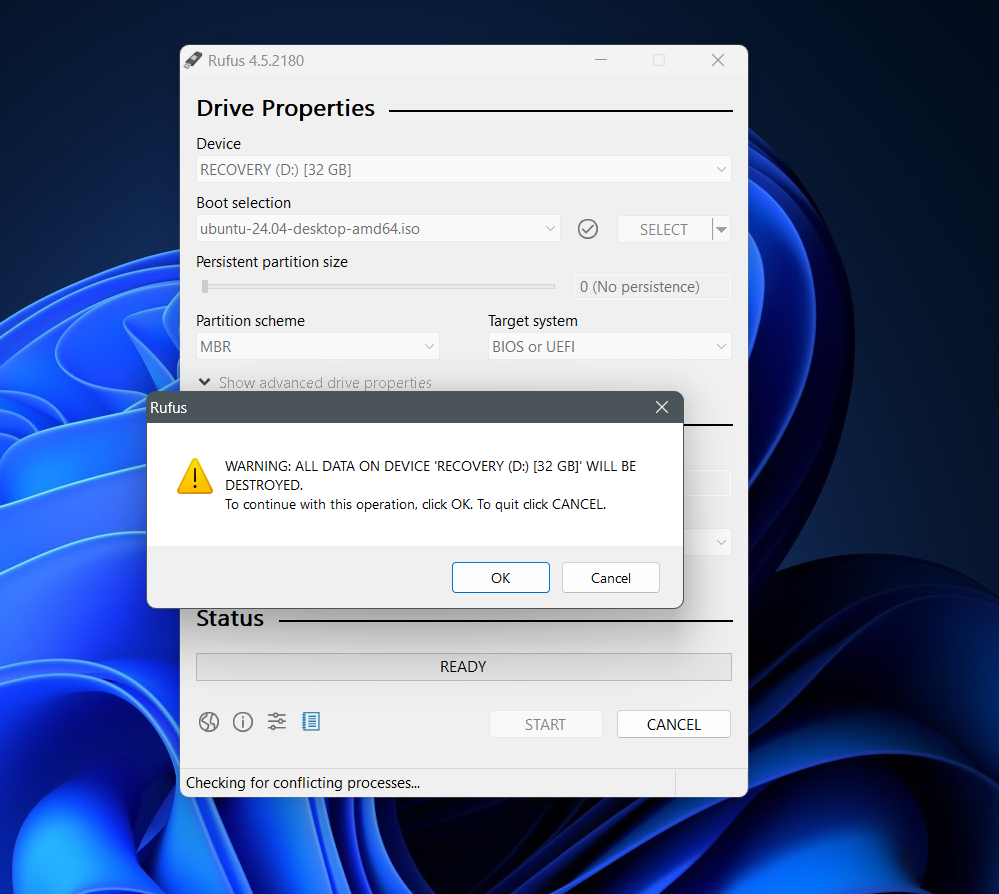
- Allow Rufus to prepare the drive.
- Wait until you see a full green bar under Ready .
How to Install Linux on Windows 11 and 10
Now that you have everything ready, it’s time for the main business. Installing today’s Ubuntu isjust as easy as installing Windows 11 , if not simpler. With the USB flash drive connected to your computer, follow these steps to install Linux on Windows 11 or 10:
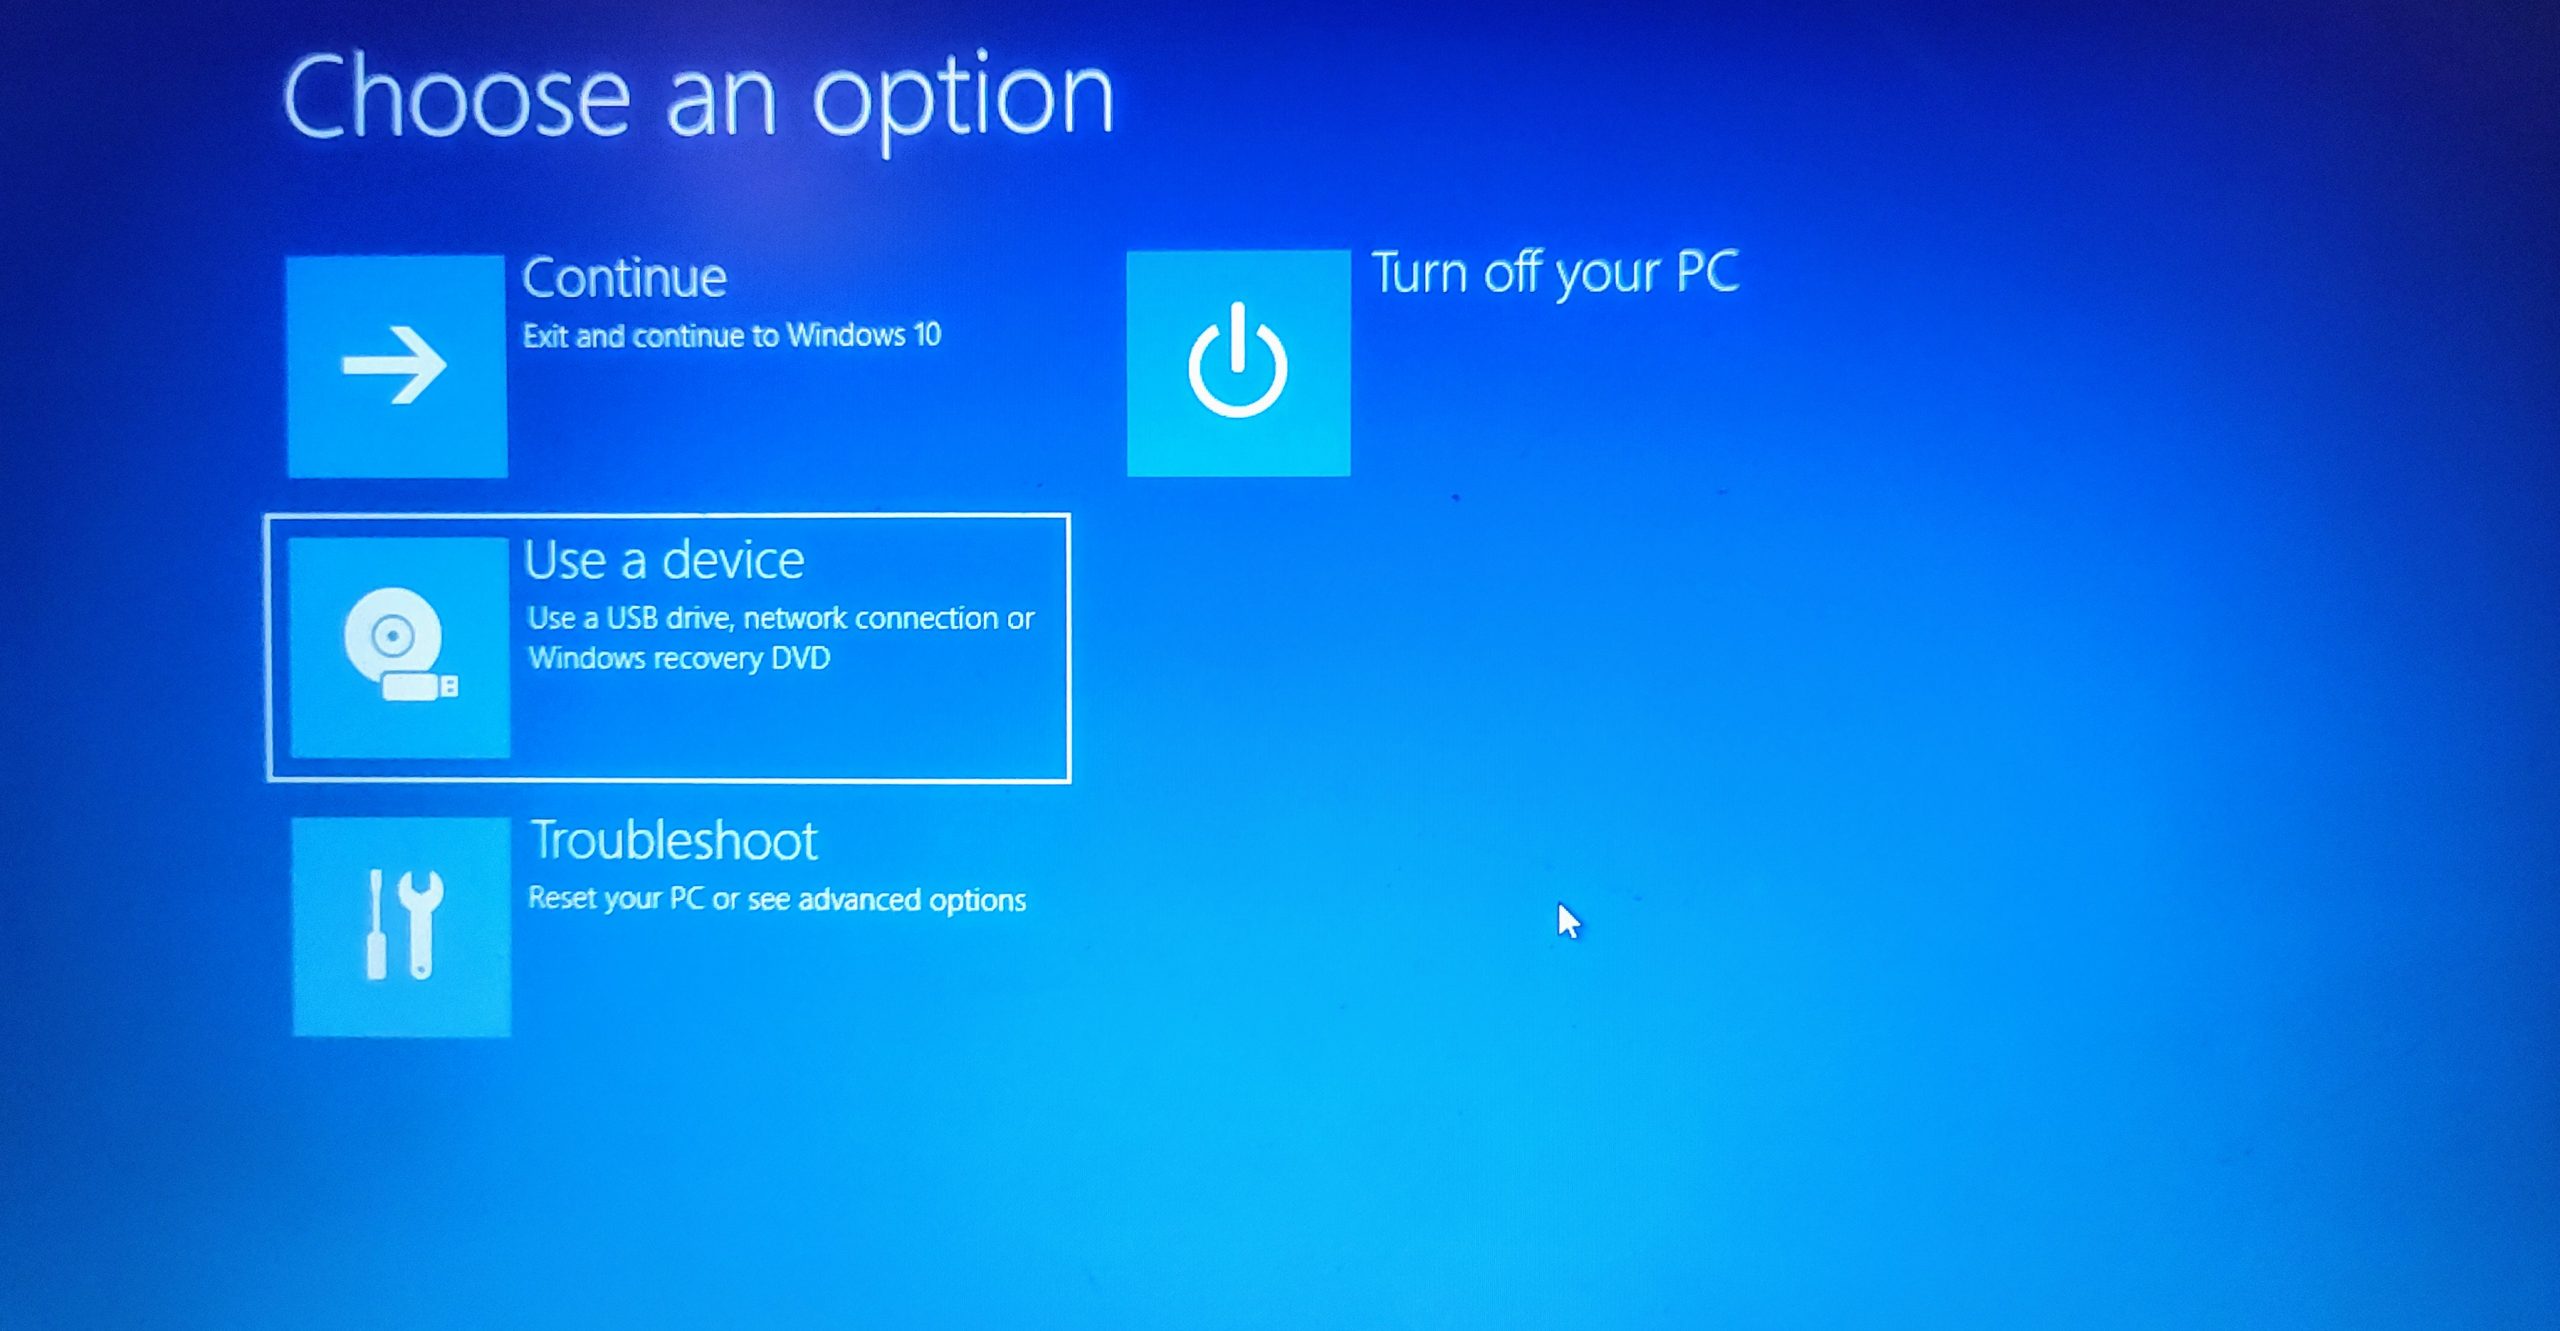
- Go to the Start menu, click the p ower icon, then hold down the Shift button and select Restart .
- After the Choose an option screen opens, select Use a device.
- Now, select the USB installation device you prepared.

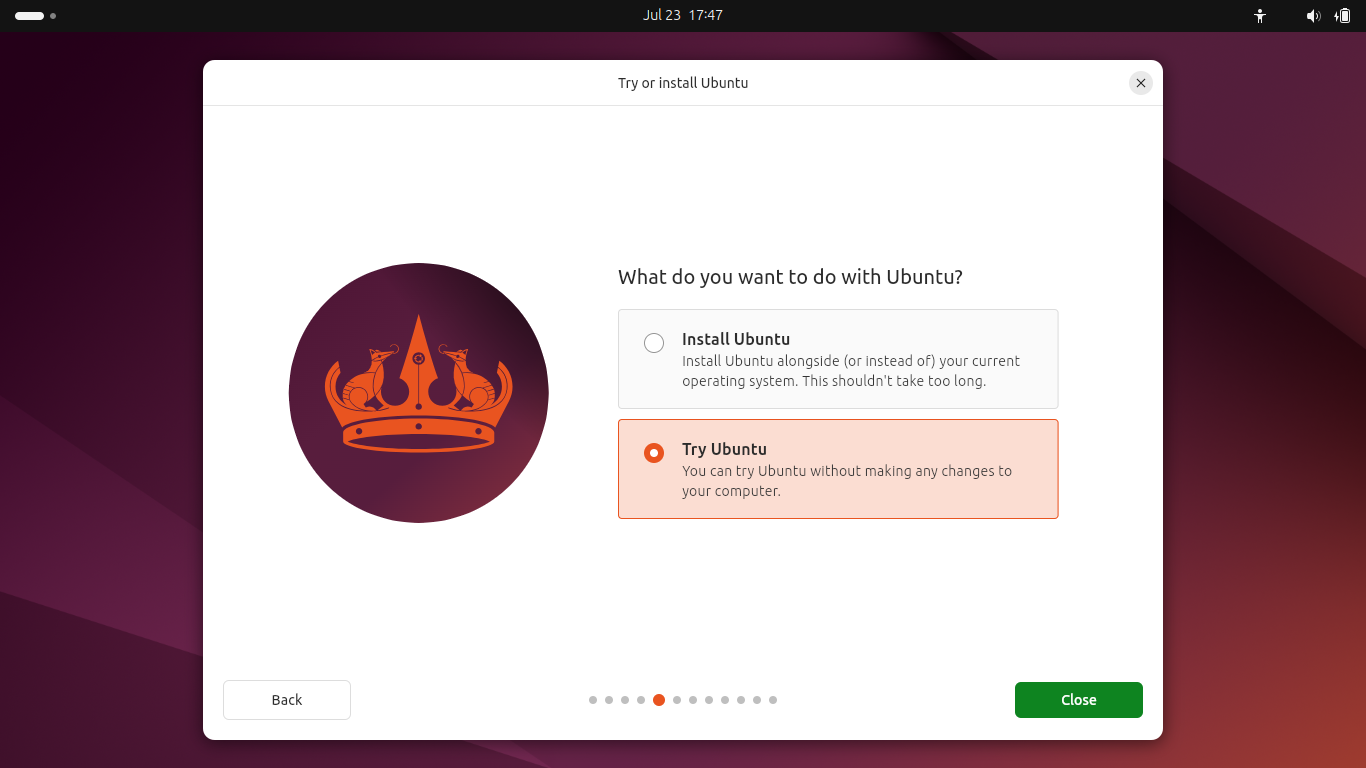
- The Ubuntu menu will now appear. Select Try or Install Ubuntu .
- Choose your language, accessibility, and keyboard layout options.

- Choose between Install Ubuntu and Try Ubuntu .
- You may have to select your language, accessibility, and keyboard layout again after double-clicking the Install Ubuntu file
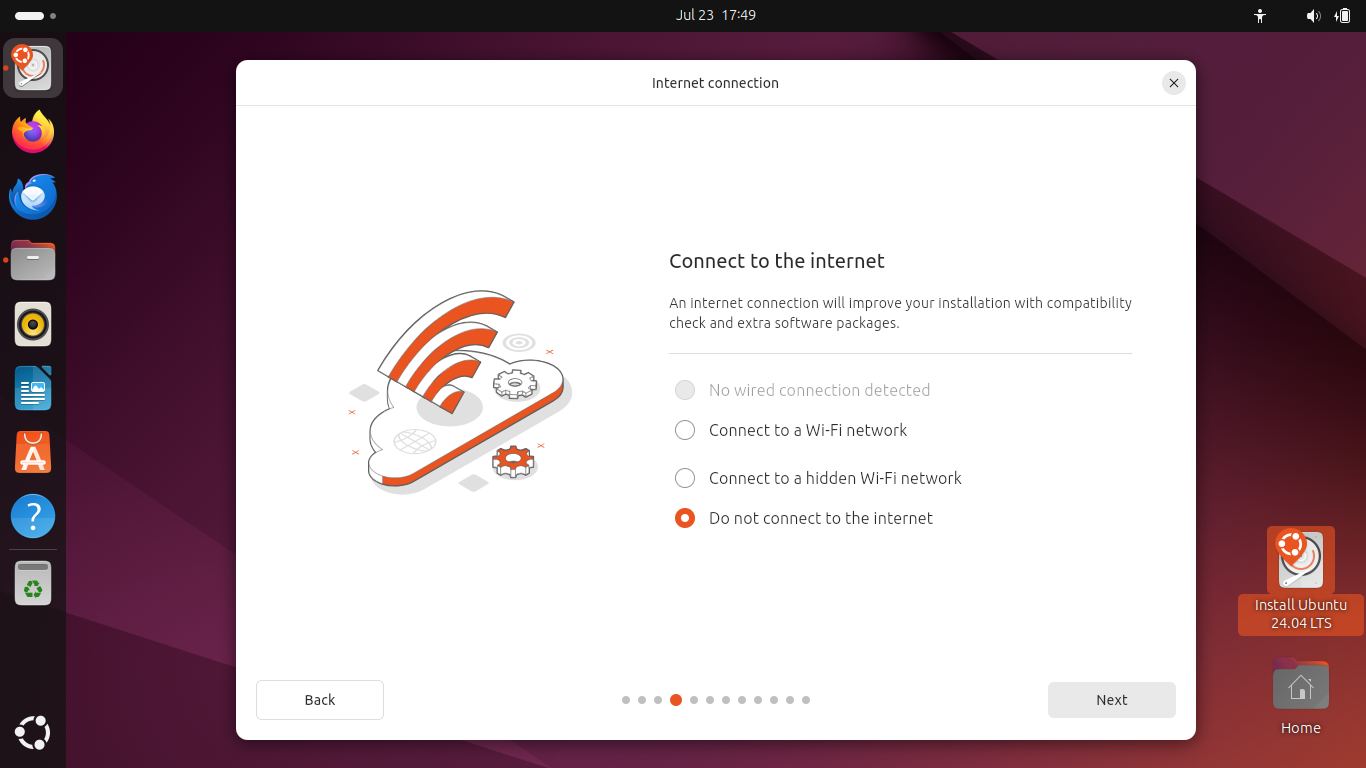
- Connect to a Wi-Fi network if you have a stable connection.
- When the Type of installation window opens, select Interactive installation if you’re not an advanced user.

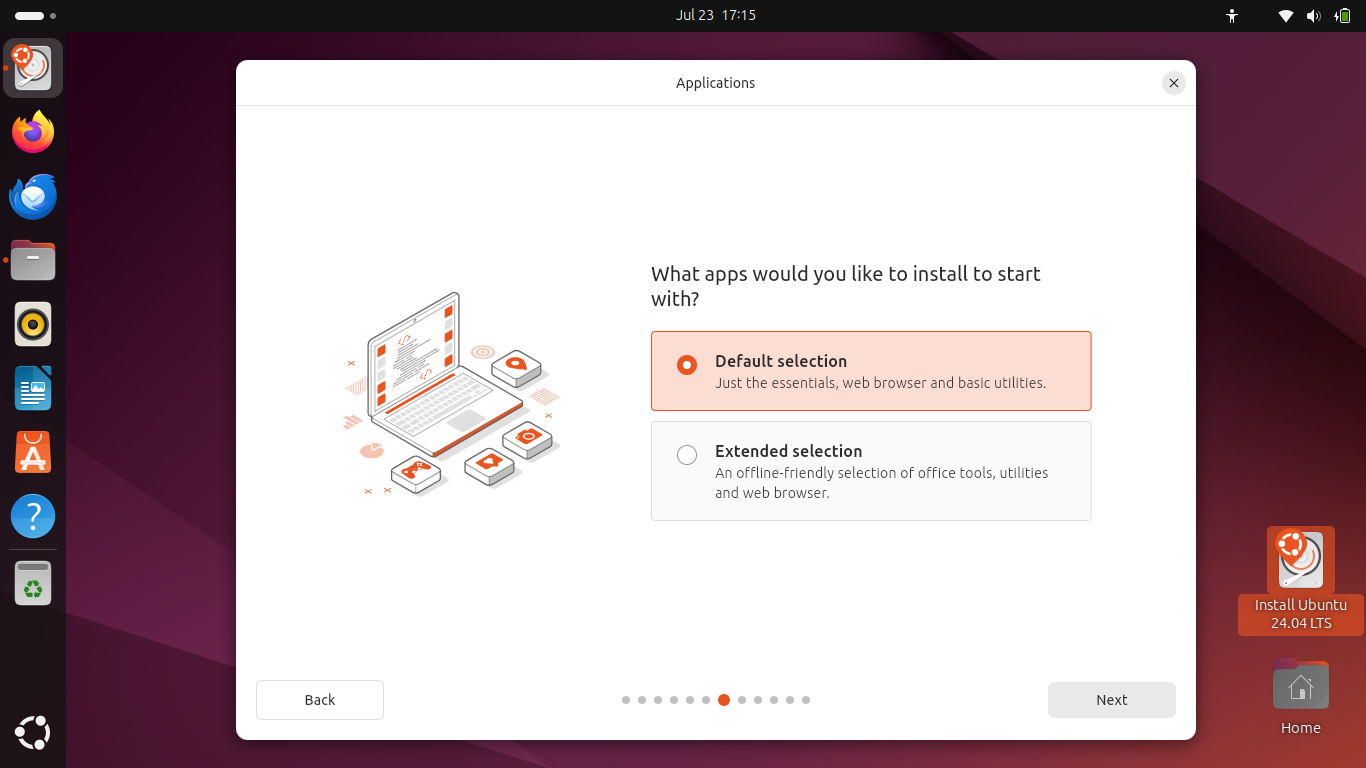
- Under Applications , you can choose the types of programs you want to install. This is where you decide whether you want to install office tools and your browser.
- The Optimize your computer page allows you to choose the type of drivers and media support you want to install. The second option will be unavailable unless you’re connected to the Internet.

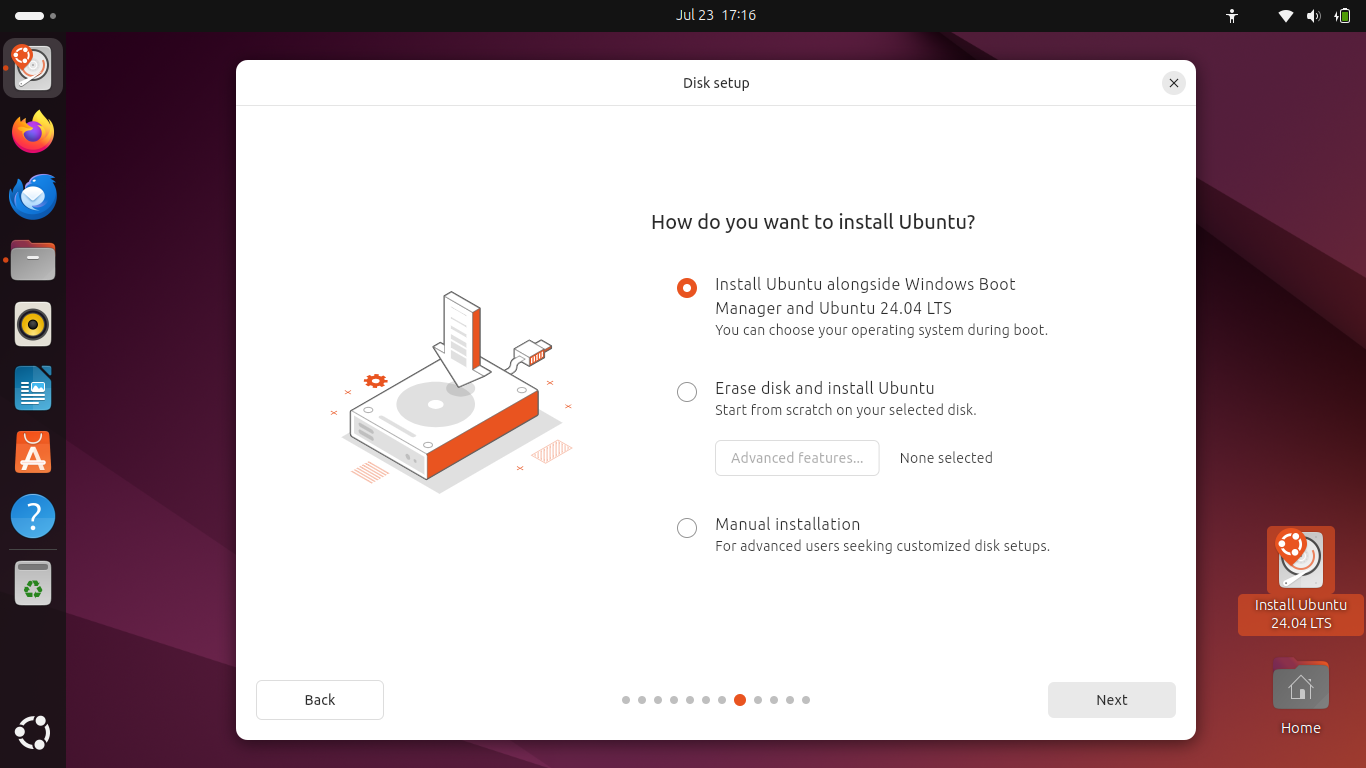
- Once the Disk setup window appears, choose Install Ubuntu alongside Windows Boot Manager .
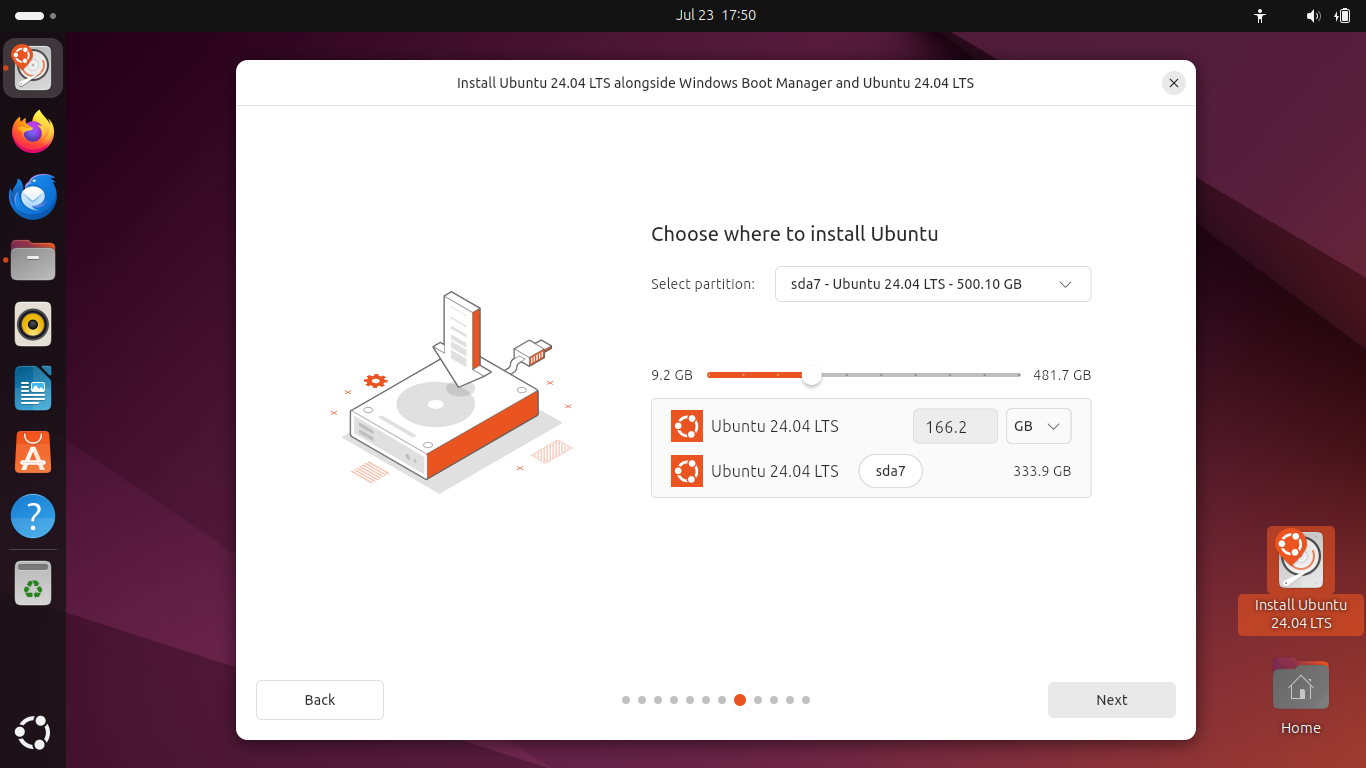
- If you didn’t create a partition earlier, the next page is where you get to set up a new one and allocate storage space for the Ubuntu partition. You can use the slider to expand the storage allocation for the new Ubuntu partition or input the number manually.
- The next step involves configuring your user account. Enter your name, computer’s name, username, and password, then click Next .
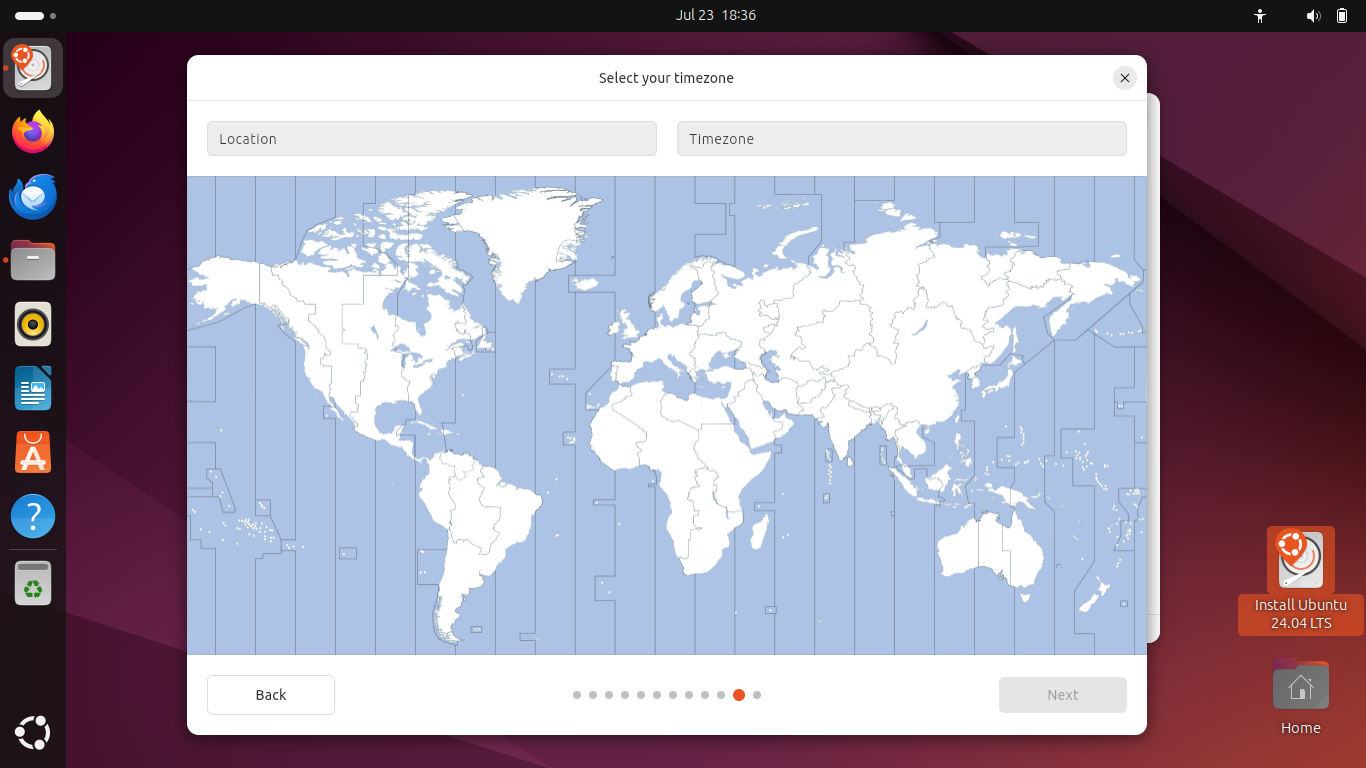
- Choose your location on the next page and click the Next button.
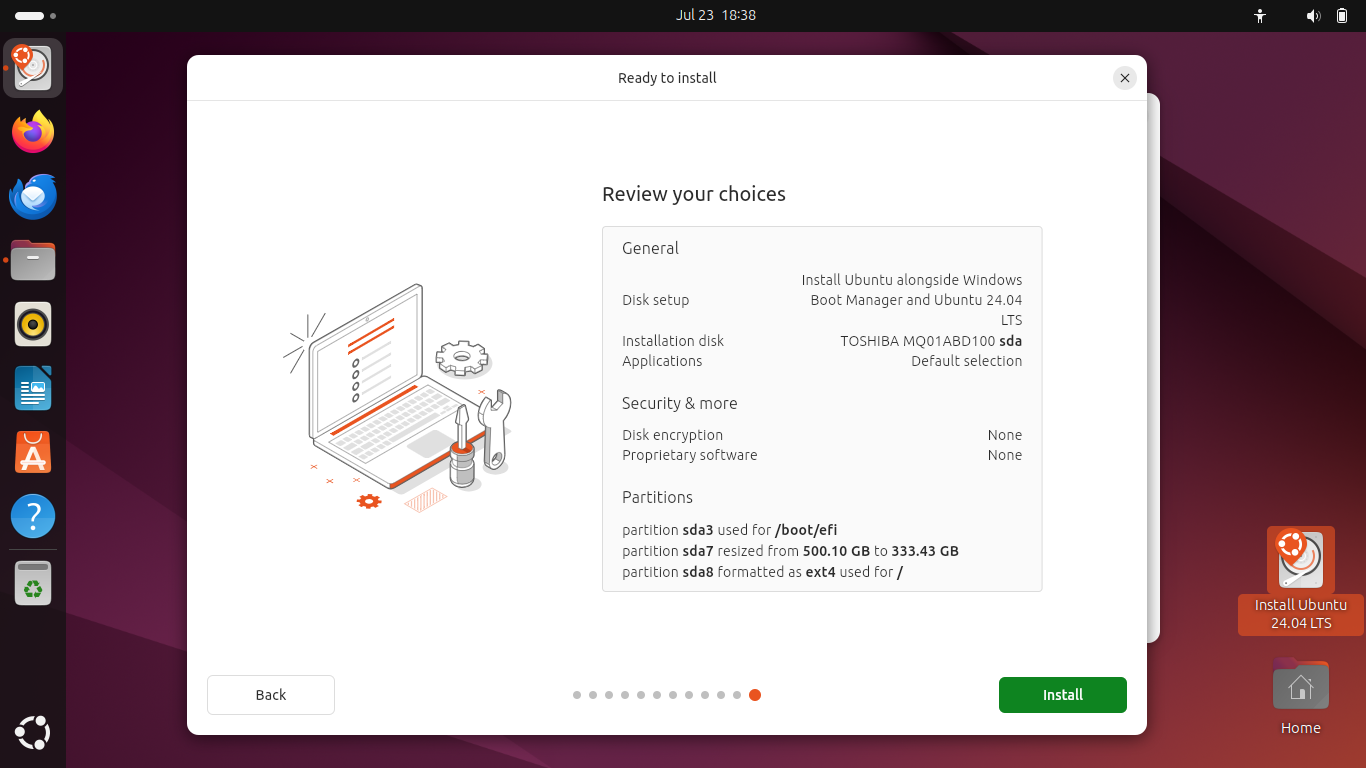
- The setup will now display your preferences. Review them and click Install .
Allow the installation to complete. The duration will depend on your installation preferences and your internet connection speed (if you elected to download applications and software components).
I had a weak signal in my case, and it took up to two hours to download drivers and the selected media support.
- Restart the system once the installation is complete, remove the USB when prompted, and hit the Enter button.
How to dual-boot Windows 10/11 and Linux: Final steps
The final step to completing your dual operating system setup is choosing a boot manager. Your Linux distro’s boot manager is the best way to select which operating system to boot into. While recent Ubuntu installations will configure your PC to boot into the GNU GRUB menu, you may have to apply some manual tweaks. Choosing the Ubuntu (or the Linux distro) boot manager involves the same principles as changing your boot order in BIOS . Follow these steps:
- Go to your BIOS environment. In this case, tap your BIOS key once you start your computer. It might be Esc, F1, F10, or F12, depending on your OEM. Follow our walkthrough on how to open the BIOS environment if you don’t know the process.
- In most BIOS environments, you’ll find the setting under the Boot Sequence/Options/Order or Advanced Settings tab.
- Select your Ubuntu boot manager as the top priority.
- Save your settings and exit.
You can now dual-boot Windows 10/11 and Linux without issues.
Understanding the Dual-Boot Process
Linux is a great operating system overall, with a wide range of applications and advantages. While it doesn’t have Windows’ massive developer support and community, it contains quite enough to get you by with regular work.
Choosing to dual-boot two operating systems on one device also gives you the added benefit of using an OS that serves you best at any given time.
However, the main downside is that you must restart your computer whenever you want to switch and can’t use the operating systems side by side.
Also, you may be unable to view and interact with files created in your Linux environment when you switch to Windows. However, you can easily view your Windows drives and their contents in Linux.
The trick is to save the files you want to retrieve on Windows to your C drive when working in Linux.
Dual-Booting Linux and Windows: Conclusion
That’s how to dual-boot Windows 10 and Linux. Remember that you can choose other Linux distros, such as Linux Mint and Fedora. You can always check each version out before making your final decision.