
First things first, what is this error code 0x204 anyway? Simply put, it’s your PC’s way of saying, “I can’t connect to the remote PC.” There are a few usual suspects behind this error, and we’re going to play detective to find out which one is causing your problem. After that, I’ll share a handful of fixes to help you get back on track and connected.
Common Causes of Remote Desktop Error Code 0x204
Alright, let’s talk about what might be going wrong:
- Network issues: Sometimes the internet just isn’t on our side. A shaky connection can throw everything off.
- Firewall settings: Your firewall might be overzealous and blocking the connection.
Also read: How to Check Firewall Settings
- Remote Desktop configuration: If the Remote Desktop settings aren’t right, it won’t work, as simple as that.
- Outdated software: Running old versions of software can be like trying to play a new game on an ancient console.
- AP Isolation: This funky feature on some routers can block devices from chatting with each other.
How to Fix Microsoft Remote Desktop Error 0x204
Now that we know the culprits, let’s roll up our sleeves and fix this!
1. Check your network connection
First, make sure both your computer and the remote PC are online. If you’re using Wi-Fi and it’s being sketchy, try plugging in an Ethernet cable.
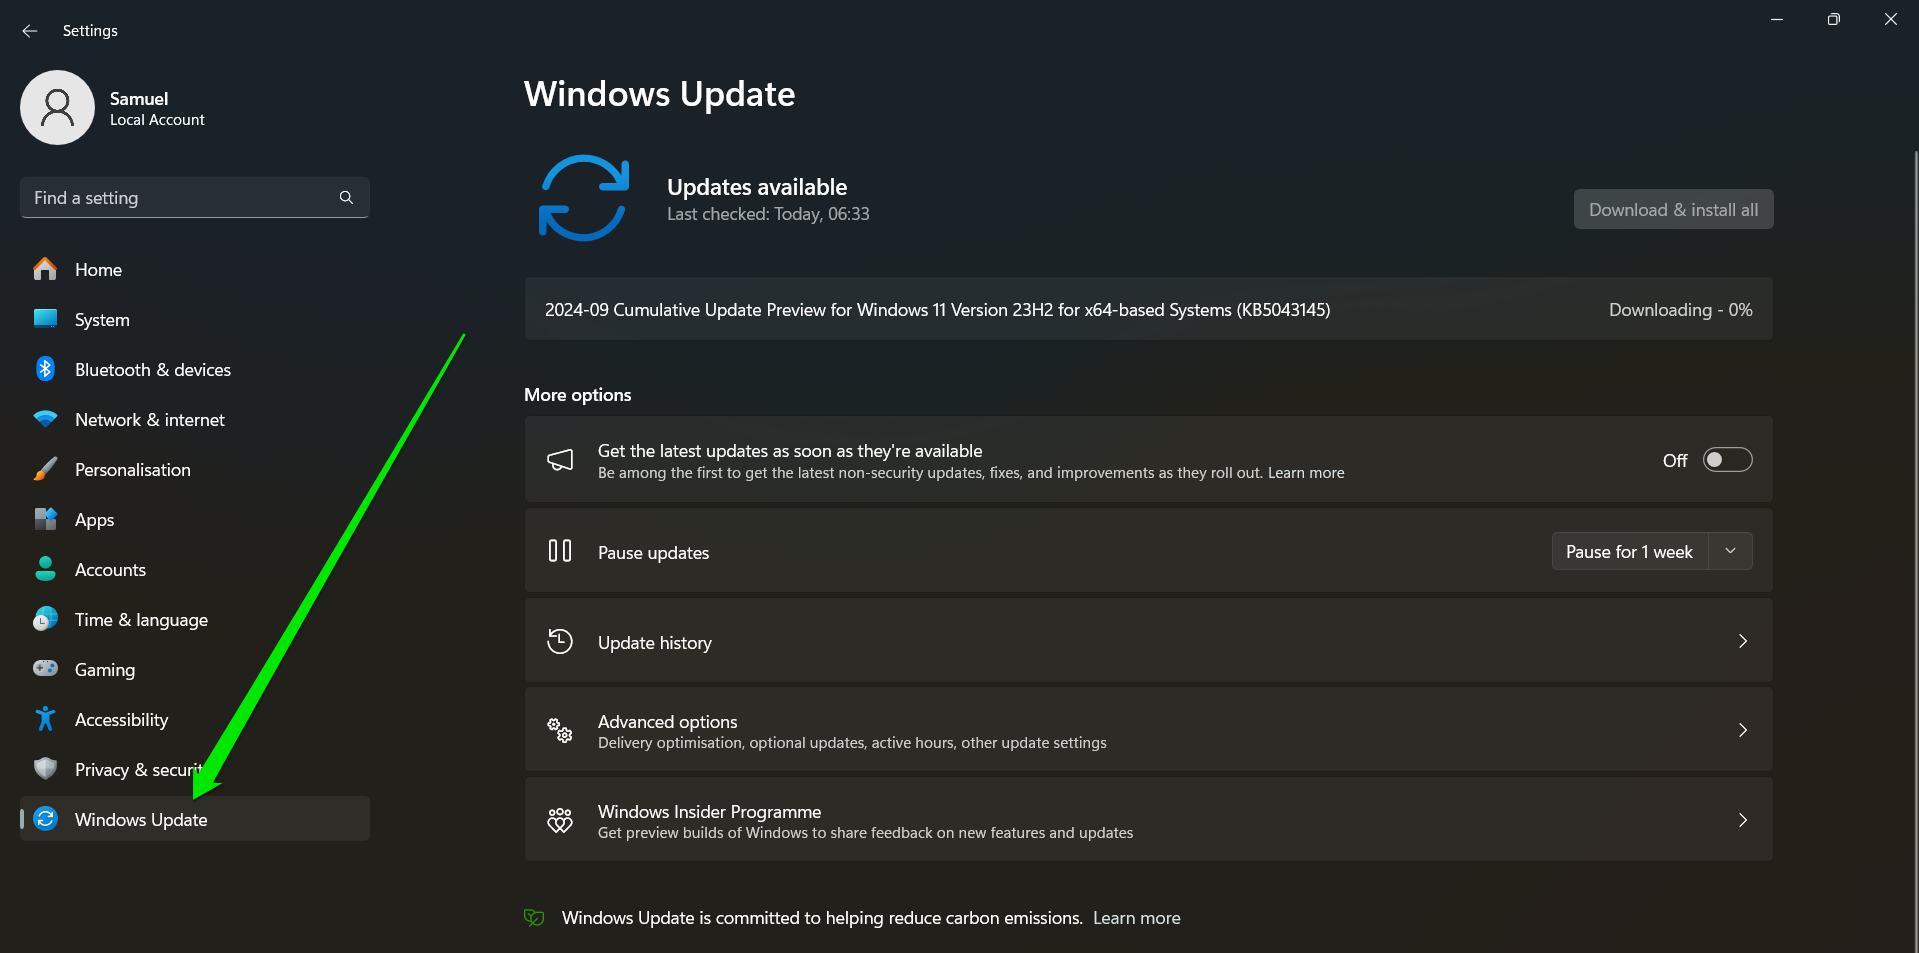
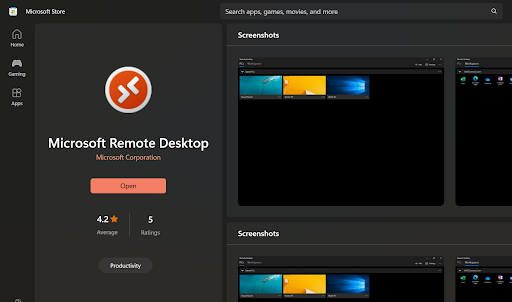
2. Update Windows and the Remote Desktop client
Old software can be a real party pooper. Make sure everything’s up to date:
For Windows: Head to Settings > Windows Update (or Settings > Update & security > Windows Update if you’re on Windows 10) and see if there are any updates waiting for you.
For the Remote Desktop client: Check the Microsoft Store for updates.
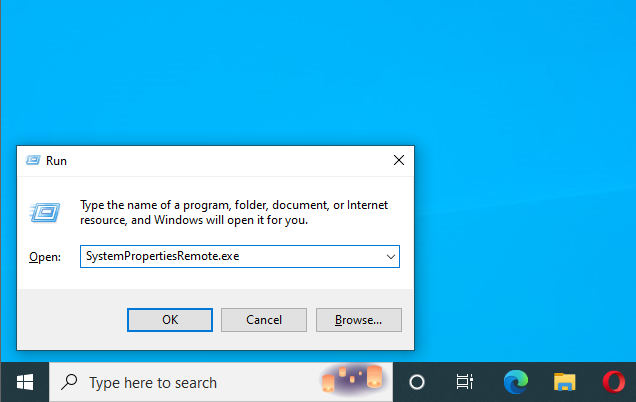
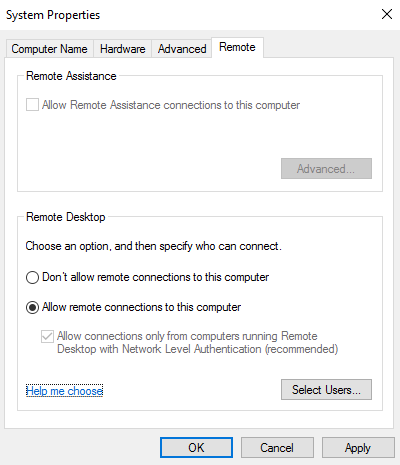
3. Configure Remote Desktop settings
Ensure Remote Desktop is actually enabled on the remote PC. Here’s how:
- Press the
Win + Rkeys together, type SystemPropertiesRemote.exe , and hit Enter.
- Enable the Allow remote connections to this computer radio button under Remote Desktop .
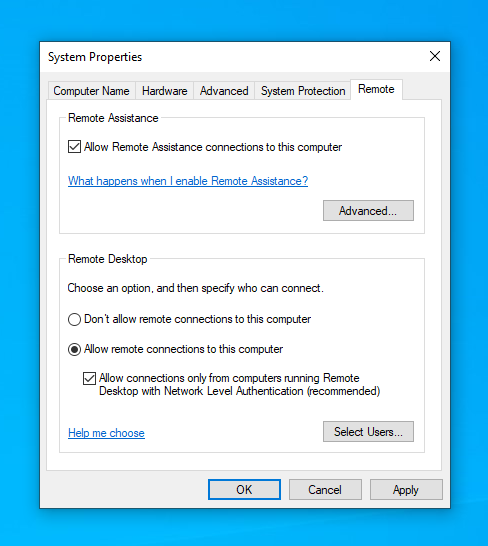
- Tick the Network Level Authentication box (that’s for some added security).
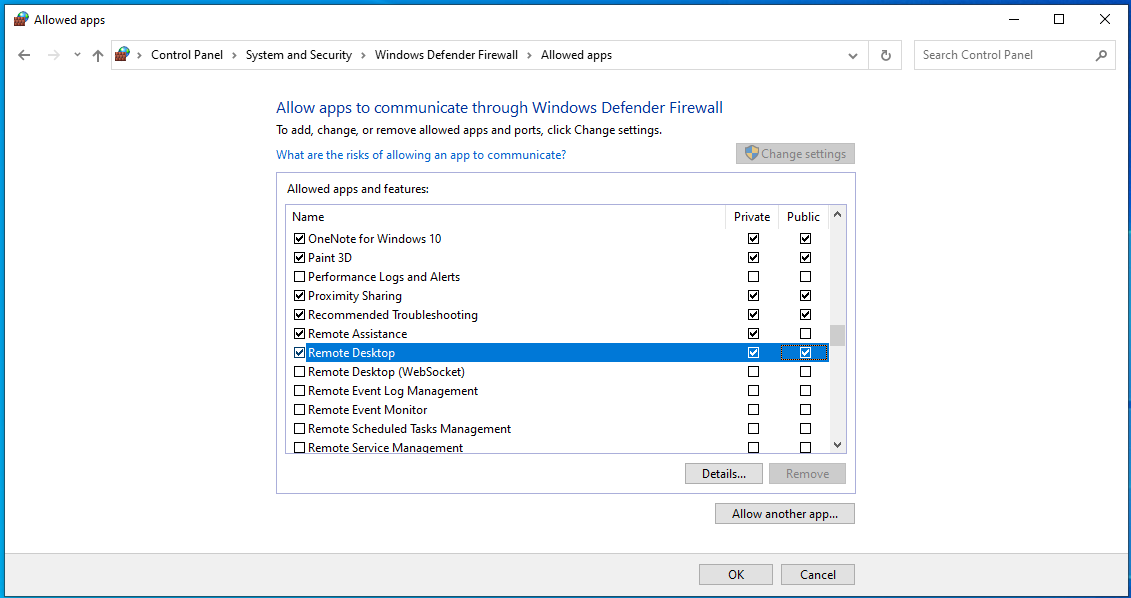
4. Configure Windows Firewall
Your firewall might think it’s protecting you by blocking Remote Desktop. Let’s fix that:
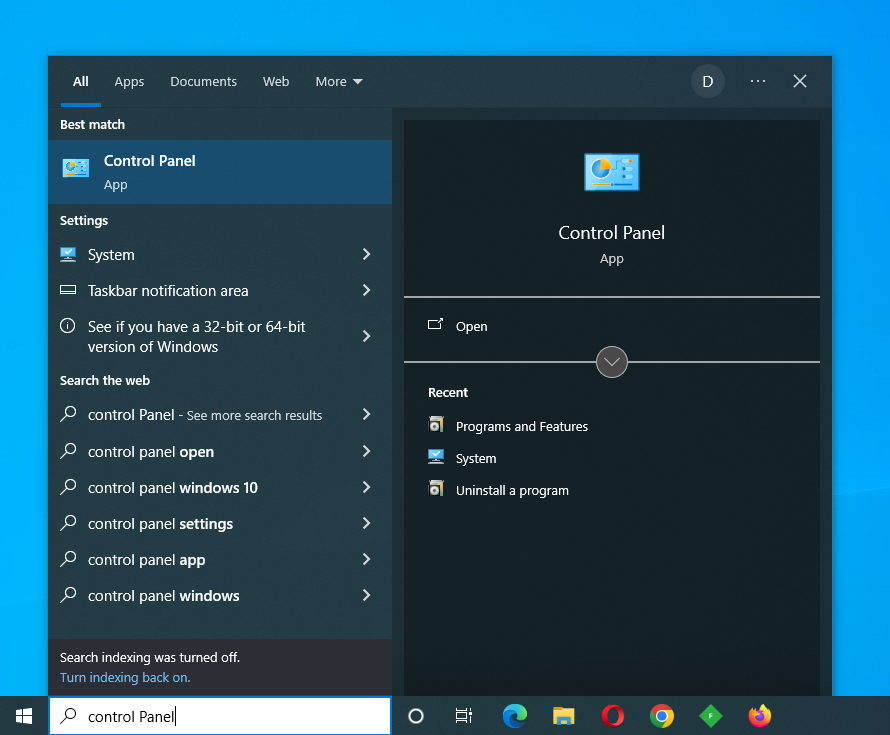
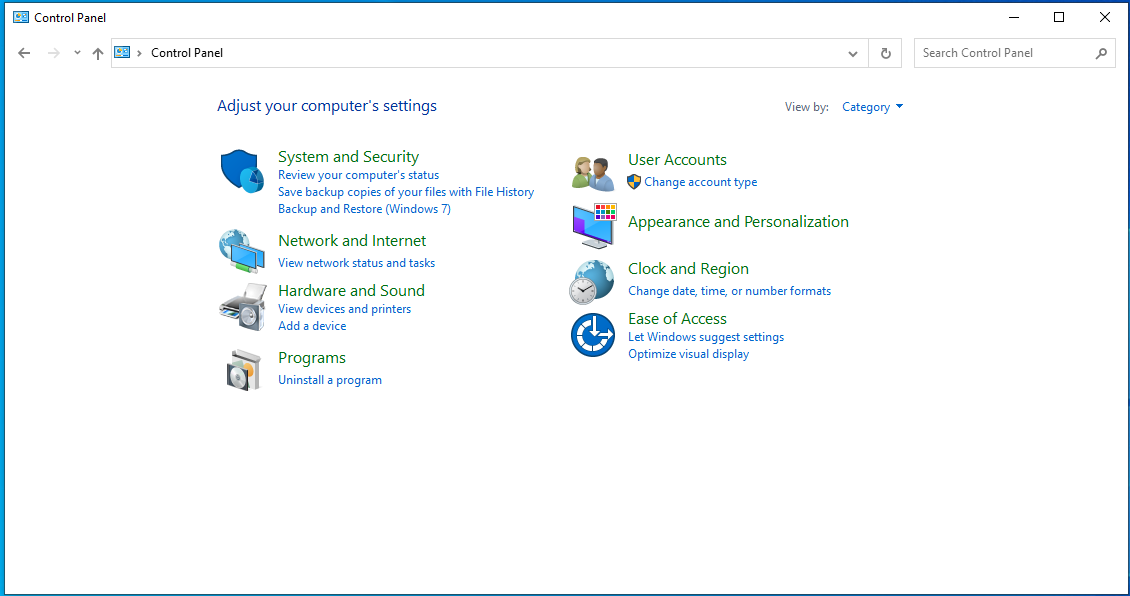
- Open Control Panel.
- Go to System and Security > Windows Defender Firewall .
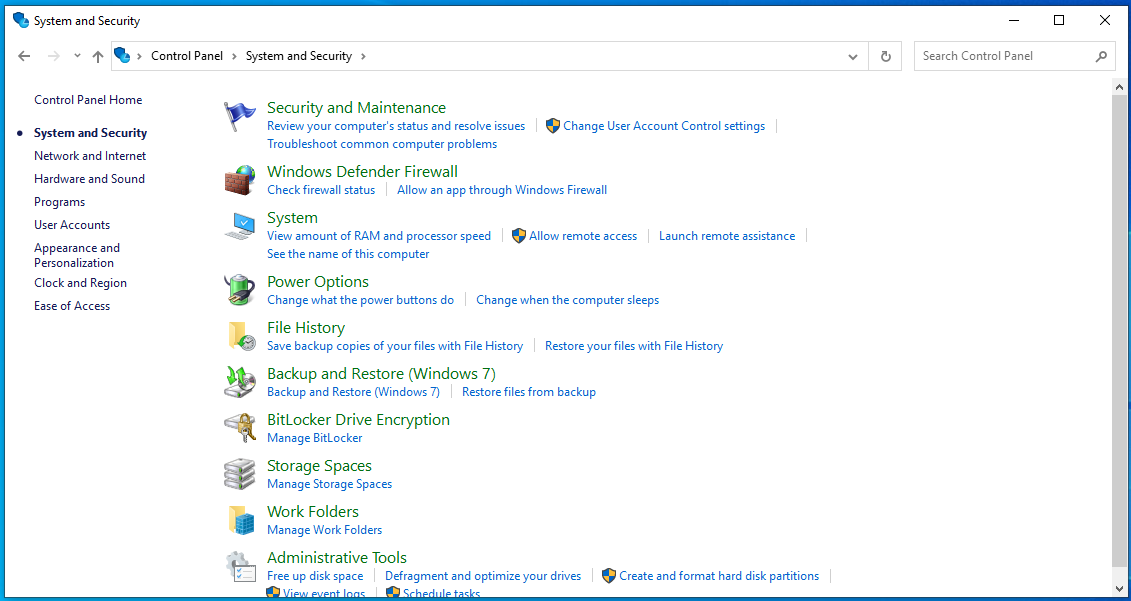
- On the left side, you’ll see the Allow an app or feature through Windows Defender Firewall option. Click it.
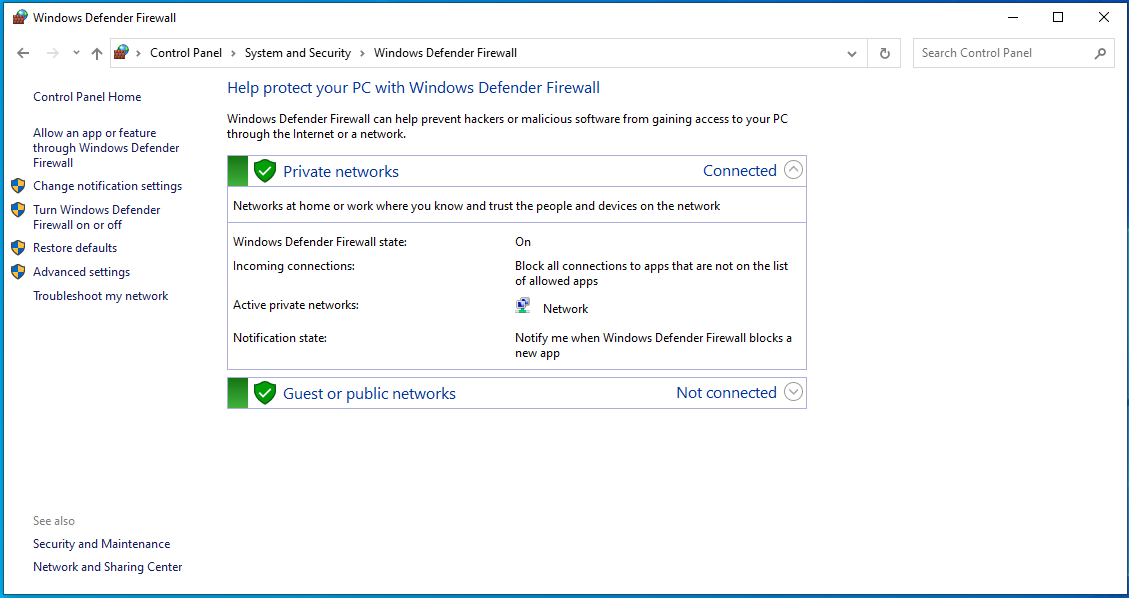
- Make sure Remote Desktop is allowed for both private and public networks.
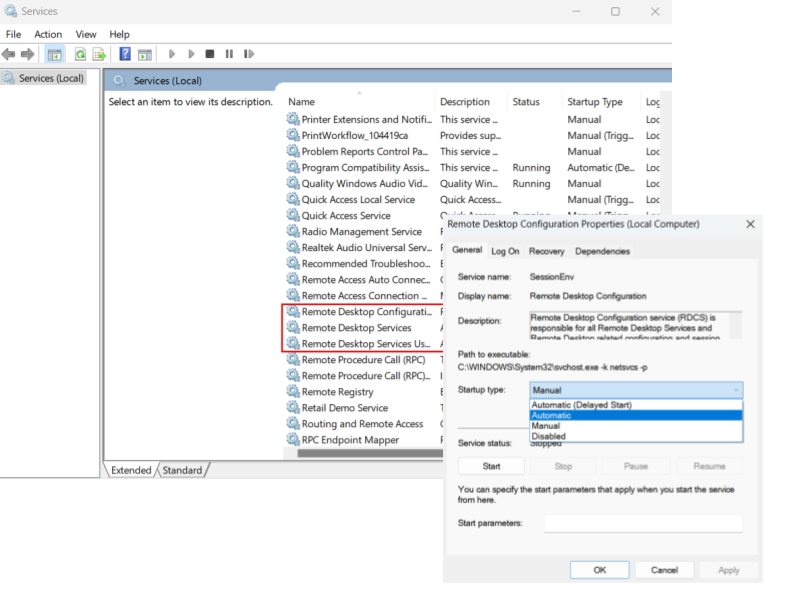
5. Verify Remote Desktop services
Make sure the necessary services are running:
- Press the
Win + Rkeys together, typeservices.msc, and hit Enter.
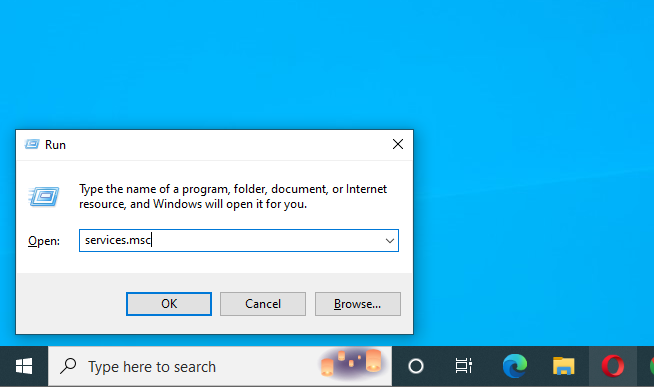
- Look for these services, double-click each of them, and set Startup type to Automatic :
- Remote Desktop Configuration
- Remote Desktop Services
- Remote Desktop Services UserMode Port Redirector
6. Disable AP Isolation
This one sounds complicated, but it’s not too bad. AP Isolation is a setting in your router that might be blocking your devices from talking to each other. Here’s how to turn it off:
- Open your router settings (by typing your router’s IP address into a web browser).
- Find the setting for AP Isolation or Client Isolation.
- Disable it and save your changes.
7. Adjust Group Policy settings
If you’re on a corporate network, the Group Policy settings might be messing with you. Adjust them like this:
- Press the
Win + Rkeys together, typegpedit.msc, and hit Enter. - Now, here’s the path you need to follow:
Computer Configuration > Administrative Templates > Windows Components > Remote Desktop Services > Remote Desktop Session Host > Connections. Double-click the Allow users to connect remotely using Remote Desktop Services setting and enable it.
8. Open port 3389
This one’s more for techies, but I’ll try to keep it simple. The thing is, Remote Desktop uses port 3389 for connection. So, if you’re still struggling, chances are that it’s closed. Here’s how you can open it:
- Press the
Win + Rkeys together, typecmd, and hit Enter. In the Command Prompt, typeipconfigand note your IPv4 address. - Get into your router again and search for the NAT or Port Forwarding section. Then, create a new port forwarding rule:
- Application name : “ RDP” or any name you prefer.
- Port range : 3389 .
- Protocol : TCP/UDP .
- Device IP : Enter the IPv4 address you noted earlier.
- Save the settings and restart your router.
Windows 10/11 (8, 7, Vista, XP)
Additional Tips
We’re almost there, and if you still haven’t gotten rid of this nasty 0x204 error code or just want to know how to maintain your PC like a pro to prevent errors like this from happening in the future, I’ve got a couple of extra tips for you.
Update your drivers
It’s been said a thousand times but is still true: outdated and corrupted drivers can lead to all sorts of problems. For instance, a faulty network driver may well be the reason for the internet going in and out and other issues. Fortunately, it’s pretty easy to update your drivers:
- You can update them manually, one-by-one, by going to Device Manager, right-clicking the device you want to update, and selecting Update driver.
Also read: How to Check if My Drivers Are Up to Date
Check for malware
There are countless types of malware, and none of them are good for your PC. And, of course, there are tons of malicious programs that can mess with your network. Here are a few tips on how you can stay on the safe side:
- Install a reliable antivirus.
- Occasionally run full scans in Windows Defender: Go to Settings > Privacy & security (or Update & security if you’re on Windows 10) > Windows Security > Virus & threat protection > Full scan > Scan now.
Also read: Signs of Malware: How to Know if Your Computer Is Infected
Conclusion
And there you have it! A whole bunch of ways to tackle the Microsoft Remote Desktop error code 0x204. Hopefully, one of these steps will work for you, and you’ll be back in business. If not, it might be time to call in reinforcements from your IT department or Microsoft Support. Good luck!
And hey, before you go, please drop a comment below and share this article on your socials if you liked it!