![[FIXED] “A Required Device Isn’t Connected or Cannot Be Accessed” Error](https://www.auslogics.com/en/articles/wp-content/uploads/2019/03/FIXED-‘A-Required-Device-Isnt-Connected-Or-Cannot-Be-Accessed-Error-568x359.png)
You probably found this article because you want to get rid of the “A required device isn’t connected or cannot be accessed” error on your computer. Well, do not worry, because we’ve got you covered. In this post, we will show you different ways to resolve this BSOD error.
Before we begin, you must know that this issue is associated with various stop error codes, including 0xc000000e, 0xc0000185, 0xc00000f, and 0xc0000001. Usually, these error codes appear when Windows fails to find the system files necessary for booting your computer properly. So, if you want to know how to fix the error 0xc0000001 and other codes similar to it, you need to learn how to correct the boot record.
Solutions for Fixing the 0xc0000225, 0xc0000185, 0xc0000001, and 0xc000000e Error Codes
You’re probably asking, “What is the error code 0xc0000185?” Well, you should know that the 0xc0000225, 0xc0000185, 0xc0000001, and 0xc000000e error codes are often associated to a missing winload.efi file. So, here are the solutions we suggest:
Solution 1: Rebuilding the Boot Configuration Data (BCD)
- On your keyboard, press
Windows key + S. - Now, type
Command Prompt. - From the results, right-click Command Prompt.
- Choose Run as administrator from the context menu.

- Once Command Prompt is up, type
bootrec /rebuildbcd, then pressEnter.
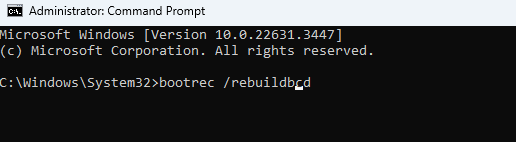
This command will prompt your computer to scan for other operating systems. You will have the freedom to choose which OS to add to the BCD.
Solution 2: Disabling Secure Boot
Before we provide the instructions for disabling Secure Boot, you need to check if you have the feature on your computer. Here’s what you have to do:
- Press the
Windows keyon your keyboard. - Type
Windows Defender. - Select Windows Defender Security Center from the results.
- On the left-pane menu, choose Device security.
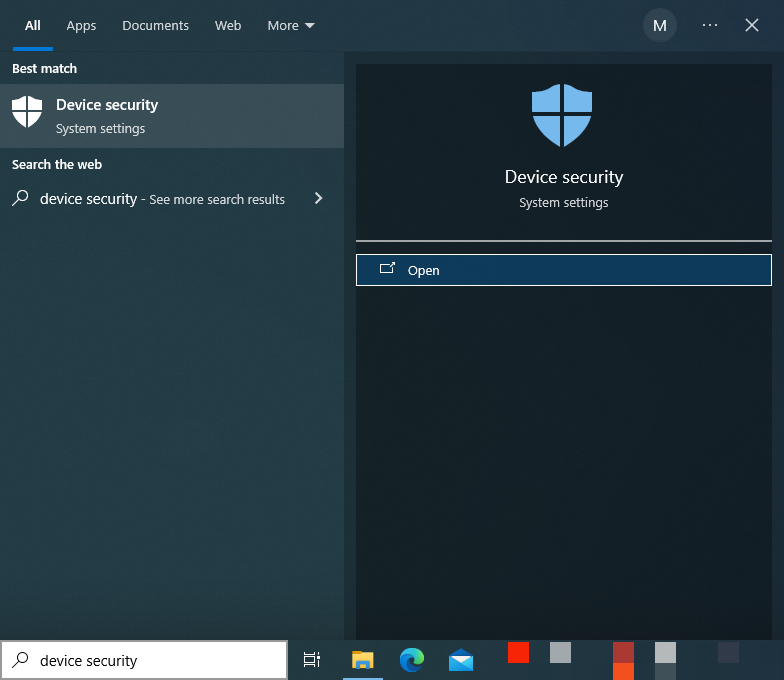
On the next screen, if you see Secure Boot, then it means that your computer has the feature. You can now proceed to disabling it, but do not forget to read the warning messages carefully. Once you’re ready, you can follow the instructions below:
- Press
Windows key + Ion your keyboard. Doing so will launch the Settings app. - Once the Settings app is open, click Update & Security.
- On the left-pane, select Windows Update.
- Now, move to the right pane and click Check for updates.
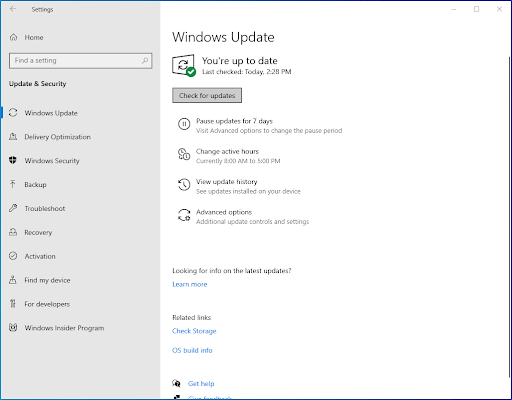
- If updates are available, download and install them.
- Restart your computer.
- Open the Settings app by repeating the first step.
- Select the Update & Security tile.
- Go to the left-pane menu, then click Recovery.
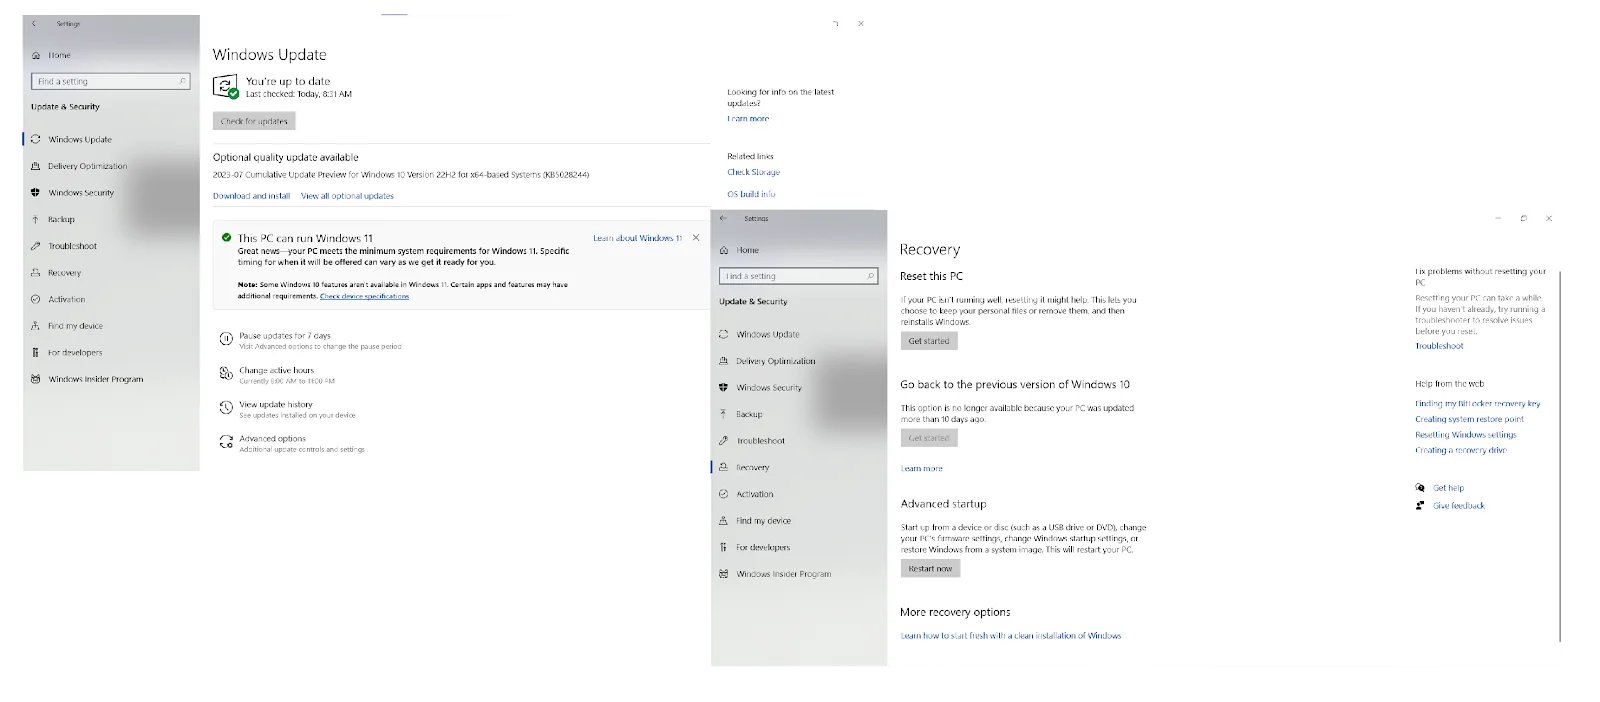
- Now, move to the right pane and click Restart now. Once you click the button, your PC will reboot, and you will see the Advanced Startup Options menu.
- Select Troubleshoot, then click Advanced options.
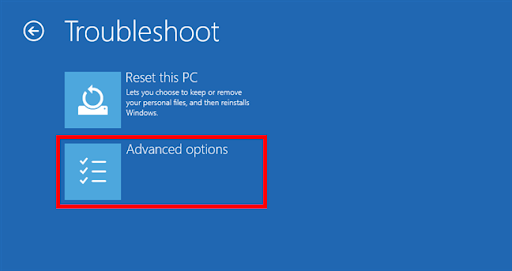
- Choose UEFI Firmware Settings to enter the BIOS.
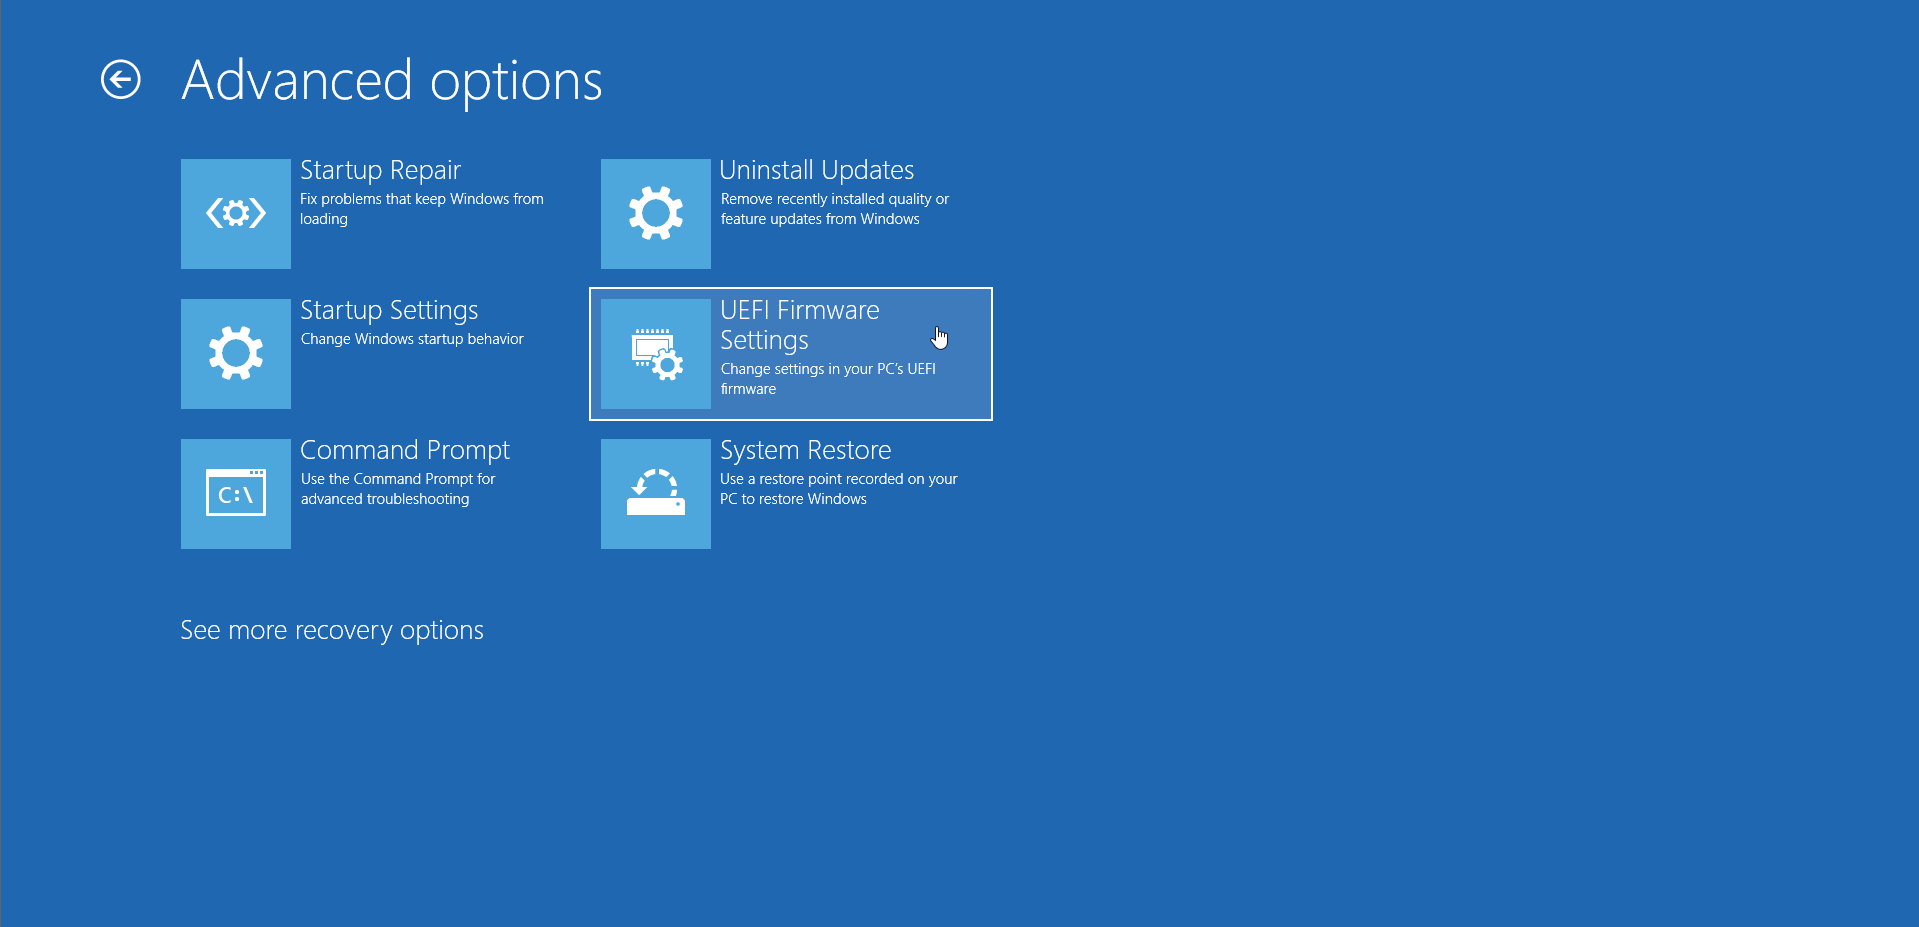
- Usually, you will find Secure Boot under any of these tabs: Boot, Security, or Authentication.
- Set Secure Boot to Disabled.
- Save the changes you made, then exit the BIOS.
After following these steps, your PC will reboot automatically. Check if the error is gone. If it is, repeat the steps, then set Secure Boot to Enabled. That’s it! You now know how to resolve the error 0xc0000225 on Windows 10.
Solution 3: Using the System File Checker
The winload.efi file is a crucial system file, and if it goes missing, various errors can occur. Fortunately, there is an easy way to fix this. You can use the System File Checker (SFC) to replace or repair the problematic system file. To perform an SFC scan, follow the steps below:
- Right-click the Windows icon on your taskbar.
- Now, select Windows PowerShell (Admin) or Command Prompt (Admin) from the results.
- Once Windows PowerShell or Command Prompt is up, type
sfc /scannow, then pressEnter.
Now, the SFC scan process will begin. Keep in mind that it will take a couple of minutes to complete. So, it is crucial that you avoid interfering with it.
Solution 4: Disabling Early Launch AntiMalware protection
Windows 10 has a new security feature that loads the Early Launch AntiMalware (ELAM) driver. This feature secures the Windows boot configuration and components. It begins to operate even before other boot-start drivers, evaluating them and helping the Windows kernel identify which are safe to initialize. Basically, its main purpose is to detect malware as early as the boot process.
While it is useful in some cases, the ELAM driver can cause various stop error codes to appear. So, it is best that you disable it. To do that, follow the steps below:
- Launch the Settings app by pressing
Windows key + I. - Select Update & Security.
- On the left pane, click Recovery.
- Go to the right pane, then click Restart now under the Advanced startup section.
- Follow this path:
Troubleshoot -> Advanced options -> Startup Settings -> Restart
- After your PC reboots, you will see the Startup Settings screen. Press
F8on your keyboard to disable the ELAM driver.
You can trust that this tool will be able to spot malware and viruses, no matter how discreetly they run in the background. What’s more, since it is released by Auslogics, a certified Microsoft Silver Application Developer, it will not interfere with Windows services and processes.
“A Required Device Isn’t Connected or Cannot Be Accessed” Error: Fixed
As you can see, fixing the “A Required Device Isn’t Connected Or Cannot Be Accessed” error is quite manageable with proper steps. Regular maintenance and backups can help prevent future issues.
So, which of our solutions helped you fix the error?
Join the discussion below and share your answer!