
In this post, we will look into several possible solutions on how to fix the DISM error 1009, also known as “The configuration registry database is corrupt.”
What Is the “The Configuration Registry Database Is Corrupt” Error?
There are several situations in which you may be running into this error. In a lot of cases, it occurs when you are trying to repair a Windows image with a damaged or corrupted registry. You probably used one of the DISM commands below:
-
Dism /Online /Cleanup-Image /Restorehealth
-
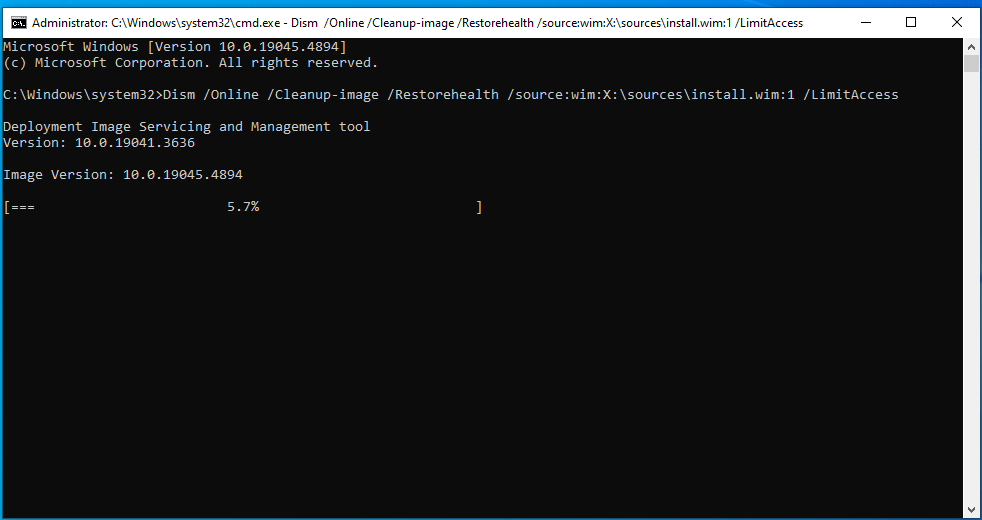
Dism /Online /Cleanup-image /Restorehealth /source:wim:X:\sources\install.wim:1 /LimitAccess
Another situation when you may encounter the DISM error 1009 is if you run this DISM command in Windows Recovery Environment (WinRE):
Dism.exe /Image:X:\ /Cleanup-Image /Restorehealth
The error can also be triggered by a failed Windows update. So, what is a corrupt registry database issue? Basically, when you see this error code, it means that there are one or more corrupt registry files somewhere in your system. Thus, your best chance of getting rid of the error is fixing the corrupted file.
How to Fix the “The Configuration Registry Database Is Corrupt” Error on Windows 10/11?
As we’ve mentioned above, there are several things you can try to remove the “The configuration registry database is corrupt” error. Here are some of the possible solutions:
- Reverting to a previous version of Windows.
- Restoring the registry from the backup.
- Performing a system restore.
- Running a Windows 10/11 in-place upgrade repair.
Below, we will go over the steps for each of the above solutions. We suggest you start at the top of the list and make your way down in case the first method doesn’t work.
To download the installation media, go to the Windows Software Download page and select the OS version you want to download. Go on to download an executable file titled MediaCreationTool.
Now, let’s get started.
Option one: Revert to a previous version of Windows
If you’ve noticed the DISM error 1009 on your PC after installing a Windows update, removing that latest update might help you get rid of the problem. Here’s how to do it:
- First, boot your PC with Windows installation media.
- When you are on the boot screen, go to Command Prompt . To access it, use the
Shift + F10key combo on your keyboard. Alternatively, you can click Next and then navigate to Repair your computer > Troubleshoot > Command Prompt .
- In the new window, type in the following command:
wmic logicaldisk get name
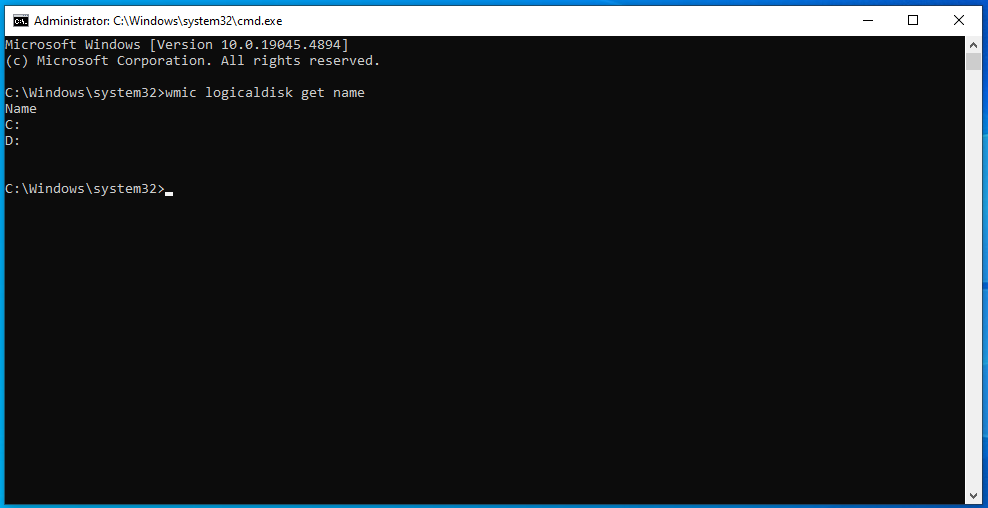
- Press the Enter key.
- Type in “dir C:” (no quotes). This command will locate the drive that has the Windows folder. Make sure to replace the letter C (if needed) with the letter of the drive where Windows is installed.
- Go on to create a scratch folder on your drive. Type in the following command:
mkdir C:\Scratch
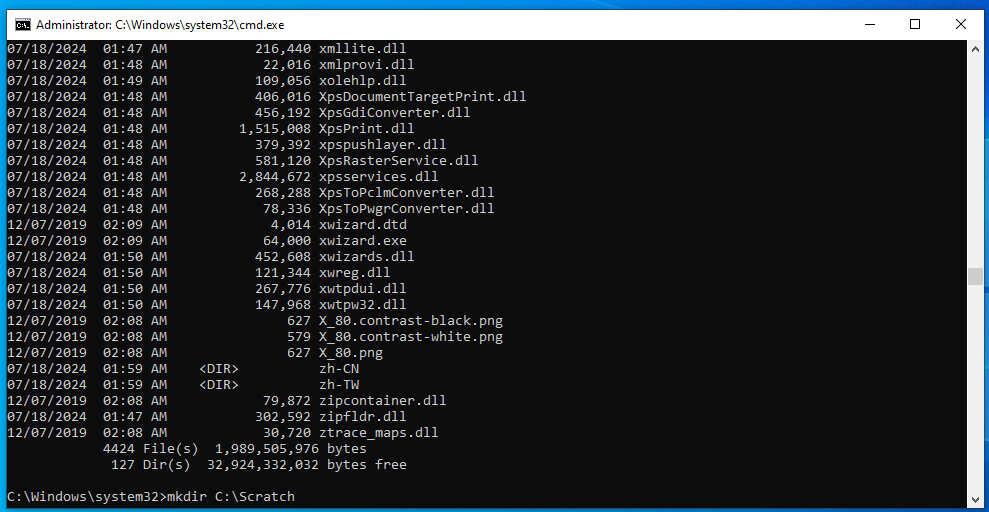
- Press the Enter key.
- Next, run the command below:
DISM /Image:C:\ /ScratchDir:C:\Scratch /Cleanup-Image /RevertPendingActions
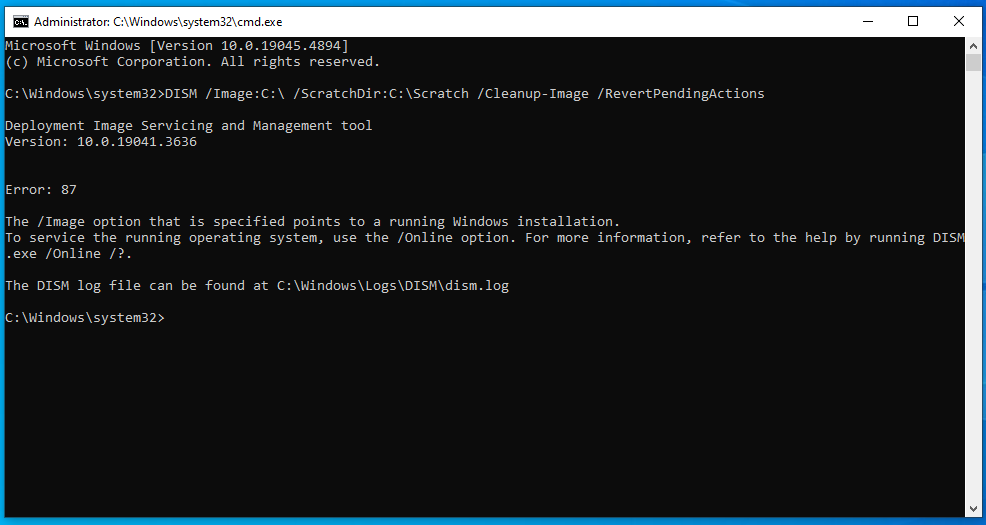
- Once the command is executed, you will receive several messages ending in:
The operation completed successfully.
- Now, you can close Command Prompt and restart your computer.
If your system boots successfully, you’re all set. However, if it fails to boot and starts installing updates again, you will need to do the following:
- Restart your computer and boot using the installation media (just like you did in the first step).
- Open Command Prompt.
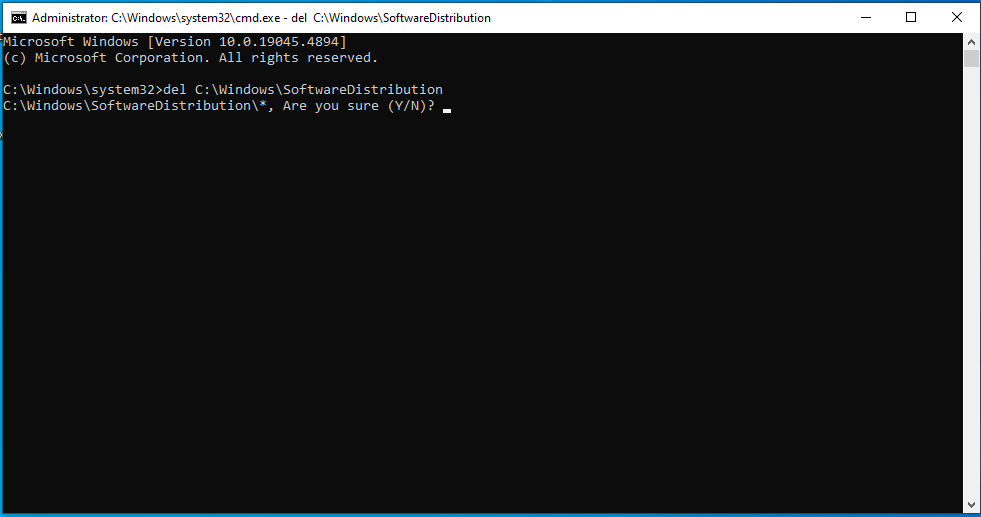
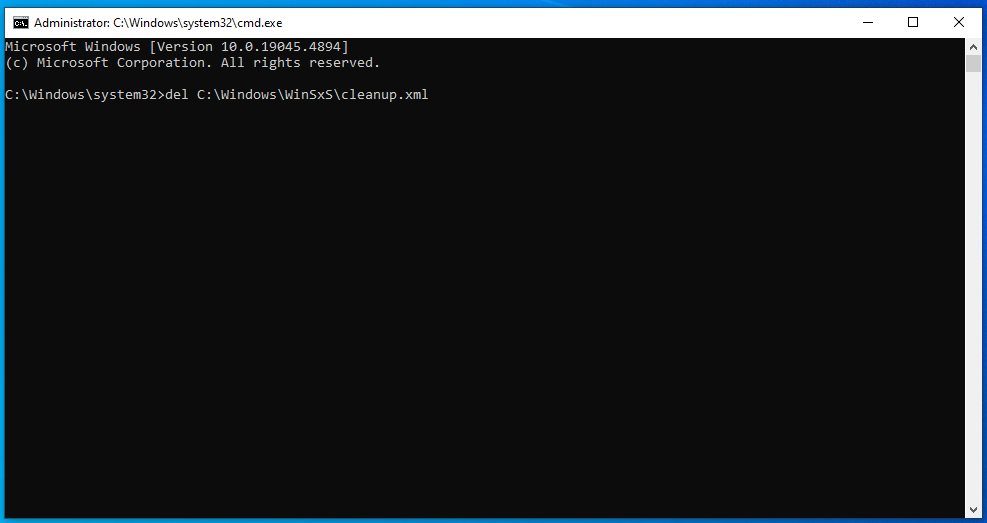
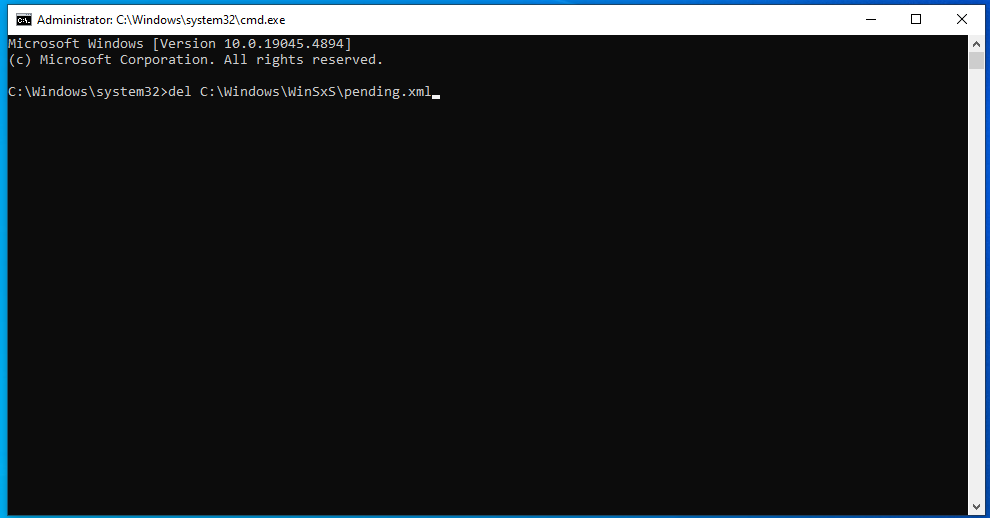
- Run the following commands (remember to replace C with the drive letter you need):
del C:\Windows\SoftwareDistribution
del C:\Windows\WinSxS\cleanup.xml
del C:\Windows\WinSxS\pending.xml
- Once more, restart your computer.
If your system still can’t boot properly, you will need to repeat the first few steps:
- Boot your PC with the installation media.
- Open Command Prompt.
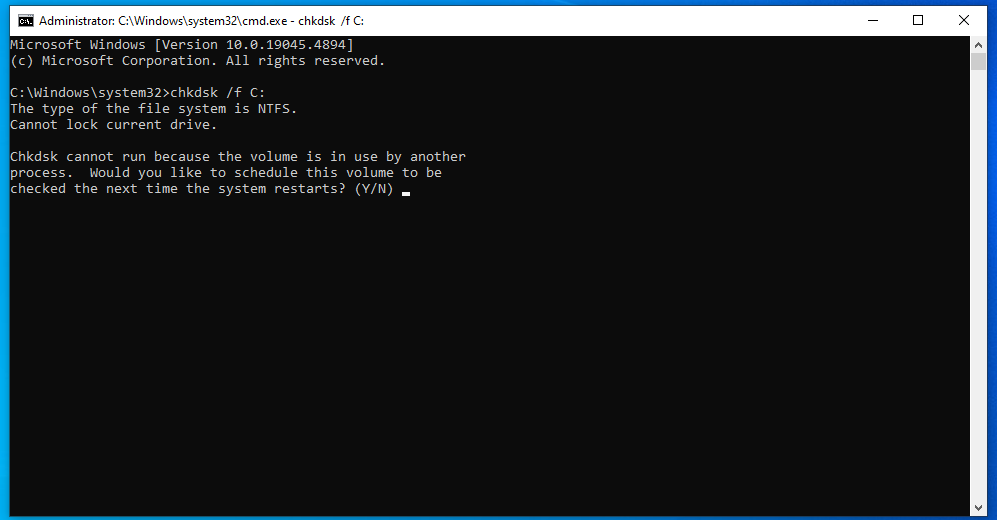
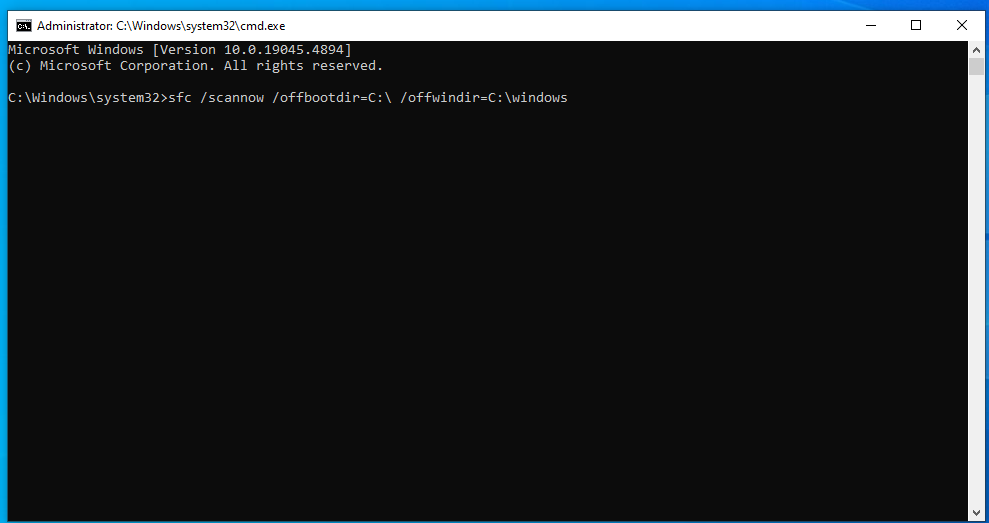
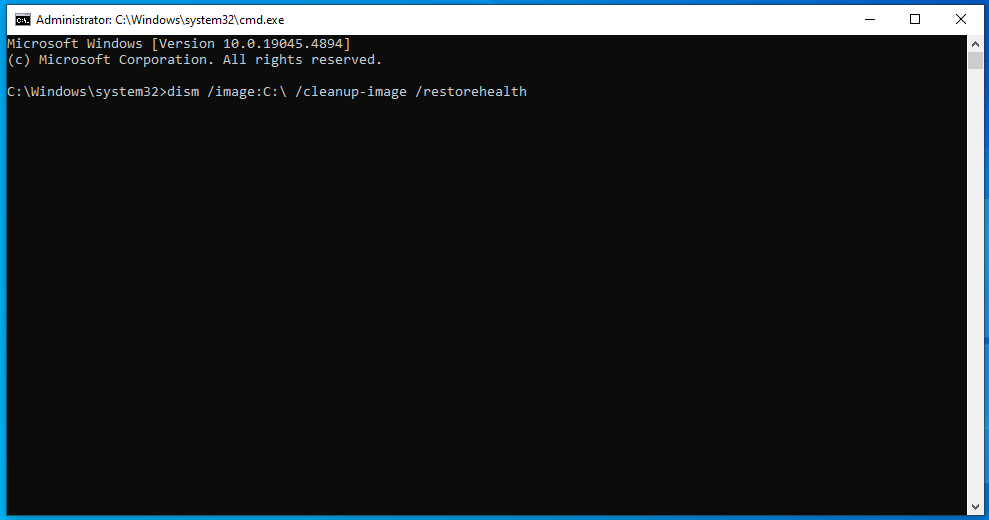
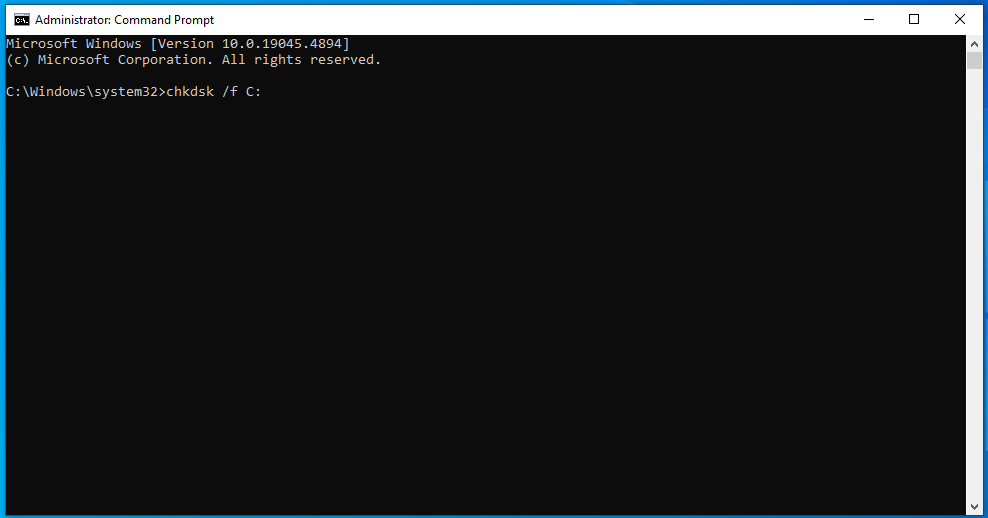
- Run the commands below (replacing the letter C as needed):
chkdsk /f C:
sfc /scannow /offbootdir=C:\ /offwindir=C:\windows
dism /image:C:\ /cleanup-image /restorehealth
- Restart your computer again.
At this point, you should have no problem booting your system, and you should no longer be seeing the DISM error 1009 message. If this method hasn’t worked, move on to the next solution.
Option two: Restore the registry from the backup
With this method, you will need to restore the Windows registry using the RegBack folder.
Here’s how to proceed:
- Boot your PC with Windows installation media.
- Launch Command Prompt.
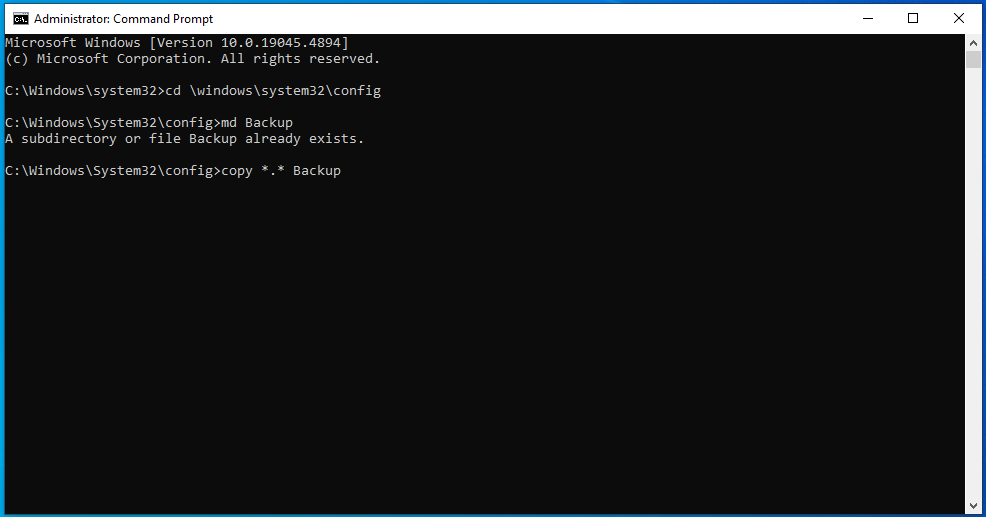
- Type “C:” (no quotes) and press the Enter key (make sure to replace C with the needed drive letter).
- Type these commands, pressing Enter after each line:
cd \windows\system32\config
md Backup
 copy *.* Backup
- In Command Prompt, run the following command to get to the RegBack folder:
cd RegBack

Now, there are two possible scenarios here:
- You may see a list of files with their respective sizes displayed in bytes. Some of these files will have zero bytes. This means that these registry files are either corrupted or empty and, thus, could be the ones causing the error. If this is the case, as we’ve mentioned above, stop here and go to Option three below, where we will tell you how to restore Windows 10/11 to a previous working state.
- The second possible scenario is that none of the files in the list will have zero bytes. In this case, run the following command:
copy *.*
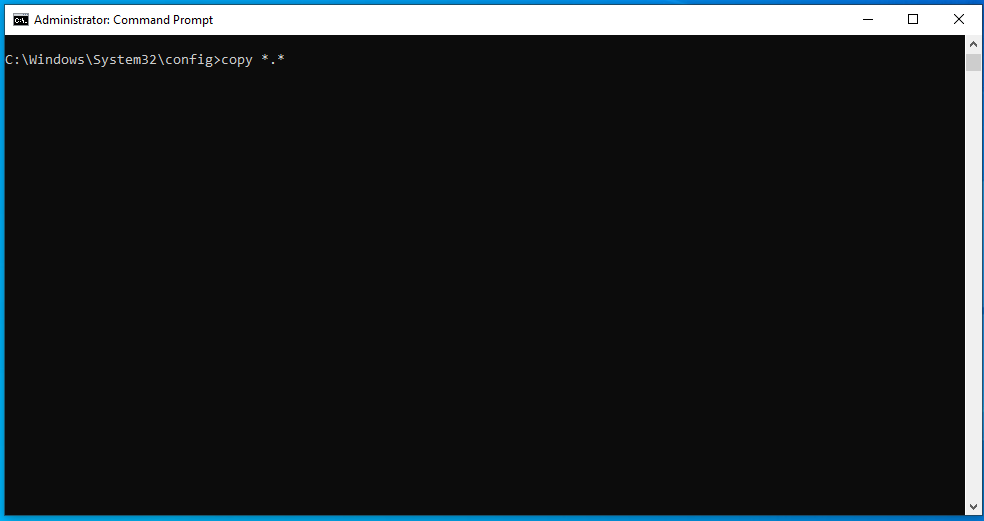
- By executing this command, you will be copying registry files from the Windows\System32\config\RegBack folder to the Windows\System32\config\ folder.
- If you receive a prompt, press A on your keyboard to overwrite the files in the destination folder.
- Once this is done, type “exit” (no quotes) and press the Enter key on your keyboard to close Command Prompt.
- Restart your computer.
If you can’t boot to your desktop, you will need to boot with the installation media again and open Command Prompt. Next, run the following commands:
chkdsk /f C:
sfc /scannow /offbootdir=C:\ /offwindir=C:\windows
dism /image:C:\ /cleanup-image /restorehealth

Once these commands are executed, restart your computer. You should now be able to boot to your desktop without any issues. The error message should not be bothering you either. If this is not the case, try the next solution.
Option three: Perform a system restore
As mentioned earlier, if you noticed some files with zero byte value in the list from the above solution, you will need to restore Windows 10/11 to an earlier version as the registry has been damaged.
Naturally, you can only use this method if you have previously created a system restore point . If you haven’t, we will include the instructions for creating one down below. If you have, you can proceed with these steps:
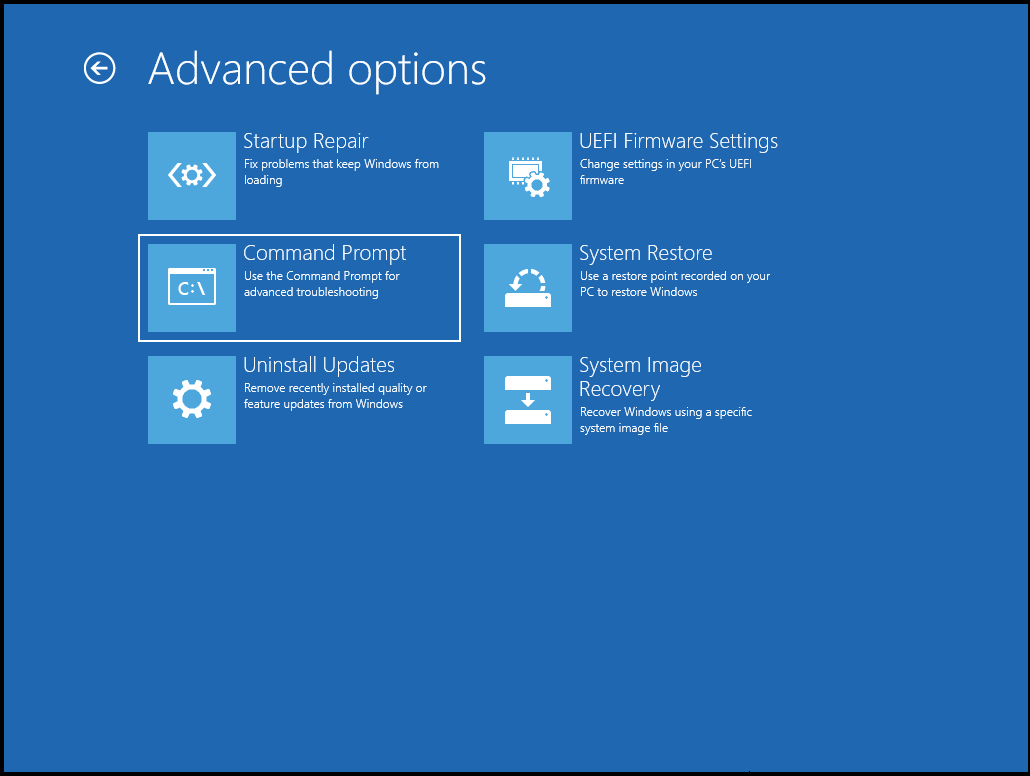
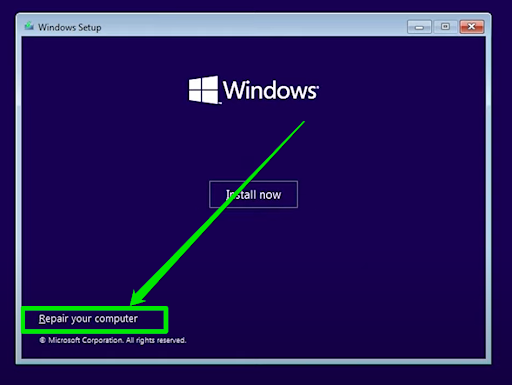
- Boot your PC with Windows installation media.
- Once you are on the boot screen, click Next .
- Go to Repair your computer .
- Select Troubleshoot .
- Click Advanced options .

- Click System Restore or Go back to a previous build .

- On the next screen, you will need to select your OS.
- In the System Restore Wizard window, click Next .
- Next, you will need to choose a restore point. This has to be a point in time where your system was working properly and you were not getting the error message.
- Click Next for the system restore process to start.
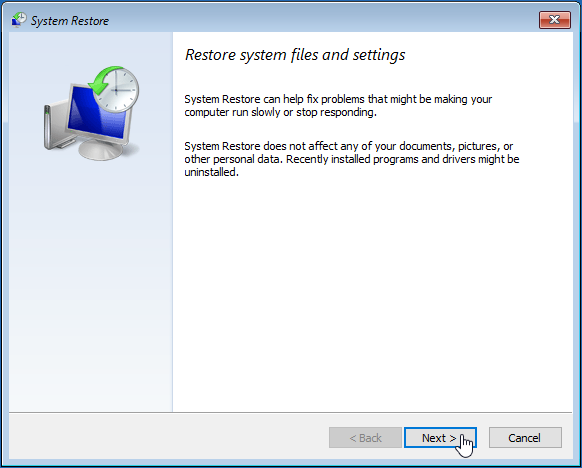
- Once the process is complete, you will be prompted to restart your PC.
You should no longer be seeing the error message on your PC. If you are still having issues, you can move on to the next fix in this list.
Option four: Run the Windows in-place upgrade repair
If none of the above solutions have been successful, you can try performing a Windows 10/11 in-place upgrade repair.
Before you proceed with this solution, you will need to do the following:
- Make sure you are signed in with admin privileges.
- Remove all external devices connected to your PC (except for the mouse, keyboard, and LAN).
- Temporarily disable or uninstall any third-party anti-malware apps.
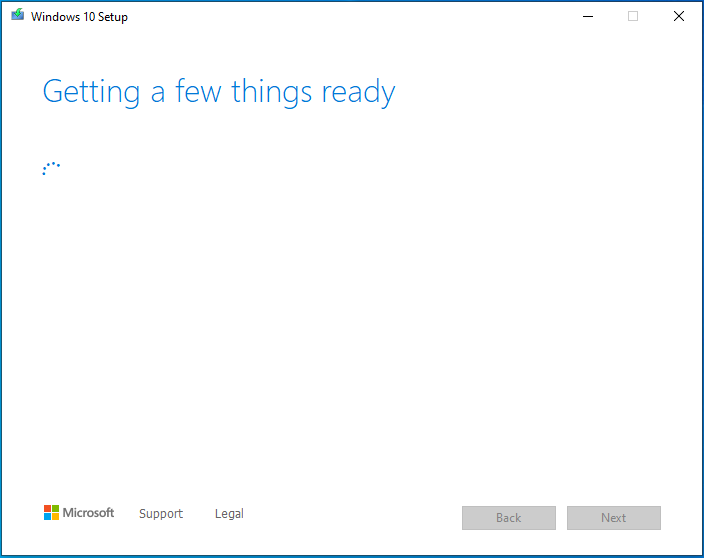
Once this is done, you can proceed with performing an in-place upgrade. During this process, you will be upgrading your Windows to the next feature update. Here’s how to do it:
- You will need the Windows installation media to proceed.
- Run it.
- If you are shown the Microsoft License Terms, accept them.
- You will then see a Getting a few things ready screen. Hold on for a few seconds.
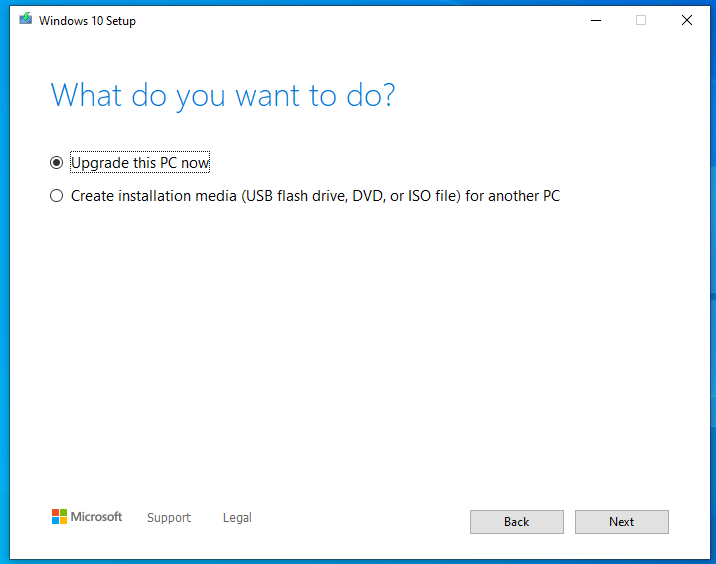
- You will see two options:
Upgrade this PC now Create installation media (USB flash drive, DVD, or ISO file) for another PC
- For this method, you will need to select the Upgrade this PC now option.
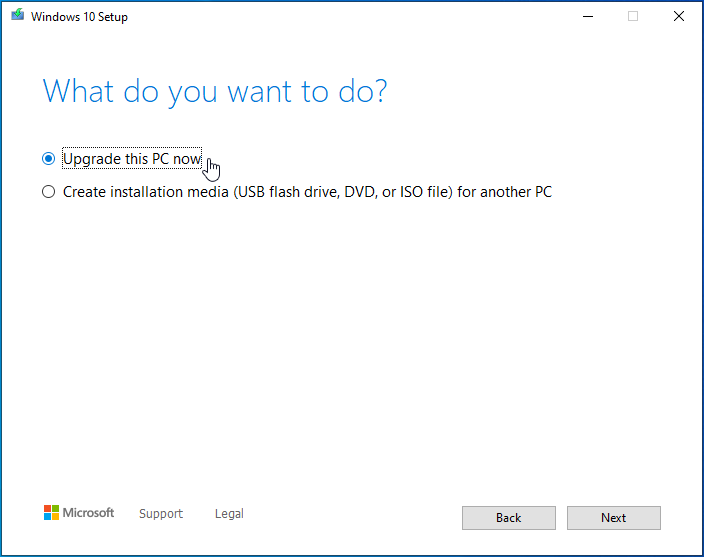
- Click Next .
- File download will begin—it can take a while, depending on your internet speed.
- Once the download is complete, you will be given a choice: you will be able to either keep your personal files or remove everything and start from scratch.
- It is generally advised to keep your files. This way, you will be able to get rid of system errors and won’t have to re-download all your files later.
- Once the process is complete, your PC might need to restart several times.
- After this, you should be able to get back to the login screen.
We hope you now know how to get rid of the DISM error 1009 on Windows 10/11 and that at least one of the solutions mentioned above has been helpful.
As you may already know, corrupt or broken entries in the registry can adversely affect your entire system, and fixing these manually can be a real hassle.
Auslogics Registry Cleaner efficiently cleans out registry keys left by uninstalled applications—thus helping you avoid lots of unwanted issues in the future.
How to Resolve the DISM Error 1009: Answered
The DISM error 1009 can often be traced to a corrupt registry database or a failed update. But there are a few things you can try to fix the error: revert to earlier Windows versions, restore backups, perform a system restore, or run an in-place upgrade. Remember to always have your Windows installation media on hand for these processes. If the problem persists, consider using a specialized tool like Auslogics Registry Cleaner to ensure the health of your system’s registry.