
When you run into network problems like the “Ping: Transmit failed. General failure” error, pinging can help troubleshoot the underlying issue.
On a Windows machine, we use the ping command to measure an IP address’s response time and, among other things, analyze the statistics of the reply received.
When you execute the ping command, packets of information are sent to devices on the same network or the Internet to determine whether they are available for connection.
But, what do you do if you send a ping and it returns the error “Ping: Transmit Failed. General Failure”?
It can be quite frustrating, especially if you are working on something. The problem is exacerbated by the fact that the notification doesn’t show additional information describing the error.
But don’t panic. In this post, we show you how to troubleshoot ping failure so that you can get back to your business.
What Causes the “Ping: Transmit Failes. General Failure” Error?
There are various possible reasons that could cause this problem. Some of the potential ones are as follows:
- Outdated network drivers or firmware;
- A misconfigured firewall;
- Hardware and software issues;
- Issues with the Domain Name System (DNS)
As we noted above, the main reason why the error occurs is not known. Having said that, the following are the most effective solutions to the “Ping: General Failure” error. These solutions worked for other users and are worth trying on your PC.
How to Fix “Ping: Transmit Failed. General Failure”
Fix 1: Temporarily disable your firewall
First, you need to check if your firewall is to blame for the ping general failure error. While this is rarely the case, it’s worth checking this out since we can’t exactly pinpoint the source of the problem.
To do that, temporarily disable the firewall and try running the ping command again. If you use Windows Defender as your security solution, here are the steps to follow:
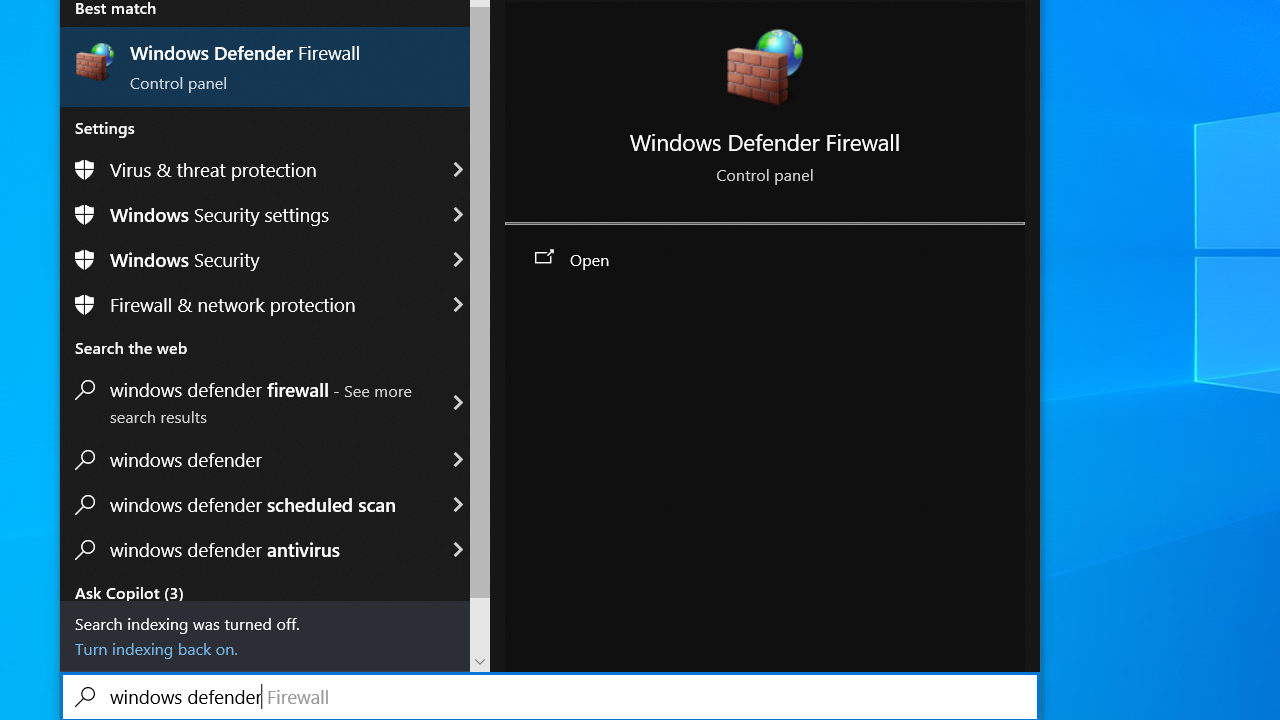
- Press the
Windows logo key + Scombination, type Firewall and select Windows Defender Firewall. This will take you directly to the Windows Defender Firewall page in the Control Panel.
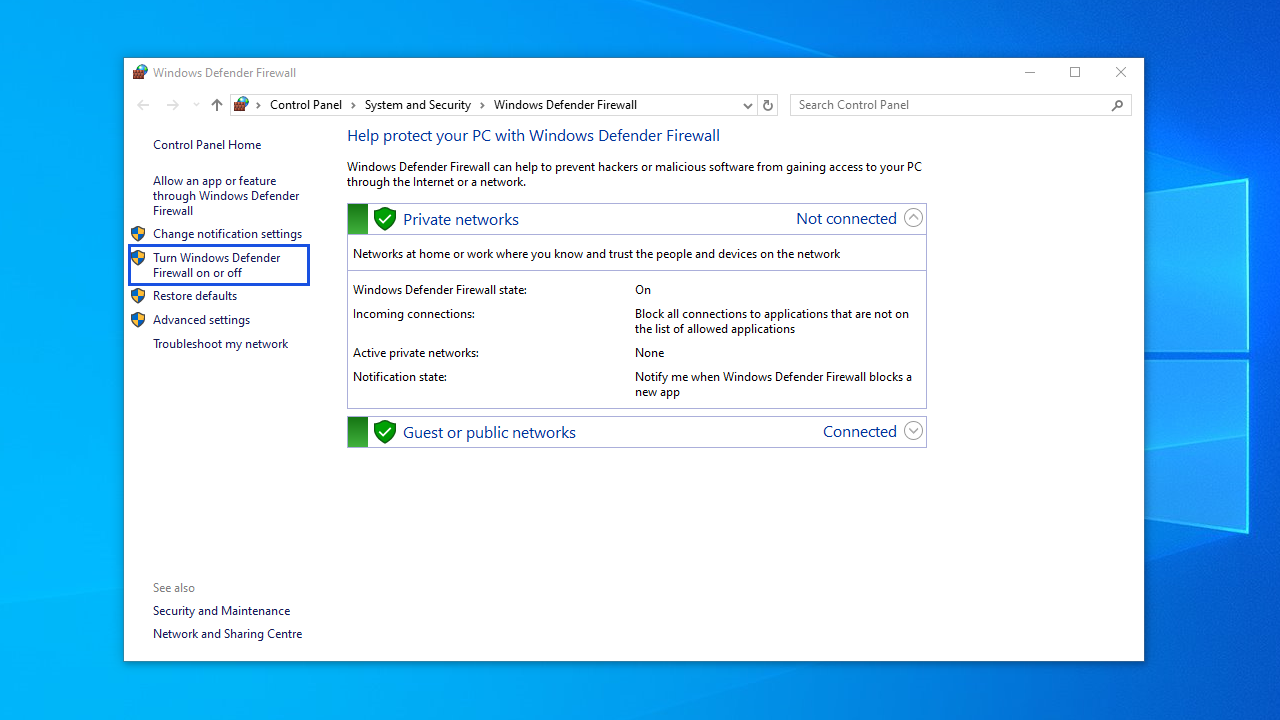
- While in this window, look for the Turn Windows Defender Firewall on or off option in the left pane and select it.
- Click the radio buttons next to Turn off Windows Defender Firewall (not recommended) for each network type.
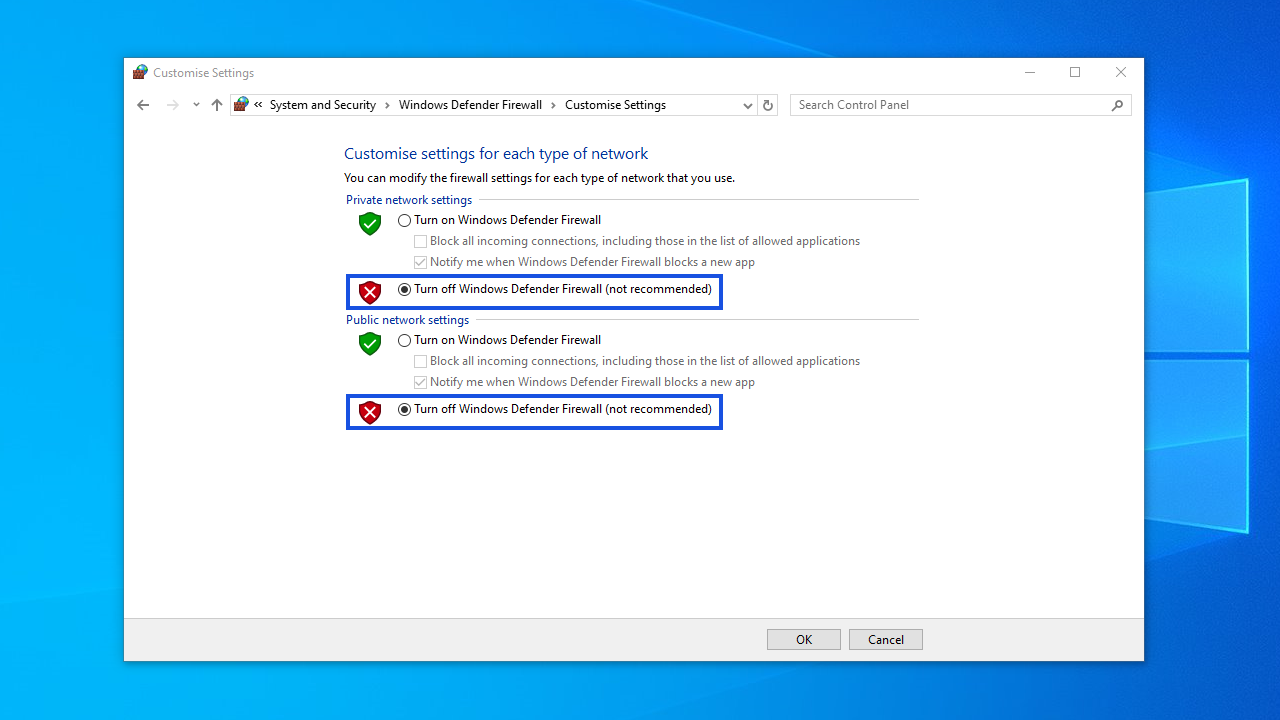
- Alternatively, you can simply block all the incoming connections by clicking the checkbox under the option to turn on Windows Firewall.
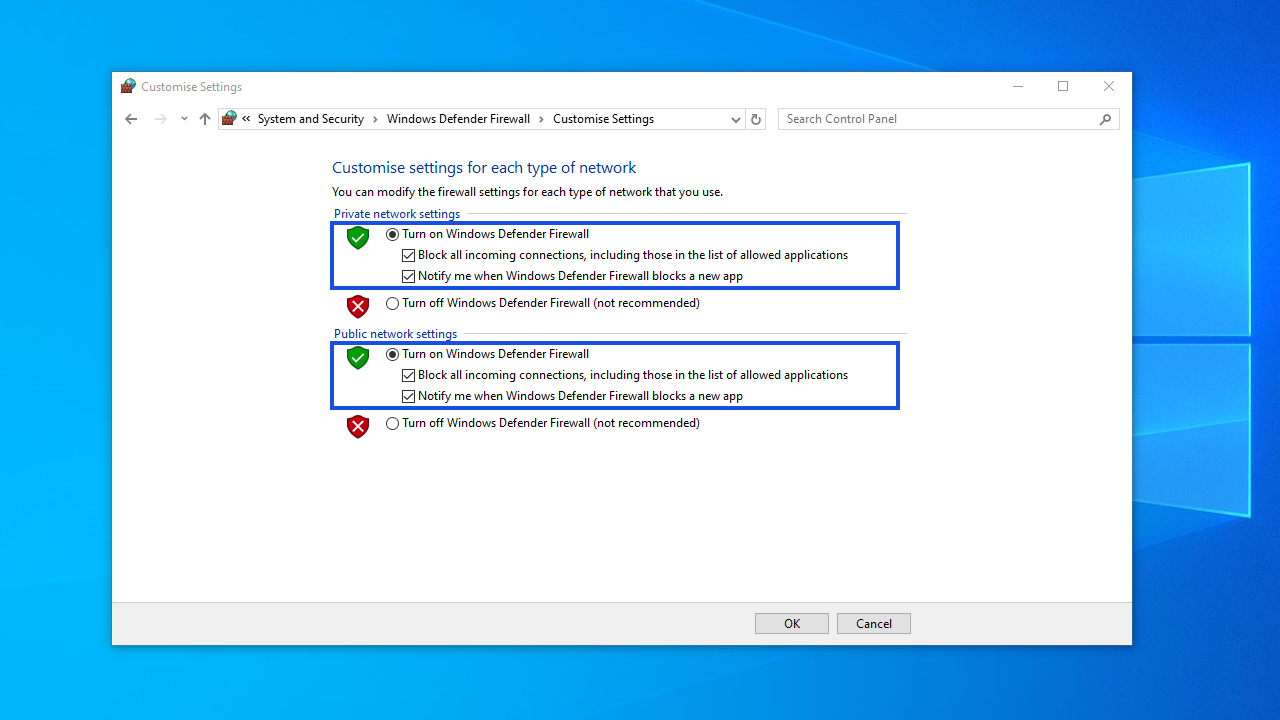
Now check if you’ll run into the ping general failure error. If you do, Windows Defender is not the culprit. Turn it back on to keep your system protected.
Fix 2: Remove any applications that block HTTP traffic
If you’ve installed any applications on your Windows machine that could, in one way or another, be capable of blocking HTTP traffic coming to or from your PC, you must uninstall them.
These applications can block your system from pinging the IP address or website that you’re trying to reach.
Examples of such programs include Simplewall, Peer Guardian, Wireshark, Peerblock, and AnyConnect.
- Open Resource Monitor (type it into the Start menu) and navigate to the Network tab.
- Under the Network Activity section, you can see which applications are currently using network connections and identify any that are being blocked or restricted.
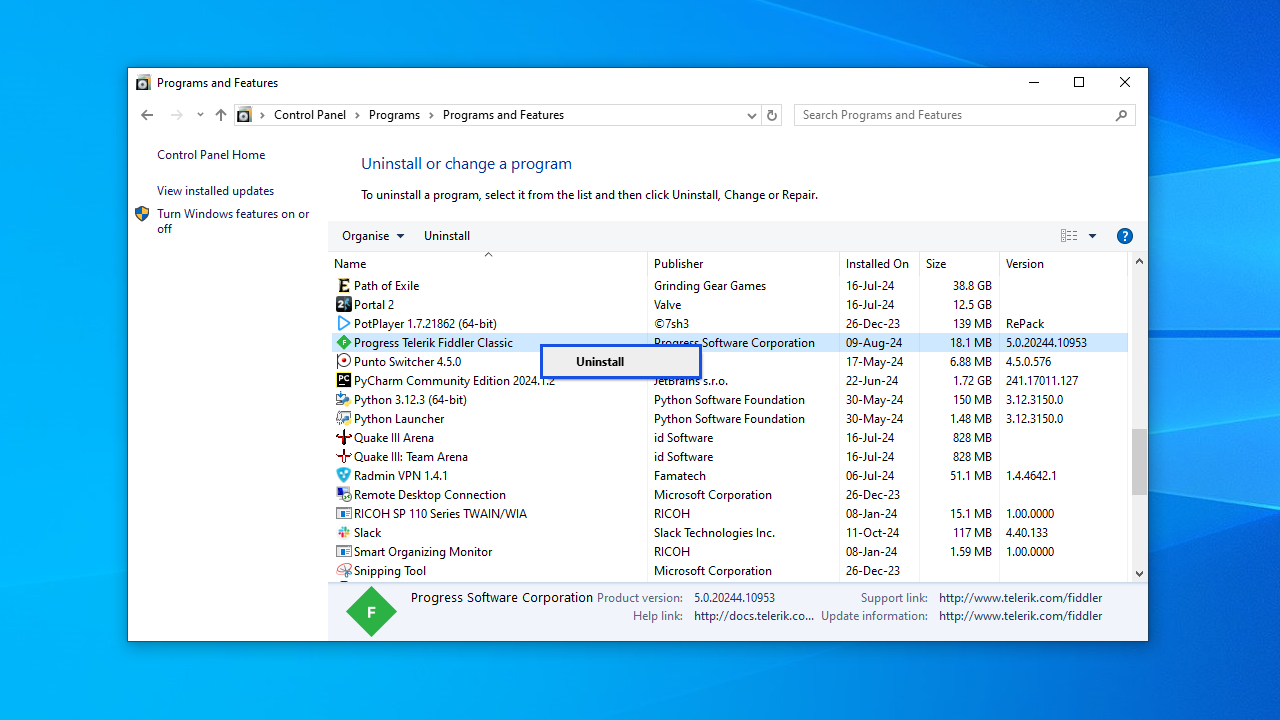
Here is how to uninstall the applications:
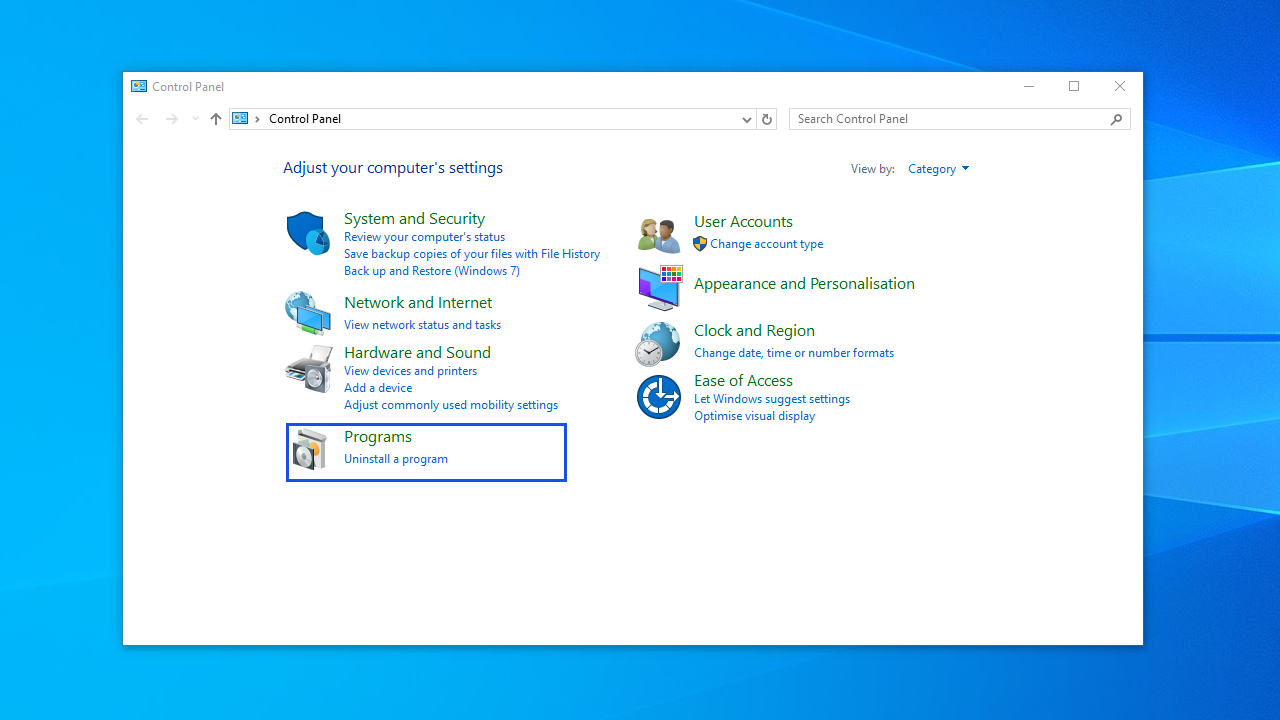
- Open the Control Panel, and go to Programs > Uninstall a program.
- Right-click the suspect program and select Uninstall.
Additionally, if you’re using VPN software, disable it when testing to check if it’s causing the error.
Fix 3: Flush your DNS cache
is an effective solution to the “Ping: Transmit failed. General failure” error on Windows 10/11.
When you clear the DNS cache, the old IP records are deleted, allowing your system to get fresh ones when you access the server. In fact, flushing your computer’s DNS cache from time to time is considered healthy.
Clearing your DNS cache will also reset your Winsock catalog, and this might help to fix the problem. To flush the DNS cache, follow the instructions below:
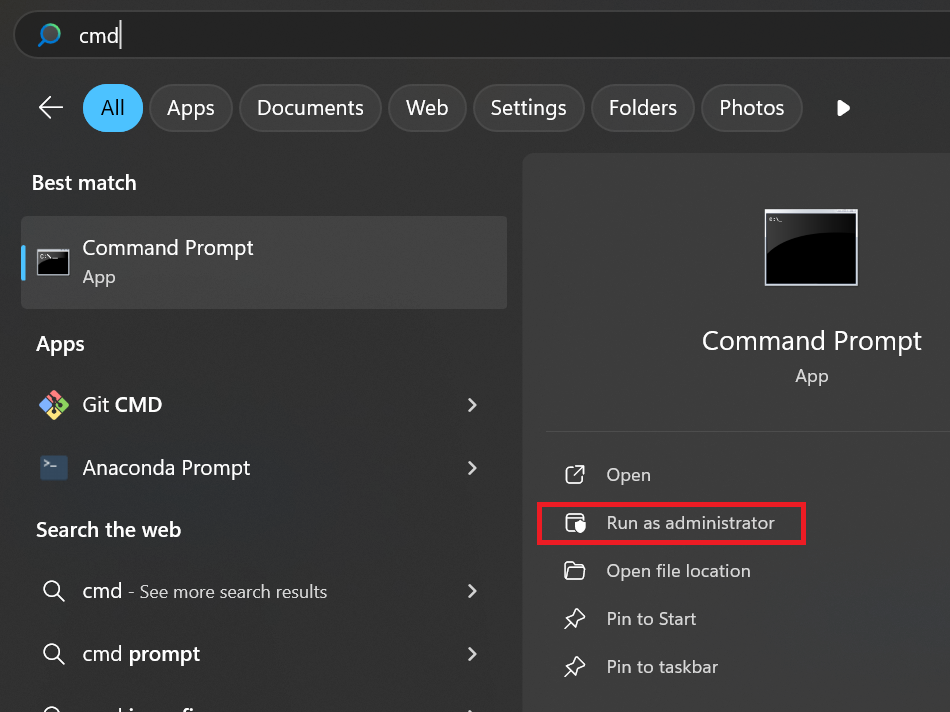
- Click the Start button in the lower-left corner of your screen.
- Once in the Start menu, go to the search bar and type
Command Promptorcmd.
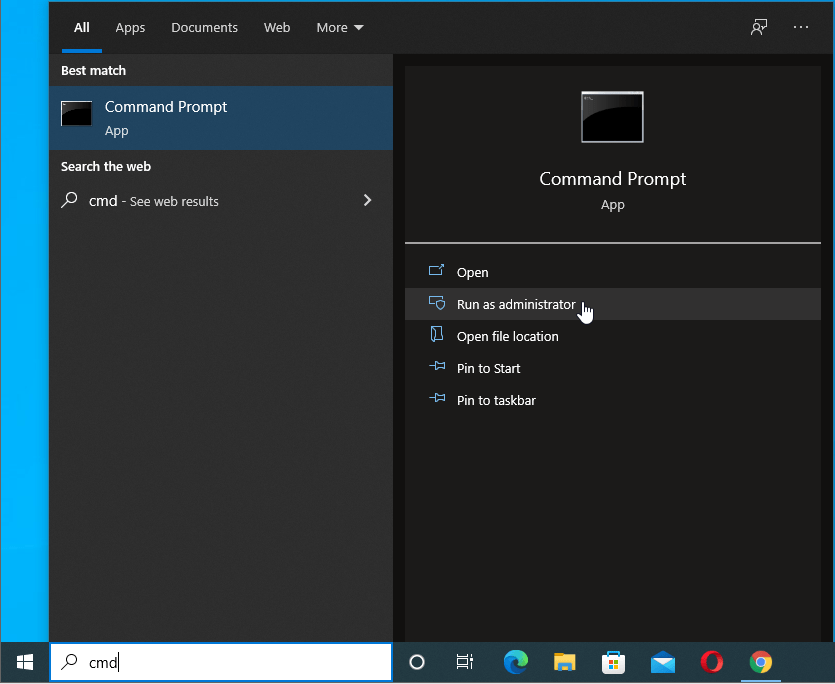
- Right-click on Command Prompt in the search results and click on Run as administrator.
- Once in the Command Prompt (Admin) window, enter the following commands one after the other and press
Enteron your keyboard after each one:
ipconfig /flushdns
ipconfig /all
ipconfig /release
ipconfig /renew
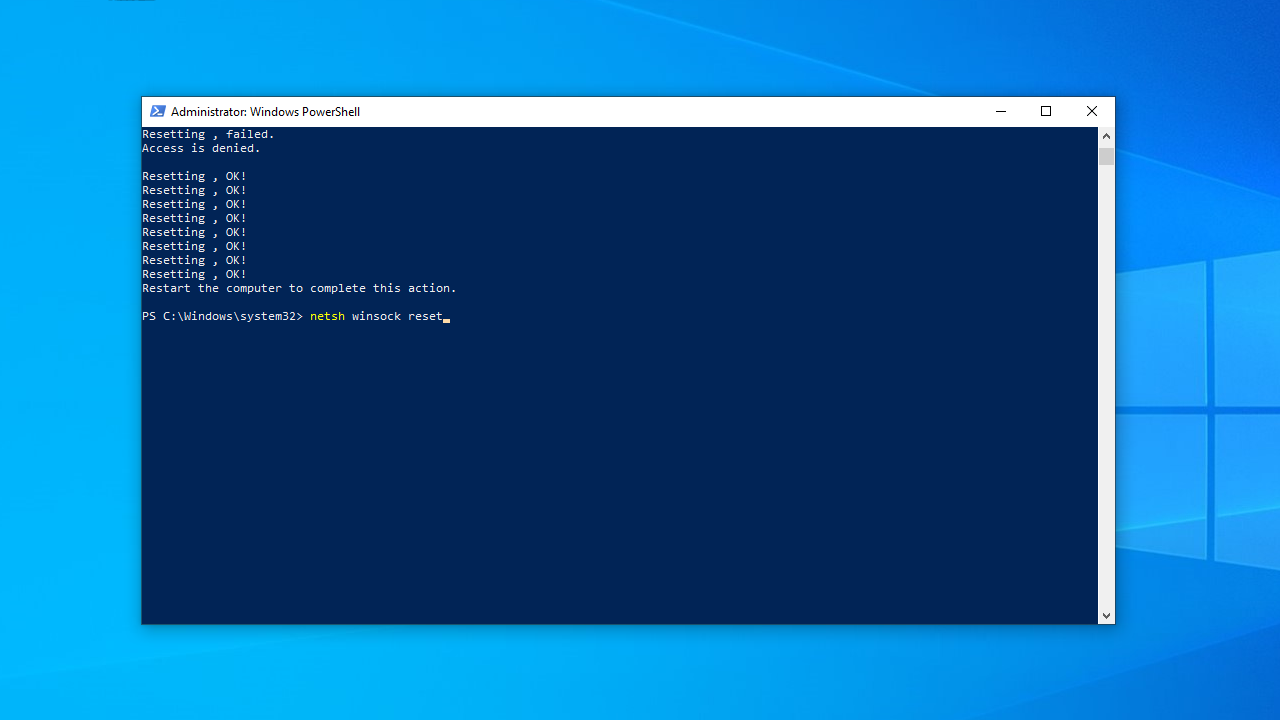
netsh int ip reset c:\tcp.txt
netsh winsock reset
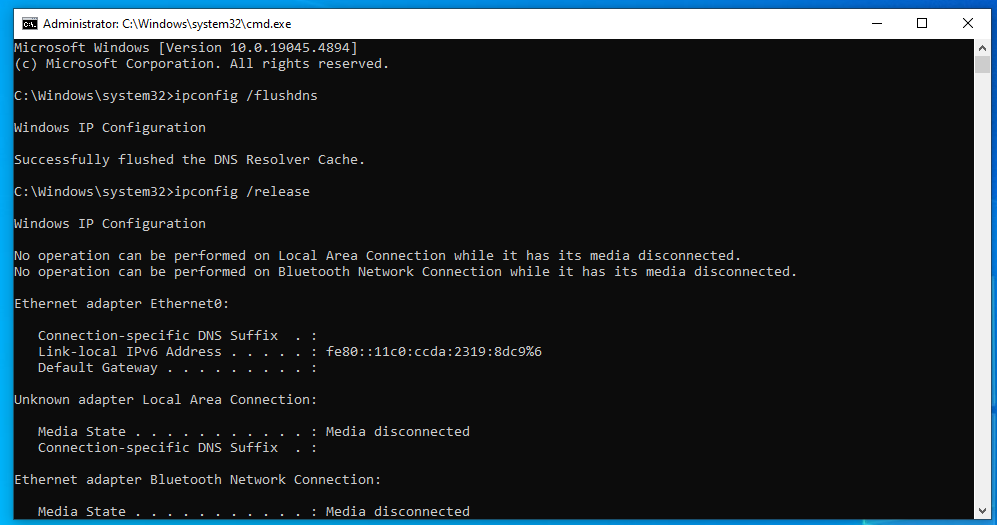
After running all the commands, close the Command Prompt (Admin) window, restart your computer, and check if your ping issue has been resolved.
Related:[FIXED] ‘Your DNS Server Might Be Unavailable’ Error on Windows 10
Fix 4: Remove All Ipv6 and IPv4 Transition Technologies
Transition technologies have been developed to simplify the task of migrating to IPv6 from IPv4. However, they may cause problems when pinging.
If you’re using any kind of protocol transition technology on your computer, try disabling it to check if this has fixed the issue.
Here are the steps:
- You’ll need to run Windows PowerShell as an admin. To do that, press the
Windows logo and Xkeys simultaneously and select Windows PowerShell (Admin).

- You can also run the Command Prompt with admin rights. Simply press the
Win + Rkeyboard shortcut, type cmd into the text box, and hit theCtrl + Shift + Entercombination. - In the elevated PowerShell or Command Prompt window, type or paste the commands below one after the other and press
Enterafter each one:
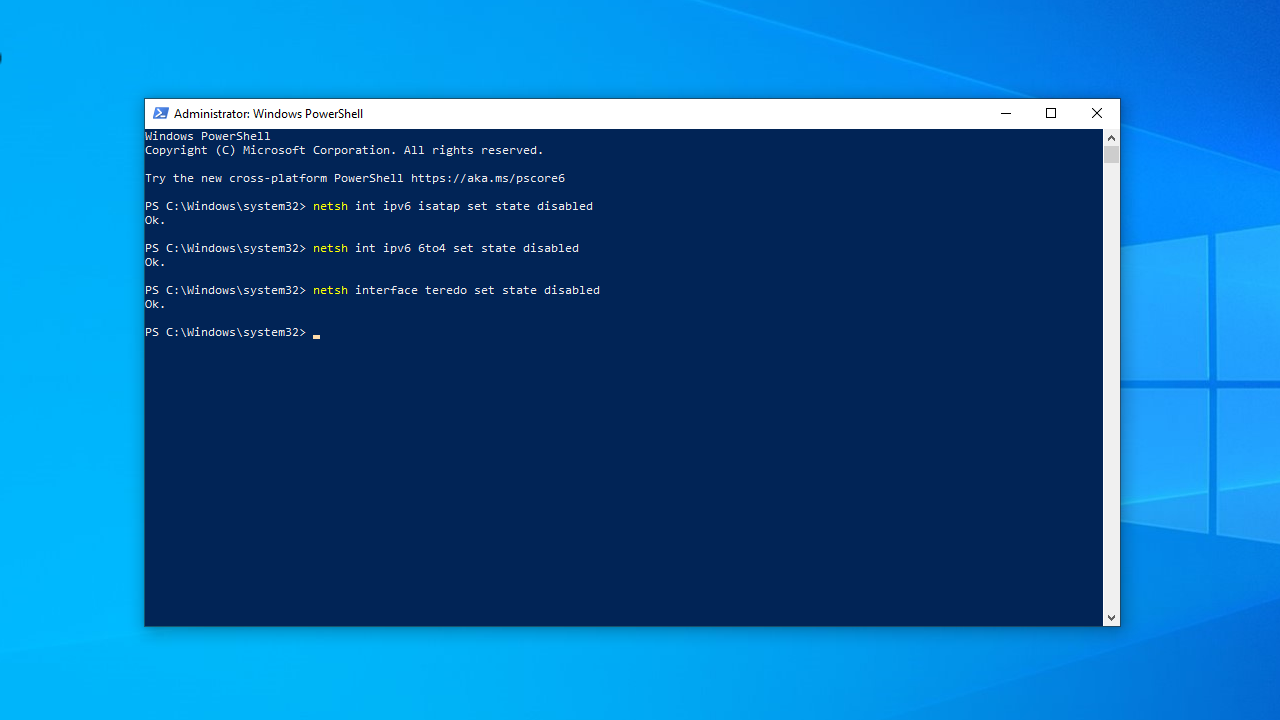
netsh int ipv6 isatap set state disabled
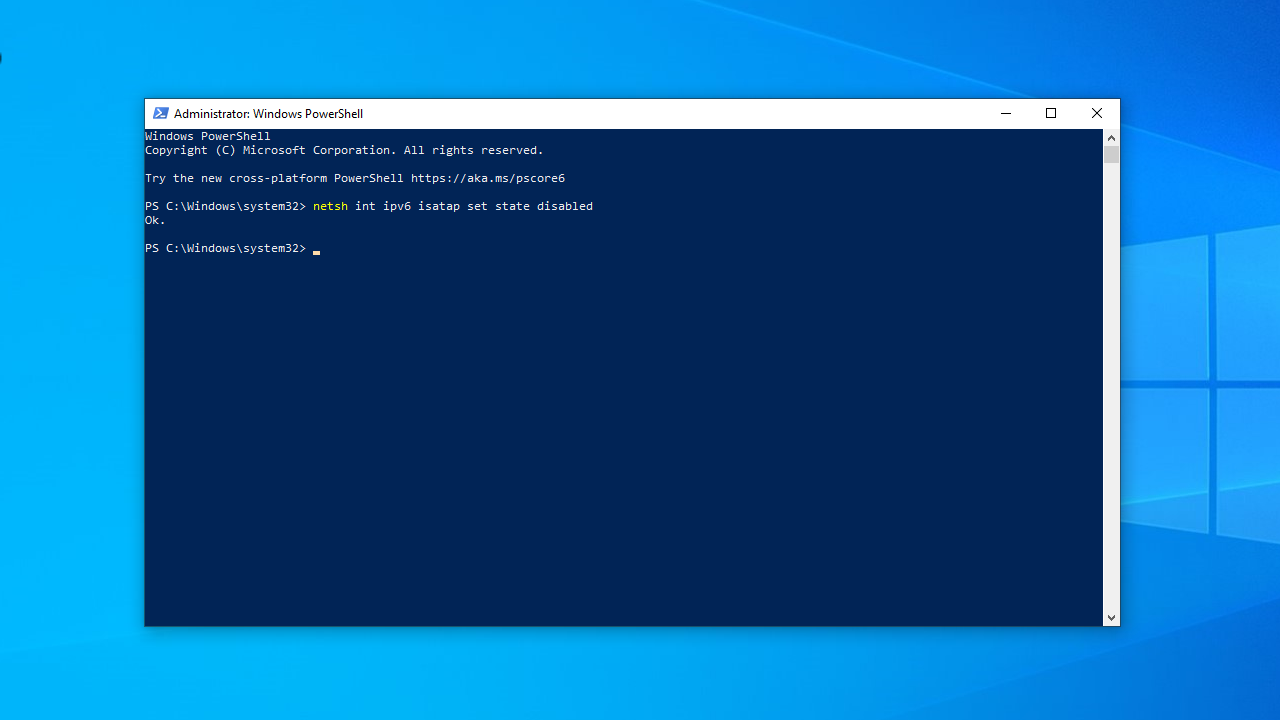
netsh int ipv6 6to4 set state disabled
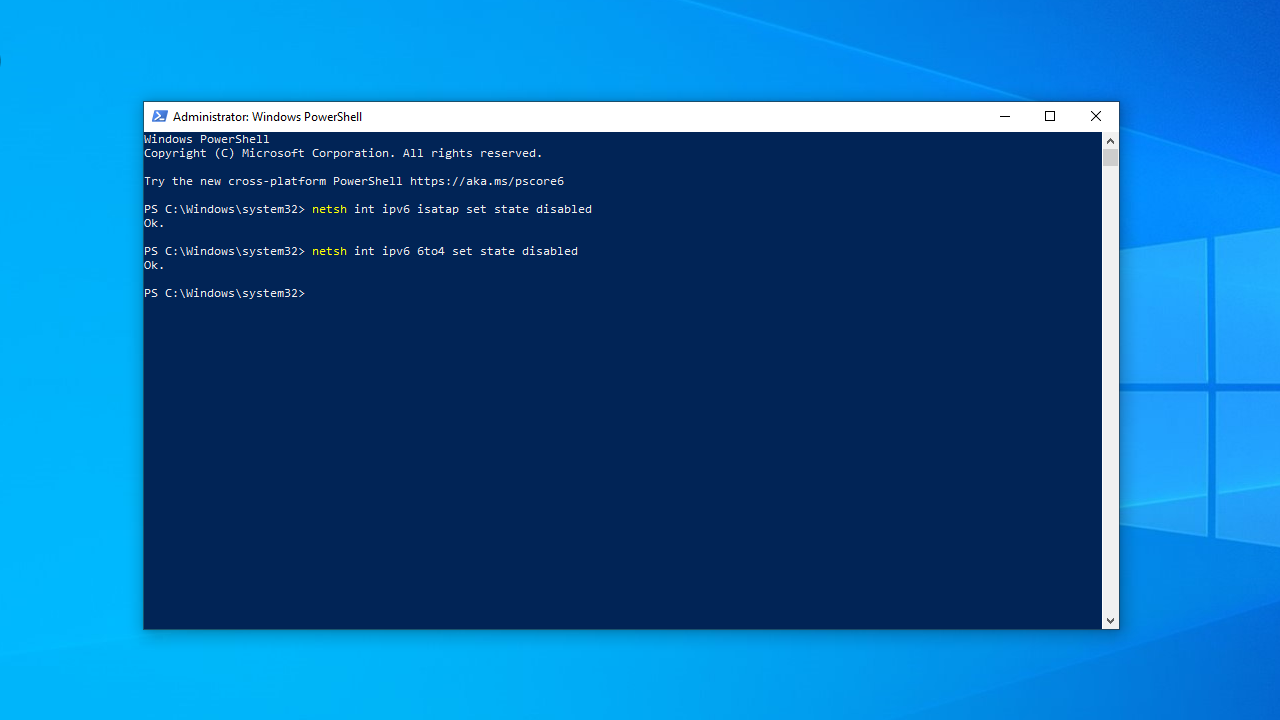
netsh interface teredo set state disabled
- Exit the Command Prompt or Windows PowerShell and restart your computer.
- Now check if the ping problem still exists.
Fix 5: Reset your PC’s TCP/IP
If you’re still struggling to resolve the ping general failure error, try resetting your PC’s TCP/IP to check if it works this time.
Here’s how:
- Run the Command Prompt or Windows PowerShell with admin rights.

- Click Yes when prompted by the system to grant administrator access.

- Type or paste the command
netsh i i r rand pressEnter.
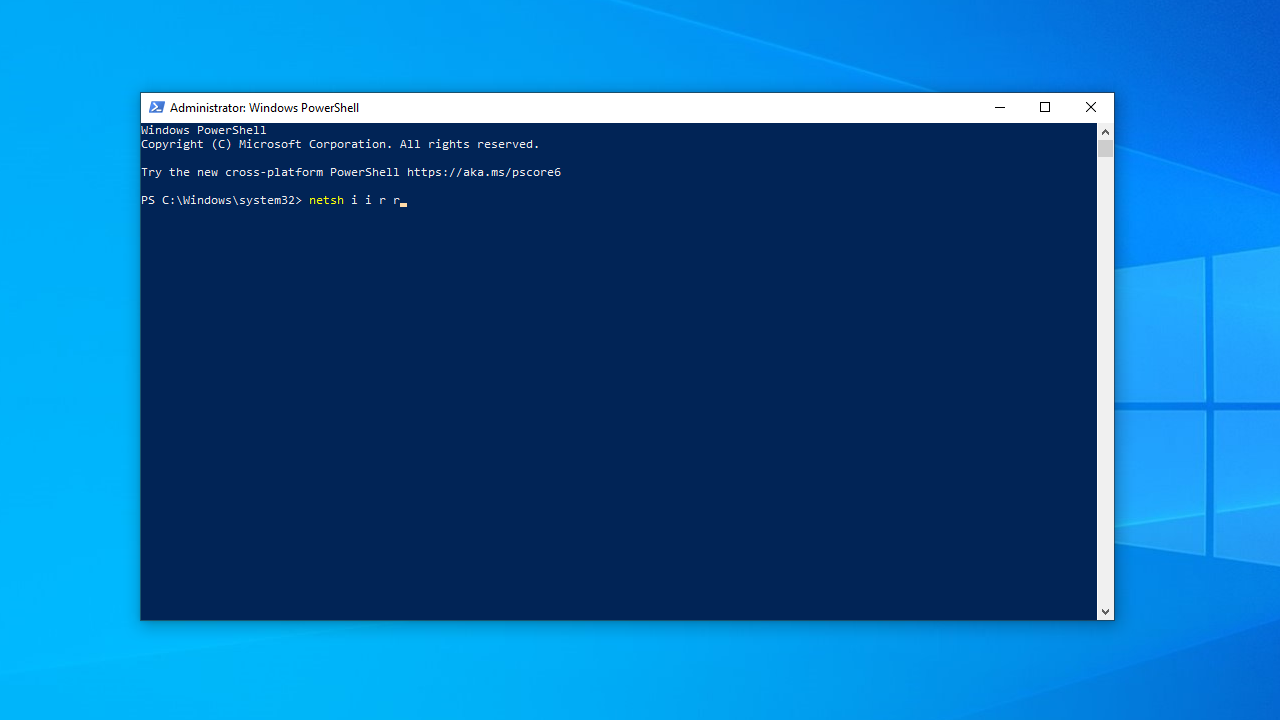
- Next, type or paste the command
netsh winsock resetand hitEnter.
- Exit the Command Prompt or Windows PowerShell and restart your computer.
This solution should fix the ping failure error.
Fix 6: Reset your PC’s hosts file
If nothing seems to work in your case, you may want to try resetting your computer’s host file.
Here is the step-by-step guide to reset your computer’s host file:
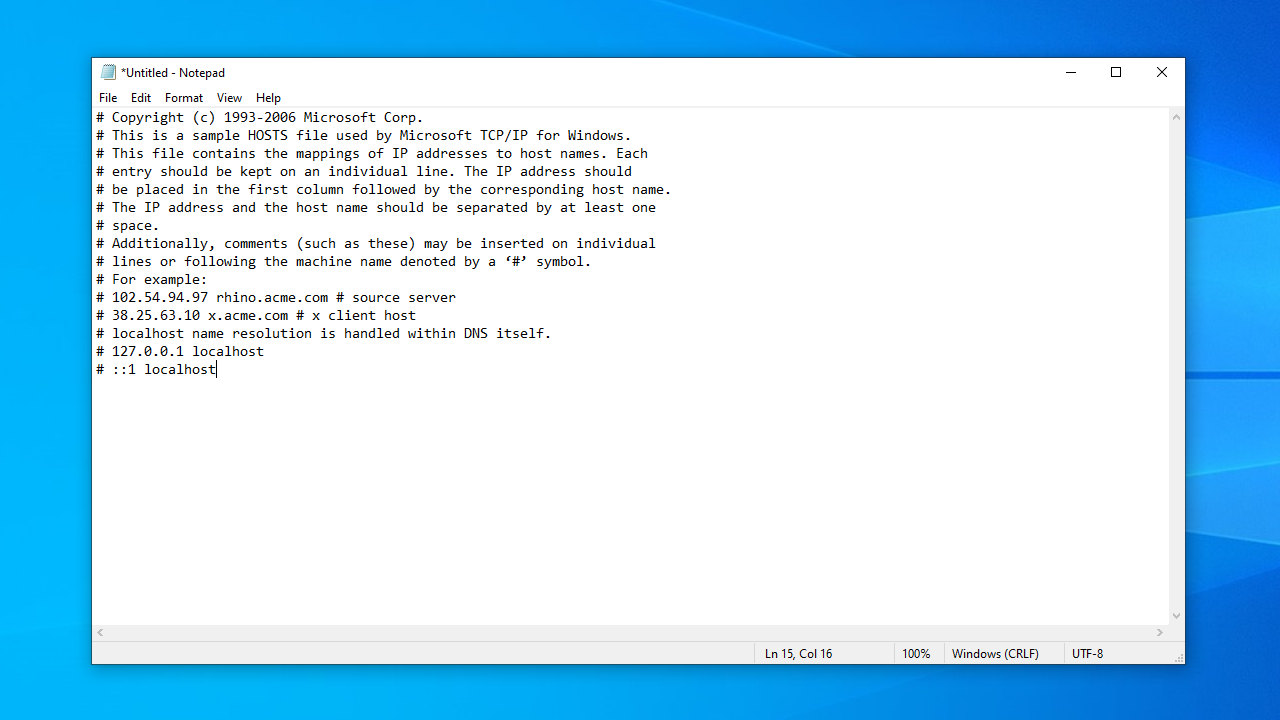
- Go to Start and launch Notepad.

- Paste the following script into a new Notepad page:
# Copyright (c) 1993-2006 Microsoft Corp.

# This is a sample HOSTS file used by Microsoft TCP/IP for Windows.

# This file contains the mappings of IP addresses to host names. Each

# entry should be kept on an individual line. The IP address should

# be placed in the first column followed by the corresponding host name.

# The IP address and the host name should be separated by at least one

# space.

# Additionally, comments (such as these) may be inserted on individual

# lines or following the machine name denoted by a ‘#’ symbol.

# For example:

# 102.54.94.97 rhino.acme.com # source server

# 38.25.63.10 x.acme.com # x client host

# localhost name resolution is handled within DNS itself.

# 127.0.0.1 localhost

# ::1 localhost
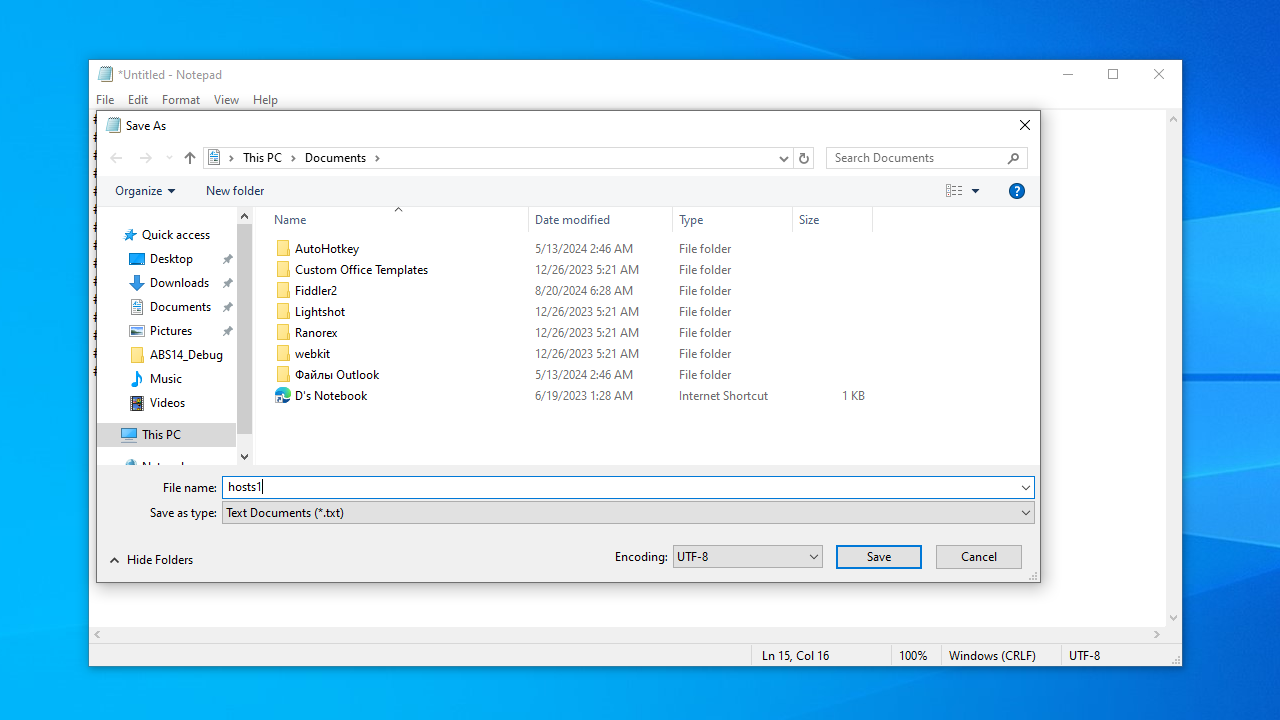
- Go to File > Save As.
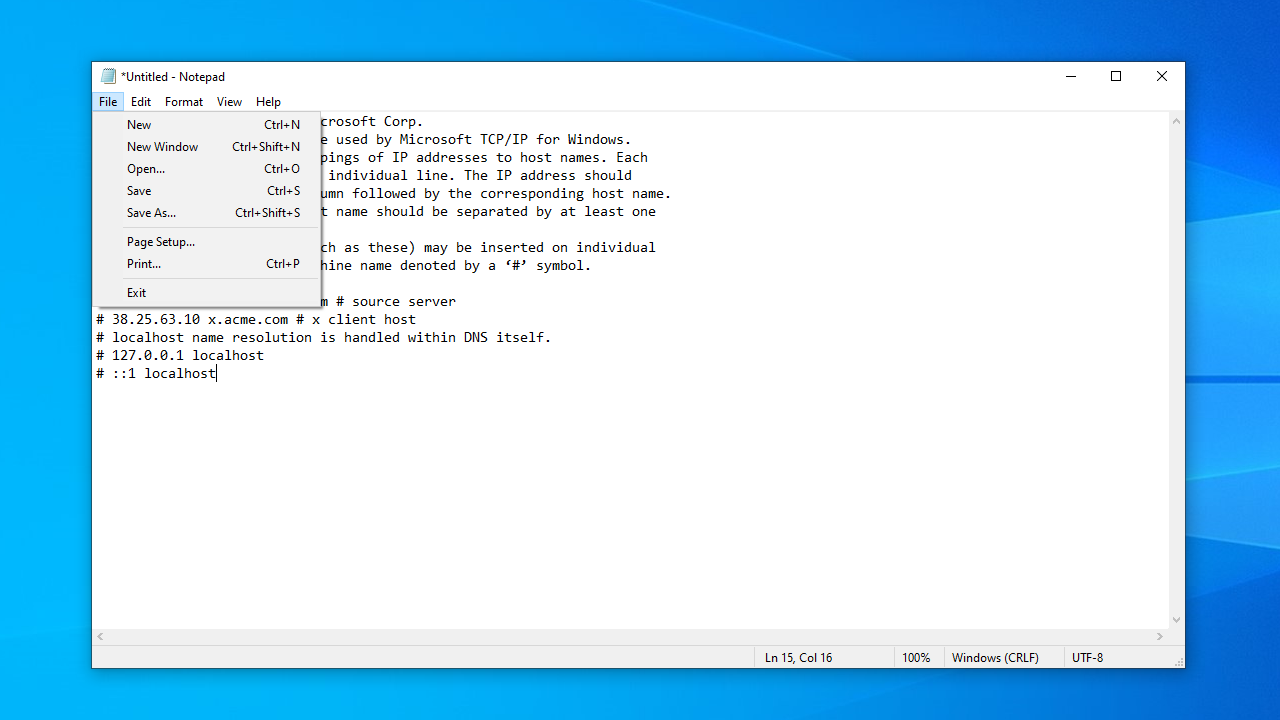
- Assign the file an appropriate title (like hosts1), and click on OK to save it to your preferred location.
- Next, open the Run command using the
Win + Rshortcut. - Type
%WinDir%\System32\Drivers\Etcinto the text box and pressEnter.

- Search for the original hosts file here.
- Right-click on it and select Rename.
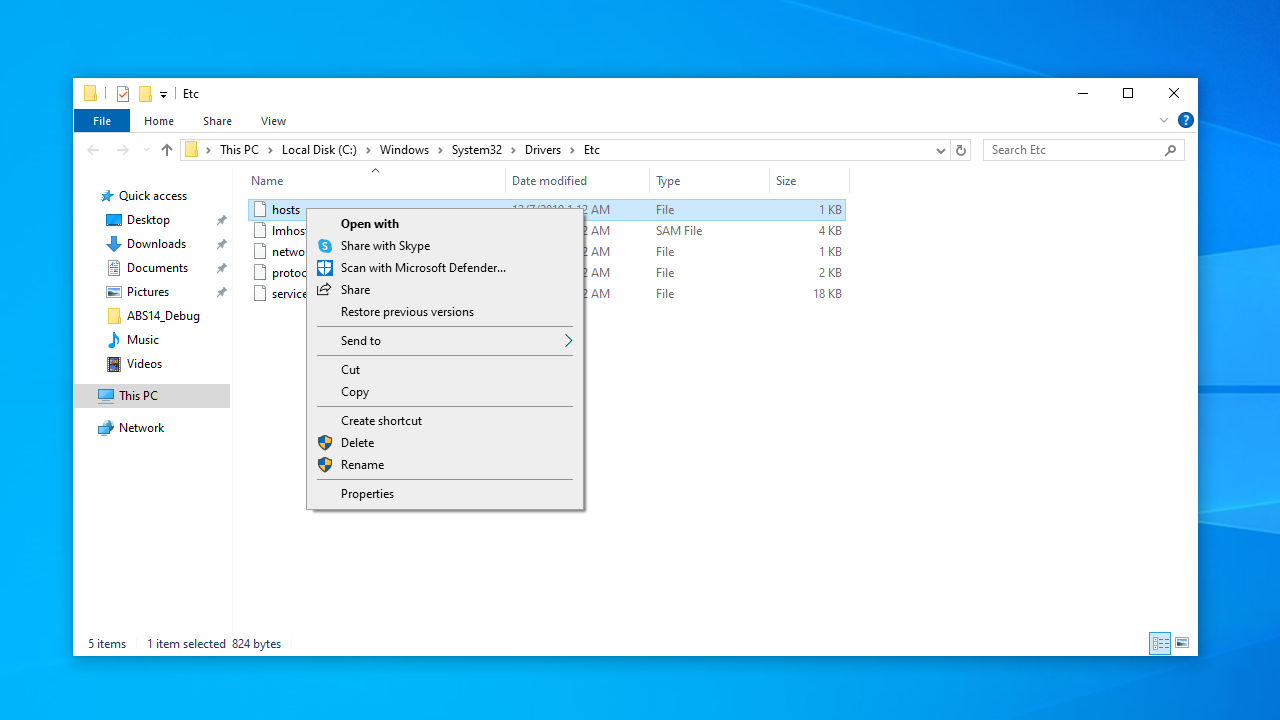
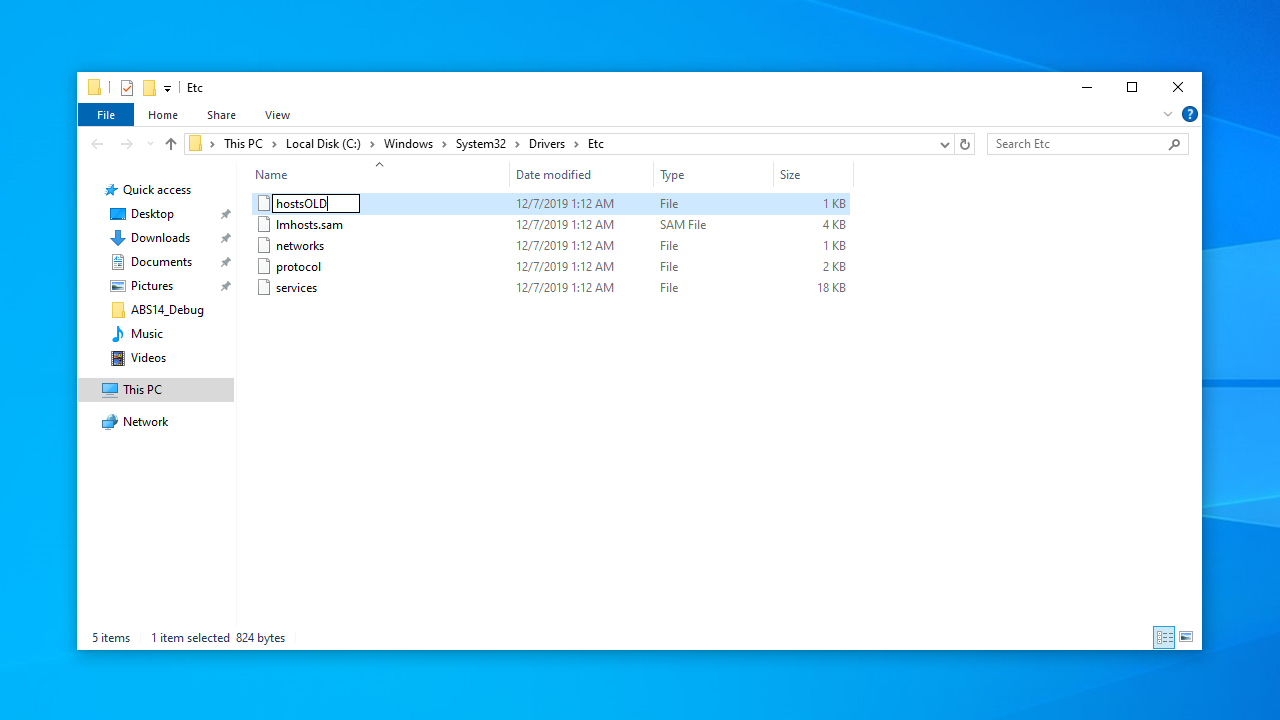
- Rename it to something like hostsOLD and hit
Enter.
- Now, move the newly created hosts1 file from where you previously saved it to the %WinDir%\System32\Drivers\Etc directory.
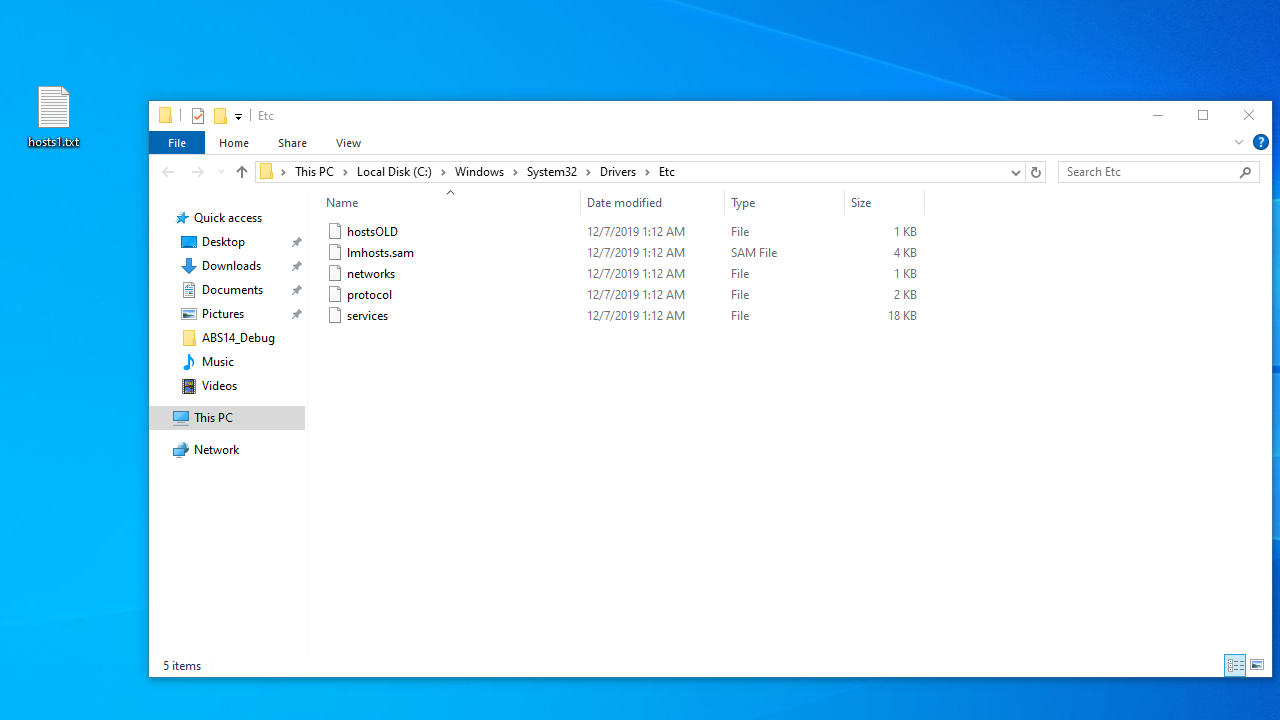
- You’ll need to provide administrator permission to move things around.
- Now restart your PC and try running the ping command again.
“Ping: Transmit Failed General Failure” Error: Fixed
Hopefully, one of these solutions will help you fix the Ping General Failure error. Have you ever run into ping issues?
If yes, how did you resolve them? Share your experience by commenting below.