

- What are Phantom Homegroups in Windows?
- Common Scenarios Related to the Nonexistent Homegroup Issue
- Method 1: Setting up a New Homegroup
- Method 2: Deleting the idstore.sset File
- Method 3: Changing your SSID
- Method 4: Renaming the MachineKeys Directory
- Method 5: Modifying the Registry
- Method 6: Opt for Cloud Storage
File sharing between devices and Homegroups within a local network are crucial for many people. However, some users complained about being asked to join a nonexistent Homegroup. As strange as it sounds, this problem is quite common on Windows 10 computers. So, resolving it is as easy as fixing the ‘Can’t find Homegroup’ issue on Windows.
What are Phantom Homegroups in Windows?
Some users reported that after reinstalling their operating system or upgrading to the latest Windows version, they had been asked to join a nonexistent Homegroup. It is worth noting that you cannot join a Homegroup that does not exist. Moreover, you cannot remove it. So, how do you address this issue? Keep reading to discover the solutions.
Common Scenarios Related to the Nonexistent Homegroup Issue
Aside from learning how to fix Homegroup not working on Windows 10, you should also know what to do when asked to join one that’s nonexistent. However, before you do that, it is best to gain a better understanding of the issue. Below are some of the common scenarios related to the problem:
- Homegroup is not working – If Homegroup is not functioning at all on your computer, you can try running a troubleshooter to fix it.
- Can’t join Homegroup on Windows 10 – To resolve this issue, you must delete the idstore.sset file on your PC.
- Nonexistent Homegroup on Windows 10 – This probably has something to do with the MachineKeys directory. You can rename it to fix the problem.
- Can’t find Homegroup on Windows 10 – The culprit may be your SSID, especially when you’re using a wireless network. You can resolve this issue by modifying the name of your network.
Method 1: Setting up a New Homegroup
If you are prompted to join a phantom Homegroup, one of the easiest workarounds is to leave it altogether. To do that, you just need to follow the instructions below:
- Switch off all the devices connected to your Homegroup.
- The next thing you should do is boot into one of the PCs, then use it to create a new Homegroup.
- Switch on the other devices one by one, then go to the Control Panel to join the newly created Homegroup. You may need to leave the Homegroup manually on all the computers. After that, you will have to switch off all your devices to be able to create a new Homegroup.
After performing these steps, you should be able to resolve the issue with the nonexistent Homegroup.
Method 2: Deleting the idstore.sset File
It is possible that the idstore.sset file has something to do with the problems with your Homegroup. So, if you are asked to join a nonexistent Homegroup, we suggest removing the file on all your devices. You can do that by following these instructions:
- Open the Run dialog box by pressing Windows Key+R on your keyboard.
- Inside the Run dialog box, type “%appdata%” (no quotes), then click OK or press Enter.
- Look for the PeerNetworking directory, then remove the idstore.sset file.
Remember to perform the same steps for all the computers affected by the problem. Once you’ve gotten rid of the file, you should be able to resolve the issue completely. On the other hand, some users recommend restarting services associated with Homegroup after deleting the files. You can do that by following these steps:
- On your keyboard, press Windows Key+R. This should open the Run dialog box.
- Now you have to type “services.msc” (no quotes) inside the Run dialog box. Don’t forget to press Enter.
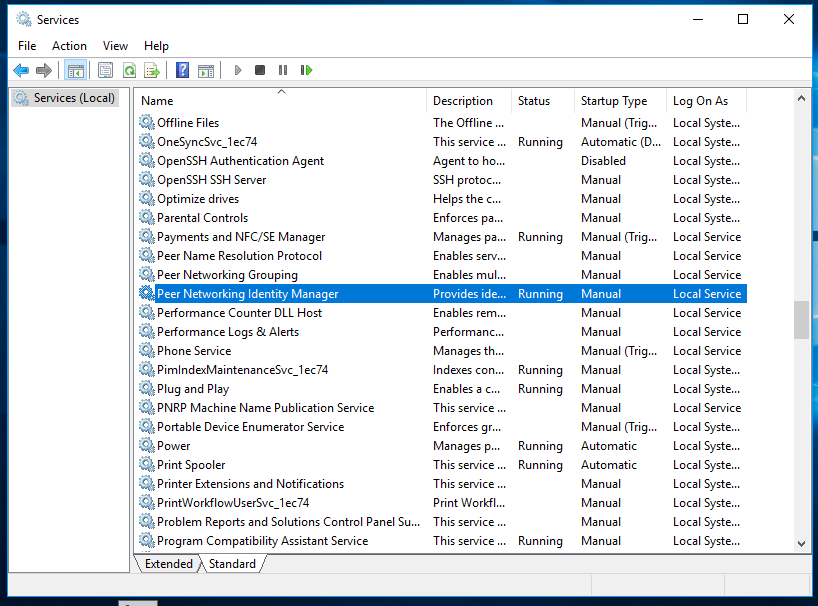
- Look for the services below and restart them:
- Homegroup Listener
- Homegroup Provider
- Peer Network Identity Manager
- Peer Network Grouping
- Peer Name Resolution Protocol
Method 3: Changing your SSID
Some users reported that the problem has possibly something to do with the SSID. If you are using a wireless network, we recommend fixing the issue by changing its name. You can get the detailed instructions by checking your router manual. You can also contact your network administrator to know the steps.
After changing your wireless network’s name, you should be able to resolve the issue. This may seem like an uncommon solution, but many users reported that it is effective. So, there’s no harm in trying it. Try connecting to a different SSID to fix the problem if you are using a dual-band or triple-band router. After that, you can create a new Homegroup.
Method 4: Renaming the MachineKeys Directory
You should also try changing the name of the MachineKeys directory because some users reported that it could be the culprit behind the nonexistent Homegroup. Aside from leaving the Homegroup on all computers on your network, you must remove the files from the PeerNetworking directory. To do that, follow the steps from Method 2.
Now, you need to rename the MachineKeys directory. Keep in mind that the process may be a bit complicated because your system protects the file. So, if you want to change its name, you need the appropriate permissions or rights. Here are the steps:
- Open File Explorer, then go to this directory:
C:\ProgramData\Microsoft\Crypto\RSA
- Look for the MachineKeys folder, then change its name to “MachineKeys_old” (no quotes).
- You will be prompted to provide administrator permission. Select Continue.
Once you’ve renamed the MachineKeys directory, you need to open Control Panel. Look for the Homegroup troubleshooter and run it. This tool should be able to fix the issue permanently.
Method 5: Modifying the Registry
Some values or entries in your registry might be corrupted, prompting the Homegroup issue to appear. So, we recommend making some changes in your registry to fix the problem. Before you do that, you need to remove the contents of the MachineKeys and PeerNetworking directories. We’ve already shared the instructions in the previous methods. Once you’ve done that, you need to get rid of the problematic entries in your registry.
You should know that the registry is a sensitive database. So, if you make even the smallest mistake, you might cause serious damage to your system. Needless to say, we only recommend this solution for people who are tech-savvy. If you are confident that you can follow the instructions to a tee, then go ahead and use this method.
- You need to open the Run dialog box first. You can do this by pressing Windows Key+R on your keyboard.
- Inside the Run dialog box, type “regedit” (no quotes).
- Before you perform any modifications, we recommend creating a backup of your registry. You can do that by right-clicking the keys, then choosing Export from the options. If you make any mistake, you can always run these exported files to restore your registry in good condition.
- Go to the left pane, then navigate to this path:
HKEY_LOCAL_MACHINE\SYSTEM\CurrentControlSet\Services\HomeGroupProvider
- Remove the contents of LocalUserMembership and ServiceData.
- Once you’ve done that, go to this path:
HKEY_LOCAL_MACHINE\SYSTEM\CurrentControlSet\Services\HomeGroupListener\
- Delete the contents of ServiceData.
- Restart your computer, then join the Homegroup.
If you want to protect your registry, system files, and drive from getting corrupted, we recommend using a trusted security software like Auslogics Anti-Malware. This program will keep your PC secure by detecting malicious items and threats that may compromise your sensitive data or damage your files. So, you can protect your computer while ensuring your system’s stability.
Method 6: Opt for Cloud Storage
It is worth noting that the latest version of Windows 10 does not include the Homegroup feature. However, there are still some alternatives you can check out. Of course, you can still share your files over the network. However, you should know that Microsoft has been improving the features of their cloud storage. So, perhaps it’s high time you tried OneDrive.
We’d like to know what you want us to discuss next.
Ask us some questions in the comment section below!