Are you restricted from accessing applications and viewing files on your PC due to the “Element not found” error? This is an annoying issue that is common among most Windows 10 and 11 users.
However, in this guide, you will learn the various methods to solve the error on Windows 10/11.
What Does the “Element Not Found” Error Mean in Windows 10/11?
The Windows explorer.exe file (Windows GUI shell), which is found on all Windows computers in the C:\Program Files subfolder, is the root cause of this error. What’s more, most programs will only function properly if the file is accurately executed.
If the Windows explorer.exe file malfunctions, there may be errors in the file drivers. Also, existing issues in the architecture of software programs or problematic system updates can terminate initiated processes. You may experience issues in launching an application, viewing an image, and modifying settings in the Windows menu.
Methods for Fixing the “Element Not Found” Error on Windows 10/11
There are several methods below which are uniquely suited to what may cause the problem on your computer. In each method, we will outline the steps to take to resolve the issue on your computer at once.
Before that, try the quick fix below:
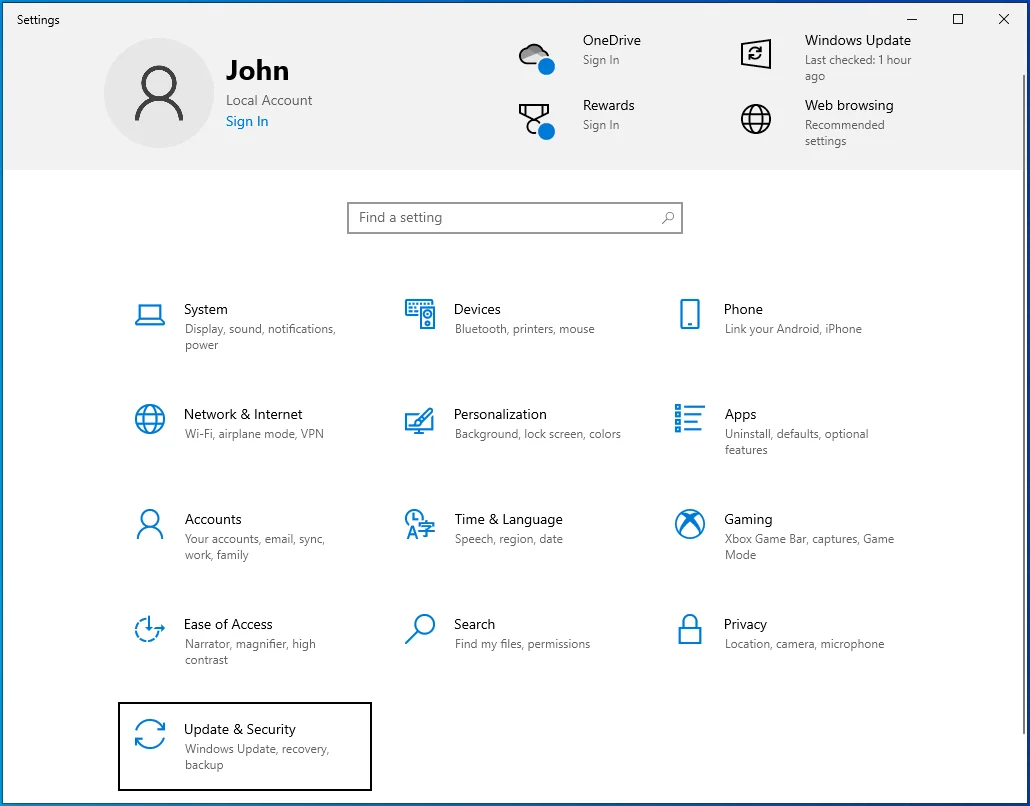
- Go to Settings, and click on Updates and Security.
- Click on Troubleshoot.
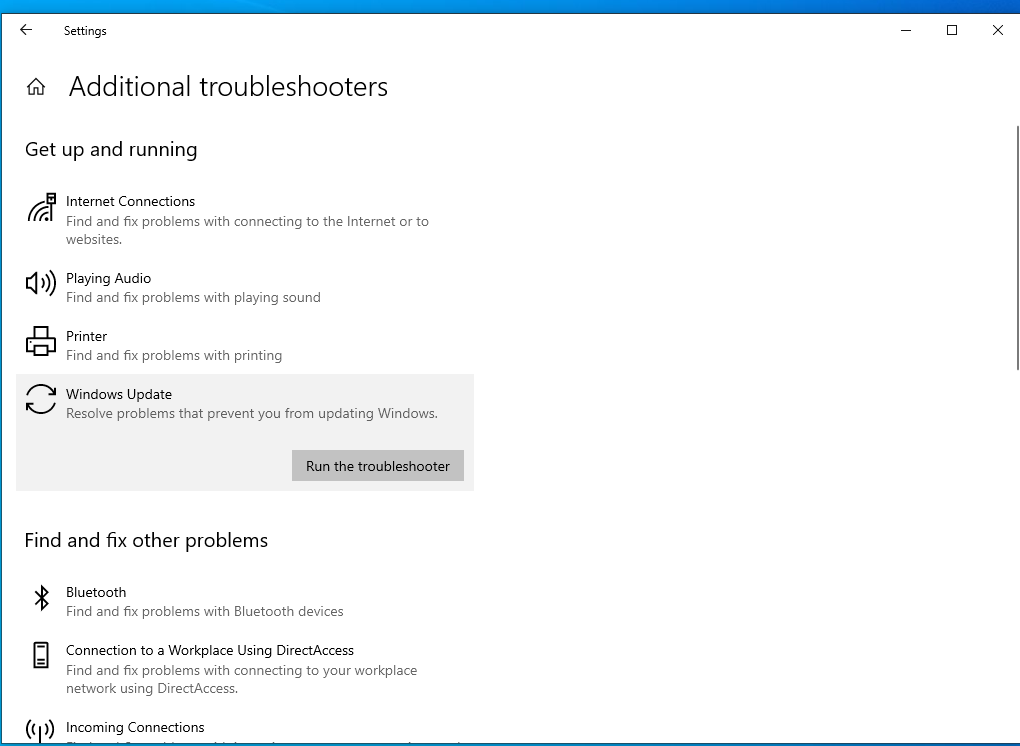
- Navigate to Additional troubleshooters. Then select Windows Updates troubleshooter.
On Windows 11, do the following:
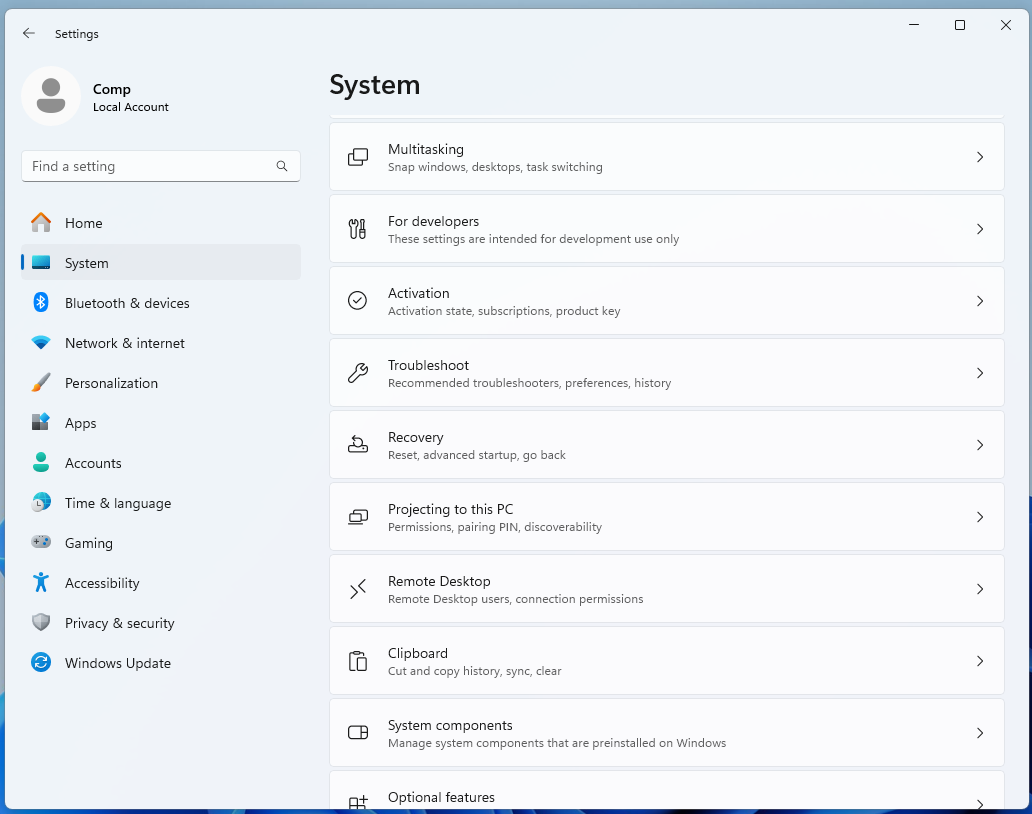
- Open Start and go to Settings.
- Click System, then Troubleshoot.
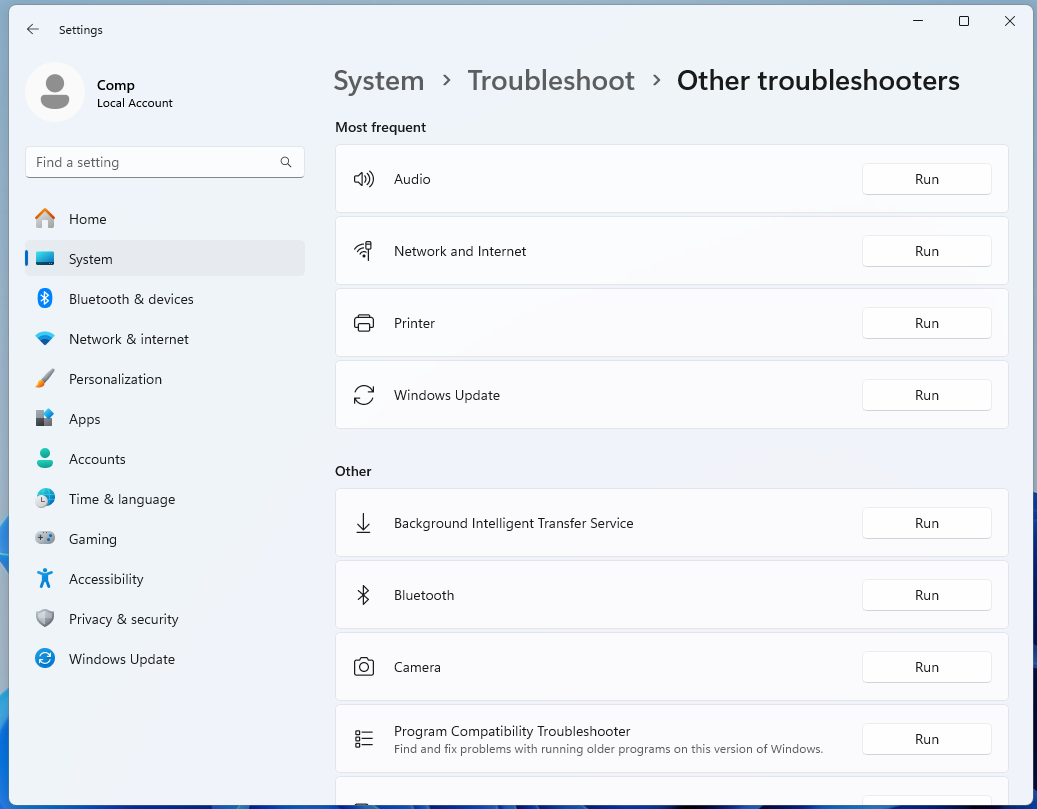
- Select Other troubleshooters.
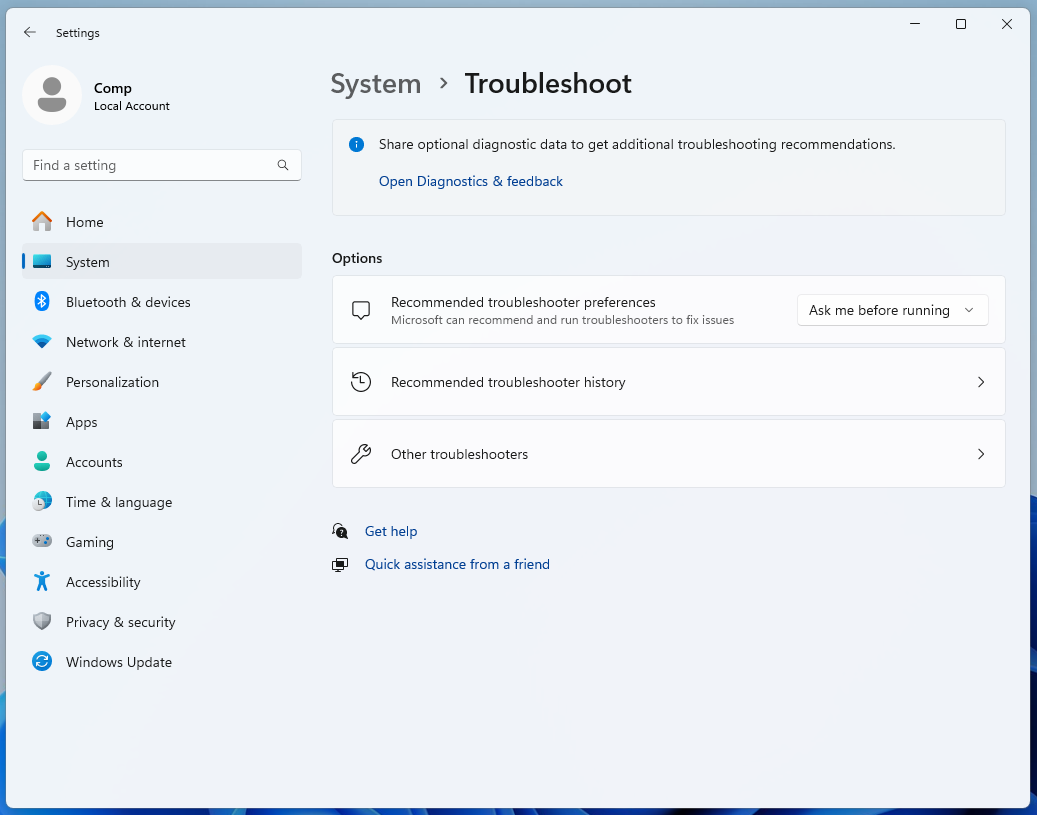
- From the list of troubleshooters, select Windows Update.
After troubleshooting, test to see if the issue is fixed.
If that didn’t work, try the following methods:
Method 1. Undo recent updates
On Windows 10/11, you don’t have to accept every notification for an update on your computer. In rare cases, upgrading your PC causes more harm than good. That said, check if you have recently updated your computer before the issue surfaced, and then follow the steps below to reverse it.
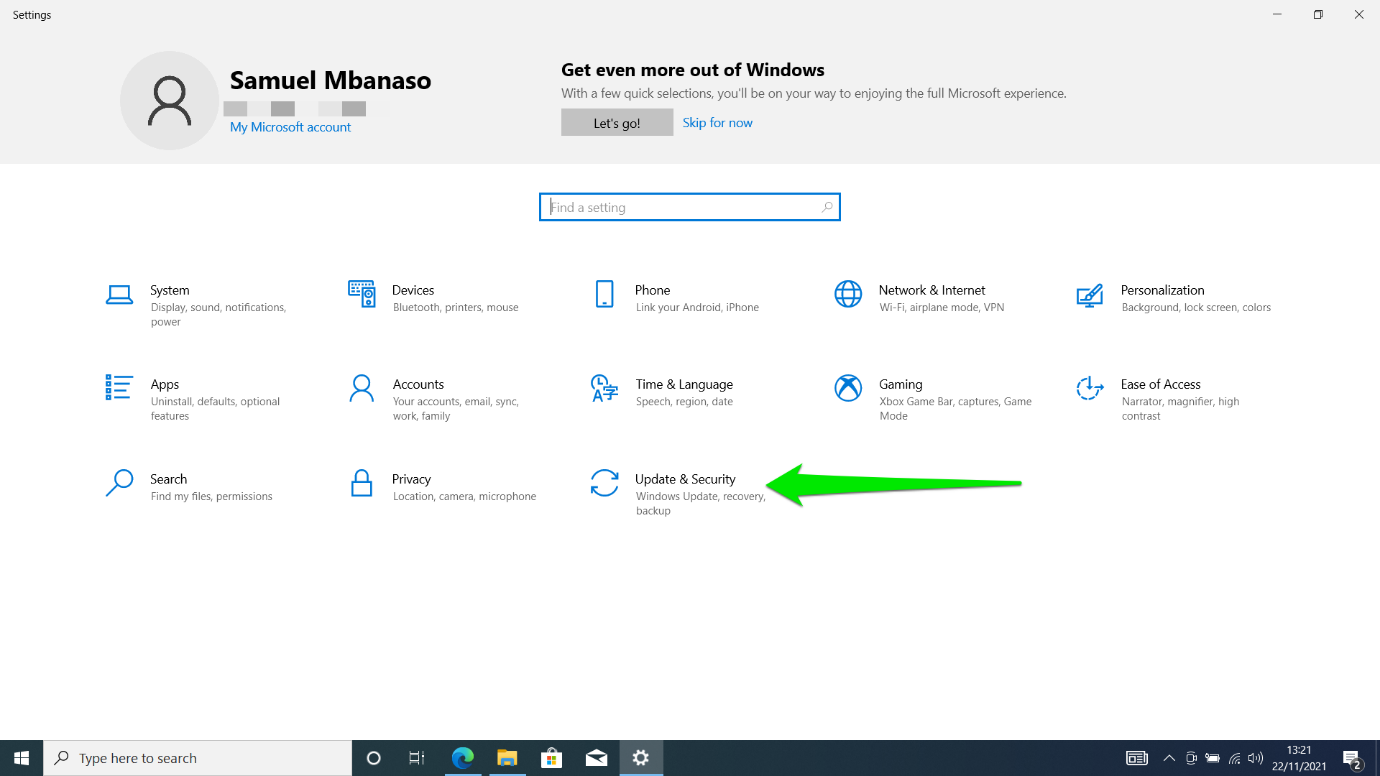
- Press the Windows Start button and then click on Settings to access the settings window.
- On the popped-up dialog box, navigate and click on Update and Security.
- Click on View installed update history and then on Uninstall updates.
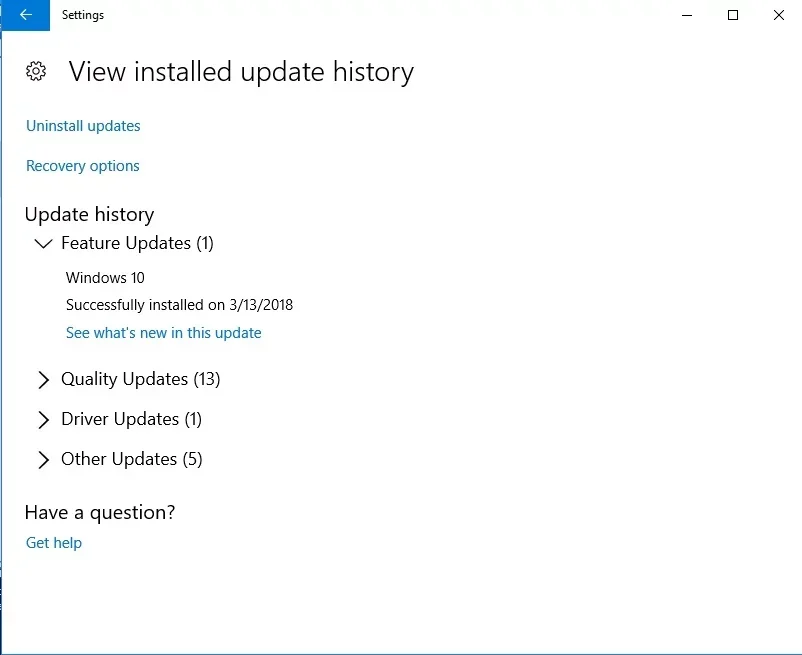
Highlight any update from the list of completed updates; right-click and then select Delete or Uninstall to undo.
The issue should be fixed already after following through the steps. However, if it persists, try the next method.
Also read: Windows Update Troubleshooter: Easily Fixing Windows Update Issues
Method 2. Install device drivers update
Unstable or damaged device drivers can cause the “Element not found” error. In that case, the hardware and GUI controlled by the explorer.exe file will not display images and other graphic files as desired.
You can update your computer’s device drivers manually or automatically. Follow the steps below to upgrade your drivers manually:
Upgrading drivers manually
- Type “Device Manager” (no quotes) in the search box next to the Start button.
- Click on Device Manager from search results to launch it.
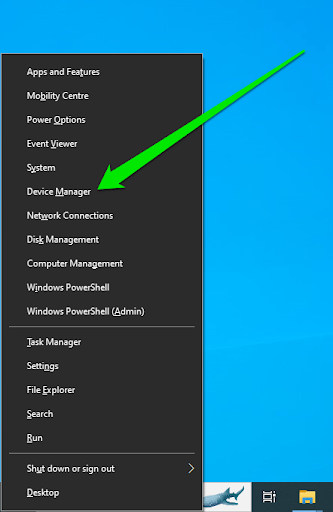
- Look for any devices with a yellow warning icon. These are typically the ones causing issues.
- Right-click on the problematic device and select Update Driver.
- Choose Search automatically for updated driver software to allow Windows to find and install the latest driver.
Upgrading drivers automatically
It is quicker and more convenient to upgrade your device drivers automatically. Doing it manually may be tedious and complicated unless you are quite conversant with the process. Also, you may make costly mistakes that can affect your PC’s performance.
It also helps to search for recent driver updates and installs them in one click. If something goes wrong with the new updates, the software stores the outdated drivers in a backup folder, and you can reinstall them anytime.
What's more, you no longer have to worry about compatibility issues as the drivers installed are suitable for your computer. Using our software enables you to do more in less time.
With the free version, you can update all your computer drivers. The only limitation is that the free version allows you to perform only one update per hour.
Method 3. Disable your antivirus program
An unstable antivirus program can also cause the “Element not found” error. This happens when the app interacts with the file systems to detect viruses and malware.
However, if the program is corrupted or unstable, it ends up causing more damage to the system than preventing it from harm.
Try the steps below to disable an unstable antivirus program on your computer:
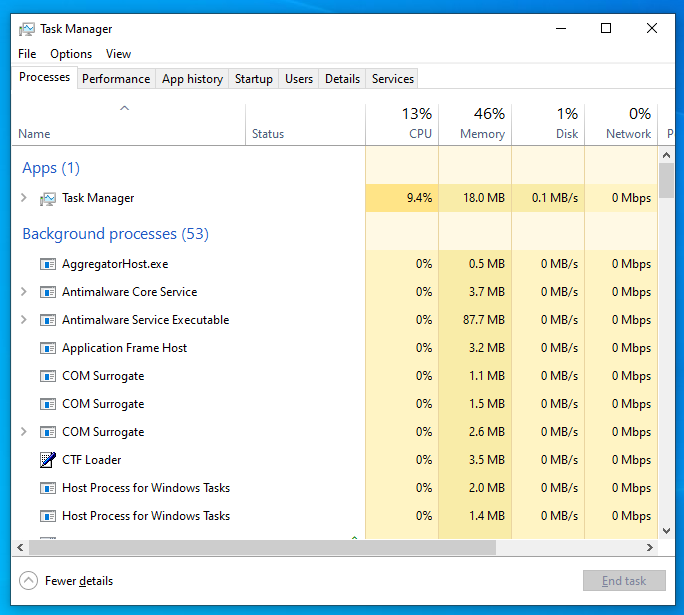
- Locate the antivirus program using the Task Manager.
- Right-click it and select Disable.
- Relaunch the application that invoked the error.
If the error no longer occurs, uninstall the antivirus program or leave it disabled. If the error still occurs, go to the next method.
Also read: How to Prevent Malware: Lock Down Your Online Safety
Method 4. Relaunch the explorer.exe file with the Task Manager
If the explorer.exe process is not started correctly, it can also lead to the “Element not found” error. To address this, use the Task Manager to stop the process and restart it.
Follow the steps below to do that:
- Go to Security Options by holding the
Ctrl + Alt + Delkeys together. - Double-click the Task Manager from the options list.
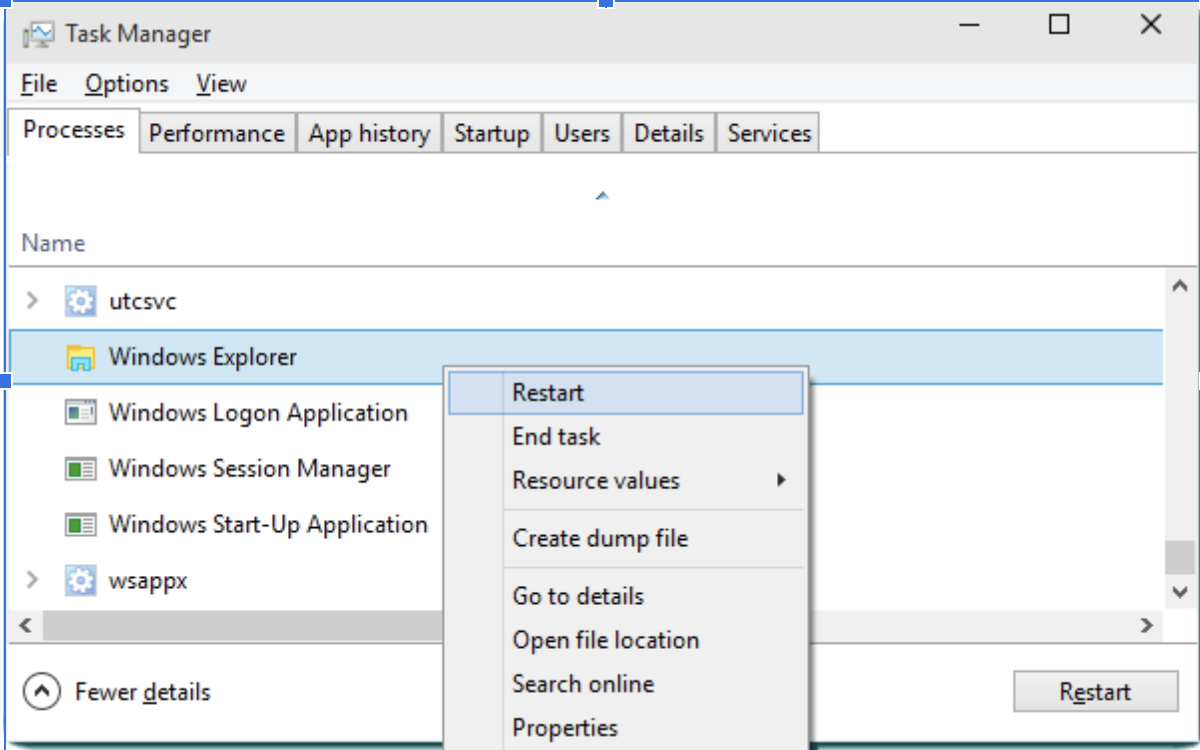
- Enlarge the Task Manager window using the Maximize button at the top-right corner.
- From the drop-down menu, right-click Windows Explorer and select End task.
- From the same window, right-click and select Run new task under File.
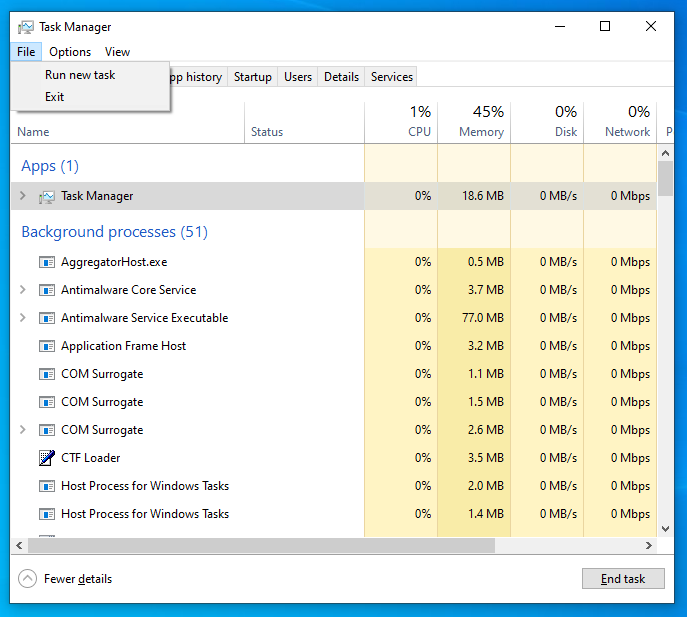
- Type “explorer” (no quotes) and hit Enter to create this task with administrator privileges.
- Click OK.
Alternatively, try these steps:
- Type “Task Manager” (no quotes) in the search box to run the program.
- From the list under the Details tab, locate explorer.exe.
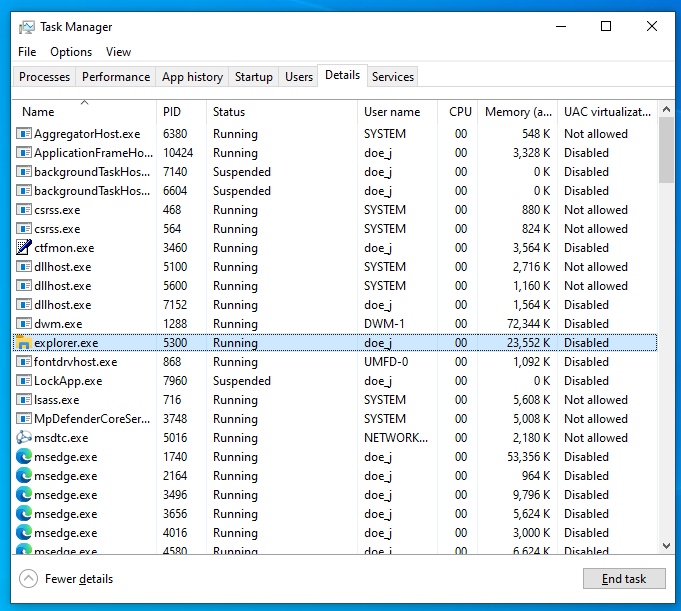
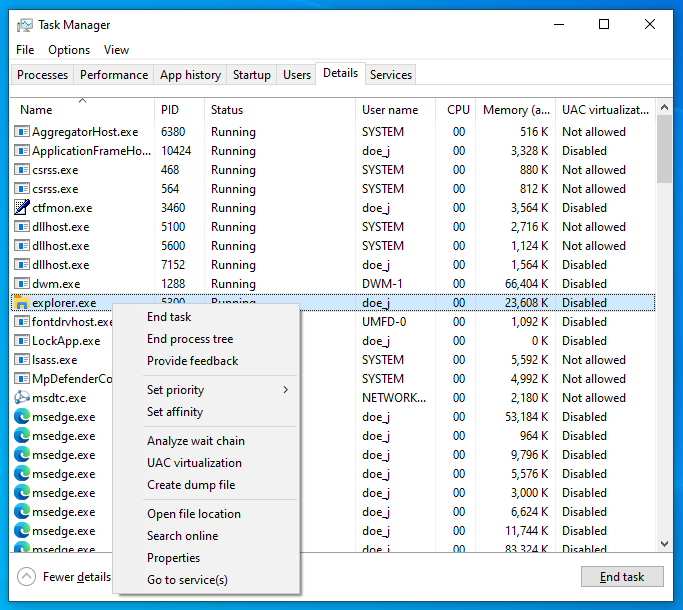
- Select and right-click on the explorer.exe file to see the options in the drop-down menu.
- Select End task and hit Enter.
- Use the
Ctrl + Shift + Escshortcut to reopen the Task Manager. - Click File from the Task Manager menu, then select Run new task.
- Type “explorer.exe” (no quotes) and tick the Create this task with administrator privileges box.
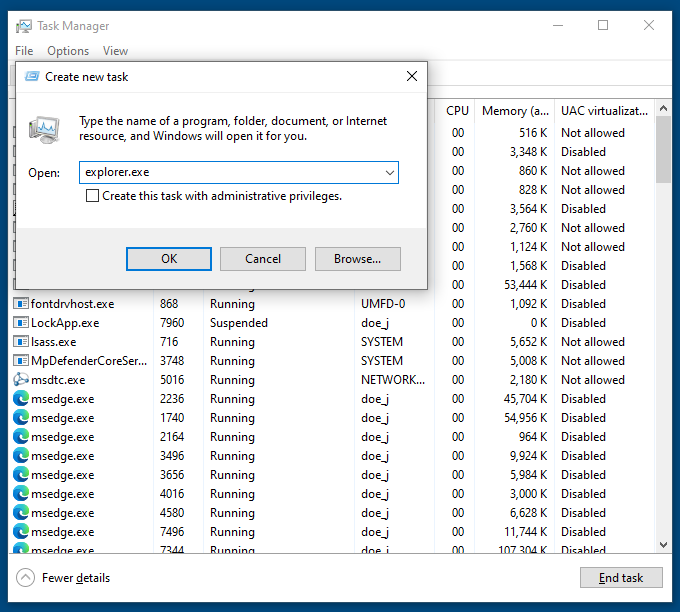
- Click OK.
Test the fix by invoking several activities. Was the problem fixed? If not, you should try the next method.
Method 5. Scan with the System File Checker (SFC)
If the above methods didn’t work, there might be missing or altered files in the system memory. The System File Checker is a Windows program for scanning and fixing such altered or missing files in the system, such as Windows Resources Protection.
To implement this fix, follow the steps below:
- Type “command prompt” (no quotes) in the search bar on your home screen.
- Right-click Command Prompt from the results, then select Run as administrator.
- Type “sfc/scannow” (no quotes) on the Command Prompt window and hit Enter.
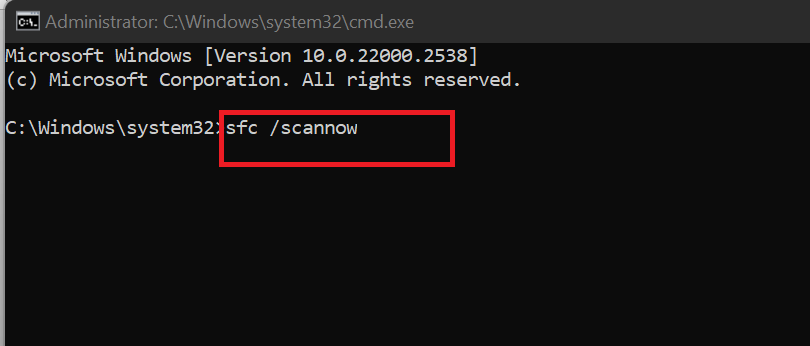
- Wait for the scan to complete, and then restart your PC.
You can also try the Deployment Image Servicing and Management (DISM) scan before running an SFC scan.
- Type “command prompt” (no quotes) in the search bar.
- Right-click Command Prompt, then select Run as administrator.
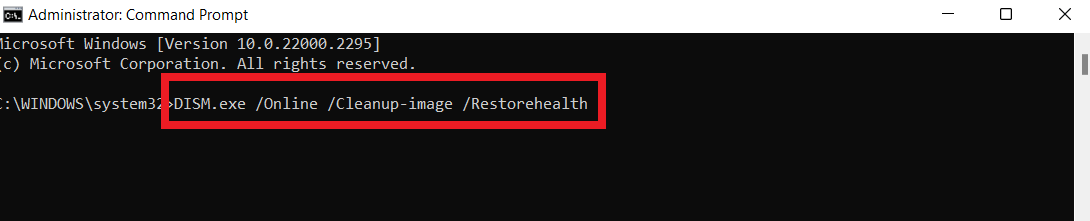
- Type the following command and hit Enter to execute:
DISM.exe /Online /Cleanup-image /RestoreHealth
Was this method useful in dealing with the issue? If not, try the sixth method.
Method 6. Delete Lenovo’s OneKey program
Windows 10/11 users using Lenovo preinstalled applications such as OneKey and CAPSOD may experience the “Element not found” error.
Uninstalling these applications should resolve the problem. To delete, follow these steps:
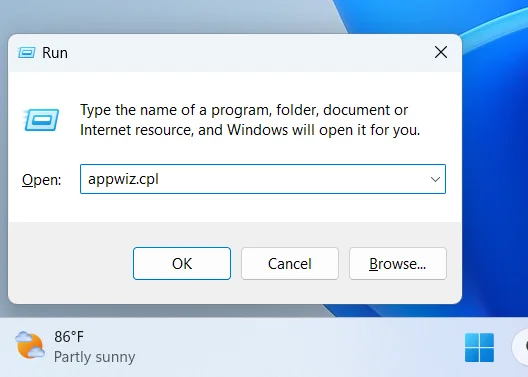
- On your keyboard, press
Windows Key + Rto launch the Run dialog box. - Type “appwiz.cpl” (no quotes) in the Run dialog box and hit Enter.
- Locate each application from the programs list.
- Right-click and select Uninstall from the drop-down menu.
Apply the next method if you still see the error on your Windows computer. This should only be a last resort after all other methods have failed.
Method 7. Reset the operating system
Resetting your computer deletes every installed program or application in the system, but it preserves crucial files. The “Element not found” error may occur if malicious programs corrupt your OS. Resetting the operating system can help resolve the error by restoring the system to a clean and stable state.
Follow the steps carefully to do this:
- Go to Settings and select Updates and Security.
- Under Update and Security, click Recovery.
- Double-click Get started on the left side and then follow the instructions to reset your PC.
Here are the steps to take on Windows 11:
- Use the
Windows + Ishortcut to open Settings. - In Settings, click System and select Recovery.
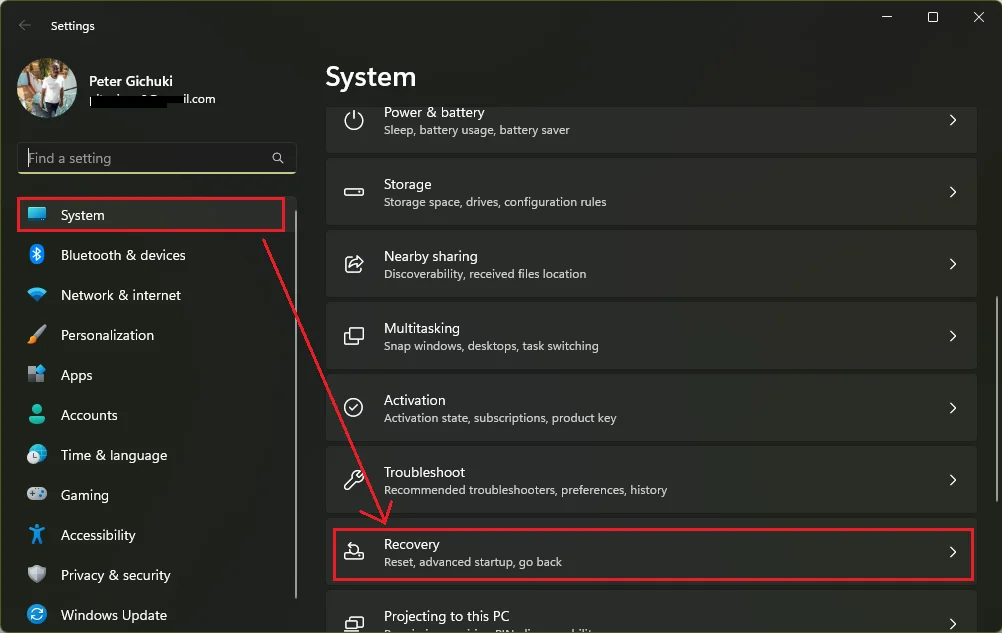
- In the Recovery section, under Recovery options, you’ll see the Reset this PC option. Click it.
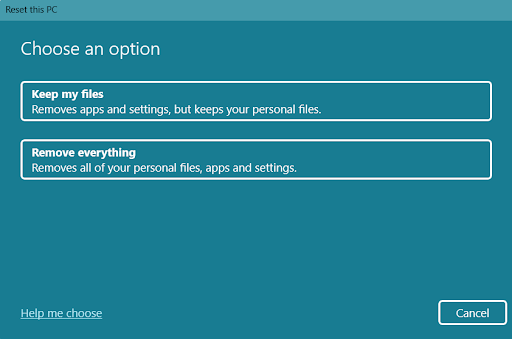
- You will be prompted to choose one of these options:
- Keep my files (this preserves your personal files but removes apps and settings).
- Remove everything (which removes all files, apps, and settings).