
It’s crucial to know how to create a local account on Windows 10 or 11 whether you’re setting up a new computer or just want to control user access on your existing one. In this article, we’ll explore several different ways to create local accounts on Windows 10 and Windows 11. Let’s begin.
What is a Local User Account?
You can use the local user account to access your Windows offline. That means all account-related information is kept locally on your computer instead of shared with Microsoft.
You are in greater control of the Microsoft services you want to use on your computer than with the online account.
These accounts may be those of a regular user or an administrator.
How to Create a Local Account on Windows 10 and 11
In this section, we’ll show you how to create local Windows 11 and 10 accounts. We’ll explain the steps involved in both Windows under each method.
Method 1: Use the Settings app to create a local account for Windows 10 and 11
How to create a local account on Windows 10
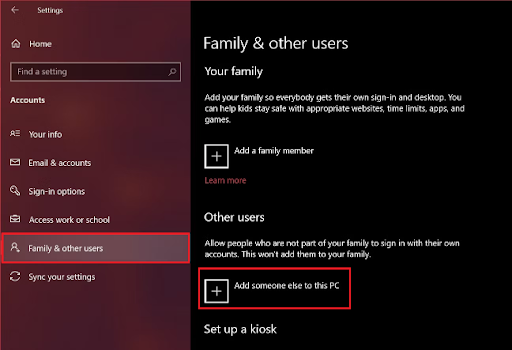
- Open the Settings app, go to Settings and click on Accounts .
- Click Family & other users on the left pane and select Add someone else to this PC under Other Users .
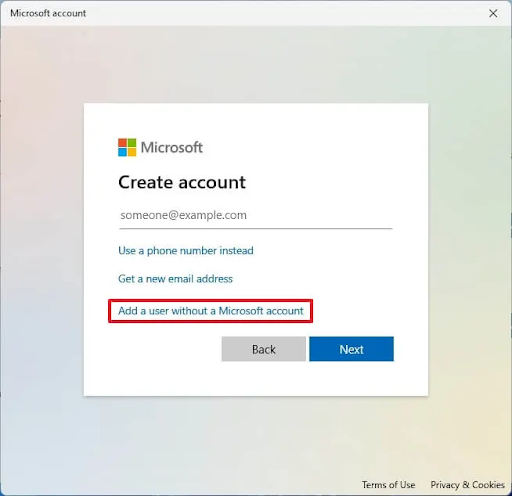
- A small window will open. Click I don’t have this person’s sign-in information instead of entering your email address.
- Microsoft will keep trying to encourage you to register for a new account. However, click add a user without a Microsoft account .
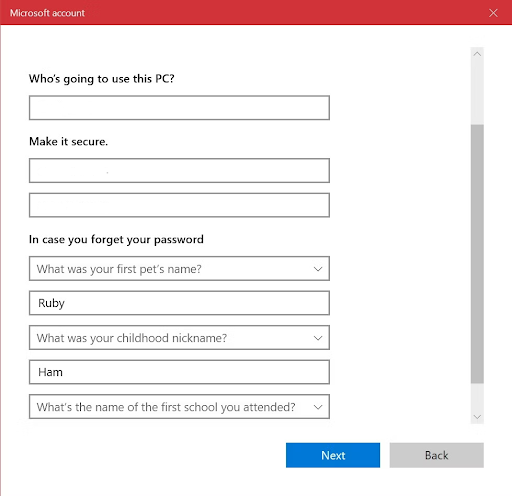
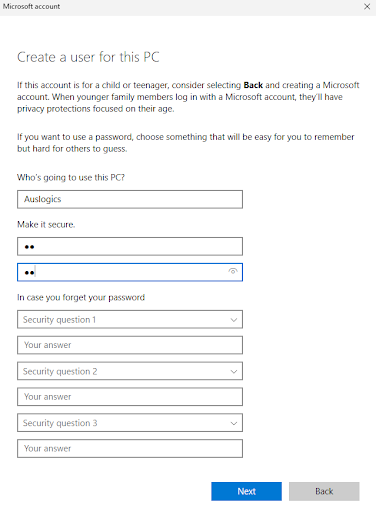
- An account setup screen will appear. Enter the necessary information, including security questions and click Next.
This will create a local account on Windows 10.
How to create a local account on Windows 11
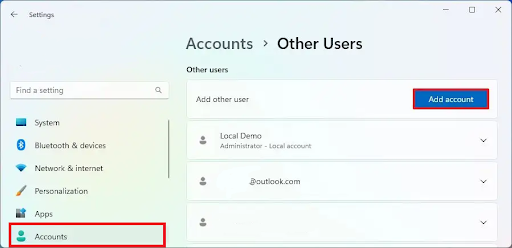
- Go to Settings and click Accounts .
- Then click Add account under Other users .
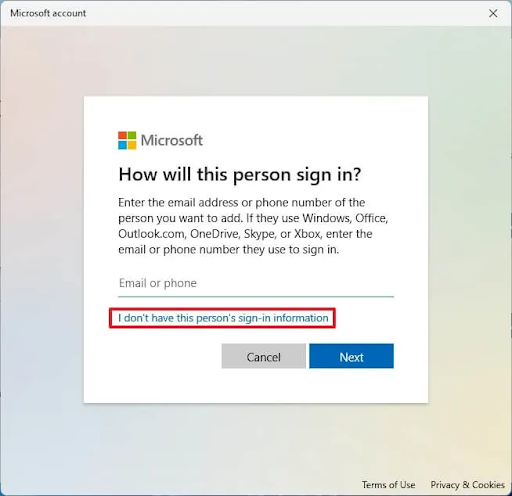
- Click I don’t have this person’s sign-in information .
- Click the Add a user without a Microsoft account option.
- Enter the necessary fields and click Next .
This will create a local account on your Windows 11 PC.
Related:How to Set Up Windows 11 Without a Microsoft Account?
Method 2. Use the command prompt to create a local user account
You can use the Netplwiz command to create a local account. Follow the steps below:
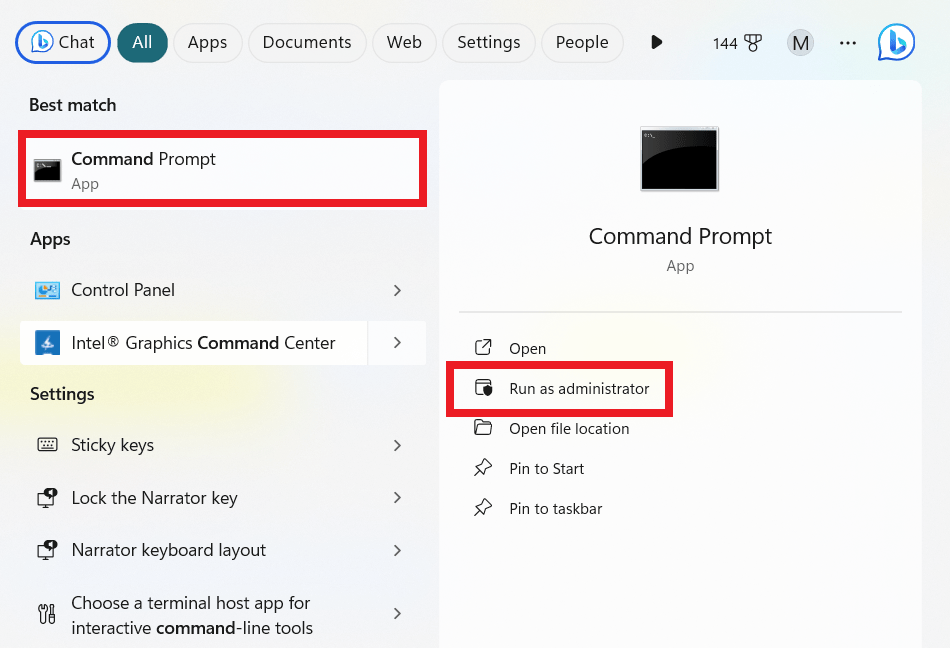
- Type the command prompt in the search bar, right-click it, and select Run as administrator .
- Type Netplwiz and press Enter .

- A pop-up window will appear; click Add .
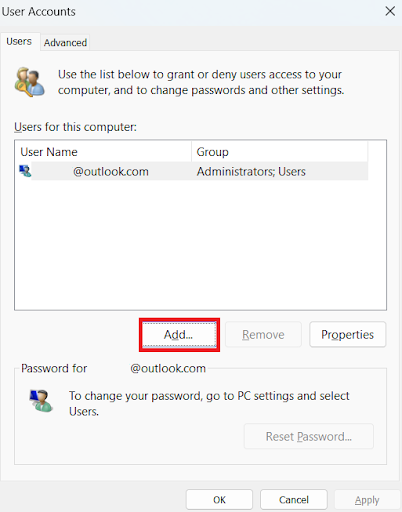
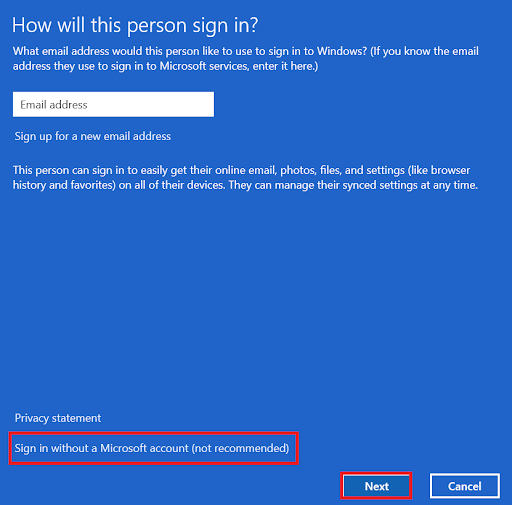
- Click Sign in without a Microsoft account (not recommended) and click Next .
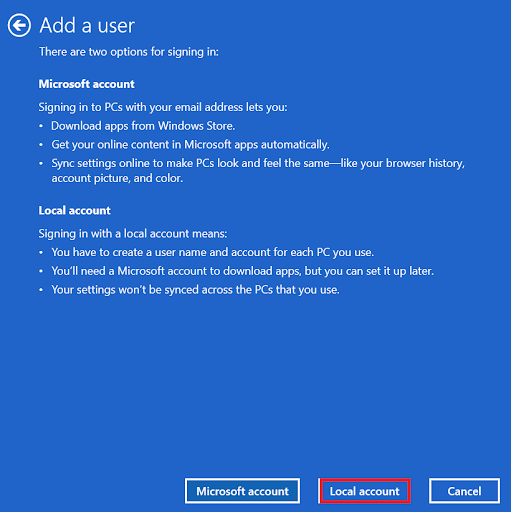
- Click on the Local Account button.
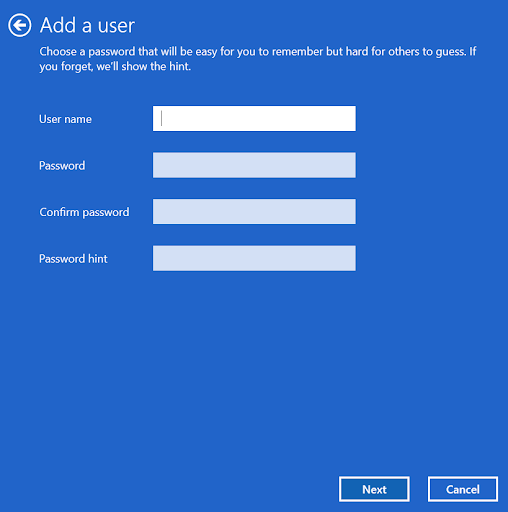
- Enter your information and password and click Next to complete the account creation.
Also Read: How to Download and Install Windows 11
Method 3. Use computer management to create a local account
You can also use computer management to create a local account. Follow the steps below to create the account.
- Type Computer Management in the search bar and click to
- open.
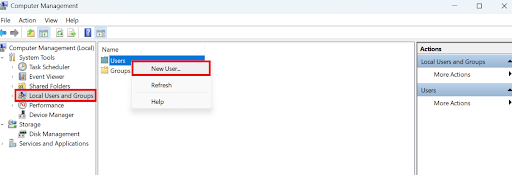
- Double-click Local Users and Groups to expand it.
- Right-click Users and select New User.
- Enter the necessary fields and click Create .

Method 4: Use the net user command prompt
Another way to learn how to create a local account on Windows 10 and 11 is to use the Net User command prompt. Follow the steps below:
- Open command prompt with administrative privileges
- Enter net user /add and then your username and password. To avoid errors, pay attention to the screenshot below to know where the spaces go.

- Press Enter to create a user account.
Related: Change Directory in CMD (Command Prompt)
Conclusion
You can now create a local account in Windows 10 and 11. We hope that our information has made the process easier.
If these suggestions were helpful to you, please share this article with your friends so they can benefit from it, too.
Please leave any further advice in the comments section below if you have any further pointers or strategies for setting up local accounts.