- Before you start…
- 1. Reboot your system
- 2. Create a temporary user account
- 3. Temporarily turn off your antivirus program
- 4. Update Windows
- 5. Change the password of your local account
- 6. Create a new local account
- 7. Run the CHKDSK utility
- 8. Check for corrupt system files and replace them
- 9. Restore Windows to a previous date
- Conclusion
Microsoft accounts offer more advantages than normal local user accounts. You get to sync different Microsoft apps and services, such as Office and OneDrive, across different devices. As great as it sounds, users still encounter issues.
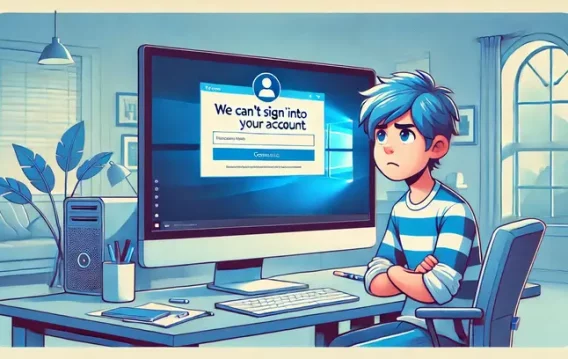
One of those issues is the “We can’t sign into your account” error. This login failure occurs when users try to log in to their Microsoft accounts. It could be caused by different problems. According to some users, the error started showing up after they logged out and tried to log in again, while others say that the error came up after they performed certain operations, such as deleting a local account, updating Windows, and making antivirus changes.
Whatever the cause of the problem, its impact remains similar across the board: users find it incredibly hard to access synced services, such as Outlook and Calendar. While the pain of not being able to access the mail can be tolerated, being locked out of OneDrive could cause serious problems.
In this article, you’ll learn how to fix “We can’t sign into your account” on Windows 10 even if you don’t have any technical experience.
Before you start…
Make sure you’re logged in to an administrator account. This is because most of the fixes you’ll be applying require admin privileges. So, it is tme to fix corrupt user profile in Windows 10 in a few easy steps.
1. Reboot your system
Even Microsoft advises that you restart your system once in a while. It is, perhaps, the oldest and easiest technique in the troubleshooting book. A common glitch that can be cleared by a reboot could be behind the problem.
If restarting your system doesn’t work, move on to the next solution.
2. Create a temporary user account
If you rely on your Microsoft account to log in to your computer, you have to create a new temporary account to make some changes. You can do this via Safe Mode. Follow these steps:
- Shut down your system.
- Turn it on, then force it to shut down after the manufacturer’s logo flashes.
- Repeat the steps three times and you should see the “Please wait” message under the Windows logo.
- Click on “Advanced Options” once you see the Automatic Repair screen.
- Next, click on Troubleshoot after you see the Choose an Option screen.
- Under Troubleshoot, select the Advanced Options tile.
- Click on Startup Settings, then click on Restart.
- After your system restarts, select the number beside Safe Mode.
- Once your PC boots in Safe Mode, right-click on the Start button and click on Run.
Note: You’re going to be making changes to the system registry. This is a serious undertaking. If you make a wrong move, you could inflict damage upon your PC. So, make sure you follow the subsequent steps carefully.
- Type “regedit” (without the quotes) and click on OK.
Important tip: Before you move ahead, back up the registry so that you can have a way out if something goes wrong. Click on File, and then click on Export. Select the folder where you’d like to save the backup file, enter the name for the file, and then click on OK.
- Now, go to the left pane of the Registry Editor and drill down to the following key:
HKEY_LOCAL_MACHINE\SOFTWARE\Microsoft\Windows NT\CurrentVersion\ProfileList
- Click on the first subfolder under ProfileList or click on each folder until you see one with a string whose data path is %systemroot%\system32\config\systemprofile.
- After selecting the folder, double-click on the RefCount DWORD under the ProfileManagement list, and then change the value from 1 to 0.
- Click on OK, close the registry, and then restart your system.
Tip: Registry entries can be left behind when programs are uninstalled. These leftovers are potentially dangerous, as they could interfere with new programs in the future. To keep your registry free from such elements, install Auslogics BoostSpeed. The tool’s registry cleaner does a good job of regularly removing broken and leftover registry keys.
You can also create another account in Safe Mode using the Command Prompt. Follow these steps:
- Boot your system in Safe Mode.
- Open the Run dialog box by right-clicking the Start button and selecting Run.
- Once Run opens, type “cmd” (no quotes) into the text box, and then hit the Shift, Ctrl, and Enter keyboard buttons together.
- Click on Yes once the User Account Control dialog box pops up and requests your confirmation.
- After the Command Prompt opens, type the following lines and hit the Enter key after each:
net user /add useraccountname mypassword
net localgroup administrators newuseraccount /add
net share concfg*C:\\\\/grant:newuseraccount,full
net user newuseraccount
Note: Replace “newuseraccount” with the name you’d like to assign to the account you’re creating. Replace “mypassword” with the password you want for the account.
- Once the commands execute successfully, reboot your system, log in to the user account, and then try checking for the error.
3. Temporarily turn off your antivirus program
Antivirus programs can cause conflicts that result in login failures. As many users reported, the problem vanished after they switched off their security programs. It’s not clear why antivirus programs interfere with the login process, but they’re known to cause problems like this from time to time.
So, disable your antivirus program and try logging in to your Microsoft account. You should easily find the Disable button on the program’s interface. If you don’t know how to, you can check online.
Using Windows Security as your main antivirus program? Then follow these steps:
- Launch the Settings application by pressing the Windows and I keyboard buttons simultaneously. You can also right-click on the Start button and select Settings from the Power User menu.
- Once Settings opens, click on Update & Security.
- Next, go to the left pane of the Update & Security interface, and then click on Windows Security.
- Click on Virus & Threat Protection under Windows Security.
- Once the Virus & Threat Protection window opens, scroll down to Virus & Threat Protection Settings and click on Manage Settings.
- On the next screen, turn Real-Time Protection off.
Note that turning Real-Time Protection off won’t prevent scheduled scans from running. But hopefully, it’ll stop the interference.
4. Update Windows
The issue has gone so widespread that Microsoft had to roll out an update to fix it.
An outdated Windows 10 build might also be the cause of the issue because it might not be in tune with most of Microsoft’s new services.
Log in to the temporary account you created to download and install the latest updates for your system.
Follow these steps:
- Press the Windows and S keys together or click on the magnifying glass in the taskbar.
- Once the search box opens, type “updates” (without the quotes), and then click on Check for Updates in the search results.
- After Windows Update opens, the utility will automatically check for available updates for your system.
- Allow the tool to download the updates, and then click on Restart Now to install them.
- Your system will now restart and install the updates.
- After the process is complete, try signing in again.
5. Change the password of your local account
If the previous methods don’t bear any fruit, try changing the password of your main local account. Many users reported this to be the fix that resolved the problem. Changing the password will force Windows to reinitialize the account, which could be what’s needed to allow you to sign in to your Microsoft account.
Note that this is one of those solutions that require you to use an administrator account.
Follow these steps to open the hidden administrator account in Windows 10:
- Tap the Windows and R keyboard buttons together or right-click on the Start button and select Run.
- Once the Run dialog window opens, type “cmd” (don’t add the quotes), and then press the Ctrl, Shift, and Enter keyboard buttons simultaneously.
- Click on the Yes button after the User Account Control window asks you to confirm your action.
- Once the Command Prompt opens, type the following line and hit the Enter key:
Net user administrator /active:yes
- Restart your system.
Now, follow these steps to change the password of your main user account:
- Log in to the admin account.
- Press the Windows and S keys together or click on the magnifying glass in the taskbar.
- Once the search box opens, type “control panel” (without the quotes), and then click on Control Panel in the search results.
- After the Control Panel opens, make sure “View by” is set to Category. Click on User Accounts.
- After the User Accounts page opens, click on User Accounts again.
- Next, click on “Manage another account”.
- On the Manage Accounts screen, select the user account whose password you want to change.
- Click on “Change the password”.
- You can now enter the old password, then enter and confirm the new password.
- Restart your system and log in to the account to check for the problem.
6. Create a new local account
As it turns out, your primary user account might be the problem. If changing the password didn’t help, try creating a new account and check if the issue goes away. This is another step that requires that you use an admin account.
Not to worry: you can easily migrate your files to the new user account and continue to use your system like nothing happened.
Log in to the administrator account and follow these steps:
- Right-click the Start button and click on Settings or use the Windows + I combo to open the Settings app.
- Once the Settings home screen appears on your monitor, click on Accounts.
- Go to the left pane of the Accounts page and click on “Family & other users.”
- Now, click on the “Add someone else to this PC” option.
- Enter the user credentials and hit the Next button.
- Log out of your current profile, log into the new one and check if you can log in to your Microsoft Account without problems.
- If you find out that the problem no longer exists, then you just confirmed that your old user account is the issue.
- Now, head over to your old account, go to Settings >> Accounts >> Family & other users and make the new account an administrator account.
- Next, go to the folder where your user data is saved (usually C:\Users) and move the contents of the folder into the user data folder of the new user account you created.
- Log into your new user account, go to Settings >> Accounts >> Family & other users, and then delete your old user account.
7. Run the CHKDSK utility
This method allows you to check for bad hard disk sectors that might be affecting your system files. Once Windows finds these sectors, it will set them apart so that they won’t be used again. With the right parameters in Command Prompt, you’ll be able to recover some of the files affected by the bad sectors.
Follow this step-by-step guide:
- Launch a File Explorer window: You can do this by double-clicking any folder on your desktop or by clicking the folder icon in your taskbar. If your desktop is clean and you have no pinned taskbar icon, you can right-click the Start button and click on File Explorer or use the Windows + E shortcut.
- Once File Explorer opens, go to the sidebar and click on This PC.
- Go to the Device and Drives section in the right pane.
- Right-click on Local Disk (C:), where Windows is installed, and then click on Properties.
- Once the Properties dialog opens, switch to the Tools tab.
- Under the Tools tab, click on the Check button in the Error Checking section.
- Windows will now give your driver the once-over, and it might bring up a dialog that reads,
“You don’t need to scan this drive
We haven’t found any errors on this drive. You can still scan for errors if you want.”
- Click on the Scan Drive option. Windows will now scan your drive, and a dialog will tell you the results of the scan.
To run a more thorough scan, you’ll have to use an elevated Command Prompt window. Follow these steps:
- Press the Windows and S keys simultaneously to open the search function beside the Start button.
- Once the search box appears, type “Command Prompt” (without the quotes) into the text field. The moment you see Command Prompt in the results, right-click it, then choose Run as Administrator.
- Wait for the User Account Control dialog window to show up, then click on the Yes button to grant Command Prompt admin rights.
- After the elevated Command Prompt window opens, type the following line into the black screen and hit Enter:
chkdsk C: /f /r /x
Replace C in the command with the drive letter of the volume where Windows is installed.
Take note of what the command switches do:
The “/f” switch will prompt the utility to fix any error that it finds during the scan.
The “/r” switch will prompt the tool to look for bad sectors and recover any readable information.
The “/x” switch will prompt the utility to unmount the volume before it is scanned.
If the message below shows up, then the volume you are trying to scan is currently in use. Press the Y key as advised:
“Chkdsk cannot run because the volume is in use by another process. Would you like to schedule this volume to be checked the next time the system restarts? (Y/N)”
- After pressing Y, reboot your PC to complete the repair process, then check if the error has been resolved.
8. Check for corrupt system files and replace them
System files are integral to every process that runs on a PC. A login failure could occur when one of the files related to the sign-in process goes missing or becomes corrupt. The remedy for this particular problem is fishing out the problematic system file and replacing it.
To do that, you have to run the System File Checker (SFC). SFC is a command-line tool that is built into Windows. It is designed to find and replace corrupt or missing system files. The utility works with another tool, known as the inbox Deployment Image Servicing and Management (DISM) tool on Windows 10. DISM helps SFC with the files it needs to perform the repair.
The following steps will show you how to use SFC:
- Press the Windows and S keys simultaneously to open the search function beside the Start button. You can also click on the magnifying glass icon in the taskbar.
Tip: If you want to show the search box in the taskbar permanently, right-click the taskbar and then select Search >> Show Search Box.
- Once the search box appears, type “Command Prompt” (without the quotes) into the text field. The moment you see Command Prompt in the results, right-click it, then choose Run as Administrator.
- Wait for the User Account Control dialog window to show up, then click on the Yes button to grant Command Prompt admin rights.
- Once the Administrator Command Prompt window comes up, type the following line into the black screen, and hit the Enter key:
DISM.exe /Online /Cleanup-image /Restorehealth
Wait for DISM to provide the necessary files using the Windows Update utility. When it’s done and you see a completion message, move on to the next step.
If the Windows Update utility isn’t working correctly or you don’t have a working Internet connection, use Windows 10 installation media as the repair source by entering the command line below instead:
DISM.exe /Online /Cleanup-Image /RestoreHealth /Source:X:\RepairSource\Windows /LimitAccess
Replace X:\RepairSource\Windows with the path to the Windows folder on the installation media you’re using. Move on to the next step once the process completes.
- Now, type “sfc /scannow” (without the quotes) into the Command Prompt, then hit the Enter key.
- If the message “Windows Resource Protection found corrupt files and successfully repaired them” appears at the end of the scan, restart your computer and check for the problem.
9. Restore Windows to a previous date
If the issue started after you made changes to your system, such as installing or uninstalling device drivers or third-party applications, try undoing them and check if that resolves the problem. Simply uninstalling or reinstalling those programs won’t do the trick. You have a better chance with System Restore.
The System Restore utility can take Windows back to a state where you didn’t experience the problem. Even if you haven’t created a restore point yourself, it’s possible that Windows did that automatically.
The steps below will show you how to restore your system:
- Launch a File Explorer window by using the Windows + E combination or by double-clicking any folder on your desktop.
- Go to the sidebar of the File Explorer window, right-click This PC, and then click on Properties.
- Once the System window appears, go to the left pane and click on the System Protection link.
- The System Protection tab of the System Properties dialog will now show up.
- Click on the System Restore button.
- After you see the System Restore wizard, click on Next on the first prompt.
- On the next screen, select a restore point and click on Next again, then click on Finish on the confirmation page.
- Windows will now restart and take you back to the state you’ve chosen.
- Check if the problem persists.
Conclusion
Nothing beats that sigh of relief that you breathe after finally resolving a problem like the one described in this article. Leave a comment below if you want to share your thoughts or ask any question.