Microsoft introduced the Action Center in Windows 10 and changed how we use specific settings.
Couched on the right side of the taskbar, the slide-out panel serves as a central hub to quickly launch tools and view notifications.
It fixes the operating system’s notification pitfalls running up to Windows 8. However, even Windows 8’s toast notifications expire after a while without any way to retrieve them.
With the Action Center, you can view old notifications and easily enable/disable features like Wi-Fi, Night Sight, Tablet Mode, and Airplane Mode, among others, with one click.
Microsoft gave the Action Center a makeover in Windows 11. From changing its name to Quick Settings to separating it from the Notification Center, the entire hub is now cleaner and more practical.
That said, Microsoft maintains—and even improves—the ease of customizing it. This article will show you how to rearrange, remove, or add Action Center icons for convenience.
You’ll also learn how to disable the Action Center and Quick Settings in Windows 10 and Windows 11.
But first, let’s answer the question, “How to customize my Windows Action Center?”
Customizing Windows 10’s Action Center
In Windows 10, the Action Center contains your notifications and quick action buttons. You can customize the arrangement of your action buttons and how you receive notifications.
The process is simple. Go to the Settings application by pressing Start and selecting Settings or tapping the Windows logo and I keyboard buttons. Click on the System icon on the first page of Settings.
Next, select Notifications & actions under System. Now, go to the right side of the screen to change your notification preferences.
Here’s a run-through of the basic options:
Get notifications from apps and other senders
Turning this off disables toast notifications.
Show notifications on the lock screen
Turning this off prevents Windows from displaying notifications when your device is locked.
Show reminders and incoming VoIP calls on the lock screen
Incoming calls and reminders still show up even when you turn off lock screen notifications. You can prevent them from displaying by turning off this option.
Show me the Windows welcome experience after updates and occasionally when I sign in to highlight what’s new and suggested
Turn this setting off if you don’t want to see the welcome presentation after installing an update and new and suggested features.
Suggest ways I can finish setting up my device to get the most out of Windows and Get tips, tricks, and suggestions as you use Windows
Uncheck these boxes if you’ve already set up your device and don’t want future disruptive alerts on tips and suggestions.
Next, scroll down to Notifications & actions to disable apps from sending toast notifications or enable them to do so.
To edit the quick action buttons, scroll up and click on Edit your quick actions.
The Action Center will now slide out. Click on the Add button to add icons not yet in the Action Center. You can also move the icons around how you see fit.
Instead of going through the Settings app, you can open the Action Center (click on the message icon in the taskbar), right-click on the surface, and click on Edit.
This allows you to add, remove, and rearrange quick action buttons.
Related:Windows 10 vs. Windows 11: What Are the Key Differences?
Customizing Windows 11’s Quick Settings
If you’re wondering, “Where is the Action Center in Windows 11?” you could be confused because it now goes by a new name and is located elsewhere.
Microsoft rebranded the panel to Quick Settings in Windows 11, giving it a cleaner look with more practical shortcuts. It now resides to the right of the Notification Center, which maintains its old spot.
To customize your Quick Settings in Windows 11, go to the right side of your taskbar and click on the volume or battery icon. Once the Quick Settings panel flies out, right-click on the surface and select Edit quick settings.
The icons will now be faded, and you’ll see a pin on each. Click on a pin to remove the corresponding icon. To reposition a button, hold and drag it around.
Finally, click on the Add button to add other icons to the Quick Settings panel.
To customize and change notification settings, right-click on the date and time display and select Notifications settings.
Once the Settings window shows up, click on the arrow beside Notifications to see different settings similar to those we explained for Windows 10.
With Auslogics BoostSpeed, your PC will be able to handle all your customization needs and more, providing a smoother and more efficient user experience.
How to Disable the Action Center in Windows 11 and Windows 10
Another similarity between the Quick Settings and Action Center panels is that you can disable them using the Registry Editor or Group Policy Editor.
While Windows 11 has separate panels for notifications and Quick Settings, they’ll both stop working when you tweak the Windows Registry.
That said, you can disable Windows 10’s Action Center through the Settings application.
Follow these steps:
- Fire up the Settings app by opening the Start menu and clicking on Settings. You can also tap the Windows logo and I keyboard buttons together.
- After the Settings window shows up, click on Personalization.
- Go to the left side of the Personalization page and click on Taskbar.
- Next, go to the right side, navigate to Notification area under Taskbar, and click on Turn system icons on or off.
- Toggle off the Action Center option on the page that follows.
- The notification icon will no longer be visible in the taskbar.
Solution 1: Using the Registry Editor (For Windows 10 and Windows 11)
Before tweaking the system registry, you must take precautions.
That’s because the registry is a sensitive area, and one wrong step can cause stability issues or even break your operating system.
If you don’t know how to use the Registry Editor, it would be a good idea to get help from a more advanced user.
Even if you’re comfortable around the registry, we recommend backing it up to have something to fall back on in case things go wrong. If you don’t know how to back up the registry, follow these steps:
- Launch the Run dialog box using the
Windows logo + Rkeyboard shortcut. - Type
regeditinto the Run box and click OK or tap the Enter keyboard button.
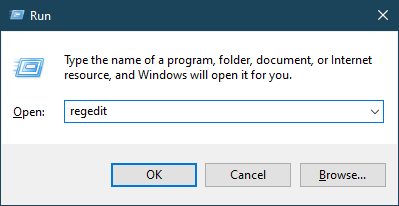
- Click on the Yes option after the UAC panel pops up.
- Now, click on File in the top-left corner of the Registry Editor and select Export.
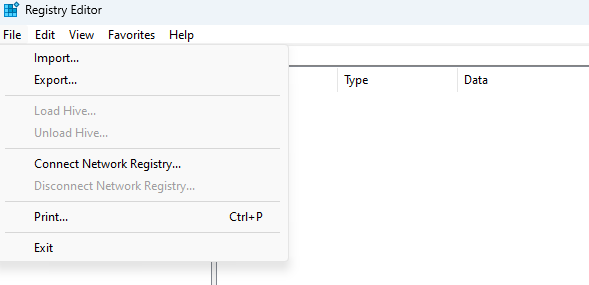
- After the Export Registry File dialog appears, head to the Export range section and select All.
- Next, select a folder and enter a file name.
- Click on the Save button.
To restore the registry, load up the Registry Editor, click on File >> Import, then navigate to the folder where you saved the file and double-click it.
Now, follow these steps to turn off the Action Center:
- Go to the left side of the Registry Editor and browse to the following key:
Computer\HKEY_CURRENT_USER\SOFTWARE\Policies\Microsoft\Windows\Explorer
- If you don’t see the Explorer key under Windows, you have to create it. To do that, right-click on Windows and select New >> Key. Then, rename the new key to
Explorer. - Now, click on Explorer and go to the right side of the Registry Editor.
- Right-click on the right side of the editor and select New >> DWORD (32-bit) Value.
- Rename the DWORD to
DisableNotificationCenter. - Next, double-click the DisableNotificationCenter DWORD, enter 1 under the Value box, and click the OK button.
- Restart your system.
Also read:How to Back Up and Restore the Windows 10 Registry
Solution 2: Using the Group Policy Editor
The Group Policy Editor is only available to Windows Pro and Enterprise edition users.
If you use Windows 10 Home or Windows 11 Home, you can use the registry method. However, you’re better off using the Settings method if you’re on Windows 10 Home.
Now, follow these steps to disable the Action Center:
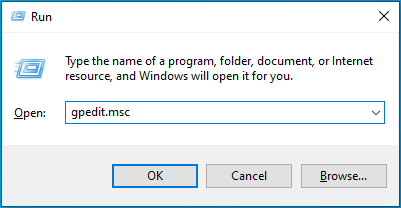
- Launch the Run dialog box by right-clicking the Start button and selecting Run. You can also tap the
Windows logo + Ikeyboard combo. - Type
gpedit.mscand hit the Enter button or click OK.
- After the Local Group Policy Editor shows up, go to the left side and browse to
User Configuration > Administrative Templates > Start Menu and Taskbar.
- Next, go to the right side and find the Remove Notifications and Action Center policy.
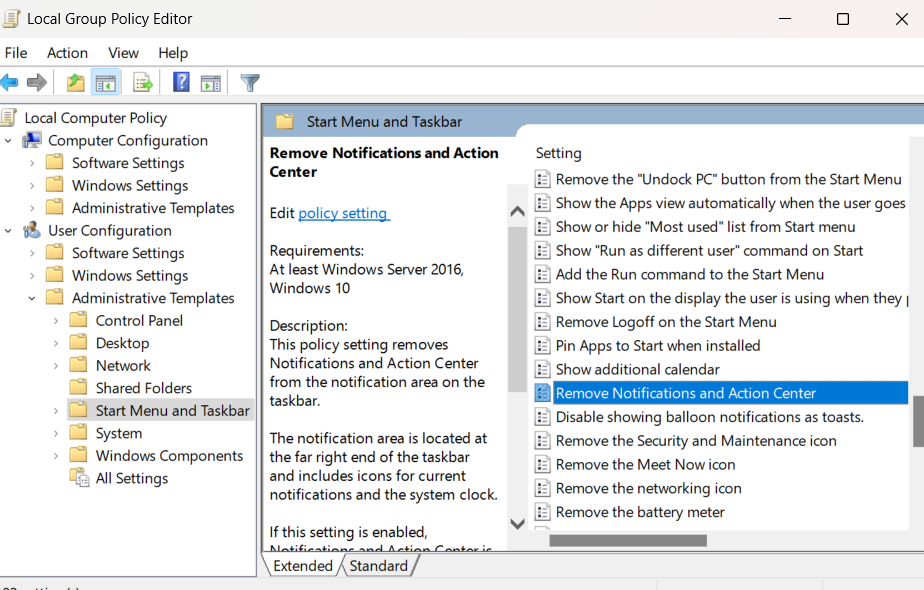
- Double-click on the policy, select Enabled when its dialog shows up, and click the OK button.
- Restart your computer.
How to Disable the Action Center in Windows 10 and Windows 11: Explained
That’s how to customize and disable the Action Center in Windows 10 and 11.
Suppose you used the Registry Editor or Group Policy Editor.
In that case, you can undo your changes by changing the DisableNotificationCenter DWORD value in the registry to 0 or disabling the Remove Notifications and Action Center policy.
One of the reasons some users choose to disable their Notifications and Action Center is their system being laggy.
When toast notifications show up, they get stuck and hardly go away. While disabling the Action Center works, it’s not a long-term fix.
You’ll still experience annoying system slowdowns because you haven’t gotten rid of the underlying problem.
To keep your system working optimally, use Auslogics BoostSpeed. The program cleans up junk and other elements that bog your system down and cause lags and glitches.
It’s compatible with Windows 11, so rest assured you won’t have interferences with the new operating system.