Have you ever saved a Word document only to find that it doesn’t appear in print preview or doesn’t print properly? This can happen for a variety of reasons. You could be dealing with formatting glitches, or there might be something off in your printer settings.
Whatever the reason may be, let’s see how to get you out of this situation.
Why Does My Word Document Look Different in Print Preview?
Most times, the error is due to the Word document settings. Microsoft Word has so many settings options that affect how it behaves.
When it comes to problems with print previews and printouts, there are five areas you might want to check for what the cause of the issue is.
They are as follows:
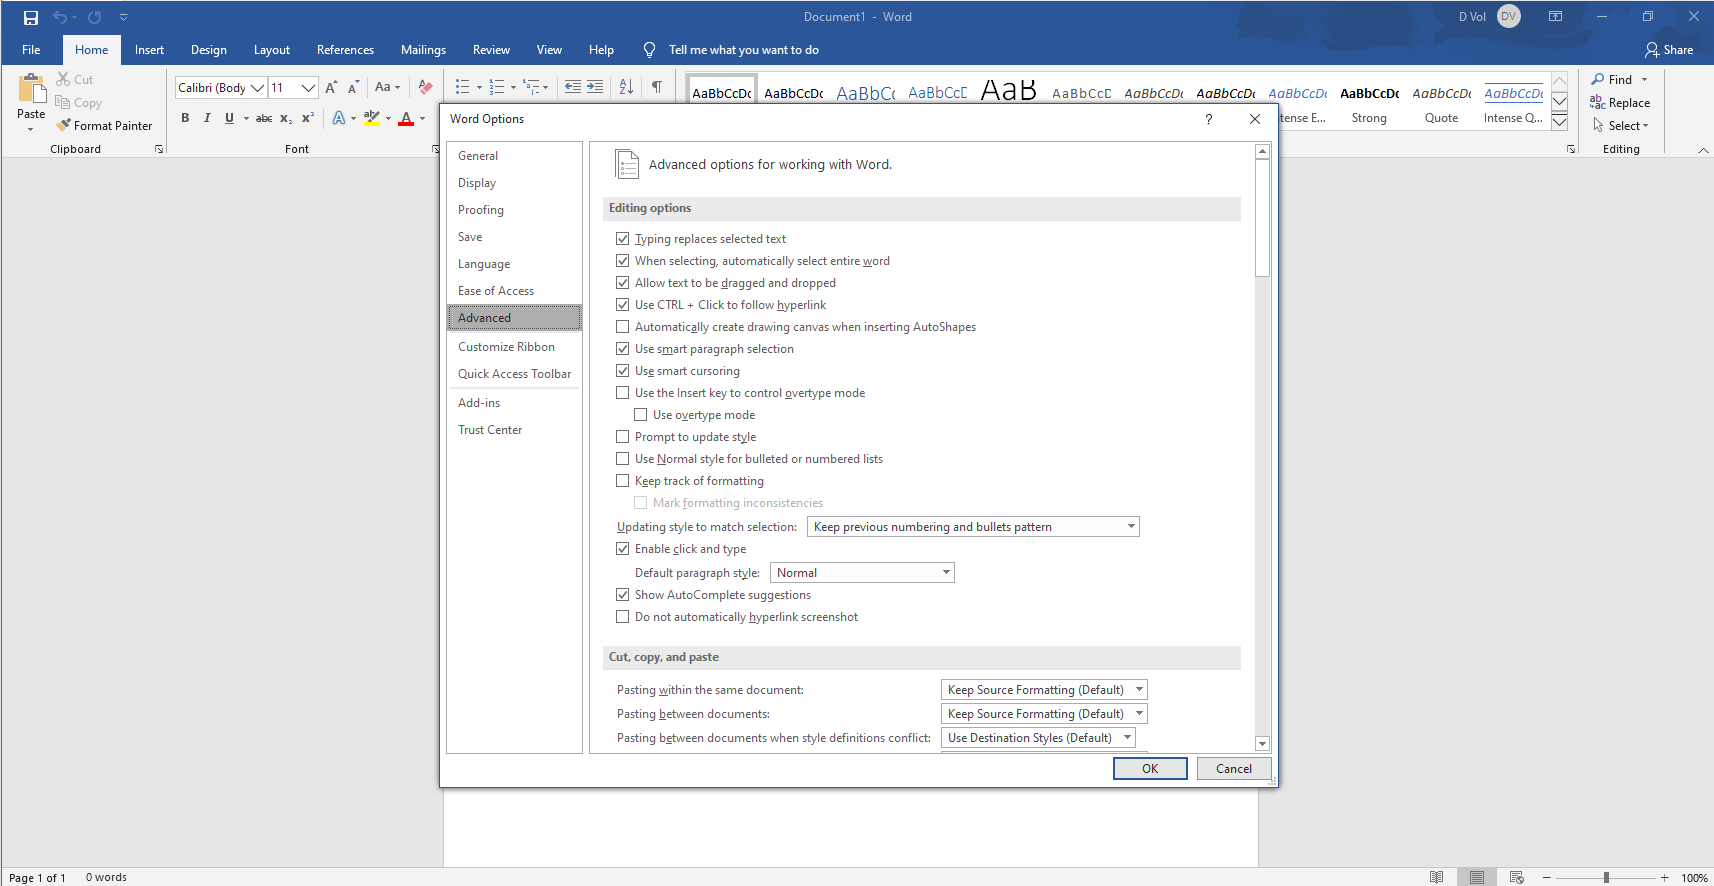
- If the Picture placeholders box is checked, inline objects (texts) will be left out in your document’s print preview display. It also means the inline objects will be missing in your printouts.
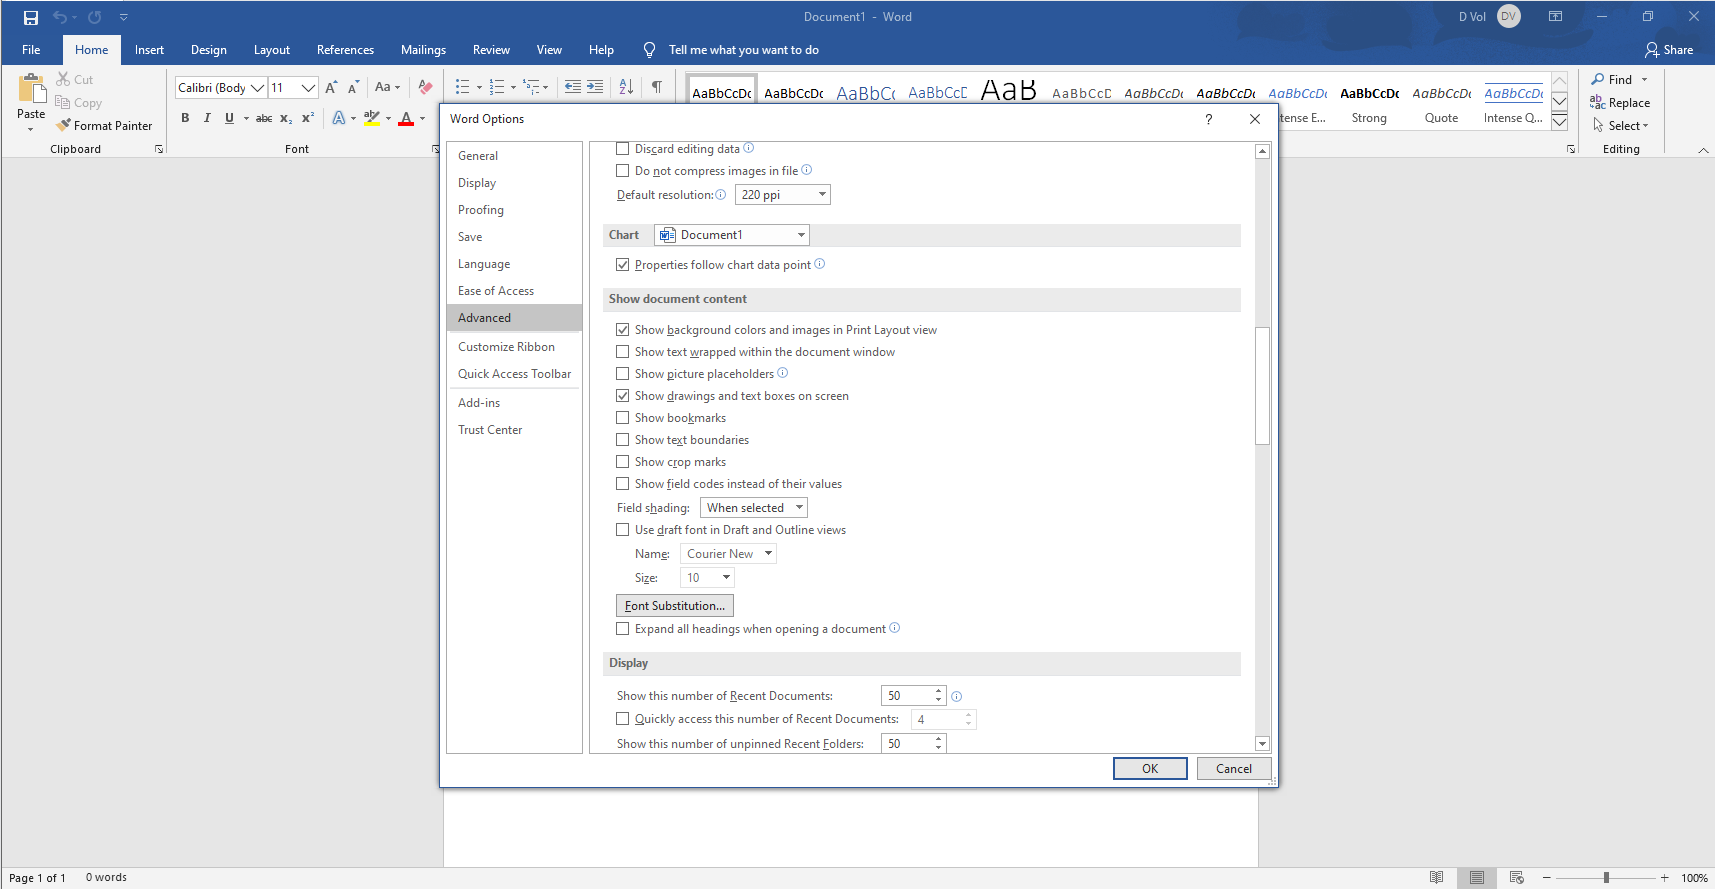
- If the Show drawings and text boxes on screen box is unchecked, floating objects (drawings) will not display in the print layout view. Still, the left-out contents will print out when the document is printed.
- Also, if the Print drawings created in Word box is unchecked, the floating objects will not display in print preview. Also, it will not be printed out.
- If a wrapped image is copied and pasted on the document from an offline webpage, you will not be able to view it unless it is converted to an inline object.
- Suppose you attempt to print the document offline while enabling the Update field option, the image will be lost.
How to Fix the Saved Word Document Not Showing When Printing Out?
If you keep getting blank pages for your document printout, try applying any of the fixes below to resolve the issue.
Solution 1: Enable Word to print graphics and inline objects
The first thing you should do is make sure that the option to print graphics and inline objects is enabled in Word. Here’ s how to do this on Windows 10/11:
- Navigate to File > Options > Advanced.
- Scroll down to Show document content .
- Check the boxes next to Show drawings and text boxes on screen and Show background colors and images in Print Layout view .
- Uncheck the box next to Show picture placeholders.
- To enable graphics printing, navigate to File > Options > Display.
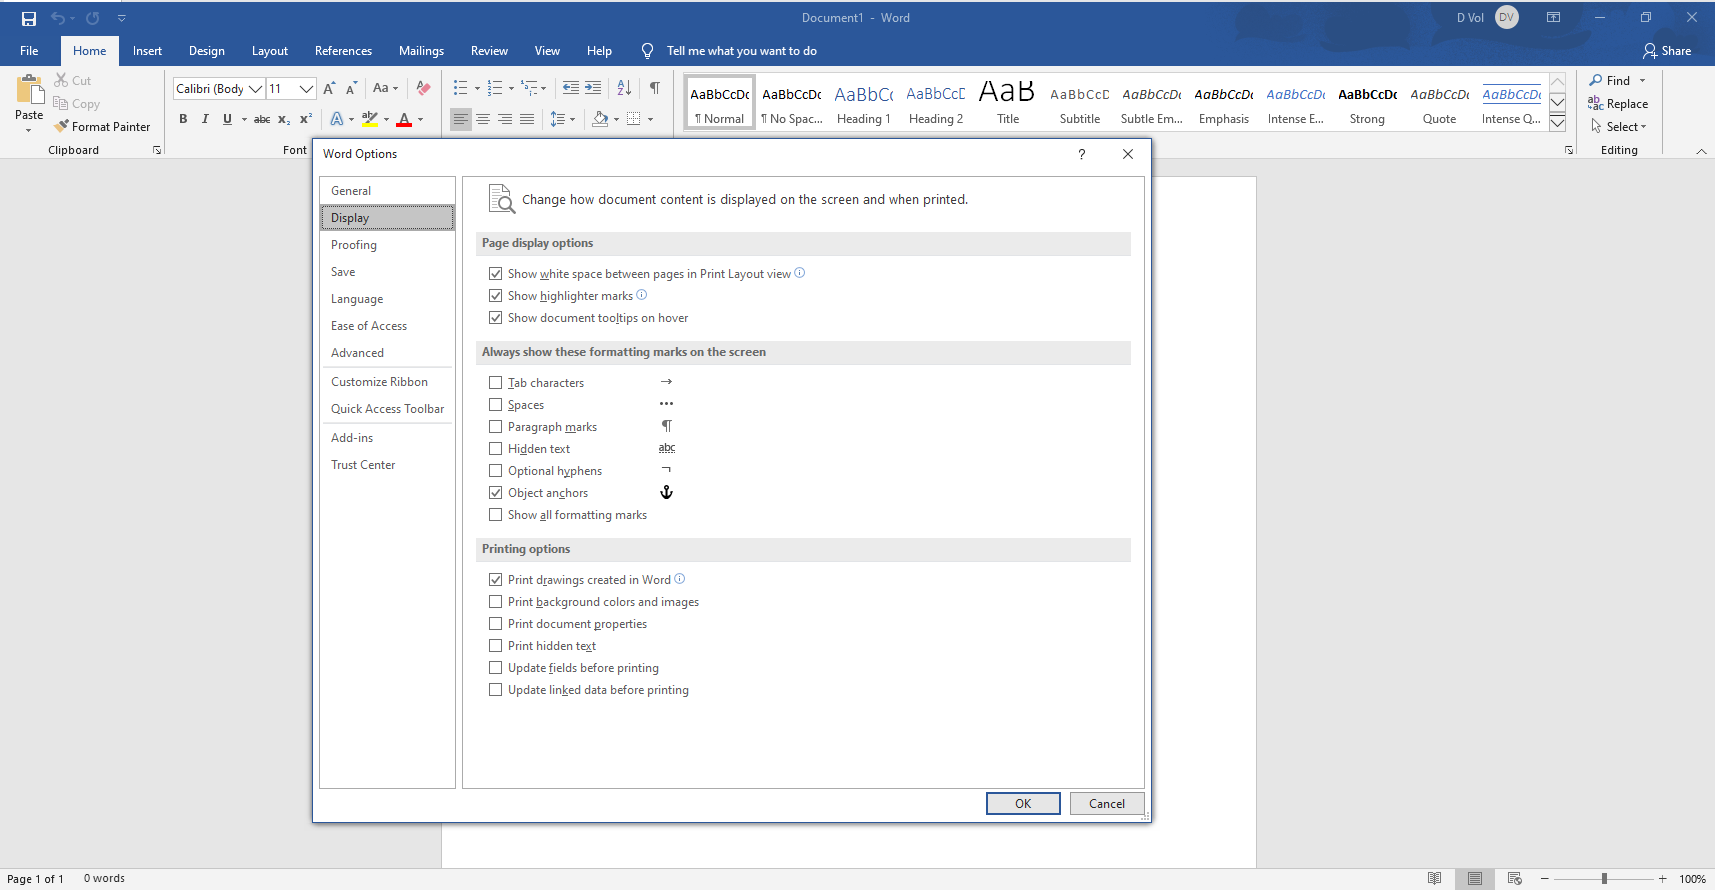
- Under the Display window, go to Printing options, and then check the boxes next to Print drawings created in Word and Print background colors and images.
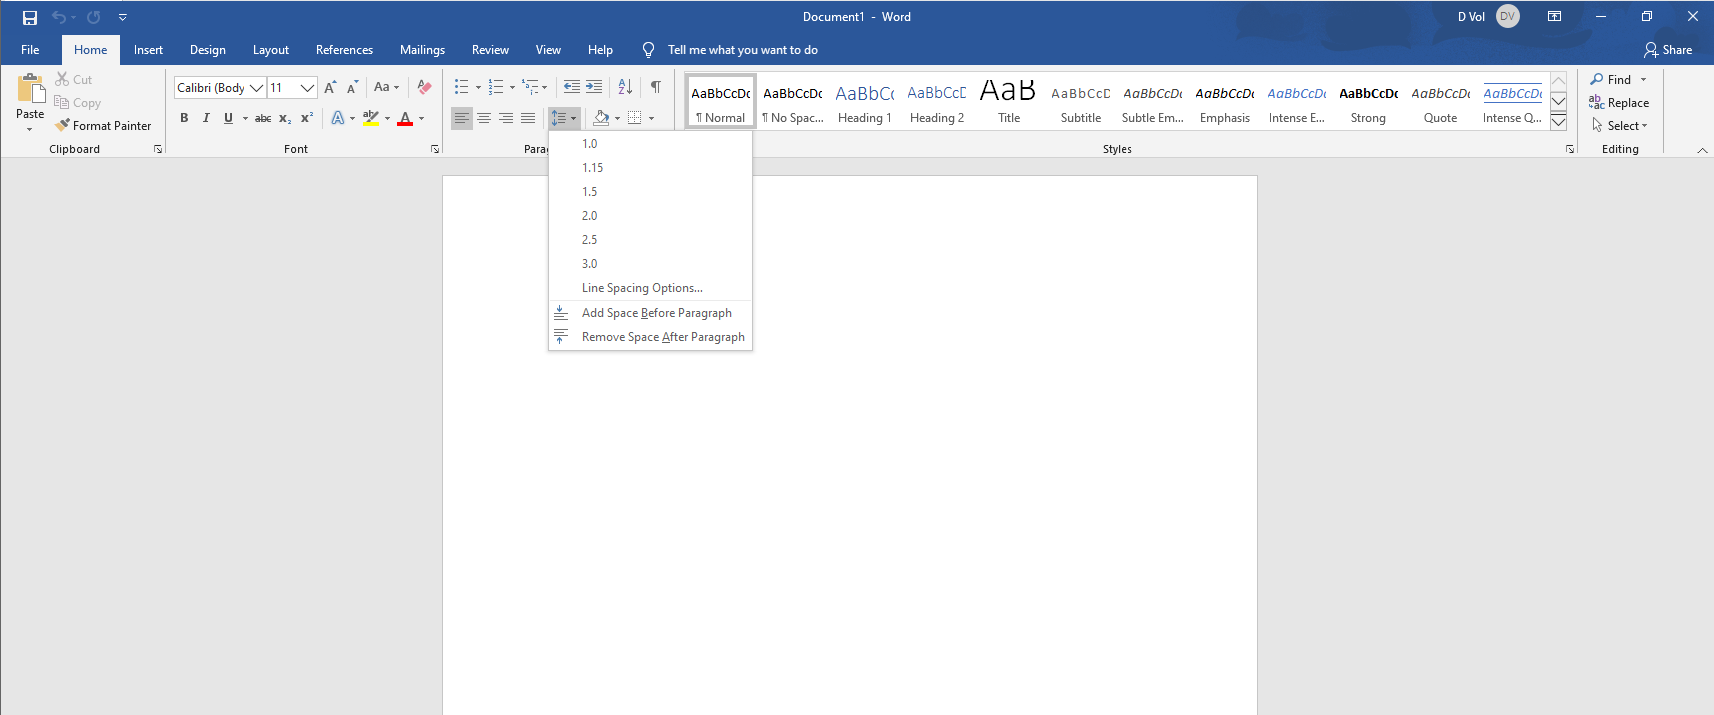
- Next, open the Paragraph dialog box from the Home tab and ensure that Line spacing is not set to Exactly.
- If the graphic is an image copied and pasted from a web page, press
Ctrl + Shift + F9after the image is pasted. This will delink the content from the webpage.
Try printing a document now to see if the problem is resolved. If it’s not solved, go to the next fix.
📌 Related: How to Check Printing History in Windows 10?
Solution 2: Update the printer drivers
Your computer relies on your printer driver to transfer every detail of your documents to the printer for printing.
With that said, if your driver is not configured to transmit the font used in your document, the printer will automatically substitute another font for it.
Suppose the printer does not have a substitute font, and the printouts may come out blank.
That’s why you must ensure you have the latest driver installed on your PC at all times.
You can update your device drivers manually or automatically, depending on your expertise and the amount of time you are willing to use.
Here’s how to update your driver on Windows 10/11 via the Device Manager:
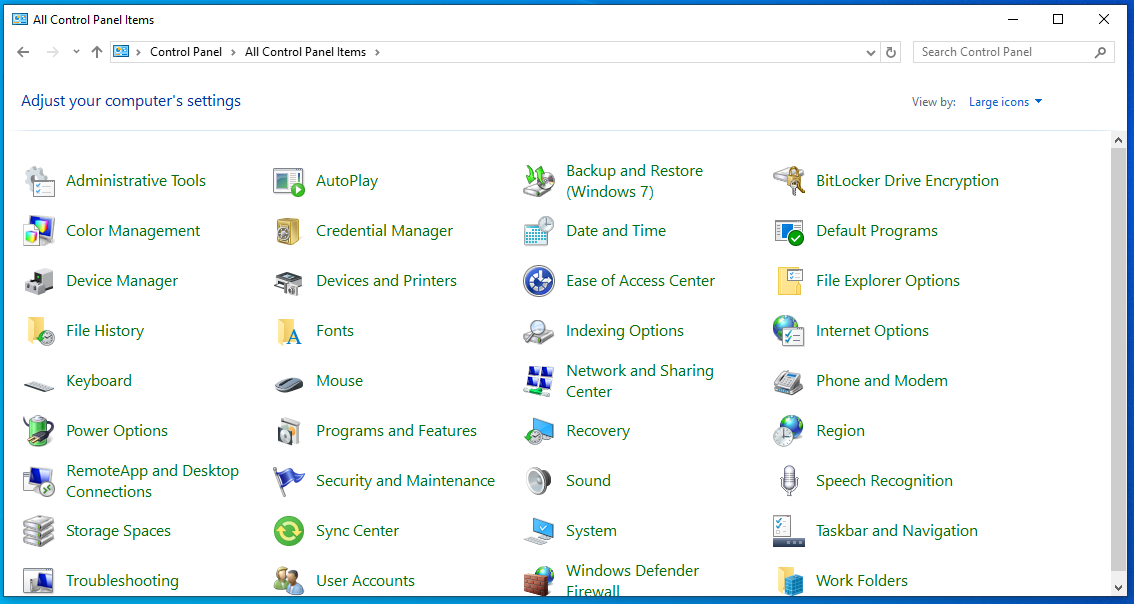
- In the search box, type
control paneland click on it from the search result. - From the Control Panel window, select Device Manager .
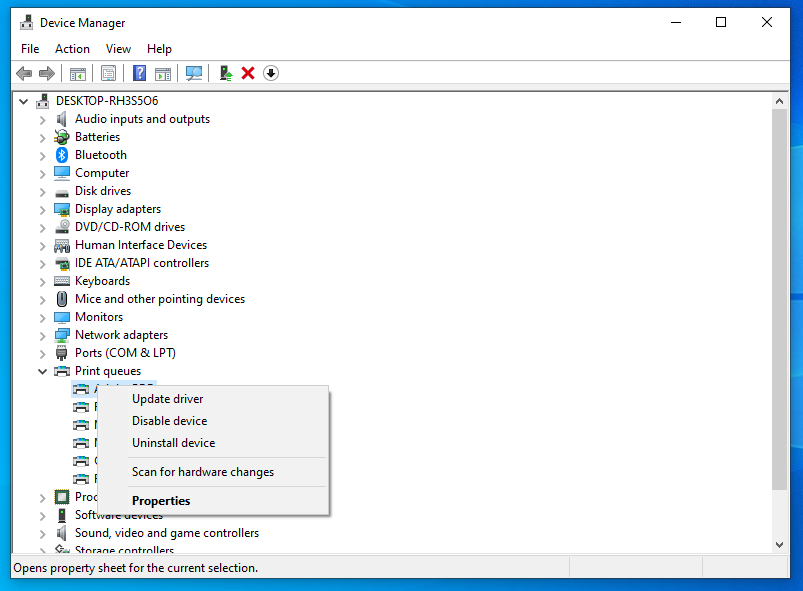
- Locate the Printer queue category and expand it.
- From the drop-down list, right-click on your printer and select Update driver.
- Select Search automatically for drivers on the next screen.
- Suppose you have already downloaded the updated version from the manufacturer’s website. Select Browse my computer for drivers.
- Complete the installation process.
Now, try printing out a document to see if the fix worked. If the driver update made no difference, it might be that the new version is not compatible with your device. In that case, the incompatible driver might introduce a new set of problems altogether.
Solution 3: Fix Microsoft Office
If the above fix fails to work, you can use the in-built auto-repair solution to fix the issue. Some users found this option useful.
To get started, follow the procedures below:
- Press the Start button, go to Settings, and select Apps & features (Apps > Installed apps in Windows 11) from the menu.
- Look for Microsoft Office or Word and click on it.
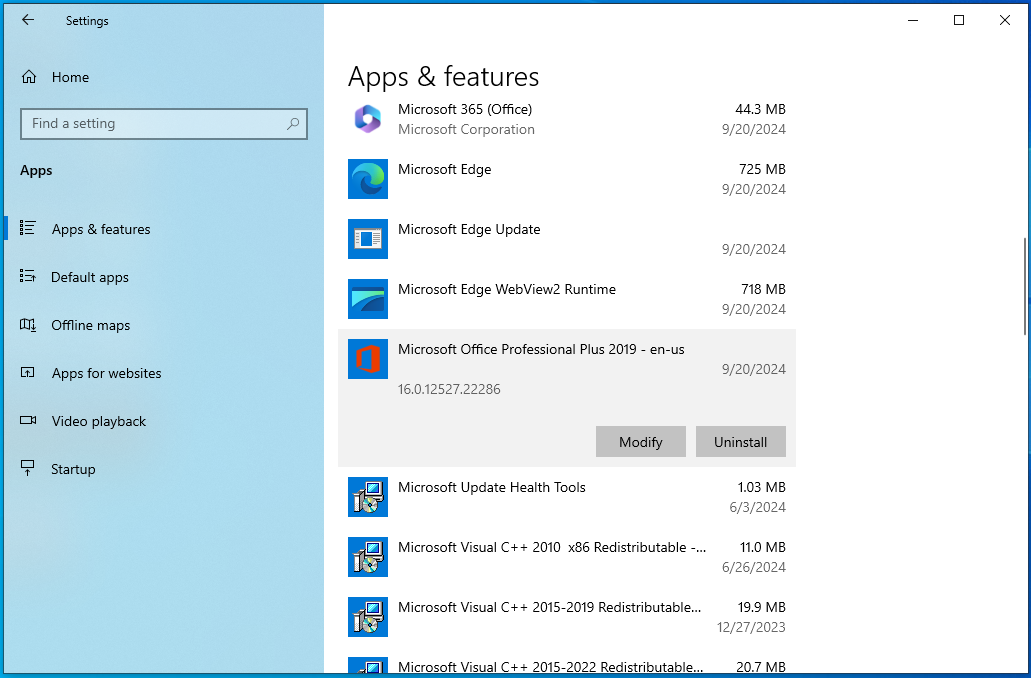
- Click Modify , and then select Quick Repair from the pop-up dialog box.
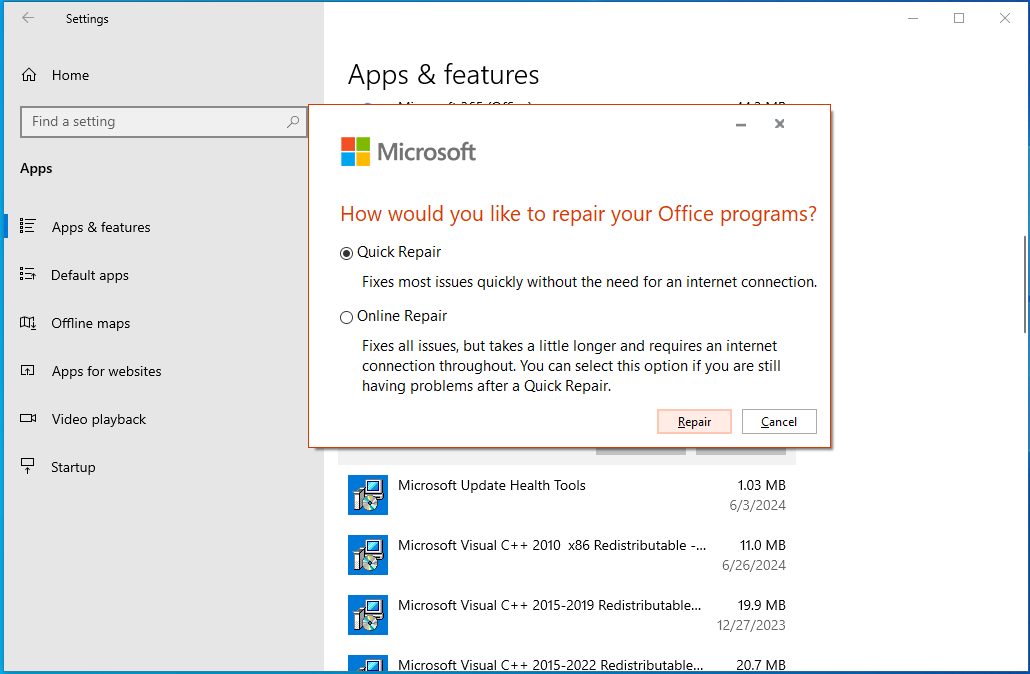
- If you’re still having issues after Quick Repair, you can also choose to run Online Repair, which takes a little longer but is more thorough .
- When the process is completed, check to see if the issue is resolved.
📌 Also read: How to Set Microsoft Office Word as Default in Windows 10?
How to Fix the Saved Word Document Not Showing on Print Preview or Printing Out: Answered
Let’ s sum up. If your saved Word document isn’t showing in print preview or not printing correctly, there are a few simple things you can do to solve the problem.
Make sure graphics printing is enabled, look into updating your drivers (you can do this easily with Auslogics Driver Updater), and use Word’ s built-in repair tools.
With all of this settled, hopefully, you will be back to printing in no time!