- What Is a Heatsink on an SSD?
- Why Do NVMe SSDs Heat Up?
- Do High Temperatures Affect SSDs?
- What Is a Normal SSD Temperature Range?
- Do I Need a Heatsink for My M.2 SSD?
- Signs and Other Reasons You Need a Heatsink for Your SSD
- How Can I Choose the Right NVMe SSD Heatsink?
- How to Install a Heatsink on an SSD
- Benefits of Using SSD Heatsinks
- Are SSD Heatsinks Enough to Prevent Overheating? Other SSD Cooling Tricks
- Final Verdict: Do SSDs Need Heatsinks?
- FAQ
Modern SSDs, especially high-performance NVMe models, can generate a surprising amount of heat when pushing data at gigabytes per second. Left unchecked, this heat can lead to throttling, where drives deliberately tank their performance to avoid damage.
Overheating is also bad for electronic components, including SSDs. While your system’s cooling can keep your SSD out of harm’s way in some cases, you need a dedicated SSD heatsink if your use case pushes your drive to the brink.
This article answers the questions “What is a heatsink on an SSD?” and “Do SSDs need heatsinks?” I’ll cover use cases, form factors, and SSDs that may or may not require heatsinks.
I’ll also explain how to check your SSD temperature and safe vs. concerning heat levels.
🎮 You need an SSD heatsink if you’re into heavy tasks like 3D rendering, video editing, open-world and 4K gameplay, and high-end simulations.
🌡️ Overheating triggers throttling (which reduces performance) and affects the long-term health of solid-state drives.
📈 An SSD heatsink helps to pull heat away from your drive to help it maintain its performance over longer periods and prolong its lifespan.
⚠️ SSD heatsinks are critical if your drive’s temperature exceeds 70°C.
📏 There are different types and sizes of SSD heatsinks ideal for different computer form factors.
What Is a Heatsink on an SSD?
An SSD heatsink is a cooling solution that pulls heat away from the drive’s memory chips and controller. It sits directly on top of the SSD, typically with a thin thermal pad sandwiched between to improve contact. So what does a heatsink do on an SSD?
It typically works by using a block of metal, usually aluminum or copper, with fins or ridges that increase surface area. This extra surface area lets heat disperse into the surrounding air more efficiently.
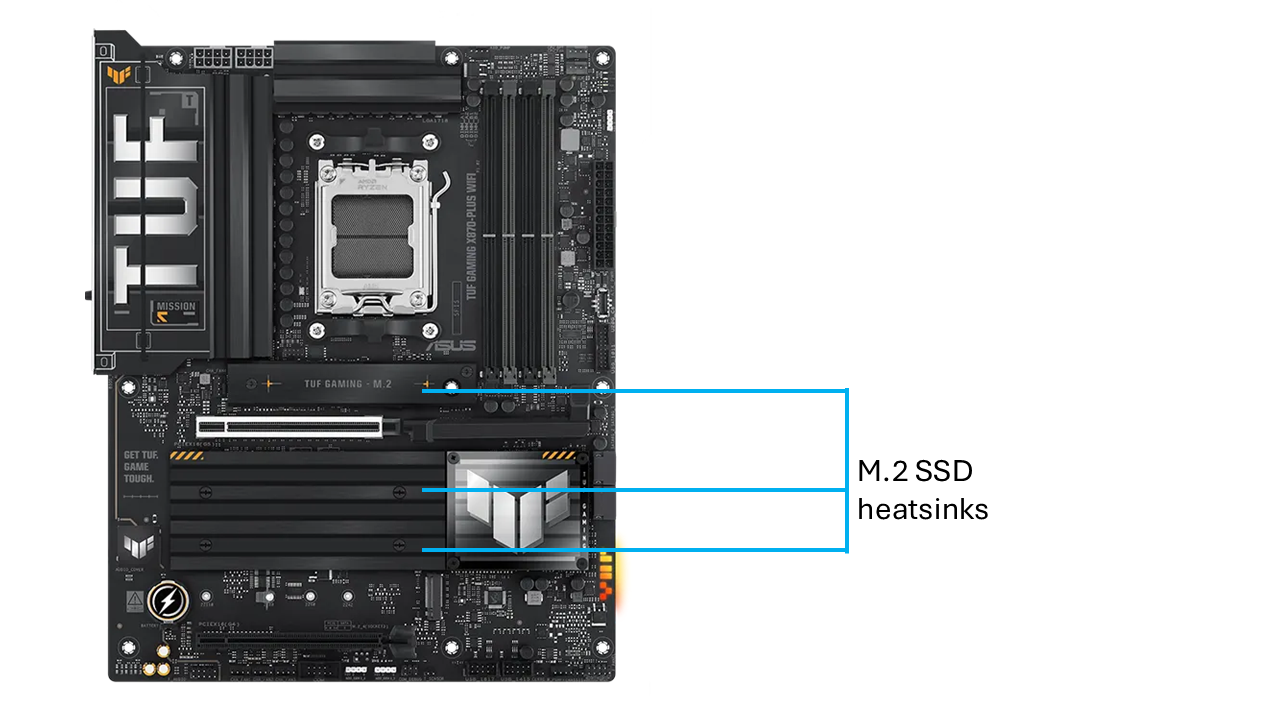
In some cases, motherboards themselves ship with integrated NVMe heatsinks.
Why Do NVMe SSDs Heat Up?
M.2 SSDs, especially NVMe drives, run hotter than traditional 2.5-inch SATA SSDs because they push data through PCIe lanes at faster speeds.
With that performance comes heat, and unlike a SATA SSD in a case-mounted bracket, an M.2 drive sits flat on the motherboard, with little airflow around it.
Here’s how an SSD works in a nutshell:
- A typical modern NVMe SSD has NAND flash memory chips, a DRAM chip, and a controller chip.
- The NAND flash memory chips store data in electrical cells.
- The DRAM chip serves as a cache, a temporary memory of sorts that tells the controller where to locate data blocks and pages faster.
- The controller is the drive’s CPU. It handles read/write commands from your operating system.
The harder each chip works, the more heat it generates. So, when you run multiple programs simultaneously, copy and move large files, render heavy 4K video files, and play demanding games, the chips will naturally run hot.
Do High Temperatures Affect SSDs?
Yes. Like any other electronic device, overheating can harm your solid-state drive. The controller, like any other CPU, cannot handle certain temperatures. The SSD’s NAND flash also requires specific operating temperature levels to maintain the SSD’s speed over a long period.
Overheating doesn’t destroy the drive outright, but it does trigger thermal throttling, a protective mechanism where the SSD’s controller slows down to keep temperatures under control. The danger here isn’t so much data loss as inconsistent performance.
Still, consider that prolonged exposure to high temperatures can affect your SSD’s health, which could potentially lead to data loss and a shorter drive lifespan.
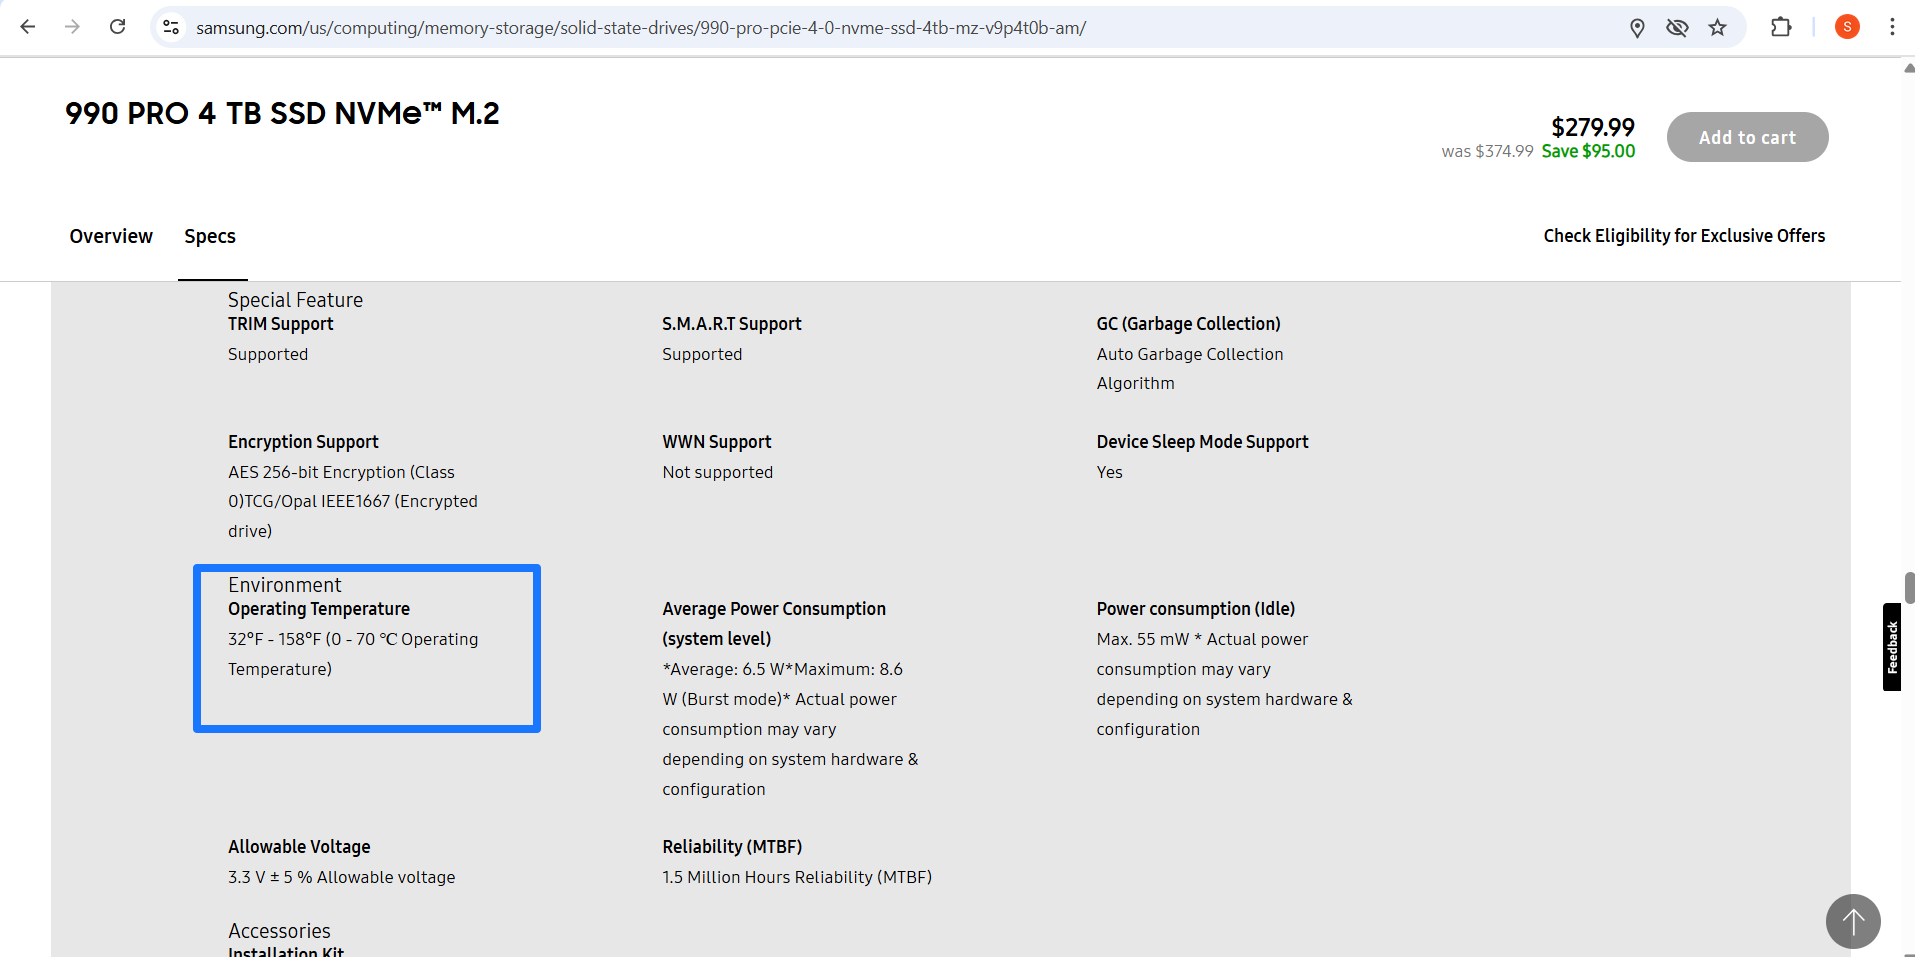
What Is a Normal SSD Temperature Range?
Most consumer SSDs are designed to operate comfortably within a temperature range of 30°C to 70°C. Light workloads, such as browsing or document editing, typically keep the drive near the lower end of that spectrum, while heavy tasks, like gaming, large file transfers, or 4K video editing, push temperatures into the 50s and 60s.
Manufacturers generally rate their SSDs with a maximum safe operating limit around 70°C. Once you cross into that territory, the controller will typically throttle performance to prevent damage. It is not catastrophic, but it is a sign that the drive is being stressed harder than it should be.
Do I Need a Heatsink for My M.2 SSD?
Yes, if you’re a heavy user. No, if you’re a light user. If you’re a gamer with long play sessions, a video editor shuffling through 4K footage, or anyone running sustained workloads on a Gen 4 or Gen 5 NVMe drive, a heatsink makes sense.
However, if you don’t regularly run operations that can stress your SSD, there’s really no point in using a heatsink. I have two SSDs on a work laptop without heatsinks, and they hover around 42°C to 47°C on regular use, which is entirely safe for any SSD. Let’s break it down in a table to give you a clearer idea:
| Use case | Heatsink needed? | Things to note |
|---|---|---|
| Mainstream PC operations (web, office apps, streaming) | No | Drives barely get warm under light loads. |
| Gaming | Maybe | Most games load quickly without issue. Consider a heatsink if the SSD is located under a hot GPU or if you frequently play open-world games and titles with lots of visual effects. |
| High-end content creation (video editing, 3D rendering, photo libraries) | Yes | These use cases involve long writes and sustained input and output operations that push temps higher. |
| Workstation activities (CAD, scientific computing, large datasets) | Yes | Heavy continuous loads need active cooling. |
The following is a test chart from Tech Illiterate, showing heat levels across various use cases. It also illustrates temperature readings when the drive is plugged in without a heatsink (no HS) vs. different heatsink sizes:

The highest temperature range on the chart represents the SSD without a heatsink, while the lowest indicates the SSD with the biggest heatsink. Overall, SSDs run cooler with heatsinks.
Signs and Other Reasons You Need a Heatsink for Your SSD
Your use case is not the only reason to go for an SSD heatsink. Here are other signs and reasons you may need one:
➡️ Performance drop-offs under load
One of the most obvious red flags is when your SSD starts strong but slows down dramatically during a large file transfer or game installation. That sudden dip usually means the drive is throttling itself to maintain heat control.
So, if you notice Windows’ transfer rate meter dip whenever you copy or move large files, you should start planning for a heatsink. General slow computer performances in some cases also point to an overheating SSD.
➡️ Temperature readings that run hot
Modern drives include onboard sensors, and tools like CrystalDiskInfo, Auslogics SSD Optimizer, and HWInfo make it easy to keep tabs. If your SSD consistently creeps or blows past 70°C, that is a clear indicator that it is struggling with heat.
You can launch any of these programs whenever you’re about to run heavy operations to monitor your SSD’s temperature.
➡️ Boot and game load times take too long
One of the major advantages you’ll always notice with SSDs over HDDs is faster launch times when starting apps and booting Windows. If you start losing that advantage, high temperatures could be holding things back.
➡️ You use a Gen 5 or high-speed Gen 4 SSD
High-end Gen 4 SSDs and Gen 5 drives push data beyond 7.45 GB/s. This feat takes a lot of energy, and heat is the natural byproduct. So, whether you use your drive for light workloads or heavy activities, your high-end drive will always run fast. That means you more than likely need a heatsink to put out all the potential heat.
Also read: SSD Speed Test: How to Test Your SSD’s Read/Write Speed
➡️ You use a small form factor
There are SSD heatsinks for almost every computer build. Compact desktops and laptops with poor airflow can trap heat and usually have inadequate cooling systems for every component. An SSD heatsink in this can help reduce your drive’s exposure to high temperatures.
How Can I Choose the Right NVMe SSD Heatsink?
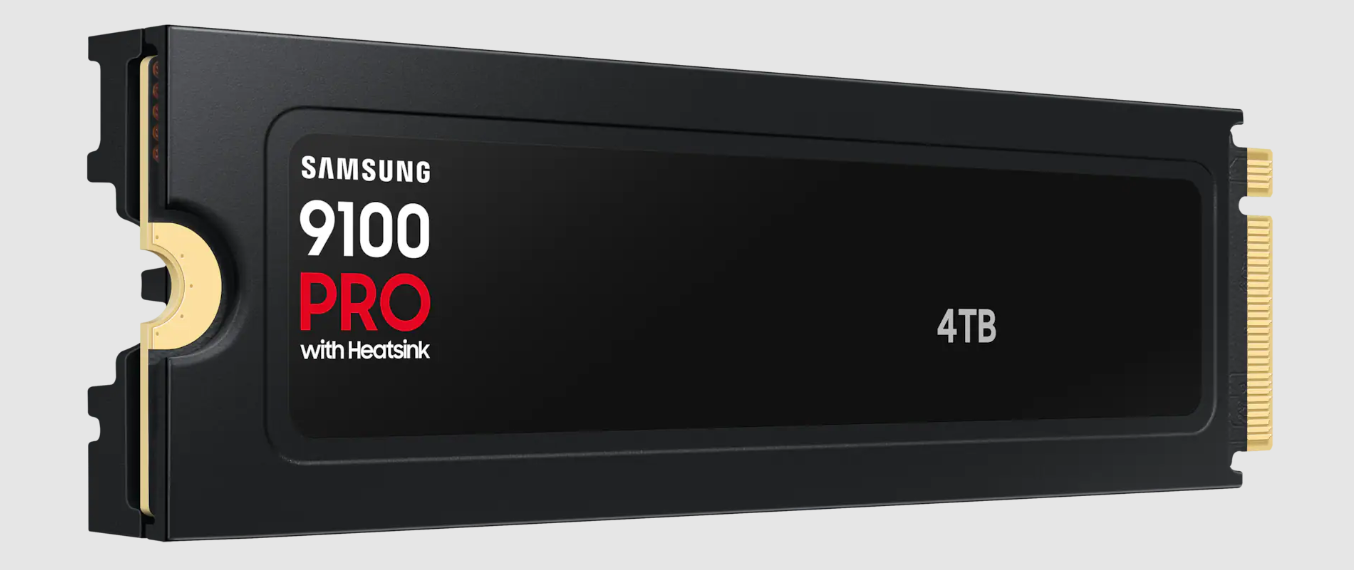
You can either purchase a drive that already ships with a heatsink or opt for an aftermarket accessory that fits your existing SSD. The right choice in either situation will depend on the type of SSD you have, your computer’s form factor, your system’s cooling unit’s capabilities, and SSD workload, in that order. First, I’ll categorize the different types of heatsinks available on the market:

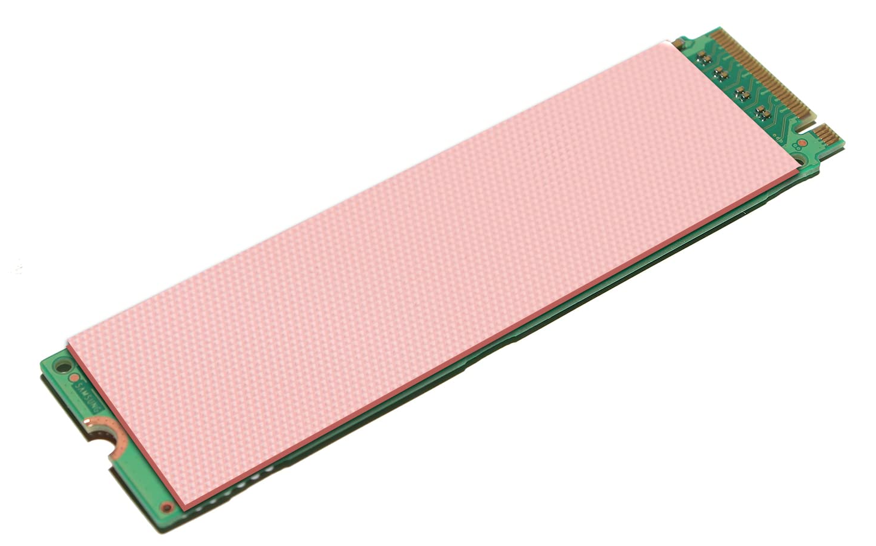
Ultra-low profile, often just a flat copper/aluminum strip or paper-like heat pad with an adhesive that helps dissipate excess heat. Great for very small form factors, such as laptops.
These are the most common types of heatsinks for smaller form factors. They usually feature aluminum fins and can be bundled with motherboards or shipped with SSDs. There are also aftermarket options.
Dual-plate or heatpipe designs for desktops. They cover both the front and back of the SSD.
These are bulky accessories with small fans or liquid loops (with radiators), mostly for extreme Gen 4/Gen 5 workloads in tower desktops with clearance. If you use a desktop PC with ample clearance, consider heatsinks with elaborate metal frames and radiators.
If you must use a heatsink for your laptop SSD due to your use case, I recommend going for an aftermarket solution that works with smaller form factors. These can be in the form of a heat sheet or a slim metallic shield that lines up with your SSD. In some cases, laptop OEMs paper over their SSDs with paper or metallic heatsinks for overheating protection.
| PC form factor | Heatsink type | Considerations |
|---|---|---|
| Full-tower desktop | Can fit any kind of heatsink | The bigger the heatsink, the better its heat-dissipation capabilities; so, the heavier your use case, the bulkier your SSD heatsink. |
| Mid-tower desktop | Can also fit every type of heatsink, depending on clearance | The beefiest heatsink options with radiators and fans may not fit if you have large internal components and cooling systems. |
| Mini-ITX/small form factor PCs | Thin and standard (low-profile) | I recommend the standard low-profile heatsink with a copper plate.
If you have clearance, you can go for slightly beefier options with top and bottom plates. |
| Bulky gaming laptops | Thin thermal pads with adhesives or low-profile thermal plates | Check your computer’s internals in its manual, OEM website, or YouTube to confirm what fits before purchasing your heatsink.
I recommend the thermal plate if it fits. |
| Slim gaming laptops | Thin thermal pads with adhesives | Use only thin thermal pads, as these systems lack the clearance required for other types of heatsinks. |
| Ultrathin productivity laptops | None | These systems generally do not have the space to allow thermal pads or heatsinks.
In most cases, drives are covered with thin films for heat dissipation. |
How to Install a Heatsink on an SSD
Installing a heatsink on an internal SSD is usually simple, but the process depends on the type of heatsink you’ve chosen. Here are the common approaches and the steps to follow.
![IMG]() Clip-on heatsinks
Clip-on heatsinks

Clip-on heatsinks come in various forms. Some are heat plates that you can just align on your SSD and fasten to your motherboard, as illustrated in this image from Amazon.
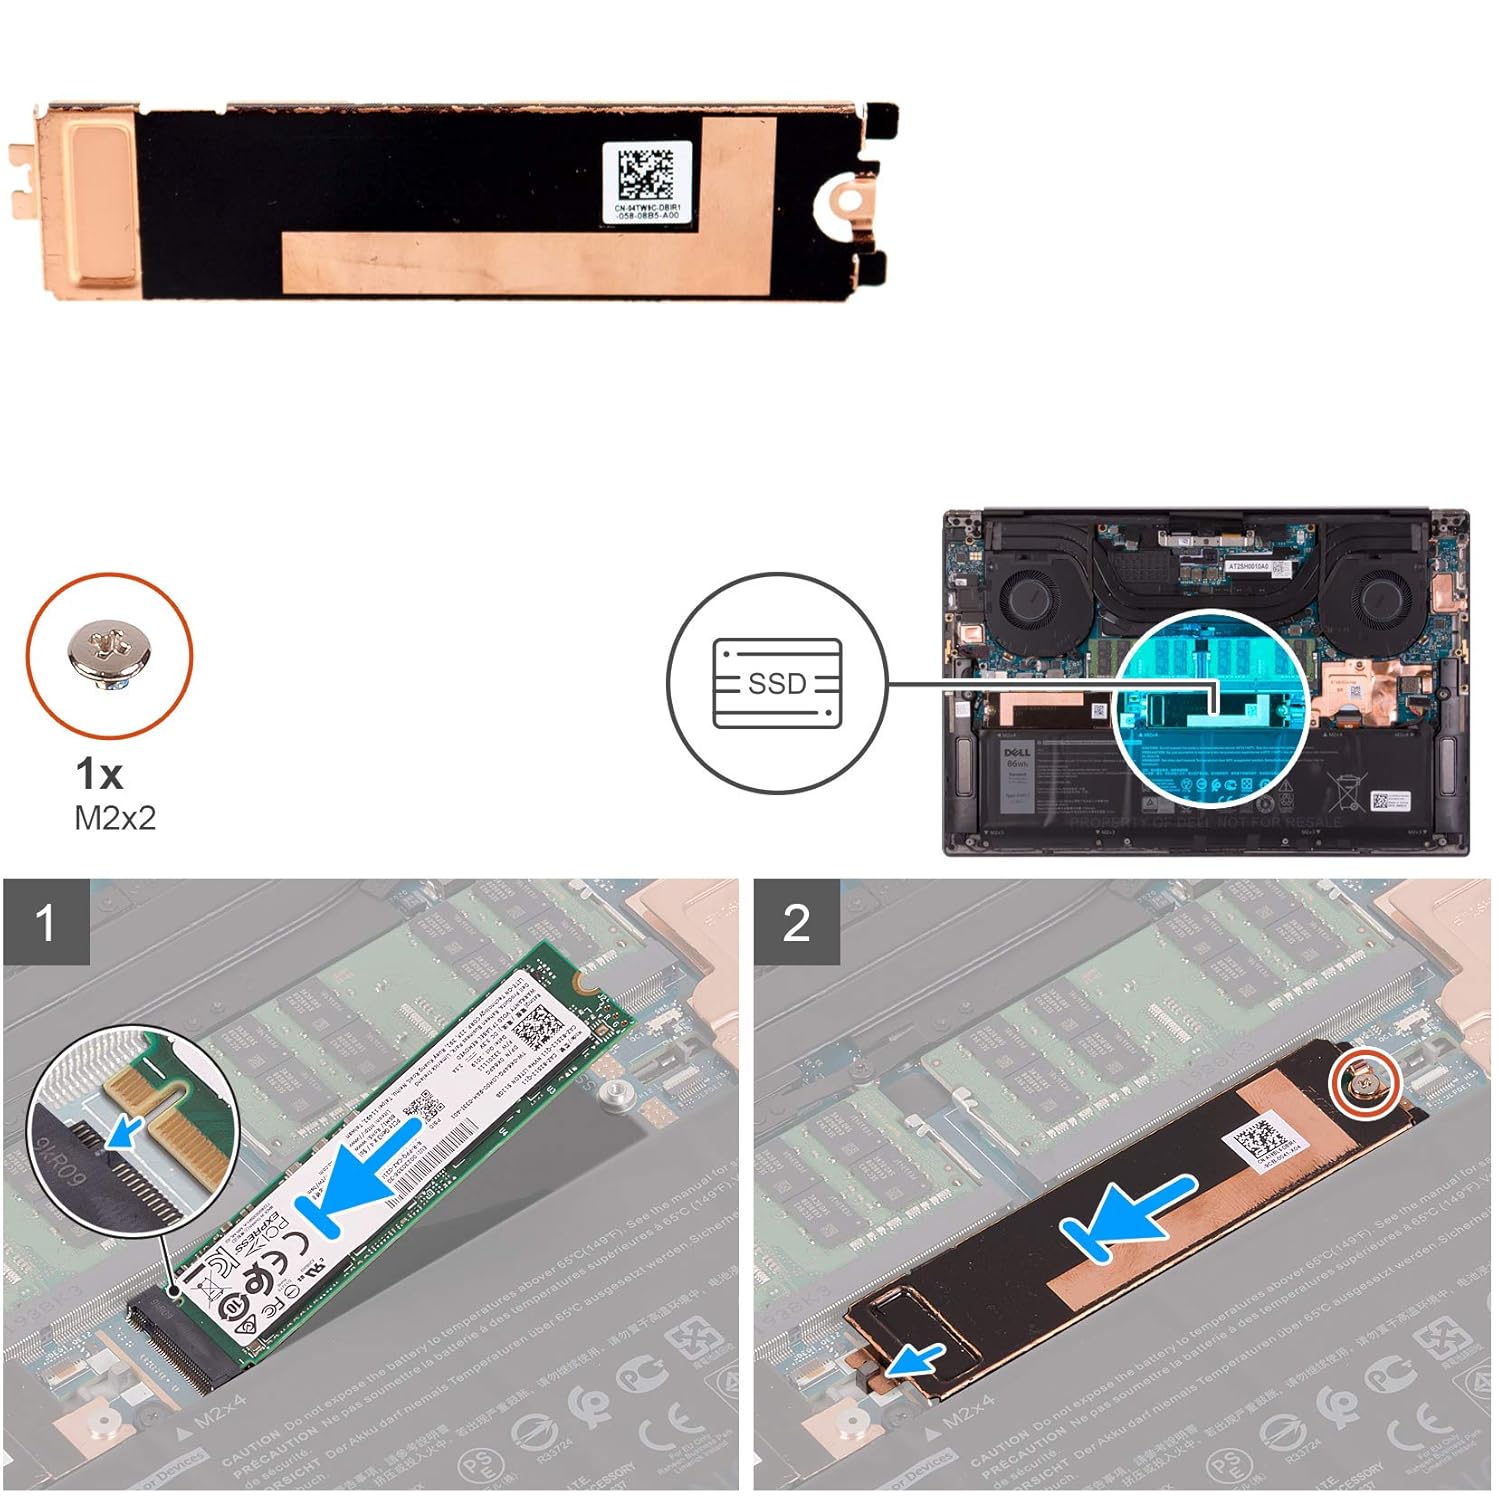
Other clip-on heatsinks are designed to snap directly onto the SSD with spring clips or brackets.
In some cases, one screw works for both the heatsink and SSD as you fasten the drive to the motherboard.
Here’s how to install them:
- Power down the PC and remove the side panel.
- Remove the SSD screw or clip attachment and disconnect it from the motherboard.
- Most of these heatsinks (copper or aluminum) come with silicon heat pads. Remove the protective films from either side.
- In some cases, you must first align the silicon pads before attaching the thermal copper plates.
- Make sure the plates align with the drive’s screw hole.
- Now, connect the drive and heatsink to the motherboard slot.
- Reassemble the case and power the system back on.
Here’s a step-by-step video guide from BuyOrBuild:
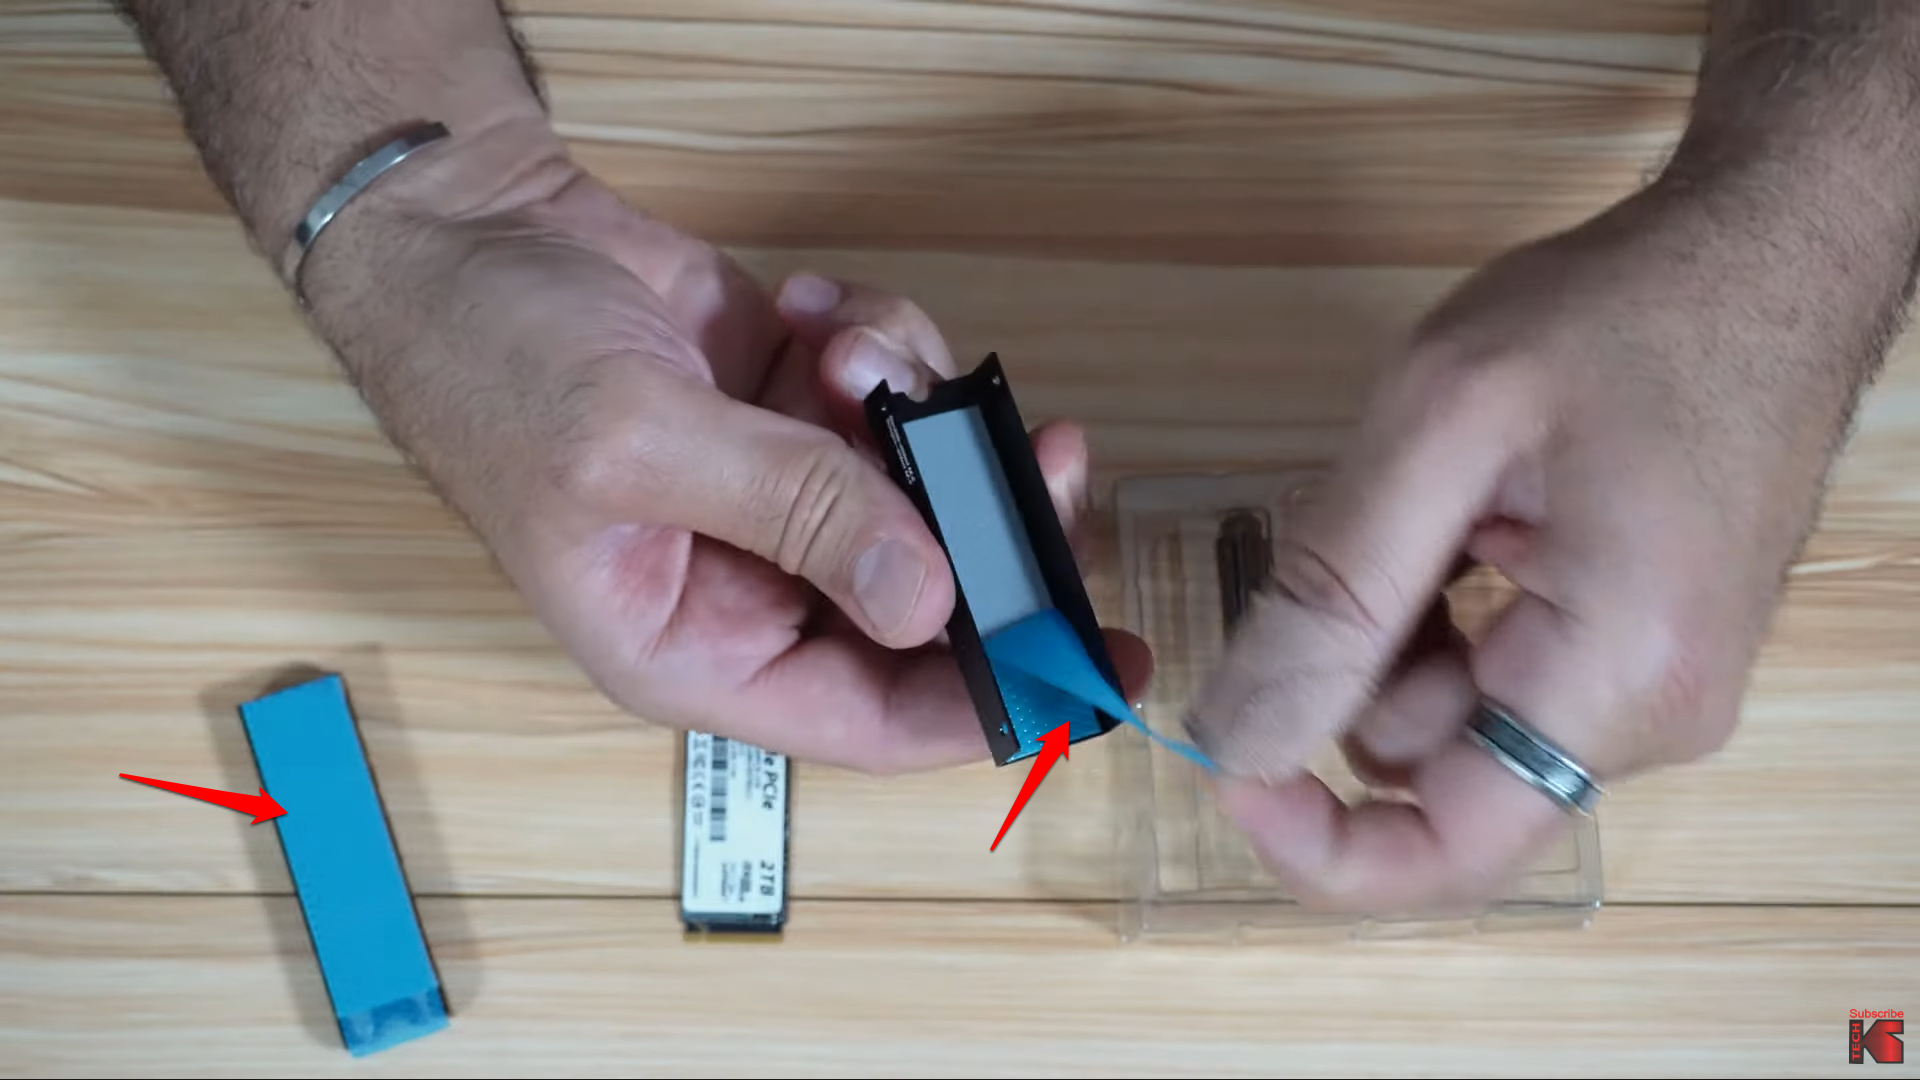
![IMG]() Adhesive or thermal pads
Adhesive or thermal pads
These are usually low-profile silicon heat pads with adhesive strips.
Follow these steps:
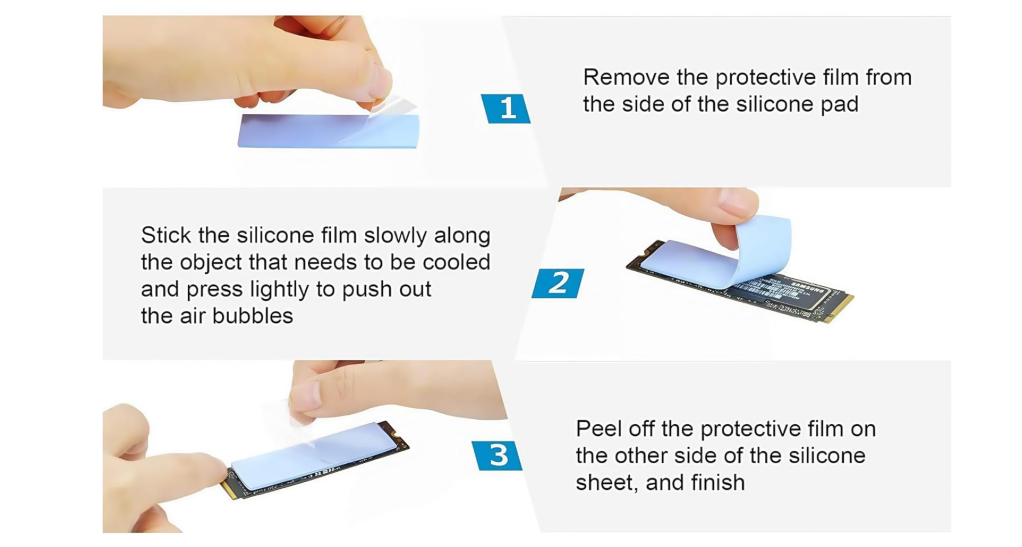
- Shut down the PC and access the SSD.
- Remove the protective film from the thermal pad or adhesive.
- Carefully place the heat pad onto the SSD, pressing evenly so it bonds to the surface.
- Insert the drive into the motherboard and screw it in.
- Let it sit for a few minutes before powering the PC back on.
![IMG]() Motherboard-integrated heatsinks
Motherboard-integrated heatsinks
Many modern motherboards include their own M.2 heatsinks with built-in thermal pads. If you’re about to install one in such a motherboard, you’re likely initializing your SSD for the first time.
Here’s how to use them for your NVMe SSDs:
- Open the heatsink cover on the motherboard (usually held down by one or two screws).
- Insert the SSD into the M.2 slot and secure it with the mounting screw.
- Remove the plastic film from the thermal pad inside the heatsink cover.
- Reattach the cover so that the pad sits firmly on the SSD.
- Tighten the screws and close the case. In most cases, the same screw fastens the heatsink and the SSD in place.
![IMG]() Beefy aftermarket enclosure-style heatsinks
Beefy aftermarket enclosure-style heatsinks
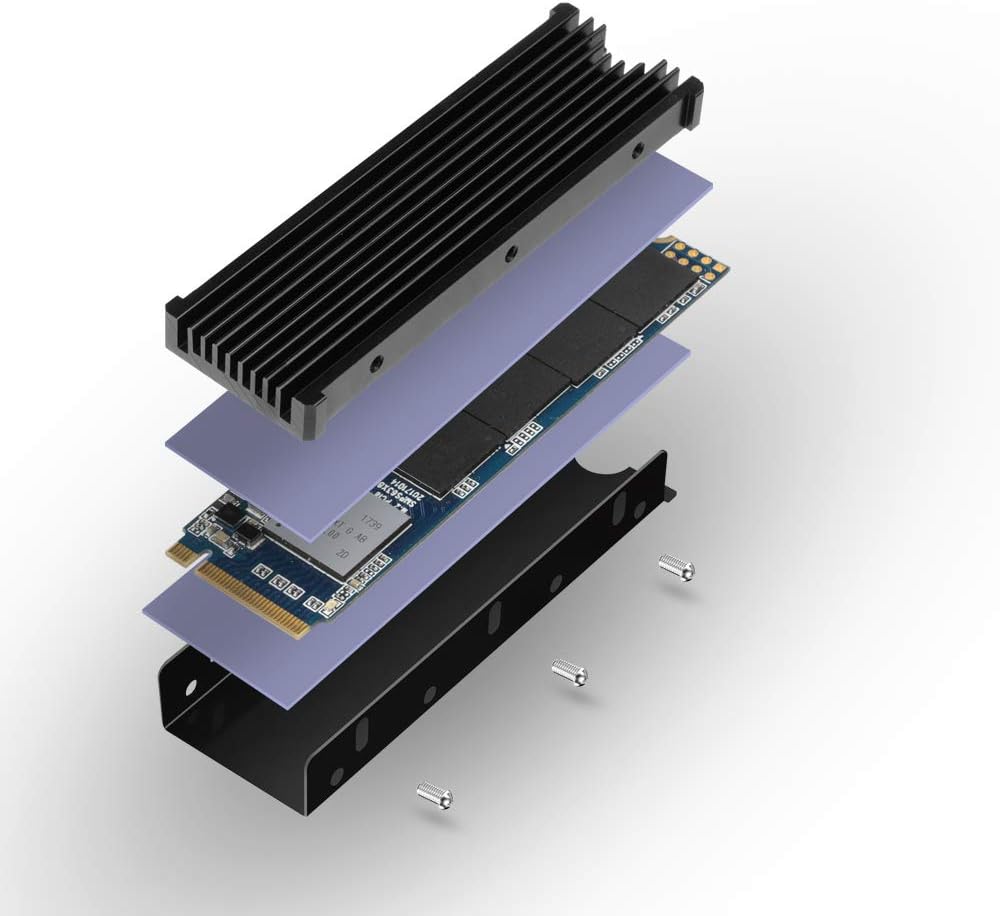
Some aftermarket heatsinks fully enclose the SSD with a combination of aluminum fins and screws.
- Disassemble the enclosure according to the manufacturer’s instructions. In most cases, you’ll have to remove the protective films from the top and bottom parts of the SSD enclosure.
- Place the SSD inside, aligning it with the thermal pads.
- Screw or clip the top and bottom parts together, ensuring firm contact. You may need to screw the sides of the enclosures, depending on the brand.
- Install the SSD back into the motherboard slot.
- Secure the M.2 screw, then reassemble your PC case and turn on your computer.
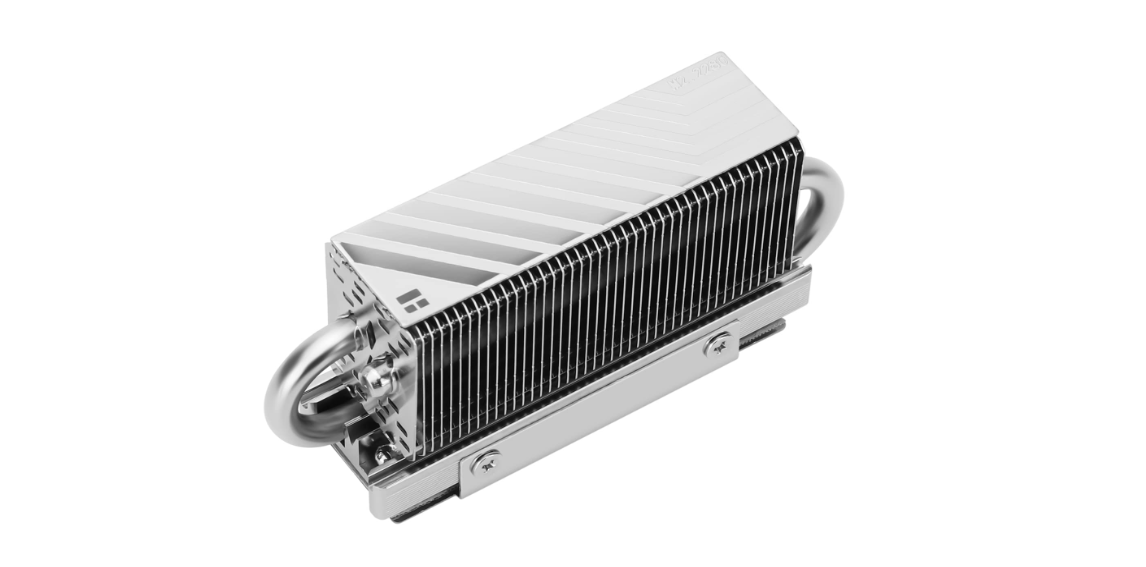
![IMG]() Advanced heatsinks with heat pipes
Advanced heatsinks with heat pipes
Some heatsinks come with the full package: heat pipes, small fans, and, in some cases, radiators. These heatsinks are only ideal for desktop PCs with enough clearance.
Installation is also slightly different from regular heatsinks. That’s because you have to connect the heatsink to a fan header on your motherboard.
Here’s a detailed video guide from Knowledge Sharing Tech.
- First, disassemble the heatsink by removing the screws on both sides. Remove the bottom plate after that.
- Remove the protective films on the top and bottom halves of the heatsink.
- Now, to place the top part on the drive, look at the fan’s direction and ensure it is not positioned next to a heat source, such as your GPU.
- Now place the top half of the heatsink on your SSD’s top side, and then attach the bottom half. Make sure the screw openings are aligned.
- Now screw the backplate to the main heatsink housing with the screws by the side.
- Install the SSD into your motherboard.
Benefits of Using SSD Heatsinks
Heatsinks don’t just prevent the doom of failing SSDs and other dangers of overheating. They also provide the following advantages.
➡️ Prevent thermal throttling
Heatsinks are among the effective SSD optimization techniques for high-end users.
They keep SSDs at lower temperatures so that drives can sustain top speeds and high performance during large file transfers, gaming, or video editing. Without the heatsink, speeds may start fast but drop sharply as the drive heats up. Cooling maintains a stable throughput.
➡️ Extend drive lifespan
Heat accelerates wear on NAND flash and the controller. Lower temperatures reduce stress on these components and prolong their life.
➡️ Enhance general system stability
Using a stable and cool SSD reduces the risks of data errors, crashes, or freezes caused by overheating during heavy workloads.
➡️ Improve boot performance
Your SSD will continue to load Windows as fast as it should without sporadic delays, since it doesn’t have to deal with temperature spikes.
Are SSD Heatsinks Enough to Prevent Overheating? Other SSD Cooling Tricks
An SSD with a heatsink will run cooler than one without the accessory. However, there are other things you can do to boost your drive’s cooling, whether you use a heatsink or not.
![IMG]() Ensure proper airflow
Ensure proper airflow

Your SSD needs proper airflow within your PC’s case and its surrounding areas to ensure any heat it produces is dispersed. Therefore, ensure that your internal cooling system, system components, cabling, and environment facilitate optimal airflow. Avoid backing your PC case against tight areas, keep your vents dust-free, and use your laptop on flat surfaces.
![IMG]() Update SSD firmware
Update SSD firmware

SSD firmware updates define how drives handle heavy workloads and power consumption when idle. You can use the tool provided by your SSD’s manufacturer to keep the drive’s firmware up to date. Examples include Samsung Magician and Crucial Storage Executive.
![IMG]() Reduce the SSD’s workload
Reduce the SSD’s workload

This practice involves ditching as many unnecessary write operations as you can. From disabling the Windows Search indexing and stopping background applications to installing games and saving large files to a secondary drive, there are many ways you can spare your SSD the stress of writing too much data.
![IMG]() Use power management settings
Use power management settings

Windows allows you to tweak your power modes so that your drive enters a lower power state when it is idle. This setting prevents the drive from being in high-power mode continuously.
![IMG]() Use optimization software programs
Use optimization software programs

Tools like Auslogics SSD Optimizer and SSD Fresh can help you apply settings and algorithms that automatically reduce write amplification to keep the heat down long-term.
![IMG]() Don’t defragment your SSD
Don’t defragment your SSD

Defragmentation is a process designed to rearrange files on HDD sectors to improve performance. It is not recommended to defragment your SSD because the operation involves heavy, unnecessary writes that can increase SSD heat.
Final Verdict: Do SSDs Need Heatsinks?
It still depends. I favor using an NVMe heatsink unless you use your computer for very light tasks and if your PC is an ultrathin notebook with soldered storage.
Even for moderate tasks, I highly recommend using a heatsink given the possible damage and data retention risks posed by high temperatures. If you’re convinced you need an SSD heatsink, choose one that suits your use case and computer’s form factor. Remember: the bigger the heatsink, the better its cooling capabilities.
But skinnier accessories can make a difference if your computer’s form factor does not allow chunky heatsinks. At the same time, don’t forget to engage in other overheating-preventing practices, such as ensuring your entire computer remains cool, reducing your SSD’s workload, and using a tool that automatically optimizes your drive.