
- Mounting ISO Files on Windows 10
- Troubleshooting Common “Mount ISO Windows 10” Errors
- Method 1: Updating Your Windows And Device Drivers
- Method 2: Make Windows Explorer the Default Program for Opening ISO Files in Windows 10
- Method 3: Unmounting All Drives
- Method 4: Change the Drive Letter of a Removable or Virtual Drive
- Method 5: Investigate Third-party Software
- Method 6: Use System Restore
- Conclusion
- FAQ
One of the great features of later versions of the Windows operating system is that they can mount ISO files without the need for a third-party application. This is quite useful, especially when you’re dealing with large software downloads. These days, a lot of files are available for download in the .iso format. It is basically the easier option over burning the files to a disk. However, several users have reported issues when they tried mounting ISO files. If you’re one of the people who encountered such errors and you want to know how to fix ISO issues on Windows 10, then you’ve come to the right place. We will show you the steps to take to ensure you don’t encounter errors when mounting your ISO files.
Mounting ISO Files on Windows 10
When you mount an ISO file, Windows 10 treats it as a virtual drive. You’ll see it as a DVD ROM on This PC, allowing you to view and use its files and burn them to a physical DVD.
Microsoft made sure mounting ISO files on Windows 10 wouldn’t be a technical process, although there are advanced methods. Now, let’s show you the basic and geeky techniques of mounting ISO files.
Using the Windows Explorer
There are different ways to mount the file within Windows’ native File Explorer. You can do the following after opening the File Explorer window and navigating to the ISO file:
- Right-click the file and select Mount.
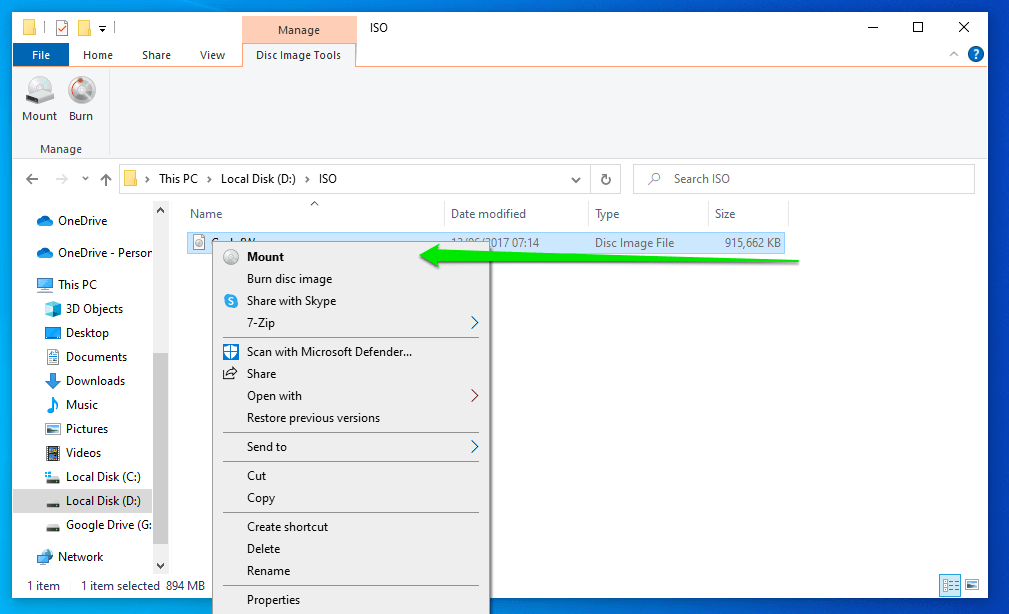
- Click the file once, go to the ribbon menu of the File Explorer window, select Disc Image Tools under Manage, and then click Mount.

- Double-click the ISO file.
Note that the last method may not work if an ISO mounting software application is currently the default program for opening ISO files.
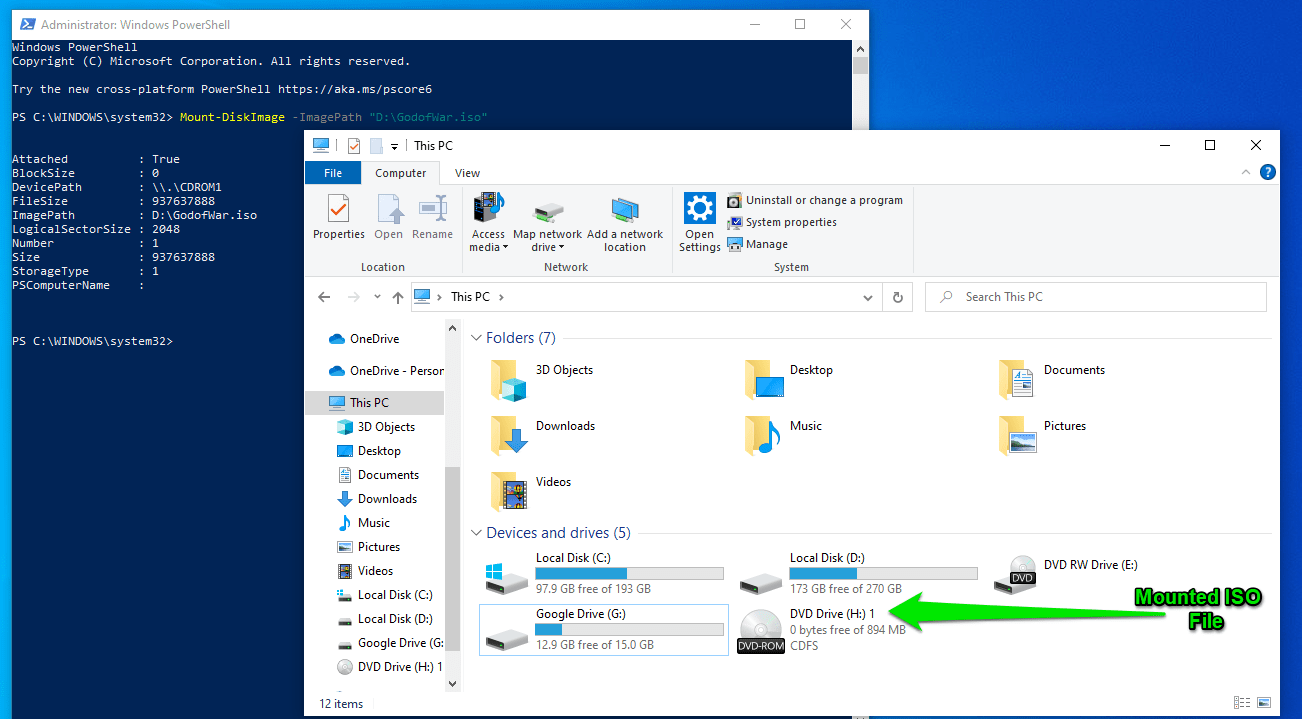
Using PowerShell
You can also enter the Windows PowerShell mount ISO command line to create the virtual drive. Follow these steps:
- Right-click your Start button, or press
Win+X, and click Windows PowerShell (Admin) in the Power User menu.

- Click Yes in the User Account Control prompt.
- Now, type this command and hit the
Enterkey (follow explanations):
Mount-DiskImage -ImagePath "ISO/FILE/LOCATION"
- Replace
ISO/FILE/LOCATIONwith the path to the file you want to mount. So, the command should look like this when we try to mount a God of War ISO file:
Mount-DiskImage -ImagePath "D:\GodofWar.iso"
- After hitting
Enter, the command may take a few seconds to a minute to execute, so do not panic.

- Once you use the command to successfully mount the ISO file, Windows 10 will display the new virtual DVD drive in This PC.
That’s how to mount your ISO file!
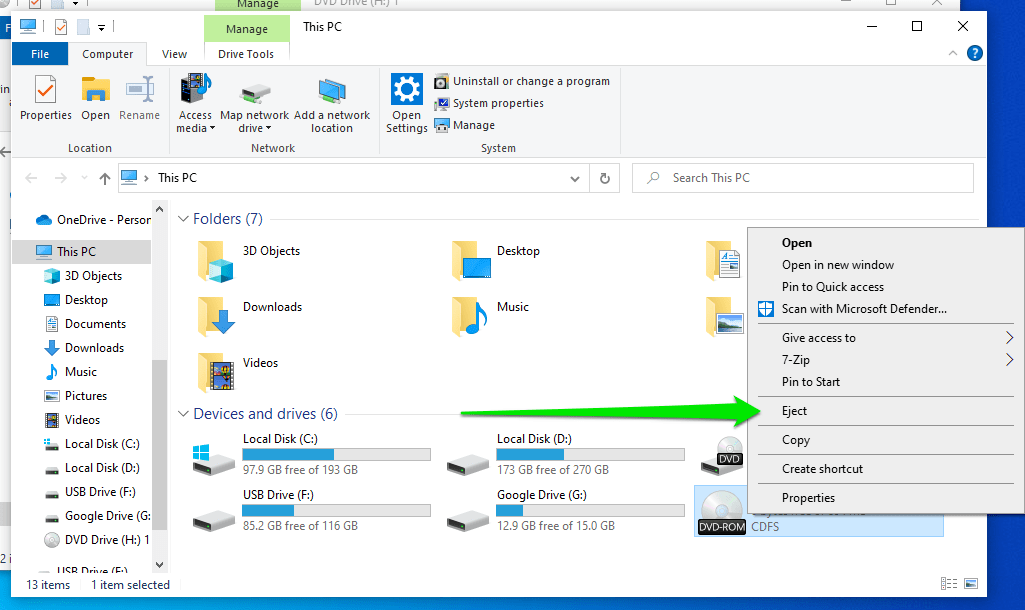
If you want to unmount it, go to This PC, right-click the virtual DVD Drive, and select Eject from the context menu.
Troubleshooting Common “Mount ISO Windows 10” Errors
If you’re encountering any problem, such as “Couldn’t mount the file,” the steps that follow will help you get rid of it.
Method 1: Updating Your Windows And Device Drivers
Updating your operating system and your computer’s drivers is one of the best ways to ensure you can mount ISO files without problems.
Windows 10 updates are designed to enhance your user experience, improve your system’s functions, and fix bugs that occur from time to time. The issue here might be related to a glitch that an update might fix.
For example, this Windows user posted a message on a Microsoft Forums thread narrating how they couldn’t mount ISO files after a major Windows 10 update (which they performed after mounting the installation ISO).
As it turned out, installing another update got rid of the problem for good.
Follow these steps to update your OS and drivers using the Windows Update Client:
- Punch the
Windows keyto open the Start menu. - Type
updateand click Check for Updates.
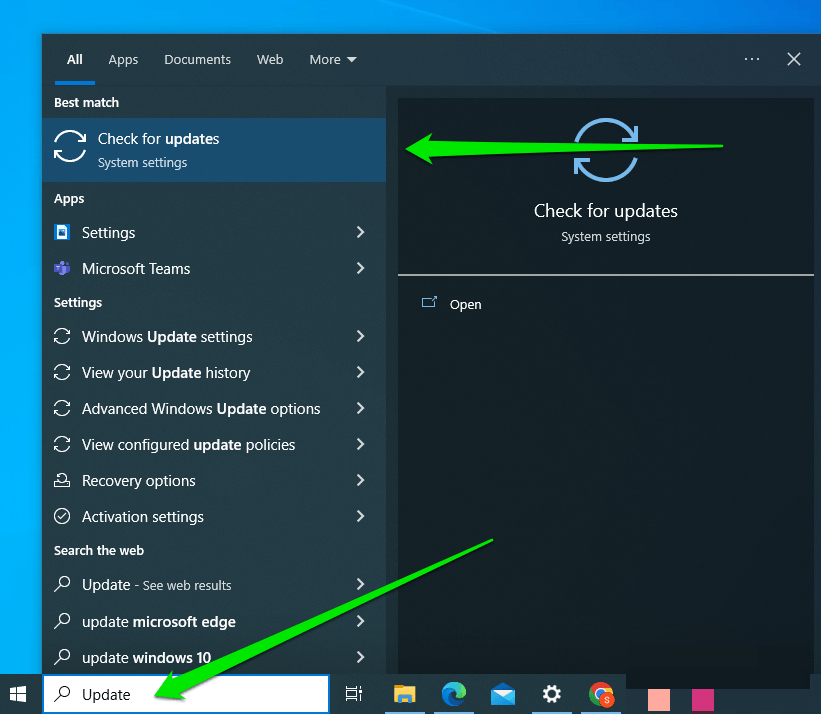
- The Windows Update Client will now open and begin to check for available updates.
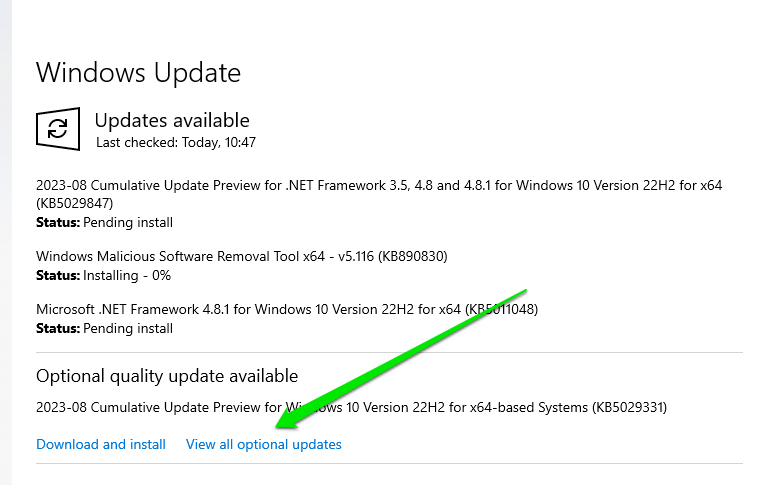
- Allow it to download the updates it finds and restart your PC when required.
- Next, go to View all Optional Updates, expand the Driver Updates section, and install available driver updates.
For instance, if you manually update your drivers, you’d have to spend a significant amount of time searching for compatible and updated versions on the manufacturer’s website.
On the other hand, when you use Auslogics Driver Updater, you only have to click a button, and you can update all your drivers to their latest manufacturer-recommended versions.
You do not have to worry about installing incorrect drivers because this reliable tool can automatically recognize your system! Once the process is complete, you can now mount ISO files from a DVD or CD.
What’s more, you will notice a significant improvement in your computer’s speed and performance.
Method 2: Make Windows Explorer the Default Program for Opening ISO Files in Windows 10
As we’ve mentioned, Windows 10 allows users to open ISO or Image (IMG) files without the help of a third-party application.
In some cases, a bug from a recent update can affect file association features on a Windows operating system. It is also possible that your system is having trouble recognizing ISO files.
Consequently, it does not automatically set a default application for mounting or accessing the files. You can make sure Windows’ File Explorer is the default application for mounting ISO files before you start. Follow these steps:
- Go to the ISO file you want to open.
- Right-click the file, then select Open With.
- Another menu will show up. Select Windows Explorer.

This process allows you to mount the file by double-clicking it if all goes well.
Method 3: Unmounting All Drives
Please unmount any ISO you may have mounted on a virtual drive. Because of the auto-replace function, you might be prevented from mounting the new ISO file over the existing one.
Follow the instructions below:
- On your keyboard, press
Windows Key+E. This should open File Explorer. - Go to the left bar menu and click This PC.
- Right-click a virtual drive, then click Eject. Do this for every virtual drive available on your computer.
- Restart your computer.
- Try mounting the ISO file on any available slot.
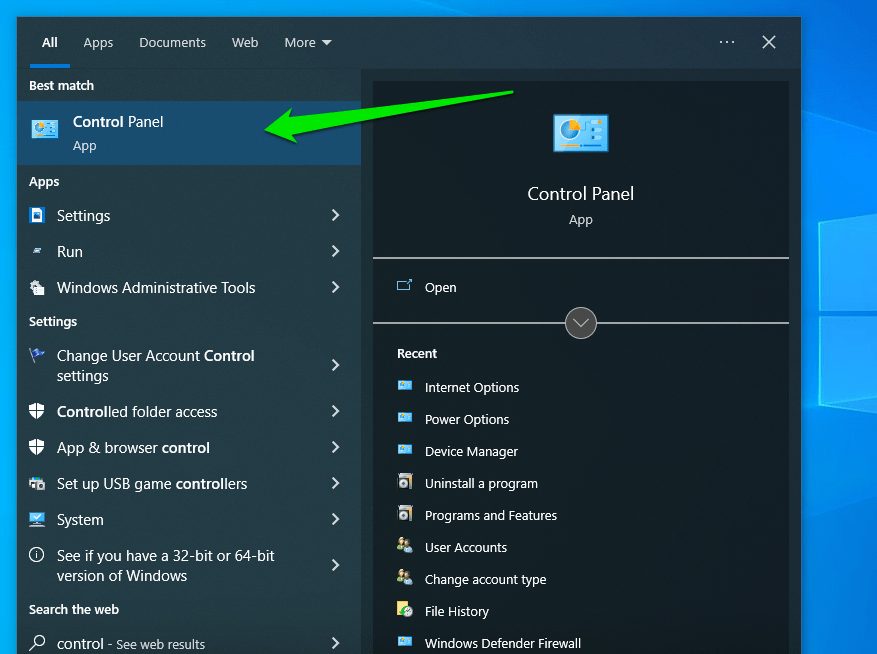
- Click Uninstall a Program under Programs after the Control Panel window opens.

- Now, search for the unwanted ISO application, click it, and select Uninstall at the top of the window.
- Follow the subsequent prompts to complete removing the program.
If you’ve already uninstalled the third-party virtual drive program and the error persists, it is possible that its entries are still in the registry. You can resolve this problem by cleaning the registry and removing entries related to the ISO file association.
It is worth noting that the registry is a sensitive database. Just misplacing a comma can prevent you from properly booting your computer! So, before you decide to clean your registry, you have to be certain that you can perform the changes correctly. Here are the steps you should follow:
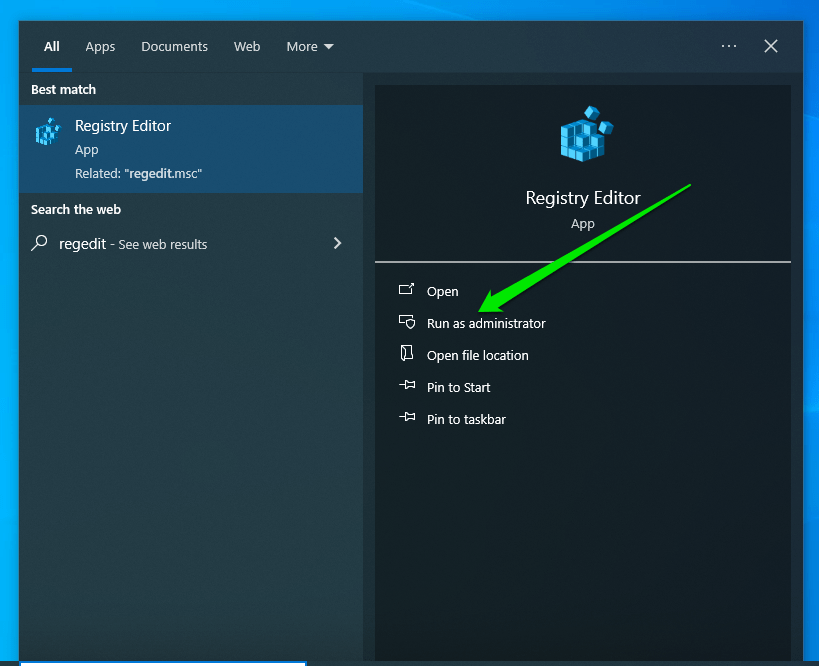
- Click the Search icon.
- Type
regedit. - Select Run as Administrator on the right side.
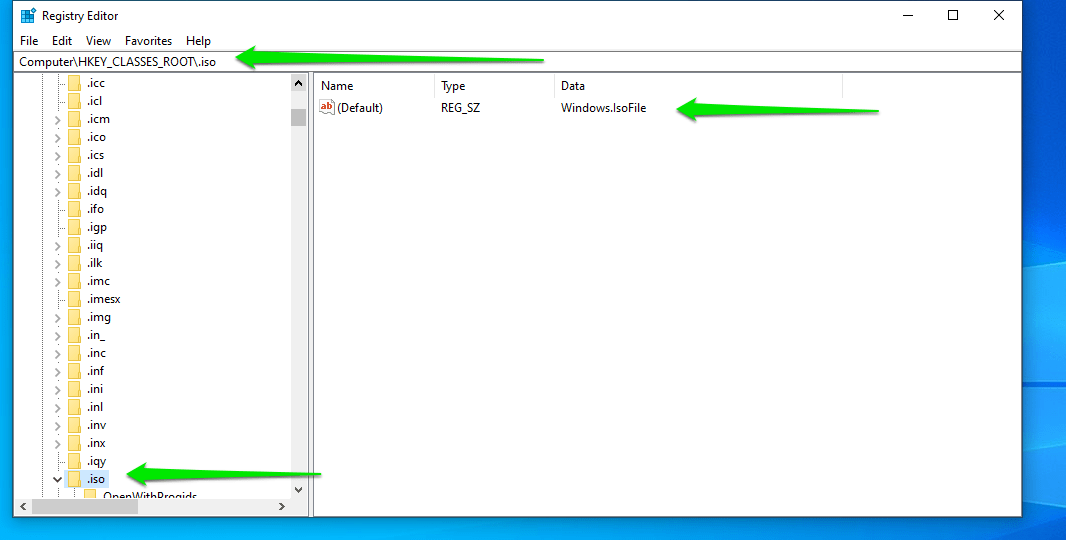
- Navigate to the following path: Computer\HKEY_CLASSES_ROOT\.iso.
- Create a backup of your registry.
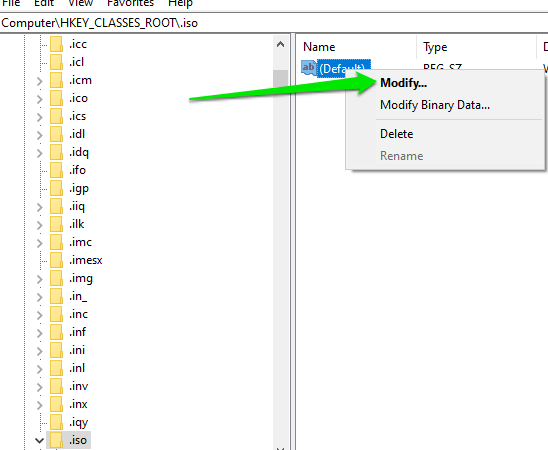
- Check if a third-party ISO tool is still associated with your ISO extension. If so, right-click the Default entry and click Modify.
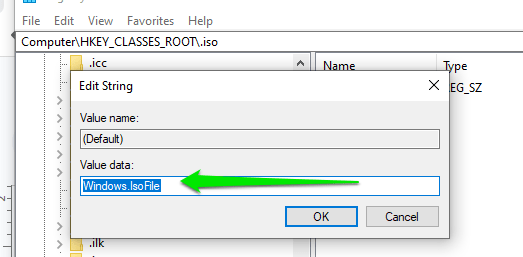
- Replace the entry under Value Data with
Windows.IsoFile, then click OK.
- Restart your computer and check if this resolves the issue.
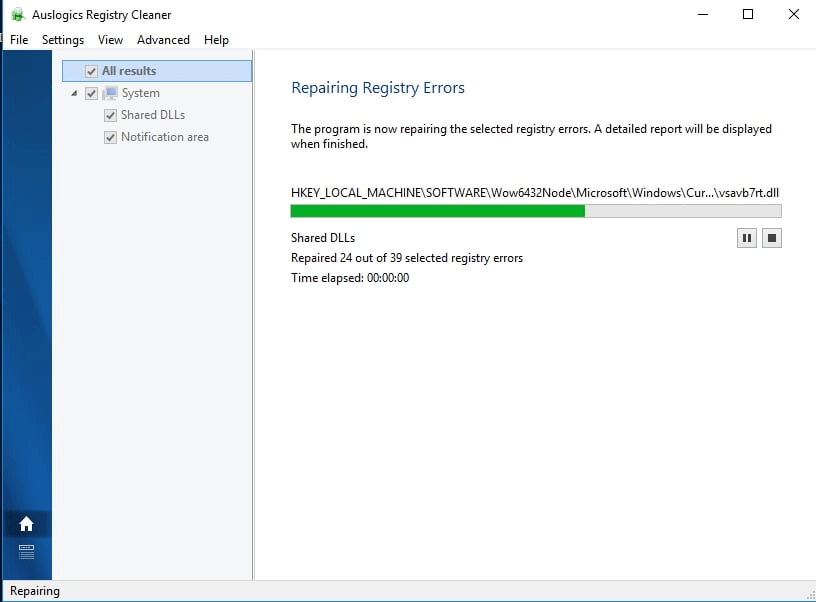
Learning how to fix ISO issues on Windows 10 is easier when you opt to use Auslogics Registry Cleaner
.
This tool automatically scans corrupted, duplicate, and outdated registry entries. With a click of a button, you can remove old ISO-related entries and resolve the issue. The best part is this tool is absolutely free!
Method 4: Change the Drive Letter of a Removable or Virtual Drive
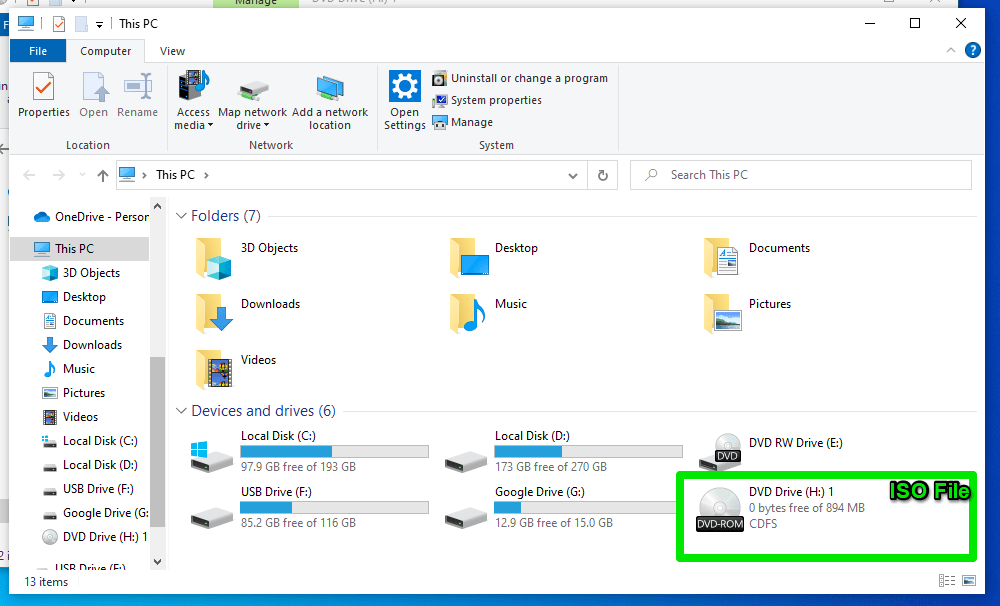
How your computer assigns drive letters may be the problem. If you check and see that the ISO shows up in This PC, but you still see the error, take a closer look at its drive letter. The error tends to occur when its driver letter serially follows that of another drive. Let’s say you have five drives: C, D, E, F, G, and the ISO is H. This arrangement could be the likely culprit.
You can resolve the matter by breaking up the serial pattern. To do that, change the drive letter of a virtual or removable media. Follow these steps:
- Connect the removable media, such as a USB flash drive or external hard drive, to your computer (if it isn’t already connected).
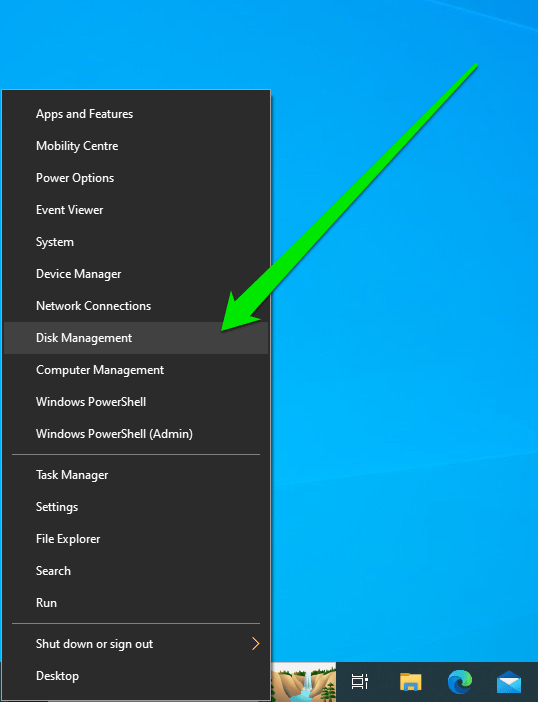
- Right-click the Start button (or press
Win+X) and select Disk Management from the Power User menu.
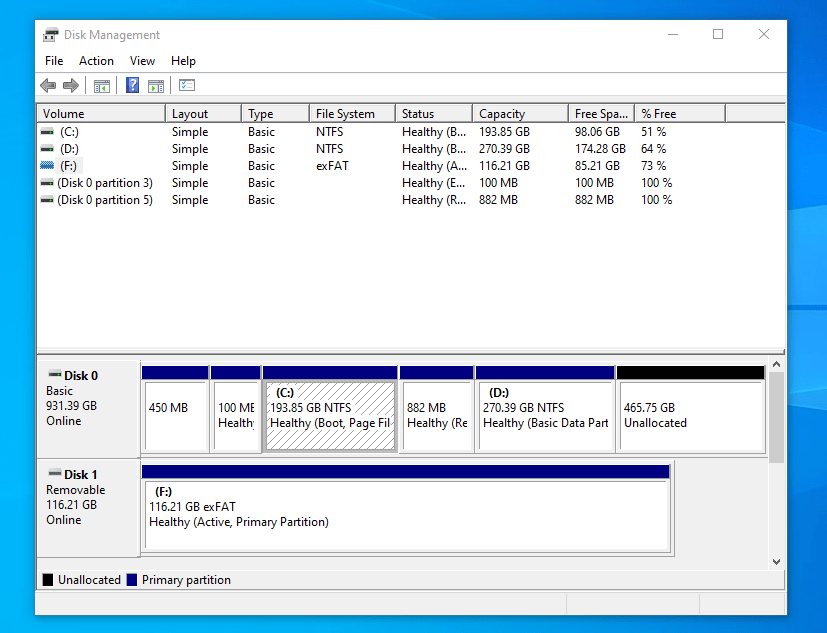
- After the Disk Management window opens, you will see a list of every drive connected to your PC, including the removable media.
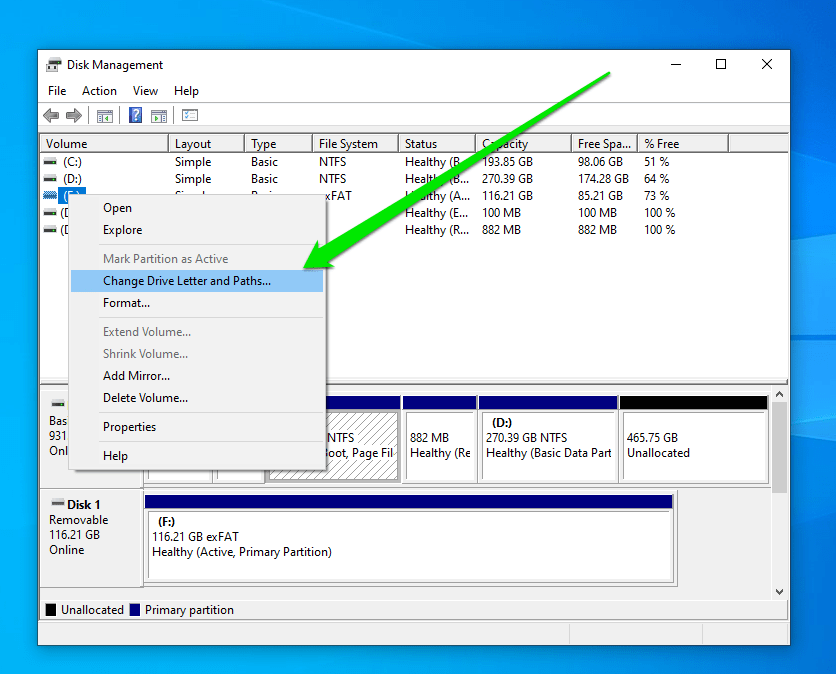
- Right-click on the partition or volume of the removable media whose drive letter you want to change.
- Click Change Drive Letter and Paths when the context menu opens.
- Click Change in the Next dialog window.
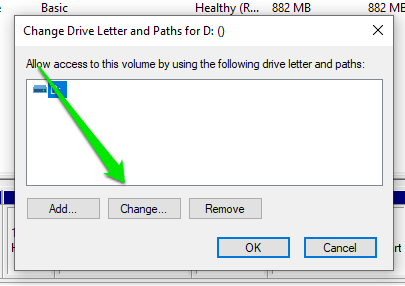
- Choose a new, available drive letter from the drop-down list.

Ensure it’s a drive letter that allows Windows to assign a preceding letter to the removable drive.
For example, if the drive’s current letter is F, assign G or H to it so that Windows will automatically assign F to the ISO.
- Click OK to confirm the change.
- A dialog box might warn that programs that rely on drive letters might not work correctly. Click Yes if you’re sure.
Now, mount the ISO again and check if reassigning drive letters did the trick.
Method 5: Investigate Third-party Software
The ISO mounting problem may be occurring due to software conflicts. You can troubleshoot this particular issue by taking some steps.
Try mounting the file in Safe Mode. Since Safe Mode runs Windows without most third-party applications, you can try running and mounting the ISO in that environment. Follow these steps to Start your PC in Safe Mode:
- Press
Win+Rto launch the Run dialog box. - After Run appears, type
msconfiginto the text box and hit theEnterkey.
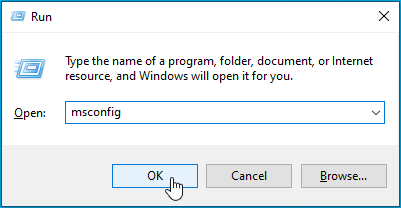
- That action will open the System Configuration dialog window.
- Go to the Boot tab.
- Head to the Boot Options area and check the box next to Safe Boot.
- Select Minimal and click OK.

- Restart your computer.
- Try mounting the ISO file after your computer boots in Safe Mode.
Move on to the next method if the error still appears. On the other hand, if you can now mount the ISO file successfully, try looking at the software applications you recently installed.
Method 6: Use System Restore
If you are suddenly seeing the error appear after being able to mount such files without any hitch in the past, restoring your OS to a previous state may be the right fix.
Thankfully, Windows often sets restore points automatically when your system goes through significant changes, such as a major driver or Windows update.
Follow these steps to restore your PC:
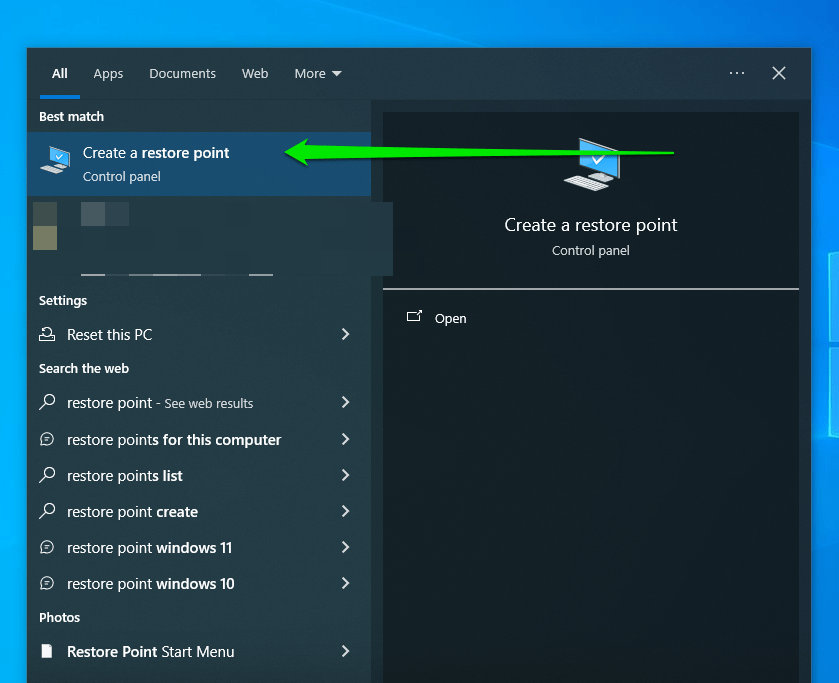
- Go to the Start menu and type
restore point. - Click Create a Restore Point in the results.
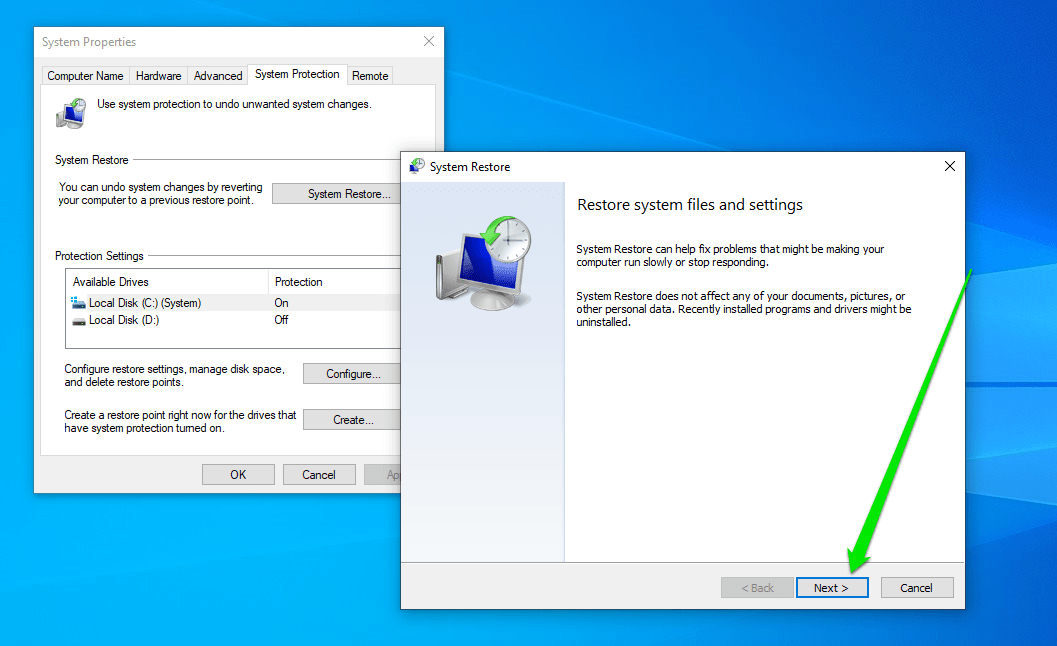
- After the System Properties window opens, click System Restore.

- Select Next in the System Restore window.
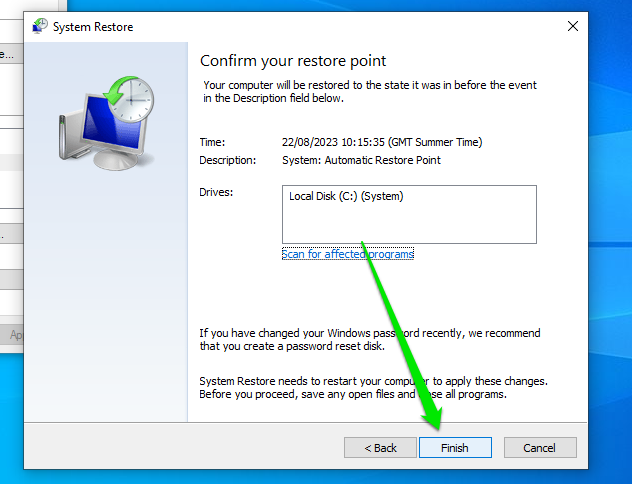
- Select a System Restore point and click Next.

- Click Finish.
Conclusion
Do you have other suggestions for mounting ISO files? We’re looking forward to hearing your ideas in the comments below!