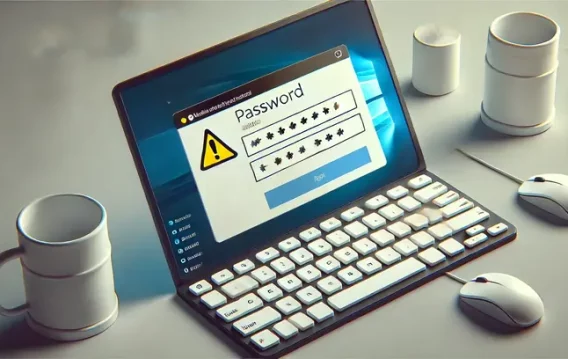
Have you been asking yourself, “Why won’t Windows 10 let me type my password on the login screen?” If so, then you are not alone.
Many people have been complaining about being unable to type in their passwords, making it impossible to sign in to their PCs.
The issue sometimes resolves itself but then reappears later. So, you need an effective solution to fix the problem once and for all.
Luckily, this article will give you excellent tips to apply today.
Why Can’t I Use my Pin to Sign in to Windows 10?
You may not be able to type in your password on the login screen due to the following reasons:
- Hardware-related problems
- Keyboard issues
- Outdated keyboard driver
- Software problems
How to Fix the ‘Can’t Type Password at the Login Screen’ Issue on Windows 10
Since you aren’t sure what the culprit of the problem is, try all the troubleshooting methods below and see what works.
Fix 1: Restart your computer
Sometimes, your PC might not recognize the keyboard when booting up, causing the typing problem. This may be resolved by performing a simple restart.
Use these instructions to do so:
- Click on the power button in the bottom-left corner of the screen.
- Select Restart and then wait for the computer to restart completely.
- Now, try typing in your password.
If you can’t click on the power button, perform a hard restart by long-pressing on the computer’s power button. Then, switch on your device to check for the issue.
Fix 2: Unplug the keyboard
The issue could also be caused by a faulty keyboard. To verify this fact, unplug your USB keyboard and then plug it back into a different port.
If you use the computer’s keyboard, try using an external one and see if the problem persists. If it disappears, then your keyboard is the culprit.
If you use a wireless keyboard, try changing the batteries and then re-connect to see whether that helps.
Fix 3: Use the on-screen keyboard
Another great way to get rid of the issue is by using the on-screen keyboard. Windows offers a virtual keyboard that you can use when facing issues with the physical one.
To try this workaround, follow the steps below:
- Press the Windows key, then type Ease of Access.
- Select Ease of Access Keyboard Settings from the results.
- On the right pane, toggle the switch for ‘Use the On-Screen keyboard’ option to On.
- When the virtual keyboard appears, type in your password and log in to your computer.
Fix 4: Disable sticky and filter keys
Some users reported that turning off sticky and filter keys on their PCs had helped them eliminate the problem.
Here is how to do the same:
- Access the Ease of Access Keyboard Settings as illustrated in the previous fix.
- Click on the Sticky Keys and Filter Keys toggle buttons to turn them off.
- Check if the issue has been solved.
Related: The Sticky Keys Situation: How to Turn Sticky Keys On and Off
Fix 5: Check for hardware issues
A faulty device or hardware connected to your computer could also trigger the typing issue on your login screen. Fortunately, using the Hardware and Device troubleshooter can help resolve the problem.
Here is how to use it:
- Press the
Windows logo + Rkeyboard combo to bring up the Run dialog box. - Type in control and click on the OK button.
- When the Control Panel window appears, select Troubleshooting.
- Next, click on the View All link on the left side of the window.
- Select Hardware and Devices and then click on the Next button. If you can’t see that option, choose Keyboard instead.
- The troubleshooter will try to find any issues and automatically solve them.
Fix 6: Update the keyboard driver
Device drivers contain crucial information that enables hardware components on your PC to work seamlessly. So, if your keyboard driver is corrupted or outdated, it may trigger the problem under discussion.
Use this guide to update the keyboard driver:
- Press the
Windows key + Xcombination to open the Power User menu. - Select Device Manager.
- On the next screen, double-click on the Keyboards section to expand it.
- Then, right-click on your keyboard driver and choose Update Driver.
- Click the Search automatically for drivers link.
- Wait for the driver to be updated.
- Finally, restart the device.
This helps prevent driver-related issues and quickly fix any that occurs. Additionally, Auslogics Driver Updater backs up a driver before updating it.
This allows you to restore the driver to its previous version if you need to.
Fix 7: Use system restore
If you still can’t type on the login screen, then you are likely dealing with a hidden issue. In such cases, performing a System Restore helps.
System Restore allows you to reverse your PC to how it was before the problem started.
These steps will guide you through performing a System Restore:
- Use the
Windows key + Scombo to bring up the Windows search bar. - Type in Create a restore point and then select Open on the right-side menu.
- When the System Properties page opens, choose System Restore.
- Click on the Next button.
- Select the Show more restore points option.
- Here, choose a restore point from a date before the problem first appeared.
- Then, click the Scan for affected programs button to view the apps that will be uninstalled during the process. These are the programs that were installed after the chosen date.
- Click on the Close button and then choose Next.
- Select Finish. Once the process completes, the issue should be gone.
Also Read: [FIXED] System Restore Not Working in Windows 10
Wrapping Up
We hope you can now log in to your PC without more hassle. Do you have any questions regarding how to fix the ‘can’t type password at the login screen’ issue on Windows 10?
Feel free to ask them in the comments section below. For more Windows 10 guides like this one, check out our blog.